• Home
  • Recipe Index
    • Desserts
    • Dinner
    • Appetizer
    • Drinks
  • About
  • Contact
  • Privacy Policy
menu icon
go to homepage
  • Home
  • Recipe Index
    • Desserts
    • Dinner
    • Appetizer
    • Drinks
  • About
  • Contact
  • Privacy Policy

search icon
Homepage link
  • Home
  • Recipe Index
    • Desserts
    • Dinner
    • Appetizer
    • Drinks
  • About
  • Contact
  • Privacy Policy

×
Taling

Taling

Chef Taling is the creator and culinary voice behind Taling’s Recipes, an online hub where she turns her lifelong love of food into step-by-step dishes home cooks can trust.

Her journey began in her grandmother’s kitchen, soaking up the aromas of spices and the joy of shared meals an experience that sparked a passion for exploring global flavors and recreating them for friends, family, and now a worldwide audience.

  • - 2 lbs chicken wings Chicken wings are the star of this dish. I love using fresh wings for the best taste. You can find them at your local grocery store or butcher shop. - 2 tablespoons olive oil - 1 tablespoon lemon zest (freshly grated) - 2 tablespoons lemon juice (freshly squeezed) - 1 tablespoon black pepper - 2 teaspoons garlic powder - 1 teaspoon onion powder - 1 teaspoon paprika - 1 teaspoon salt - 1/2 teaspoon cayenne pepper (optional for extra heat) The marinade gives these wings their bold flavor. Olive oil helps the spices stick. Lemon zest and juice add a bright kick. Black pepper and cayenne pepper bring heat, while garlic and onion powders add depth. Paprika gives a nice color, and salt enhances all the flavors. - Fresh parsley, chopped (for garnish) Chopped parsley makes a beautiful garnish. It adds a fresh touch and bright color to the wings. You can skip this if you prefer, but it makes a nice presentation! Start with 2 pounds of chicken wings. First, pat them dry with paper towels. This makes the wings crispy. Remove any extra moisture. A dry wing cooks better in the air fryer. In a large bowl, mix 2 tablespoons of olive oil, 1 tablespoon of lemon zest, and 2 tablespoons of lemon juice. Add 1 tablespoon of black pepper, 2 teaspoons of garlic powder, 1 teaspoon of onion powder, 1 teaspoon of paprika, and 1 teaspoon of salt. If you want heat, add 1/2 teaspoon of cayenne pepper. Stir this well to combine. Add the chicken wings to the bowl. Toss them in the marinade until they are coated. If you have time, let them sit for 30 minutes in the fridge. This helps the wings soak up the flavor. Preheat your air fryer to 380°F (193°C) for about 5 minutes. Place the wings in the air fryer basket in a single layer. Do not overcrowd them. Cook the wings for 25 to 30 minutes. Flip them halfway through cooking. This helps them cook evenly. Once the wings are golden brown, they are ready. Carefully remove them from the air fryer. Let them rest for a few minutes. This helps keep them crispy. Before serving, garnish with fresh parsley for a nice touch. Enjoy your crispy lemon pepper wings! Air frying can make your wings crispy without too much oil. Here are some tips: - Dry the wings well: Use paper towels to remove moisture. This helps them get crispy. - Preheat the air fryer: Always preheat to 380°F (193°C) before cooking. It ensures even cooking. - Do not overcrowd: Place wings in a single layer. This helps them cook evenly and get crispy. Marinating your wings is key to great taste. Here's how to do it right: - Use fresh ingredients: Fresh lemon juice and zest give the best flavor. - Marinate time: Let wings sit in the marinade for at least 30 minutes. For deeper taste, try 2 hours. - Toss well: Make sure every wing is coated. This helps each bite burst with flavor. Cooking time can vary based on wing size. Here are some adjustments: - Smaller wings: If your wings are smaller, check them at 20 minutes. - Larger wings: For bigger wings, you may need up to 35 minutes. - Check for doneness: Wings should be golden brown and crispy. A meat thermometer should read 165°F (74°C) inside. Use these tips for tasty, crispy lemon pepper wings every time! {{image_2}} To make spicy lemon pepper wings, add more heat. Use 1 to 2 teaspoons of cayenne pepper. You can also add hot sauce to the marinade. This gives the wings a fiery kick. Mix the hot sauce with olive oil, lemon zest, and the other spices. The result is a zesty, spicy treat that packs a punch. For a sweet twist, try honey lemon pepper wings. Add 2 tablespoons of honey to the marinade. The honey adds a nice sweetness that balances the tart lemon. It caramelizes during cooking, giving a lovely glaze. This version is perfect for those who love sweet and savory flavors. If you enjoy fresh herbs, go for herb-infused wings. Add a mix of dried herbs like thyme, oregano, or rosemary. Just 1 teaspoon of each will enhance the flavor. You can also use fresh herbs if you have them on hand. This variation adds a fragrant aroma and a burst of freshness to your wings. To store leftover wings, let them cool first. Place the wings in an airtight container. Use parchment paper between layers to keep them from sticking. They can stay fresh in the fridge for up to three days. Make sure to seal them well to avoid drying out. When you want to eat the leftover wings, preheat your air fryer to 350°F (175°C). Place the wings in the basket in a single layer. Reheat for about 8-10 minutes. Flip them halfway for even heating. This method keeps them crispy and delicious. If you want to save wings for later, freezing is a great option. First, let them cool completely. Then, arrange the wings in a single layer on a baking sheet. Freeze them for about an hour until firm. After that, transfer them to a freezer bag and seal tightly. They can last up to three months in the freezer. When ready to enjoy, thaw them in the fridge overnight before reheating. To cook wings in the air fryer, you need about 25 to 30 minutes. Set the air fryer to 380°F (193°C). Flip the wings halfway through cooking. This ensures they cook evenly and get that nice golden color. Yes, you can make these wings in an oven. Preheat your oven to 425°F (218°C). Place the wings on a baking sheet lined with parchment paper. Bake for about 40 to 45 minutes, flipping them halfway through. They won’t be as crispy as in the air fryer but will still taste great. Serve lemon pepper wings hot for the best taste. You can place them on a platter with fresh parsley on top. Pair them with dipping sauces like ranch or blue cheese. They make a great appetizer or snack for parties! We explored how to create delicious chicken wings using an air fryer. You learned about the right ingredients, from wings to marinades, and how to make them pop with flavor. I shared tips for air frying and achieving that perfect crispiness. We also discussed tasty variations and how to store leftovers. In closing, mastering these steps lets you enjoy great wings anytime. Whether for a game day or a family dinner, these tips will make you a pro at wing-making.
    Air Fryer Crispy Lemon Pepper Wings Quick and Easy Recipe
  • - 1 cup orzo pasta - 2 tablespoons olive oil - 4 cloves garlic, minced - 4 cups vegetable broth - 2 cups fresh spinach, roughly chopped - 1/2 cup grated Parmesan cheese - 1/2 teaspoon red pepper flakes (optional) - Salt and black pepper to taste - Fresh parsley, chopped (for garnish) This dish starts with simple, fresh ingredients. The orzo pasta gives a nice, chewy base. Olive oil adds richness and depth. Garlic adds a fragrant kick, while vegetable broth gives it a savory flavor. Fresh spinach makes it healthy and colorful. The Parmesan cheese brings creaminess and a salty touch. Red pepper flakes add a little heat, but you can skip them if you prefer. Seasoning with salt and black pepper helps balance the flavors. Finally, a sprinkle of fresh parsley brightens the dish. This mix of ingredients creates a lovely, comforting meal. - Heat 2 tablespoons of olive oil in a large pot over medium heat. - Add 4 cloves of minced garlic. Sauté for 1 minute until it smells great. Be careful not to burn the garlic. - Stir in 1 cup of orzo pasta. Cook for about 2 minutes. This toasts the orzo and adds flavor. - Pour in 4 cups of vegetable broth. Bring this mixture to a boil. - Once boiling, lower the heat. Cover the pot and let it simmer for about 10 minutes. The orzo should be tender and most of the liquid absorbed. - Stir in 2 cups of roughly chopped fresh spinach. Let the spinach wilt for about 2 minutes. - Remove the pot from heat. Add 1/2 cup of grated Parmesan cheese. Stir until it melts and becomes creamy. - If you like a little kick, add 1/2 teaspoon of red pepper flakes. - Season with salt and black pepper to taste. - Serve the orzo in bowls. Garnish with fresh parsley and extra Parmesan for a lovely look. How to prevent burning garlic Burning garlic can ruin your dish. To avoid this, keep the heat low. Sauté the garlic for only about one minute. Watch it closely. Stir it often. If it starts to brown, reduce the heat or add a splash of broth to cool it down. This will keep the garlic sweet and fragrant. Ensuring perfect orzo texture For the best orzo, use plenty of broth. This helps it cook evenly. Stir it occasionally while it simmers. This keeps it from sticking together. You want the orzo to be al dente, which means it should be firm but not hard. Once it absorbs the broth, it’s ready for the spinach and cheese. Best side dishes to pair One-Pot Garlic Parmesan Orzo with Spinach is filling on its own. You can serve it with a simple salad or garlic bread. A side of roasted vegetables also works well. These sides add color and nutrients to your meal. Creative ways to garnish To make your dish pop, garnish it with chopped parsley. You can also sprinkle more Parmesan on top. For a little heat, add a few red pepper flakes. These small touches make your dish look and taste even better. Alternative ingredients or methods To make this dish healthier, consider using whole grain orzo. You can also swap out the Parmesan for a lower-fat cheese. For a protein boost, add cooked chicken or chickpeas. Lastly, fresh herbs like basil or thyme can enhance flavor without extra calories. {{image_2}} You can make this dish your own. Consider adding protein for a more filling meal. Chicken or shrimp work well. Cook the protein first, then add it back in after the orzo. If you want a vegetarian dish, try chickpeas or lentils. They add protein and fiber too. Enhance the taste with extra herbs and spices. Fresh basil or oregano gives a fresh twist. You could also use thyme or rosemary for a more earthy flavor. If you want a richer taste, swap the Parmesan for a sharper cheese. Try aged cheddar or Gruyère for a unique touch. If you need a gluten-free dish, use gluten-free orzo. Many brands offer this option. Just cook it according to the package instructions. The rest of the recipe stays the same, ensuring you enjoy all the flavors without gluten. To store leftovers, let the orzo cool down first. Place it in an airtight container. This helps keep it fresh. You can keep it in the fridge for up to three days. When reheating, use a microwave or a pot. Add a splash of broth or water to keep it moist. Heat it slowly on low. Stir often to make sure it warms evenly. Yes, you can freeze this dish! It freezes well and keeps its flavor. To freeze, let the orzo cool completely. Then, place it in a freezer-safe container. Leave some space at the top for expansion. To thaw, move it to the fridge overnight. You can also use the microwave. Heat it until warm, adding a little broth or water if needed. In the refrigerator, your orzo will last about three days. In the freezer, it can stay fresh for up to three months. Just remember to label your container with the date. This helps you keep track of how long it has been stored. How long does it take to cook orzo? It takes about 10 minutes to cook orzo. You simmer it in broth until tender. This quick cooking time makes orzo a great choice for busy nights. Can I make this dish ahead of time? Yes, you can make this dish ahead of time. Store it in the fridge for up to three days. Just reheat it on the stove with a splash of broth. What can I use instead of Parmesan cheese? You can use Pecorino Romano or nutritional yeast for a vegan option. Both will add a nice cheesy flavor. Alternatives for vegetable broth? You can use chicken broth if you are not vegetarian. Water with a pinch of salt works too, but broth adds more flavor. Is this recipe vegan-friendly? No, this recipe is not vegan due to the Parmesan cheese. To make it vegan, swap the cheese for nutritional yeast. Can I make this dish nut-free? Yes, this dish is nut-free as it does not contain any nuts. You can enjoy it safely if you have nut allergies. This blog provided a clear guide to making a healthy orzo dish. We covered main ingredients and the step-by-step cooking process. I shared tips to enhance flavors and serve well. You learned how to store leftovers and even explore variations. Ultimately, this dish is versatile and quick to prepare. With the right methods, you can make it suit any taste or diet. Enjoy cooking, and don’t hesitate to experiment!
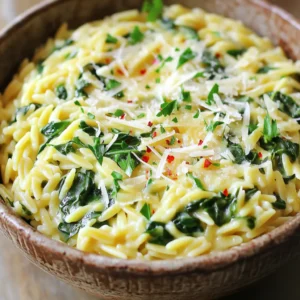
    One-Pot Garlic Parmesan Orzo with Spinach Delight
  • To make delicious pumpkin pecan granola bars, you need these simple ingredients: - 2 cups rolled oats - 1 cup canned pumpkin puree - 1/2 cup natural almond butter - 1/2 cup maple syrup - 1/2 teaspoon vanilla extract - 1/4 teaspoon salt - 1 teaspoon ground cinnamon - 1/2 teaspoon ground nutmeg - 1/2 cup chopped pecans - 1/4 cup dried cranberries (optional) If you need to swap out any ingredients, here are some options: - Almond butter: You can use peanut butter or sunflower seed butter. - Maple syrup: Honey or agave syrup work well too. - Rolled oats: Quick oats can be used, but the texture may differ. - Canned pumpkin puree: You can use fresh pumpkin puree if you prefer. These alternatives keep the taste great while catering to your needs. These pumpkin pecan granola bars are healthy and satisfying. Here is a quick look at their nutrition: - Calories: About 180 per bar - Protein: 4 grams - Fat: 7 grams - Carbohydrates: 28 grams - Fiber: 3 grams These bars are a good source of fiber and healthy fats, making them a great snack or breakfast option. Enjoy your tasty treat! First, gather all your ingredients. You will need rolled oats, pumpkin puree, almond butter, maple syrup, vanilla extract, salt, cinnamon, nutmeg, chopped pecans, and dried cranberries if you like. 1. Preheat your oven to 350°F (175°C). This makes sure the bars bake evenly. 2. Line an 8x8 inch baking dish with parchment paper. Leave some paper hanging over the sides. This helps you lift the bars out later. 3. In a large bowl, mix the rolled oats, cinnamon, nutmeg, and salt. Stir them well to combine. Next, make your wet mixture. 1. In another bowl, mix the pumpkin puree, almond butter, maple syrup, and vanilla extract. Stir until it is smooth. 2. Pour this wet mix into the bowl with the dry ingredients. Mix well until all the oats are coated. 3. Now, fold in the chopped pecans and dried cranberries if you are using them. 4. Transfer this mixture into the lined baking dish. Press it down firmly. Make sure it forms an even layer. 5. Bake it for 25–30 minutes. Look for golden brown edges. After baking, let the pan cool for about 10 minutes. 1. Use the parchment paper to lift the bars out of the pan. 2. Place them on a wire rack to cool completely. 3. Once they are cool, cut the bars into your desired size. These steps ensure that your pumpkin pecan granola bars turn out tasty and easy to enjoy! To make the best pumpkin pecan granola bars, start with fresh ingredients. Use rolled oats that are whole and not quick oats. This gives the bars a nice chewy texture. Mix the wet and dry ingredients well. This ensures every oat gets coated in the pumpkin and almond butter mix. Press the mixture firmly into the pan. This helps the bars hold together when baked. Bake until the edges turn golden brown. This is key to getting a perfect texture. Store your granola bars in an airtight container. They stay fresh for up to one week at room temperature. For longer storage, place them in the fridge. You can also freeze the bars. Wrap each one in parchment paper for easy grabbing later. Serve them with tea or coffee for a tasty treat. For a fun touch, tie the bars with twine. It looks rustic and makes a great gift. Feel free to change up the recipe! You can swap pecans for walnuts or almonds. If you like more fruit, add raisins or chopped dates. To make it sweeter, mix in chocolate chips. You can also use different spices like ginger or allspice for a new flavor. For a nut-free option, use sunflower seed butter instead of almond butter. The possibilities are endless! {{image_2}} You can switch up the ingredients based on the season. In fall, use fresh pumpkin. In spring, try using mashed bananas. For summer, consider substituting with fresh berries. Each swap brings a new taste to your bars. Want to mix it up? Try adding dark chocolate chips for a sweet kick. You can also use different nuts like walnuts or almonds. For a spicier flavor, add a pinch of ginger or cloves. These changes create unique taste profiles. To make these bars gluten-free, use certified gluten-free oats. For a vegan version, swap almond butter with sunflower seed butter. You can also replace maple syrup with agave nectar. These adjustments keep the bars tasty and suitable for all diets. To keep your pumpkin pecan granola bars fresh, store them in an airtight container. This helps prevent them from becoming stale. You can layer parchment paper between bars to stop them from sticking together. I recommend keeping them at room temperature for up to a week. If you live in a warm area, the fridge is a good choice. If you want to keep your granola bars longer, freezing is a great option. First, cut the bars into squares. Then, wrap each bar tightly in plastic wrap. Place the wrapped bars in a freezer bag or container. They can last in the freezer for up to three months. When you want to enjoy one, just thaw it in the fridge overnight or at room temperature for a few hours. These granola bars have a shelf life of about a week at room temperature. If you notice any change in smell, color, or texture, it’s best to toss them. Look for signs like a hard or dry texture. If they feel sticky or smell off, don’t eat them. Keeping an eye on these signs ensures you enjoy your tasty treats at their best! To make your granola bars chewier, you can add more sticky ingredients. Use extra almond butter or maple syrup. This will help bind the oats together more firmly. You can also try adding mashed bananas or applesauce for added moisture. Press the mixture down tightly in the pan before baking to keep them dense. Yes, you can omit the nuts or switch them out. If you are not a fan of pecans, try walnuts or almonds. You could also use seeds like pumpkin or sunflower seeds. Just keep the total amount the same, so your bars stay balanced. This gives you flexibility based on your taste or allergies. Pumpkin pecan granola bars pair well with many items. Try them with yogurt for a tasty breakfast. They also go great with a cup of tea or coffee. For a fun snack, serve them with fresh fruit. You can even crumble them over ice cream for dessert. Enjoy how they complement other flavors! This blog post covered how to make delicious granola bars. We listed all the ingredients and offered swaps for those you may not have. I explained each step clearly, so you can easily bake them. You also learned helpful tips for storage and serving. Creating your own bars lets you customize flavors and textures. Remember, your options are endless. Enjoy making tasty snacks that fit your needs!
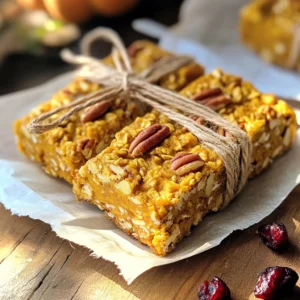
    Pumpkin Pecan Granola Bars Tasty and Easy Recipe
  • - 1 ½ cups all-purpose flour - 1 teaspoon baking powder - 1 teaspoon baking soda - ½ teaspoon salt - 1 teaspoon ground cinnamon - ½ teaspoon ground nutmeg - ¼ teaspoon ground ginger I start with all-purpose flour for a soft loaf. Baking powder and baking soda help it rise. Salt adds flavor and balances sweetness. I love adding cinnamon, nutmeg, and ginger. These spices give the loaf that warm, cozy vibe. - ½ cup granulated sugar - ½ cup packed brown sugar - ½ cup vegetable oil - 2 large eggs - 1 cup pumpkin puree - 1 teaspoon vanilla extract For the sweet base, I mix granulated and brown sugar. Brown sugar adds depth. Vegetable oil keeps the loaf moist. Eggs help bind everything. Pumpkin puree gives it that rich flavor, and vanilla extract rounds it out. - 8 oz cream cheese, softened - ¼ cup powdered sugar - 1 tablespoon vanilla extract The cream cheese filling is the star. I use softened cream cheese for a smooth texture. Powdered sugar adds sweetness, and a touch of vanilla gives it a lovely note. This filling creates a delicious surprise inside the loaf. First, preheat your oven to 350°F (175°C). This step is key for even baking. While the oven heats, you need to prepare your loaf pan. You can either grease and flour a 9x5-inch loaf pan or line it with parchment paper. Lining with parchment makes it easy to lift out the loaf later. Greasing and flouring helps it release from the pan easily, too. In a medium bowl, whisk together the dry ingredients. This includes the flour, baking powder, baking soda, salt, cinnamon, nutmeg, and ginger. Mixing these well ensures that the flavors blend evenly. Set this bowl aside. In a large bowl, whisk together the granulated sugar, brown sugar, and vegetable oil. You want this to be smooth. Then, add the eggs, pumpkin puree, and vanilla extract. Whisk until everything is fully mixed. This creates a moist and tasty batter. Now, it’s time to assemble the loaf. Pour half of the pumpkin batter into your prepared pan. Next, dollop half of the cream cheese filling over the batter. Use a knife to swirl it lightly. This creates nice pockets of cream cheese in the loaf. Then, add the remaining pumpkin batter on top. Repeat the process with the last of the cream cheese filling. Swirl again for a pretty pattern. This layering gives you a delicious mix of pumpkin and cream cheese in every slice. Bake your loaf in the preheated oven for 55-65 minutes. Check it with a toothpick. When it comes out clean, your loaf is ready. Once baked, let the loaf cool in the pan for 10 minutes. After that, transfer it to a wire rack to cool completely. This cooling step is vital to keep the loaf from becoming soggy. To get that perfect bakery-style texture in your loaf, avoid overmixing the batter. Overmixing can make the loaf dense and tough. Mix just until you see no dry flour. This keeps your loaf light and airy. Using room temperature ingredients is key too. When you use cold eggs or cream cheese, they don’t blend well. They can create lumps in your batter and filling. Take your ingredients out of the fridge ahead of time. Let them sit for about 30 minutes before you start. Want to boost the flavor of your pumpkin loaf? Add more spices! Consider using cloves or allspice for an extra kick. You can also mix in finely chopped nuts like walnuts or pecans. Chocolate chips are another tasty option. They add sweetness and richness to each bite. For a lovely presentation, slice your loaf and place it on a decorative platter. This makes it look inviting. You can dust the top with powdered sugar for a sweet touch. A drizzle of maple syrup adds a nice shine and flavor. These simple steps make your loaf as pretty as it is delicious! {{image_2}} You can mix up the flavors of your pumpkin cream cheese loaf by changing the spices. If you want a different taste, try using cardamom or allspice. They add warmth and depth. You can also switch to other squash. Butternut or acorn squash works great, too. They provide a lovely sweetness and texture. If you need a gluten-free option, use gluten-free flour blends. They work well to keep the loaf soft and tasty. You can also swap out the sugar. Try using honey, maple syrup, or a sugar substitute like stevia. These options can make your loaf healthier without losing flavor. To enjoy this loaf even more, add spreads like butter or cream cheese. You can also drizzle some maple syrup on top. For drinks, coffee or spiced tea pairs nicely. They enhance the warm flavors of the loaf, making your snack time special. After baking your pumpkin cream cheese loaf, let it cool. Wrap it tightly in plastic wrap. This keeps it moist and fresh. Store it at room temperature for up to three days. If you want to keep it longer, place it in the fridge. In the fridge, it can last up to a week. Keep it in an airtight container for best results. To enjoy your pumpkin loaf later, freezing is a great option. Slice the loaf before freezing. Wrap each slice in plastic wrap and then place it in a freezer bag. Be sure to remove as much air as possible. This helps prevent freezer burn. Your loaf will stay fresh for up to three months. When you're ready to enjoy it, thaw it in the fridge overnight. For quick thawing, you can use the microwave. Just be careful not to overheat it, as it can dry out. In the fridge, your pumpkin cream cheese loaf lasts about a week. If frozen, it can stay good for three months. Check for signs of spoilage like mold or an off smell. If you notice these signs, it’s best to discard it. Keeping an eye on your loaf will help you enjoy it at its best! Yes, you can use canned pumpkin. It saves time and works great. When using canned pumpkin, look for 100% pumpkin puree, not pumpkin pie filling. This ensures you get the real flavor without extra sugar or spices. If you prefer, you can roast and puree fresh pumpkin. This gives a fresher taste, but it takes more time. Either choice will make your loaf delicious. To slice your pumpkin bread cleanly, use a serrated knife. Let the loaf cool completely before cutting. This way, the bread firms up, making it easier to slice. Start at the end and apply gentle pressure. Slow, even strokes help keep the slices neat. You can also put the loaf in the fridge for a short time before slicing. This helps the bread hold its shape. Yes, you can make the cream cheese filling ahead of time. Mix the softened cream cheese, powdered sugar, and vanilla extract as directed. Store it in an airtight container in the fridge. It stays good for up to three days. Just remember to let it sit at room temperature for a bit before using. This makes it easier to swirl into the pumpkin batter. This blog post covered everything you need to know about making pumpkin bread with cream cheese filling. We explored essential ingredients, like all-purpose flour, spices, and sugar, as well as how to mix them properly. I shared tips for achieving that perfect, bakery-style texture and presented some fun variations for different diets. In the end, your pumpkin bread can delight anyone. With the right steps, it turns out moist and rich every time. Enjoy baking and sharing your creation!
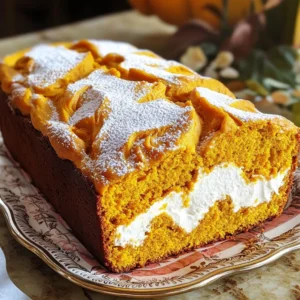
    Bakery-Style Pumpkin Cream Cheese Loaf Irresistible Treat
  • To make Minute Garlic Parmesan Pasta Skillet, you need a few key ingredients. Here’s a simple list: - Main ingredients: - 8 oz spaghetti or your favorite pasta - 4 cloves garlic, minced - 1/4 cup unsalted butter - Sauce components: - 1 cup heavy cream - 1 cup grated Parmesan cheese - Optional ingredients: - 1/2 tsp crushed red pepper flakes (for heat) - Zest of 1 lemon (for brightness) Using fresh garlic enhances the flavor. The butter adds richness, while heavy cream and Parmesan create a creamy sauce. If you like some spice, add red pepper flakes. The lemon zest gives a fresh touch that balances the dish. Gathering these ingredients ensures a quick and tasty meal. I love how easy it is to whip this up. This dish is perfect for busy days or a cozy night in. Enjoy the process of cooking and savor the flavors! First, fill a large pot with salted water. Bring it to a boil. Salt helps to flavor the pasta well. Add 8 oz of spaghetti or your favorite pasta. Cook it according to the package instructions until it is al dente. This usually takes about 8 to 10 minutes. When the pasta is done, save 1 cup of pasta water before draining. This water helps adjust the sauce later. Next, use the same pot to sauté the garlic. Melt 1/4 cup of unsalted butter over medium heat. Add 4 cloves of minced garlic and optional 1/2 tsp of crushed red pepper flakes. Cook for about 1 to 2 minutes. You want the garlic to smell great, but be careful not to burn it. Burnt garlic can ruin the dish. Now for the sauce! Pour in 1 cup of heavy cream and bring it to a gentle simmer. Stir in 1 cup of grated Parmesan cheese. Mix well until the cheese melts. This will take about 2 to 3 minutes. The sauce should thicken slightly. A smooth sauce is key for a great pasta dish. Time to combine! Add the drained pasta back to the pot. Toss it well with the creamy garlic Parmesan sauce. If the sauce seems too thick, add some of the reserved pasta water. Do this a little at a time until you reach your desired sauce thickness. This step makes a big difference in how the dish turns out. Finally, season the pasta with salt and black pepper to taste. Add the zest of 1 lemon for a fresh kick. Lemon zest brightens up the flavors and makes the dish more exciting. Finish by removing the pot from heat. Garnish with fresh parsley before serving. Enjoy your meal! - Use a large pot for boiling pasta. It helps cook evenly. - A pasta pot with a built-in strainer saves time when draining. - Chop garlic and parsley ahead of time. This makes cooking faster. - Measure out all ingredients before starting. This keeps things organized. - Serve pasta in shallow bowls for a nice look. - Top with extra Parmesan and parsley. This adds color and flavor. - Add a lemon wedge on the side. It brightens the dish. - Pair with a simple green salad. A fresh salad balances the meal. - Try adding fresh basil or oregano for more taste. - Consider using thyme for a warm flavor twist. - A splash of white wine can elevate the sauce. - Pair with a crisp white wine like Sauvignon Blanc. It complements garlic well. {{image_2}} You can easily add protein to your Minute Garlic Parmesan Pasta Skillet. Here’s how: - Chicken: Cook diced chicken in the skillet before adding garlic. Cook for about 6-8 minutes until no longer pink. Then add garlic and follow the recipe. - Shrimp: Sauté shrimp for 3-4 minutes. Make sure they turn pink. Then add garlic and continue with the recipe. - Tofu: Use firm tofu. Cube it and sauté for 5-7 minutes until golden. Add garlic next and proceed with the recipe. Cooking times for proteins can vary. Always check that chicken is cooked through. It should reach an internal temperature of 165°F. Shrimp should be opaque, and tofu should be crispy on the outside. If you want a vegetarian dish, try these substitutes: - Pasta: Use any pasta shape you like. Whole wheat or gluten-free options work well too. - Cream: Swap heavy cream with coconut cream for a vegan touch. Or use cashew cream for a lighter feel. - Cheese: Nutritional yeast can replace Parmesan. It gives a cheesy flavor without dairy. These changes keep the dish tasty while meeting your dietary needs. Feel free to swap out ingredients for variety: - Pasta Types: Try penne, fusilli, or even zoodles (zucchini noodles) for a fun twist. - Seasonal Vegetables: Add veggies like spinach, cherry tomatoes, or bell peppers. Cook them with the garlic for extra flavor. These swaps keep the meal fresh and exciting, perfect for any season! To store leftover garlic parmesan pasta, place it in an airtight container. This keeps it fresh and tasty. You should refrigerate it within two hours of cooking. The pasta stays good for up to three days. When reheating, use a skillet over low heat. Add a splash of reserved pasta water or cream. This keeps the sauce creamy and prevents it from drying out. Stir gently until heated through. If you want to freeze the dish, let it cool first. Then, transfer it to freezer-safe containers. Leave some space at the top, as the pasta will expand. Label each container with the date. It can last up to three months in the freezer. To thaw, move it to the fridge overnight. For quick thawing, place it in cold water. When ready to eat, reheat in a skillet over medium heat. Add a bit of reserved pasta water to help it regain its creamy texture. Stir often until hot. This dish is quick to make. It takes about 20 minutes total. You spend 5 minutes prepping ingredients. Cooking the pasta takes around 10 minutes. Sautéing the garlic and making the sauce adds another 5 minutes. Yes, you can swap the cheese! Try using mozzarella for a stretchier texture. Feta adds a tangy kick. You could also use Pecorino Romano for a sharper flavor. Each cheese gives a unique twist to the dish! This pasta pairs well with many sides. A crisp garden salad complements it nicely. Garlic bread adds a tasty touch. Roasted vegetables can add color and flavor too. You could even serve it with grilled chicken for protein. Absolutely! You can make this dish in advance. Store it in airtight containers in the fridge. It stays fresh for up to 3 days. Just reheat it on the stove or in the microwave. To keep it creamy, add a splash of water or cream when reheating. This post covered the key ingredients and steps for making delicious garlic Parmesan pasta. You learned how to cook pasta, sauté garlic, and create a smooth sauce. We also discussed ways to customize the dish with proteins, veggies, and herbs. Remember, cooking is about experimenting and having fun. Use these tips to create your version. Enjoy the dish and share it with friends!
    Minute Garlic Parmesan Pasta Skillet Quick and Tasty Meal
  • To make Apple Cider Donut Trifle Cups, you'll need: - 4 apple cider donuts, crumbled - 2 cups vanilla pudding - 1 cup whipped cream - 1 cup diced apples (preferably sweet varieties) - 1 teaspoon cinnamon - 2 tablespoons brown sugar These ingredients blend to create a sweet, layered dessert that brings joy to any gathering. Enhance your trifle cups with these garnishes: - Caramel sauce for drizzling - Thin apple slices for decoration - Crushed nuts for added crunch These little touches make your trifle cups look and taste even better! You can switch some ingredients if needed: - Use chocolate pudding instead of vanilla for a richer flavor. - Swap apple cider donuts for cinnamon donuts or sponge cake. - Try different apples, like tart Granny Smith or sweet Fuji. These substitutions allow you to customize the trifle to your taste and what you have on hand. Start by dicing your apples into small pieces. I prefer sweet apples for their taste. In a small bowl, mix the diced apples with one teaspoon of cinnamon and two tablespoons of brown sugar. This blend adds a warm, sweet flavor. Let the apples sit for about 10 minutes. This allows the sugar to draw out the juice from the apples. You will see a nice syrup form at the bottom of the bowl. Grab your clear cups or dessert glasses. Begin with a layer of crumbled apple cider donuts. Use about half of the donuts for the bottom layer. Next, spoon a layer of vanilla pudding over the donuts. Smooth it out with the back of your spoon for a nice look. After that, add a layer of whipped cream. You can use a piping bag for a fancy touch, or just spoon it on. Now, take your cinnamon-sugar apple mixture and spoon it over the whipped cream. Repeat the layering process. Start again with donut crumbles, then pudding, followed by whipped cream, and finally the apple mixture. Finish with a big dollop of whipped cream on top. If you want to make it special, drizzle some caramel sauce over the top. A sprinkle of cinnamon adds a nice touch, too. Enjoy this treat chilled for the best flavor! Make your trifle cups look great. Use clear cups to show off the layers. This makes it fun to see the bright apples, cream, and donuts. For a fancy touch, add a thin apple slice on the rim. A sprinkle of crushed nuts adds crunch and color. Serve the cups chilled for the best taste. To boost flavor, try adding nutmeg or ginger to the apple mix. These spices add warmth that pairs well with the sweet donuts. Drizzle some caramel sauce on top for extra sweetness. You can also swap the vanilla pudding for a butterscotch or pumpkin flavor. These changes can make the trifle even more special. One mistake is not letting the apples sit long enough. They need to sit so they can soak up the cinnamon and sugar. This step brings out their natural sweetness. Avoid overfilling the cups. Each layer should be even and not too packed. This helps keep each bite balanced and tasty. Lastly, don't skip the chilling step. Chilling helps the flavors blend and makes each bite creamy and smooth. {{image_2}} You can change your trifle cups with the seasons. In fall, use spiced donuts. In winter, try peppermint donuts for a festive twist. In spring, swap for lemon donuts to brighten the dish. Summer? Fresh berry toppings can add a burst of color and flavor. Each season brings new tastes to enjoy. To make this treat gluten-free, use gluten-free apple cider donuts. Check the label to be sure. For a vegan option, swap the pudding for a plant-based version and use coconut cream instead of whipped cream. You can still enjoy all the layers without missing any flavors. Mixing flavors can elevate your trifle. Add nutmeg for warmth or ginger for a kick. Try using different fruits like pears or berries. You can even mix in some nuts for crunch. These small changes can create a new favorite dessert every time. Store your Apple Cider Donut Trifle Cups in the fridge. Use an airtight container. They will stay fresh for about 2 to 3 days. Keep the whipped cream from getting too soft. If you notice it losing its shape, enjoy them quickly. Freezing is not the best option for these trifle cups. The texture of the whipped cream and pudding can change. If you must freeze them, separate the layers first. You can freeze the crumbled donuts and apple mixture. Just thaw them before layering again. These trifle cups taste best when served cold. Enjoy them the same day you make them. The flavors blend nicely after a few hours in the fridge. They are perfect for parties or gatherings, especially in autumn. Yes, you can use store-bought apple cider donuts. They save time and still taste great. Just crumble them up as you would with homemade ones. The flavor will still shine through in your trifle cups. You can store the trifle cups in the fridge for up to two days. Keep them covered to avoid drying out. After two days, the donuts may get soggy. You can use chocolate pudding or butterscotch pudding instead of vanilla. Both will add a fun twist to your trifle. If you want a lighter option, try Greek yogurt mixed with honey. Yes, you can use gluten-free apple cider donuts for this recipe. Check the store for gluten-free brands. Ensure the pudding and any other ingredients are gluten-free too. Yes, you can make this trifle ahead of time. Assemble it a day in advance and store it in the fridge. Just add the whipped cream and caramel sauce right before serving for the best taste. This blog covered key ingredients and how to prepare them for your trifle. I shared tips for better presentation and ways to adapt the recipe for different diets. Remember to store your trifle properly for the best taste. Enjoy experimenting with flavors and substitutes to make it your own. With these steps in mind, you can create a great dessert that impresses everyone!
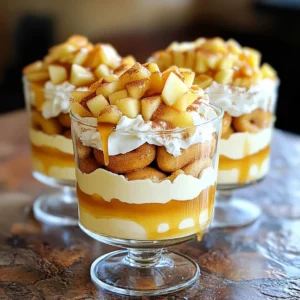
    Apple Cider Donut Trifle Cups Easy Seasonal Delight
  • To make Air Fryer Honey Garlic Brussels Sprouts, gather these key items: - 1 lb Brussels sprouts, trimmed and halved - 3 tablespoons honey - 2 tablespoons soy sauce - 2 cloves garlic, minced - 1 tablespoon olive oil - Salt and pepper to taste - 1 teaspoon sesame seeds (for garnish) If you want to amp up the taste, consider these options: - Red pepper flakes for a spicy kick You can swap some ingredients without losing flavor: - Use maple syrup instead of honey for a vegan option. - Tamari can replace soy sauce for a gluten-free version. - Coconut oil works well in place of olive oil. To make the honey garlic sauce, grab a large bowl. Add 3 tablespoons of honey. Next, pour in 2 tablespoons of soy sauce. Then, add 2 minced cloves of garlic. Follow this with 1 tablespoon of olive oil. Season with salt and pepper to taste. Mix everything well until it blends nicely. This sauce is sweet, salty, and packed with flavor. Now, it’s time to coat the Brussels sprouts. Take 1 pound of trimmed and halved Brussels sprouts. Add them to the bowl with the honey garlic sauce. Toss the sprouts gently until each one is fully coated. Make sure no sprout is left dry. This step is key for flavor and caramelization. Preheat your air fryer to 375°F (190°C). This step helps the sprouts cook evenly. Place the coated Brussels sprouts in the air fryer basket in a single layer. Don’t crowd the basket; it may take two batches. Air fry for 15-18 minutes. Shake the basket halfway through to ensure even cooking. The sprouts should turn crispy and caramelized when done. After cooking, transfer them to a serving dish. Drizzle any leftover sauce over the top. Sprinkle sesame seeds for a nice touch. If you like heat, add red pepper flakes for a spicy kick. Enjoy your crunchy delight! To get the best crunch, you must start with fresh sprouts. Look for bright green, firm Brussels sprouts. Trim and halve them evenly to ensure they cook well. The honey garlic sauce adds flavor, but too much moisture can make them soggy. Keep the sauce light. If you notice extra liquid, drain it before cooking. Preheat your air fryer to 375°F (190°C). This step helps the Brussels sprouts cook evenly. Place them in a single layer to let hot air circulate. If your air fryer is small, cook in batches. Shake the basket halfway through to help with even browning. Check for doneness after 15 minutes. They should be crispy and have a nice caramel color. These honey garlic Brussels sprouts shine on their own or as a side dish. They pair well with grilled chicken or fish. For a twist, add red pepper flakes for heat. You can also sprinkle some extra sesame seeds for a nice finish. Serve them warm in a decorative bowl with a drizzle of honey on top. This not only looks great but also adds more sweetness. {{image_2}} If you want some heat, try adding red pepper flakes. Just sprinkle them into the sauce. This spice brings a nice kick to your sweet dish. You can adjust the amount based on your taste. For a bolder flavor, consider adding some sriracha sauce to the mix too. It blends well with honey and garlic. You can swap honey for other sweeteners. Maple syrup is a great choice. It adds a rich flavor that pairs nicely with Brussels sprouts. Agave nectar is another option if you want a vegan twist. Each sweetener gives a different taste, so feel free to experiment. Brussels sprouts are not the only veggies you can use. Try adding broccoli or cauliflower for more color. Slice carrots or bell peppers for a sweet addition. Just remember to cut them to a similar size. This ensures even cooking in the air fryer. Mixing vegetables can create a fun and tasty medley. To store leftover Brussels sprouts, first let them cool. Place them in a container with a lid. You can keep them in the fridge for up to three days. Make sure they are sealed tightly to keep them fresh. When you are ready to eat the leftovers, you can reheat them in the air fryer. Set the air fryer to 350°F (175°C). Heat for about 5 to 7 minutes. This will help them regain some crunch. You can also use a microwave, but this may make them soggy. If you want to freeze Brussels sprouts, place them in a freezer-safe bag. Remove as much air as you can before sealing. They will stay good for about three months. When you're ready to cook them, thaw them in the fridge overnight before reheating in the air fryer. This will help keep their texture. Yes, you can use frozen Brussels sprouts. Just keep in mind that they may not get as crispy. I suggest thawing them first. Pat them dry with a towel. This helps remove excess moisture. Then, toss them in your honey garlic sauce and air fry as usual. You can tell the Brussels sprouts are done when they are crispy and golden brown. They should be tender inside. Check them at around 15 minutes. If they need more time, give them a few extra minutes. Shake the basket halfway through cooking for even crispiness. These Brussels sprouts pair well with many dishes. Try them with grilled chicken or salmon. They also go great with rice or quinoa. You can serve them as a side dish at dinner or even as an appetizer. The sweet and savory flavors make them a hit with everyone! This guide covered all you need to know about making honey garlic Brussels sprouts. You learned about essential ingredients, easy steps, and useful tips for cooking. We explored tasty variations and how to store leftovers, ensuring you can enjoy these sprouts later. Remember, air frying gives a crisp outside and tender inside. Use these ideas to make your dish unique. Experiment confidently, and enjoy your meals with great flavors and textures.
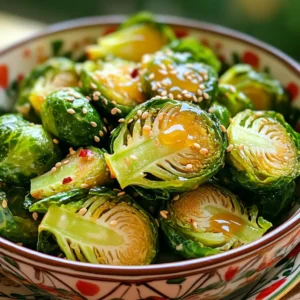
    Air Fryer Honey Garlic Brussels Sprouts Crunchy Delight
  • - 1 cup almond butter - 1/2 cup coconut oil, melted - 1/4 cup cocoa powder - 1/4 cup maple syrup or honey - 1 teaspoon pure vanilla extract - 1/4 teaspoon sea salt - 1/2 cup dark chocolate chips - 1/4 cup chopped almonds (optional topping) Gather these simple ingredients. Each one plays a key role in flavor and texture. Almond butter gives a creamy base. Coconut oil helps things bind together while adding richness. Cocoa powder provides that deep chocolate taste. Maple syrup or honey adds just the right sweetness. Vanilla extract boosts all the flavors. Sea salt balances the sweetness and enhances taste. Dark chocolate chips are the final layer of joy. If you like, sprinkle chopped almonds on top for crunch. This mix will help you create a treat that feels indulgent yet simple. - In a mixing bowl, combine: - 1 cup almond butter - 1/2 cup melted coconut oil - 1/4 cup cocoa powder - 1/4 cup maple syrup or honey - 1 teaspoon pure vanilla extract - 1/4 teaspoon sea salt - Stir the mixture until it is smooth and well combined. This step is key for a rich flavor. - Line a muffin tin with paper liners to keep the cups from sticking. - Spoon about 2 tablespoons of the almond butter mixture into each liner. Fill them halfway. Use the back of a spoon to press down gently for even layers. - Place the muffin tin in the freezer for 15 to 20 minutes. This helps the almond butter layer set. - While that freezes, melt 1/2 cup dark chocolate chips in a microwave-safe bowl. Heat in 30-second bursts, stirring until smooth. - Remove the muffin tin from the freezer. Pour the melted chocolate over the almond butter layer in each cup. - If you want, sprinkle with 1/4 cup chopped almonds for a nice crunch. - Return the muffin tin to the freezer for another 30 minutes to let the chocolate set. - After they are set, remove the cups from the freezer and peel away the paper liners. Enjoy! - Use natural almond butter for a healthier option. This choice enhances flavor and nutrition. - Allow the chocolate to cool slightly before pouring over the almond butter. This helps keep the layers distinct. - Replace maple syrup with agave nectar for a vegan option. This change keeps the sweetness while meeting dietary needs. - Use other nut butters like peanut butter for a different flavor. Each nut butter brings its own unique taste and texture. {{image_2}} You can easily mix up the flavors. Adding a pinch of sea salt on top gives a nice touch. Salt balances the sweetness and enhances the chocolate. Another fun idea is to add shredded coconut into the almond butter mix. This adds a chewy texture and a tropical twist to your cups. You can adjust the taste and feel by changing the cocoa powder amount. Adding more cocoa powder gives a richer, deeper chocolate flavor. To add crunch, try topping your cups with different nuts or seeds. Chopped walnuts or sunflower seeds work well. Mixing these in can make the treat even more delicious! You can keep these no-bake chocolate almond butter cups in the freezer. Use an airtight container for best results. They will stay fresh for up to 2 months. When you want to enjoy them, simply thaw before serving. If you’re in a hurry, you can eat them straight from the freezer. They taste great cold! These cups are best enjoyed at room temperature. Let them sit out for a few minutes before serving. Avoid putting them in the microwave. Reheating can change their texture, and we want them to stay smooth and creamy. Enjoy your tasty treat! Yes, you can use peanut butter or cashew butter. Both options work well. Each nut butter adds a unique flavor. This gives you room to create your favorite taste. These cups can be stored in the freezer for up to 2 months. Just keep them in an airtight container. They will stay fresh and tasty. You can enjoy them whenever you like. Yes, they are quite healthy. They contain good fats from the nut butter and coconut oil. The maple syrup or honey adds natural sweetness. This makes them a guilt-free treat that tastes great! These no-bake chocolate almond butter cups are easy and fun to make. You only need a few ingredients and simple steps to get delicious results. Remember, you can swap ingredients to match your taste. Store them in your freezer for a sweet treat anytime. Enjoy this guilt-free snack without worry. You’ll love how satisfying they are and how quick they come together. Happy cooking!
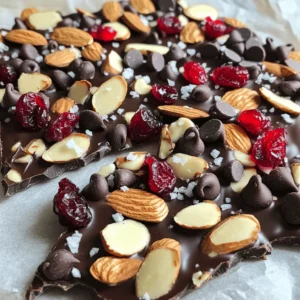
    No-Bake Chocolate Almond Butter Cups Delightfully Simple
  • - 1 ½ cups graham cracker crumbs - ⅓ cup unsalted butter, melted - 2 tablespoons granulated sugar - 8 oz cream cheese, softened - ½ cup powdered sugar - 1 teaspoon vanilla extract - 1 cup heavy whipping cream - 2 cups fresh strawberries, hulled and sliced - 2 tablespoons lemon juice - 1 tablespoon granulated sugar (for strawberries) - Fresh mint leaves (for garnish) When measuring your ingredients, accuracy is key. Use a dry measuring cup for the graham cracker crumbs and sugar. For the butter, melt it and measure in a liquid measuring cup. Cream cheese should be softened, so let it sit out for 30 minutes. Use a kitchen scale for precise measurement if you have one. You can swap some ingredients if needed. Instead of graham crackers, use crushed cookies like Oreos for a different flavor. You can use coconut oil instead of unsalted butter for a dairy-free option. If you don't have powdered sugar, blend granulated sugar until fine. For a lighter version, try using low-fat cream cheese. Fresh strawberries are best, but frozen ones will work too; just thaw and drain excess liquid. To start, grab a medium mixing bowl. Add 1 ½ cups of graham cracker crumbs. Next, pour in ⅓ cup of melted unsalted butter and 2 tablespoons of granulated sugar. Mix it all together. You want the crumbs to feel like wet sand. This step is key; the crust holds everything in place. Now, press the crumb mixture firmly into the bottom of your jars or dessert cups. Make sure it’s even and compact. This will give your cheesecake a solid base. Set the jars aside. In a large mixing bowl, take 8 oz of softened cream cheese. Use an electric mixer to beat it until it’s smooth and creamy. This step ensures a rich filling. Add in ½ cup of powdered sugar and 1 teaspoon of vanilla extract. Mix until everything is smooth and well combined. In another bowl, whip 1 cup of heavy cream until soft peaks form. This whipped cream adds lightness to the filling. Gently fold the whipped cream into the cream cheese mixture. Be careful not to deflate the whipped cream. This keeps your filling fluffy. Now it’s time to assemble. Spoon the cream cheese mixture over the graham cracker crust in each jar. Fill them about ¾ full. This layer is where the magic happens. Next, take 2 cups of fresh strawberries that you’ve hulled and sliced. Mix them with 2 tablespoons of lemon juice and 1 tablespoon of sugar in a bowl. Let them sit for about 10 minutes. This allows the strawberries to become sweeter and juicier. Spoon the macerated strawberries on top of the cream cheese layer. Distribute them evenly across all jars. For a fancy touch, you can add a dollop of the remaining cream cheese mixture on top. Finish with a fresh mint leaf for color. Finally, refrigerate the jars for at least 2-4 hours. If possible, let them set overnight. This waiting time helps the cheesecake become firm and delicious. Enjoy your easy and tasty no-bake strawberry cheesecake jars! To achieve the best whipped cream, start with cold heavy cream. Cold cream whips up faster and better. Use a clean bowl and beaters. This helps the cream reach soft peaks quickly. Whip until it is fluffy but still holds its shape. Be careful not to over-whip, as it can turn buttery. Gently fold the whipped cream into the cream cheese mix. This keeps the texture light and airy. Fresh strawberries make this dessert shine. Choose ripe berries for the best taste. Remove the green tops and slice them thinly. Mix the slices with lemon juice and sugar. Let them sit for about ten minutes. This softens the berries and brings out their natural sweetness. The lemon juice adds brightness, enhancing the flavor of the strawberries. Presentation is key to making your jars appealing. Use clear jars to show off the lovely layers. Mason jars are a great choice, adding a rustic touch. You can also top the jars with a dollop of cream cheese mix. A fresh mint leaf adds a pop of color. Consider using striped paper straws for a fun look. Serve chilled for the best experience. {{image_2}} You can change the flavor of your cheesecake jars. Try adding chocolate for a rich twist. Melt some chocolate and mix it into the cream cheese. You can also use blueberry or raspberry instead of strawberries. Just swap the berries when you layer them on top. Each fruit brings its own taste and fun colors. Want a lighter version? Use low-fat cream cheese. It keeps the creaminess but cuts down on fat. You can also use Greek yogurt in place of some cream cheese. This adds protein and makes it healthier. For the crust, swap regular butter for coconut oil. It gives a nice flavor while keeping it light. If you need a gluten-free dessert, use gluten-free graham crackers. They work just like regular ones. You can also make a crust with ground nuts like almonds or pecans. Mix them with melted butter for a crunchy base. This adds flavor and texture while keeping your cheesecake jars safe for gluten-free diets. To store leftover cheesecake jars, cover them tightly with plastic wrap. You can also use a lid if your jars have one. This keeps the cheesecake fresh and prevents it from absorbing other smells in your fridge. Make sure to keep them in the main part of the fridge, not the door. The fridge door can be warmer and may not keep your dessert as fresh. Leftover cheesecake jars can stay fresh in the fridge for up to three days. After that, the crust may become soggy. If you can, enjoy your jars within this time for the best taste and texture. Always check for any signs of spoilage before eating. If something looks or smells off, it's best to toss it. You can freeze these cheesecake jars if you want to keep them longer. First, make sure the jars are airtight. If not, transfer the cheesecake to a freezer-safe container. These jars can last up to two months in the freezer. When you're ready to eat, thaw them in the fridge overnight. Avoid microwaving the jars, as this can change the texture. Yes, you can make these jars ahead of time. I often whip them up a day before I need them. This lets the flavors blend well. Just cover the jars and keep them in the fridge. They stay fresh and tasty for up to two days. This makes them great for parties or special meals. If you want a change, you can use cookies instead of graham crackers. Digestive biscuits work well. You can also use vanilla wafers or even crushed Oreos for a fun twist. Just make sure the texture is similar. This will keep your crust thick and tasty. These jars last about three to four days in the fridge. Keep them covered tightly to avoid drying out. If you notice the strawberries getting soft, it’s best to eat them sooner. Enjoy your cheesecake jars while they are fresh for the best taste! You now have all the tools to make delicious No Bake Strawberry Cheesecake Jars. We covered key ingredients, step-by-step instructions, and tips to enhance your recipe. Plus, we explored variations and storage methods to keep your jars fresh. Remember, making cheesecake jars is simple and fun. Enjoy experimenting with flavors and sharing your creations. Your friends will love this tasty treat! Dive in and make the jars your own. Happy baking!
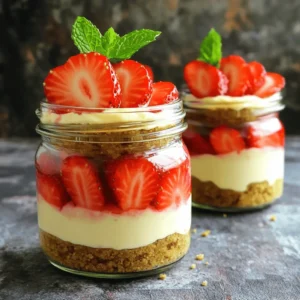
    No Bake Strawberry Cheesecake Jars Easy and Delicious
  • To make bakery-style cinnamon swirl bread, you'll need these key items: - 3 ½ cups all-purpose flour - ½ cup granulated sugar - 1 packet (2 ¼ tsp) instant yeast - 1 tsp salt - 1 cup warm milk (about 110°F/43°C) - ¼ cup unsalted butter, melted - 2 large eggs - 1 tbsp vanilla extract - ⅓ cup brown sugar - 2 tsp ground cinnamon These ingredients create a soft and fluffy bread that swirls with sweet cinnamon goodness. The warm milk helps the yeast grow, and the butter adds richness. You will also need a few baking essentials: - A large mixing bowl - A floured surface for kneading - A rolling pin - A greased 9x5-inch loaf pan - A sharp knife for slicing These tools help you shape and prepare the dough without any hassle. Having everything ready makes baking more fun and easy. For a special touch, consider these optional toppings: - 1 egg wash (1 egg beaten with 1 tbsp water) for a golden crust - Powdered sugar for dusting after baking The egg wash gives your bread a shiny finish, while powdered sugar adds sweetness. You can choose one or both to make your bread look and taste amazing! First, grab a large mixing bowl. Pour in 1 cup of warm milk and ¼ cup of melted unsalted butter. Then, add ½ cup of granulated sugar. Sprinkle 1 packet of instant yeast over the top. Let this sit for about 5 minutes. You want to see some bubbles forming. This shows the yeast is active and ready to work. Next, it's time to add the eggs and 1 tablespoon of vanilla extract. Stir this mixture well until it combines smoothly. Gradually mix in 3 ½ cups of all-purpose flour and 1 teaspoon of salt. Keep stirring until the dough begins to come together. Now, turn the dough out onto a floured surface. Knead it for 8 to 10 minutes. You want it to feel smooth and elastic. If the dough is too sticky, add a little more flour. Next, place the dough in a greased bowl. Cover it with a kitchen towel and set it in a warm spot to rise for about 1 hour. It should double in size. Enjoy this time; your bread is on its way to becoming amazing! To get the right dough, start with warm milk. It helps the yeast wake up. Mix in melted butter and sugar until smooth. When you add flour, do this slowly. The dough should feel soft but not sticky. If it feels too wet, add more flour, just a tablespoon at a time. Knead it on a floured surface for 8-10 minutes. You want it smooth and elastic. This is key for soft bread. To get a nice cinnamon swirl, roll the dough into a big rectangle. Aim for about 18x12 inches. Spread melted butter on top, then sprinkle your cinnamon-sugar mix evenly. When you roll it up, do it tightly. This helps keep the swirl intact. After cutting the roll, twist the two halves with the cut sides facing up. This will show off that lovely swirl when it bakes. Bake your bread at 350°F (175°C). This temperature gives a nice golden color. Keep an eye on it after 25 minutes. It should look brown and sound hollow when tapped. If it needs more time, check every 2-3 minutes. Let it cool in the pan for 10 minutes before moving it to a wire rack. This helps keep it moist. Enjoy the smell as it cools! {{image_2}} You can make your cinnamon swirl bread even better. Try adding nuts or fruits. Walnuts or pecans give a nice crunch. You can also add raisins or chopped apples for sweetness. When you sprinkle the cinnamon-sugar mix, fold in the nuts or fruits. It adds a fun twist and more flavor. A glaze can make your bread shine. You can use a simple glaze made from powdered sugar and milk. Mix one cup of powdered sugar with two tablespoons of milk. Drizzle it on the bread after it cools. For a richer taste, mix in some vanilla extract. You can also brush the top with melted butter and sprinkle more cinnamon sugar. It gives a sweet touch. Spices can change the whole taste of your bread. Try nutmeg or cardamom for a warm flavor. Mix these spices with your brown sugar and cinnamon. This gives your bread a unique twist. Experiment to find your favorite mix. You might just create a new family favorite! To keep your cinnamon swirl bread fresh, wrap it tightly in plastic wrap. You can also use aluminum foil. Place it in an airtight container at room temperature. This helps keep the bread moist. Enjoy it within three days for the best taste. If you want to save some for later, freezing works well. Slice the bread before freezing. Wrap each slice in plastic wrap, then place them in a freezer-safe bag. This way, you can take out just what you need. The bread can last up to three months in the freezer. To reheat, take out a slice and place it in the toaster. You can also warm it in the oven at 350°F (175°C) for about 10 minutes. This gives it a nice crust. If you prefer it warm and soft, use the microwave for about 15 seconds. Enjoy your bread warm! Yes, you can use whole wheat flour. Just replace half of the all-purpose flour with whole wheat. This change adds fiber and nutrients. The bread may be denser, but it still tastes great. You might need to add a bit more liquid to keep the dough soft. If your dough doesn't rise, check the yeast. It needs to be fresh and active. Make sure your milk is warm, about 110°F. If the dough is cold, it won’t rise well. Also, ensure you are in a warm spot for rising. You can place it in an oven with the light on to help. To make this recipe vegan-friendly, swap the eggs with flax eggs. Mix 1 tablespoon of flaxseed meal with 2.5 tablespoons of water for each egg. Replace the butter with coconut oil or vegan butter. Use plant-based milk instead of regular milk. This keeps all the flavor while making it vegan. You learned about the key ingredients for baking and how to prepare dough. I shared tips to perfect your swirl and get the baking time just right. You can even explore tasty variations like adding nuts or fruits. Storing and reheating your baked goods is simple. With these steps and tricks, you can create delicious treats at home. Keep experimenting and enjoy the fun of baking!
    Bakery Style Cinnamon Swirl Bread Easy and Delicious
  • - 1.5 lbs boneless, skinless chicken thighs - 2 cups carrots, sliced - 1 cup celery, chopped - 1 small onion, diced - 4 cloves garlic, minced - 1 teaspoon dried thyme - 1 teaspoon dried rosemary - 1 bay leaf The main ingredients make this dish hearty and flavorful. Chicken thighs give a rich taste. They stay moist during cooking. The veggies add color and crunch. Carrots, celery, and onion work well together. Garlic gives a nice kick, too. Thyme and rosemary bring an earthy flavor. The bay leaf adds depth to the broth. - 4 cups low-sodium chicken broth - 2 cups biscuit dough (store-bought or homemade) - 2 cups frozen peas - Salt and pepper to taste - Fresh parsley for garnish The chicken broth is key for a tasty base. It keeps everything moist. You can use low-sodium broth to control salt. Biscuit dough forms the dumplings; they puff up nicely. Frozen peas add a pop of color and sweetness. Season with salt and pepper for balance. Fresh parsley makes a great garnish, too. It brightens up the dish and looks pretty! Start by layering the ingredients in the slow cooker. Place 1.5 lbs of boneless, skinless chicken thighs at the bottom. Pour in 4 cups of low-sodium chicken broth. Next, add 2 cups of sliced carrots, 1 cup of chopped celery, 1 small diced onion, and 4 cloves of minced garlic. This mix makes a tasty base. Now, we need to add flavor. Sprinkle 1 teaspoon of dried thyme and 1 teaspoon of dried rosemary over the top. Toss in 1 bay leaf. Season with salt and pepper to taste. These spices will give your dish a rich aroma. Cover the slow cooker. Cook on low for 6 hours or high for 3 hours. The chicken will be tender and easy to shred. After cooking, remove the chicken. Use two forks to shred it into bite-sized pieces. Discard the bay leaf, as we don’t want that in our meal. Return the shredded chicken to the cooker. Stir in 2 cups of frozen peas. This adds a sweet pop of color and flavor. Now, it's time for the dumplings. Take 2 cups of biscuit dough and break it into small pieces. You can use store-bought or homemade dough. Drop these pieces on top of the broth mixture in the slow cooker. Cover and cook on high for an additional hour. This step makes the dumplings fluffy and tender. Before serving, stir gently. This mixes the dumplings and chicken together. It’s ready to enjoy! How to ensure flavorful broth To make a rich broth, use low-sodium chicken broth. It adds depth without too much salt. Add garlic, onion, and herbs like thyme and rosemary for extra flavor. The longer you cook the broth, the more it develops. If you have time, let it simmer longer for deeper taste. Best practices for dumpling texture For fluffy dumplings, do not over-mix the dough. Just combine until moist. Drop spoonfuls gently onto the broth. Keep the lid closed while cooking to trap steam. This helps the dumplings rise and stay soft. Let them cook until they are light and fluffy. Using prepped ingredients To cut down on prep time, use pre-chopped veggies. Many stores offer fresh or frozen options. You can also buy ready-made biscuit dough for the dumplings. This saves time and effort, making the dish easier to prepare on busy days. Storing leftovers for future recipes If you have leftovers, store them in an airtight container. They can last in the fridge for 3-4 days. You can also freeze them for up to 3 months. Just make sure to separate the dumplings, as they can get soggy when thawed. {{image_2}} You can switch chicken thighs for chicken breast. Chicken breast is leaner and cooks well. Just keep in mind, it may dry out more easily. For veggies, you can try different options. Zucchini, bell peppers, or even green beans work well. They add color and flavor. Feel free to mix and match based on what you have at home. You can choose between homemade or store-bought biscuit dough. Homemade dough can taste fresher, but store-bought saves time. If you’re in a hurry, store-bought is a great choice. If you need gluten-free dumplings, look for gluten-free biscuit mixes. Many brands offer tasty options. Just follow the package directions for the best results. Enjoy your meal just the way you like it! After making slow cooker chicken dumplings, you may have leftovers. Store them safely to enjoy later. - Storing leftovers in the refrigerator: Let the chicken dumplings cool to room temperature. Place them in an airtight container. They stay fresh in the fridge for about 3-4 days. - Freezing chicken and dumplings: You can freeze leftovers too! Use freezer-safe containers or bags. Make sure to remove as much air as possible. They can last up to 3 months in the freezer. Just label the bags with the date. When you're ready to enjoy your chicken dumplings again, reheating correctly is key. - Best practices for reheating without losing texture: For the best taste, thaw frozen dumplings in the fridge overnight. Reheat them gently. This helps keep the dumplings fluffy and the chicken tender. - Microwave vs. stovetop methods: You can use either method. For the microwave, place the dumplings in a bowl. Cover with a damp paper towel. Heat in short bursts, checking often. For stovetop, use a pot with a splash of broth. Heat on low, stirring gently until warmed through. How long do leftovers of slow cooker chicken dumplings last? Leftovers can stay fresh in the fridge for about 3 to 4 days. Store them in an airtight container. To enjoy them later, reheat gently. Can I use frozen chicken for this recipe? Yes, you can use frozen chicken. Just add an extra hour to the cooking time. Make sure the chicken reaches a safe temperature of 165°F. What can I serve with chicken dumplings? You can serve chicken dumplings with crusty bread or a fresh salad. Both options add great texture and flavor. Try a simple green salad with a light vinaigrette. How to adjust the recipe for smaller servings? To make smaller servings, cut the recipe in half. Use 0.75 lbs of chicken and adjust the broth and veggies accordingly. This way, you still enjoy the full flavor without leftovers. This blog post shared the ingredients and steps for making slow cooker chicken dumplings. You learned about the main ingredients, cooking process, and essential tips. I emphasized the importance of using fresh ingredients and proper storage. In the end, slow cooker chicken dumplings are easy, filling, and a family favorite. Try different ingredients to suit your taste. Enjoy this comforting dish tonight!
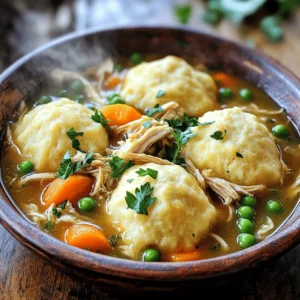
    Savory Slow Cooker Chicken Dumplings Simple Delight
  • To make mango salsa fish tacos, gather these fresh and tasty ingredients: - Fish Options: tilapia, cod, or halibut - Spices: chili powder, cumin, garlic powder - Fresh Produce: mango, red onion, jalapeño, cilantro, lime, avocado - Tortillas: corn tortillas - Seasoning: salt and pepper You will need one pound of firm white fish. This fish should be cut into one-inch pieces. I like to use tilapia because it cooks quickly and has a mild flavor. Cod and halibut are also great choices. For spices, you will need chili powder, cumin, and garlic powder. These spices add a warm, savory taste to the fish. Make sure to season the fish well with salt and pepper, too. Next, let’s talk about the fresh produce. A ripe mango brings sweetness to the salsa. You want it diced into small pieces. The red onion adds a nice crunch, while the jalapeño gives a little heat. Don’t forget the fresh cilantro for a burst of flavor. Lastly, a squeeze of lime juice brightens everything up. Avocado slices make the tacos creamy and rich. For the tortillas, I recommend using corn tortillas. They have a great texture and flavor. These will hold all your yummy fillings together. Gather these ingredients, and you are ready to make a delicious meal! Marinating the Fish with Spices To start, take your fish and cut it into 1-inch pieces. In a bowl, mix the fish with 2 tablespoons of olive oil. Add 1 teaspoon of chili powder, 1 teaspoon of cumin, and 1/2 teaspoon of garlic powder. Season with salt and pepper to taste. Toss everything together until each piece is coated well. Let the fish sit for about 10 minutes to soak up those great flavors. Cooking Techniques for Better Flavor Preheat a skillet over medium-high heat. Once hot, add the seasoned fish in a single layer. Cook for 3 to 4 minutes on each side. The fish should be golden and flake easily with a fork when done. Remove it from the heat and set it aside. This method keeps the fish juicy and full of flavor. Ingredients Mixing Guidelines For the mango salsa, take 1 ripe mango and dice it. Then, chop 1/2 a red onion and 1 small jalapeño after removing the seeds. In a bowl, combine the mango, onion, jalapeño, and 1/4 cup of fresh cilantro. Squeeze in the juice of 1 lime for a zesty kick. Gently mix everything together and add a pinch of salt to taste. Tips for Achieving the Right Texture Mix the salsa carefully to keep the mango pieces intact. You want a nice balance of crunch from the onion and jalapeño, with the softness of the mango. Let the salsa sit for a few minutes to allow the flavors to blend. Warming Tortillas: Best Practices To warm the corn tortillas, you can use a dry skillet over medium heat. Cook each tortilla for about 30 seconds on each side until they are soft and warm. Alternatively, you can microwave them for about 15 seconds. This step makes the tortillas easier to fold. Layering Fish and Salsa Now, it’s time to build your tacos. Place a spoonful of the cooked fish on each warm tortilla. Top it with a generous amount of mango salsa. Add a few slices of avocado for creaminess. Enjoy these vibrant tacos right away for the best taste! To make sure your fish is perfect, look for a few signs. The fish should turn opaque and flake easily with a fork. This usually takes about 3-4 minutes per side on medium-high heat. If the fish looks dry or hard, you may have overcooked it. You can add more flavor to your fish tacos with a few extras. Try mixing in some lime zest for a fresh twist. You can also add diced bell peppers or corn to the salsa. A pinch of smoked paprika can give the fish a nice kick. Feel free to adjust spices to match your taste! These tacos pair well with simple sides. Serve with a fresh green salad or tortilla chips and salsa. For drinks, a light beer or a refreshing limeade works great. You can also try a chilled white wine to enhance the meal. Enjoy your delicious tacos with friends and family! {{image_2}} You can switch up the fish in these tacos. Chicken works great if you prefer poultry. Shrimp is another tasty choice. If you want a plant-based option, try tofu or tempeh. Just season them like the fish. Each protein brings its own flavor and texture. Adjust the cooking time based on what you choose. Mango salsa can be fun to change. You can add other fruits like pineapple or peaches for sweetness. Try adding bell peppers for a crunch. Even diced tomatoes can enhance the mix. Each fruit or veggie adds unique taste and texture. Feel free to experiment based on what you have. This keeps the salsa fresh and exciting. When it comes to tortillas, corn is classic. But flour tortillas can be softer and chewier. If you want to cut carbs, use lettuce wraps. You can also find low-carb tortillas at many stores. Each type offers a different experience. Choose what you enjoy most or what fits your diet. Store leftover fish tacos in an airtight container. Make sure to separate the fish from the tortillas and salsa. This keeps everything fresh. Place the fish in the fridge within two hours of cooking. It will stay good for up to three days. For mango salsa, use a clean, airtight container. Keep it in the fridge for up to four days. Always check for freshness before using. If you see any signs of spoilage, it’s best to toss it. If you want to keep it longer, you can freeze it. Just make sure to leave some space in the container since it can expand. When reheating, avoid using the microwave alone. It can make the fish tough. Instead, try these methods: - Skillet: Heat a small amount of oil in a pan. Add the fish and cook on medium heat until warmed through. - Oven: Place the fish on a baking sheet. Heat in a preheated oven at 350°F until hot, about 10 minutes. These methods help restore the fish's texture while keeping it moist. Enjoy your tasty fish tacos again! Yes, you can use frozen fish for these tacos. Just make sure to thaw it first. To thaw, place the fish in the fridge overnight. If you're short on time, you can also use the cold-water method. Submerge the sealed fish in cold water for about 30 minutes. After thawing, pat it dry with a paper towel. This helps the spices stick better when you cook it. Cook the fish just like fresh, aiming for 3-4 minutes on each side. The spice level of the mango salsa can vary. It mainly depends on the jalapeño you use. If you want it mild, remove all the seeds and membranes. For more heat, leave some of the seeds in. You can also add more jalapeño or a pinch of cayenne pepper to boost the spice. Taste the salsa as you mix it, and adjust to your liking. This way, you can find the perfect balance for your palate. Making this recipe gluten-free is simple. Use corn tortillas instead of flour tortillas, as they are naturally gluten-free. Check the labels on the spices to ensure they are gluten-free. Most spices are safe, but some blends may contain gluten. You can also replace any soy sauce with tamari, which is gluten-free. With these swaps, you can enjoy delicious fish tacos without worry. We covered how to make delicious fish tacos from scratch. You learned about the key ingredients and steps for marinating fish, making mango salsa, and assembling the tacos. I shared tips to perfect your cooking times and suggested ways to customize the dish. Remember, you can mix and match proteins and salsas to create your own twist. With proper storage and reheating, you can enjoy these tacos later. Dive into this meal as a fun family dish or a tasty treat for friends!
    Mango Salsa Fish Tacos Flavorful and Easy Recipe
  • - 2 ripe avocados - 1 cup cherry tomatoes, halved - 1 cup fresh mozzarella balls, drained - 1/4 cup fresh basil leaves, chopped - 2 tablespoons balsamic glaze - 1 tablespoon olive oil - Salt and pepper to taste Using high-quality ingredients makes a big difference. Fresh avocados give a creamy texture. Ripe cherry tomatoes add sweetness. Choose mozzarella balls that are fresh and soft. Fresh basil leaves bring bright flavor. Balsamic glaze should be thick and rich. When you pick top ingredients, your dish shines. Caprese stuffed avocados are not just tasty; they are healthy too. Avocados are full of good fats. They help your heart and keep you full. Cherry tomatoes add vitamins C and K. Mozzarella brings protein and calcium. This dish is light but satisfying. Plus, it's a good source of fiber. Enjoying this treat is a smart choice for your meal. Start by cutting the avocados in half lengthwise. Use a sharp knife for this. Carefully remove the pit with a spoon or knife. Make sure to be gentle. Next, scoop out a bit of the avocado flesh. This creates space for your filling. Chop the scooped-out flesh into small pieces. Set these aside for later use. In a mixing bowl, combine one cup of halved cherry tomatoes. Add one cup of fresh mozzarella balls that you drained. Toss in the chopped basil leaves and the small pieces of avocado you set aside. Drizzle two tablespoons of olive oil over the mix. Sprinkle salt and pepper to taste. Gently mix everything together. This step is key to blending the flavors. Grab your avocado halves. Spoon the Caprese salad mixture into each half. Fill them generously, but don’t overstuff. Drizzle balsamic glaze over the top for added flavor. This will make the dish shine. You can serve right away, or chill for up to 15 minutes. Chilling helps the flavors meld together nicely. Place the stuffed avocados on a platter for a beautiful presentation. Garnish with extra basil leaves and a drizzle of balsamic glaze. Enjoy your tasty treat! To find the perfect avocado, look for a few key signs. First, check the skin. It should be dark and slightly bumpy. Gently squeeze the avocado; it should yield just a bit but not feel mushy. If it feels hard, it is not ripe yet. You can also check the stem. If it pops off easily and is green underneath, the avocado is ripe. Avoid any with large dark spots or dents, as these may indicate overripeness or spoilage. Caprese stuffed avocados are a great treat for many occasions. You can serve them as a light lunch, a savory snack, or a colorful appetizer. Pair them with crusty bread or tortilla chips for added crunch. These stuffed avocados also shine at parties. Just prepare the filling ahead of time and stuff them just before serving. This keeps them fresh and tasty. Presentation is key to making your dish stand out. Place the stuffed avocados on a bright platter to catch the eye. Garnish them with extra basil leaves for a pop of color. A light drizzle of balsamic glaze adds shine and elegance. For added flair, sprinkle some sea salt on top. This enhances the flavors while making your dish look gourmet. {{image_2}} You can switch the cheese for a unique taste. Try feta for a tangy kick. Goat cheese adds creaminess and flavor. If you want a stronger taste, use aged cheddar. Each cheese brings a different twist to your Caprese stuffed avocados. Want a filling dish? Add protein like grilled chicken or shrimp. Diced turkey or ham also work well. You can even mix in chickpeas for a plant-based option. This makes the meal more balanced and satisfying. Make the most of seasonal produce. In summer, use fresh peaches or mangoes for sweetness. In the fall, add roasted butternut squash for warmth. Winter calls for citrus like orange or grapefruit to brighten the dish. Each seasonal swap keeps the flavors fresh and exciting. To keep your Caprese stuffed avocados fresh, store them in an airtight container. This helps prevent browning. If possible, keep the avocado halves separate from the salad mix. You can also sprinkle lemon juice on the avocado flesh to slow down browning. Aim to eat leftovers within a day for the best taste. Stuffed avocados are best enjoyed fresh. However, they can last in the fridge for about 1 day. If you store them properly, you may get an extra 24 hours. After that, the taste and texture may decline. Always check for freshness before eating. Reheating stuffed avocados is not recommended. They taste best cold or at room temperature. If you need to eat them warm, try to just warm the filling gently. Avoid using a microwave, as it can make the avocado mushy. Instead, use a low oven for a short time. Caprese stuffed avocados are a great dish for your health. They offer healthy fats from avocados. The fresh mozzarella adds protein and calcium. Cherry tomatoes provide vitamins A and C. Basil gives you antioxidants. This dish is low in carbs and high in flavor. Eating this meal can help you feel full longer. Yes, you can prepare parts of this recipe ahead of time. You can mix the Caprese salad mixture a few hours in advance. Just keep it in the fridge until you're ready to serve. However, I recommend waiting to stuff the avocados until right before you eat. This keeps the avocados fresh and green. You can get creative with your stuffing! Adding grilled chicken can make it heartier. You could also use different cheeses, like feta or goat cheese. For a spicy kick, consider adding jalapeños. You might even include nuts for a crunchy texture. The options are endless, so feel free to experiment! In this blog post, we explored the ingredients for Caprese stuffed avocados and their quality. We also covered step-by-step instructions on how to prepare and assemble this dish. You learned tips for choosing ripe avocados and how to present your plates beautifully. Variations offered ways to customize the recipe, making it your own. In my final thoughts, this dish is not just tasty; it’s also flexible and fun. Enjoy creating it for yourself and your loved ones!
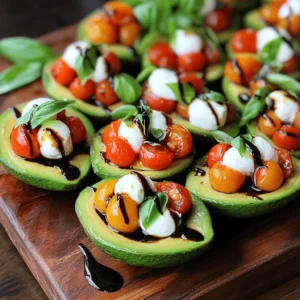
    Caprese Stuffed Avocados Flavorful and Healthy Treat
  • - 1 lb chicken tenders - 1 cup buttermilk or alternative - 1 cup all-purpose flour - 2 large eggs To start, you need fresh chicken tenders. They cook fast and stay juicy. Buttermilk or a lemon-milk mix adds flavor and moisture. All-purpose flour helps the coating stick. Beaten eggs create a binding layer. - 1 cup panko breadcrumbs - 3 tablespoons everything bagel seasoning - Salt and pepper to taste Panko breadcrumbs give a great crunch. Everything bagel seasoning adds a tasty twist. Use salt and pepper to enhance flavors. Together, these make the chicken tasty and fun. - Cooking spray - Air fryer - Bowls for breading station You need an air fryer for this recipe. It cooks the chicken evenly and quickly. Use cooking spray for crispiness. Set up three bowls for the breading: one for flour, one for eggs, and one for panko. This makes the process smooth and easy. Start by putting the chicken tenders in a bowl. Pour in the buttermilk. This mix helps make the chicken tender. Let it soak for at least 30 minutes. This time is key for adding flavor. Next, you need to preheat your air fryer. Set it to 400°F (200°C). This takes about 5 minutes. Preheating ensures even cooking. Now, let’s set up the breading station. You need three bowls: - First bowl: 1 cup of flour with salt and pepper. - Second bowl: 2 large beaten eggs. - Third bowl: 1 cup of panko mixed with 3 tablespoons of everything bagel seasoning. To bread the chicken, take a tender from the buttermilk. Let the extra drip off. First, dredge it in the flour. Then dip it in the beaten eggs. Finally, coat it with the panko mix, pressing gently to stick. Place the breaded chicken tenders in the air fryer basket. Lay them flat in a single layer. Lightly spray them with cooking spray to make them crispy. Cook at 400°F (200°C) for 10 to 12 minutes. Flip halfway through for even cooking. To check if the chicken is done, use an instant-read thermometer. The inside should reach 165°F (74°C). This ensures the chicken is safe to eat. To boost the taste of your chicken tenders, consider adding garlic powder or paprika. These spices add depth and a hint of warmth. You can also mix in some fresh herbs like thyme or parsley for a fresh touch. Marinating your chicken in buttermilk is key. Let it sit for at least 30 minutes. This makes the chicken tender and juicy. For great breading, use three separate bowls: flour, eggs, and panko. Make sure to coat each tender well. This helps the breadcrumbs stick better. Don't skip the cooking spray! A light spray adds extra crispiness and keeps the chicken from drying out. Serve your chicken tenders with dips like honey mustard or ranch for extra flavor. Pair them with crispy fries or a fresh salad for a complete meal. For a nice touch, arrange the tenders on a wooden board. Add a small bowl of sauce and some parsley on top for color. This makes your dish look appealing and tasty! {{image_2}} You can swap out all-purpose flour for whole grain flour. Whole grain flour adds fiber and nutrients. For a gluten-free option, use gluten-free flour. This keeps your meal tasty and safe for those with gluten issues. Instead of panko, you can use crushed pork rinds. Pork rinds add crunch and flavor without carbs. They work well in many recipes, giving a nice twist. You can change the seasoning to fit your taste. For a spicy kick, add cayenne pepper or chili powder. You can also use lemon zest for a fresh zing. Mix it up with garlic powder or onion powder for added depth. Dipping sauces can also be fun. Try honey mustard, ranch, or even a spicy sriracha mayo. Each dip can change the meal's whole vibe. If you want to bake instead of air fry, preheat your oven to 400°F (200°C). Place the chicken on a baking sheet lined with parchment paper. Bake for 15-20 minutes, flipping halfway through, until golden. You can also use a traditional fryer. Heat oil to 350°F (175°C) and fry the chicken for about 5-7 minutes. This gives a crispy texture but adds more oil to the dish. Choose the method that suits your style! To keep your chicken tenders fresh, store them in an airtight container. Place a layer of paper towels at the bottom to absorb moisture. You can keep the chicken tenders in the fridge for up to three days. After that, they may lose their flavor and texture. To reheat chicken tenders, use your air fryer. Set it to 350°F (175°C) for about 5 to 7 minutes. This method helps keep them crispy. You can also use an oven at the same temperature. Avoid using a microwave, as it makes chicken soggy. If you want to freeze the chicken tenders, do it before cooking. Place the breaded tenders in a single layer on a baking sheet. Once frozen solid, transfer them to a freezer bag. They can stay in the freezer for up to three months. When you're ready to eat, cook them straight from frozen. Cook for about 15 to 18 minutes at 400°F (200°C), flipping halfway through. Yes, you can use chicken breasts. Just cut them into strips. The cooking time may change. Cook the strips for about 12-15 minutes. Always check that the chicken reaches 165°F (74°C). This ensures safety and flavor. If you lack buttermilk, don’t worry! You can make a quick substitute. Mix 1 cup of milk with a squeeze of lemon juice or vinegar. Let it sit for a few minutes. This will mimic the tangy flavor of buttermilk. It depends on your air fryer size. Typically, you can fit 4-6 tenders in a single layer. Avoid overcrowding them. This helps them cook evenly and stay crispy. You can cook in batches if needed. Absolutely! Feel free to explore other seasonings. You can try garlic powder, paprika, or even taco seasoning. Mix and match for fun flavors. Just make sure to adjust the amount to your taste preference. You now have a complete guide for making delicious air fryer chicken tenders. From the main ingredients to storage tips, each step is laid out for you. Remember to marinate your chicken well for the best flavor. Experiment with coatings and seasonings to find what you love. Don’t forget, these tenders can be stored and reheated easily, so you can enjoy them anytime. Use what you learned to cook up the perfect meal. Get ready to impress with your tasty homemade chicken tenders!
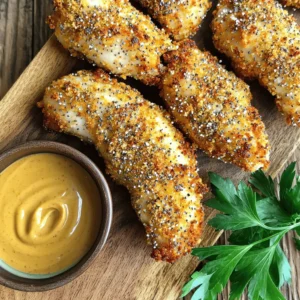
    Air Fryer Everything Bagel Chicken Tenders Delight
  • For this recipe, you need: - 2 lbs chicken wings These wings are the star of the dish. They are juicy and perfect when cooked right. Make sure to choose fresh wings for the best taste. The marinade gives the wings their sweet and savory flavor. You’ll need: - 1/4 cup honey - 1/4 cup soy sauce (or coconut aminos for a gluten-free option) - 4 cloves garlic, minced - 1 tablespoon fresh ginger, grated - 1 tablespoon apple cider vinegar - 1 teaspoon sesame oil - 1/2 teaspoon black pepper - 1/4 teaspoon red chili flakes (optional for heat) Mix these ingredients well. The honey and soy sauce balance each other. Garlic and ginger add depth and warmth. Apple cider vinegar brings a nice tang, while sesame oil adds a hint of nuttiness. The red chili flakes can spice it up if you like. To make the wings look great and add flavor, consider these garnishes: - Sesame seeds - Chopped green onions These garnishes add a nice crunch and fresh taste. They make your wings pop on the plate. Enjoy your delicious Air Fryer Honey Garlic Wings! To start, gather all the ingredients. In a large bowl, mix together: - 1/4 cup honey - 1/4 cup soy sauce (or coconut aminos for gluten-free) - 4 cloves garlic, minced - 1 tablespoon fresh ginger, grated - 1 tablespoon apple cider vinegar - 1 teaspoon sesame oil - 1/2 teaspoon black pepper - 1/4 teaspoon red chili flakes (if you want heat) Stir these together well. This mix will be your marinade. The honey gives a nice sweet touch, while the garlic and ginger add bold flavors. Next, add the 2 lbs of chicken wings to the bowl. Make sure each wing is covered in the marinade. This step is key for flavor. Once coated, cover the bowl with plastic wrap. Place it in the fridge for at least 30 minutes. If you have time, marinate for up to 2 hours. More time means more flavor! When you’re ready to cook, preheat your air fryer. Set it to 380°F (190°C) for about 5 minutes. Lightly spray the air fryer basket with cooking spray or oil. This helps the wings not stick. Take the wings out of the marinade, shaking off any extra liquid. Place them in the basket in a single layer. Cook for 25-30 minutes. Flip them halfway through for even cooking. The wings should be crispy and golden brown when done. While the wings cook, heat the leftover marinade in a small pan. Cook it over medium heat for about 5-7 minutes until it thickens slightly. Once the wings are cooked, toss them in this sauce or drizzle it on top. For a nice finish, sprinkle sesame seeds and chopped green onions before serving. Enjoy the sweet and savory flavors of your honey garlic wings! To make your wings extra crispy, here are some tips: - Pat the chicken wings dry with paper towels. This helps remove moisture. - Use a little baking powder in your marinade. It boosts crispiness. - Air fry the wings in a single layer. This allows for better airflow. - Flip the wings halfway through cooking. This helps both sides crisp up. - If you want them super crispy, air fry them for an extra 5 minutes at the end. Marinating your wings is key for flavor. Aim for at least 30 minutes. For more taste, let them sit for 2 hours. The longer you marinate, the better the flavor. You can also marinate them overnight for a fun twist. Just remember to keep them in the fridge! To get the best results with your air fryer, follow these tips: - Preheat your air fryer before adding the wings. This helps them cook evenly. - Lightly grease the basket with cooking spray. This prevents sticking. - Don't overcrowd the basket. Cook in batches if needed. This ensures even cooking. - Always check the wings for doneness. Look for a crispy, golden brown color. - Let the wings rest for a few minutes after cooking. This keeps them juicy. {{image_2}} To make these wings gluten-free, swap soy sauce with coconut aminos. This option tastes great. It keeps the sweet and savory notes of the dish. You can also use gluten-free soy sauce if you prefer. Always check labels to ensure they are gluten-free. Want to spice things up? Add a pinch of cayenne pepper or smoked paprika to the marinade. These spices add a nice kick and depth. You can also mix in some garlic powder or onion powder for a flavor boost. Feel free to experiment with your favorite spices for a unique twist. While chicken wings are classic, you can use chicken thighs or drumsticks. Both options stay juicy and tender. Adjust the cooking time slightly, as they may take a bit longer. Just make sure the internal temperature reaches 165°F. This way, you ensure safe and tasty chicken. To store leftover wings, place them in an airtight container. Make sure they cool down first. You can keep them in the fridge for up to three days. If you want to keep them longer, freeze them. Just remember to wrap them well. Reheating is easy! You can use the air fryer or oven. For the air fryer, set it to 350°F (175°C) and heat for about 8-10 minutes. If using the oven, preheat to 350°F (175°C) and bake for 15-20 minutes. This makes them crispy again. Freezing wings is a great option. Place the cooked wings on a baking sheet in a single layer. Freeze them until solid, then transfer to a freezer bag. They can last up to three months. When you want to eat them, thaw in the fridge overnight. Then, reheat as mentioned above. Yes, you can make the wings ahead. Marinate them and store in the fridge. You can prepare the wings up to 2 hours in advance for great flavor. Just remember to cook them fresh when you are ready to serve. This way, they stay crispy and delicious. You can try many sauces with these wings. Buffalo sauce adds spice. Teriyaki sauce gives a sweet twist. Barbecue sauce is another favorite. You can mix and match to find your best flavor. Feel free to get creative and use what you love. Yes, you can use frozen chicken wings. Just make sure to thaw them first. Thaw in the fridge overnight or use the microwave. Once thawed, you can follow the same steps in the recipe. This makes it easy to enjoy wings anytime. Check the wings for a crispy outside and golden brown color. They should reach an internal temperature of 165°F (74°C). You can use a meat thermometer for accuracy. If you want extra crispiness, cook them for an additional 5 minutes in the air fryer. You learned how to make tasty air fryer chicken wings. We covered the ingredients, marination steps, and cooking tips to get them crispy. You saw how to store leftovers and answered common questions. Remember, customizing flavors can make your wings unique. With a few tricks, you can impress anyone. Enjoy your cooking!
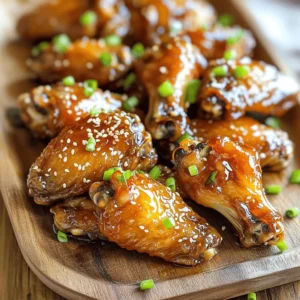
    Irresistible Air Fryer Honey Garlic Wings Recipe
  • To make these apple crumb muffins, you need: - 1 ½ cups all-purpose flour - 1 cup granulated sugar - ½ teaspoon baking soda - 1 teaspoon baking powder - ½ teaspoon salt - 1 teaspoon ground cinnamon - ½ cup unsalted butter, melted and cooled - 2 large eggs - 1 teaspoon vanilla extract - ½ cup milk - 2 cups apples, peeled, cored, and diced For the delicious crumb topping, gather these: - ½ cup brown sugar - ½ cup rolled oats - ½ cup all-purpose flour - 1 teaspoon ground cinnamon - ¼ cup cold unsalted butter, cubed Choosing the right apples makes a big difference. I prefer sweeter varieties like Fuji or Honeycrisp. These apples add flavor and sweetness to your muffins. Look for firm apples with bright colors. Avoid any that feel soft or have bruises. Fresh apples will give your muffins a better taste and texture. First, set your oven to 350°F (175°C). This temperature is perfect for baking muffins. While the oven heats, prepare your muffin tin. You can use paper liners or grease it with cooking spray. This step helps prevent the muffins from sticking. In a large bowl, combine the dry ingredients. Use 1 ½ cups of all-purpose flour, 1 cup of granulated sugar, ½ teaspoon of baking soda, 1 teaspoon of baking powder, ½ teaspoon of salt, and 1 teaspoon of ground cinnamon. Whisk these ingredients together until they blend well. This mixture gives the muffins structure and flavor. In another bowl, mix the wet ingredients. You need ½ cup of melted butter, 2 large eggs, 1 teaspoon of vanilla extract, and ½ cup of milk. Stir these until smooth. Next, pour the wet mix into the dry mix. Gently fold them together. Avoid over-mixing; this keeps the muffins light and fluffy. Finally, add 2 cups of diced apples to the batter. Fold them in until they are evenly mixed. For the crumb topping, take a small bowl. Combine ½ cup of brown sugar, ½ cup of rolled oats, ½ cup of all-purpose flour, and 1 teaspoon of cinnamon. Mix these well. Then, add ¼ cup of cold, cubed unsalted butter to the bowl. Use your fingers or a pastry cutter to mix until it looks like coarse crumbs. This topping adds a crunchy texture to your muffins. Now, fill each muffin cup about ¾ full with the batter. Sprinkle the crumb topping generously over each muffin. Place the tin in the preheated oven and bake for 18-22 minutes. To check if they are done, insert a toothpick into the center. If it comes out clean, your muffins are ready. Let them cool in the pan for 5 minutes, then move them to a wire rack. Enjoy the warm, delightful scent as they cool! To avoid common mistakes, measure your flour correctly. Too much flour makes muffins dry. Always spoon flour into your measuring cup and level it off. Mix the wet and dry ingredients gently. Over-mixing makes tough muffins. Finally, don’t skip the crumb topping. It adds flavor and crunch. For a perfect crumb texture, use cold butter for the topping. Cold butter creates those lovely crunchy bits. Mix the topping until it looks like coarse crumbs. If it feels too wet, add a bit more flour. Sprinkle the topping generously on each muffin before baking to ensure a nice crust. Serve these muffins warm for the best taste. A light sprinkle of powdered sugar makes them look fancy. Pair them with a slice of fresh apple and a cup of tea or coffee. They are great for breakfast or as a snack. You can also try adding a dollop of whipped cream on top for a treat! {{image_2}} You can add nuts or dried fruits to your apple crumb muffins. Walnuts or pecans add crunch. Dried cranberries or raisins can add sweetness. When you mix in these extras, use about ½ cup. This will keep the balance of flavors just right. Chop the nuts coarsely and fold them in with the diced apples. If using dried fruits, chop them smaller for even mixing. For a gluten-free version, swap the all-purpose flour. Use a gluten-free blend instead. Make sure it has a binding agent like xanthan gum. This helps give the muffins structure. You can also use almond flour or coconut flour, but adjust the liquid. These flours absorb more moisture. You might need to add an extra tablespoon of milk to keep the batter moist. You can enhance the flavor of your muffins easily. Adding spices like nutmeg or ginger can add warmth. A splash of almond or maple extract can give a nice twist. When mixing the batter, use ¼ teaspoon of nutmeg or ginger. For extracts, a teaspoon is perfect. This makes the muffins unique and more flavorful. To keep your apple crumb muffins fresh, store them in an airtight container. This helps lock in moisture and flavor. Place them at room temperature for up to three days. If you want to keep them longer, consider freezing. For long-term storage, freeze the muffins after they cool completely. Wrap each muffin in plastic wrap. Then place the wrapped muffins in a freezer-safe bag. They can last up to three months in the freezer. When ready to enjoy, just take out the number you need. To reheat the muffins, use your oven or microwave. For the oven, preheat to 350°F (175°C). Place the muffins on a baking sheet for about 10 minutes. For the microwave, heat each muffin for 15-20 seconds. Enjoy them warm for the best taste! To keep your muffins moist, use apples that are juicy. You can use sweeter varieties of apples. Adding a little extra butter also helps. Make sure not to over-mix the batter. Over-mixing can make them dry. Use fresh ingredients for the best results. Yes, you can use other fruits. Pears, berries, or peaches work great. Just ensure the fruit is ripe. Diced fruits will blend well into the batter. Adjust the sugar if your fruit is less sweet. Apple crumb muffins stay fresh for about three days at room temperature. Store them in an airtight container. If you want them to last longer, refrigerate them for up to a week. They can also be frozen for about three months. To warm leftover muffins, preheat your oven to 350°F. Place the muffins on a baking sheet. Heat them for about 5-7 minutes. You can also use a microwave for 15-20 seconds. Enjoy them warm for the best taste. You now know how to make delicious apple crumb muffins from scratch. We covered the key ingredients, clear steps, and helpful tips to avoid mistakes. I shared fun variations and explained how to store your muffins for later. Remember, fresh apples make a big difference in taste. With these insights, you can enjoy tasty muffins anytime. Dive into your baking adventure, and let every bite remind you of the effort you put into it. Enjoy your apple muffins!
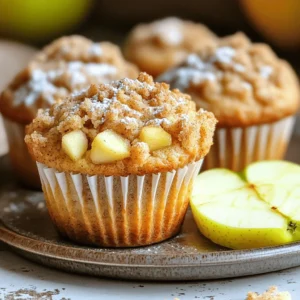
    Apple Crumb Muffins Delightful Taste and Texture
  • - 2 cans (28 oz each) whole peeled tomatoes - 1 medium onion, chopped - 4 cloves garlic, minced - 2 cups vegetable broth - 1 tablespoon olive oil - 1 teaspoon sugar (to balance acidity) - 1 teaspoon dried oregano - 1 teaspoon salt (adjust to taste) - 1/2 teaspoon black pepper - 1 cup fresh basil leaves, loosely packed - 1/2 cup heavy cream (or coconut cream for a dairy-free option) I love using whole peeled tomatoes for this soup. They add rich flavor and texture. The fresh basil leaves brighten the dish and give it a lovely aroma. Vegetable broth is key for depth, but you can also use chicken broth if you prefer. Chopping the onion and mincing the garlic really builds the base of flavor. Olive oil adds some richness, while sugar helps balance the natural acidity of the tomatoes. Dried oregano, salt, and black pepper round out the taste perfectly. - Sugar to balance acidity - Olive oil for flavor - Seasonings (oregano, salt, pepper) You might want to add a little extra sugar if the soup tastes too tart. Olive oil is not just for cooking; it also boosts the flavor. Feel free to add more herbs or spices based on your taste. - Slow cooker - Immersion blender - Measuring cups and spoons A slow cooker is essential for this recipe. It lets the flavors blend beautifully over time. An immersion blender makes it easy to purée the soup to your liking. Measuring cups and spoons help ensure that each ingredient is just right. Start by chopping one medium onion and mincing four cloves of garlic. The onion adds sweetness and depth. The garlic brings a lovely aroma. After that, measure and gather all your ingredients. You will need two cans of whole peeled tomatoes, two cups of vegetable broth, one tablespoon of olive oil, one teaspoon of sugar, one teaspoon of dried oregano, one teaspoon of salt, and half a teaspoon of black pepper. Don't forget the star of the dish: one cup of fresh basil leaves and half a cup of heavy cream, or use coconut cream for a dairy-free option. Now, combine all the ingredients in the slow cooker. Pour in the tomatoes with their juice. Add the chopped onion, minced garlic, vegetable broth, olive oil, sugar, oregano, salt, and black pepper. Stir gently to mix everything well. Cover the slow cooker and set it to low for 6 to 8 hours or high for 3 to 4 hours. Cooking it on low makes the flavors blend beautifully, while high cooking saves time. Once the cooking time is up, it’s time for the fresh basil. Add the basil leaves to the soup, and grab your immersion blender. Blend the soup until it reaches the texture you want. If you like it chunkier, blend just half. After blending, stir in the heavy cream or coconut cream. Taste and adjust the seasoning if needed. Let it heat for another 10 to 15 minutes on low. Now, you’re ready to serve this warm, tasty Tomato Basil Soup! To get the best taste, adjust your seasoning. Start with salt and pepper. You can taste the soup before serving. If it needs more flavor, add a pinch of salt or pepper. Balancing acidity is key. Add a teaspoon of sugar to smooth out the sharpness of the tomatoes. This small step makes a big difference. You can choose between chunky or smooth soup. If you like a chunky texture, blend just half of the soup. For a creamy consistency, blend it all. Use an immersion blender for the best results. It makes blending easy and quick. Make sure to blend until you reach your desired texture. Garnishing is important for a great look. Add fresh basil leaves on top of each bowl. A drizzle of olive oil adds shine and flavor. Serve with crusty bread to complete the meal. The bread soaks up the soup and makes it even better. Enjoy the colors and textures on your plate! {{image_2}} You can easily make this soup fit your needs. For a dairy-free option, use coconut cream instead of heavy cream. This swap gives the soup a rich texture without dairy. If you're vegan, simply skip the cream altogether. The soup remains tasty with just the tomatoes and herbs. For a fresher taste, consider using fresh tomatoes instead of canned ones. You will need about 4 pounds of ripe tomatoes for the same flavor. Another option is to add more herbs. Try thyme or parsley for an extra layer of flavor. These herbs work well with the basil and create a complex taste. This soup pairs nicely with salads or sandwiches. A simple green salad or a grilled cheese can complement the soup well. You can also transform the soup into a pasta sauce. Just blend it a little less and serve it with your favorite pasta. This gives you a new way to enjoy the same great flavors. To store your soup, let it cool first. Transfer it to an airtight container. It will stay fresh in the fridge for about 3 to 5 days. For longer storage, you can freeze it. Use freezer-safe bags or containers. Make sure to leave some space for expansion. The soup can last up to 3 months in the freezer. When reheating your soup, the stovetop is best. Pour the soup into a pot. Heat it over medium-low heat. Stir it often to prevent sticking. If you want to use the microwave, place it in a microwave-safe bowl. Heat it in short bursts, stirring in between. If the soup is too thick, add a splash of broth or water to adjust the consistency. In the fridge, your soup lasts about 3 to 5 days. If you see any signs of spoilage, like off smells or mold, it's best to throw it out. Always trust your senses when it comes to food safety. If it looks or smells wrong, it's better to be safe than sorry. Cooking slow cooker tomato basil soup takes 6-8 hours on low or 3-4 hours on high. The low setting lets the flavors blend well. The high setting cooks it faster, but you may lose some depth in flavor. I often choose the low setting. It gives me time to enjoy my day while the soup cooks. Yes, you can use fresh tomatoes! To replace canned tomatoes, use about 10-12 medium fresh tomatoes. First, you need to blanch and peel them. Cut them into quarters and add them to the slow cooker. This method gives the soup a bright and fresh taste. Remember that fresh tomatoes can vary in flavor, so taste as you go! Tomato basil soup pairs well with many dishes. Here are some great ideas: - Grilled cheese sandwiches for a classic combo. - Crusty bread to soak up the soup. - Salads for a light and fresh side. - Pasta for a heartier meal. Choose what you love most. Each option adds a nice touch to your meal! This guide shows you how to make delicious slow cooker tomato basil soup. You learned about the key ingredients, kitchen tools, and step-by-step instructions. We also shared tips to enhance flavor and texture. Dietary variations and storage tips help you adapt the recipe to your needs. Enjoy crafting this comforting soup using fresh ingredients and simple techniques. You can impress guests or simply treat yourself. Remember, cooking is fun and rewarding! Dive in and savor each spoonful of your creation.
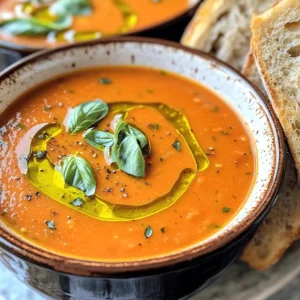
    Slow Cooker Tomato Basil Soup Flavorful and Easy Recipe
  • To make these tasty pumpkin spice donut holes, gather the following: - 1 cup all-purpose flour - 1/2 cup pumpkin puree - 1/4 cup granulated sugar - 1/4 cup brown sugar, packed - 1/4 cup milk - 1 large egg - 1 teaspoon baking powder - 1/2 teaspoon baking soda - 1 teaspoon pumpkin pie spice - 1/2 teaspoon vanilla extract - 1/4 teaspoon salt - 1/4 cup melted butter (for coating) - 1/2 cup granulated sugar (for coating) - 1 teaspoon cinnamon (for coating) You can swap some ingredients if needed: - All-purpose flour: Use whole wheat or gluten-free flour. - Pumpkin puree: Replace with applesauce for a lighter flavor. - Granulated sugar: Try coconut sugar or honey as alternatives. - Milk: Use almond milk or oat milk for dairy-free options. - Egg: A flaxseed meal mix (1 tablespoon flaxseed + 2.5 tablespoons water) works as a binder. Understanding what’s in your donut holes is key: - All-purpose flour: Provides carbs and some protein. - Pumpkin puree: Offers fiber, vitamins A and C, and antioxidants. - Granulated sugar: Adds sweetness but has no nutrients. - Brown sugar: Adds moisture and a hint of flavor. - Milk: Contributes calcium and protein. - Egg: Adds protein and helps bind the mix. - Baking powder and baking soda: These help the donut holes rise. - Pumpkin pie spice: Brings warm flavors like cinnamon and nutmeg. - Vanilla extract: Enhances overall flavor. - Salt: Balances sweetness and boosts flavor. - Melted butter: Adds richness and helps the sugar coating stick. - Cinnamon sugar: Provides a sweet and spicy finish. These ingredients come together to create a warm, cozy treat that celebrates fall. First, gather all your ingredients. This makes cooking easier and more fun. You will need flour, pumpkin puree, sugars, milk, an egg, baking powder, baking soda, pumpkin pie spice, vanilla, salt, melted butter, and more sugar with cinnamon for coating. Preheat your oven to 350°F (175°C). Grease a mini muffin tin with cooking spray or butter. Start by mixing dry ingredients in a bowl. Combine flour, baking powder, baking soda, pumpkin pie spice, and salt. Whisk them well. In another bowl, mix the wet ingredients. Add pumpkin puree, granulated sugar, brown sugar, milk, egg, and vanilla extract. Whisk until smooth. Gradually add dry ingredients to the wet mix. Stir until just combined. A few lumps are fine; don’t overmix. Next, fill each muffin cup 2/3 full with batter. Bake for 10 to 12 minutes. Check doneness with a toothpick. If it comes out clean, they are ready. Once baked, let the donut holes cool for about five minutes in the tin. Then, move them to a wire rack. While they cool, make the cinnamon sugar mix. Combine granulated sugar and cinnamon in a bowl. When the donut holes are warm, dip each one in melted butter. Roll them in the cinnamon sugar mixture to coat well. Enjoy your tasty Pumpkin Spice Donut Holes warm! To make the best pumpkin spice donut holes, follow these tips: - Use fresh pumpkin puree. Fresh puree gives a richer taste. - Don’t overmix the batter. Mix until just combined for light, fluffy donut holes. - Grease the tin well. This helps the donut holes come out easily. - Check the temperature. Make sure your oven is preheated to 350°F for even baking. - Use a toothpick test. Insert a toothpick to check if they are done. It should come out clean. Avoid these common mistakes to ensure success: - Too much flour. Measuring too much can make them dense. Always spoon flour into your measuring cup. - Skipping the cooling step. Letting them cool for a few minutes helps them firm up before coating. - Not coating while warm. Coating them right after baking helps the sugar stick better. - Baking too long. If they are overbaked, they will be dry. Watch them closely in the last minutes. Here are some ideas to boost the flavor: - Add nuts. Chopped pecans or walnuts can add a nice crunch and flavor. - Try different spices. A pinch of nutmeg or allspice can enhance the pumpkin spice flavor. - Glaze option. Drizzle a simple glaze made of powdered sugar and milk for extra sweetness. - Stuff them. Fill with cream cheese or chocolate for a surprise inside. {{image_2}} You can change the flavors of your donut holes easily. For a chocolate twist, add cocoa powder to the batter. Just use 2 tablespoons of cocoa powder to replace some flour. You can also mix in mini chocolate chips for a sweet surprise. If you want a fruity touch, add mashed bananas or applesauce. This will give your donut holes a moist texture. You can also try different spices. Swap pumpkin pie spice for cinnamon or nutmeg. Each spice adds a unique taste. To make these donut holes gluten-free, use a gluten-free flour blend. Just ensure it has a good mix of starches and proteins. You can also replace the egg with a flaxseed egg. Mix 1 tablespoon of ground flaxseed with 2.5 tablespoons of water. Let it sit for a few minutes until it thickens. For a vegan version, switch milk with almond or oat milk. Choose a plant-based butter for coating. This way, everyone can enjoy these tasty treats! Add seasonal flavors to your donut holes for more fun. Try mixing in chopped nuts like pecans or walnuts. You can also sprinkle in dried cranberries or raisins for a chewy bite. For garnishing, drizzle maple syrup or caramel on top. This makes them look fancy and taste even better. You can also dust them with powdered sugar for a sweet finish. These little changes will make your pumpkin spice donut holes stand out. To keep your pumpkin spice donut holes fresh, store them in an airtight container. This helps keep them moist and tasty. You can keep them at room temperature for up to two days. If you want them to last longer, store them in the fridge. Just remember, they might lose some of their fluffiness. When you’re ready to enjoy these donut holes again, reheating is easy. Preheat your oven to 350°F (175°C). Place the donut holes on a baking sheet. Heat them for about five to seven minutes. This method helps restore their warm, soft texture. You can also use a microwave. Just heat them for about 10-15 seconds at a time. Be careful not to overheat, or they might get tough. If you want to save some for later, freezing is a great option. Allow the donut holes to cool completely. Then, place them in a single layer on a baking sheet. Freeze them for about one hour. Once frozen, transfer them to a freezer bag. Seal it tightly and label it with the date. They can last up to three months in the freezer. When you're ready to eat, thaw them overnight in the fridge, then reheat as mentioned above. Enjoy your tasty treat anytime! Pumpkin spice donut holes are bite-sized treats made with pumpkin puree and warm spices. They have a soft, cake-like texture and are rolled in cinnamon sugar. These mini donuts capture the flavors of fall in every bite. Yes, you can make these donut holes ahead of time. Bake them and store them in an airtight container. They stay fresh for about two days at room temperature. For longer storage, freeze them for up to three months. You can tell your donut holes are done when a toothpick inserted comes out clean. They should also be golden brown on top. If they look slightly puffed and spring back when touched, they are ready. You can find pumpkin spice donut holes at many bakeries and coffee shops in the fall. Some grocery stores may also sell them in the bakery section. If you want a fresh batch, making them at home is always a great option! We explored the ingredients, baking steps, and variations for pumpkin spice donut holes. You learned how to create these tasty treats with helpful tips and storage tricks. Remember, ingredient swaps and flavor combinations can make your baking fun and unique. Use these insights to impress family and friends. Keep experimenting and enjoy every bite of your delightful donut holes. Happy baking!
    Pumpkin Spice Donut Holes Tasty Fall Treat Recipe
  • To make Minute Garlic Shrimp Fried Rice, you need a few key ingredients: - 2 cups cooked jasmine rice (preferably cold) - 1 lb medium shrimp, peeled and deveined - 4 cloves garlic, minced - 2 tablespoons soy sauce - 1 tablespoon oyster sauce - 1 tablespoon sesame oil - 1 cup mixed vegetables (peas, carrots, bell peppers) - 2 green onions, chopped - Salt and pepper to taste - 1 tablespoon vegetable oil for cooking - 1 teaspoon red pepper flakes (optional for heat) These ingredients work together to bring great flavor to the dish. Cold jasmine rice is best, as it helps to avoid mushiness. If you don’t have all the ingredients, you can switch a few out. For example: - Shrimp: Use chicken, tofu, or even beef. - Vegetables: Swap in whatever you like, such as broccoli or snap peas. - Sauces: If you don’t have oyster sauce, try using hoisin sauce for a sweet touch. - Rice: Any leftover rice works, but jasmine gives the best taste. Feel free to mix and match based on what you have! When buying shrimp, look for these signs of freshness: - Color: Fresh shrimp should be a nice pink or gray. - Smell: They should smell like the ocean, not fishy. - Texture: The shrimp should feel firm and not slimy. Always ask your fishmonger about the shrimp's source. Fresh, wild-caught shrimp usually taste better than farmed ones. First, gather all your ingredients. This makes cooking quick and easy. You need: - 2 cups cooked jasmine rice (preferably cold) - 1 lb medium shrimp, peeled and deveined - 4 cloves garlic, minced - 2 tablespoons soy sauce - 1 tablespoon oyster sauce - 1 tablespoon sesame oil - 1 cup mixed vegetables (peas, carrots, bell peppers) - 2 green onions, chopped - Salt and pepper to taste - 1 tablespoon vegetable oil for cooking - 1 teaspoon red pepper flakes (optional for heat) Make sure your shrimp is cleaned and ready. Cold jasmine rice works best. If you use warm rice, it may become mushy. Heat a large skillet or wok over medium-high heat. Add vegetable oil. Once hot, throw in the minced garlic. Sauté for about 30 seconds, but be careful. You don’t want it to burn. Next, add the shrimp and cook for 2 to 3 minutes. Stir occasionally until they turn pink. Remove the shrimp from the skillet and set them aside. In the same skillet, add your mixed vegetables. Stir-fry them for 2 to 3 minutes. They should be heated through but still crisp. Push the vegetables to one side of the skillet. Add the cold rice to the other side. Break up clumps and stir-fry for about 2 minutes. Let the rice get a bit crispy for texture. Now, return the shrimp to the skillet. Pour in soy sauce, oyster sauce, sesame oil, salt, pepper, and red pepper flakes if you want heat. Mix everything well. Ensure the sauce coats all the ingredients evenly. Finally, stir in the chopped green onions. Mix again and cook for an additional minute. After that, remove the skillet from heat. Taste and adjust seasoning if needed. Serve the fried rice in a large bowl. For a nice touch, garnish with extra green onions and a sprinkle of sesame seeds. Enjoy your meal! To get fluffy fried rice, start with cold cooked rice. Freshly cooked rice can be too sticky. Use a fork to break up clumps before adding it to your pan. This helps each grain stay separate. Stir-frying rice over high heat also aids in achieving that perfect texture. It allows moisture to escape and keeps the rice light and fluffy. Use soy sauce and oyster sauce to boost flavor. Soy sauce gives a salty touch, while oyster sauce adds depth. If you like heat, add red pepper flakes. Start with a small amount and taste as you go. You can also switch up the vegetables. Adding more bell peppers or some bok choy can change the taste. Experiment until you find your ideal flavor profile. One common mistake is overcrowding the pan. Too many ingredients can steam instead of fry. Cook in batches if needed. Another mistake is not heating the oil enough. Hot oil ensures a nice sear on the shrimp and veggies. Lastly, don't forget to taste your dish before serving. Adjust salt and pepper if needed. Trust your taste buds to guide you! {{image_2}} You can swap shrimp for chicken, beef, or even tofu. Each protein brings a new taste and texture. If using chicken, cut it into small pieces. Cook it until golden, then add garlic. For beef, thin slices work best. Just be sure to cook it fully. Tofu is great for vegans. Simply cube it and sauté until it’s crispy. To make this dish vegetarian or vegan, skip the shrimp and oyster sauce. Use mushrooms or tempeh instead. Both add a nice umami flavor. You can also add extra veggies like broccoli or snap peas. This keeps your meal colorful and packed with nutrients. Use soy sauce or coconut aminos to maintain that savory taste. Adding nuts like cashews or peanuts gives a nice crunch. Just toss them in during the last minute of cooking. You can also mix in fruits like pineapple for a sweet twist. It pairs well with the savory flavors. For spices, try adding ginger or a splash of lime juice. These will brighten the dish and enhance the flavor. Experiment and find your favorite combo! To keep your Minute Garlic Shrimp Fried Rice fresh, store it in an airtight container. Let it cool down first, as hot rice can create steam and moisture, which leads to sogginess. Place the container in the fridge if you plan to eat it within three days. For longer storage, freezing is a good option. When reheating fried rice, use a skillet for the best results. Heat the skillet over medium heat and add a splash of water or oil. This helps prevent sticking. Add your fried rice and stir frequently until it's hot. You can also use the microwave, but cover the rice with a damp paper towel to keep it moist. Freezing fried rice is easy. Portion it into servings before freezing. Use freezer bags or containers to store each portion. Remove as much air as possible to prevent freezer burn. To defrost, leave it in the fridge overnight. Reheat it in a skillet for a tasty meal anytime. Yes, you can use frozen shrimp. Just thaw them before cooking. Place them in cold water for about 15 minutes. Once thawed, pat them dry with a paper towel. This helps them cook better. Use cold cooked jasmine rice. This rice has a firmer texture, which helps prevent mushiness. Spread the rice out to cool before using it. If it clumps, break it apart gently with a fork. Reheating in a skillet is best. Heat a little oil over medium heat. Add the fried rice and stir frequently. This keeps the texture nice and helps avoid sogginess. You can also add a splash of water to steam it slightly. Use gluten-free soy sauce, like tamari. Check the oyster sauce for gluten. You can find gluten-free options at most stores. This allows you to enjoy the same great taste without gluten. You learned about the key ingredients for making delicious garlic shrimp fried rice. We discussed selecting fresh shrimp and shared tips for cooking perfect rice. You can customize this dish with different proteins or make it vegetarian. Remember the best practices for storing and reheating your fried rice to keep it tasty. Now, you have the tools to enjoy a flavorful meal any time. Making garlic shrimp fried rice can be fun and easy, so get cooking!
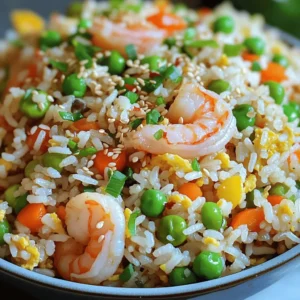
    Minute Garlic Shrimp Fried Rice Quick and Tasty Meal
  • - 2 cups plain Greek yogurt - 1/3 cup cocoa powder (unsweetened) - 1/4 cup honey or maple syrup I use plain Greek yogurt for creaminess and protein. Cocoa powder adds rich chocolate flavor. You can choose honey or maple syrup as a sweetener. Both options work well, so pick the one you like best. - 1/2 cup dark chocolate chips - 1/4 cup sliced almonds - 1/4 cup dried cranberries or cherries Toppings make your bark extra fun. Dark chocolate chips add sweetness and crunch. Sliced almonds give a nice nutty flavor. Dried cranberries or cherries add a fruity touch. You can mix and match these toppings based on your taste. - 1 teaspoon vanilla extract - A pinch of sea salt Vanilla extract boosts the chocolate flavor. Just a pinch of sea salt helps balance the sweetness. It makes each bite more exciting! To start, you need to combine the main ingredients. In a mixing bowl, add 2 cups of plain Greek yogurt, 1/3 cup of unsweetened cocoa powder, 1/4 cup of honey or maple syrup, and 1 teaspoon of vanilla extract. Whisk these ingredients together until smooth. This mixture should be thick and creamy. If it’s too runny, add a bit more cocoa powder. Now, let’s move to assembling the bark. First, line a baking sheet with parchment paper, covering the entire surface. This makes it easy to lift the bark later. Next, spread the yogurt mixture onto the lined baking sheet. Aim for an even layer that’s about 1/4 inch thick. This helps the bark freeze evenly. Now it’s time to freeze the bark. Place the baking sheet in the freezer for about 2 to 3 hours. This duration ensures the bark becomes firm. To check if it’s ready, gently press the center. It should feel solid. If it’s still soft, give it more time in the freezer. Once firm, remove it from the freezer and break it into pieces. Use your hands or a knife for this. Store the pieces in an airtight container in the freezer for a quick snack later. Getting the right texture matters a lot. The ratio of Greek yogurt to cocoa powder is key. Use 2 cups of yogurt to 1/3 cup of cocoa. This ratio gives you a rich base. It should not be too thick or too runny. Whisking is also important. Use a sturdy whisk to mix the yogurt and cocoa. Whisk until smooth and free of lumps. This step ensures your bark has a creamy texture. You can add fun mix-ins to boost flavor. Try adding peanut butter or almond butter for extra richness. You can also add a pinch of cinnamon for a warm touch. Don't be afraid to experiment! Swap the dried cranberries for cherries or even raisins. Each change can make the bark feel new and exciting. Serving this protein bark is easy. Break it into uneven pieces for a rustic look. You can stack them on a plate or arrange them in a colorful bowl. For garnishing, drizzle a little melted dark chocolate on top. You can also sprinkle some sea salt for contrast. Fresh fruit like strawberries or banana slices can add color and taste. {{image_2}} You can change the flavor of your bark by using flavored Greek yogurt. Try vanilla or coconut yogurt for a twist. If you want more warmth, add spices like cinnamon or nutmeg. Just a pinch can make a big difference in taste. For a vegan option, substitute Greek yogurt with dairy-free yogurt like almond or coconut yogurt. You can also use agave syrup instead of honey. If you need nut-free alternatives, skip the almonds and use seeds like sunflower seeds or pumpkin seeds. They add crunch without the nuts. Adding seasonal fruits can brighten your bark. In summer, try fresh strawberries or blueberries. In fall, dried figs or apples work well. You can also use different nuts to suit the season. Walnuts in winter or pistachios in spring can change the bark's flavor and look. For easy storage, I recommend using an airtight container. Glass containers work great, but plastic ones are fine too. Make sure the container seals well to keep out air. This helps keep the bark fresh longer. Store the bark in the freezer, where it stays firm and tasty. Avoid the fridge, as it can make the bark too soft. You can keep Chocolate Greek Yogurt Protein Bark in the freezer for up to three months. After that, it may lose its flavor and texture. Look for signs of spoilage, like ice crystals or a change in color. If it looks or smells off, it’s best to toss it. It’s not ideal to refreeze protein bark, but you can if you must. If you thaw some and don’t eat it all, put it back in the freezer quickly. To thaw, place it in the fridge for a few hours. This keeps it from getting too soft and mushy. Enjoy your bark while it’s fresh for the best taste! To make this treat, follow these steps: 1. In a bowl, mix Greek yogurt, cocoa powder, honey, and vanilla. Whisk until smooth. 2. Line a baking sheet with parchment paper. 3. Spread the yogurt mixture onto the sheet, about 1/4 inch thick. 4. Top with dark chocolate chips, sliced almonds, dried cranberries, and sea salt. 5. Freeze for 2-3 hours until firm. 6. Break the bark into pieces and store in an airtight container. This simple method gives you a tasty snack. This protein bark is packed with good stuff. Each piece has around: - 5 grams of protein from Greek yogurt - 150-160 calories per piece, depending on sweeteners used Greek yogurt helps build muscle. It also has probiotics for gut health. The dark chocolate adds antioxidants, making this a smart snack. Yes, you can personalize the bark! Here are some ideas: - Toppings: Try different nuts, seeds, or dried fruits. - Flavors: Use flavored Greek yogurt like vanilla or berry for a twist. - Sweeteners: Swap honey for agave syrup or use less for a lower sugar option. Get creative! Your bark can reflect your tastes. You’ve learned how to make delicious Chocolate Greek Yogurt Protein Bark. We covered key ingredients like Greek yogurt, cocoa powder, and sweeteners. You now know how to layer and freeze this treat for the best texture. Don't forget the variety in toppings and flavors to make it your own. Whether for a snack or dessert, this bark is tasty and healthy. You can store it well and enjoy it for days. Get creative and try new flavors, and enjoy your homemade treat!
    Chocolate Greek Yogurt Protein Bark Irresistible Treat
  • To make Caramel Pecan Turtle Brownies, you need some simple but key ingredients. Here’s the list: - 1 cup unsalted butter (2 sticks) - 2 cups granulated sugar - 4 large eggs - 2 teaspoons vanilla extract - 1 cup all-purpose flour - 1 cup unsweetened cocoa powder - 1 teaspoon baking powder - ½ teaspoon salt - 1 cup chopped pecans - 1 cup caramel sauce (store-bought or homemade) - ½ cup chocolate chips Each ingredient plays a role in creating these rich, chewy, and gooey brownies. The unsalted butter adds moisture and richness. Granulated sugar gives sweetness and helps with texture. Eggs bind the mix and add fluff. Vanilla extract brings depth and aroma. The flour and cocoa powder form the base for the brownies. Baking powder helps them rise. Salt balances the sweetness and enhances flavor. Chopped pecans add crunch and nutty taste. Caramel sauce provides that sticky, sweet layer. Finally, chocolate chips give pockets of melted chocolate in every bite. These ingredients work together to create a dessert that is hard to resist. Feel free to personalize the recipe with your favorite nuts or chocolates as you experiment! - Preheat the oven to 350°F (175°C). - Grease and line a 9x13-inch baking pan with parchment paper. Leave some overhang for easy lifting. - Melt 1 cup of unsalted butter in a large saucepan over medium heat. - Stir in 2 cups of granulated sugar until well combined. - Add 4 large eggs one at a time, mixing well after each. - Include 2 teaspoons of vanilla extract for aroma. - In a separate bowl, mix 1 cup of flour, 1 cup of cocoa powder, 1 teaspoon of baking powder, and ½ teaspoon of salt. - Gradually fold the dry mix into the wet mix until just blended. - Gently incorporate 1 cup of chopped pecans and ½ cup of chocolate chips, setting aside the rest for later. - Pour half of the brownie batter into the prepared pan and spread evenly. - Drizzle half of the 1 cup of caramel sauce over the batter. - Use a knife to swirl it for a marbled look. - Add the rest of the brownie batter over the caramel layer and smooth it out. - Drizzle the remaining caramel sauce on top and sprinkle the reserved chocolate chips. - Bake in the preheated oven for 30-35 minutes. - Use a toothpick to check for doneness; it should come out with moist crumbs. - Let the brownies cool in the pan for at least 15 minutes. - Lift them out using the parchment paper and let them cool completely before cutting into squares. To get the best brownies, avoid overmixing. When you mix too much, the brownies can become tough. Mix until just combined. This keeps them soft and chewy. To know if your brownies are done, use a toothpick. Insert it in the center. If it comes out with moist crumbs, they are ready. If it has wet batter, bake a little longer. You can use store-bought caramel sauce for ease. It saves time and tastes good. If you want a richer flavor, make your own. Homemade caramel can add a special touch. Drizzling caramel is fun! Use a spoon to create a nice swirl. Let the caramel drizzle fall slowly for even coverage. This gives your brownies a beautiful look. A sprinkle of sea salt on top makes a big difference. It balances the sweetness and adds depth. Just a pinch can elevate your brownies. You can also change the nuts for a new flavor. Try walnuts or almonds instead of pecans. Each nut brings its own taste and crunch. Experiment to find your favorite! {{image_2}} If you want to skip nuts, it's easy! Just use chocolate chips only. This keeps the brownies rich and sweet. You won't miss the pecans at all. Many people love this nut-free twist. It’s a great choice for anyone with nut allergies. You can also play with chocolate types. Try dark chocolate chips for a deeper flavor. They add a nice contrast to the sweet caramel. White chocolate chips work too. They bring a creamy taste that balances well with the cocoa. Mixing dark and white chips can give you an exciting look and taste. Looking for something different? Add a splash of mint extract for a mint chocolate version. This gives your brownies a refreshing kick. You’ll love the cool taste! For a tropical touch, mix in some coconut flakes. Coconut adds a chewy texture and a hint of sweetness. Both twists make this dessert even more special. To keep your caramel pecan turtle brownies fresh, use an airtight container. This helps to lock in moisture. Layer parchment paper between brownies to prevent sticking. Store the container in a cool place, away from sunlight. If you keep them at room temperature, they stay fresh for about three days. For longer storage, refrigerate them for up to a week. You can freeze brownies for later enjoyment. Cut them into squares and wrap each piece tightly in plastic wrap. Place the wrapped brownies in a freezer-safe bag. They can last up to three months in the freezer. When you want to enjoy them, simply take them out and let them thaw at room temperature for about an hour. For a quicker method, you can microwave a piece for about 10-15 seconds. Enjoy the gooey goodness! Yes, you can! If you want to swap nuts, try walnuts or almonds. They will add a nice crunch. You can even skip nuts altogether for a nut-free treat. Just make sure to keep the same amount in the recipe. Check your brownies at 30 minutes. Insert a toothpick in the center. If it comes out with moist crumbs, they are done. If it has wet batter, bake for a few more minutes. Keep an eye on them to avoid overbaking. Absolutely! Use a 1-to-1 gluten-free flour blend. This works well in most recipes. Just make sure the blend contains xanthan gum for better texture. You can find many good options at your local grocery store. To reheat, place brownies on a microwave-safe plate. Heat in short bursts, about 10-15 seconds. Check often to avoid drying them out. For the best texture, warm them in the oven at 350°F for about 5-10 minutes. Enjoy them gooey and warm! You now have a complete guide to making delicious caramel brownies. We covered the ingredients, step-by-step instructions, and useful tips for perfecting your texture. You learned about fun variations, storage options, and answered some common questions. With these techniques, you can enjoy rich, gooey brownies anytime. Start baking and enjoy tasty treats with family and friends! Your caramel brownie adventure awaits!
    Caramel Pecan Turtle Brownies Irresistible Dessert Delight
  • - 4 boneless, skinless chicken thighs - 1/4 cup honey - 1/4 cup soy sauce (or tamari for gluten-free) - 4 cloves garlic, minced - 1 tablespoon fresh ginger, grated - 1 tablespoon rice vinegar - 1 teaspoon sesame oil - Salt and pepper to taste - 1/2 cup carrots, sliced - 1/2 cup bell peppers, sliced (any color) The main stars of this dish are the chicken thighs. They stay juicy and tender in the slow cooker. The honey and soy sauce mix brings sweetness and a savory kick that makes your taste buds dance. Garlic and ginger add depth and aroma, making the dish irresistible. Carrots and bell peppers not only add color but also a nice crunch. - 1 tablespoon cornstarch (optional, for thickening) - 1 tablespoon water (if using cornstarch) - Chopped green onions and sesame seeds, for garnish If you like a thicker sauce, cornstarch works great. Mix it with water to create a slurry before adding it to the dish. This step gives your sauce that perfect consistency. For a finishing touch, sprinkle green onions and sesame seeds. They add a burst of flavor and a beautiful look to your plate. Using these ingredients, you can create a meal full of flavor. I love how easy it is to prepare. Plus, it’s healthy and satisfying. Enjoy cooking this dish! Placing Chicken Thighs in the Slow Cooker Start by placing the chicken thighs in the bottom of your slow cooker. Make sure they fit snugly but do not overcrowd them. This helps them cook evenly. Making the Honey Garlic Sauce In a medium bowl, whisk together the following: - 1/4 cup honey - 1/4 cup soy sauce - 4 cloves garlic, minced - 1 tablespoon fresh ginger, grated - 1 tablespoon rice vinegar - 1 teaspoon sesame oil Mix until everything is well combined. This sauce will give your chicken a sweet and savory flavor. Adding Vegetables and Seasoning Pour the honey garlic mixture over the chicken thighs. Make sure they are well coated. Next, add: - 1/2 cup sliced carrots - 1/2 cup sliced bell peppers Season with salt and pepper to taste. This adds layers of taste and texture. Setting the Cooking Time Cover the slow cooker and set it to cook. You can choose to cook on low for 6-7 hours or high for 3-4 hours. The chicken will become tender and soak up all the flavors. Thickening the Sauce (Optional) If you want a thicker sauce, mix 1 tablespoon of cornstarch with 1 tablespoon of water to make a slurry. About 30 minutes before serving, add this to the slow cooker. Stir well and cook on high to thicken the sauce. Shredding the Chicken Once the cooking time is up, use two forks to shred the chicken right in the slow cooker. Mix it with the sauce and vegetables. This ensures every bite is delicious. - Marinating Chicken in Sauce: For the best taste, marinate the chicken in the honey garlic sauce. This step helps the chicken soak up all the flavors. You can marinate it for at least 30 minutes, or even overnight for a deeper flavor. Just mix honey, soy sauce, garlic, ginger, rice vinegar, and sesame oil, then pour it over the chicken. - Balancing Sweetness with Additional Seasonings: If you find the sauce too sweet, add more garlic or a splash of rice vinegar. This will help balance the flavors. You might also try adding a pinch of red pepper flakes for a hint of heat, which can enhance the dish's depth. - Choosing the Right Cook Time: Cooking on low for 6-7 hours will give you tender chicken. If you are short on time, use the high setting for 3-4 hours. Just keep an eye on it to ensure the chicken stays juicy. - Avoiding Overcooked Chicken: To prevent overcooking, check your chicken's doneness about 30 minutes before the end of the cooking time. It should be tender, but not falling apart. If it starts to look dry, add a little water or broth to keep it moist. - Pairing with Rice or Quinoa: Serve your honey garlic chicken over a bed of rice or quinoa. Both options soak up the sauce well. This makes each bite flavorful. - Garnishing Ideas: For a pop of color and taste, sprinkle chopped green onions and sesame seeds on top before serving. This adds a nice crunch and brightness to the dish. You can even add some chopped cilantro for extra freshness. {{image_2}} Using Different Vegetables You can change the veggies in this dish. Try using broccoli, snap peas, or zucchini. Each adds a new taste and texture. You can also mix and match your favorites. Just remember to slice them thinly. This ensures they cook evenly with the chicken. Adding Spices for Extra Kick Want more flavor? Add spices! A pinch of red pepper flakes gives heat. You can also sprinkle in some black pepper or garlic powder. For a sweet twist, try adding a dash of smoked paprika. These spices can really liven up your dish! Gluten-Free Options If you need gluten-free, use tamari instead of soy sauce. This swap keeps the sauce tasty without gluten. Also, check all other ingredients. Some sauces and condiments may contain gluten too. Low-Sugar Substitutes For a low-sugar version, reduce the honey. You can swap honey for a sugar-free syrup. This keeps the dish sweet without extra sugar. Another option is to use less honey and add a splash of apple cider vinegar for balance. To keep leftovers fresh, place them in an airtight container. You can store them in the fridge for up to four days. Make sure the chicken cools down before sealing the container. If you want to save it for a longer time, you can freeze it. Place the chicken in freezer-safe bags and remove as much air as possible. It will stay good for about three months in the freezer. When it’s time to eat your leftovers, the best way to reheat is in the microwave or on the stove. If using the microwave, heat it in short bursts. Stir the chicken between each burst to ensure even warmth. If you prefer the stove, place the chicken in a pan over low heat. Add a splash of water or chicken broth to keep it moist. This helps prevent the chicken from drying out. Enjoy your tasty dish again! Can I use chicken breast instead of thighs? Yes, you can use chicken breast. Chicken thighs add more flavor and moisture, but breasts work too. Just be careful not to overcook them. They can dry out faster than thighs. How can I make this recipe spicier? To spice things up, add some red pepper flakes or a dash of hot sauce. You can also mix in fresh chili peppers. Start with a small amount and taste as you go. Can I cook on high if I'm short on time? Yes, you can cook on high for 3-4 hours. The chicken will still be tender, but low cooking is best for flavor. High heat cooks faster but may change the texture slightly. What if I don’t have a slow cooker? If you don’t have a slow cooker, use a Dutch oven or a heavy pot. Cook it on low heat on the stove, covered. Stir often, and check for doneness to avoid burning. How to adjust servings for larger groups? To serve more people, simply increase the ingredients. Use more chicken and double the sauce mix. Make sure your slow cooker can hold the extra amount. Can I double the recipe? Yes, you can double the recipe. Just be mindful of your slow cooker size. If it’s too full, the chicken may not cook evenly. You might need to cook it a bit longer too. This blog post guides you through making a delicious honey garlic chicken in a slow cooker. You learned about the main and optional ingredients and the step-by-step instructions to prepare and cook your dish. I shared tips for flavor and perfect slow-cooking, plus variations to suit different diets. In the end, cooking should be enjoyable. Experiment with flavors and ingredients. Enjoy your meal and impress others with your cooking skills. Happy cooking!
    Slow Cooker Honey Garlic Chicken Simple and Tasty Dish
  • - 1 lb boneless, skinless chicken thighs - 2 cups cooked jasmine rice - 1 cup broccoli florets - 1 red bell pepper, sliced - 1 carrot, julienned - 1 cup sugar snap peas - 1/2 cup creamy peanut butter - 1/4 cup soy sauce - 2 tablespoons honey - 1 tablespoon rice vinegar - 1 tablespoon sesame oil - 1 teaspoon minced garlic - 1 teaspoon grated ginger - Water to thin - Green onions - Cilantro - Crushed roasted peanuts - Lime wedges Gather all your ingredients before you start cooking. The chicken thighs give a rich taste. The jasmine rice acts as a soft base. Fresh veggies add crunch and color. The peanut sauce is the star of the show. It brings all the flavors together. I love using creamy peanut butter for a smooth sauce. Soy sauce adds a salty depth. Honey brings sweetness, while rice vinegar adds tang. Sesame oil gives a nutty taste. Don't forget the garlic and ginger for zing! Adjust the water in the sauce to get your desired thickness. For garnishes, green onions and cilantro add freshness. Crushed peanuts give a nice crunch. A lime wedge adds a burst of citrus. This meal is all about balance. You can play with these ingredients to make it your own! To make the peanut sauce, start with a medium bowl. Add 1/2 cup of creamy peanut butter, 1/4 cup of soy sauce, 2 tablespoons of honey, 1 tablespoon of rice vinegar, 1 tablespoon of sesame oil, 1 teaspoon of minced garlic, and 1 teaspoon of grated ginger. Whisk these ingredients together until smooth. If the sauce is too thick, add water. Mix in small amounts until the sauce is just right. Set the sauce aside for later. Next, heat 1 tablespoon of vegetable oil in a large skillet over medium-high heat. Season 1 pound of bite-sized chicken thighs with salt and pepper. Once the oil is hot, add the chicken to the skillet. Cook for about 5 to 7 minutes. You want the chicken to be golden brown and fully cooked. When done, remove the chicken from the skillet and set it aside. Now, in the same skillet, add your vegetables. Toss in 1 cup of broccoli florets, 1 sliced red bell pepper, 1 julienned carrot, and 1 cup of sugar snap peas. Stir-fry these for about 4 to 5 minutes. You want the veggies to be tender-crisp. This keeps their bright colors and fresh taste. Return the cooked chicken to the skillet with the veggies. Pour the prepared peanut sauce over the mixture. Stir well to coat everything evenly. Heat it all together for an additional 2 to 3 minutes. This warms the dish through. Once heated, it’s time to assemble. In serving bowls, scoop 2 cups of cooked jasmine rice. Top the rice with your chicken and vegetable mixture. Enjoy the vibrant colors and flavors! - Use boneless, skinless chicken thighs for juicy bites. - Cook chicken on medium-high heat for 5-7 minutes. - Ensure golden color shows the chicken is cooked. - For crisp veggies, stir-fry quickly over high heat. - Add broccoli and snap peas last to keep them crunchy. - Swap peanut butter for almond or cashew butter. - Use coconut aminos if you need a soy-free option. - Adjust spice levels by adding more or less garlic. - Add chili paste if you like more heat. - Serve in colorful bowls to make the dish pop. - Add lime wedges on the side for a fresh look. - Use chopped cilantro and green onions as bright garnishes. - Place crushed peanuts on top for a crunchy finish. {{image_2}} You can switch the chicken for tofu or shrimp. Tofu adds a rich texture. Use firm tofu for the best results. Shrimp cooks fast and brings a nice flavor. If you want other meats, try beef or pork. Both pair well with the peanut sauce. Feel free to add more veggies. Zucchini is a great choice. It cooks quickly and has a mild taste. Snow peas also work well, adding a nice crunch. You can switch to seasonal vegetables too. Look for what's fresh at your local market. For gluten-free options, use tamari instead of soy sauce. It has a similar taste and works great. If you want a vegan version, swap chicken for tofu and use maple syrup instead of honey. These changes keep the dish tasty and friendly for different diets. To keep your Thai Peanut Chicken Bowls fresh, store them in the fridge. Use airtight containers for best results. This prevents air and moisture from spoiling your food. Make sure to let the dish cool before sealing the container. This helps avoid condensation inside the container. You can freeze this dish if you want to save some for later. First, let it cool completely. Then, place it in freezer-safe bags or containers. Squeeze out as much air as possible before sealing. When you’re ready to eat, thaw the dish in the fridge overnight. To reheat, warm it on the stove or microwave until hot. Leftovers can last in the fridge for about 3 to 4 days. Be sure to check for signs of spoilage. If you see any mold or if it smells off, it's best to throw it away. Always trust your senses; they help you stay safe while enjoying your meals. Making Thai Peanut Chicken Bowls takes about 30 minutes. You will spend 15 minutes on prep and 15 minutes cooking. This quick time makes it a great weeknight meal. Yes, you can make the peanut sauce ahead of time. Store it in an airtight container in the fridge for up to a week. Just give it a good stir before using it. If it thickens, add a little water to thin it out. This dish is not very spicy. The peanut sauce has a mild flavor. If you want more heat, add some chili flakes or sriracha. You can control the spice level to fit your taste. You can serve Thai Peanut Chicken Bowls with many tasty sides. Here are a few ideas: - Steamed edamame - Cucumber salad - Fresh spring rolls - A simple green salad These sides will add freshness and balance to the meal. In this post, we explored making Thai Peanut Chicken Bowls with simple ingredients. You learned about the key ingredients like chicken, rice, and fresh veggies, along with a creamy peanut sauce. We provided step-by-step instructions on preparing each part and tips for success. You can even customize the dish with various proteins and veggies. Whether you're cooking for yourself or guests, these bowls are a tasty and flexible meal choice. Enjoy your cooking and share your creations!
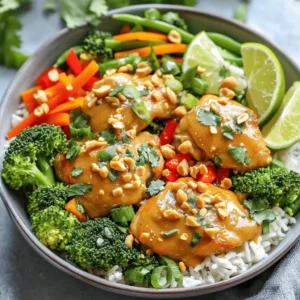
    Thai Peanut Chicken Bowls Flavorful and Easy Recipe
  • - 1 pound boneless, skinless chicken breast, cut into bite-sized pieces - 1 cup bell peppers (mixed colors), sliced - 1 cup pineapple chunks (fresh or canned) - 1 small onion, chopped - 2 cloves garlic, minced - 1 tablespoon grated ginger - 1/4 cup soy sauce - 1/4 cup apple cider vinegar - 1/4 cup honey - 1 tablespoon cornstarch - 2 tablespoons vegetable oil - Salt and pepper to taste - Sesame seeds for garnishing - Cooked rice or quinoa for serving You can switch up the chicken with other proteins. Try shrimp, tofu, or beef. If you want more veggies, add broccoli, snap peas, or carrots. To make the dish gluten-free, use tamari instead of soy sauce and check your vinegar. This way, everyone can enjoy this quick meal. Whisking the sauce First, grab a small bowl. In it, add 1/4 cup soy sauce, 1/4 cup apple cider vinegar, and 1/4 cup honey. Next, add 1 tablespoon cornstarch. Whisk until smooth. Set the sauce aside for now. Cooking the chicken In a large skillet or wok, heat 2 tablespoons vegetable oil over medium-high heat. Once hot, add 1 pound of bite-sized chicken pieces. Season with salt and pepper. Cook the chicken for about 5-7 minutes until it turns golden brown and is fully cooked. Sautéing aromatics Add 1 small chopped onion to the skillet. Then add 2 cloves minced garlic and 1 tablespoon grated ginger. Sauté these for 2-3 minutes until the onion looks translucent. Adding vegetables and sauce Now, stir in 1 cup of sliced bell peppers and 1 cup of pineapple chunks. Cook for another 2 minutes, just until the peppers start to soften. Pour the sweet and sour sauce over the mixture. Stir it well to coat everything evenly. Simmering for thickness Let the dish simmer for 2-3 minutes. This helps the sauce thicken and blend the flavors. Serving suggestions Once done, remove it from heat. Serve the sweet and sour chicken over cooked rice or quinoa. Top it with sesame seeds for a nice touch. Enjoy your quick and tasty meal! To ensure your chicken cooks properly, cut it into small, even pieces. This helps it cook evenly. Always check the chicken’s center; it should be no longer pink. For the perfect sauce, start by mixing soy sauce, apple cider vinegar, honey, and cornstarch. Whisk until smooth. Pour this mixture over the chicken and veggies. Let it simmer to thicken, stirring often. For garnishes, sprinkle sesame seeds on top for a nice crunch. You can also add chopped green onions for a fresh taste. When it comes to side dishes, serve your sweet and sour chicken over fluffy rice or quinoa. Both add great texture and soak up the sauce well. When meal prepping, chop your veggies and chicken ahead of time. Store them in the fridge for quick access. You can also make the sauce in advance. Just keep it in a jar until you’re ready to cook. For quick cooking, use high heat. This speeds up the cooking process and gives your chicken a nice golden color. {{image_2}} You can change the fruits and veggies you use. Try using mango or broccoli. These will add new flavors and colors. You can also swap the sauce. Use teriyaki or barbecue sauce for a twist. You might want to use a slow cooker. This makes the chicken very tender. Just add all the ingredients and let it cook for several hours. You can also use an Instant Pot. This speeds up cooking time and keeps flavors locked in. To make this dish healthier, use less honey or soy sauce. You can add more veggies for fiber. For a vegetarian option, replace chicken with tofu. Make sure to press the tofu first. For a vegan dish, use maple syrup instead of honey and skip the chicken. To store leftovers, let the chicken cool first. Place it in an airtight container. This helps keep it fresh. I recommend using glass or plastic containers with tight lids. They prevent air from getting in and causing spoilage. You can freeze Minute Sweet & Sour Chicken too. Just place cooled leftovers in a freezer-safe bag. Try to remove as much air as possible. This prevents freezer burn. When you want to eat it, move it to the fridge to thaw overnight. For reheating, microwave it until hot throughout. Stir it halfway for even heating. In the fridge, this dish stays fresh for about 3 to 4 days. Always check for signs of spoilage. If it smells off or looks strange, it’s best to throw it out. Remember, food safety is key! Can I use frozen chicken? Yes, you can use frozen chicken. Just make sure to thaw it first. Cut it into small pieces for even cooking. Cooking time may increase slightly. Can I use a different type of vinegar? Absolutely! You can use rice vinegar or white vinegar. Each type will change the flavor a bit. Experiment to find what you like best. How do I make it more spicy? Add red pepper flakes or sriracha. You can also use spicy mustard in the sauce. Start small and taste as you go. Can I make it in bulk for meal prep? Yes, this recipe works great for meal prep. Just double or triple the ingredients. Store in airtight containers for easy meals later. What pairs well with Minute Sweet & Sour Chicken? Serve it with fluffy rice or quinoa. Steamed broccoli or snap peas also make a nice side. Try adding a fresh salad for crunch. How can I make this dish gluten-free? Use gluten-free soy sauce, like tamari. Ensure all other ingredients are gluten-free. This way, everyone can enjoy the dish! You can create a delicious Minute Sweet & Sour Chicken with simple ingredients and steps. We covered what you need, from chicken and veggies to sauces. I also shared tips for cooking and serving. Remember, you can adjust the recipe to fit your taste and dietary needs. Store leftovers properly to enjoy later. With variations and quick cooking methods, this dish fits any meal plan. Now, enjoy cooking and savoring this tasty meal!
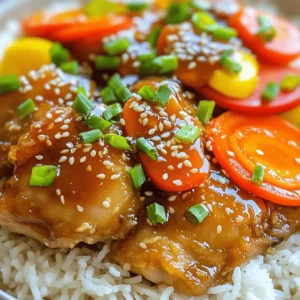
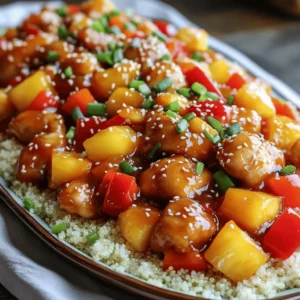
    Minute Sweet & Sour Chicken Quick and Tasty Meal
  • - 1 pound Brussels sprouts, halved - 3 tablespoons olive oil - 4 cloves garlic, minced - 1/2 cup grated Parmesan cheese - 1 teaspoon salt - 1/2 teaspoon black pepper - 1/2 teaspoon red pepper flakes (optional) - Fresh parsley, chopped (for garnish) Gather these ingredients for a tasty dish. Start with a pound of Brussels sprouts. Halve them to help them cook evenly and get crispy. Use three tablespoons of olive oil to coat your sprouts. Minced garlic adds a rich flavor, so grab four cloves. You will need 1/2 cup of grated Parmesan cheese. This cheese will melt and give a nice crust. Add one teaspoon of salt for flavor. Use 1/2 teaspoon of black pepper to add a little kick. If you like heat, add 1/2 teaspoon of red pepper flakes. Finally, chop some fresh parsley to use as a garnish. These simple ingredients make a great snack or side dish. Each one plays a key role in building flavor and texture. With just a few items, you can make something truly special. Enjoy the process of preparing your meal with these fresh and flavorful ingredients! - Preheat the air fryer to 375°F. - In a large bowl, toss the halved Brussels sprouts with: - 3 tablespoons olive oil - 4 cloves minced garlic - 1 teaspoon salt - 1/2 teaspoon black pepper - 1/2 teaspoon red pepper flakes (optional) Mix until every sprout is well-coated. This step makes sure the flavors blend nicely. - Place the Brussels sprouts in the air fryer basket. Lay them in a single layer. - Cook for 12-15 minutes. Shake the basket halfway through cooking. This helps them crisp up evenly. You will know they are ready when they turn golden brown and crispy. - Remove the Brussels sprouts from the air fryer. - Sprinkle 1/2 cup grated Parmesan cheese over them. Toss gently to coat. - Garnish with fresh chopped parsley before serving. This adds a pop of color and flavor to your dish. Enjoy your crispy, cheesy Brussels sprouts! To get the best crispiness, set your air fryer to 375°F (190°C). This heat cooks the Brussels sprouts evenly. Shaking the basket halfway through cooking is key. It helps the air circulate, so every sprout gets that nice crunch. If you want to change the oil, try avocado oil or melted butter. Both work well and add flavor. For cheese, you can use Pecorino Romano or nutritional yeast for a vegan option. Each choice adds a unique taste to your dish. If you need to make more, just double the ingredients. Keep the same cooking time but check for doneness. For larger batches, you might need to cook in two rounds. This ensures all the sprouts get that crispy finish. {{image_2}} You can easily boost the flavor of your Air Fryer Garlic Parmesan Brussels Sprouts. Here are some ideas: - Adding spices or herbs: Try adding spices like smoked paprika or garlic powder. Fresh herbs like thyme or rosemary can also add a nice touch. Experimenting with different flavors keeps things fun. - Combining with other vegetables: Mix in other veggies such as carrots or bell peppers. They add color and taste. Just remember to cut them into similar sizes for even cooking. Making your Brussels sprouts fit your diet is simple. Here are some options: - Vegan modifications: To make this dish vegan, skip the Parmesan cheese. Instead, use nutritional yeast. It brings a cheesy flavor without dairy. You can also try vegan cheese options for a similar taste. - Low-carb options: This recipe is already low in carbs. You can enjoy it guilt-free. If you want to lower carbs even more, skip the red pepper flakes. They add heat but not carbs. These variations let you customize your Brussels sprouts to suit your taste and diet. Enjoy experimenting to find your perfect blend! To keep your Brussels sprouts fresh, store them in an airtight container. Place them in the fridge. They stay good for up to three days. If you want to save them longer, freezing is a great option. Spread the cooled sprouts on a baking sheet. Freeze for a few hours until firm. Then, transfer them to a freezer bag. They can last for up to three months in the freezer. For the best taste, reheat your Brussels sprouts in the air fryer. Preheat it to 350°F (175°C). Place the sprouts in the basket and heat for about 5 minutes. This method keeps them crispy. You can also use the oven. Preheat it to 350°F (175°C) and place the sprouts on a baking sheet. Heat for about 10 minutes. Avoid the microwave, as it can make them soggy. How do I ensure my Brussels sprouts are crispy? To get crispy Brussels sprouts, start by using fresh ones. Halve them for better cooking. Toss the sprouts with olive oil, garlic, salt, and pepper. The oil helps them crisp up. Spread them out in a single layer in the air fryer. Shake the basket halfway through cooking. This helps them cook evenly. Cook until they turn golden brown. Can I make this recipe without Parmesan cheese? Yes, you can skip the Parmesan cheese if you want. Try using nutritional yeast for a cheesy flavor. You can also add more garlic or spices to boost taste. The dish will still be tasty without the cheese. Feel free to experiment with flavors you enjoy. What dipping sauces pair well with garlic parmesan Brussels sprouts? Many sauces go great with these sprouts. A simple ranch dressing works well. You can also try a tangy balsamic glaze. For a spicy kick, use sriracha or buffalo sauce. These dips will enhance the flavors and add variety to your meal. Overview of calories and macros A serving of Air Fryer Garlic Parmesan Brussels sprouts has about 150 calories. It contains 10 grams of fat and 5 grams of protein. The dish is low in carbs, making it a good choice for many diets. Health benefits of Brussels sprouts Brussels sprouts are full of vitamins and minerals. They are high in fiber, which is good for digestion. These sprouts also contain antioxidants, which help fight disease. Eating them can support heart health and reduce inflammation. They are a smart choice for a healthy meal. This post covered how to make crispy garlic parmesan Brussels sprouts in an air fryer. We discussed ingredients, preparation steps, and best cooking techniques. You learned tips for perfect crispiness and ingredient swaps. Additionally, we explored variations, storage, and reheating methods. In summary, you now have all you need to enjoy this tasty dish. Happy cooking!
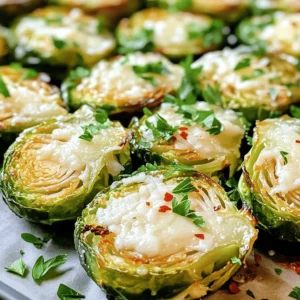
    Air Fryer Garlic Parmesan Brussels Sprouts Delight
  • - 4 medium apples, peeled, cored, and sliced - 1 cup rolled oats - 1/4 cup unsweetened applesauce - 1 cup apple juice (or water) - 1 tablespoon lemon juice - 1/2 cup brown sugar (or coconut sugar) - 1 teaspoon ground cinnamon - 1/2 teaspoon nutmeg - 1/4 teaspoon salt - 1/4 cup chopped walnuts - 1/4 cup raisins or dried cranberries Gathering the right ingredients is key to a great dish. Start with fresh apples for the best flavor. You want to peel, core, and slice four medium apples. I love using Granny Smith or Honeycrisp apples because they add a nice tartness. Next, we need one cup of rolled oats. These oats help to give a warm, hearty texture. For sweetness, use a half cup of brown sugar or coconut sugar. Both work well, but coconut sugar is a healthier choice. Don't forget the spices! You’ll need one teaspoon of ground cinnamon, half a teaspoon of nutmeg, and a quarter teaspoon of salt. These spices will fill your kitchen with amazing smells. Add in a quarter cup of unsweetened applesauce for moisture. This also helps to keep the dish from being too dry. You’ll need one cup of apple juice or water to help everything cook down nicely. A tablespoon of lemon juice brightens the flavors and keeps the apples looking fresh. If you want to add a crunch, use a quarter cup of chopped walnuts. You can also toss in a quarter cup of raisins or dried cranberries for a sweet touch. These optional add-ins can take your dish to the next level. Start by peeling each apple. I find using a simple peeler works best. After peeling, core the apples to remove the seeds. Then, slice the apples into thin pieces. Thin slices cook evenly and soak up flavors well. Place the sliced apples in a large bowl as you work. In the bowl with the apples, add the lemon juice. This keeps the apples fresh and adds a nice tang. Next, sprinkle in the brown sugar, cinnamon, nutmeg, and salt. Toss the apples gently. Make sure every slice gets coated in the sweet and spicy mix. This step makes your dish really pop with flavor. Now, it’s time to layer the ingredients in the slow cooker. Start with half of the apple mixture. Spread it evenly on the bottom. Next, add half of the rolled oats on top. If you like, sprinkle some of the walnuts and raisins now. Repeat with another layer of apples, oats, and top with any leftover walnuts and raisins. This layering builds texture and taste. Pour the unsweetened applesauce evenly over your layered mix. Then, add the apple juice. This juice adds moisture, which is key for cooking. It helps the apples and oats become soft and creamy. Without enough liquid, your dish may dry out. Cover the slow cooker with the lid. Set it to cook on low for about 4 to 5 hours. This slow cooking breaks down the apples, making them tender. You want them soft but not mushy. Check them after 4 hours to see if they meet your preferred texture. Once cooked, gently stir the mixture before serving. This helps mix the flavors together. Spoon the warm cinnamon apple and oat mix into bowls. For extra yum, top with a scoop of yogurt or a drizzle of maple syrup. These toppings add richness and a touch of sweetness. To make the best cinnamon apples with oats, choose the right apples. I recommend these varieties for great flavor and texture: - Honeycrisp - Granny Smith - Fuji - Braeburn Honeycrisp apples are sweet and crisp. Granny Smith apples bring a nice tartness. Fuji apples are super sweet, while Braeburn offers a delightful balance of sweet and sour. Mix different apples for extra depth! You can make this dish lighter without losing taste. Here are some easy swaps: - Use coconut sugar instead of brown sugar. - Replace apple juice with water or unsweetened almond milk. - Add more oats and fewer apples for added fiber. - Skip the nuts or use seeds instead for less fat. These changes keep the dish yummy and help with health goals. Cooking time can vary based on your slow cooker. Here are some tips: - If your slow cooker runs hot, check after 3 hours. - For slower cookers, it may need up to 6 hours. - Always look for tender apples and soft oats. Adjusting the time helps you get perfect results every time! {{image_2}} To make cinnamon apples with oats without nuts, simply skip the walnuts. You can add more raisins or cranberries instead. They add a nice sweet touch and keep the dish tasty. If you like crunch, consider adding seeds like pumpkin or sunflower seeds. Both options give you a delightful texture without using nuts. For a vegan version, swap honey or any dairy products with plant-based options. Use maple syrup or agave syrup instead of brown sugar if you want a different sweet taste. Omit the butter and instead use coconut oil, or enjoy it as it is. The apples and oats still shine through, making it a cozy treat. You can add more flavors to your slow cooker treat. Try putting in a teaspoon of vanilla extract for warmth. Ginger adds a nice zing too; just use 1/4 teaspoon. If you want a spicier mix, consider adding a pinch of allspice or cardamom. These little changes create a new twist each time you make this dish! To store leftovers in the fridge, let the dish cool first. Transfer the cinnamon apples with oats into an airtight container. Seal it tightly to keep out air. This helps retain moisture and flavor. You can store it in the fridge for up to four days. When you want to enjoy it again, just reheat in the microwave or on the stove. Best practices for freezing this dish start with cool down time. After cooling, portion the apples and oats into freezer-safe bags or containers. Squeeze out as much air as you can before sealing. Label each bag with the date. You can freeze it for up to three months. When ready to eat, thaw overnight in the fridge, then reheat. In the fridge, the cinnamon apples with oats lasts about four days. When frozen, it can last about three months. Always check for any off smells or colors before eating. If it smells good and looks fine, it’s safe to eat! Yes, you can use instant oats. They cook faster than rolled oats. If you use instant oats, cut the cooking time to about 2 to 3 hours. This will help keep the texture nice and not mushy. Absolutely! You can add pears, berries, or even bananas. Sliced pears bring a nice softness. Berries add a burst of flavor and color. This makes the dish more fun and tasty. Yes, it can be gluten-free! Just use certified gluten-free oats. Most other ingredients are naturally gluten-free. Always check labels to be sure. To reduce sweetness, cut back on the brown sugar. You can use half the amount. You might also use unsweetened applesauce to add flavor without extra sugar. You can serve this dish as a dessert or a breakfast. A scoop of yogurt on top adds creaminess. A drizzle of maple syrup gives extra sweetness. This post covers how to make a delicious slow-cooked apple dish. We explore fresh ingredients, mixing steps, and cooking tips. You can customize it with nuts or spices. In conclusion, this recipe is easy, tasty, and flexible. You can make it healthier or vegan. Store leftovers with care for later. Enjoy sharing this warm treat with friends and family!
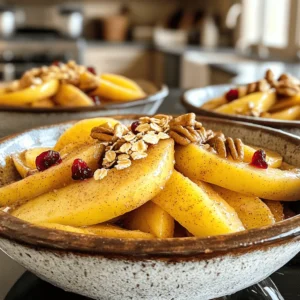
    Cinnamon Apples with Oats Comforting Slow Cooker Treat
  • - 1 pound potato gnocchi - 4 cups vegetable broth - 1 cup shredded sharp cheddar cheese - 1 cup heavy cream - 2 tablespoons unsalted butter - 1 medium onion, chopped - 2 cloves garlic, minced - 2 carrots, diced - 2 celery stalks, diced - 1 teaspoon dried thyme - 1 teaspoon paprika - Salt and pepper to taste - Fresh chives or parsley for garnish Gathering the right ingredients is key for a great Cheddar Gnocchi Soup. Start with 1 pound of potato gnocchi. This gives the soup its heartiness. Next, grab 4 cups of vegetable broth. This adds a rich base. You’ll need 1 cup of shredded sharp cheddar cheese for that creamy, cheesy goodness. A cup of heavy cream makes the soup extra rich and smooth. You’ll also need 2 tablespoons of unsalted butter. This adds flavor when you sauté the vegetables. For the veggies, chop 1 medium onion, minced 2 cloves of garlic, and dice 2 carrots and 2 celery stalks. These will create a tasty mix. Don’t forget 1 teaspoon each of dried thyme and paprika for flavor. Finally, season with salt and pepper to taste, and garnish with fresh chives or parsley for a pop of color. You can change things up with different cheese, like gouda or mozzarella. If you want a lighter broth, chicken broth works well too. For a dairy-free option, try coconut milk instead of cream. - Pot for cooking - Wooden spoon or spatula - Knife and chopping board Using the right tools makes cooking easier. A large pot is perfect for cooking the soup. A wooden spoon or spatula helps mix everything well. A knife and chopping board are great for prepping the vegetables. {{ingredient_image_1}} To start, melt 2 tablespoons of unsalted butter in a large pot over medium heat. Add the chopped onion, diced carrots, and diced celery. Sauté these veggies for about 5-7 minutes until they soften. Next, stir in 2 minced garlic cloves and cook for another 1-2 minutes. This will make your kitchen smell great! Now, pour in 4 cups of vegetable broth and bring it to a boil. Add 1 teaspoon of dried thyme and 1 teaspoon of paprika for flavor. Once the broth boils, it’s time to add the 1 pound of potato gnocchi. Cook them according to the package instructions. This usually takes around 2-3 minutes, or until the gnocchi floats to the top. Lower the heat to a simmer. Now add 1 cup of heavy cream and 1 cup of shredded sharp cheddar cheese. Stir everything together until the cheese melts and the soup becomes creamy. Don’t forget to taste it! Adjust with salt and pepper as needed. When serving, ladle the soup into bowls. For a pop of color, garnish with fresh chives or parsley. This makes the dish look fancy! Pair it with crusty bread or a light salad for a complete meal. Enjoy the warm, cheesy goodness! To keep your soup creamy, avoid curdling. Add cheese when the heat is low. Stir gently as it melts. This helps create a smooth blend. If you see curds forming, take the pot off the heat. Let it cool for a moment before stirring again. Want more flavor? Add fresh herbs like basil or parsley. You can also try spices like cayenne for heat. Homemade broth adds depth, too. It gives your soup a richer taste than store-bought. Prepare your veggies ahead of time. Chop the onion, carrots, and celery early. Store them in the fridge. You can also use quick-cooking gnocchi. Some brands cook in just one minute! This saves you time on busy days. Pro Tips Perfect Gnocchi Texture: Ensure the gnocchi are cooked just until they float to maintain their delicate texture. Cheese Selection: Use a high-quality sharp cheddar for a more pronounced flavor in the soup. Customize the Veggies: Feel free to add more vegetables like spinach or kale for extra nutrition and flavor. Make it Ahead: This soup can be made ahead of time; just add the gnocchi and cheese right before serving to keep everything fresh. {{image_2}} You can make this soup your own. Adding proteins like chicken or sausage boosts flavor. Cook these before adding them to the soup. You can also toss in vegetables like spinach or peas. They add color and nutrition. Just add them a few minutes before serving for freshness. Want more heat? Add some chili flakes to the pot. Start with a pinch and taste as you go. For different flavor profiles, think about spices like cumin or curry powder. These will change the taste and make it unique. Herbs make a big difference in flavor. Fresh herbs like chives or parsley add brightness. Dried herbs work too but use less. You can also explore creative pairings. Try smoked paprika for a smoky twist or lemon zest for brightness. These changes can make your soup shine. To keep your Cheddar Gnocchi Soup fresh, store it in the fridge. Use an airtight container for best results. Let the soup cool down before sealing it. This helps prevent moisture build-up. You can also divide the soup into smaller portions. This makes it easy to grab and reheat later. If you want to freeze the soup, portion it into smaller containers. Each container should hold one serving. This way, you can defrost just what you need. When it's time to eat, thaw it in the fridge overnight. Reheat the soup on the stove over low heat. Stir it well to ensure even warming. In the fridge, the soup lasts about three to four days. Check for signs of spoilage before eating. If it smells off or shows any mold, toss it out. The soup should look creamy and smooth. Always trust your senses when it comes to food safety. Yes, you can use store-bought gnocchi. In fact, I often recommend it for ease. Fresh or frozen gnocchi works great too. They cook quickly and add texture to your soup. Just follow the package instructions for best results. Absolutely! This soup is perfect for meal prep. You can make it ahead and store it in the fridge. Just keep it in a sealed container. It stays good for about 3 days. Reheat it gently on the stove when you’re ready to enjoy. To make this soup gluten-free, choose gluten-free gnocchi. Many brands offer great options. Also, check your vegetable broth to ensure it’s gluten-free. This way, you can enjoy the creamy goodness without worry. You can serve this soup with crusty bread or a fresh salad. Garlic bread pairs well too, adding a nice crunch. If you want something light, a simple green salad works beautifully. These sides enhance your meal and balance the soup's richness. Yes, you can omit the cream. Use more vegetable broth instead. This will keep the soup light while still tasty. You might miss some creaminess, but the flavors will still shine through. Consider adding a splash of milk or a dairy-free alternative for a richer taste. In this blog post, we covered making a tasty Cheddar Gnocchi Soup. You learned about the key ingredients, steps to cook it, and ways to customize the recipe. I shared tips for creamy texture and flavor enhancements. Don't forget, you can store leftovers for later! Explore your options with substitutions and variations to make it your own. This soup is simple yet satisfying. Enjoy every spoonful and make it a dish you love to share. Happy cooking!
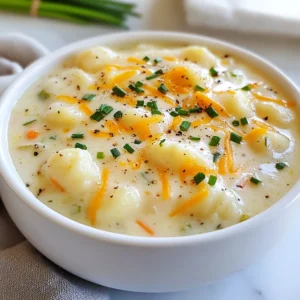
    Cheddar Gnocchi Soup Creamy and Comforting Delight
  • - Dry ingredients: - 1 cup all-purpose flour - 1 teaspoon baking powder - 1/2 teaspoon baking soda - 1 teaspoon ground cinnamon - 1/2 teaspoon ground nutmeg - 1/4 teaspoon salt - Wet ingredients: - 1 cup pumpkin puree - 1/2 cup granulated sugar - 1/2 cup brown sugar, packed - 1/2 cup unsalted butter, softened - 2 large eggs - 1 teaspoon vanilla extract - 1 cup brewed coffee, cooled - Optional ingredients: - 1/2 cup chopped walnuts or pecans - For the Crumb Topping: - 1/2 cup all-purpose flour - 1/4 cup brown sugar, packed - 1/4 cup rolled oats - 1/4 cup cold unsalted butter, cubed - 1 teaspoon ground cinnamon This recipe blends warm spices and rich pumpkin. Each ingredient plays a key role. The all-purpose flour gives the cake its structure. Baking powder and soda help it rise. Cinnamon and nutmeg add warmth and depth. Salt balances the sweetness. The pumpkin puree is the star. It makes the cake moist and flavorful. Granulated and brown sugars sweeten the cake, while butter adds richness. Eggs bind the mixture, giving it a tender crumb. Vanilla extract enhances the overall flavor. Brewed coffee adds a unique twist. It deepens the cake's taste and offers a hint of bitterness. If you want a nutty crunch, add walnuts or pecans. The crumb topping features more flour, brown sugar, oats, and butter. This creates a lovely texture and a sweet finish. Gather all these ingredients before you start. They work together to create a delightful fall treat. Enjoy the process, and let the scents fill your kitchen! 1. Preheat your oven to 350°F (175°C). This helps the cake bake evenly. 2. Grease a 9-inch square baking dish. This will keep your cake from sticking. 3. In a large bowl, cream together the softened butter, granulated sugar, and brown sugar. Mix until it is light and fluffy. 4. Add the eggs one at a time, mixing well after each egg. Then stir in the pumpkin puree and vanilla extract until everything is well combined. 1. In another bowl, whisk together the flour, baking powder, baking soda, cinnamon, nutmeg, and salt. This helps to mix the dry ingredients evenly. 2. Gradually add this dry mix to the pumpkin mixture. Alternate with adding the cooled brewed coffee. Start and end with the flour mixture. Stir gently until just combined. If you want, fold in the chopped walnuts or pecans at this point. 1. Pour the batter into your prepared baking dish. Use a spatula to smooth the top. 2. For the crumb topping, in a separate bowl, combine flour, brown sugar, oats, and cinnamon. Add the cold cubed butter and mix until it looks like coarse crumbs. 3. Sprinkle the crumb topping evenly over the cake batter. This will give your cake a crunchy layer. 4. Bake in the oven for 30-35 minutes. Check for doneness by inserting a toothpick into the center. It should come out clean. 5. Let the cake cool in the pan for at least 10 minutes before slicing and serving. Enjoy your treat with coffee! To get the right texture, use fresh pumpkin puree. It keeps the cake moist and soft. Ensure your butter is softened before mixing. Cold butter does not blend well and can lead to lumps. Eggs should be at room temperature. This helps them mix better and creates a light cake. Serve your cake warm with a dusting of powdered sugar. A slice of fall fruit adds color and flavor. Try pairing it with a hot cup of coffee. The rich coffee flavor in the cake goes well with a latte or a spiced chai. Avoid over-mixing your batter. This can make the cake dense. Be careful with the crumb topping; it should be crumbly, not paste-like. If your topping is too wet, it won’t crisp up. Always check the cake with a toothpick. It should come out clean when done. {{image_2}} You can change the flavors in your Pumpkin Coffee Crumb Cake. Try adding spices like ginger or cloves. These spices give a warm kick that fits fall well. You can also add chocolate chips for a sweet twist. Dried fruit like raisins or cranberries can add a chewy texture too. Each option makes the cake special and fun. If you need a gluten-free cake, use alternatives like almond flour or a gluten-free blend. These flours can change the cake's texture, so add a bit more liquid. For moisture, consider using a little extra pumpkin puree or brewed coffee. This keeps your cake from drying out and makes it delicious. Want to make your cake healthier? You can reduce sugar by half, or swap it for honey or maple syrup. These natural sweeteners add great flavor. You can also replace butter with applesauce or yogurt. This cuts fat while keeping the cake moist. These small changes can make your treat a bit better for you while still being tasty! To keep your Pumpkin Coffee Crumb Cake fresh, store it in an airtight container. This method preserves moisture and flavor. If you don’t have one, covering the cake with foil works too. Just make sure the foil is tight. This will help keep air away from the cake. You can freeze the cake for later enjoyment. First, let it cool completely. Then, wrap it tightly in plastic wrap. Place it in a freezer-safe bag or container. When you want to eat it, take it out and let it thaw in the fridge overnight. For the best texture, reheat it in the oven for a few minutes before serving. At room temperature, the cake lasts about three days. If you store it in the fridge, it can last up to a week. Just remember to keep it covered to maintain its yumminess! Yes, you can use fresh pumpkin. Just cook and mash it first. Make sure it is smooth. Fresh pumpkin adds a nice flavor. It may take a bit more time to prepare. To make it dairy-free, use plant-based butter. Replace regular milk with almond or oat milk. This keeps the cake moist and tasty without dairy. Always check labels to ensure they are dairy-free. You can use brewed tea or hot chocolate for a different taste. If you want a caffeine boost, use espresso. Unsweetened cocoa can add a rich flavor as well. Each option brings its own twist to the cake. Yes, you can make the crumb topping ahead of time. Just store it in the fridge. You can keep it for up to two days before baking. It will save you time on baking day! This blog post covered everything you need to know about baking a delicious pumpkin cake. We discussed the key ingredients, from the dry and wet components to optional mix-ins. You learned the step-by-step instructions, essential baking tips, and ways to serve the cake. Plus, we explored variations and storage best practices. Keep these tips in mind for a tasty treat. Enjoy your baking and share your results!
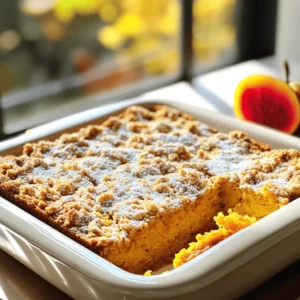
    Pumpkin Coffee Crumb Cake Delightful Fall Treat
  • To make Air Fryer Parmesan Zucchini Chips, gather these simple ingredients: - 2 medium zucchinis, thinly sliced - 1 cup grated Parmesan cheese - 1 cup breadcrumbs (preferably whole wheat) - 1 teaspoon garlic powder - 1 teaspoon onion powder - 1 teaspoon dried oregano - 1 teaspoon salt - 1/2 teaspoon black pepper - Cooking spray or olive oil for misting You can swap some ingredients to fit your taste or diet: - Zucchini: Try yellow squash or eggplant for a different flavor. - Parmesan cheese: Use Pecorino Romano or nutritional yeast for a vegan option. - Breadcrumbs: Replace with crushed cornflakes or almond flour for a gluten-free choice. - Spices: Experiment with smoked paprika or Italian seasoning to change the taste. To make this recipe, you need a few key tools: - Air fryer: This is essential for crisping the zucchini. - Large mixing bowl: Use this for combining the coating ingredients. - Sharp knife: A good knife helps you slice the zucchini thinly. - Cutting board: Protects your counters and makes cutting easier. - Measuring spoons and cups: Ensure accurate ingredient amounts. - Tongs: Use these to flip the zucchini chips easily while cooking. Having these tools ready will make your cooking process smooth and fun! Start by gathering your ingredients. You will need: - 2 medium zucchinis, thinly sliced - 1 cup grated Parmesan cheese - 1 cup breadcrumbs (preferably whole wheat) - 1 teaspoon garlic powder - 1 teaspoon onion powder - 1 teaspoon dried oregano - 1 teaspoon salt - 1/2 teaspoon black pepper - Cooking spray or olive oil for misting Next, preheat your air fryer to 400°F (200°C). This takes about 5 minutes. While the fryer heats, mix your coating. In a large bowl, combine the grated Parmesan, breadcrumbs, garlic powder, onion powder, oregano, salt, and black pepper. Stir it well. Now, prepare the zucchini. Place the thinly sliced zucchini in another bowl. Mist it lightly with cooking spray or drizzle with olive oil. Toss to coat every slice evenly. This step helps the coating stick. Take each zucchini slice and dip it into the coating mixture. Press gently to ensure it sticks well. Arrange the coated slices in a single layer in the air fryer basket. Make sure they do not overlap. This helps each chip cook evenly. Air fry the zucchini chips for about 12-15 minutes. Flip them halfway through cooking. Keep an eye on them. Cooking times may change based on the thickness of your slices and your air fryer model. When you see them turn golden brown and crispy, they are ready. Use tongs to remove them from the fryer. Let the zucchini chips cool for a few minutes before serving. To check if your zucchini chips are done, look for a golden color. They should feel crisp when touched. If they seem soft, give them a few more minutes in the air fryer. Remember, every air fryer is a bit different. Testing a few chips will help you find the perfect cooking time. Enjoy your crispy zucchini chips! To get your zucchini chips crispy, use thin slices. Aim for about 1/8 inch thick. This helps them cook evenly and crisp up nicely. Misting with cooking spray or olive oil adds a golden color and crunch. Avoid overcrowding the air fryer basket; this leads to soggy chips. Cook in batches if needed. To boost flavor, try adding extra spices. A pinch of cayenne pepper gives heat. Smoked paprika adds a nice smoky taste. You can also mix in some fresh herbs like thyme or rosemary. For a cheesy kick, add a bit of grated Parmesan to the breadcrumbs. This makes every bite packed with flavor. One common mistake is not seasoning enough. The salt and spices add flavor, so don't skip them. Another mistake is cutting the zucchini too thick. If your slices are too thick, they won't crisp well. Lastly, remember to flip the chips halfway through cooking. This helps them brown evenly and stay crispy. {{image_2}} You can easily change the flavor of your zucchini chips. For a spicy kick, add cayenne pepper or chili powder to the breading mix. This adds heat without losing the great texture. If you prefer herb-infused chips, try adding dried basil or thyme to the mix. Fresh herbs can also work wonders. Just chop them finely and add them to your coating. Experiment with different spices to find your favorite flavor! If you want gluten-free chips, swap regular breadcrumbs for gluten-free ones. There are many brands available now. For a vegan option, use nutritional yeast instead of Parmesan cheese. This will give you a cheesy flavor without dairy. You can also use a plant-based milk to mist the zucchini instead of olive oil. These simple swaps make the recipe fit various diets while keeping it tasty! These zucchini chips pair well with many dips. A classic marinara sauce adds a nice tang. You can also serve them with a yogurt dip made from Greek yogurt, lemon juice, and herbs. This adds creaminess and freshness. For a fun twist, try a spicy salsa or guacamole for a burst of flavor. Present the chips on a colorful platter with your chosen dip for a snack that looks as good as it tastes! To store leftover zucchini chips, let them cool first. Place them in an airtight container. Keep the container in the fridge. They will stay fresh for up to three days. If you want to keep them crisper, place paper towels in the container. This will absorb moisture. When you want to eat your leftover chips, reheating is key. Preheat your air fryer to 350°F (175°C) for a few minutes. Place the zucchini chips in the basket in a single layer. Heat for about 3-5 minutes. This helps restore their crispiness. You can also use an oven if you don’t have an air fryer. For long-term storage, freezing is a great option. First, let the chips cool completely. Arrange them in a single layer on a baking sheet. Freeze them for about 1-2 hours until firm. Then, transfer them to a freezer-safe bag. Remove as much air as possible before sealing. They can stay in the freezer for up to two months. When you're ready to eat, cook them straight from the freezer. Just add a few extra minutes to the cooking time. To make zucchini chips crispy, slice the zucchini thin. A good thickness is about 1/8 inch. Mist them lightly with cooking spray or olive oil. This helps the breading stick. Mix grated Parmesan, breadcrumbs, and spices in a bowl. Coat each slice with this mixture. The key is to arrange them in a single layer in the air fryer. Overlapping slices can lead to sogginess. Cook at 400°F for 12-15 minutes, flipping halfway. Keep an eye on them for perfect crispiness. Yes, you can use other cheeses! Parmesan gives a nice flavor, but mozzarella or cheddar can work too. Just make sure to grate the cheese finely. This helps it stick to the zucchini slices. You can also mix different cheeses for a fun taste. Just remember that different cheeses can change the crispiness and flavor. You will know the zucchini chips are done when they are golden brown and crispy. Check them around the 12-minute mark. If they look too pale, give them a few more minutes. The air fryer cooks quickly, so keep an eye on them. If they start to brown too fast, lower the temperature slightly. Let them cool a bit before eating, as they will crisp up more as they cool. This article covered all you need to know about making zucchini chips. We explored required ingredients, substitutions, and tools. I shared step-by-step cooking instructions, tips for crispiness, and flavor ideas. You now have storage info and answers to common questions. With these insights, you can make tasty, crunchy zucchini chips at home. Enjoy experimenting with your own flavors and variations. You’ll create a snack everyone loves!
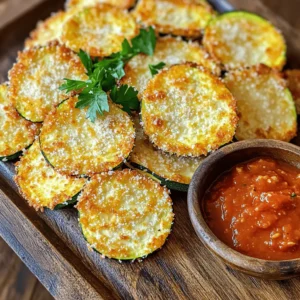
    Air Fryer Parmesan Zucchini Chips Crispy and Easy Recipe
  • - 2 cups all-purpose flour - 1/4 cup granulated sugar - 1/2 teaspoon salt - 1 tablespoon instant yeast - 1/2 teaspoon ground cinnamon - 1/4 teaspoon ground nutmeg - 1/4 teaspoon ground ginger - 3/4 cup pumpkin puree - 1/4 cup warm milk - 1 large egg - 1/4 cup unsalted butter, melted - 1/2 cup packed brown sugar - 2 teaspoons cinnamon (for filling) - 1/2 cup cream cheese, softened - 1/2 cup powdered sugar - 1 teaspoon vanilla extract - 2 tablespoons milk (for cream cheese frosting) For best results, use standard measuring cups and spoons. This ensures accurate amounts. Use a kitchen scale if you have one. It helps with precision, especially with flour. Keep the butter unsalted to control salt levels in your rolls. Make sure the pumpkin puree is pure without added ingredients. You can swap all-purpose flour with whole wheat flour for a healthier option. If you need a gluten-free version, try a gluten-free flour blend. Coconut sugar can replace granulated sugar for a unique flavor. Almond milk works well instead of regular milk. If you don’t have cream cheese, ricotta can be a nice substitute. Start by grabbing a large mixing bowl. Whisk together these dry ingredients: - 2 cups all-purpose flour - 1/4 cup granulated sugar - 1/2 teaspoon salt - 1 tablespoon instant yeast - 1/2 teaspoon ground cinnamon - 1/4 teaspoon ground nutmeg - 1/4 teaspoon ground ginger Mix these well until everything is combined. Next, take another bowl for the wet ingredients. Combine: - 3/4 cup pumpkin puree - 1/4 cup warm milk - 1 large egg - 1/4 cup melted unsalted butter Stir these until smooth. Gradually add the wet mix to the dry mix. Stir until a dough forms. Now, turn the dough onto a floured surface. Knead it for about 5-7 minutes. You want it smooth and elastic. Place the dough in a greased bowl. Cover it with a kitchen towel. Let it rise in a warm place for about 1 hour, or until it doubles in size. After the dough has risen, punch it down gently. Roll it out into a rectangle, about 1/4 inch thick. Spread brown sugar evenly over the dough. Sprinkle 2 teaspoons of cinnamon on top. Now, roll the dough tightly into a log, starting from one end. Pinch the seams to seal it well. Cut the log into 12 equal pieces. Place them in a greased baking dish. Cover these rolls with a towel. Let them rise again for 30 minutes. Preheat your oven to 350°F (175°C). Bake the rolls for 20-25 minutes. They should be golden brown when done. While the rolls bake, prepare the cream cheese frosting. In a bowl, mix: - 1/2 cup softened cream cheese - 1/2 cup powdered sugar - 1 teaspoon vanilla extract - 2 tablespoons milk Stir until the mixture is smooth and creamy. Once the rolls are baked, let them cool slightly. Then, drizzle the cream cheese frosting on top. Enjoy these soft, sweet treats! To make great pumpkin cinnamon rolls, focus on the dough. Use all-purpose flour for the best result. Make sure to knead the dough for 5-7 minutes. This helps it become smooth and elastic. If the dough feels too sticky, add a little more flour. Aim for a soft, pliable dough that holds its shape. If you want to speed up the rising, try a warm spot in your kitchen. You can turn on the oven to its lowest setting for a few minutes. Then, turn it off and place the dough inside. Cover it with a towel. This can cut the rising time in half. Another trick is to place a bowl of hot water next to the dough. The steam helps the dough rise faster. Serve your pumpkin cinnamon rolls warm for the best taste. Drizzle the cream cheese frosting right before serving. You can add a sprinkle of cinnamon on top for extra flair. These rolls pair well with coffee or tea. For a fun twist, serve them with apple cider or a scoop of vanilla ice cream. Enjoy! {{image_2}} You can make your pumpkin cinnamon rolls even better by adding nuts or chocolate chips. Chopped pecans or walnuts add a nice crunch. Use about 1/2 cup of nuts. If you prefer chocolate, use semi-sweet chocolate chips. They will melt slightly and add richness. Mix them into the filling before rolling up the dough. This gives you a sweet surprise in every bite. If you need gluten-free rolls, you can swap the all-purpose flour. Use a gluten-free flour blend instead. Make sure it has xanthan gum for the right texture. Follow the same steps in the recipe. Keep an eye on the baking time. Gluten-free dough may need a few extra minutes to cook through. Enjoy the same great flavor without gluten! You can change up the cream cheese frosting to match your taste. For a hint of spice, add a pinch of ground cinnamon or nutmeg. For a citrus twist, mix in some lemon or orange zest. This brightens the flavor and pairs well with pumpkin. To make it richer, add a tablespoon of maple syrup. It gives a wonderful depth to the frosting. Try out these variations for a fun twist! To keep your pumpkin cinnamon rolls fresh, place them in an airtight container. This will help them stay soft and tasty. You can also wrap them tightly in plastic wrap. Store the rolls at room temperature for up to three days. If you want to keep them longer, consider freezing them. Freezing your pumpkin cinnamon rolls is easy! First, let the rolls cool completely. Then, place them on a baking sheet. Freeze them for about an hour until solid. Once frozen, transfer the rolls to a freezer-safe bag or container. They can last in the freezer for up to three months. When you are ready to enjoy them, you can thaw them overnight in the fridge. To reheat your pumpkin cinnamon rolls, preheat your oven to 350°F (175°C). Place the rolls on a baking sheet and cover them with foil. Heat for about 10-15 minutes. This helps the rolls stay moist. You can also microwave them for 15-20 seconds for a quick warm-up. Don’t forget to add some cream cheese frosting on top for extra flavor! Yes, you can make pumpkin cinnamon rolls ahead of time. Prepare the dough up to the first rise. After the dough rises, roll it out and cut the rolls. Place them in a greased dish, cover with plastic wrap, and keep in the fridge overnight. The next day, let them rise for 30 minutes before baking. This saves time and gives you fresh rolls in the morning. You can tell pumpkin cinnamon rolls are done by looking for a golden brown color. The edges should also be firm. If you tap the top, it should sound hollow. For an exact check, use a toothpick. Insert it into the center; if it comes out clean, the rolls are ready. Pumpkin cinnamon rolls pair well with many items. Here are some tasty options: - Hot coffee or chai tea - A side of fresh fruit, like apples or pears - A dollop of whipped cream for extra sweetness - A sprinkle of chopped nuts for crunch You learned how to make delicious pumpkin cinnamon rolls. We covered the ingredients, including substitutes, and the step-by-step process. You now know tips for perfect dough and creative variations. Storing leftovers is easy with the right methods. Enjoy these treats warm or with a twist. Remember, baking is about having fun and experimenting! Your kitchen adventure awaits. Happy baking!
    Pumpkin Cinnamon Rolls With Cream Cheese Delight
  • - Young green jackfruit details You need 2 cans of young green jackfruit in brine. Make sure it is not in syrup. Drain and rinse the jackfruit before using it. This removes excess salt and helps with flavor. - Seasonings and spices For flavor, gather these spices: - 1 tablespoon olive oil - 1 onion, finely chopped - 3 cloves garlic, minced - 1 tablespoon smoked paprika - 1 teaspoon ground cumin - 1 teaspoon chili powder - Salt and pepper to taste - 1 cup BBQ sauce (store-bought or homemade) - Optional toppings Add extra flavor and crunch with these toppings: - Pickled jalapeños - Coleslaw These ingredients help create a tasty BBQ jackfruit slider. The jackfruit acts like pulled meat, while the spices bring warmth and depth. The optional toppings add a nice touch. Enjoy experimenting with the flavors! To start, you need to shred the jackfruit. Use your hands or a fork to pull it apart. Aim for small pieces that look like pulled meat. Make sure to remove any seeds or tough bits. This step is key for great texture. Next, heat a large pan over medium heat. Add one tablespoon of olive oil. Once it’s hot, toss in the finely chopped onion. Sauté the onion for about five minutes. You want it to be soft and clear. Then, add three cloves of minced garlic. Cook for another one to two minutes until it smells amazing. Now it’s time to add the jackfruit. Stir it into the pan with the onions and garlic. Sprinkle in one tablespoon of smoked paprika, one teaspoon of ground cumin, and one teaspoon of chili powder. Season with salt and pepper to taste. Mix everything well so the spices coat the jackfruit. Pour in one cup of BBQ sauce. Stir until the jackfruit is fully covered. Lower the heat and let it simmer for about 20 to 25 minutes. Stir occasionally. This lets the jackfruit soak up all the great flavors and become sticky. While the jackfruit simmers, preheat your oven to 350°F (175°C). Grab your slider buns and place them on a baking sheet. Toast the buns in the oven for about five minutes. You want them to be golden brown. Once the jackfruit is ready, it’s time to build your sliders. Take the bottom half of each slider bun and add a generous scoop of the BBQ jackfruit mix. If you like, top it with pickled jalapeños and a dollop of coleslaw. Finally, cap it with the top half of the bun. Enjoy your tasty BBQ Jackfruit Sliders! To make your BBQ jackfruit sliders even more tasty, adjust the spices. You can add more smoked paprika for a deeper flavor. If you like heat, toss in extra chili powder. Try adding a pinch of cayenne pepper for a spicy kick. Choosing the right BBQ sauce matters too. A sweet sauce pairs well with the jackfruit's flavor. For a tangy twist, use a vinegar-based sauce. Experiment with different sauces to find your favorite match. Shredding jackfruit can be tricky. Use your hands or a fork to pull it apart. Aim for pieces that look like pulled pork. Don’t worry about small seeds; they are soft and edible. Just remove tough core parts. Sautéing is key for great flavor. Start with medium heat. Heat your olive oil until it shimmers. Add onions and cook until they are soft and clear. Then, add garlic for just a minute. This builds a rich base for your sliders. {{image_2}} You can switch up the recipe with different proteins or vegan substitutes. For a meaty feel, try using pulled pork or shredded chicken instead of jackfruit. If you want to keep it plant-based, consider using tofu or tempeh. Both options soak up flavors well. You can also experiment with unique BBQ sauce options. Try a spicy mango BBQ sauce for a sweet kick. A mustard-based sauce can give your sliders a tangy twist. Don’t be afraid to mix flavors that you love! When serving BBQ jackfruit sliders, think about tasty side dishes that pair well. Classic options include baked beans, sweet potato fries, or a fresh green salad. Each side can balance the rich flavors of your sliders. You can also get creative with toppings. Try adding sliced avocados or fresh cilantro for a fresh taste. Crispy fried onions can add a nice crunch. Pickled jalapeños give a spicy and tangy flavor that many enjoy. Experiment with your favorites! To keep your BBQ jackfruit sliders fresh, store them in an airtight container. Make sure to let them cool to room temperature first. If you store them this way, they can last for about 3-5 days in the fridge. Always check for any off smells before eating leftovers. To reheat the sliders, use the oven for the best results. Preheat your oven to 350°F (175°C). Place the sliders on a baking sheet and cover them with foil to keep them moist. Heat for about 10-15 minutes. This method helps maintain the texture of the jackfruit and the buns. You can also use a microwave for quick reheating, but it may make the buns a bit soft. Enjoy your sliders warm for the best taste! Jackfruit is a large tropical fruit. It is known for its unique taste and texture. Young green jackfruit is often used in savory dishes. It is low in calories and high in fiber. Here’s a quick look at its nutritional profile: - Calories: 95 per cup - Fiber: 2.5 grams - Protein: 2.4 grams - Vitamin C: 18.4 mg - Potassium: 739 mg Jackfruit is rich in vitamins and minerals. It can help with digestion and boost your immune system. Plus, it is a great meat substitute for vegans and vegetarians. Yes, you can easily make BBQ jackfruit sliders gluten-free. The key is to choose the right buns. Look for gluten-free slider buns at your local store. You can also make your own using gluten-free flour. Here are some options: - Gluten-free hamburger buns - Lettuce wraps as a bun substitute - Cauliflower bread buns These options keep the sliders tasty and safe for those with gluten sensitivities. Making your own BBQ sauce is simple and fun. Here’s a quick recipe you can try: - 1 cup ketchup - 2 tablespoons apple cider vinegar - 2 tablespoons brown sugar - 1 tablespoon Worcestershire sauce (use a gluten-free version if needed) - 1 teaspoon smoked paprika - 1 teaspoon garlic powder - Salt and pepper to taste Mix all the ingredients in a bowl. Adjust the sweetness and spices to your liking. This sauce pairs perfectly with jackfruit. It adds a rich flavor to your sliders. You learned how to make tasty jackfruit sliders. We covered all the key steps, from preparing the jackfruit to assembling the sliders. Use the tips and tricks to enhance flavor and try variations for fun. Don't forget to store leftovers well and reheat them right. Now you have everything to impress at your next gathering. Enjoy your delicious sliders!
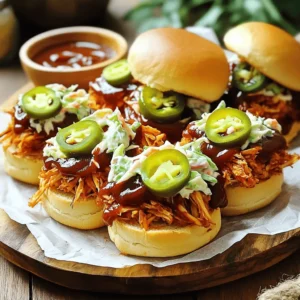
    BBQ Jackfruit Sliders Flavorful and Easy Recipe
  • - 2 pounds Yukon Gold potatoes, peeled and cubed - 4 cloves garlic, minced - 1/2 cup unsalted butter, at room temperature - 1/2 cup heavy cream, warmed - 1/4 cup fresh parsley, finely chopped - 1/4 cup fresh chives, finely chopped Yukon Gold potatoes work best for this dish. They are creamy and buttery. The garlic gives a strong flavor that lifts the dish. Unsalted butter adds richness without extra salt. Heavy cream makes the mash smooth and rich. Fresh herbs, like parsley and chives, bring a pop of color and freshness. - Salt - Pepper Salt and pepper are key to bringing out flavors. You can adjust them to your taste. Add more salt to enhance the buttery flavor. Freshly ground pepper adds a nice kick. Always taste your mash before serving. Adjust seasoning as needed. To start, take 2 pounds of Yukon Gold potatoes. Peel them and cut them into cubes. Place the potatoes in a large pot and cover them with water. Bring the water to a boil over medium-high heat. Once boiling, reduce the heat to a simmer. Cook the potatoes for about 15 to 20 minutes. You want them to be fork-tender, which means a fork easily goes into the potato. While the potatoes cook, we need to sauté the garlic. Take 2 tablespoons of unsalted butter and melt it in a small skillet over medium heat. Once the butter melts, add 4 cloves of minced garlic. Sauté the garlic for about 2 to 3 minutes. You want it fragrant but not browned. The smell will fill your kitchen, making it hard to resist. After draining the potatoes, return them to the pot. Now, it’s time to mash. You can use a potato masher or a ricer. A ricer gives a smoother texture, while a masher gives a chunkier feel. Mash until you reach your desired consistency. It should be creamy and smooth. Next, add the remaining butter, the sautéed garlic, and 1/2 cup of warmed heavy cream to the mashed potatoes. Also, mix in 1/4 cup of finely chopped parsley and 1/4 cup of finely chopped chives. Stir everything together until well combined. You want a rich, creamy mixture. Now, taste the mashed potatoes. Add salt and pepper to your liking. For presentation, transfer the mashed potatoes to a warm serving bowl. You can garnish with extra chopped herbs or a drizzle of olive oil. This adds a nice touch and makes them look great. To make your mashed potatoes creamy, you can try alternatives to butter and cream. Use olive oil or coconut cream for a lighter option. These swaps add unique flavors. When it comes to mashing techniques, use a potato masher for a rustic feel. A ricer will give you a smooth texture. Always mash while the potatoes are hot. This helps them absorb the butter and cream better. Enhancing flavor is easy with herbs and spices. Add rosemary, thyme, or even a pinch of nutmeg for depth. These herbs brighten up the dish. If you want to add cheese, consider cream cheese or sharp cheddar. These cheeses melt well and create a rich taste. For serving, use a warm bowl. This keeps the potatoes hot longer. You can also create a small well in the center. This is perfect for olive oil or extra butter. Garnish your mashed potatoes with fresh herbs. A sprig of parsley or chives makes it look beautiful. You can also drizzle some olive oil on top for added flair. {{image_2}} You can easily adapt garlic herb mashed potatoes to fit different diets. For a vegan option, swap the butter and cream with plant-based alternatives. Use coconut cream for a rich taste, and choose vegan butter for that creamy texture. This way, everyone can enjoy this dish without worry. If you need a gluten-free version, you’re in luck! All the ingredients in this recipe are naturally gluten-free. Just make sure that the butter and any pre-packaged products don’t have gluten in them. You can enjoy this dish guilt-free. Sometimes, you might not have all the ingredients on hand. That's okay! For potatoes, you can use Russet or red potatoes. They will give you a different flavor and texture but still taste great. If you want to substitute cream, try using milk or a plant-based milk. The texture will change slightly, but it will still be delicious! You can also use sour cream for a tangy twist. Adding new flavors can make your mashed potatoes even more exciting. Roasted garlic adds a sweet, nutty taste. Just roast the garlic in the oven before mashing it in. For a touch of luxury, drizzle some truffle oil on top before serving. This creates a rich aroma and elevates the dish to a gourmet level. You could also mix in cheese, like Parmesan or cheddar, for an extra burst of flavor! To keep garlic herb mashed potatoes fresh, store them in the fridge. Place them in an airtight container. They can last for about three to five days. Make sure they cool down to room temperature before sealing. For long-term storage, you can freeze mashed potatoes. Scoop them into freezer bags or containers. Remove as much air as possible to prevent freezer burn. They will keep well for up to two months. To reheat frozen mashed potatoes, thaw them in the fridge overnight. Then, heat them on the stove over low heat or in the microwave. Add a splash of cream or milk to restore creaminess. You can get creative with leftover mashed potatoes. Use them to make potato cakes. Just mix in some cheese and breadcrumbs, form patties, and pan-fry until golden. Another idea is to use them as a topping for shepherd's pie. Spread the mashed potatoes over seasoned meat and veggies, then bake until bubbly. You can also stir them into soups for added creaminess. These ideas will make your leftovers exciting and delicious! To make your mashed potatoes smooth, start with the right tools. Use a potato ricer or a sturdy masher. Ricing gives a fluffier texture than mashing. Always mash while the potatoes are hot. Add warm cream and butter for a silky finish. If you want extra smoothness, mix with an electric mixer on low speed. Avoid overmixing; this can make them gluey. Yes, you can use other types of potatoes for mashed potatoes. However, some work better than others. Yukon Gold potatoes are creamy and buttery. Russet potatoes are starchy, which makes them fluffy. Red potatoes have a waxy texture and hold their shape well. For a unique flavor, try purple potatoes. Each type brings its own taste and texture. To reheat mashed potatoes, use gentle heat. Place them in a pot with a splash of cream or milk. Heat on low, stirring often to avoid sticking. You can also use a microwave. Cover the bowl with a damp paper towel to keep moisture in. Heat in short bursts, stirring in between until warm. This keeps them creamy and soft. Yes, you can make garlic herb mashed potatoes ahead of time. Prepare them as usual and let them cool. Store in an airtight container in the fridge for up to two days. When ready to serve, reheat them gently. Add a little cream or butter to restore creaminess. This makes meal prep easy and saves time on busy days. In this post, I covered how to make perfect garlic herb mashed potatoes. We looked at key ingredients like Yukon Gold potatoes and fresh herbs. I shared step-by-step instructions, tips for texture and flavors, and even variations for special diets. Remember, great mashed potatoes start with the right ingredients and techniques. Experiment with flavors and presentation to impress your guests. Enjoy your creamy creations!
    Garlic Herb Mashed Potatoes Savory and Creamy Delight
  • To make Air Fryer Garlic Parmesan Chicken Wings, you will need: - 2 lbs chicken wings - 3 tablespoons olive oil - 1 teaspoon garlic powder - 1 teaspoon onion powder - 1 teaspoon smoked paprika - 1/2 teaspoon black pepper - 1/2 teaspoon salt - 1/4 cup grated Parmesan cheese - 2 tablespoons fresh parsley, chopped (for garnish) - 1 tablespoon minced garlic (fresh) Having these items ready makes cooking easy and fun. Choose fresh chicken wings. Look for wings that are plump and not discolored. Fresh garlic adds a nice punch. Use whole cloves and mince them right before cooking. Fresh herbs like parsley brighten the dish. Store them in a cool place until you are ready to use them. If you can, buy high-quality olive oil. It enhances the flavor of the wings. If you don’t have garlic powder, you can use fresh garlic instead. Just add more minced garlic to the mix. For smoked paprika, regular paprika works too, but it will change the flavor a bit. If you want a little heat, add cayenne pepper. You can also swap the chicken wings for drumsticks if you prefer. The cooking time might change slightly, so keep an eye on them. {{ingredient_image_1}} Start with fresh chicken wings. I use about 2 lbs for this recipe. First, pat the wings dry with paper towels. This step helps make the wings crispier. Removing excess moisture is key. If they are wet, they won't crisp well. Dry wings absorb the coating better too. Next, we need to marinate the wings. In a large bowl, mix 3 tablespoons of olive oil with garlic powder, onion powder, smoked paprika, black pepper, and salt. This creates a flavorful mix. Toss the wings in this mixture until they are fully coated. Don't rush; make sure every wing gets some love. After mixing, add 1 tablespoon of minced garlic. This gives the wings a nice kick. Now, it's time for the air fryer. Preheat it to 375°F (190°C) for about 5 minutes. This ensures even cooking. Place the wings in the basket in a single layer. Avoid overcrowding for best results. Cook them for 25-30 minutes. Flip them halfway through cooking. This helps them brown evenly. When they are golden and crispy, they are ready. After cooking, toss the wings with 1/4 cup of grated Parmesan cheese. Finally, serve with chopped parsley on top for a fresh touch. Enjoy your delicious creation! To get crispy chicken wings, you must dry them well. Patting them with paper towels removes excess moisture. This step is key for a great crunch. Next, coat the wings in a mix of spices and oil. The oil helps them crisp up in the air fryer. Make sure not to overcrowd the basket. This allows hot air to circulate freely, giving you wings that are golden and crunchy. Preheating your air fryer is very important. It helps the wings cook evenly from the start. Set it to 375°F (190°C) for about 5 minutes. This quick step makes a huge difference. If you skip it, your wings might not get that nice, crispy finish. Follow these steps to avoid common mistakes. First, make sure to flip the wings halfway through cooking. This ensures they brown evenly. Second, check the wings for doneness. They should be golden brown and crispy. Use a meat thermometer if unsure; the internal temperature should be 165°F (74°C). Finally, add the Parmesan cheese right after cooking. This way, it melts and sticks well to the wings, enhancing the flavor. Pro Tips Pat Dry for Crispiness: Ensure your chicken wings are thoroughly dried with paper towels before seasoning. This helps achieve a perfectly crispy texture when air frying. Don't Overcrowd the Basket: When air frying, always place the wings in a single layer without overcrowding. This allows hot air to circulate evenly, resulting in crispier wings. Flip Halfway Through Cooking: Remember to flip the wings halfway through the cooking time. This ensures even cooking and browning on both sides. Garnish for Extra Flavor: Adding fresh parsley and additional Parmesan cheese just before serving enhances the flavor and presentation of your wings. {{image_2}} You can easily change the flavor of your chicken wings. For a spicy kick, add cayenne pepper or hot sauce to the marinade. Mix in 1-2 teaspoons of smoked chipotle for a smoky taste. If you love BBQ, swap the garlic powder for your favorite BBQ rub. This gives the wings a sweet and tangy flavor. Experiment with different hot sauces to find your favorite mix. While wings are great, you can use other chicken parts too. Chicken drumsticks work well in the air fryer. They take a bit longer to cook, so aim for 30-35 minutes. You can even use chicken thighs for juicy bites. Just ensure all pieces are the same size for even cooking. Adjust the cooking time if needed, as some parts may take longer. Get creative with seasonings to match your taste. Try adding lemon zest for a fresh twist. You can also use Italian seasoning for a herby flavor. For a savory touch, mix in some ranch seasoning. If you want something different, use a curry blend for an exotic flair. Remember, the key is to find flavors you enjoy. To store leftovers, let the chicken wings cool down. Place them in an airtight container. You can keep them in the fridge for up to three days. Make sure to layer them with parchment paper to avoid sticking. For reheating, use the air fryer again. Preheat it to 375°F (190°C). Place the wings in the basket in a single layer. Heat for about 5-7 minutes. This keeps them crispy and tasty. You can also use an oven if needed. Just set it to 350°F (175°C) and heat for 10-15 minutes. You can freeze the wings if you have extra. Place them in a freezer-safe bag. Remove as much air as possible. They will stay good for up to three months. When ready to eat, thaw in the fridge overnight. Then, reheat using the air fryer for best texture. Yes, you can use frozen chicken wings. However, you must adjust the cooking time. Start by air frying the wings for about 10 minutes at 375°F (190°C). After that, check the wings' doneness and continue cooking until they are golden and crispy. Make sure to coat the frozen wings in the marinade after they thaw slightly in the air fryer. To get extra crispy wings, air fry them for 30 to 35 minutes. Flip the wings halfway through cooking to ensure even crispiness. Also, patting the wings dry before marinating helps, as it removes moisture and aids in crisping the skin. Several sauces pair nicely with garlic parmesan wings. Here are some great options: - Ranch dressing - Blue cheese dressing - Hot sauce for a spicy kick - Honey mustard for a sweet touch These sauces enhance the flavor and add a fun twist to your meal. You learned about the essential ingredients for making tasty garlic parmesan wings. You also saw tips on choosing fresh ingredients and exciting substitutes. The step-by-step guide showed how to prepare, marinate, and cook chicken wings in an air fryer. Using the right tips, you’ll achieve crispy results every time. There are flavor variations to try, plus storage tips for leftovers. Overall, these wings are easy and fun to make. Now, you're ready to impress with your cooking skills. Enjoy your delicious wings!
    Air Fryer Garlic Parmesan Chicken Wings Delightful Meal
  • To make Air Fryer Parmesan Avocado Fries, gather the following items: - 2 ripe avocados - 1 cup breadcrumbs (panko gives extra crunch) - 1/2 cup grated Parmesan cheese - 1 teaspoon garlic powder - 1 teaspoon paprika - Salt and pepper to taste - 2 large eggs - 1 tablespoon olive oil You can add more flavors to your fries. Try these options: - Chili powder for heat - Italian seasoning for extra herbs - Lemon zest for brightness - Cayenne pepper for a spicy kick If you don't have some ingredients, here are smart swaps: - Use nutritional yeast instead of Parmesan for a vegan option. - Swap breadcrumbs for crushed cornflakes for a gluten-free choice. - Replace eggs with a mixture of ground flaxseed and water for a plant-based option. - Olive oil can be swapped with avocado oil for a similar taste. First, grab two ripe avocados. Slice them in half and take out the pit. Use a spoon to scoop out the flesh gently. Cut each half into wedges or fries. Keep the size even for cooking. This helps them cook evenly. In a bowl, mix one cup of breadcrumbs with half a cup of grated Parmesan cheese. Add one teaspoon of garlic powder and one teaspoon of paprika. Season with salt and pepper to taste. Stir this mixture well. In another bowl, beat two large eggs. Add one tablespoon of olive oil. Whisk until smooth. Preheat your air fryer to 400°F (200°C). Dip each avocado fry into the egg mix first. Let any extra egg drip off. Then, coat it in the breadcrumb mix. Press gently to make it stick. Place the coated fries in a single layer in the air fryer basket. You may need to work in batches. Cook for 8-10 minutes. Flip the fries halfway through for even crispiness. When they turn golden brown, they are ready. Let them cool for a couple of minutes before serving. To cut avocados well, choose ripe ones. A ripe avocado yields to gentle pressure. Start by slicing the avocado in half lengthwise. Twist the halves to separate them. Remove the pit carefully with a spoon or a knife. Next, scoop the flesh out slowly to avoid bruising. For fries, cut each half into wedges. Aim for even sizes for even cooking. To make your fries crispy, coat them evenly. The egg mixture helps the breadcrumbs stick. Press the breadcrumbs onto the avocado fries firmly. Using panko breadcrumbs can give a great crunch. Preheat your air fryer fully to 400°F (200°C) before cooking. Air fry for 8-10 minutes, flipping halfway through for even heat. Allow them to cool slightly before serving; this retains crispiness. Avoid using unripe avocados; they won’t taste good. Don’t skip preheating the air fryer; it ensures crispness. If you overcrowd the basket, fries may not cook evenly. Remember to flip the fries halfway for the best results. Lastly, don’t rush the cooling time. Letting them sit for a couple of minutes helps keep them crispy. {{image_2}} To make spicy avocado fries, add heat to your coating. Mix in 1-2 teaspoons of cayenne pepper or chili powder with the breadcrumbs and cheese. This gives a kick to your fries. You can also serve them with a spicy dip, like sriracha mayo, for extra flavor. Adjust the spice to your taste! For cheese-stuffed avocado fries, scoop out some flesh from the avocado halves. Fill the space with your favorite cheese, like mozzarella or pepper jack. Then, coat and air fry as usual. This creates a gooey, cheesy center that pairs perfectly with the crispy coating. It adds a fun twist to the classic recipe. You can make these fries vegan by swapping a few ingredients. Use aquafaba, the liquid from canned chickpeas, instead of eggs. For cheese, try nutritional yeast or vegan cheese shreds. Use gluten-free breadcrumbs if needed. Follow the same steps for coating and cooking. You still get crispy fries without any animal products! To keep your leftover avocado fries fresh, place them in an airtight container. Make sure they cool down first. Store them in the fridge for up to 2 days. This helps maintain their flavor and texture. If you want to enjoy them later, it's best to reheat them to make them crispy again. For the best results, use your air fryer to reheat the fries. Set the air fryer to 350°F (175°C). Heat the fries for about 3-5 minutes. This method helps restore their crunch. Avoid using the microwave, as it can make them soggy. If you don't have an air fryer, you can use a conventional oven at the same temperature. You can freeze the avocado fries if you want to make them ahead. Place the uncooked, breaded fries in a single layer on a baking sheet. Freeze them for about 1-2 hours. Once frozen, transfer them to a freezer-safe bag. They can last up to 3 months in the freezer. When ready to cook, no need to thaw. Just air fry them straight from the freezer, adjusting the time as needed. Yes, you can use other cheeses. Cheddar or mozzarella can add great flavor. Each cheese gives a unique taste. Experiment to find your favorite. You may want to mix cheeses for more depth. Try using a blend of Parmesan and Cheddar for a rich, savory bite. The fries are done when they are golden brown and crispy. After 8-10 minutes, check their color. They should look deliciously crunchy. You can flip them halfway through to ensure even cooking. If they need more time, add a couple of minutes. Avocado fries taste great with many dipping sauces. Lime aioli adds a zesty twist. Spicy ranch also works well for a kick. You can try garlic dip or classic ketchup too. For a fun twist, mix Greek yogurt with herbs for a fresh sauce. Each sauce enhances the flavor of the fries. Avocado fries are a tasty twist on a classic snack. We covered their ingredients, from seasonings to substitute options. I shared step-by-step prepping and cooking instructions. Tips helped you avoid common mistakes and achieve the right crispiness. I also explored fun variations, like spicy and cheese-stuffed options. Remember to store leftovers properly for maximum flavor. Enjoy your tasty avocado fries and make them your very own!
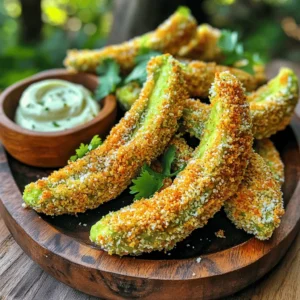
    Air Fryer Parmesan Avocado Fries Crispy and Tasty
  • To make Brown Butter Pumpkin Spice Blondies, gather these key ingredients: - 1 cup unsalted butter - 1 cup brown sugar - 1/2 cup granulated sugar - 2 large eggs - 1 teaspoon vanilla extract - 1 cup pumpkin puree - 2 cups all-purpose flour - 1 teaspoon baking powder - 1 teaspoon baking soda - 1 teaspoon pumpkin pie spice - 1/2 teaspoon salt - 1/2 cup chocolate chips (optional) These ingredients work together to create a rich, moist blondie with a warm pumpkin flavor. The brown butter adds a nutty taste that pairs perfectly with the spices. Using both brown and granulated sugar gives the blondies a nice balance of sweetness. Make sure to use pure pumpkin puree, not pie filling. This keeps your blondies from being too sweet. The chocolate chips are optional, but they add a nice touch if you want a little extra sweetness. Gathering fresh ingredients will ensure your blondies taste their best. Make sure your butter is unsalted for better control of the overall flavor. Each ingredient plays a vital role, so don't skip any! - Preheat the oven to 350°F (175°C). - Grease a 9x13 inch baking pan and line it with parchment paper. - Melt the butter in a medium saucepan over medium heat. - Stir frequently until it turns golden brown and smells nutty. This should take about 5-7 minutes. Watch it closely to avoid burning. - In a large bowl, combine brown and granulated sugar. - Add the eggs one at a time, mixing well after each. - Stir in the vanilla extract and pumpkin puree until smooth. - In a separate bowl, whisk together flour, baking powder, baking soda, pumpkin pie spice, and salt. - Gradually add the dry mix into the wet mixture, stirring until just combined. - Pour the batter into the prepared pan and spread it evenly. - Bake for 25-30 minutes or until a toothpick comes out clean. - Cool in the pan for 10 minutes, then transfer to a wire rack. - Let it cool completely before cutting into squares and serving. To get the best texture, you must brown the butter right. Start with a medium heat. Stir it often until it turns golden brown and smells nutty. This usually takes about 5-7 minutes. Keep an eye on it. If it burns, the flavor will change. When mixing, be gentle. Overmixing makes blondies tough. Mix until the wet and dry ingredients just come together. You want some lumps to keep them soft. If you want to switch things up, you can use other fats instead of butter. Coconut oil works well for a dairy-free option. You can also try using applesauce or yogurt for a lighter treat. For sugars, you can swap brown sugar with coconut sugar. It gives a unique taste. You can also mix in different spices. Try cinnamon or nutmeg for a fun twist. If you love crunch, add nuts like walnuts or pecans. Dust the top of your blondies with powdered sugar. It adds a lovely finish and looks great. For serving, a dollop of whipped cream is a perfect touch. You can also add a scoop of vanilla ice cream for extra creaminess. These small details make your blondies feel special and festive. {{image_2}} You can make these blondies even better! Try adding nuts like walnuts or pecans for crunch. Dried fruits like cranberries or raisins add a nice chew. You can also mix in seeds like pumpkin or sunflower for extra texture. If you want to change the flavor, add a pinch of nutmeg or ginger. These spices add warmth and depth to the taste. Adding chocolate chips makes these blondies rich and sweet. They melt slightly and create gooey pockets. You can also use butterscotch chips or caramel bits for a different treat. Both options bring a new twist to the classic recipe. If you prefer no chocolate, simply leave it out. The blondies will still taste amazing with just pumpkin spice. If you follow a gluten-free diet, you can still enjoy these blondies. Use almond flour or coconut flour instead of all-purpose flour. You can also try a gluten-free baking blend. Just be sure it has xanthum gum for the right texture. This way, you can enjoy these yummy treats without worry. To keep your blondies fresh, let them cool completely. If you store them warm, moisture will build up and make them soggy. Use an airtight container for the best results. This keeps the blondies soft and moist. A covered dish also works but may not keep them as fresh. Remember, air is not your friend here! Want to save some for later? You can freeze the blondies! First, cut them into squares. Wrap each square tightly in plastic wrap. Then, place them in a freezer-safe bag or container. They will stay good for up to three months. When you want to enjoy them, take a square out and let it thaw in the fridge overnight. If you’re in a hurry, just leave it at room temperature for a couple of hours. Enjoy your treat again! You can check if the blondies are done by using a toothpick. Insert it into the center of the blondies. If it comes out clean or with a few moist crumbs, they are ready. If the toothpick has wet batter, bake them a little longer. The blondies should also look golden on top and feel set around the edges. You can use pumpkin pie filling, but it has added spices and sugar. This will change the flavor and sweetness of your blondies. If you do use it, reduce or skip the pumpkin pie spice and sugar in the recipe to balance the flavors. When stored in an airtight container, the blondies last about 3 to 4 days at room temperature. Make sure they are completely cool before sealing them. This helps keep them soft and fresh. Yes, you can double the recipe. Just use a larger baking pan, like a 12x18 inch, and adjust the baking time. Check for doneness with a toothpick, as larger batches may take longer to bake. These blondies pair great with whipped cream or vanilla ice cream. You can also dust them with powdered sugar for a pretty touch. For a fun twist, try serving them with caramel sauce or a drizzle of chocolate. This blog post covered everything you need to make delicious Brown Butter Pumpkin Spice Blondies. We've discussed the key ingredients, the step-by-step instructions, and tips for great texture. You can even explore variations and storage options. These blondies are perfect for fall and can be tailored to your taste. Experiment with flavors, textures, and pairings to make them your own. Enjoy baking and sharing these treats with friends and family!
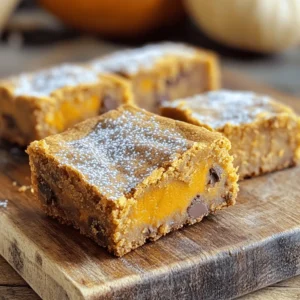
    Brown Butter Pumpkin Spice Blondies Soft Autumn Treat
  • To make this dish, you will need a few key items. Here’s what you need: - 4 tilapia fillets - 1/4 cup unsalted butter, melted - 4 cloves garlic, minced - Juice and zest of 1 lemon - 1 teaspoon dried oregano - Salt and pepper to taste - 1 cup cherry tomatoes, halved - 1 cup green beans, trimmed These ingredients create a fresh and flavorful meal that is easy to make. The seasoning is what makes this recipe shine. The garlic adds a rich taste. Lemon juice gives it a bright kick. Dried oregano brings in a nice herb flavor. Don’t forget to use salt and pepper. They help to balance all the flavors. Mix these well into the melted butter before you drizzle it. For a pop of color and taste, you can add fresh parsley on top. It makes the dish look nice and adds freshness. You could also try adding lemon slices for extra zest. If you want, a sprinkle of red pepper flakes can add a bit of heat. These are optional but can enhance your meal nicely. First, set your oven to 400°F (200°C). This heat cooks the tilapia just right. Next, gather all your ingredients. You need four tilapia fillets, melted butter, minced garlic, and lemon juice. The zest adds bright flavor. Don’t forget the dried oregano, salt, and pepper. You also need one cup of halved cherry tomatoes and one cup of green beans. Take a large sheet pan and place the tilapia fillets in the center. They should sit flat. Drizzle half of the garlic butter mixture over the fillets. Make sure they get a good coat. In another area of the pan, add the halved cherry tomatoes and green beans. Drizzle the rest of the garlic butter over these veggies. Toss them gently to coat. This step helps the flavors mix well. Now it’s time to bake! Slide the sheet pan into the preheated oven. Let it bake for 12 to 15 minutes. You can check if it's done by using a fork. If the fish flakes easily, it’s ready. The veggies should be tender too. After baking, carefully take the pan out of the oven. Let the dish cool for a minute. Finally, sprinkle fresh parsley on top for a nice finish. Enjoy your meal! To get the best texture for tilapia, choose fresh fillets. Look for bright color and a firm feel. When you bake it, the fish should flake easily. This means it is done. The key is to not overcook it. Stick to 12-15 minutes at 400°F. Use a fork to test doneness. If it flakes, it’s ready! Adding more flavors can make this dish even better. Try fresh herbs like thyme or dill. A splash of white wine adds a nice touch too. For some heat, add red pepper flakes. If you like a bit of crunch, sprinkle breadcrumbs on top before baking. This gives the fish a tasty crust! Timing and temperature are crucial for a great meal. Preheat your oven to 400°F. This helps the food cook evenly. Place the tilapia in the center of the pan. Arrange veggies around it. This way, they cook at the same time. Check the fish after 12 minutes. If it’s not flaky yet, give it a few more minutes. Always keep an eye on it! {{image_2}} You can easily swap tilapia for another fish. Cod, halibut, or sole work well. These fish have a mild taste and cook similarly. Just ensure the fillets are of equal thickness. This way, they cook evenly. Adjust the cooking time slightly if you use thicker fillets. This dish is great for using fresh veggies. You can add zucchini, bell peppers, or asparagus. Just chop them to a similar size as the green beans. Toss them with the garlic butter mix before baking. This adds color and nutrition to your meal. You can make this dish fit your diet. To make it gluten-free, just watch the butter. Most butter is gluten-free. If you want a dairy-free option, use olive oil instead of butter. The flavor will still shine through. You can even use vegan butter for a similar taste. Adjust the seasonings as needed to suit your taste. Storing your Garlic Butter Lemon Tilapia is easy. First, let it cool down to room temperature. Then, place it in an airtight container. This helps keep the flavors fresh. You can store leftovers in the fridge for up to three days. When you want to eat it again, check for any off smells or changes in texture. To enjoy the best flavor, reheat your tilapia gently. Use the oven or a skillet for even heating. If using an oven, preheat it to 350°F (175°C). Place the tilapia in a baking dish and cover it with foil. Heat for about 10 to 15 minutes, or until warm. If using a skillet, add a small amount of butter and heat over medium-low. This method helps keep the fish moist and tasty. If you want to save some for later, freezing is a great option. Wrap the tilapia tightly in plastic wrap, then seal it in a freezer bag. This helps prevent freezer burn. You can freeze it for up to two months. When ready to eat, thaw it in the fridge overnight. Avoid thawing in the microwave, as it can make the fish tough. After thawing, reheat as described above for a delicious meal. Tilapia cooks quickly in the oven. It usually takes about 12 to 15 minutes at 400°F (200°C). You know it's done when it flakes easily with a fork. Cooking time can vary based on your oven and the thickness of the fillets. Checking at the 12-minute mark is a good idea. Yes, you can use frozen tilapia fillets. Just make sure to thaw them first. You can leave them in the fridge overnight or use a quick thaw method. Place them in a sealed bag and run cold water over them for about 30 minutes. After thawing, pat them dry before cooking. This helps the garlic butter mix stick better. This dish pairs well with many sides. Here are some great options: - Rice or quinoa for a hearty base - A fresh green salad for crunch - Garlic bread for extra flavor - Roasted potatoes for a classic side You can also serve it with a light white wine. This adds a nice touch to your meal. Enjoy! Garlic Butter Lemon Tilapia is easy and tasty. We covered key ingredients, like tilapia, garlic, and lemon. I shared how to prep and bake for the best results. You learned tips for great texture and flavor. Explore variations by using other fish or adding vegetables. Proper storage can keep leftovers fresh, and reheating tips maintain taste. With this guide, you'll make a delicious meal every time. Enjoy cooking!
    Garlic Butter Lemon Tilapia Sheet Pan Delight
  • To make these Peanut Butter Chocolate Oat Bars, you need simple and healthy ingredients. Here’s what you will need: - 2 cups rolled oats - 1 cup natural peanut butter (smooth or crunchy) - 1/2 cup honey or maple syrup - 1/2 cup dark chocolate chips - 1/4 cup unsweetened cocoa powder - 1/4 teaspoon salt - 1/2 teaspoon vanilla extract - Optional: 1/4 cup chopped nuts or seeds for added crunch Each ingredient plays a key role in the final taste and texture. Rolled oats provide a hearty base. Natural peanut butter adds creaminess and richness. Honey or maple syrup gives sweetness and binds everything together. Dark chocolate chips bring a delightful burst of flavor. Unsweetened cocoa powder intensifies the chocolate taste. A little salt balances the flavors, and vanilla extract enhances the aroma. You can also add chopped nuts or seeds for extra texture and nutrition. These ingredients work together to create a tasty snack that is easy to make and satisfying to eat. How to Preheat Your Oven First, set your oven to 350°F (175°C). This step warms the oven for even baking. Lining the Baking Pan with Parchment Paper Grab an 8x8 inch baking pan. Place parchment paper inside, letting it hang over the edges. This makes it easy to lift out the bars later. Combining Oats, Cocoa Powder, and Salt In a large bowl, mix 2 cups of rolled oats, 1/4 cup of cocoa powder, and 1/4 teaspoon of salt. Stir well until combined. This mix adds flavor and texture to your bars. Steps for Melting Peanut Butter with Honey/Maple Syrup Take a microwave-safe bowl. Combine 1 cup of natural peanut butter, 1/2 cup of honey (or maple syrup), and 1/2 teaspoon of vanilla extract. Heat for 30-45 seconds until warm. Stir until smooth. This mixture binds the bars together. Pouring and Mixing the Ingredients Together Pour the peanut butter mixture over the dry oats. Use a spatula to mix them well. Make sure everything is sticky and uniform. Incorporating Chocolate Chips and Optional Add-ins Next, fold in 1/2 cup of dark chocolate chips. You can also add 1/4 cup of chopped nuts or seeds if you like extra crunch. Mix until evenly distributed. How to Properly Bake the Mixture Transfer the mixture into the prepared baking pan. Press down firmly to create an even layer. Bake for 15-20 minutes until the edges are slightly golden. Cooling Process and Cutting Instructions After baking, let the bars cool completely in the pan. Once cool, use the parchment paper to lift them out. Cut into squares or rectangles. Enjoy your tasty snack! To get a smooth texture, start with dry ingredients. Mix the oats, cocoa powder, and salt in a big bowl. Stir them well so they blend evenly. For your wet ingredients, heat the peanut butter, honey, and vanilla in the microwave. This makes it easier to mix. When you combine the two mixtures, use a spatula to fold them. This way, you ensure every oat gets coated well. To know when your bars are done, look at the edges. They should be golden brown. The center may still look soft, but that’s okay. It will firm as it cools. Set a timer for 15 minutes and check. If the edges are not golden, bake for another few minutes. Don’t overbake, or the bars will be dry. You can make these bars even better! Add-ins can boost the taste and texture. Try mixing in chopped nuts or seeds for a crunchy bite. You can also add spices like cinnamon for warmth. If you love coconut, shredded coconut works great too. Experiment and find your favorite mix! {{image_2}} You can change the sweet taste of these bars. Using agave nectar can give a nice twist. It’s sweeter than honey and has a lower glycemic index. This option is great for those who want a lighter sweetness. If you prefer sugar-free, try stevia or monk fruit sweetener. These add sweetness without extra calories. You might need to adjust the amount since they are much sweeter than honey. Feel free to swap peanut butter with other nut butters. Almond butter works well and adds a rich, nutty flavor. It’s a tasty choice for those who want to try something new. Cashew butter is another choice. It’s creamier and has a milder taste. Both nut butters give the bars a different texture and flavor. Adding spices can boost the taste of your bars. Try cinnamon for a warm, sweet touch. Just a pinch can make a big difference! Nutmeg is also a great option. It gives a cozy, fall flavor. You can experiment with both spices to find your favorite combo. These small changes can make your bars even more enjoyable! Choosing the right container is key. Use an airtight container to keep your bars fresh. Glass or plastic works well. Make sure the bars cool completely before storing them. This helps prevent moisture build-up and keeps them from getting soggy. How long do these bars last in the fridge? They can stay fresh for up to one week. After that, the taste and texture may change. To enjoy them at their best, eat them within this time. You can freeze these bars for later. To freeze, cut them into squares or rectangles. Wrap each piece in plastic wrap, then place them in a freezer-safe bag. This keeps them fresh for up to three months. To thaw, just take them out and let them sit at room temperature for about 30 minutes. Enjoy your tasty snack anytime! Yes, you can use quick oats. They will make the bars softer. Rolled oats create a chewier texture, which many prefer. If you choose quick oats, reduce the baking time slightly. To make these bars vegan, swap honey for maple syrup or agave. Use a plant-based peanut butter. All other ingredients are already vegan-friendly. You can use agave nectar or brown rice syrup. Both options work well. They maintain moisture and sweetness. Look for golden edges and a firm center. The bars should not jiggle. They will firm up as they cool. Yes, you can add protein powder. Start with 1/4 cup and mix it in with the dry ingredients. Adjust other liquids if needed for texture. You learned how to make tasty Peanut Butter Chocolate Oat Bars. We covered the right ingredients and simple steps to mix, bake, and store them. I shared tips for flavor options and even answered common questions. These bars are easy to customize and great for snacks or desserts. Try different add-ins and enjoy them fresh or stored. Now, it's time to make your own bars and share them with friends! Enjoy your baking adventure!
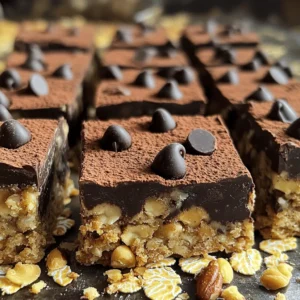
    Peanut Butter Chocolate Oat Bars Simple and Tasty Snack
  • - 8 oz. elbow macaroni - 1 lb. ground beef or turkey - 1 packet taco seasoning - 1 can (15 oz.) diced tomatoes with green chilies - 2 cups beef broth - 1 cup corn (frozen or canned, drained) - 1 cup shredded cheddar cheese - 1 cup black beans (canned, drained and rinsed) - 1/2 cup diced bell peppers (any color) - 1/2 cup diced onion - 2 cloves garlic, minced - 2 tablespoons olive oil - Salt and pepper to taste You need these core ingredients to create a tasty Cheesy Taco Pasta Skillet. The elbow macaroni gives the dish a nice bite. Ground beef or turkey provides protein and flavor. Taco seasoning adds that classic taco taste. Diced tomatoes with green chilies give a nice kick. Beef broth keeps everything moist and rich. Corn adds sweetness, while black beans boost fiber. - Fresh cilantro or parsley For a fresh touch, add cilantro or parsley on top. These herbs brighten the dish and add color. You can also try sour cream or sliced avocado for extra creaminess. This dish serves four and packs a punch. Each serving has about: - Calories: 550 - Protein: 30g - Carbohydrates: 60g - Fat: 20g This meal is filling and has good nutrition. It combines protein, carbs, and healthy fats. Perfect for a quick weeknight dinner. You can easily adjust the ingredients to fit your dietary needs. To start, gather all your ingredients. This makes cooking smooth and quick. - 8 oz. elbow macaroni - 1 lb. ground beef or turkey - 1 packet taco seasoning - 1 can (15 oz.) diced tomatoes with green chilies - 2 cups beef broth - 1 cup corn (frozen or canned, drained) - 1 cup shredded cheddar cheese - 1 cup black beans (canned, drained and rinsed) - 1/2 cup diced bell peppers (any color) - 1/2 cup diced onion - 2 cloves garlic, minced - 2 tablespoons olive oil - Salt and pepper to taste - Fresh cilantro or parsley for garnish (optional) Chop the onion and bell peppers. Mince the garlic. This helps build flavor. Heat olive oil in a large skillet over medium heat. Add the diced onion and bell peppers. Cook until they soften, about 3 to 4 minutes. Next, add the minced garlic. Cook for one minute to release its aroma. Then, add the ground beef or turkey. Break it up with a spatula and cook until it browns, about 5 to 7 minutes. If there's extra fat, drain it. Sprinkle the taco seasoning over the meat. Stir well to coat the meat evenly. Now, pour in the diced tomatoes, corn, and beef broth. Bring this mixture to a boil. Once boiling, stir in the elbow macaroni. Lower the heat and cover the skillet. Let it simmer for 10 to 12 minutes. Stir occasionally until the pasta is tender. When the pasta is cooked, stir in the black beans and shredded cheddar cheese. Mix until the cheese melts and becomes gooey. Taste the dish. Add salt and pepper if needed to enhance the flavor. For a fresh touch, garnish with chopped cilantro or parsley before serving. This adds a nice color and brightness. Feel free to adjust the taco seasoning to match your taste. You can also add more cheese for extra creaminess. Enjoy your Cheesy Taco Pasta Skillet! When making Cheesy Taco Pasta Skillet, avoid these common pitfalls: - Overcooking the pasta: Check the pasta often. You want it tender, not mushy. - Skipping the seasoning: Always add taco seasoning to the meat. This adds great flavor. - Not draining excess fat: If using beef, drain fat after cooking. Too much fat can make it greasy. - Rushing the garlic: Cook garlic just until fragrant. Burnt garlic tastes bitter and ruins the dish. To make your dish even better, try these tips: - Use fresh herbs: Adding cilantro or parsley enhances the flavor. Fresh herbs make a big difference. - Experiment with cheese: Try mixing cheddar with pepper jack for a spicy kick. - Add more veggies: Bell peppers, corn, or even spinach add color and nutrients. - Top with sour cream: A dollop of sour cream adds creaminess and balances the spices. Having the right tools makes cooking easier. Here are my top picks: - Large skillet: A deep skillet holds all the ingredients well. - Spatula: A sturdy spatula helps break up the meat evenly. - Measuring cups: Use them for accurate ingredient amounts. - Wooden spoon: A wooden spoon stirs without scratching your skillet. {{image_2}} You can easily make this dish vegetarian. Just swap out the meat for plant-based ground meat or lentils. Use vegetable broth instead of beef broth for flavor. Replace cheese with vegan cheese or skip it altogether. Add more veggies like zucchini or mushrooms for extra nutrition. If you need gluten-free options, choose gluten-free pasta. You can also use quinoa or rice for a new twist. For low-sodium needs, make your own taco seasoning. This way, you control the salt. Use fresh tomatoes instead of canned for a healthier choice. Want some heat? Add sliced jalapeños or a dash of hot sauce to the skillet. You can also use spicy taco seasoning for an extra kick. For a smoky flavor, try adding chipotle peppers in adobo sauce. This makes your dish bold and exciting! After your meal, let the Cheesy Taco Pasta Skillet cool down. Then, place it in an airtight container. This keeps the flavors fresh. Store it in the fridge for up to three days. If you have a lot, divide it into smaller portions. This helps when you want to reheat just enough for one meal. To reheat, you can use the microwave or the stovetop. If you use the microwave, put the pasta in a bowl and cover it. Heat it for about 1-2 minutes. Stir halfway through. On the stovetop, add a splash of beef broth to a skillet. Heat over low heat, stirring often, for about 5 minutes. This keeps the pasta moist and tasty. If you want to save some for later, freezing is a great option. Let the dish cool completely. Then, transfer it to a freezer-safe container. Make sure to leave some space for expansion. Label the container with the date. You can freeze it for up to three months. When you're ready to eat, thaw it in the fridge overnight before reheating. Yes, you can use other pasta shapes. Penne or rotini work well too. Just adjust the cooking time as needed. Make sure the pasta is small enough to mix well with the meat and sauce. Leftovers stay fresh for up to three days in the fridge. Store them in an airtight container. If you see any signs of spoilage, it’s best to toss it out. Yes, you can prepare it ahead. Cook the pasta and meat mixture, then cool it. Store it in the fridge for up to two days. When ready to serve, reheat on the stove or in the microwave. This dish pairs well with a fresh salad or tortilla chips. You can also add a dollop of sour cream or guacamole for extra flavor. Enjoying it with a side of fresh salsa is a great choice too! In this post, we covered the key ingredients and step-by-step cooking process for the Cheesy Taco Pasta Skillet. I shared tips for avoiding common mistakes and ways to personalize the dish. You learned how to store leftovers and the best ways to reheat them. This dish is not just easy to make but also fun to customize. Whether you prefer vegetarian options or want to spice it up, you can enjoy this meal your way. Try it out and make it your own!
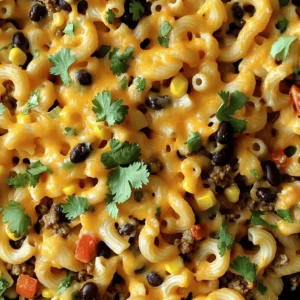
    Cheesy Taco Pasta Skillet Quick and Flavorful Meal
  • - 2 cups all-purpose flour - 1 cup granulated sugar - 1 tablespoon baking powder - 1/2 teaspoon salt - 1 teaspoon ground cinnamon - 1/2 teaspoon nutmeg - 1/2 cup unsalted butter, melted - 1 cup milk - 2 large eggs - 1 teaspoon vanilla extract - 2 cups diced apples (peeled, such as Granny Smith or Honeycrisp) - 1/4 cup maple syrup (for glaze) - 1/2 cup powdered sugar (for glaze) These ingredients create a muffin that is soft and flavorful. The apples add a nice texture, while the spices give warmth. Use fresh apples for the best taste. The melted butter keeps the muffins moist. - Chopped walnuts or pecans - Extra maple syrup for drizzling If you want a little crunch, add some nuts on top. They add flavor and texture. You can also drizzle more syrup if you love that sweet taste. Each muffin has about 200 calories. They have 4 grams of protein and 8 grams of fat. The apples add vitamins and fiber. This treat is not just tasty, but also offers some nutrients. Enjoy these muffins as a fun snack or breakfast! Start by preheating your oven to 375°F (190°C). This helps the muffins rise well. Next, grab a large mixing bowl. Add 2 cups of all-purpose flour, 1 cup of granulated sugar, 1 tablespoon of baking powder, and 1/2 teaspoon of salt. Now, add in 1 teaspoon of ground cinnamon and 1/2 teaspoon of nutmeg. Whisk these dry ingredients well. Make sure there are no lumps. This mix creates a great base for your muffins. In another bowl, melt 1/2 cup of unsalted butter. Then, mix in 1 cup of milk, 2 large eggs, and 1 teaspoon of vanilla extract. Stir these wet ingredients until they blend smoothly. This step is key for a rich flavor. The melted butter adds moisture, making your muffins soft and tasty. Pour the wet mix into the bowl of dry ingredients. Stir carefully until just combined. It’s okay if some flour shows. Overmixing can make muffins tough. Now, gently fold in 2 cups of diced apples. Use apples like Granny Smith or Honeycrisp for sweetness. Once mixed, divide the batter evenly into muffin cups. Fill each cup about 2/3 full. This allows space for rising. Place the muffin tin in your preheated oven. Bake for 18 to 22 minutes. Check with a toothpick. If it comes out clean, they’re done. Let the muffins cool in the pan for five minutes. Then, move them to a wire rack. While they cool, prepare the glaze. In a small bowl, whisk together 1/4 cup of maple syrup and 1/2 cup of powdered sugar. Adjust if needed. Drizzle the glaze over cooled muffins. Top with nuts if you like. Enjoy your fresh and flavorful muffins! To keep muffins light, mix carefully. After you add wet ingredients to dry, stir just until you see no dry flour. Lumps are okay! Overmixing makes muffins tough. It’s better to be gentle. This helps the muffins rise and stay soft. Choose apples that add flavor and moisture. I love using Granny Smith or Honeycrisp apples. They balance sweetness and tartness. Other good options include Fuji or Gala. They also hold their shape well during baking. For a great glaze, mix maple syrup and powdered sugar. Start with 1/4 cup of syrup and 1/2 cup of sugar. Whisk until smooth. If it’s too thick, add more syrup. If it’s too runny, add more sugar. You want it thick but pourable. This glaze adds a sweet touch to your muffins. {{image_2}} You can make your muffins special by adding fruits or nuts. For a fruity twist, try mixing in 1 cup of blueberries, cranberries, or even diced pears. These fruits add color and enhance the flavor. If you enjoy nuts, consider adding 1/2 cup of chopped walnuts or pecans. They bring a nice crunch and a rich taste. Just fold these extras gently into the batter before baking. If you need gluten-free muffins, swap out regular flour for gluten-free flour. Look for a blend made for baking. Make sure it has a good mix of flours and starches. You might need to add a bit more liquid. Start with an extra tablespoon of milk. This small change helps keep the muffins moist and fluffy. For a vegan version, replace the eggs with flax eggs. Mix one tablespoon of ground flaxseed with three tablespoons of water. Let it sit for a few minutes until it thickens. Use almond milk or oat milk instead of regular milk. Instead of butter, use coconut oil or a plant-based butter. These swaps keep your muffins delicious while making them vegan-friendly. To keep your maple glazed apple muffins fresh, store them in an airtight container. Place the muffins in a single layer, if possible. You can also use plastic wrap for extra protection. Keep them at room temperature for up to three days. If you want them to last longer, refrigerate them. This will keep them fresh for up to a week. Freezing is a great option for these muffins. To freeze, let the muffins cool completely. Wrap each muffin in plastic wrap or foil. Then, place them in a freezer-safe bag or container. Label the bag with the date. You can freeze them for up to three months. When you’re ready to enjoy one, just thaw it at room temperature. Reheating is easy! If you want a warm muffin, preheat your oven to 350°F (175°C). Place the muffin on a baking sheet and heat for about 5-10 minutes. You can also use a microwave. Heat the muffin for about 10-15 seconds. This helps bring back that fresh taste and soft texture. Enjoy your muffins warm! Yes, you can swap some ingredients. For flour, try whole wheat flour for a healthier option. You can use brown sugar instead of granulated sugar for extra flavor. If you don’t have apples, pears work well too. You can also replace eggs with applesauce or mashed bananas for a vegan option. Just remember, each swap may change the taste slightly. These muffins stay fresh for about three days at room temperature. Place them in an airtight container to keep them moist. If you want to store them longer, put them in the fridge, where they can last up to a week. For the best taste, warm them slightly before serving. Serve the muffins warm or at room temperature. Drizzle the maple glaze on top right before serving. You can add sliced apples or extra nuts for a nice touch. Pair them with a cup of coffee or tea for a delicious treat. These muffins also make a great breakfast or snack for any time of day. You learned how to make maple glazed apple muffins, from key ingredients to baking. I shared tips to avoid overmixing and to pick the best apples. You can also explore fun variations like gluten-free or vegan options. Proper storage helps keep your muffins fresh for longer. These muffins are tasty and flexible for many diets. Enjoy sharing them and let your creativity shine in the kitchen!
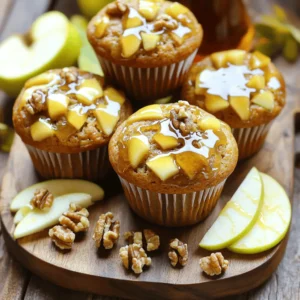
    Maple Glazed Apple Muffins Fresh and Flavorful Treat
  • - 2 cups pecan halves - 1 cup brown sugar - 1/4 cup unsalted butter, melted - 2 teaspoons vanilla extract - 1 teaspoon ground cinnamon - 1/4 teaspoon cayenne pepper (adjust to taste) - 1/4 teaspoon salt - 1 egg white, lightly beaten To make slow cooker candied pecans, start with the main ingredients. You need fresh pecan halves, brown sugar, melted unsalted butter, and vanilla extract. Each of these adds sweetness and depth to the dish. Next, add flavoring ingredients. Ground cinnamon gives warmth, while cayenne pepper adds a kick. Salt balances the sweetness. Finally, the egg white helps the sugar mix stick to the pecans. This blend creates a sweet and spicy treat that is hard to resist. Make sure to have all your ingredients ready. This way, you can easily move from mixing to cooking without any delays. First, let's mix our sugar and butter blend. In a mixing bowl, add: - 1 cup brown sugar - 1/4 cup unsalted butter, melted - 2 teaspoons vanilla extract - 1 teaspoon ground cinnamon - 1/4 teaspoon cayenne pepper - 1/4 teaspoon salt Stir these ingredients until smooth. You want a nice, thick mixture that coats well. Next, whisk the egg white in a separate bowl. Make it light and frothy. This step helps the pecans stick to the sweet mix. Now, let’s get our pecans ready. Take 2 cups of pecan halves and toss them in the bowl with the beaten egg white. Make sure they are well coated. Pour the sugar mix over the pecans. Stir gently to coat each pecan evenly. Transfer the coated pecans to your slow cooker. Spread them out evenly. Set your slow cooker to low heat. Cook for about 2 hours. Stir every 30 minutes to keep them from sticking. Once cooking is done, turn off the slow cooker. Spread the pecans onto a lined baking sheet. Let them cool completely. As they cool, they will become crisp. If you find any clumps, break them apart once cooled. For a nice touch, serve them in a decorative bowl. You can sprinkle a pinch of sea salt on top for extra flavor. Store any leftovers in an airtight container. To make the best candy coating, focus on the sugar mixture. Mix the brown sugar, melted butter, vanilla, cinnamon, cayenne, and salt until smooth. This helps the coating stick well. Use a bowl that allows you to stir easily. A whisk can help blend the ingredients thoroughly. Stirring during cooking is key. Set the slow cooker to low heat and cook for two hours. Stir every 30 minutes to keep the pecans from sticking. This ensures every pecan gets coated evenly. If you skip stirring, some pecans may burn. Want to boost the flavor? Add spices like nutmeg or ginger. A pinch of nutmeg can add warmth. You can also try adding a dash of allspice for a unique taste. Customizing the sweetness is simple. If you like it sweeter, add more brown sugar. You can also mix in some honey or maple syrup. Adjust to your taste. Remember, you can always add but not take away! {{image_2}} You can easily swap pecans for other nuts. Almonds, walnuts, and cashews all work well. Each nut adds a unique crunch and taste. If you want a mix, combine different nuts for a fun treat. This nut blend brings a variety of textures and flavors to your snack. Do you like sweet or spicy? You can adjust the flavor to suit your taste. Add more cayenne pepper for heat. If you prefer a sweeter snack, increase the brown sugar. You can also enhance your pecans with chocolate or caramel. Drizzle melted chocolate over cooled pecans or mix caramel bits in before cooking. Both options give a rich and delightful twist to this snack. To keep your slow cooker candied pecans fresh, use an airtight container. This helps keep out air and moisture. Store them in a cool, dry place away from sunlight. If stored correctly, these tasty pecans can last for up to two weeks. If you want to re-crisp your pecans, preheat your oven to 350°F. Spread the pecans on a baking sheet and heat them for about 5-10 minutes. Keep an eye on them to avoid burning. This method helps restore their crunch. To maintain freshness, seal the container tightly after each use. This way, your candied pecans stay delicious and ready for snacking! Can I use different nuts for this recipe? Yes, you can use other nuts. Almonds, walnuts, or cashews work well. Each nut brings a unique taste. Just follow the same steps. What is the ideal cooking time for the best texture? The best cooking time is about 2 hours on low heat. Stir every 30 minutes. This helps the nuts cook evenly. They should be crunchy when done. How can I adjust the recipe for dietary restrictions? To make it dairy-free, swap the butter for coconut oil. You can use maple syrup instead of brown sugar for a vegan option. Always check for nut allergies before serving. This blog covers how to make slow cooker candied pecans. We explored the key ingredients, easy steps, and tips for a perfect candy coating. You can customize flavors and even substitute nuts. Proper storage keeps them fresh for longer. In conclusion, making these pecans is simple and fun. You can enjoy them as snacks or gifts. Happy cooking!
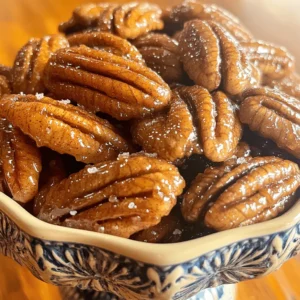
    Slow Cooker Candied Pecans Tasty Snack Recipe
  • - 1 lb boneless, skinless chicken breast, cut into bite-sized pieces - 1/3 cup honey - 2 tablespoons Sriracha sauce (adjust for spice preference) - 1 tablespoon soy sauce - 1 teaspoon garlic powder - 1 teaspoon ground ginger - 1/2 teaspoon salt - 1/2 teaspoon black pepper - 1 tablespoon cornstarch - Fresh cilantro, chopped (for garnish) - Sesame seeds (for garnish) The main ingredients create a sweet and spicy mix. The chicken gives a tender base. Honey adds a rich sweetness. Sriracha brings heat, and soy sauce adds depth. Together, they create a marinade that coats the chicken perfectly. The seasonings enhance flavor. Garlic powder and ground ginger add warmth and aroma. Salt and black pepper balance the dish. Cornstarch helps the chicken get crispy in the air fryer. It makes each bite exciting. For garnishes, fresh cilantro adds color and freshness. Sesame seeds give a nice crunch. They make the dish look beautiful and taste even better. Each ingredient plays an important role in making these chicken bites juicy and flavorful. To make the marinade, I start by mixing honey, Sriracha sauce, soy sauce, garlic powder, ground ginger, salt, and black pepper in a bowl. This mix gives the chicken a sweet and spicy kick. I stir it well to combine all the flavors. After that, I add chicken pieces to the bowl. I ensure each piece is coated in the marinade. I cover the bowl with plastic wrap. I let it sit in the fridge for at least 30 minutes. For more flavor, I suggest marinating for up to 2 hours. Once the chicken is marinated, I pull it from the fridge. Next, I sprinkle cornstarch over the chicken pieces. I gently toss the chicken to coat it evenly. This step is key for a crispy texture. After that, I preheat the air fryer to 400°F (200°C) for about 5 minutes. This ensures the chicken cooks evenly. I place the marinated chicken in a single layer in the air fryer basket. If my air fryer is small, I might have to cook the chicken in batches. I cook the chicken bites for 10 to 12 minutes. I shake the basket halfway through cooking for even results. The chicken should turn golden and reach an internal temperature of 165°F (75°C). Once done, I carefully take the chicken bites out and transfer them to a serving platter. For an extra touch, I drizzle any leftover honey Sriracha sauce on top and garnish with chopped cilantro and sesame seeds. To get the best texture for your chicken, marinating is key. Let the chicken soak in the marinade for at least 30 minutes. For more flavor, go for 2 hours if you can. This helps the chicken absorb the sweet and spicy notes. Using cornstarch is just as important. It gives the chicken a nice crispy layer when air frying. Sprinkle it over the marinated chicken and toss it well. This simple step makes all the difference. Want more heat? You can easily adjust the Sriracha amount. Start with 2 tablespoons for a good kick. If you like it milder, use just 1 tablespoon. You can also add other spices, like paprika or cayenne, for extra flavor. This way, you can customize your chicken bites to match your taste. Pair these chicken bites with rice or a fresh salad. They also go well with crispy veggies. For a nice touch, serve the chicken on a platter. Drizzle extra honey Sriracha sauce on top. Don't forget to sprinkle some fresh cilantro and sesame seeds for color. This makes the dish pop and look more inviting. {{image_2}} You can switch up the flavor by using different hot sauces. Try a smoky chipotle sauce for a deeper taste. You can also use a sweet and sour sauce for a tangy twist. Barbecue sauce adds a nice sweetness too. Mix and match to find what you love best! Chicken thighs work great if you want a juicier bite. They take longer to cook, about 15 minutes, so keep an eye on them. You can also use tofu for a tasty vegan option. Just cut it into cubes and marinate as you would the chicken. It cooks faster, around 10 minutes. If you're gluten-free, choose a gluten-free soy sauce. Coconut aminos is a great substitute too. You can also use honey substitutes like agave syrup for a lower-calorie option. This keeps the dish sweet while cutting calories. Store your Air Fryer Honey Sriracha Chicken Bites in the fridge. Let them cool down first. Place the bites in an airtight container. This keeps them fresh and tasty. You can store them for up to four days. To freeze the chicken bites, let them cool completely. Arrange them in a single layer on a baking sheet. Freeze until solid, then transfer to a freezer bag. Squeeze out the air to prevent freezer burn. For best taste, use them within three months. To reheat, place them in the air fryer at 350°F (175°C) for about 8-10 minutes. They should be hot and crispy again. In the fridge, chicken bites last about four days. Look for any off smells or color changes. If they smell bad or look slimy, toss them out. One serving of Air Fryer Honey Sriracha Chicken Bites has about 300 calories. This includes the chicken and the tasty sauce. Nutritional breakdown: - Protein: 25 grams - Carbohydrates: 30 grams - Fat: 10 grams These bites give you a good mix of protein and flavor without too many calories. This makes them great for a snack or a meal. Yes, you can use frozen chicken for this recipe. Just remember to thaw it first. Thawing helps the chicken absorb the marinade better. Tips for using frozen chicken: - Thaw the chicken in the fridge overnight. - If you’re in a hurry, you can use the microwave to thaw it. Just make sure to cook it right after. - After thawing, follow the same steps for marinating and cooking. Using frozen chicken saves time and is often more convenient. These chicken bites pair well with several side dishes. You can create a complete meal with ease. Recommended side dishes and drinks: - Steamed rice or fried rice - Fresh salad with a light dressing - Crispy vegetables like broccoli or carrots - Cold drinks like iced tea or lemonade These options balance the spicy and sweet flavors of the chicken bites, making your meal even better. This post covered how to make Air Fryer Honey Sriracha Chicken Bites. We went over main ingredients like chicken, honey, and Sriracha. Then, I shared tips on marinating and cooking to get the best texture. You also learned variations, storage tips, and serving ideas. In short, these bites are tasty and easy to make. Enjoy customizing them to fit your taste!
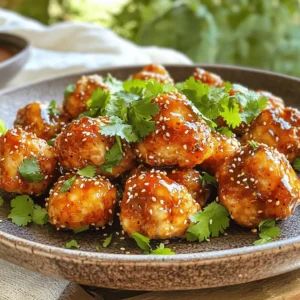
    Air Fryer Honey Sriracha Chicken Bites Juicy and Flavorful
  • - 4 salmon fillets (skinless) - 1/4 cup honey - 4 cloves garlic, minced - 2 tablespoons soy sauce (low sodium) - 1 tablespoon rice vinegar - 1 tablespoon olive oil - Salt and pepper to taste - 1/2 teaspoon red pepper flakes (optional for spice) - Fresh parsley, chopped (for garnish) - Lemon wedges (for serving) To make honey garlic salmon, gather your ingredients. The key player is the salmon. I use skinless fillets for a tender bite. Honey adds sweetness, while garlic gives it a nice kick. Soy sauce adds depth, and rice vinegar gives a slight tang. Olive oil keeps the salmon moist while cooking. Salt and pepper enhance all the flavors. If you like spice, add red pepper flakes for a little heat. Chop fresh parsley for garnish to brighten your dish. Serve with lemon wedges on the side for a zesty touch. This mix of ingredients creates a dish that is both easy and flavorful. First, grab a small bowl. Mix together the following: - 1/4 cup honey - 4 cloves garlic, minced - 2 tablespoons soy sauce - 1 tablespoon rice vinegar - 1/2 teaspoon red pepper flakes (optional) Stir well until all the ingredients blend together. Set this marinade aside for later. Take your 4 salmon fillets and pat them dry with paper towels. This step helps the skin crisp up. Next, season both sides with salt and pepper. This adds flavor. Heat 1 tablespoon of olive oil in a large skillet over medium heat. Once the oil is hot, carefully place the salmon fillets in the skillet. Cook them for about 4-5 minutes until they turn golden brown. Now, flip the fillets gently. Pour the honey garlic mixture over the salmon. Let the sauce sizzle and cook for another 3-5 minutes. Spoon the sauce over the fillets while they cook. You’ll know they’re done when the salmon flakes easily with a fork. Remove the salmon from the skillet and let it rest for a minute. Pour any leftover sauce from the skillet over the fillets. This gives them a nice glaze. Garnish with fresh chopped parsley and serve with lemon wedges on the side for a zesty kick. - The best cooking temperature for salmon is medium heat. This helps cook it evenly. - To avoid overcooking salmon, use a timer. Cook it for about 4-5 minutes per side. The salmon should flake easily when done. - Serve the salmon on a bed of steamed rice for a nice look. You can also pair it with sautéed vegetables. - For garnishing, sprinkle fresh parsley on top. Add lemon wedges on the side for a zesty touch. - To elevate the dish, try adding dill or thyme. These herbs pair well with salmon. - Balance sweetness and saltiness by using low-sodium soy sauce. This keeps the flavors bright without overpowering the dish. {{image_2}} You can switch salmon for chicken or shrimp. For chicken, use skinless breasts. Cut them into thin pieces to cook faster. Marinate the chicken like you do with salmon. Cook until golden and safe to eat. For shrimp, use large, peeled shrimp. Add them to the pan after the sauce. Cook for 3-4 minutes until they turn pink. Both options give you a tasty twist! Try adding seasonal veggies or fruits. In spring, use asparagus or snap peas. Toss them in the pan with salmon. In summer, add zucchini or bell peppers for a fresh touch. Fall brings sweet potatoes or Brussels sprouts, while winter calls for hearty greens like kale. You can even add sliced apples or pears for sweetness. These changes make your dish colorful and fun! You can easily change the marinade for special diets. For a gluten-free version, use tamari instead of soy sauce. If you want low-carb, skip the honey or use a sugar substitute. You can add more garlic for a bold flavor or some ginger for a spicy kick. Adjusting the marinade means everyone can enjoy this dish! To store leftover salmon in the fridge, let it cool first. Place the fillets in an airtight container. This keeps them fresh for up to three days. If you want to keep the glaze, pour some over the salmon before sealing. This helps maintain flavor. To freeze cooked salmon with honey garlic glaze, wrap each fillet in plastic wrap. Then, place them in a freezer bag. Remove as much air as possible to avoid freezer burn. Frozen salmon can last for up to three months. When ready to eat, thaw it in the fridge overnight. For reheating, the oven works best to keep the salmon moist. Preheat your oven to 350°F (175°C). Place the salmon on a baking sheet and cover it with foil. Heat for about 10-15 minutes. If you're in a hurry, use the microwave. Heat in short bursts, checking often to avoid overcooking. You can pair Honey Garlic Salmon with many side dishes. Here are some great options: - Steamed rice - Sautéed vegetables - Quinoa salad - Mashed potatoes - Roasted asparagus These sides bring out the sweet and savory flavors of the salmon. Fresh herbs like parsley also add color and taste. Yes, you can marinate salmon ahead of time. Marinating for at least 30 minutes works well. For deeper flavor, try marinating overnight. Keep the salmon in the fridge during this time. Just remember to pat it dry before cooking. This keeps the skin nice and crispy if you use skin-on fillets. To check if salmon is cooked, look for these signs: - The color changes from bright pink to opaque. - It flakes easily with a fork. - The internal temperature reaches 145°F (63°C). Cooking time usually takes about 7-10 minutes in total. Keep an eye on it to avoid overcooking. Yes, this recipe is great for meal prep! Here are some tips: - Cook multiple salmon fillets at once. - Store leftovers in airtight containers in the fridge. - Pair with your favorite sides for easy meals. You can enjoy this dish all week without losing flavor. This blog post showed how to make honey garlic salmon. We explored the simple ingredients needed. I shared step-by-step cooking instructions and tips for perfecting your dish. You learned about variations and storage methods to keep leftovers fresh. Experiment with sides and flavors to make it your own. Remember, cooking can be fun and creative! Enjoy your homemade honey garlic salmon.
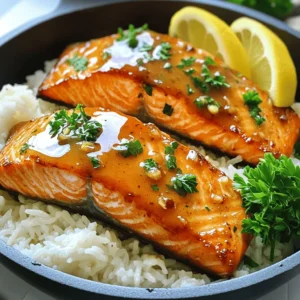
    Honey Garlic Salmon Skillet Easy and Flavorful Dish

Posts pagination

← Newer 1 2 3 4 5 … 66 Older →

Footer

↑ back to top

More information

  • Drinks
  • Appetizer
  • Dinner
  • Desserts
  • About
  • Contact
  • Privacy Policy

Our Policies

  • Privacy Policy
  • GDPR Policy
  • Terms Of Use
  • Copyright Policy
  • Cookie Policy
  • Disclaimer

Copyright © 2025 cheftaling