Introduction
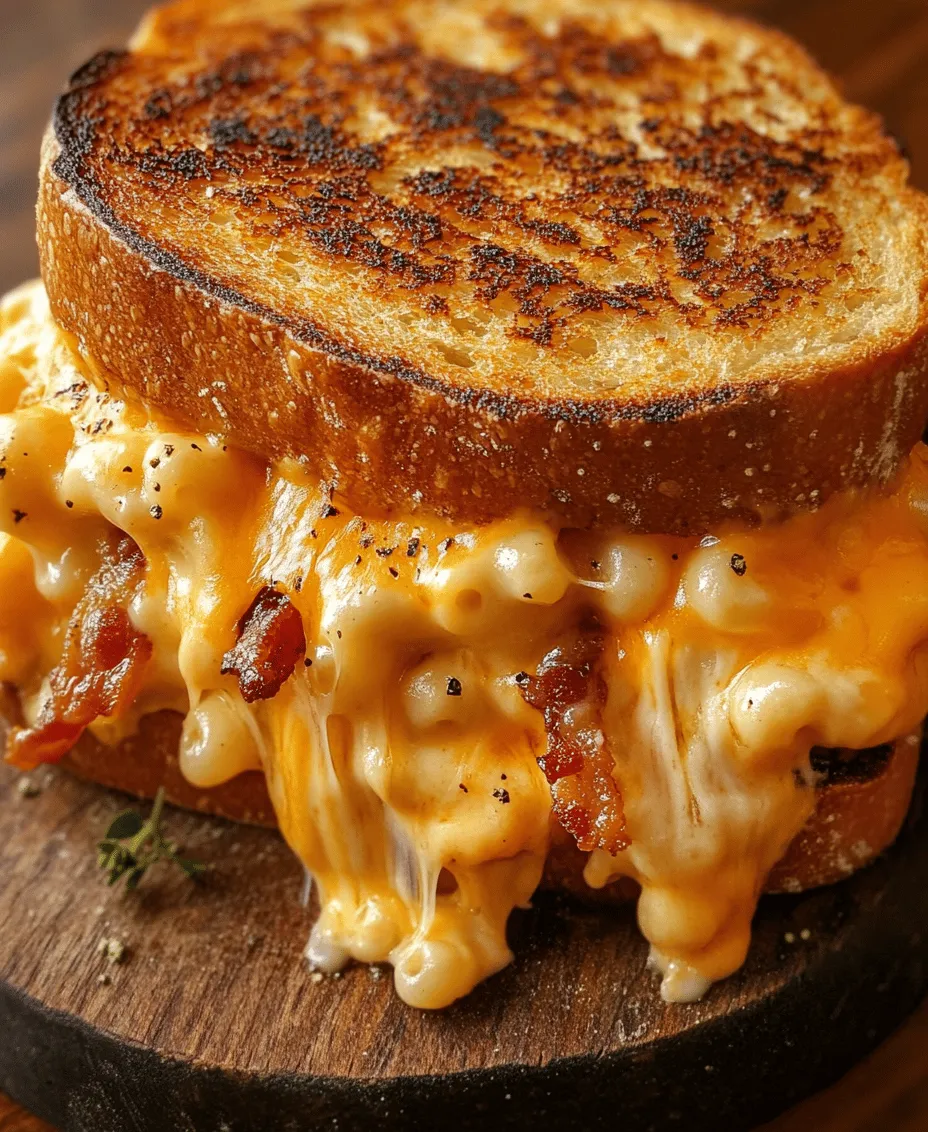
Comfort food has a unique way of warming the heart and soul, transcending generations and cultures with its rich, satisfying flavors. Whether it’s the nostalgic aroma of a homemade stew or the creamy, cheesy goodness of a well-made mac and cheese, comfort food brings a sense of familiarity and joy. Among the myriad of comfort dishes, the Mac ‘n’ Cheese Bacon Melt stands out as a delectable fusion that combines two beloved favorites: classic macaroni and cheese and crispy bacon.
This recipe is not just about indulging in a cheesy delight; it also embraces the principle of creativity in the kitchen. By using leftover ingredients creatively, you can minimize food waste while crafting a dish that’s both satisfying and resourceful. The Mac ‘n’ Cheese Bacon Melt is perfect for those who want to take their comfort food experience to the next level, offering a crunchy exterior with a gooey, flavorful filling that makes every bite a celebration of taste.
Understanding the Ingredients
To create the ultimate Mac ‘n’ Cheese Bacon Melt, it’s essential to understand the role of each ingredient involved in this indulgent dish. The hallmark of this recipe is undoubtedly the mac and cheese itself, which serves as the creamy base. The macaroni pasta provides a hearty foundation, while the cheese sauce, typically made from a blend of sharp cheddar and creamy mozzarella, delivers richness and depth of flavor.
Bacon, the other star of this dish, adds a savory, smoky crunch that complements the creamy pasta beautifully. The contrast of textures between the soft macaroni and the crispy bacon creates a delightful eating experience.
Bread Choices
The choice of bread for your melt is equally important and can greatly affect the overall flavor and texture. Here are some popular options:
– Sourdough: This option is known for its tangy flavor and sturdy crust, which can hold up well against the creamy filling.
– White Bread: A classic choice, white bread has a soft, fluffy texture that offers a comforting bite.
– Whole Grain: For a healthier twist, whole grain bread adds fiber and a nutty flavor that can enhance the dish.
Nutritional Benefits
While mac and cheese and bacon may not be the first foods that come to mind when considering nutrition, there are benefits to be found. Macaroni and cheese is rich in carbohydrates, providing energy, while cheese offers a good source of calcium and protein. Bacon, though high in fat, also packs a flavor punch and contains essential nutrients such as B vitamins.
For those looking to elevate the dish further, consider incorporating optional ingredients like diced tomatoes for a burst of freshness or jalapeños for a spicy kick. Both additions contribute additional nutrients and enhance the overall flavor profile of the sandwich.
The Art of Preparing the Filling
Now that we’ve explored the ingredients, it’s time to focus on preparing the filling that will bring our Mac ‘n’ Cheese Bacon Melt to life. The process begins with cooking the macaroni until it’s al dente, as this will ensure the pasta maintains its shape and texture when combined with the cheese sauce.
Step-by-Step Guide to Preparing the Mac ‘n’ Cheese and Bacon Mixture
1. Cook the Pasta: In a large pot of boiling salted water, add your macaroni and cook according to the package instructions, usually about 7-8 minutes. Drain and set aside.
2. Make the Cheese Sauce: In a separate saucepan, melt butter over medium heat. Whisk in flour to create a roux, cooking for about 1-2 minutes until it turns a light golden color. Gradually add milk, whisking constantly to prevent lumps. Continue cooking until the sauce thickens. Stir in shredded cheese until melted and smooth.
3. Combine Ingredients: In a mixing bowl, combine the cooked macaroni with the cheese sauce and chopped bacon. Mix until the pasta is thoroughly coated.
4. Seasoning: This step is crucial! Taste your mixture and add salt, pepper, and any additional spices like garlic powder or paprika to enhance the flavor. The right balance of seasoning can elevate the dish from ordinary to extraordinary.
5. Achieve the Perfect Consistency: The filling should be creamy but not overly runny. If it appears too thick, add a splash of milk to loosen it up. Conversely, if it’s too watery, you may need to cook it a little longer to evaporate some of the moisture.
By following these steps, you’ll create a mac and cheese filling that’s not only flavorful but also has the perfect texture for our melt.
Assembling the Perfect Sandwich
Once your filling is prepared, it’s time to assemble the Mac ‘n’ Cheese Bacon Melt. This process is all about layering ingredients effectively to create a sandwich that is both delicious and visually appealing.
Techniques for Layering Ingredients
1. Choose Your Bread: Start with your chosen bread; if you’re using sourdough or whole grain, slice it thickly to provide a sturdy base for the filling.
2. Spread the Filling: Generously scoop the mac and cheese bacon filling onto one slice of bread. Use a spatula to spread it evenly across the surface, ensuring a good amount in every bite.
3. Add More Cheese: For an extra cheesy experience, sprinkle additional shredded cheese on top of the filling before placing the second slice of bread on top. This will create a gooey layer of melted cheese when grilled.
4. Press Down: Gently press down on the sandwich to help it hold together during grilling.
The Significance of Cheese Types
The type of cheese you choose can significantly impact the flavor and texture of your Mac ‘n’ Cheese Bacon Melt. While cheddar and mozzarella are traditional choices, consider experimenting with other cheeses such as fontina, gouda, or pepper jack for added depth and character. Each cheese brings its own unique qualities, making it possible to customize your melt according to your preferences.
Visual Presentation Tips
While taste is paramount, presentation matters too. To create an appetizing sandwich, consider the following tips:
– Cut the Sandwich: Slice the sandwich diagonally for an attractive presentation. This also makes it easier to eat.
– Garnish: Add a sprinkle of fresh herbs like parsley or chives on top for a pop of color.
– Serve with Sides: Consider serving your Mac ‘n’ Cheese Bacon Melt with a side salad or crispy potato chips for a complete meal.
Grilling Your Mac ‘n’ Cheese Bacon Melt
Once assembled, the final step is grilling your sandwich to golden perfection. Preheat your skillet or griddle over medium heat and add a pat of butter or a drizzle of olive oil to prevent sticking. The key is to grill the sandwich slowly, allowing the cheese to melt while the bread develops a crispy, golden crust.
By following these detailed steps, you’ll create a Mac ‘n’ Cheese Bacon Melt that is not only a feast for the senses but also a celebration of comfort food at its finest. The rich flavors, combined with the satisfying textures, will leave you craving more.
Choosing the Right Cooking Equipment
When it comes to preparing the delicious Mac ‘n’ Cheese Bacon Melt, the choice of cooking equipment is crucial for achieving the perfect texture and flavor. You can use either a skillet or a frying pan, but understanding the differences can enhance your cooking experience.
Skillet vs. Frying Pan
A skillet typically has higher sides and is great for holding in moisture, making it perfect for dishes that require a bit more depth, like our Mac ‘n’ Cheese Bacon Melt. On the other hand, a frying pan is generally flatter with lower sides, which is ideal for quick cooking and flipping. For this recipe, a heavy-bottomed skillet is recommended as it provides even heat distribution, which is vital for melting the cheese and achieving that golden crust.
Optimal Heat Settings for Even Cooking
The heat setting plays a significant role in ensuring your sandwich cooks evenly. Start by preheating your skillet over medium heat. This temperature allows the bread to toast without burning while giving the cheese enough time to melt. If your heat is too high, the outside may char before the inside reaches the desired gooey consistency.
Heat Management Tips:
– Medium Heat: This is the ideal starting point for most cooking tasks in this recipe. It allows for even cooking without risk of burning.
– Adjust as Necessary: If you notice that the sandwich is browning too quickly, lower the heat slightly. Conversely, if it seems to be taking too long, feel free to increase the heat.
– Covering the Sandwich: For a few minutes during cooking, you might want to cover your skillet with a lid. This step traps heat and steam, helping to melt the cheese more effectively while still allowing the bread to crisp up.
Techniques for Ensuring a Perfectly Golden Brown Crust
Achieving a golden-brown crust is one of the hallmarks of a well-made Mac ‘n’ Cheese Bacon Melt. Here are some tried-and-true techniques to help you get that perfect crust every time:
– Butter Generously: Spread a liberal amount of butter on the outside of the sandwich. This not only adds flavor but also helps achieve that golden color. Consider using a mix of butter and olive oil to enhance the crispiness and flavor.
– Press Down Gently: When the sandwich is placed on the skillet, use a spatula to gently press down on it. This action helps the bread make better contact with the skillet, promoting even browning.
– Monitor Closely: As the bread cooks, keep a close eye on it. The first side should take about 4-5 minutes to achieve that golden color. If it browns too quickly, reduce the heat to prevent burning.
Flipping the Sandwich: A Critical Step
Flipping the sandwich may seem straightforward, but it’s a critical step that can make or break your Mac ‘n’ Cheese Bacon Melt.
Importance of Timing and Technique
The timing of your flip is essential. Wait until the first side has reached a beautiful golden brown before attempting to turn it over. Use a spatula to lift the sandwich slightly, checking the color underneath.
Checking for Doneness
When flipping the sandwich, make sure to check that the cheese is starting to melt. You can gently pry the top slice of bread to see if the cheese is gooey. If it’s not, give it a few more minutes before flipping.
Common Mistakes to Avoid
– Rushing the Flip: Flipping too soon can lead to a messy sandwich with ingredients spilling out. Be patient and wait for the right moment.
– Forgetting to Adjust Heat: After the flip, you may need to adjust the heat again. The second side usually cooks faster, so reduce the heat if necessary to prevent burning.
– Using the Wrong Tool: Avoid using a fork to flip the sandwich; this can cause the filling to ooze out. A spatula is your best friend here.
Serving Suggestions
Once your Mac ‘n’ Cheese Bacon Melt is perfectly cooked, it’s time to think about how to serve it. Here are some creative ideas to elevate your dining experience.
Creative Side Dishes
Consider pairing your sandwich with a light salad or some crispy vegetables. A simple arugula salad with a lemon vinaigrette can balance the richness of the sandwich. Alternatively, serve it with sweet potato fries or homemade coleslaw for a heartier meal.
Dipping Sauces
Dipping sauces can take your Mac ‘n’ Cheese Bacon Melt to the next level. Think beyond the usual ketchup; try serving with:
– Spicy Sriracha Mayo: A mix of mayonnaise and Sriracha adds a creamy, spicy kick.
– Honey Mustard: This sweet and tangy sauce complements the salty bacon beautifully.
– BBQ Sauce: For a smoky flavor, BBQ sauce is an excellent choice, especially if you enjoy a bit of sweetness with your savory.
Presentation Ideas
For an impressive presentation, slice the sandwich diagonally and arrange the halves on a plate. Garnish with fresh herbs, such as parsley or chives, to add color. Serve with the dipping sauces in small ramekins for a restaurant-style feel.
Nutritional Information
Understanding the nutritional value of your Mac ‘n’ Cheese Bacon Melt can help you make healthier choices while still enjoying this comfort food.
Calories and Nutritional Breakdown
Depending on the ingredients used, one serving of the Mac ‘n’ Cheese Bacon Melt can range from 600 to 800 calories. The exact numbers will vary based on the type of cheese, bacon, and bread used, as well as portion sizes.
Making the Dish Healthier
If you’re looking to enjoy this dish with a health-conscious twist, consider these substitutions:
– Turkey Bacon: Using turkey bacon instead of traditional pork bacon reduces calories and saturated fat.
– Low-Fat Cheese: Opt for low-fat cheese varieties to lower the overall calorie count while still providing that creamy texture.
– Whole Grain Bread: Choose whole-grain bread instead of white bread for added fiber and nutrients.
Conclusion
The Mac ‘n’ Cheese Bacon Melt stands out as a delightful comfort food option that combines the creamy decadence of mac and cheese with the savory crunch of bacon. It’s an indulgent dish that not only satisfies hunger but also warms the heart, making it perfect for any occasion.
As you embark on your culinary journey with this recipe, don’t hesitate to experiment with variations that suit your personal taste. Whether that means adding jalapeños for a spicy kick or incorporating different cheeses for a unique flavor profile, the possibilities are endless.
Cooking is about creativity and enjoyment. So gather your ingredients, fire up the skillet, and relish the joy of making this delicious Mac ‘n’ Cheese Bacon Melt from scratch. Each bite is a reminder of the comfort that homemade meals can bring. Enjoy!