Introduction
In recent years, the art of homemade pizza has surged in popularity, with enthusiasts across the globe experimenting with various toppings, sauces, and crusts to create their perfect pie. Making pizza from scratch not only allows for creativity but also offers a rewarding culinary experience that brings friends and family together. Among the many personalities who have influenced the pizza-making landscape, Gordon Ramsay stands out with his culinary prowess and attention to detail. Known for his fiery personality and exceptional skills, Ramsay has perfected the craft of pizza making through years of experience, and his approach emphasizes the importance of quality ingredients and precise techniques.
At the heart of every great pizza lies its dough. A well-crafted dough serves as the foundation for a delicious pizza, providing the right texture, flavor, and structure to support your desired toppings. Gordon Ramsay’s pizza dough recipe is revered for its simplicity and effectiveness, allowing home cooks to replicate restaurant-quality results in their own kitchens. In this article, we will explore the essential ingredients that contribute to the dough’s success, delve into step-by-step instructions for crafting the perfect base, and share tips that will elevate your homemade pizza game.
Understanding the Ingredients
Before diving into the step-by-step instructions, it’s crucial to understand the role each ingredient plays in the dough. Each component works together harmoniously to create the perfect pizza base, and knowing the science behind these ingredients will help you appreciate the craft of pizza making even more.
Strong White Bread Flour
One of the key ingredients in Gordon Ramsay’s pizza dough is strong white bread flour. This type of flour is characterized by its high protein content, typically around 12-14%. The higher protein levels contribute to the development of gluten, which gives the dough its structure and elasticity. When kneaded, gluten strands form, allowing the dough to rise and create that desirable chewy texture. Using strong white bread flour ensures that your pizza crust can withstand the weight of toppings while still achieving a light and airy bite.
Sea Salt
Salt is often overlooked in baking, but it plays a vital role in enhancing flavor and strength. In Ramsay’s pizza dough, sea salt not only adds depth to the taste but also strengthens the dough by tightening gluten strands. It helps to control the fermentation process by regulating yeast activity, ensuring a balanced rise. Using high-quality sea salt can elevate the overall flavor profile of your dough, making it a crucial component of the recipe.
Sugar
While sugar is commonly associated with sweet recipes, it serves an important purpose in pizza dough as well. In this recipe, sugar activates the yeast, kickstarting the fermentation process. As the yeast consumes the sugar, it produces carbon dioxide, which causes the dough to rise. Additionally, sugar contributes to browning during baking, leading to a beautifully golden crust. It’s essential not to use too much sugar, as this can overpower the dough’s flavor.
Instant Yeast
Gordon Ramsay’s recipe calls for instant yeast, which differs from active dry yeast in several ways. Instant yeast has finer granules, allowing it to dissolve quickly in moisture and activate faster than active dry yeast. This means that you can skip the step of proofing the yeast in warm water before adding it to the dough. Instant yeast is ideal for busy home cooks looking to streamline the pizza-making process without sacrificing quality.
Warm Water
The temperature of the water used in the dough is crucial for activating the yeast. Warm water, ideally between 100°F to 110°F (37°C to 43°C), creates an ideal environment for yeast to thrive. Too hot of water can kill the yeast, while too cold water can hinder its activation. It’s important to measure the water carefully and ensure that it is warm but not scalding to achieve the best results.
Olive Oil
Olive oil adds flavor and moisture to pizza dough, enhancing its overall texture. Ramsay recommends using high-quality extra virgin olive oil for the best flavor. The oil also helps to tenderize the dough, making it easier to stretch and shape. Additionally, it creates a slightly crispier crust when baked, adding to the overall appeal of your pizza.
Cornmeal
While cornmeal may not be a direct ingredient in the dough itself, it plays a significant role in the baking process. Sprinkling cornmeal on your pizza peel or baking surface prevents sticking, allowing you to effortlessly transfer your pizza from the preparation surface to the oven. It adds a subtle crunch to the crust, enhancing the overall texture of your pizza.
Step-by-Step Instructions
Now that we have a clear understanding of the ingredients, let’s move on to the step-by-step instructions for creating Gordon Ramsay’s perfect homemade pizza dough. Each step is designed to ensure that you achieve the best possible results, and paying attention to the details will set you up for success.
Activating the Yeast
The first step in making your pizza dough is to activate the instant yeast. While instant yeast does not require proofing like active dry yeast, it’s still good practice to combine it with warm water and a pinch of sugar to kickstart its activity.
1. In a mixing bowl, combine 1 cup of warm water (about 100°F to 110°F) with 1 teaspoon of sugar and 2 teaspoons of instant yeast.
2. Stir gently to dissolve the yeast and sugar, then let the mixture sit for about 5-10 minutes.
3. You should see small bubbles forming on the surface, indicating that the yeast is active and ready to use.
Mixing the Dry Ingredients
Once your yeast is activated, it’s time to prepare the dry ingredients. Ensuring an even distribution of salt and flour is essential for the dough’s structure and flavor.
1. In a large mixing bowl, combine 3 cups of strong white bread flour and 1 teaspoon of sea salt.
2. Use a whisk or a fork to mix the flour and salt thoroughly, ensuring that the salt is evenly distributed throughout the flour.
Combining Ingredients
With your dry ingredients ready, it’s time to bring everything together. Creating a well in the flour mixture helps to incorporate the wet and dry ingredients effectively.
1. Make a well in the center of the flour mixture, resembling a small crater.
2. Pour the activated yeast mixture into the well, followed by 2 tablespoons of olive oil.
3. Using a fork, gradually mix the flour into the wet ingredients, starting from the inner rim of the well. This method helps to combine the ingredients without overworking the dough initially.
Kneading the Dough
Once the ingredients are combined and form a shaggy dough, it’s time to knead. Kneading develops gluten, which is essential for achieving the perfect texture in your pizza crust.
1. Turn the dough out onto a lightly floured surface.
2. Begin kneading the dough by pressing it down and away from you, then folding it back over itself. Rotate the dough a quarter turn and repeat this process.
3. Knead for about 8-10 minutes until the dough is smooth and elastic. You’ll know it’s ready when it springs back when poked and feels slightly tacky but not sticky.
As you knead, be mindful of your dough’s consistency. If it feels too sticky, sprinkle a little extra flour; if it’s too dry, you can add a small amount of water.
Following these initial steps will set the foundation for a perfect pizza dough. The next part of the recipe will include details on the rising process, shaping the dough, and tips for the best results to ensure your homemade pizza is truly exceptional. Stay tuned for the continuation of this flavorful journey!

First Rise
Once you’ve mixed your ingredients and created a cohesive dough, it’s time for the first rise. This step is crucial for developing the gluten structure that gives your pizza crust its chewy texture and allows it to rise beautifully.
Ideal Conditions for Dough Rising
To achieve the best results during the first rise, create an environment that encourages the yeast to thrive. Ideally, you want a warm, draft-free spot in your kitchen. The temperature should be around 75°F to 80°F (24°C to 27°C). If your kitchen is cool, consider preheating your oven to the lowest setting for a few minutes, then turning it off and placing the dough inside, covered with a damp cloth or plastic wrap. This creates a cozy atmosphere for the dough to rise effectively.
Explanation of Yeast Fermentation and Its Impact on Flavor
During the first rise, yeast ferments the sugars present in the dough, producing carbon dioxide and alcohol. This process not only helps the dough to rise but also enhances the flavor profile of your pizza crust. The longer the dough ferments, the more complex and nuanced the flavors become. Allowing the dough to rise for at least an hour is ideal, but for even better results, consider a longer fermentation period of up to 24 hours in the refrigerator. This slow fermentation will yield a crust with a rich, artisan flavor that rivals your favorite pizzeria.
Shaping the Dough
After your dough has risen and doubled in size, it’s time to shape it. This step is essential for preparing the dough for its second rise and helps maintain its structural integrity.
Techniques for Deflating and Dividing the Dough
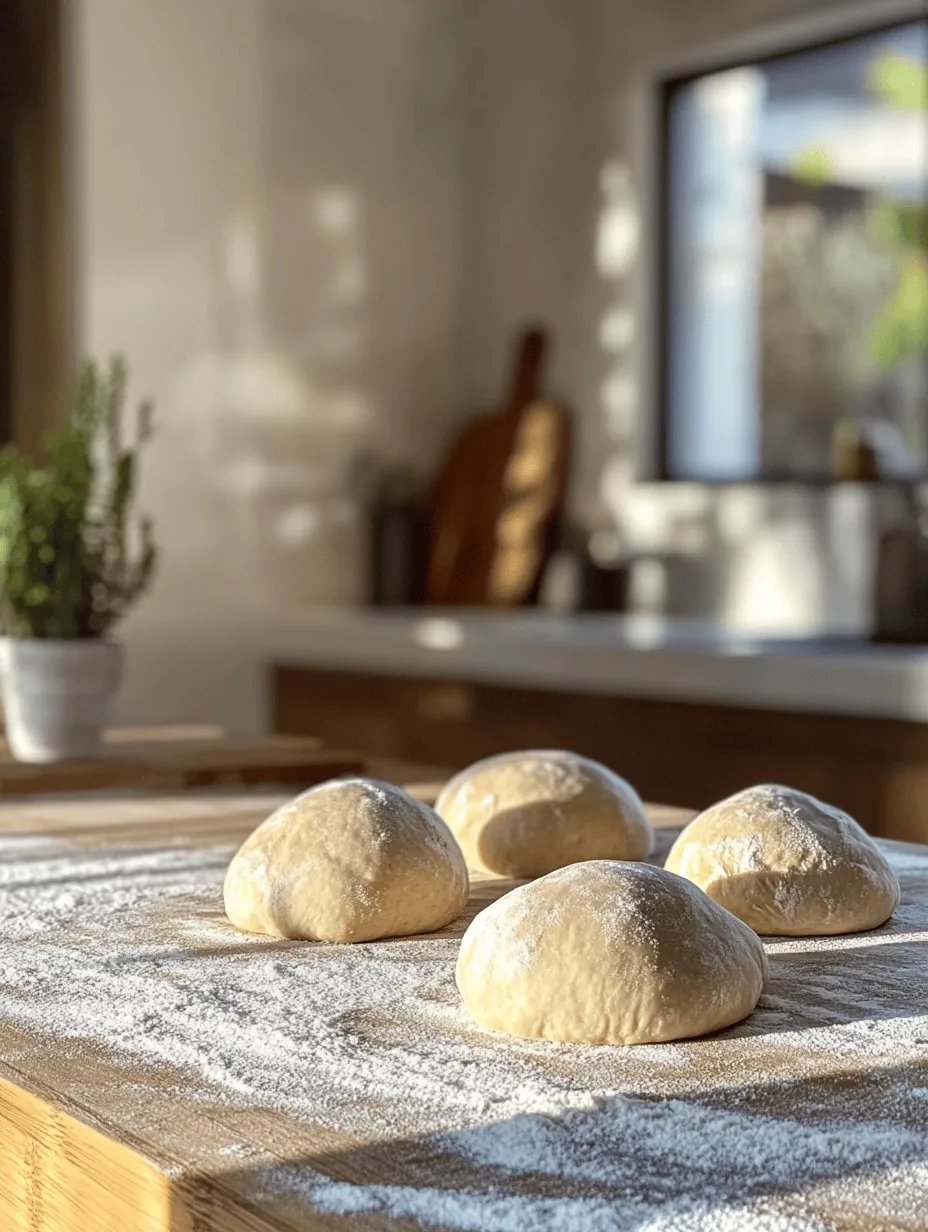
Gently punch down the risen dough to release excess air. This deflation is crucial for avoiding large bubbles in your final crust. Use a bench scraper or knife to divide the dough into equal portions, depending on how many pizzas you plan to make. For medium-sized pizzas, divide the dough into four equal balls.
Importance of Shaping into Balls for Even Rising
Once divided, shape each portion into a tight ball. This process involves tucking the edges of the dough into the center and rolling it on a clean surface to create a smooth exterior. Shaping the dough into balls allows for an even rise during the second fermentation, ensuring that your pizzas have a consistent texture and structure.
Second Rise
The second rise is equally important and helps to further develop the dough’s flavor and texture.
Role of the Second Rise in Dough Development
During the second rise, the dough continues to ferment and develop flavor. This stage is essential for achieving a light and airy crust. The yeast will work on any remaining sugars, and the gluten structure will relax, making it easier to stretch the dough into your desired shape.
Timing and Conditions for Optimal Results
Allow the dough balls to rest for at least 30 minutes to 1 hour at room temperature, covered with a damp cloth to prevent drying out. If you’ve opted for a longer fermentation in the refrigerator, let the dough come to room temperature for about 30 minutes before shaping. This will make it easier to work with.
Preparing for Baking
With your dough ready, it’s time to prepare for baking. High temperatures are crucial for achieving that perfect pizza crust.
Preheating the Oven
Preheat your oven to its maximum temperature, ideally around 475°F to 500°F (245°C to 260°C). This high heat will help create a crust that is crispy on the outside and soft on the inside. If you have a pizza stone, place it in the oven while it preheats to ensure it reaches the necessary temperature.
Importance of High Temperatures for Pizza Crusts
High temperatures are essential for creating the Maillard reaction, which gives your pizza crust its golden-brown color and distinctive flavor. A hot oven mimics the conditions of a traditional pizza oven, resulting in a crust that is both chewy and crisp.
Benefits of Using a Pizza Stone
Using a pizza stone can dramatically improve your baking results. The stone retains heat and distributes it evenly across the surface, ensuring that your pizza cooks evenly. If you don’t have a pizza stone, an upside-down baking sheet can be used as a substitute—just make sure to preheat it in the oven as well.
Rolling Out the Dough
Now that your oven is preheated, it’s time to roll out your dough.
Techniques for Achieving the Perfect Thickness and Shape
On a lightly floured surface, take one of your dough balls and gently flatten it with your hands. Use a rolling pin to roll it out to your desired thickness—typically around 10-12 inches in diameter for a medium pizza. Aim for a slightly thicker edge (the crust) and a thinner center. If you prefer a more rustic look, you can also stretch the dough by hand, using your fingers to gently push from the center outwards.
Tips for Preventing Sticking While Rolling
To prevent sticking, use a generous amount of flour on your work surface and on the rolling pin. If the dough sticks, gently lift it and dust with more flour as needed. Alternatively, you can place the dough between two sheets of parchment paper and roll it out, which will help prevent sticking without additional flour.
Topping and Baking the Pizza
With your rolled-out dough ready, it’s time to add your favorite toppings and bake.
Suggestions for Classic and Creative Pizza Toppings
Start with a base of tomato sauce, spread evenly across the dough, leaving a small border for the crust. Next, sprinkle a generous layer of shredded mozzarella cheese. From here, the options are endless! Consider classic toppings such as pepperoni, mushrooms, bell peppers, and olives. For a twist, try creative combinations like goat cheese and caramelized onions or a white pizza with ricotta and spinach. The key is to balance flavors and avoid overloading the pizza to ensure it bakes evenly.
Baking Times and What to Look for in a Finished Crust
Carefully transfer your topped pizza onto the preheated pizza stone or baking sheet. Bake for 10-15 minutes, keeping an eye on it to prevent burning. The pizza is done when the crust is golden brown and the cheese is bubbly and slightly browned. If using a pizza stone, you might find that the crust cooks faster, so adjust your baking time accordingly.
Serving and Enjoying Your Homemade Pizza
Once your pizza is cooked to perfection, it’s time to serve and enjoy.
Guidelines for Slicing and Serving
Allow the pizza to cool for a couple of minutes after removing it from the oven. This rest time helps the cheese set a bit, making slicing easier. Use a sharp pizza cutter or a large knife to cut the pizza into wedges. Serve hot, garnished with fresh basil or a drizzle of olive oil for added flavor.
Pairing Suggestions for Beverages or Side Dishes
Pair your homemade pizza with a refreshing salad or some garlic bread for a complete meal. For beverages, a crisp white wine, a light beer, or even a homemade lemonade can complement the flavors of your pizza beautifully.
Importance of Sharing the Experience with Family and Friends
Homemade pizza is not just about the final product; it’s about the experience of making it together. Gather your family and friends to share in the fun of creating your own personal pizzas. This interactive cooking experience creates lasting memories and allows everyone to enjoy their customized creations.
Conclusion
Making Gordon Ramsay’s perfect homemade pizza dough is a rewarding experience that brings joy to both the cook and those who get to enjoy the final product. The process of crafting the dough, shaping it, and topping it with your favorite ingredients is not only a culinary skill but also an expression of creativity and personal taste.
As you experiment with different toppings and styles, remember that there are no hard and fast rules in pizza making—let your taste guide you. Whether you prefer classic Margherita or adventurous combinations, the joy of homemade pizza lies in the journey of creation.
Take a moment to reflect on the process and savor the results of your hard work. Each pizza baked is a testament to your culinary skills and a delicious meal that can be enjoyed with loved ones. So roll up your sleeves and dive into the world of homemade pizza—your kitchen and taste buds will thank you!