• Home
  • Recipe Index
    • Desserts
    • Dinner
    • Appetizer
    • Drinks
  • About
  • Contact
  • Privacy Policy
menu icon
go to homepage
  • Home
  • Recipe Index
    • Desserts
    • Dinner
    • Appetizer
    • Drinks
  • About
  • Contact
  • Privacy Policy

search icon
Homepage link
  • Home
  • Recipe Index
    • Desserts
    • Dinner
    • Appetizer
    • Drinks
  • About
  • Contact
  • Privacy Policy

×

Appetizer

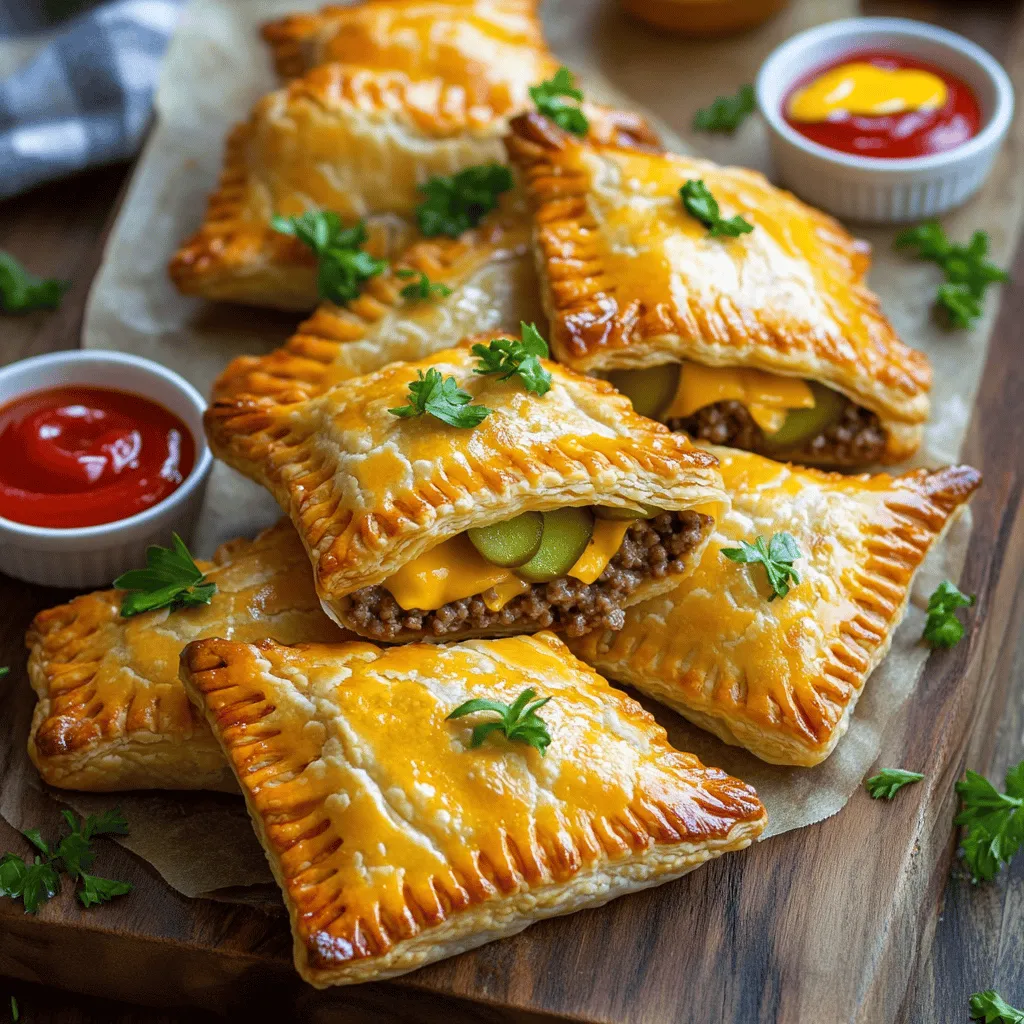
  • Cheeseburgers Hand Pies Tasty and Fun Snack Idea
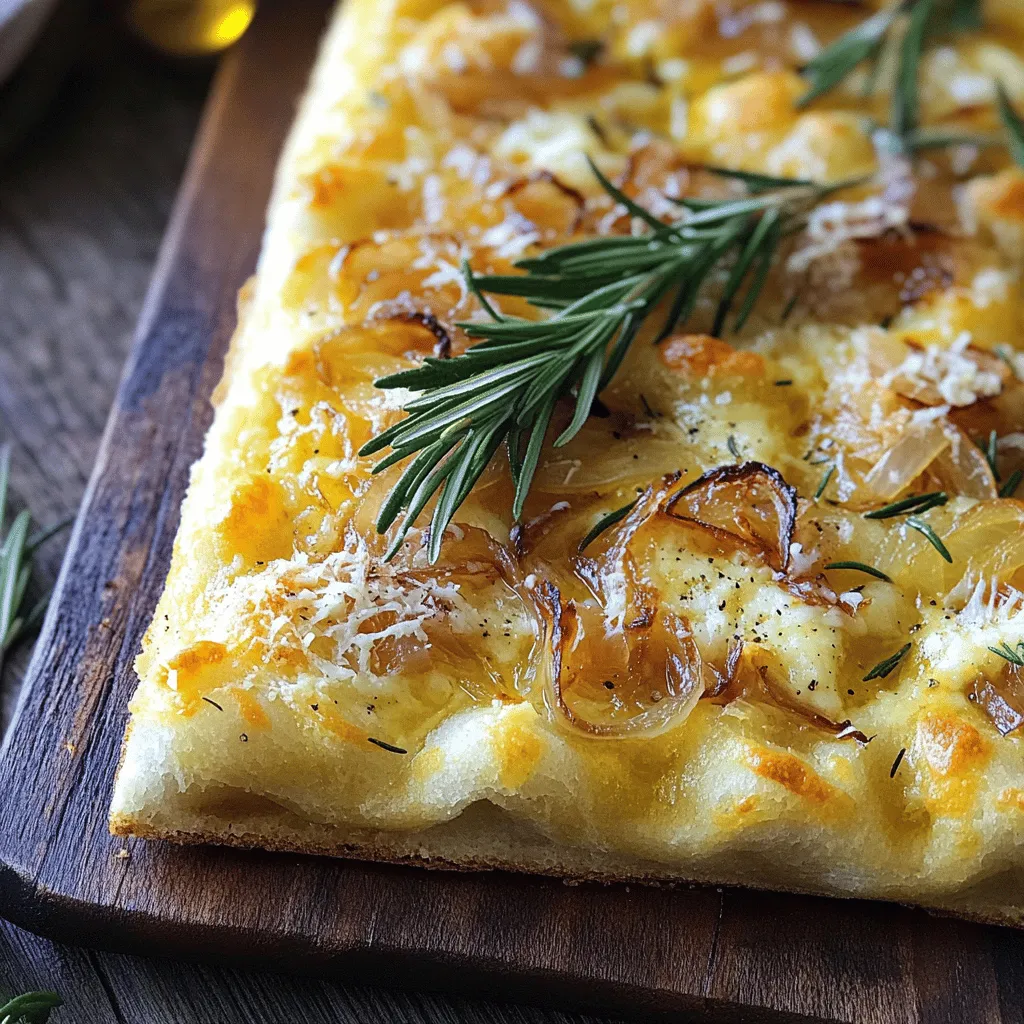
  • Cheesy Onion Focaccia Bread Tasty and Simple Recipe
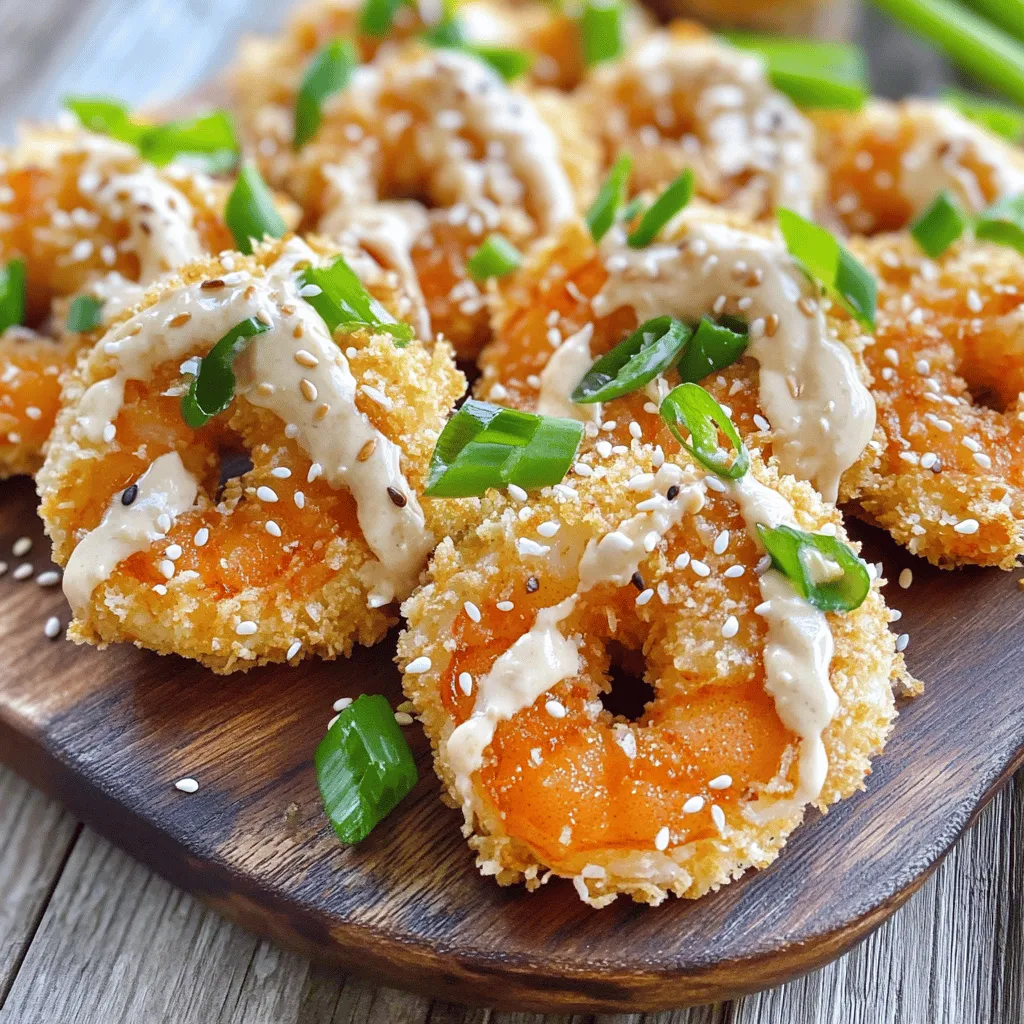
  • Air Fryer Bang Bang Shrimp Crispy and Flavorful Treat
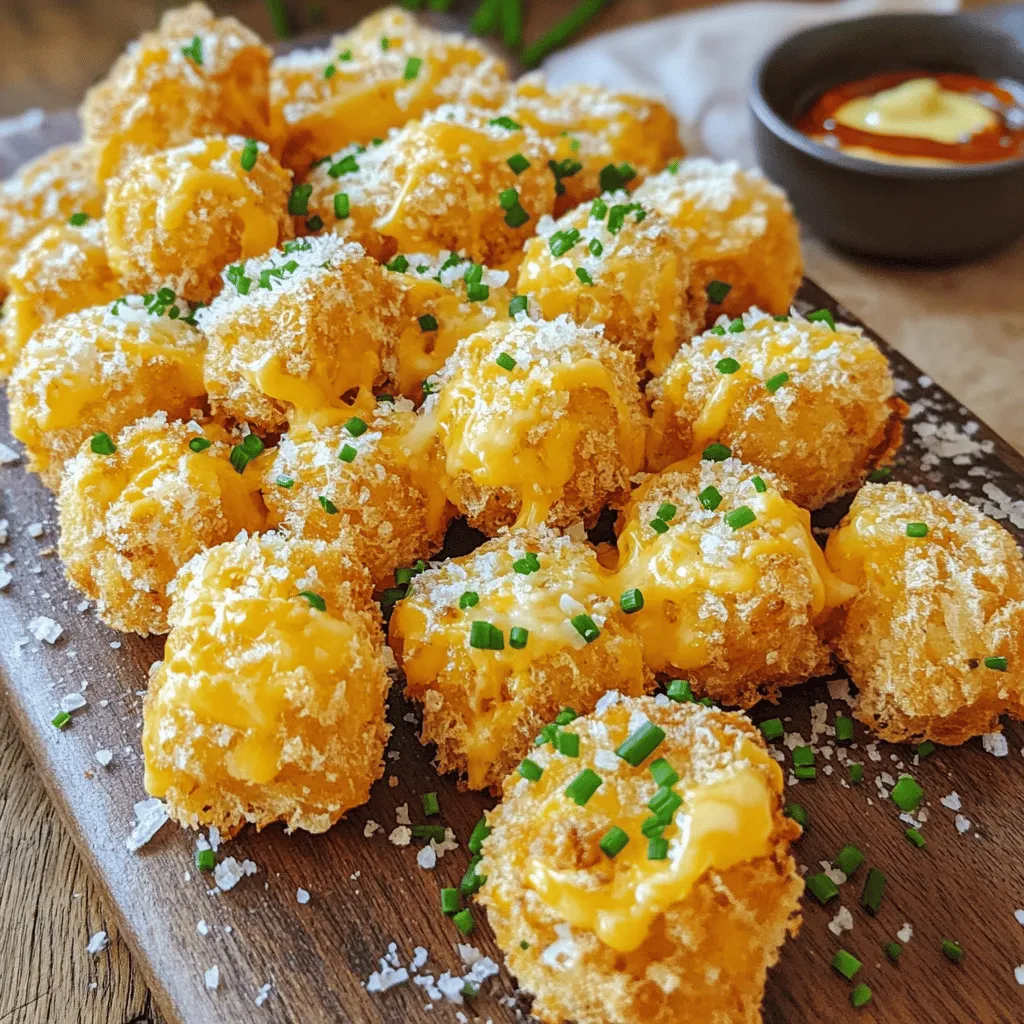
  • Air Fryer Cheesy Tater Tots Flavorful Snack Delight
  • Air Fryer Southwest Egg Rolls Crunchy and Flavorful Delight
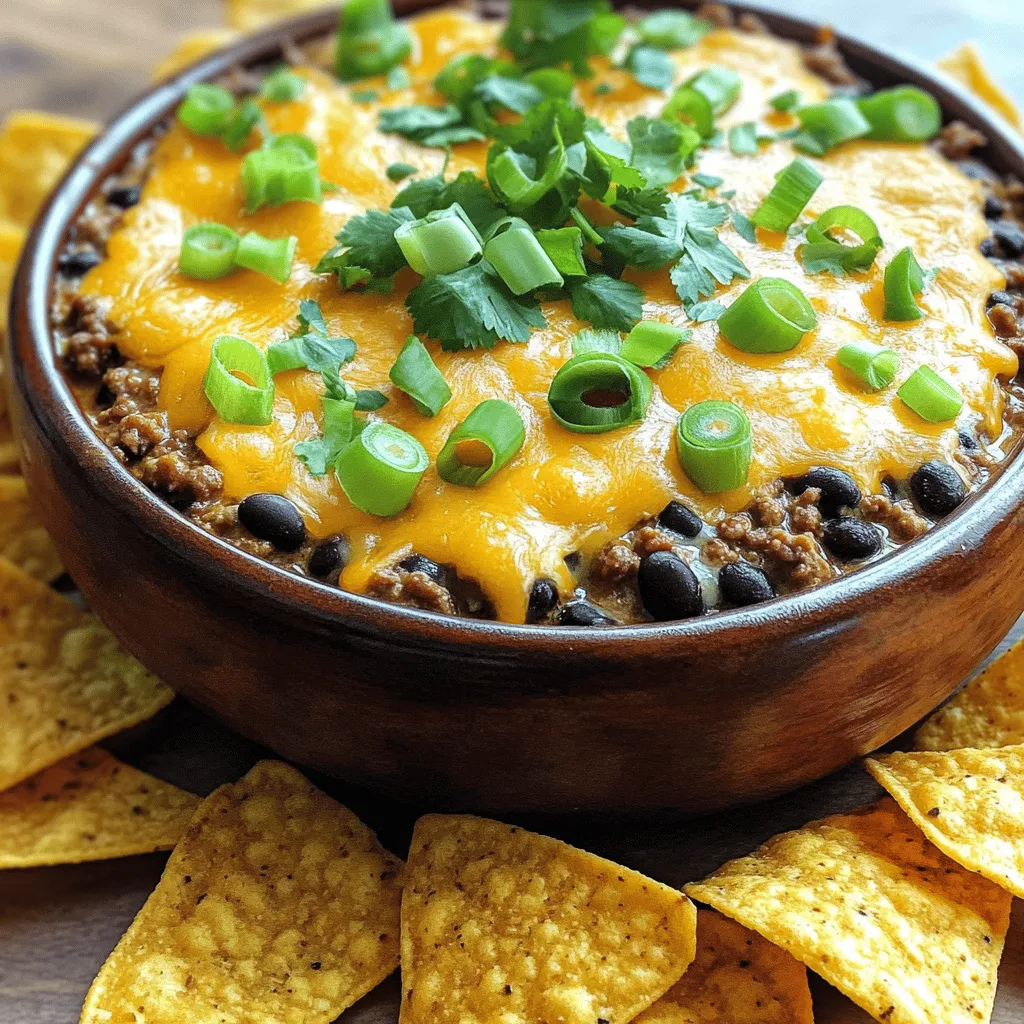
  • Sloppy Joe Dip Flavorful and Fun Party Snack
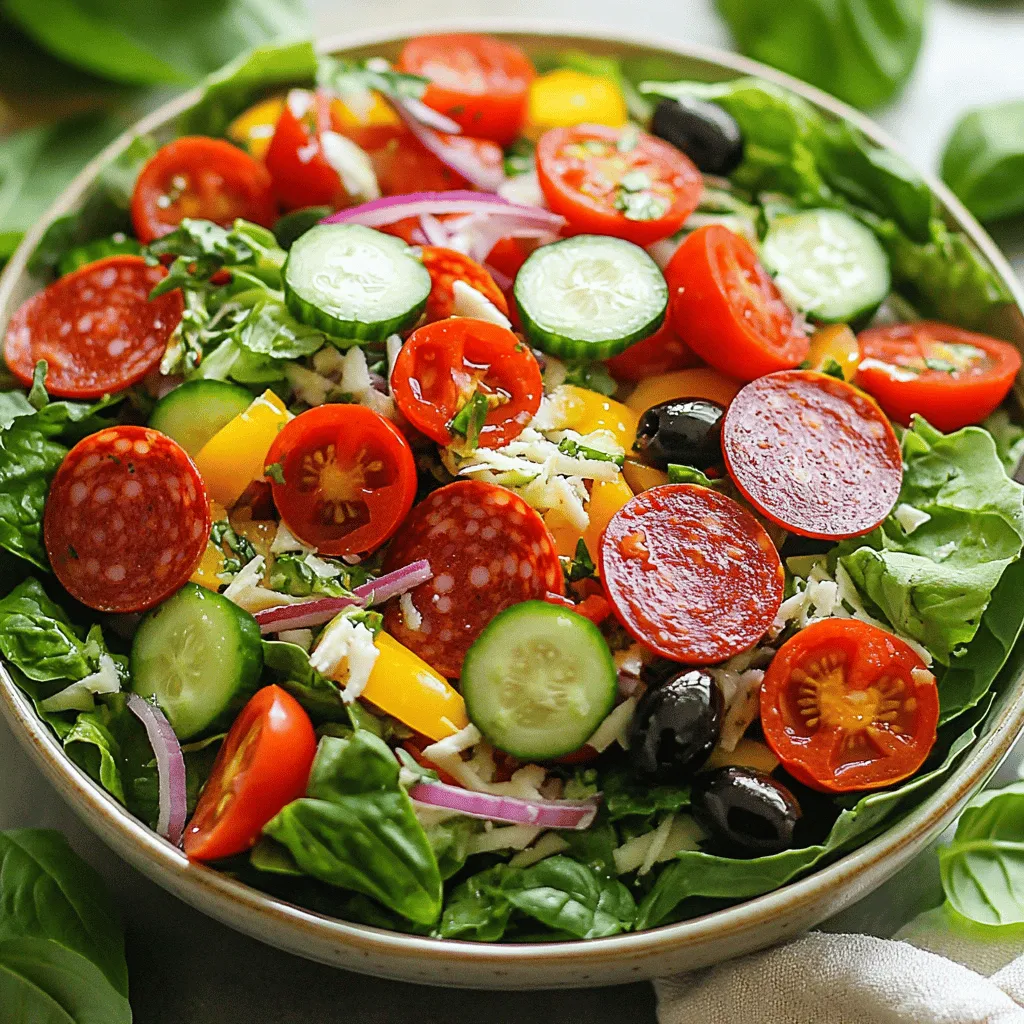
  • Pepperoni Salad Flavorful and Easy Recipe Guide
  • Garlic Knots Recipe Easy and Flavorful Delight
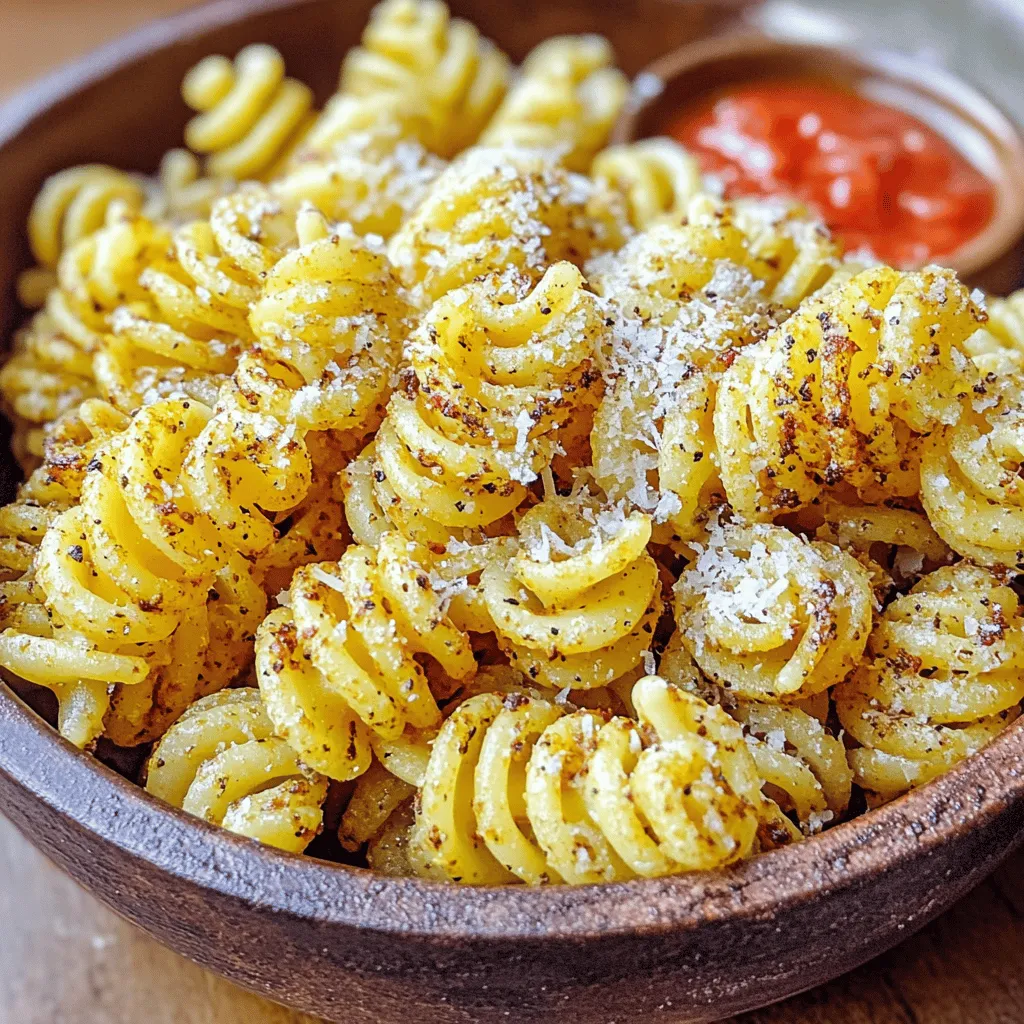
  • Air Fryer Pasta Chips Crunchy and Flavorful Snack
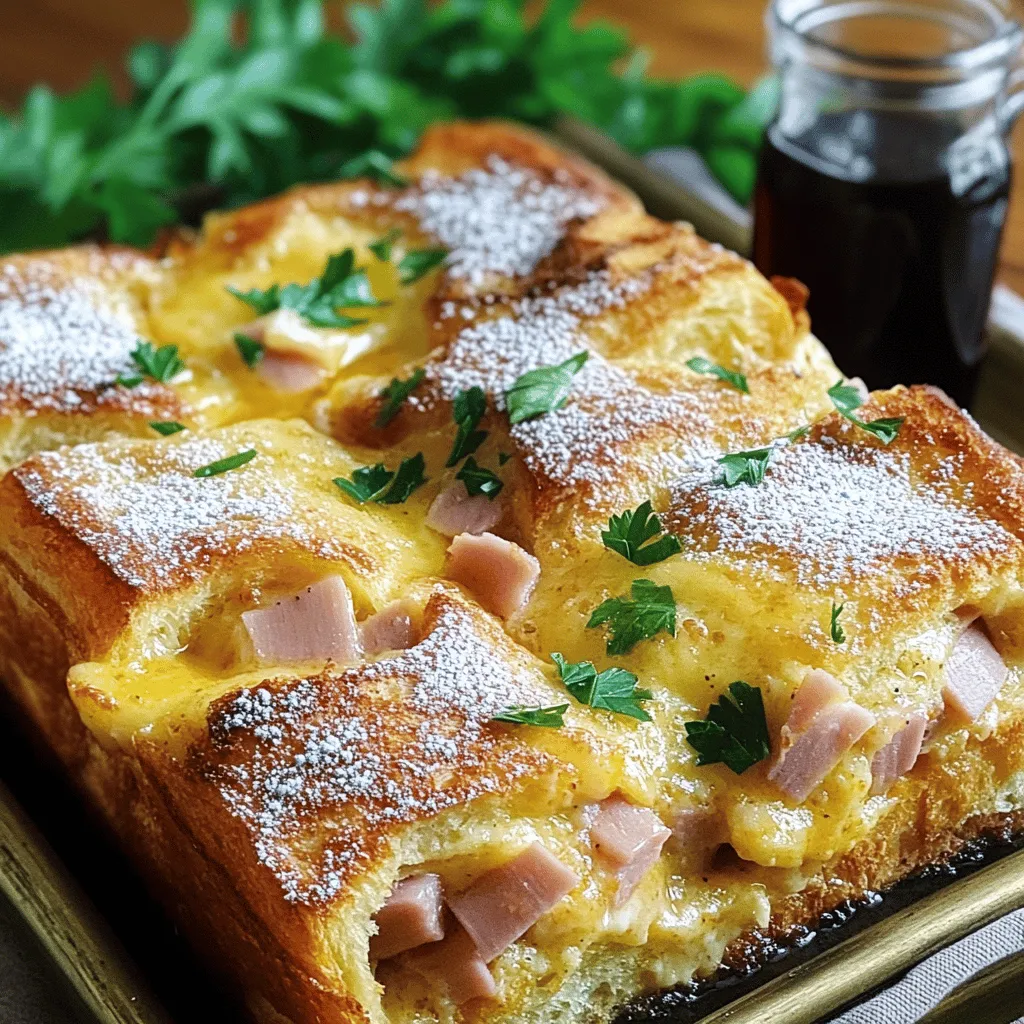
  • Monte Cristo Breakfast Casserole Tasty Brunch Recipe
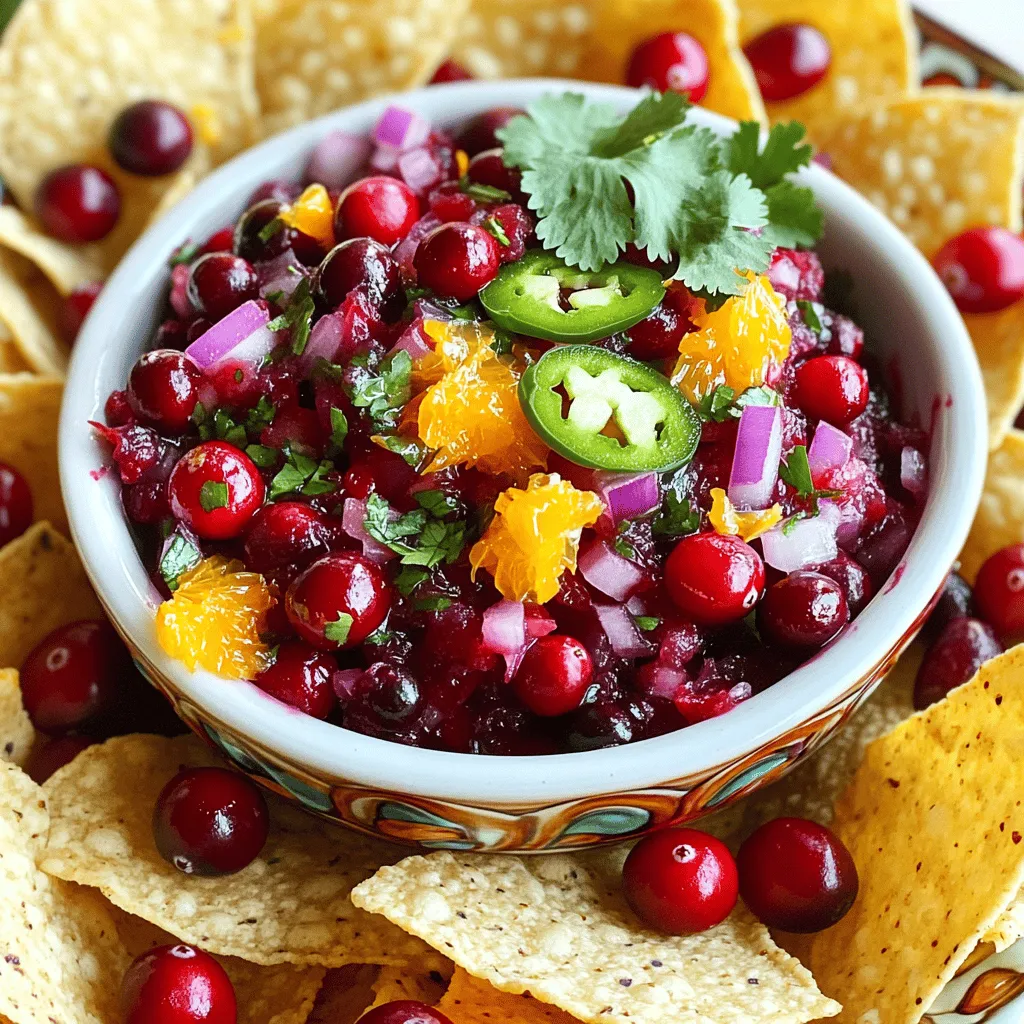
  • Cranberry Salsa Refreshing and Simple Recipe Guide
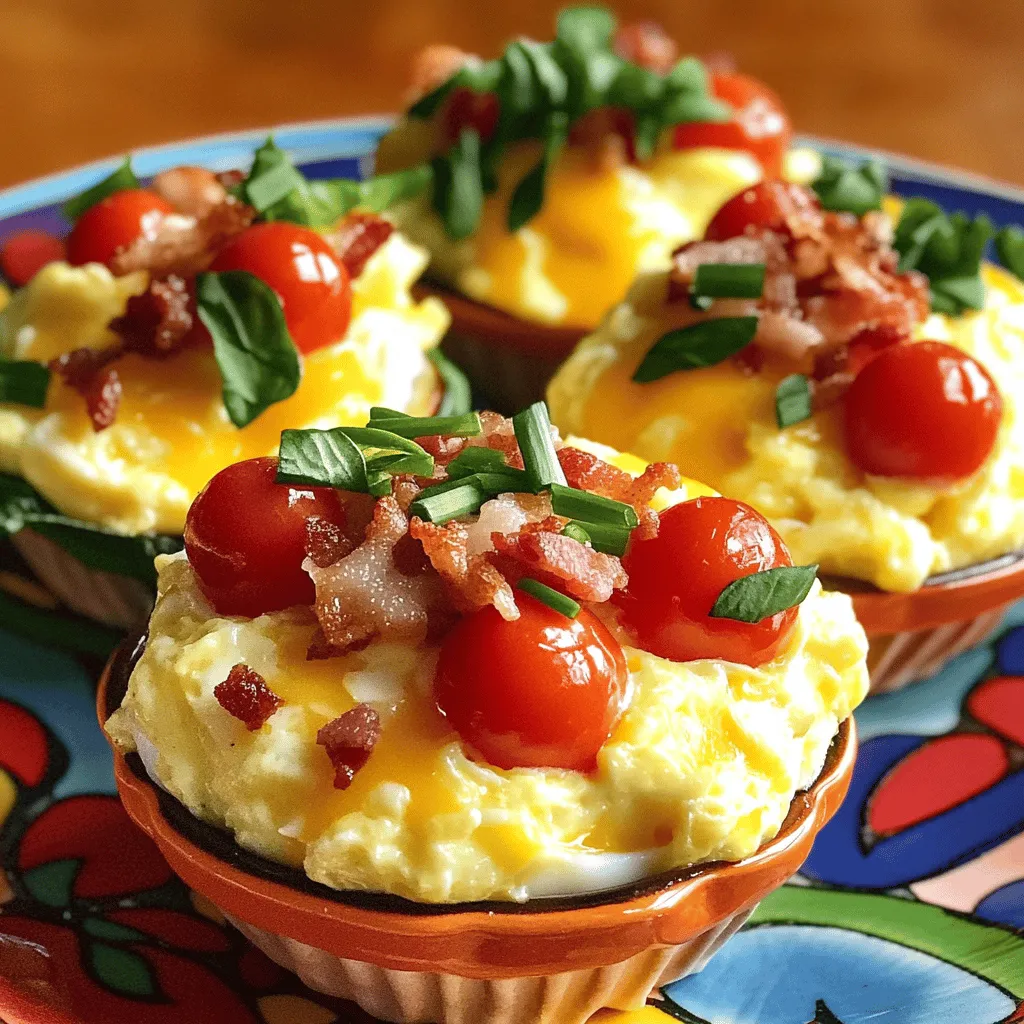
  • Delicious Breakfast Cups Quick and Easy Recipes
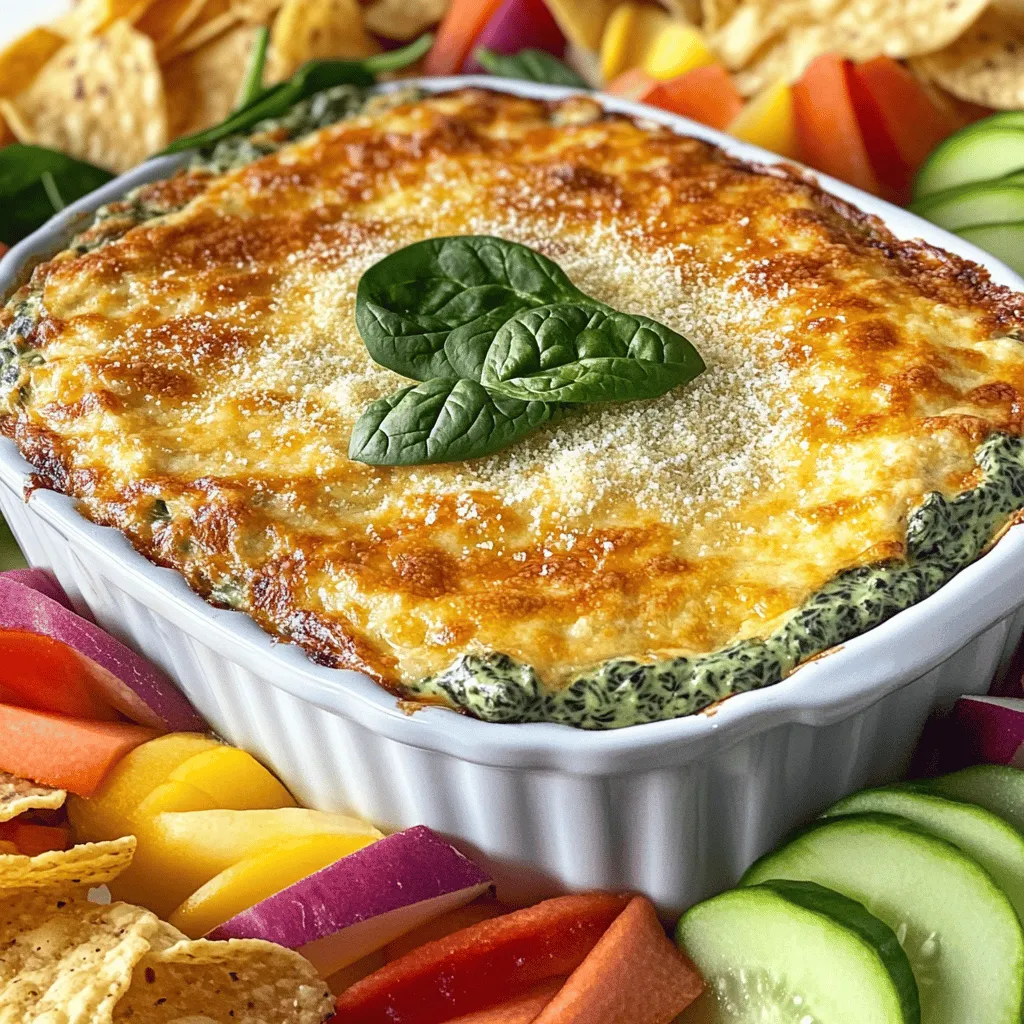
  • Easy Spinach Dip Perfect for Gatherings and Parties
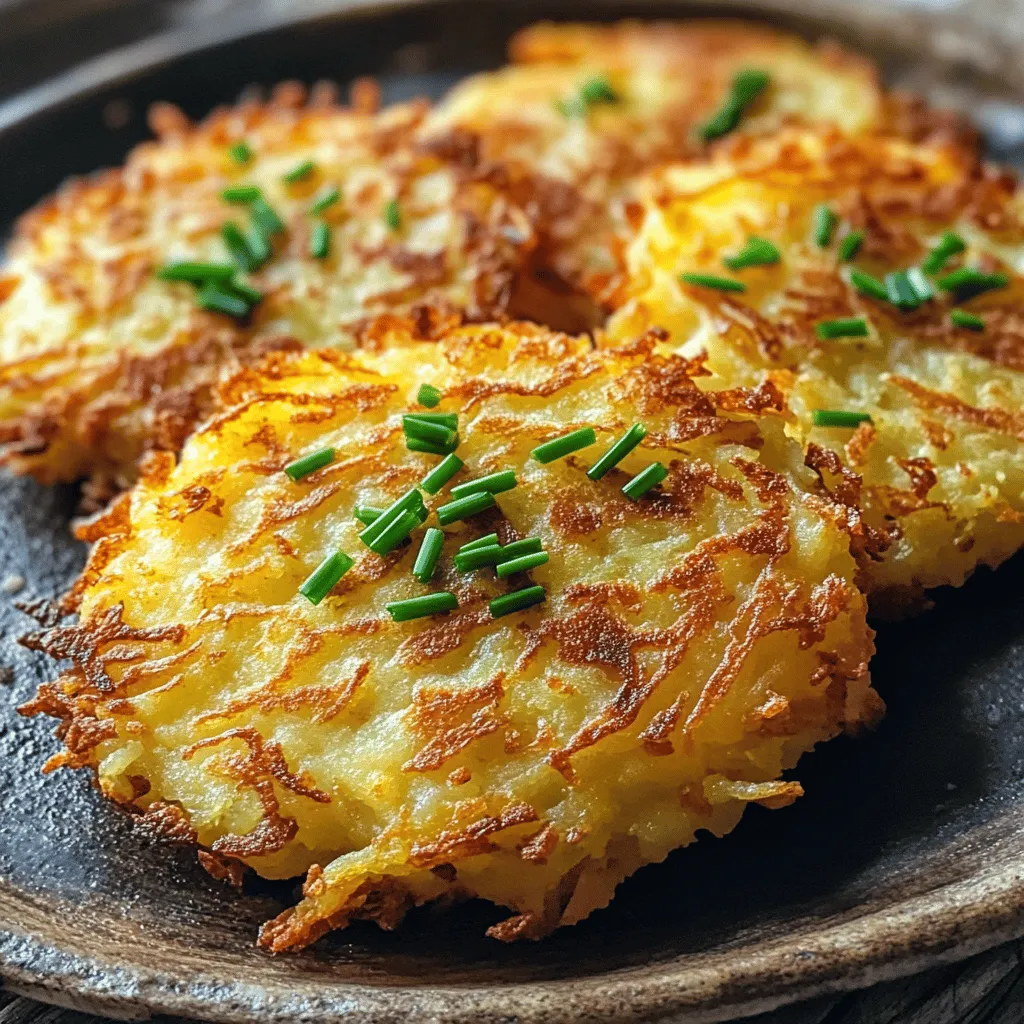
  • Crispy Hash Brown Patties Recipe
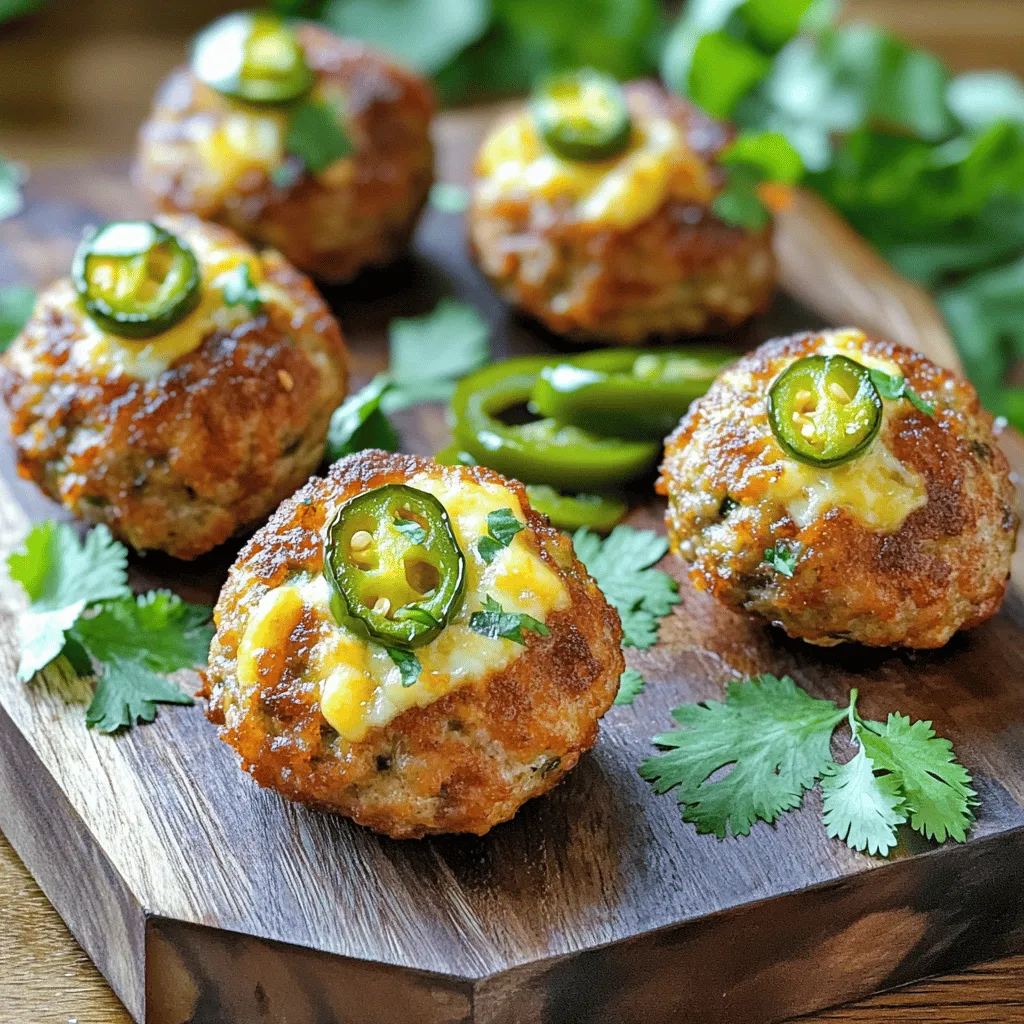
  • Jalapeño Popper Stuffed Meatballs: A Flavor Explosion
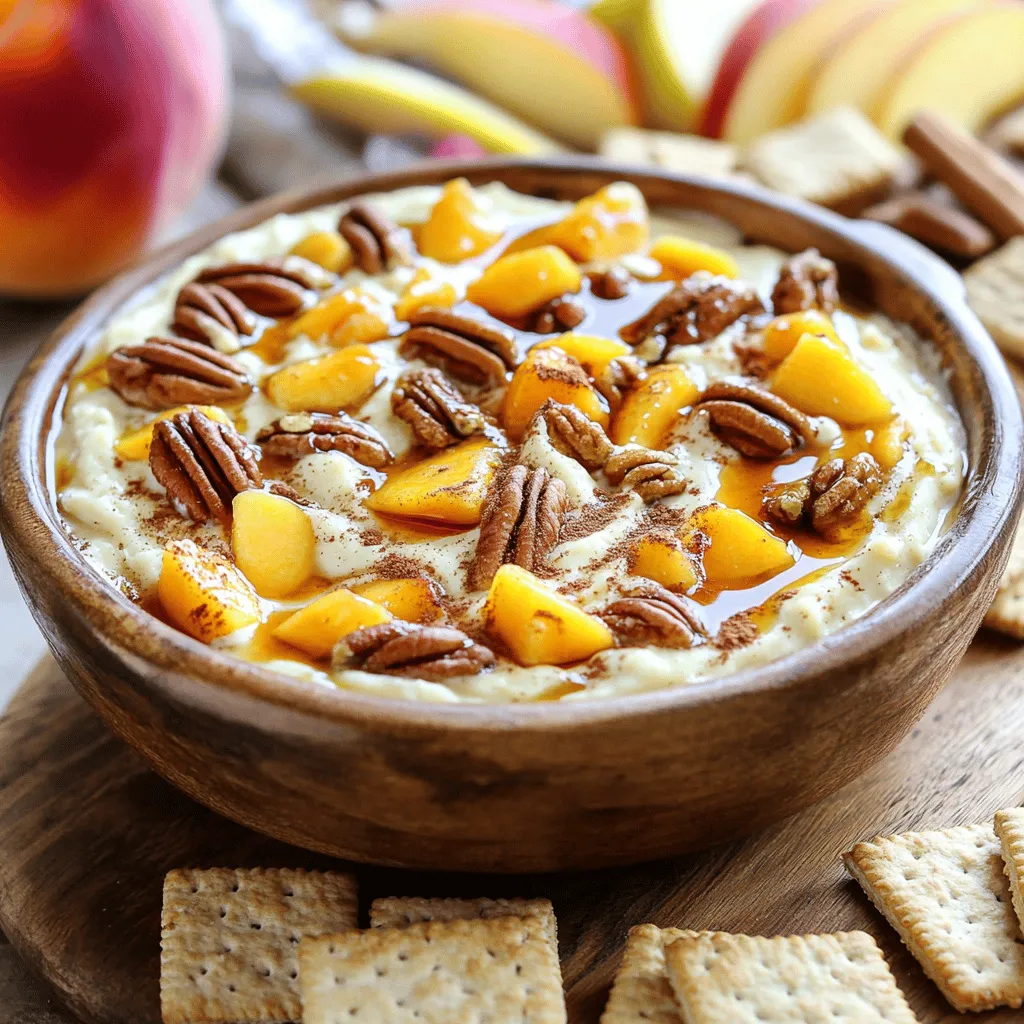
  • Bourbon Peach Pecan Dip: A Flavorful Crowd-Pleaser
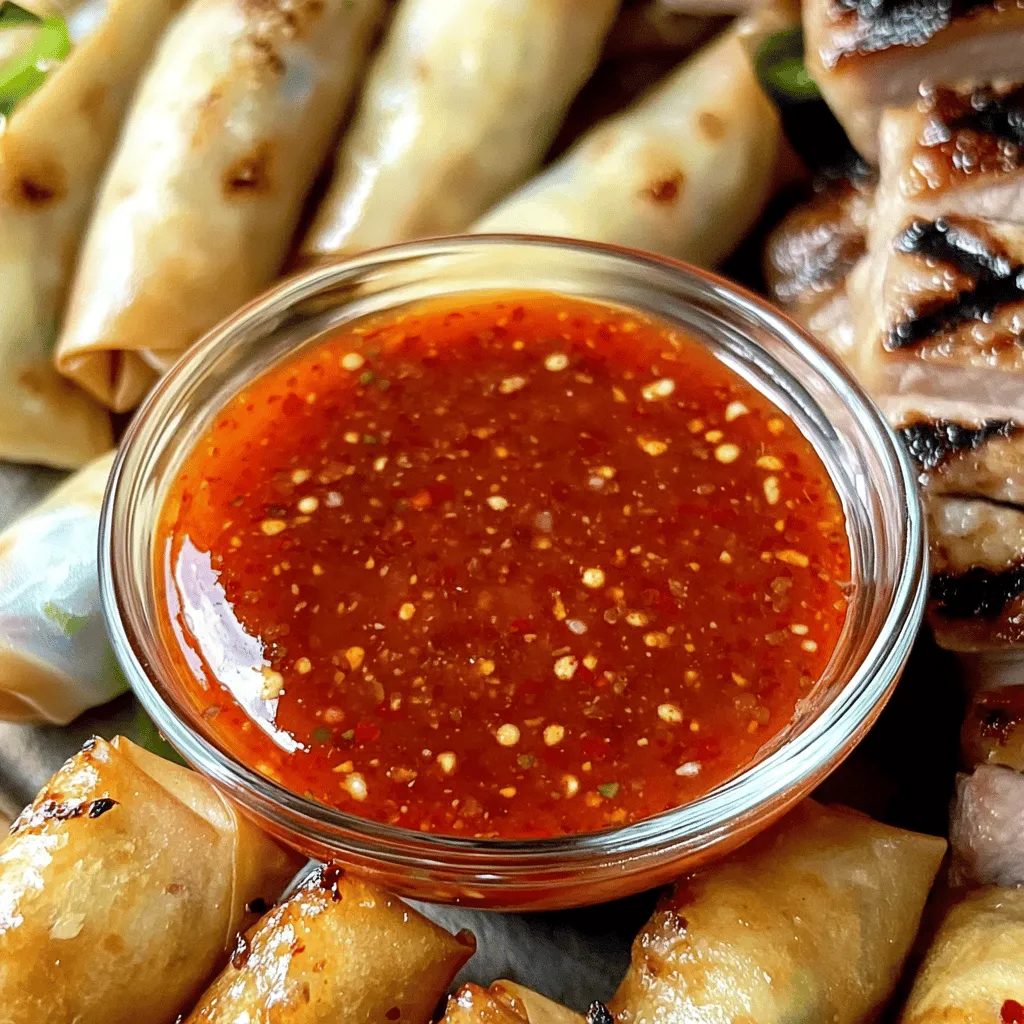
  • Sweet Chili Delight Sauce Recipe
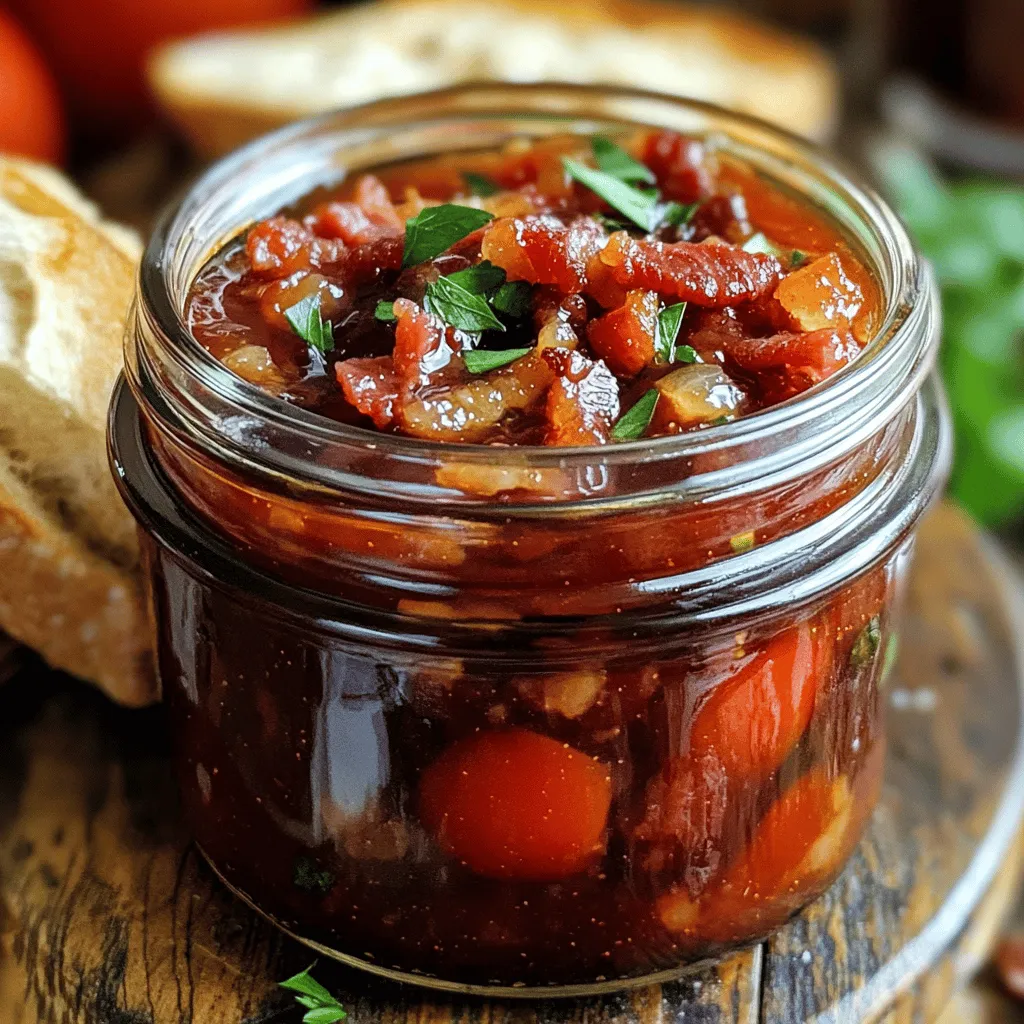
  • Spicy Tomato Jam Recipe: A Unique Twist on Tradition
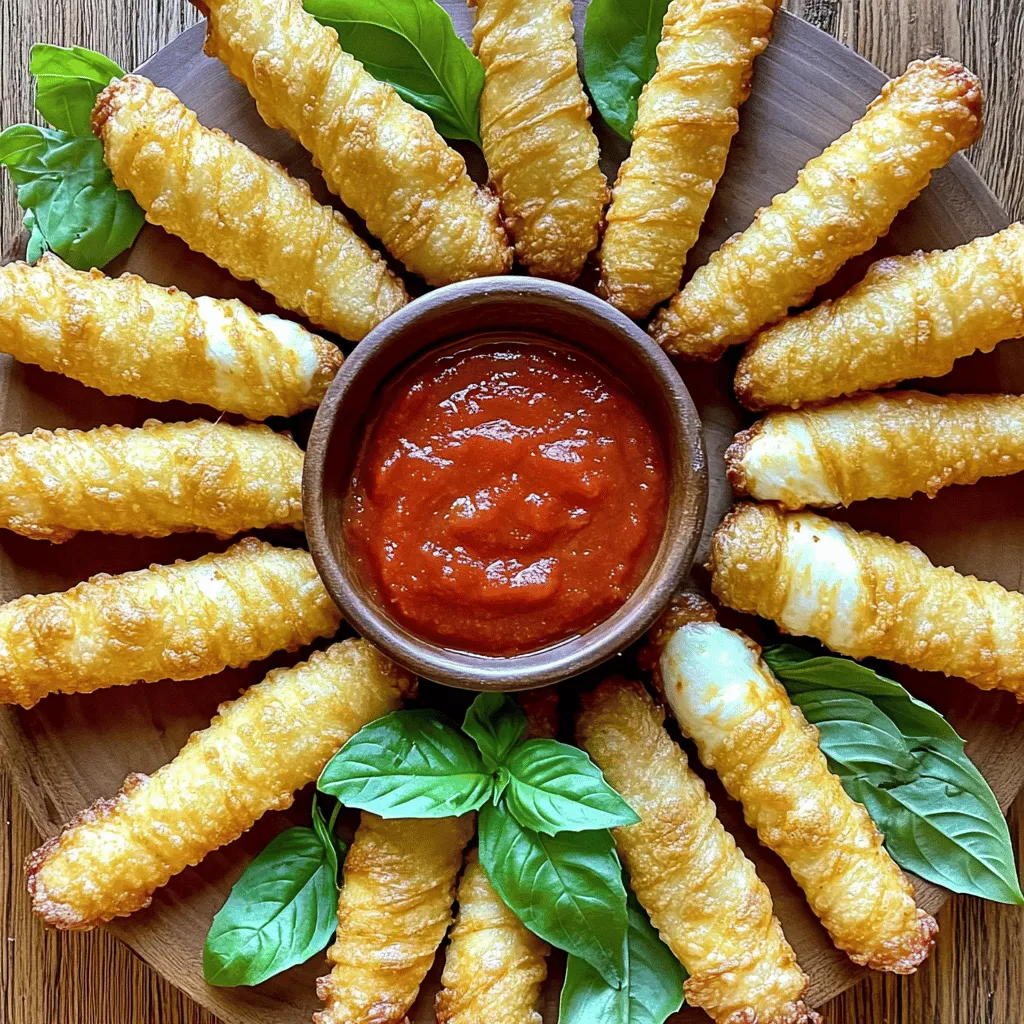
  • Cheesy Delight Mozzarella Sticks Recipe
  • Tomato Bacon Jam Recipe: Elevate Your Dishes with This Savory-Sweet Spread
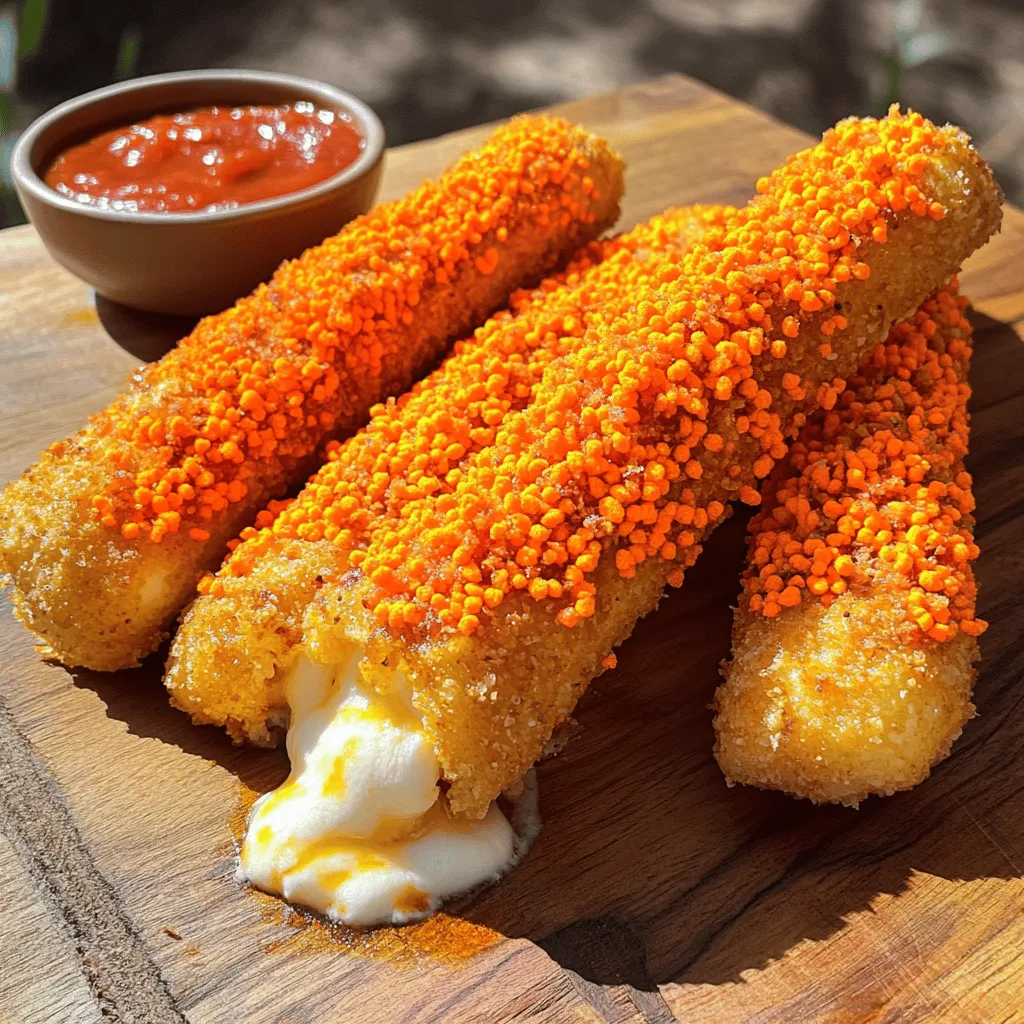
  • Hot Cheeto Mozzarella Sticks: A Flavorful Snack Revolution
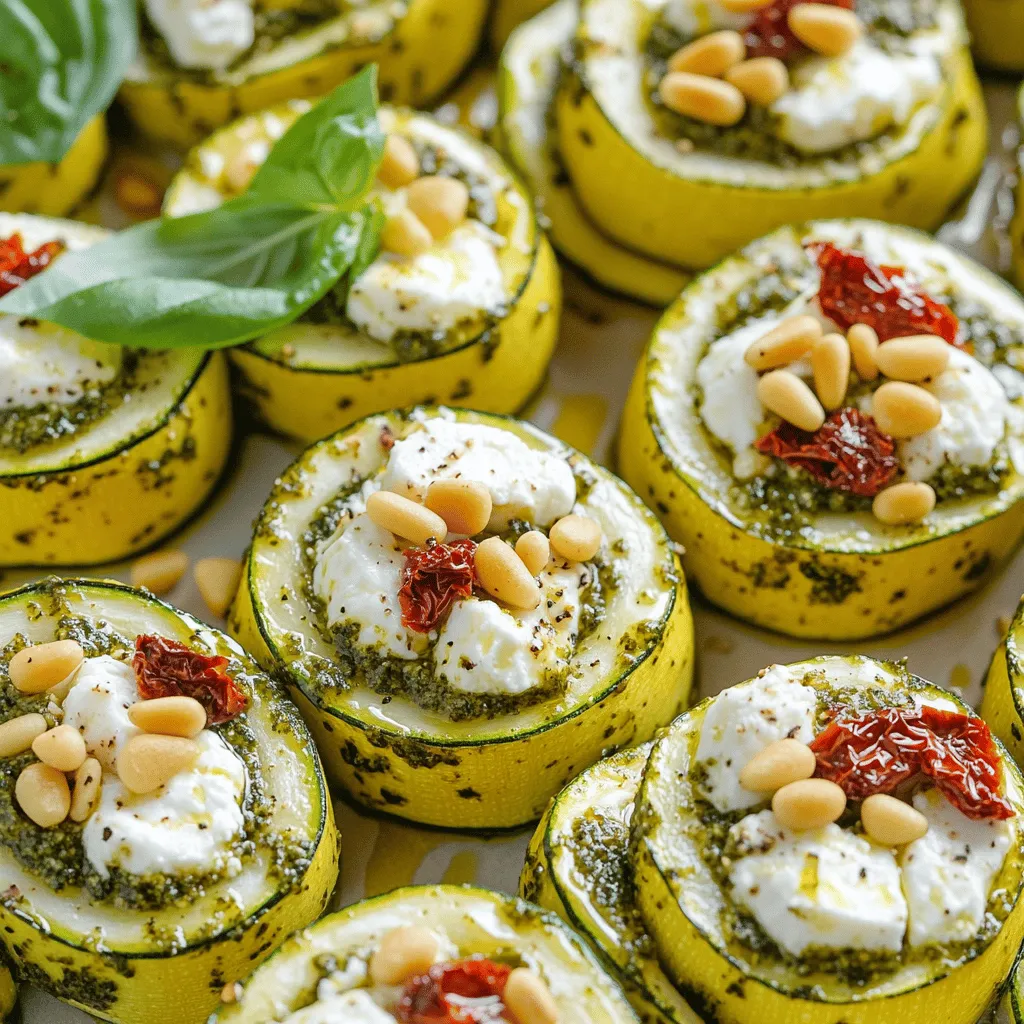
  • Pesto Feta Rolls Recipe: A Delicious Mediterranean-Inspired Dish
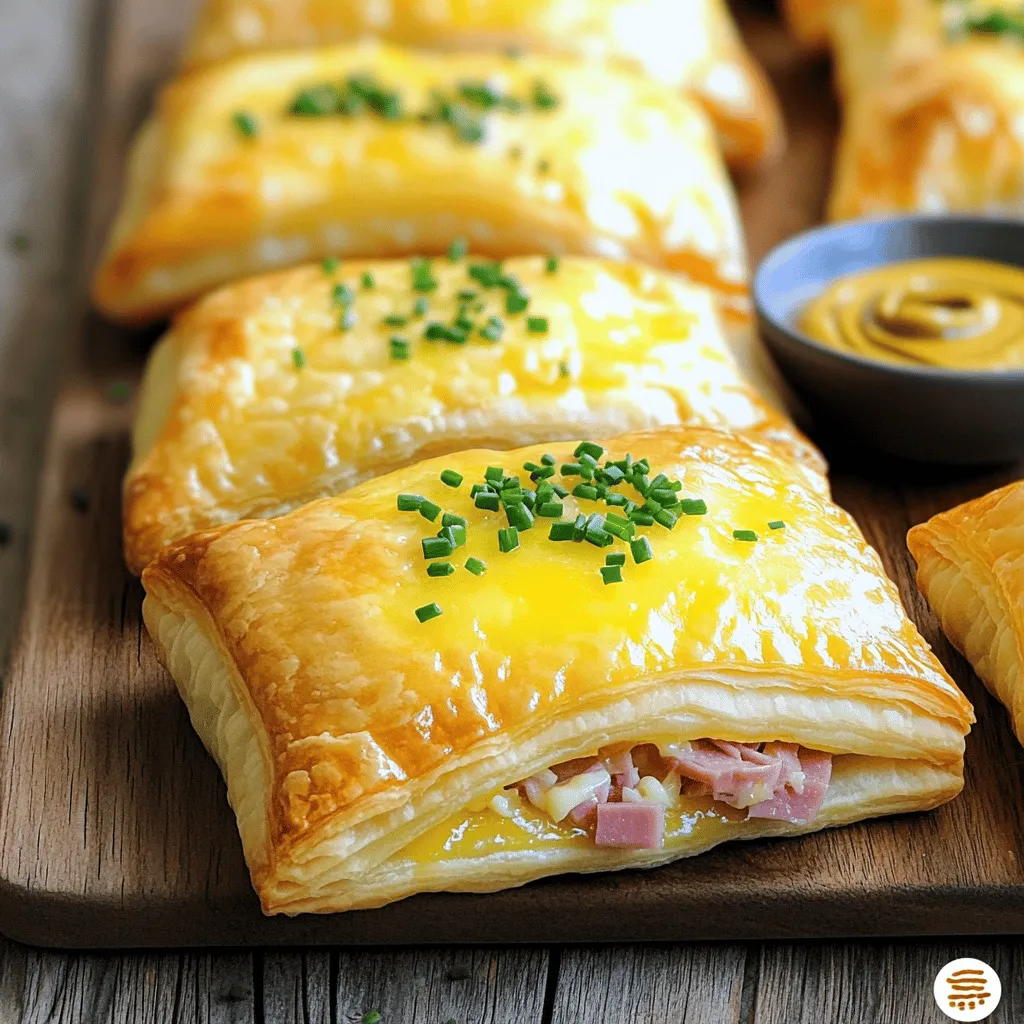
  • Flaky Ham & Cheese Breakfast Delight: A Perfect Start to Your Day
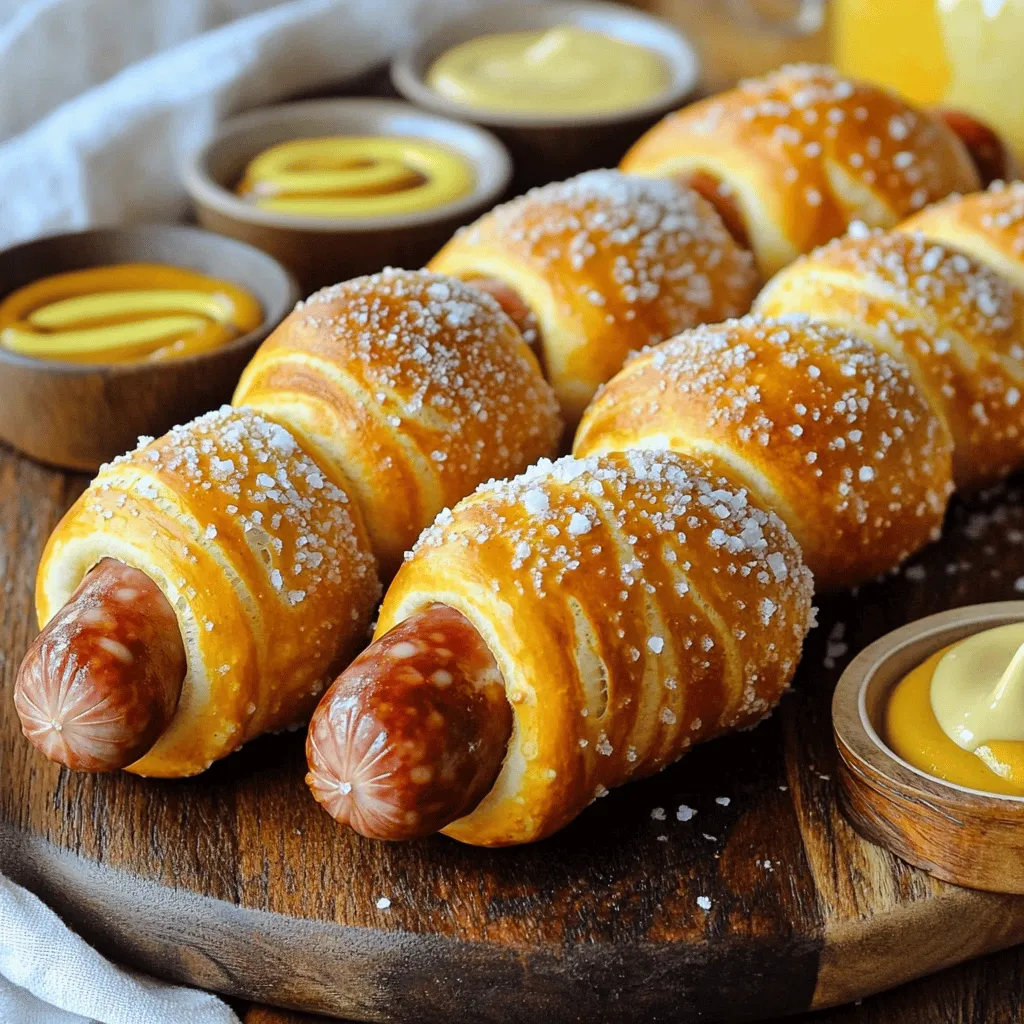
  • Pretzel Pigs in a Blanket Recipe
  • Creamy Cheesy Delight Queso Recipe
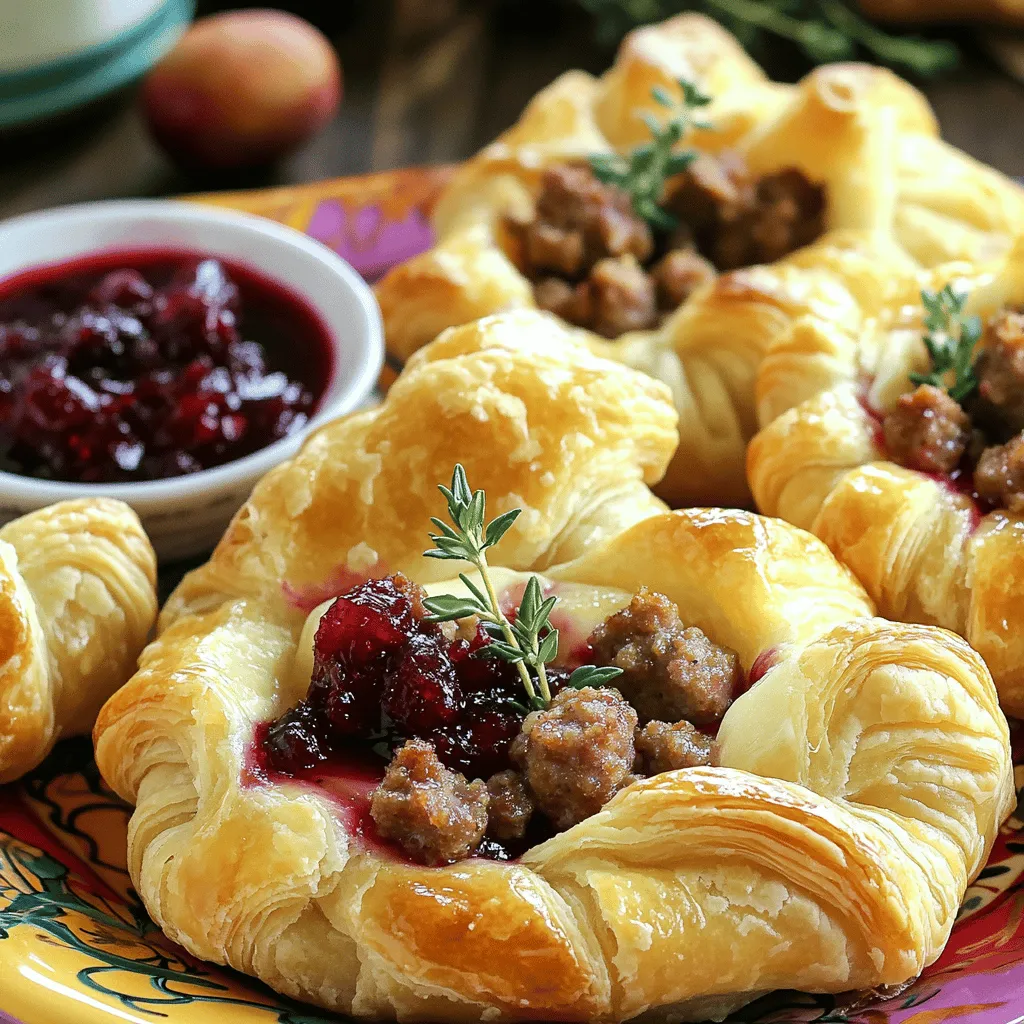
  • Sausage Cranberry Brie Bites: A Flavorful Appetizer
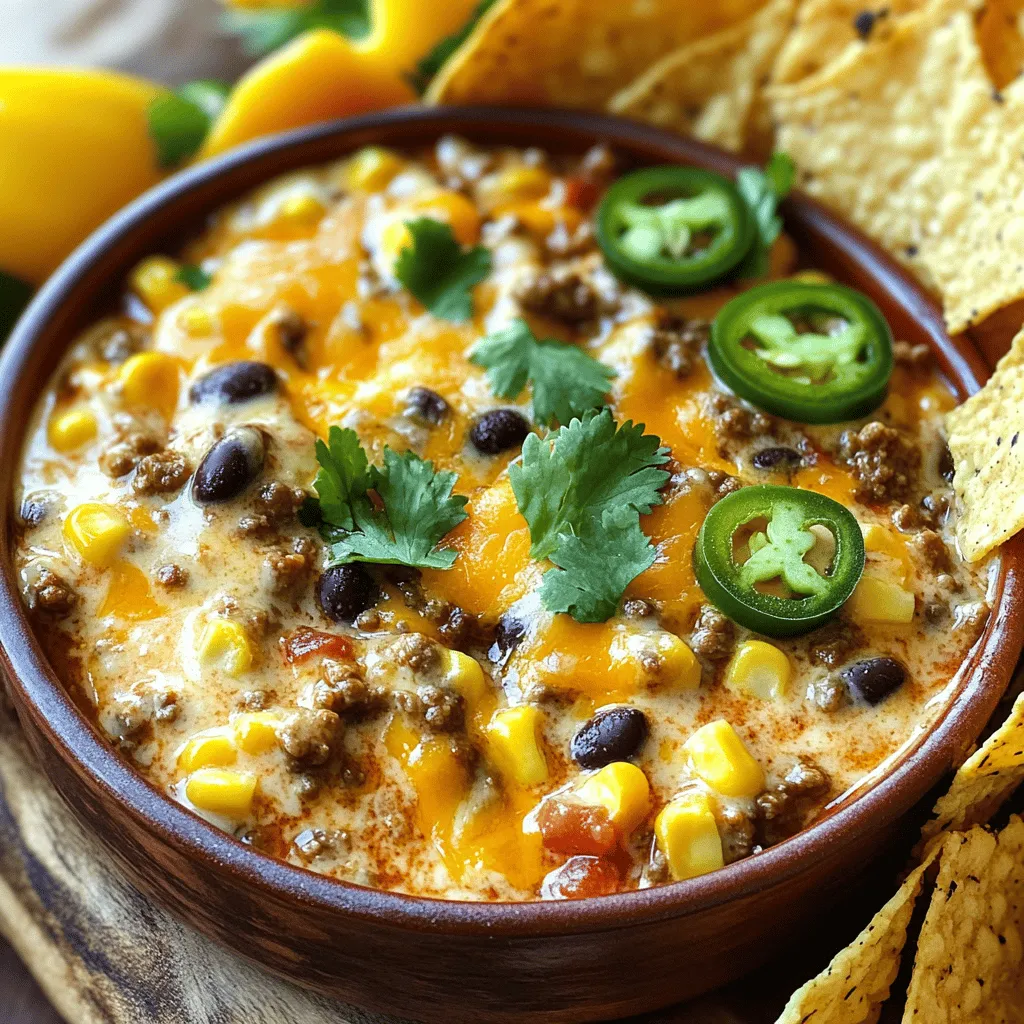
  • Tantalizing Slow Cooker Taco Dip: The Allure of a Beloved Appetizer
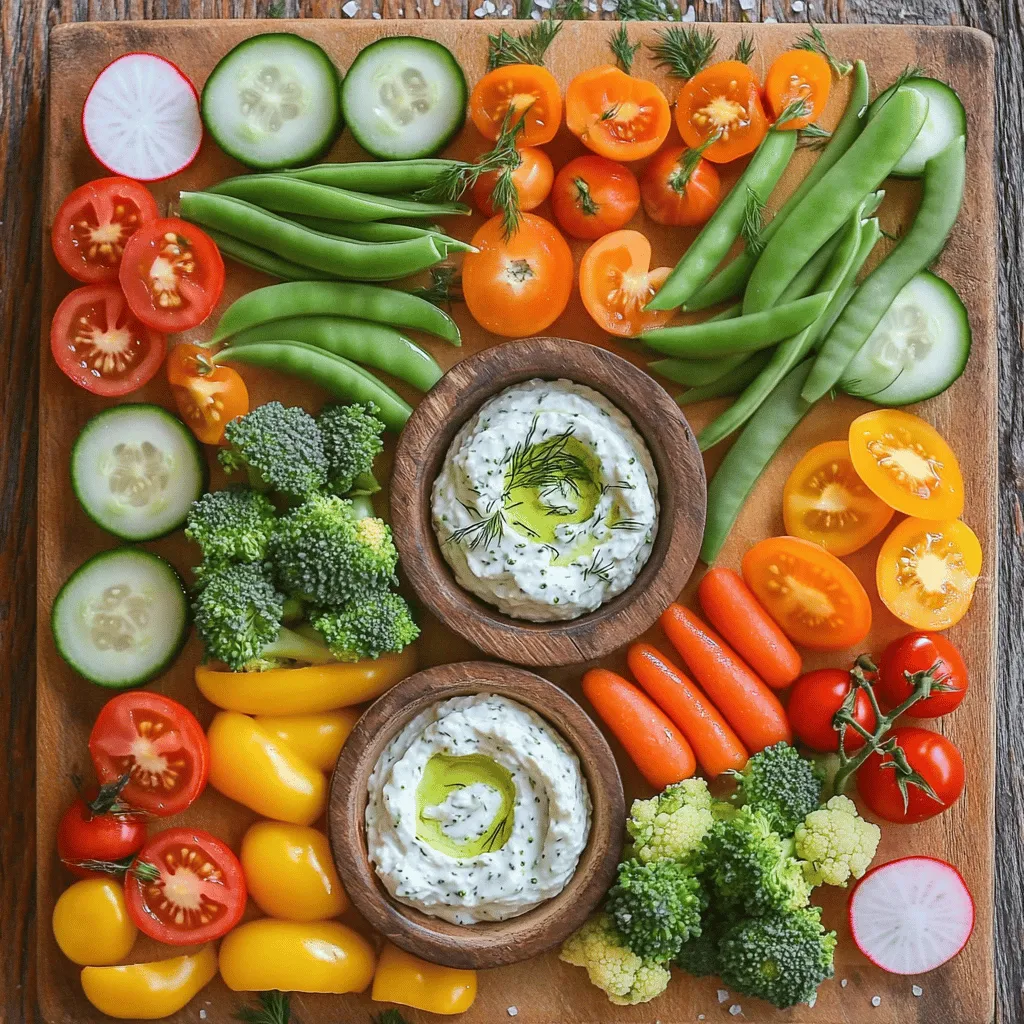
  • Rainbow Garden Vegetable Tray Recipe
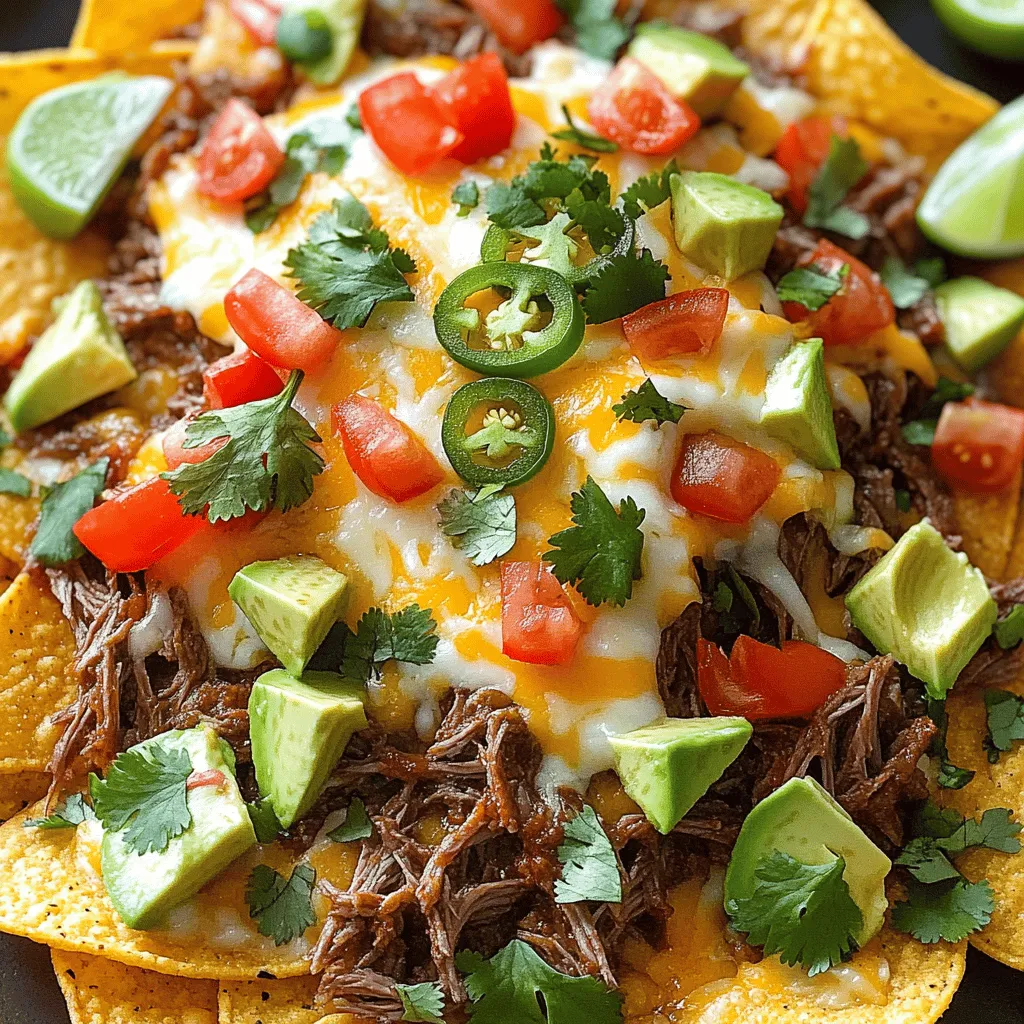
  • Birria Nachos Recipe
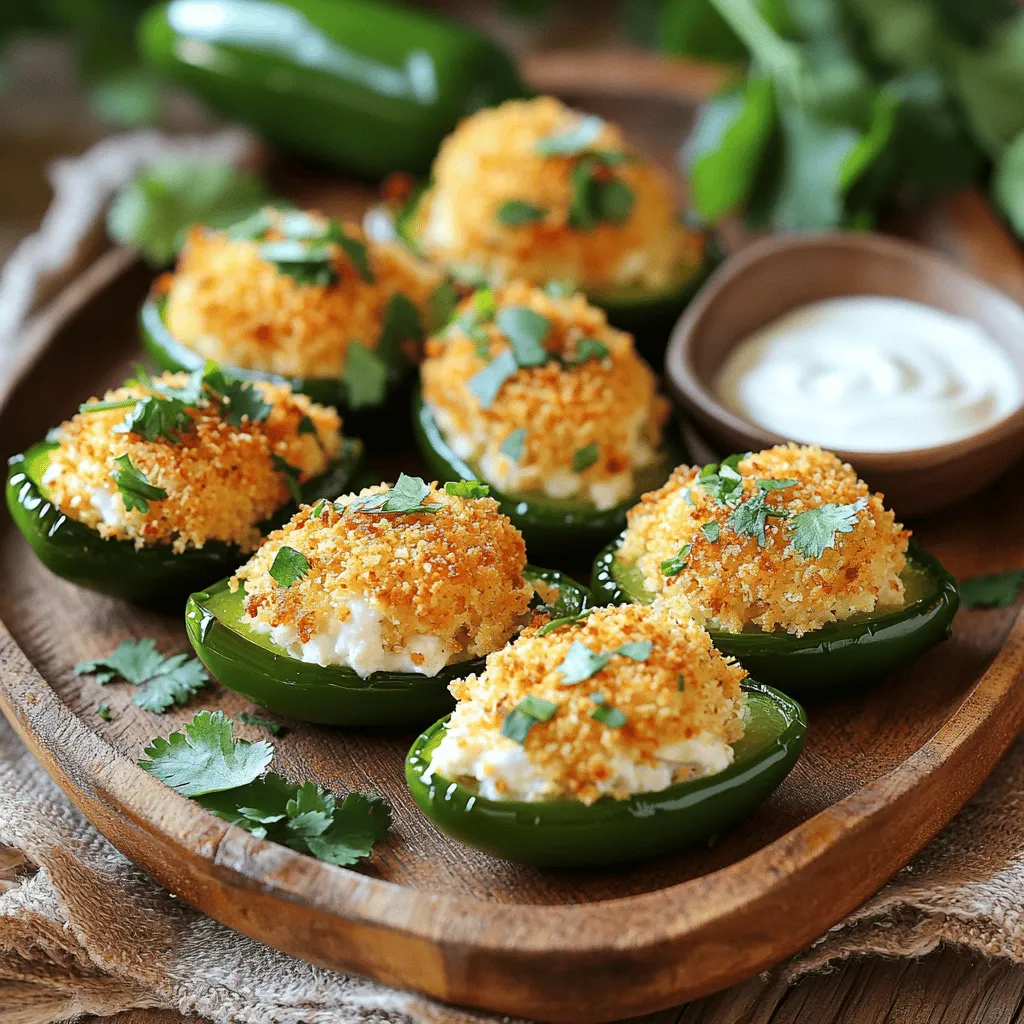
  • Spicy Chicken Jalapeno Bites: A Flavor-Packed Party Delight
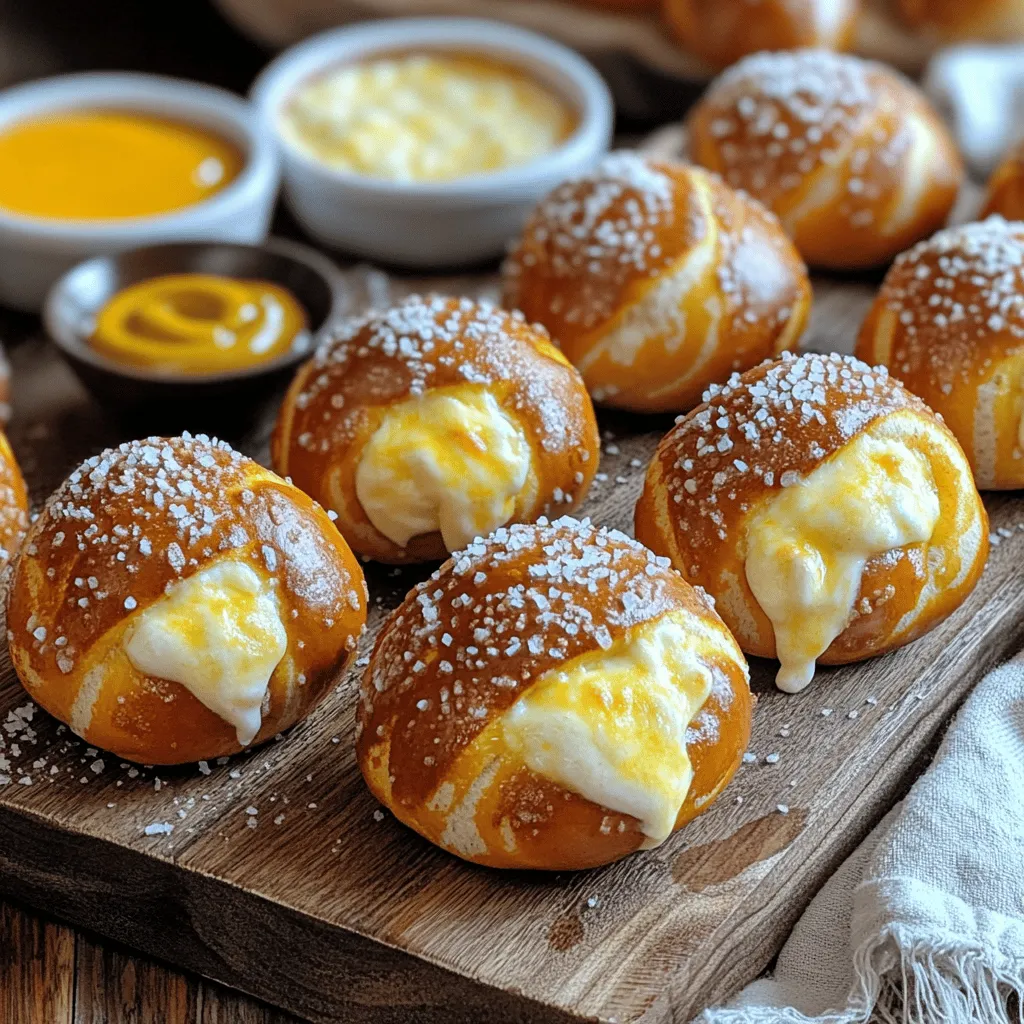
  • Cheese Stuffed Pretzel Bombs: A Delicious Snack to Share
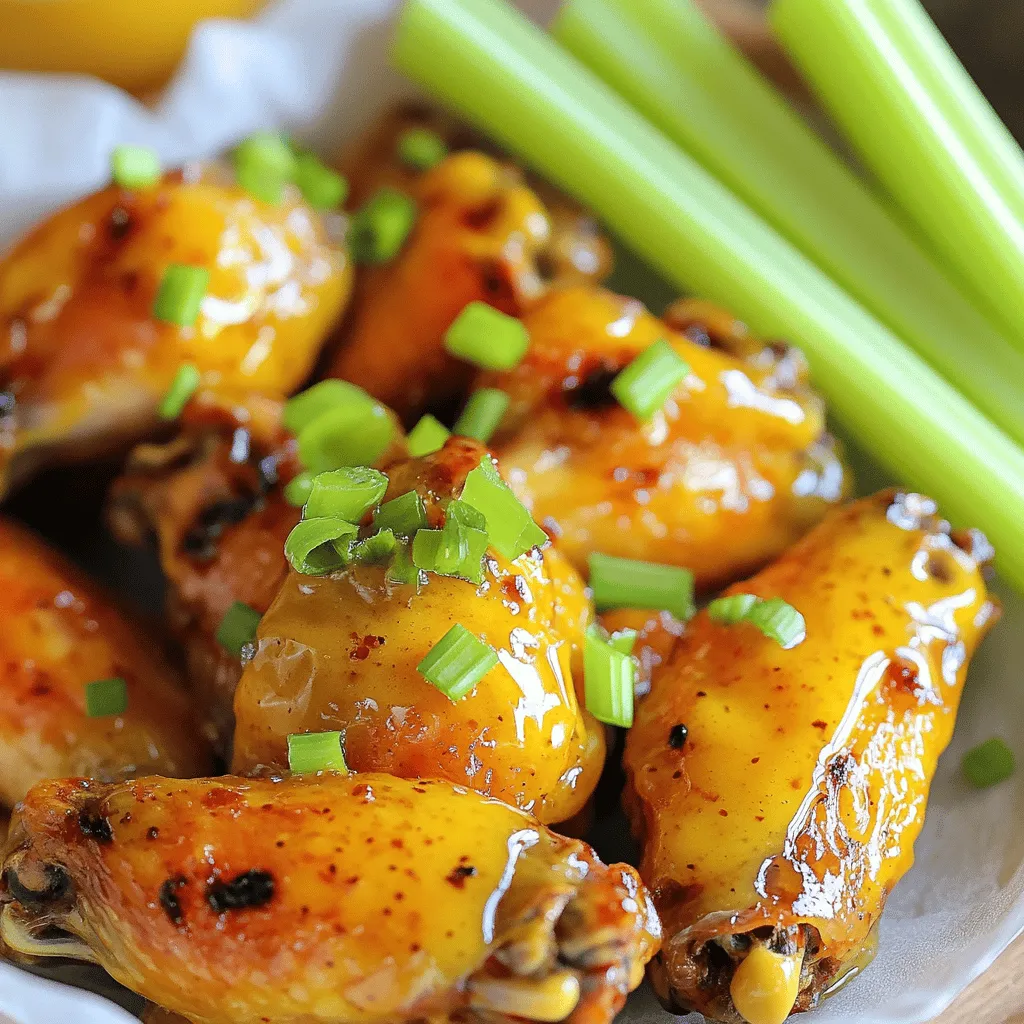
  • Buffalo Honey Mustard Chicken Wings Recipe: A Flavorful Twist on a Classic
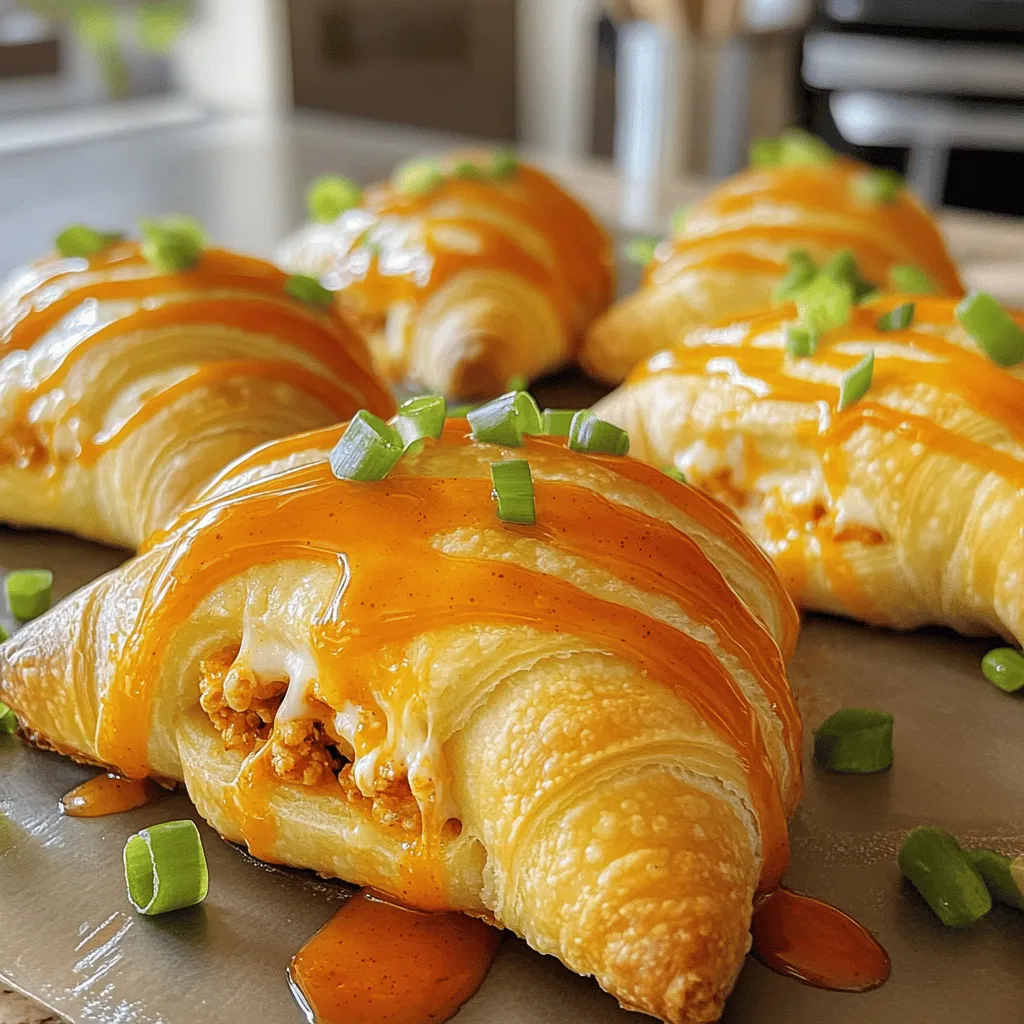
  • Buffalo Chicken Bombs Recipe: The Ultimate Appetizer
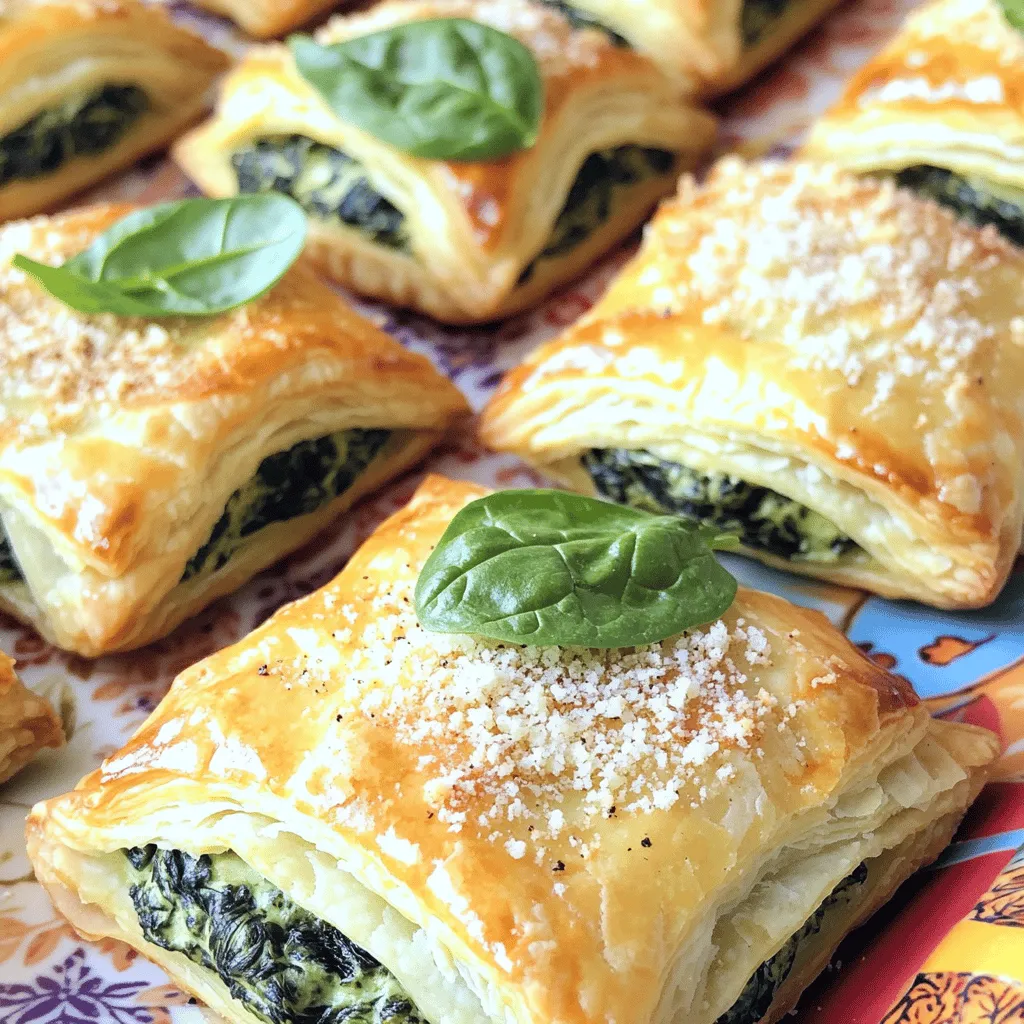
  • Spinach Dip Bites: A Flavorful Appetizer Recipe
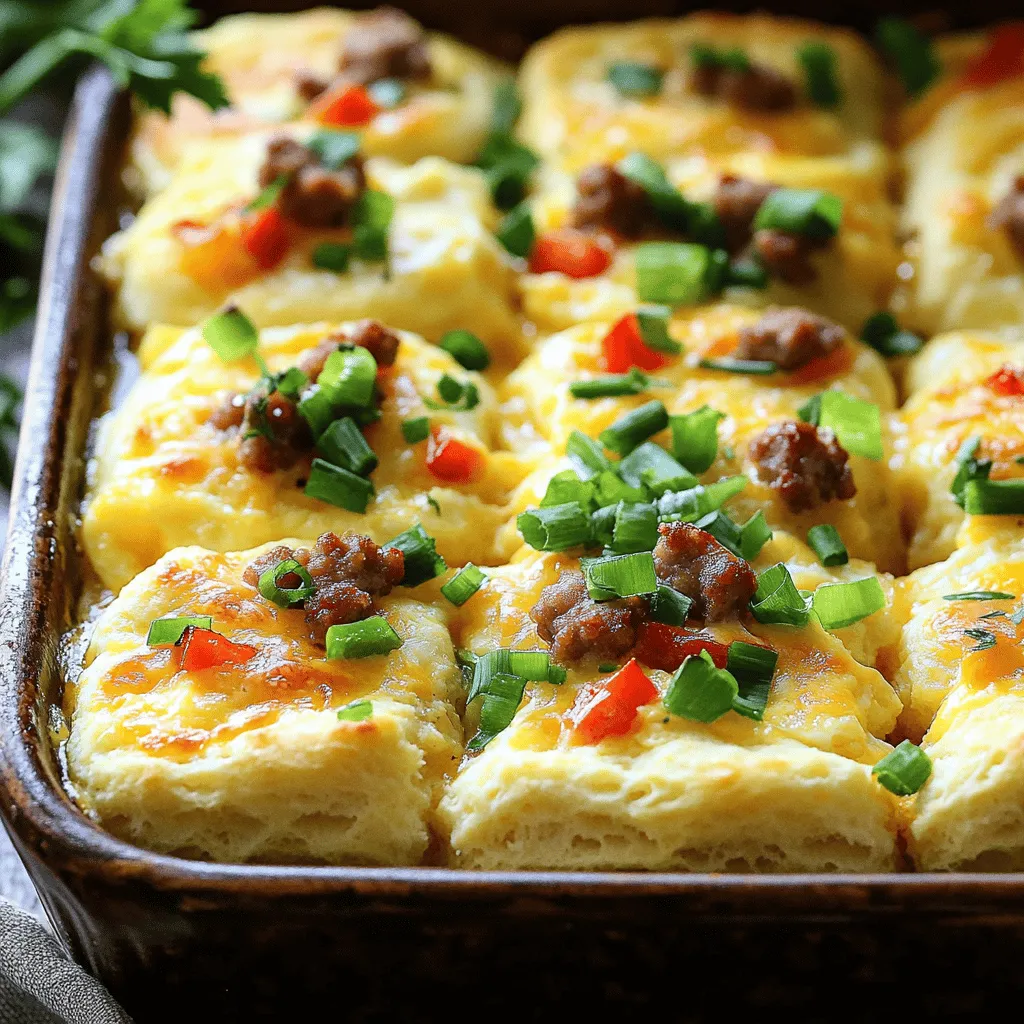
  • Butter Biscuit Breakfast Bake: A Delicious Start to Your Day
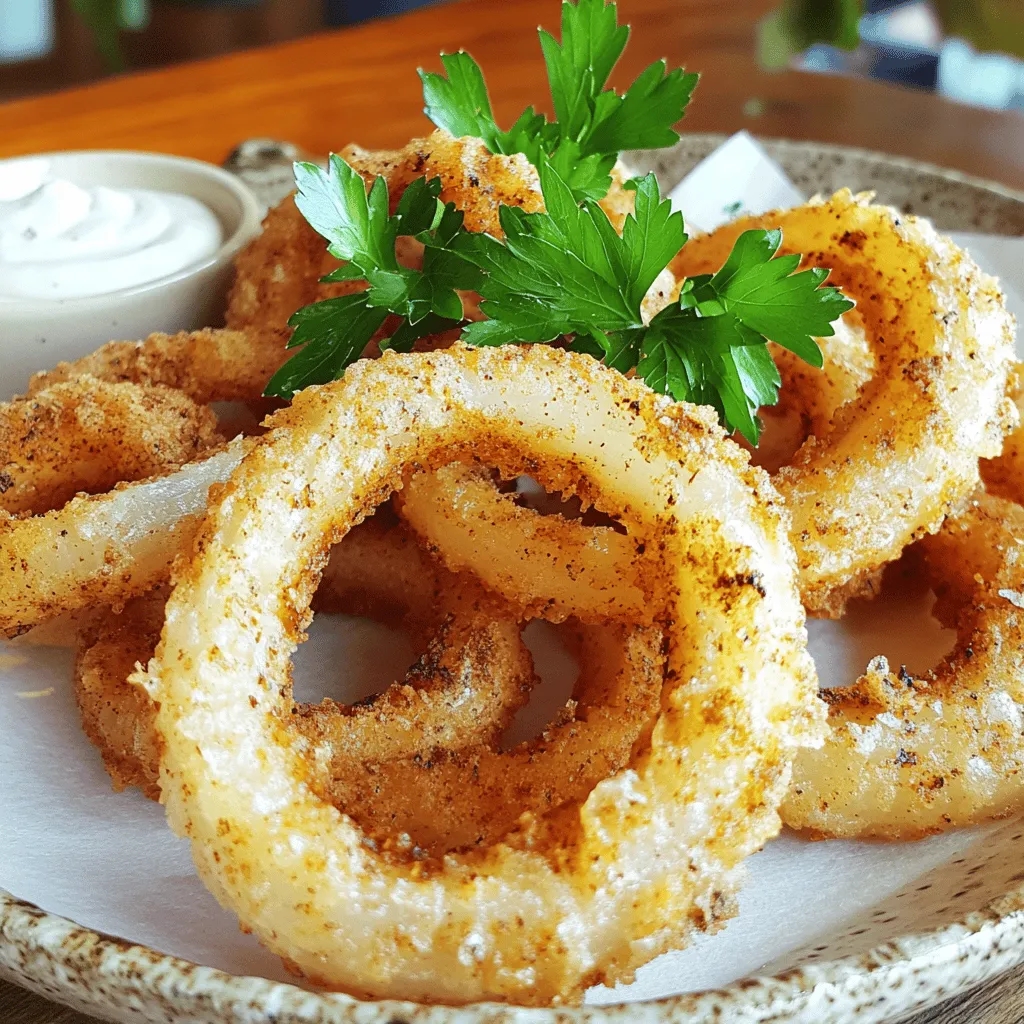
  • Crispy Onion Delights: A Step-by-Step Guide to Perfectly Fried Onion Rings
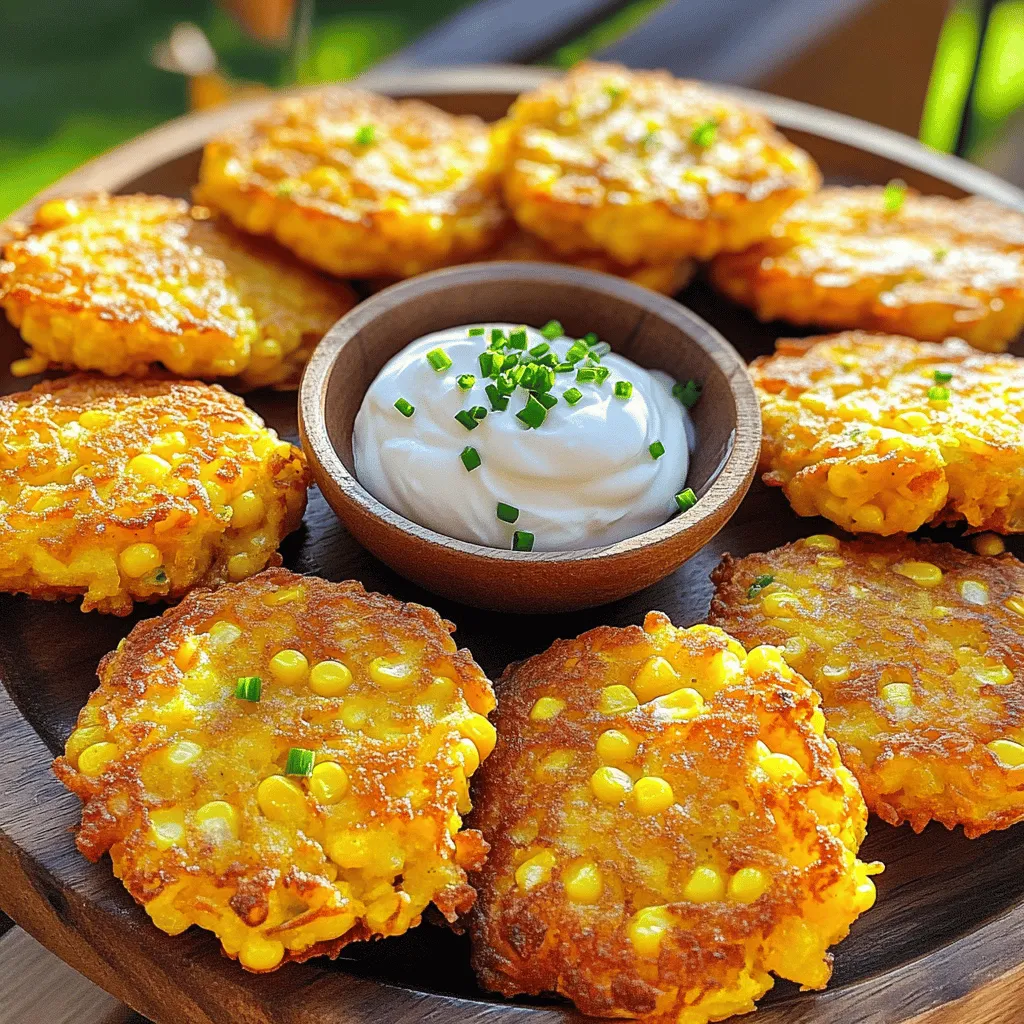
  • Golden Sweet Corn Fritters Recipe
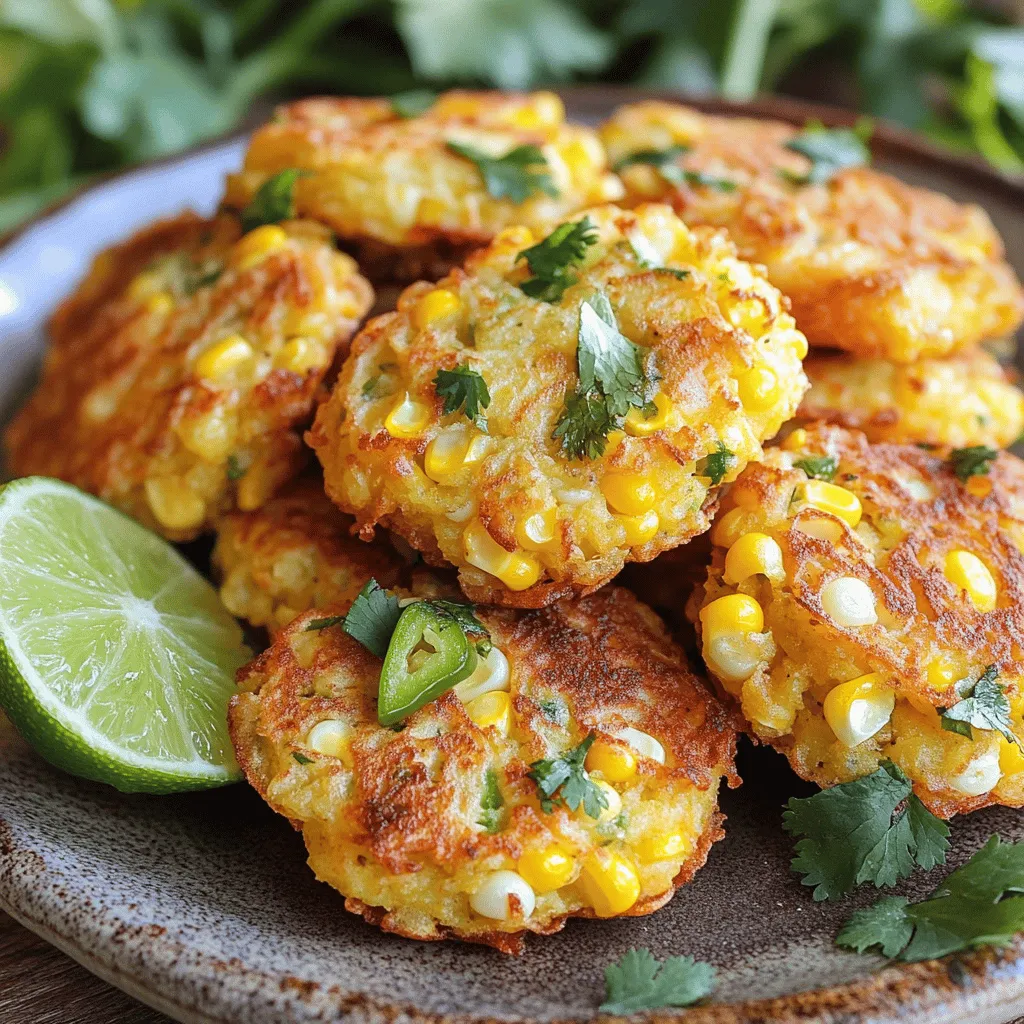
  • Delicious Jalapeño Corn Fritters: A Flavorful Snack Recipe
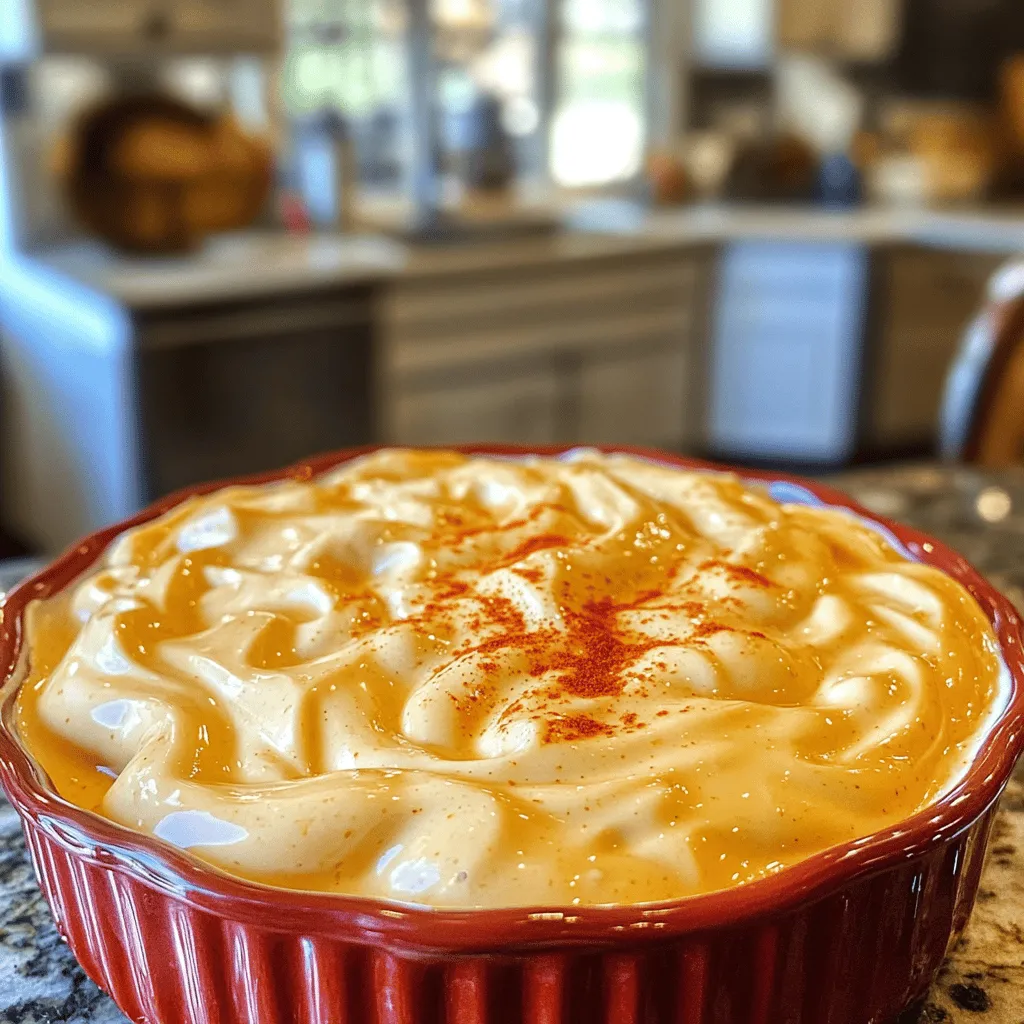
  • Fry Sauce Fiesta: A Flavorful Condiment
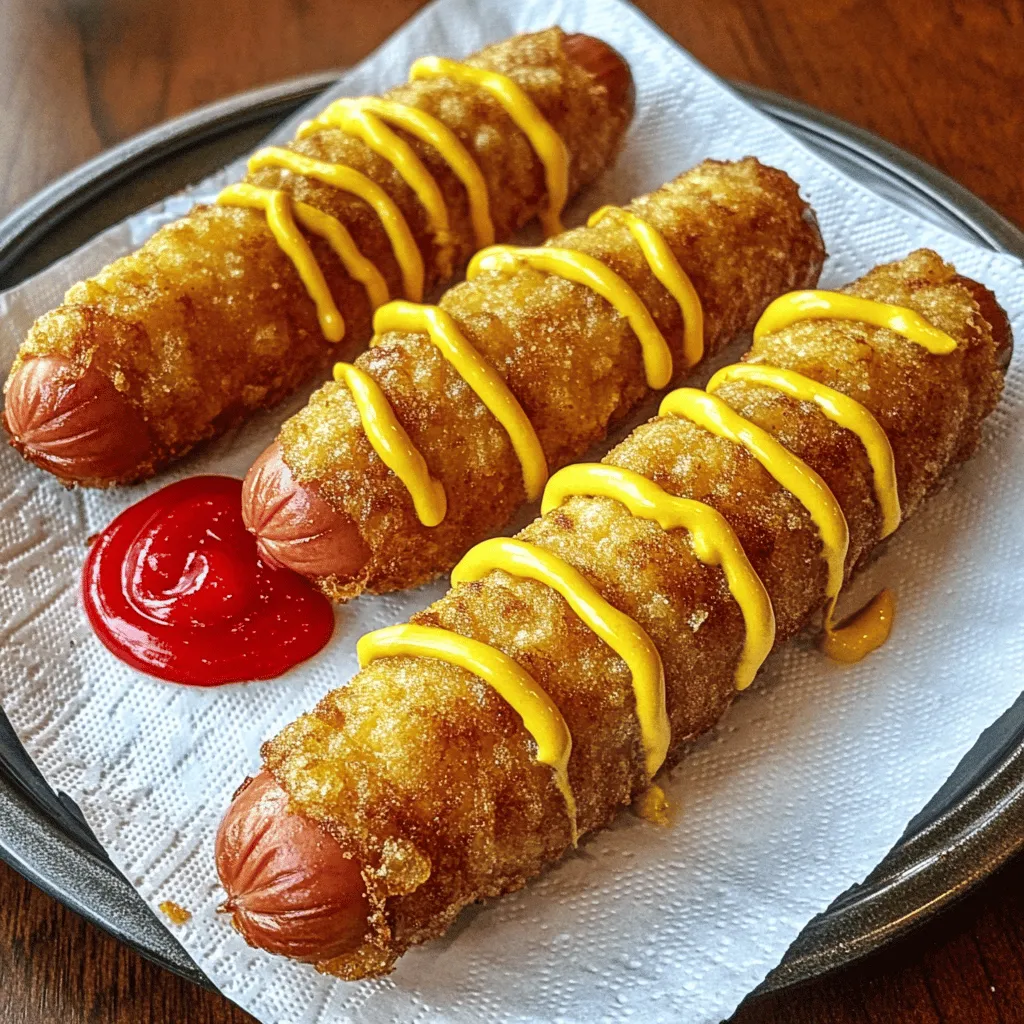
  • Chicago Style Corn Dogs Recipe: A Delicious Journey into American Street Food
  • Jalapeno Popper Smashed Potatoes: A Flavorful Comfort Dish
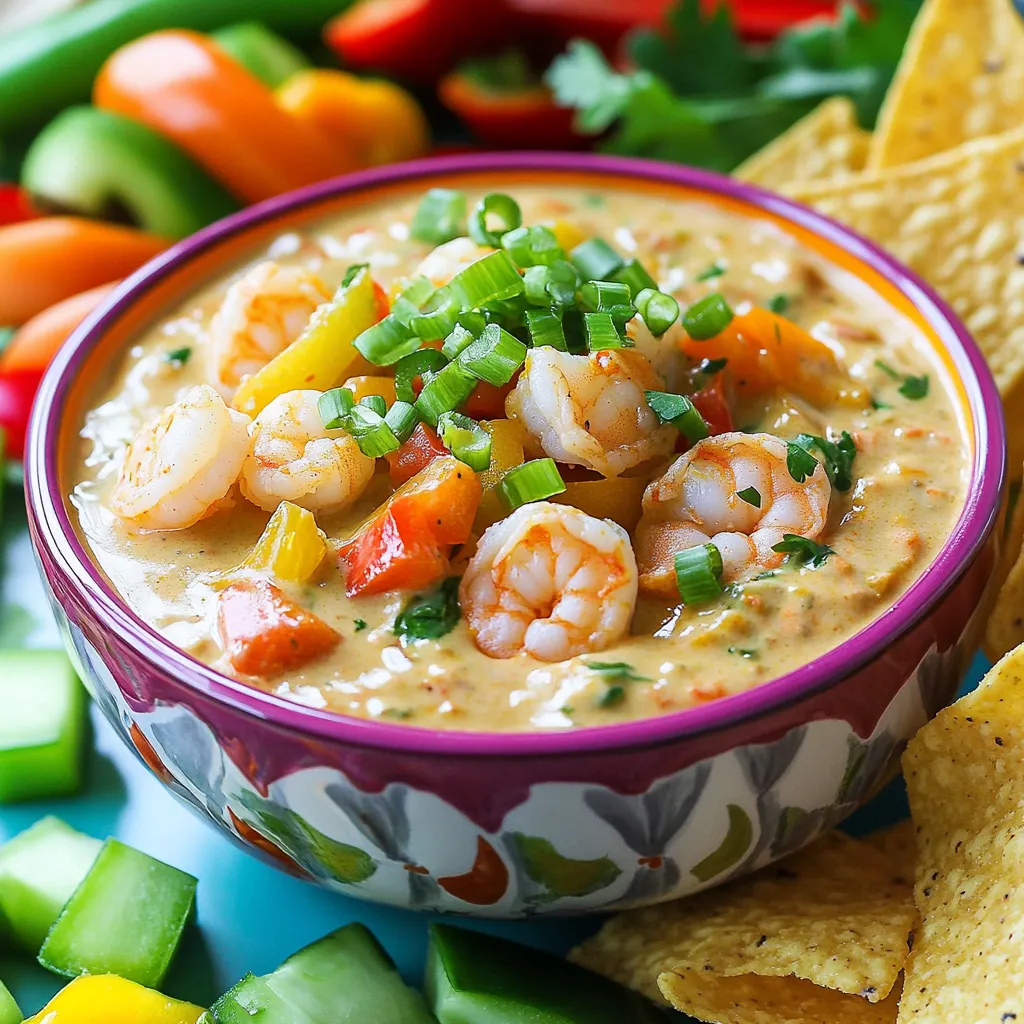
  • Zesty Shrimp Dip Delight Recipe

Posts pagination

Previous page 1 … 10 11 12 … 15 Next page

Hi I’m Taling

I love sharing perfected dishes from my kitchen. I’m sure they’ll earn a spot in your heart. Let’s savor this journey together!.

More about me

Recent Desserts

  • To make these tasty cookies, you need some key ingredients: - 1 cup rolled oats - 1 cup all-purpose flour - 1/2 teaspoon baking soda - 1/2 teaspoon cinnamon - 1/4 teaspoon salt - 1/2 cup unsalted butter, softened - 1/2 cup brown sugar, packed - 1/4 cup honey - 1 large egg - 1 teaspoon vanilla extract These ingredients create a chewy texture. The oats give a hearty feel, while honey adds natural sweetness. You can make your cookies even better with some add-ins: - 1/2 cup raisins or chocolate chips (optional) - 1/2 cup chopped nuts (e.g., walnuts or pecans, optional) Raisins bring a hint of chewiness, and nuts add a nice crunch. Chocolate chips make everything sweeter, and you can mix and match! If you need substitutions, there are many options: - Use gluten-free flour instead of all-purpose flour for a gluten-free version. - Replace the egg with 1/4 cup of applesauce for a vegan choice. - Swap honey with maple syrup if you want a different flavor. These changes allow you to make cookies fit your needs. Enjoy experimenting and find what works best for you! {{ingredient_image_1}} Start by gathering your ingredients. You need rolled oats, flour, baking soda, cinnamon, salt, butter, brown sugar, honey, an egg, and vanilla extract. If you want, add raisins, chocolate chips, or nuts. 1. Preheat your oven to 350°F (175°C). Line a baking sheet with parchment paper. 2. In a medium bowl, mix the oats, flour, baking soda, cinnamon, and salt. Stir these until they blend well. 3. In a large bowl, cream the softened butter and brown sugar. Beat until it looks smooth and fluffy. 4. Add honey, the egg, and vanilla extract. Mix these together till smooth. 5. Gradually add the dry mix. Stir just until combined. Do not overmix. 6. If you choose, fold in raisins, chocolate chips, or nuts. 1. Use a tablespoon to scoop portions of the dough. Place them on the baking sheet. Leave space between each scoop for spreading. 2. Bake for 10-12 minutes. Watch for the edges to turn golden brown. The centers can look soft but will firm up as they cool. 3. For best results, rotate your baking sheet halfway through. This helps cookies bake evenly. 1. When done, take the cookies out of the oven. Let them cool on the baking sheet for 5 minutes. 2. After that, transfer them to a wire rack. Allow them to cool completely. 3. Serve these cookies on a pretty plate. Drizzle honey on top for extra sweetness. A sprinkle of powdered sugar also looks nice. Enjoy your warm and chewy cookies! To make the best honey oatmeal cookies, focus on the butter. Use softened butter, not melted. Creaming the butter and brown sugar helps create a light texture. Don't overmix your dough. Mix until just combined for chewy cookies. Bake them until the edges are golden but the centers seem soft. They will firm up as they cool. One mistake is not preheating the oven. Always preheat to 350°F (175°C). This helps the cookies bake evenly. Another issue is using the wrong flour. All-purpose flour works best for this recipe. Lastly, avoid crowding the baking sheet. Leave space between cookies to allow for spreading. Store leftover cookies in an airtight container. They stay fresh for about a week. If you want to keep them longer, freeze them. Just place them in a freezer-safe bag. To thaw, leave them at room temperature for a few hours. Enjoy your cookies soft and chewy again! Pro Tips Chill the Dough: For even chewier cookies, refrigerate the dough for at least 30 minutes before baking. This helps to prevent spreading and enhances the flavor. Use Fresh Ingredients: Ensure your baking soda and spices are fresh for the best flavor and texture. Old ingredients can lead to flat or bland cookies. Customize Your Add-ins: Feel free to experiment with various mix-ins like dried fruits, seeds, or different types of chocolate to suit your taste preferences. Perfect Storage: Store cookies in an airtight container at room temperature for up to a week. For longer freshness, freeze them in a single layer and transfer to a container once solid. {{image_2}} You can make these cookies healthier with some simple swaps. Instead of all-purpose flour, try using whole wheat flour. This adds fiber and nutrients. You can also replace some butter with unsweetened applesauce. This change cuts fat and adds moisture. Using less brown sugar can also help. Try just a third of a cup to reduce sugar while still keeping sweetness. Add-ins can change the flavor of your cookies in fun ways. Instead of raisins, try dried cranberries or cherries for a tart touch. For a nutty flavor, use chopped almonds or pecans. You can also mix in dark chocolate chips for a rich taste. If you want a spice kick, add a pinch of nutmeg or ginger. These add-ins make each batch unique and fun to explore. Seasonal changes inspire great variations. In fall, add pumpkin spice and chopped apples for a cozy vibe. During winter, mix in peppermint chips for a festive flair. In the summer, fresh berries can give a bright burst of flavor. These seasonal twists let you enjoy honey oatmeal cookies all year round. Each season brings a new taste adventure! Each Honey Oatmeal Cookie has about 100 calories. This number can change based on the add-ins you choose. If you use chocolate chips or nuts, the calories may go up a bit. To keep track, you can divide the total calories by the number of cookies you bake. These cookies have oats, which are good for heart health. Oats can help lower bad cholesterol. Honey gives a natural sweetness and has antioxidants. It can also help soothe a sore throat. Brown sugar adds flavor but is less processed than white sugar. Using nuts can add healthy fats and protein, making the cookies more filling. You can cut sugar by using less brown sugar or honey. Replace some of the sugar with mashed bananas or applesauce. This change keeps cookies moist and sweet. You can also try using whole wheat flour for more fiber. If you skip the raisins or chocolate chips, you lower the calories too. To make these cookies vegan, swap the butter for a plant-based option. Use coconut oil or vegan butter. Replace the egg with a flax egg. To make a flax egg, mix one tablespoon of ground flaxseed with two and a half tablespoons of water. Let it sit for five minutes until it thickens. You can still use honey, but for a fully vegan cookie, substitute it with maple syrup or agave nectar. If you want to skip the eggs, use a flax egg or applesauce. A quarter cup of unsweetened applesauce works great in place of one egg. You can also use mashed banana or yogurt as alternatives. Each option adds moisture and keeps your cookies chewy. Yes, you can freeze these cookies! After baking, let them cool completely. Place the cookies in an airtight container or a freezer bag. They will last for about three months. To enjoy later, thaw them overnight in the fridge or microwave them for a few seconds. They will taste fresh and delightful! In this article, we explored how to make delicious honey oatmeal cookies. We covered key ingredients, step-by-step instructions, and tips for success. You can try different flavors and healthier swaps to suit your taste. Remember to avoid common mistakes for the best texture. Finally, enjoy these cookies fresh or store them well for later. Each bite offers great taste and health benefits that you can feel good about.
    Honey Oatmeal Cookies Comforting and Chewy Delight
  • To make your blondies, you need simple yet tasty items: - 1 cup unsalted butter - 1 cup packed brown sugar - 1/2 cup granulated sugar - 2 large eggs - 1 teaspoon vanilla extract - 2 cups all-purpose flour - 1 teaspoon baking powder - 1/2 teaspoon baking soda - 1/4 teaspoon salt - 1 cup chocolate chips (semisweet or milk) - 1/2 cup chopped nuts (optional, like walnuts or pecans) Each ingredient plays a key role. The butter gives rich flavor. The sugars add sweetness and texture. Eggs bind everything together. Flour gives structure. Baking powder and baking soda help them rise. You can take your blondies up a notch with some fun add-ins! Here are some ideas: - 1/2 cup of shredded coconut for a tropical flair - 1/2 cup of dried fruit like cranberries or apricots for a chewy bite - A sprinkle of sea salt on top to enhance sweet flavors These add-ins let you customize your blondies. You can make each batch unique and exciting. If you need to swap some items, here are great options: - Use coconut oil instead of butter for a dairy-free treat - Replace all-purpose flour with oat flour for a gluten-free option - Try maple syrup in place of granulated sugar for a deeper flavor These substitutions will still give you delicious blondies. You can enjoy them no matter your dietary needs. {{ingredient_image_1}} Start by preheating your oven to 350°F (175°C). Line a 9x13 inch baking pan with parchment paper. Leave some paper over the sides to help lift out the blondies later. In a medium saucepan, melt one cup of unsalted butter over medium heat. Stir it often. Cook until the butter turns a golden brown and smells nutty. This takes about 5 to 7 minutes. Be careful not to burn it. After that, pour the browned butter into a mixing bowl and let it cool for a few minutes. Once cooled, mix in one cup of packed brown sugar and half a cup of granulated sugar. Stir until the mix is smooth. Add two large eggs, one at a time, mixing well after each egg. Next, stir in one teaspoon of vanilla extract. In another bowl, whisk together two cups of all-purpose flour, one teaspoon of baking powder, half a teaspoon of baking soda, and a quarter teaspoon of salt. Gradually add this dry mix to the wet ingredients, stirring until just combined. Be careful not to overmix. Finally, gently fold in one cup of chocolate chips and half a cup of chopped nuts, if you like. Now, pour the batter into your prepared baking pan. Spread it out evenly. Place the pan in the oven and bake for 20 to 25 minutes. The edges should look lightly golden. To check if they are done, insert a toothpick in the center. If it comes out with a few moist crumbs, your blondies are ready! After baking, let the blondies cool in the pan for about 10 minutes. Use the parchment paper to lift them out. Move them to a wire rack to cool completely. Once cool, cut them into squares. Enjoy your chewy brown butter blondies! To get that chewy texture, don’t overmix your batter. Mix just until the flour disappears. Adding brown sugar helps keep your blondies moist and chewy. The brown butter also adds richness that boosts the chewiness. Finally, let them cool before cutting. This helps them set and hold their shape. Brown butter is key to making these blondies shine. Melt your butter slowly over medium heat. Keep stirring until it turns a beautiful golden brown. You’ll know it’s done when it smells nutty. This process adds a deep, rich flavor that makes your blondies special. Remember to let it cool before mixing it with sugar and eggs. One common mistake is not measuring ingredients correctly. Use a kitchen scale for accuracy if you can. Another mistake is opening the oven door too soon. This can cause the blondies to sink. Always check for doneness with a toothpick. It should come out with a few moist crumbs, not wet batter. Avoiding these mistakes will help you bake perfect blondies every time. Pro Tips Use Fresh Ingredients: Always use fresh eggs and quality chocolate chips for the best flavor and texture in your blondies. Don't Overmix: When combining the wet and dry ingredients, mix just until combined to maintain a chewy texture. Cool Before Cutting: Allow the blondies to cool completely before cutting to ensure clean edges and prevent them from falling apart. Experiment with Mix-ins: Feel free to add your favorite mix-ins like dried fruit or different types of nuts for a unique twist on the classic blondie. {{image_2}} If you want nut-free blondies, simply skip the nuts. You can still enjoy a chewy texture and rich flavor. The chocolate chips will add enough sweetness. If you like, add a bit more flour to keep the texture nice. This way, those with nut allergies can enjoy this treat too! You can change the flavor of your blondies easily. Adding spices like cinnamon or nutmeg gives a warm taste. A teaspoon of almond extract can add a nice twist. Want a tropical touch? Add some shredded coconut. These small changes can create a whole new dessert experience. Taste buds will thank you! Using different types of chocolate is simple. If you love dark chocolate, swap in dark chocolate chips. They will give a richer flavor. For a sweeter treat, use white chocolate chips. You can even mix them for a fun blend. Each type of chocolate brings its own magic to these blondies. Enjoy experimenting! To keep your chewy brown butter blondies fresh, store them in an airtight container. This helps keep them soft and chewy. Place parchment paper between layers to prevent sticking. Store them at room temperature for up to five days. If you want them to last longer, the fridge can work too. Just know that cold blondies may lose some chewiness. Freezing blondies is easy and a smart choice. Start by letting them cool completely. Once cool, cut them into squares. Wrap each square in plastic wrap. Then, place the wrapped blondies in a freezer bag. They can stay in the freezer for up to three months. When you’re ready to enjoy, simply take one out and let it thaw at room temperature. If you want to warm up your blondies, the oven is best. Preheat your oven to 350°F (175°C). Place the blondies on a baking sheet for about 5-10 minutes. This warms them and brings back their chewy texture. You can also use a microwave. Heat them for about 10-15 seconds. Be careful not to overheat; you want them warm, not hot. Enjoy every bite! Blondies and brownies look alike, but they taste very different. Blondies use brown sugar, while brownies use cocoa powder. That gives blondies a sweet, butterscotch flavor. Brownies have richer chocolate flavor. The texture is also different. Blondies are chewy and soft, while brownies can be fudgy or cake-like. To check if your blondies are done, look at the edges. They should be lightly golden. Insert a toothpick in the center. If it comes out with a few moist crumbs, they are ready. If it comes out wet with batter, bake them a bit longer. This usually takes about 20 to 25 minutes. You can use margarine, but it will change the flavor a bit. Butter gives blondies a rich taste. Margarine may not brown like butter, which adds a nutty flavor. If you need to use margarine, choose one that has a higher fat content for better results. In this post, I covered key ingredients for chewy brown butter blondies and helpful tips for baking. You learned how to prepare the batter, bake your blondies, and cool them properly. I shared storage tips and answered common questions about blondies. Brown butter adds a rich taste you will love. Baking is fun, so don’t be afraid to try new flavors. Enjoy your blondies and share with friends.
    Chewy Brown Butter Blondies Perfectly Delicious Treat
  • To make a flourless chocolate lava cake, you need: - 1 cup semi-sweet chocolate chips - 6 tablespoons unsalted butter - 3 large eggs - 1/2 cup granulated sugar - 1 teaspoon vanilla extract - 1/4 teaspoon salt - 1/4 cup unsweetened cocoa powder These simple ingredients create a rich and gooey dessert that everyone loves. You can enhance your cake with these extras: - Powdered sugar for dusting - Vanilla ice cream for serving These additions make your lava cake even more delightful. This dessert is naturally gluten-free since it uses no flour. If you want to make it dairy-free, you can swap the butter and chocolate for dairy-free options. Always check labels to ensure they meet your needs. {{ingredient_image_1}} Start by preheating your oven to 425°F (220°C). Grease four ramekins with unsalted butter. Make sure to cover the entire inside. Then, dust each ramekin with cocoa powder. This step helps the cakes pop out easily after baking. In a microwave-safe bowl, mix the semi-sweet chocolate chips with the unsalted butter. Heat them in the microwave for 30 seconds. Stir the mixture well after each interval. Keep doing this until it is smooth and shiny. This blend is the heart of your lava cake. In another bowl, crack three large eggs. Add the granulated sugar, vanilla extract, and salt. Whisk these together until the mix is pale and frothy. Next, pour the melted chocolate mixture into this egg mix. Fold the two together gently. Be careful not to overmix; we want a rich, smooth batter. Sift the unsweetened cocoa powder over your batter. Gently fold it in until combined. Now, divide the batter evenly among the prepared ramekins, filling each about 3/4 full. Place the ramekins on a baking sheet for easy handling. Bake in your preheated oven for 12-14 minutes. The edges should be firm, but the center will still jiggle slightly. After baking, let the cakes cool for 1-2 minutes. Carefully flip each ramekin onto a serving plate. The cakes should slide out easily. If you want, dust them with powdered sugar for a nice touch. Serve warm, and don't forget a scoop of vanilla ice cream for extra delight! To get that gooey center, watch your baking time closely. Bake the cakes for 12 to 14 minutes. The edges should feel firm, but the center must jiggle. If you bake too long, the center will cook through. Use a timer to help you avoid overbaking. Every oven is different, so check a minute early. Trust me, the perfect lava cake is all about timing. If you have any leftover lava cakes, store them in the fridge. Place them in an airtight container to keep them fresh. They will last for about three days. When you’re ready to eat them, reheat in the microwave. Heat for about 20 seconds. This warms them without losing the gooey center. Enjoy them warm for the best taste. The type of chocolate you use makes a big difference. I recommend semi-sweet chocolate chips for a rich flavor. Dark chocolate works too, if you want a more intense taste. Just remember, the better the chocolate, the better the cake. Look for high-quality brands with simple ingredients. Always choose chocolate you love to eat on its own. Pro Tips Perfect Chocolate Melting: To avoid scorching the chocolate, melt it in short 30-second intervals, stirring in between to ensure even melting without burning. Check for Doneness: The ideal lava cake should have firm edges and a soft, gooey center. If unsure, do a toothpick test; it should come out with moist crumbs, not wet batter. Cooling Time: Allow the cakes to cool for just 1-2 minutes before inverting. This helps set the edges while keeping the center molten. Serving Suggestions: For an extra touch of elegance, serve with a dollop of whipped cream or a fresh raspberry alongside the vanilla ice cream. {{image_2}} You can spice up your flourless chocolate lava cake with fun flavors. Want a minty twist? Just add a few drops of mint extract to the batter. This will give it a cool and fresh taste. If you love coffee, add one tablespoon of instant coffee granules. It brings out the chocolate flavor nicely. For a fruity touch, mix in some orange zest. Each flavor adds a new layer of fun to this dessert. If you want a healthier cake, switch the granulated sugar. You can use coconut sugar or maple syrup. Coconut sugar has a lower glycemic index, so it’s a bit better for your health. If you use maple syrup, reduce the amount of butter slightly. This keeps the cake moist while making it a bit lighter. These swaps keep the richness you love but make it a tad healthier. Want to make this cake gluten-free? You're already set! The recipe contains no flour. For a dairy-free option, use vegan chocolate chips and coconut oil instead of butter. The taste remains rich and delicious. If you have egg allergies, try using flax eggs. Mix one tablespoon of ground flaxseed with three tablespoons of water for each egg. Let it sit until it thickens. These swaps help you enjoy this tasty dessert no matter your dietary needs. To store leftover lava cakes, let them cool first. Place them in airtight containers. Keep them in the fridge for up to three days. If you want to enjoy them later, wait to dust with powdered sugar until you're ready to serve. This keeps them looking fresh. When you're ready to eat, reheat the lava cakes. Preheat your oven to 350°F (175°C). Place the cakes on a baking sheet. Heat for about 8-10 minutes. This warms them without overcooking. You can also use the microwave. Heat on low for about 20-30 seconds. Check to see if they are warm enough. If you want to save lava cakes for later, freezing is a great option. Wrap each cooled cake tightly in plastic wrap. Then, place them in a freezer-safe bag. They can last up to three months. When you want to eat one, take it out and thaw it in the fridge overnight. Then, reheat as needed. Enjoy that molten center again! Yes, you can use dark chocolate or milk chocolate. Dark chocolate gives a rich taste. Milk chocolate offers a sweeter flavor. Just keep the same amount of chocolate chips. Adjust the sugar if you use a sweeter chocolate. Watch the edges closely while baking. They should be firm and set. The center should jiggle slightly when you shake the ramekin. If it looks too firm, it may not have a molten center. You can serve it with a scoop of vanilla ice cream. The cold ice cream pairs well with the warm cake. Fresh berries also add a nice touch. A sprinkle of powdered sugar makes it look fancy too. Yes, you can make the batter ahead of time. Just cover it and keep it in the fridge. When ready to bake, pour it into the ramekins and bake as usual. It’s a great way to save time before a dinner party! In this article, we explored making delicious chocolate lava cakes. You learned about the key ingredients and optional items to serve. I shared step-by-step instructions for perfecting your cakes, along with useful tips to achieve that molten center. We also discussed fun variations to customize your cakes and smart storage practices. As you try this recipe, have fun experimenting! Enjoy the rich flavors and warm centers. Happy baking!
    Flourless Chocolate Lava Cake Rich and Decadent Dessert
  • To make Crème Brûlée French Toast, gather these ingredients: - 1 loaf of brioche bread, sliced thick (about 8 slices) - 4 large eggs - 1 cup whole milk - 1/2 cup heavy cream - 1/2 cup granulated sugar - 1 tablespoon vanilla extract - 1 teaspoon ground cinnamon - Pinch of salt - 1/4 cup brown sugar (for topping) - Fresh berries (for garnish) - Whipped cream (optional, for serving) Each ingredient plays a special role in this recipe. - Brioche Bread: This soft bread adds sweetness and richness. Its thick slices soak up the egg mixture well. - Eggs: They bind the mixture and give the toast a custardy texture. Always use large eggs for best results. - Whole Milk and Heavy Cream: These create a creamy base. Whole milk adds richness, while heavy cream boosts flavor. - Granulated Sugar: This sweetens the egg mixture. It helps to create a balanced flavor. - Vanilla Extract: This adds a warm, sweet aroma. It enhances the overall taste. - Ground Cinnamon: It gives a hint of spice. Cinnamon makes the dish cozy and inviting. - Brown Sugar: This forms a crunchy topping. It caramelizes beautifully, adding a nice contrast to the soft bread. If you can't find some ingredients, here are some substitutes: - Brioche Bread: You can use challah or any thick-sliced bread. They work well too. - Heavy Cream: Use half-and-half for a lighter option. It still adds creaminess. - Whole Milk: Almond milk or oat milk can work if you prefer dairy-free. - Granulated Sugar: You can swap it with coconut sugar or honey for a different sweetness. - Brown Sugar: If you don’t have brown sugar, use granulated sugar with a touch of molasses. {{ingredient_image_1}} To start, gather your ingredients. You will need 4 large eggs, 1 cup of whole milk, 1/2 cup of heavy cream, 1/2 cup of granulated sugar, 1 tablespoon of vanilla extract, 1 teaspoon of ground cinnamon, and a pinch of salt. 1. In a large mixing bowl, whisk together the eggs, milk, heavy cream, granulated sugar, vanilla, cinnamon, and salt. Mix until it is smooth and creamy. This mixture is the heart of your French toast. 2. Let the mixture sit for a few minutes. This gives the flavors time to blend well together. Now, it’s time to assemble your French toast. 1. Take a loaf of brioche bread and slice it thickly, about 8 slices. Arrange the slices in a greased baking dish. You can slightly overlap them if needed. 2. Pour your egg mixture over the brioche slices. Make sure each slice is well soaked. This step is key for that rich, custardy texture. 3. Cover the dish with plastic wrap and refrigerate. Let it sit for at least 2 hours or overnight. The longer it sits, the better it tastes. After the soaking time, you’re ready to bake. 1. Preheat your oven to 350°F (175°C). This ensures even cooking. 2. Remove the plastic wrap and sprinkle 1/4 cup of brown sugar evenly over the soaked bread. This will create that lovely caramel top. 3. Bake in the oven for 30-35 minutes. Look for a golden top and a set center. 4. For a special touch, use a kitchen torch to caramelize the brown sugar. Aim for a bubbly, golden finish for that perfect crème brûlée effect. 5. Let it cool for a few minutes before slicing. This helps the toast hold its shape. Enjoy your delicious Crème Brûlée French Toast warm, topped with fresh berries and whipped cream if you like! To get the best texture, use thick slices of brioche bread. This bread soaks up the egg mixture well. I recommend letting it sit in the fridge for at least two hours. Overnight soaking yields even better results. This allows the bread to absorb all the flavors. One common mistake is not soaking the bread long enough. If you skip this step, the toast may turn out dry. Also, avoid using too much heat while baking. Baking at 350°F ensures even cooking without burning the top. Remember, caramelizing the sugar with too much heat can lead to burnt sugar. Serve your Crème Brûlée French Toast warm. Top it with fresh berries for a burst of flavor. A dollop of whipped cream adds a nice touch, too. You can sprinkle some extra cinnamon on top for added warmth. Consider pairing it with maple syrup for sweetness or a drizzle of honey for a unique twist. Pro Tips Use Day-Old Brioche: For the best texture, use day-old brioche bread. It will absorb the custard mixture better without becoming too soggy. Customize Your Flavors: Feel free to experiment with different extracts like almond or orange for a unique twist on the classic flavor. Check for Doneness: To ensure your French toast is perfectly set, gently shake the baking dish. If the center jiggles too much, it needs more time in the oven. Serving Suggestions: Serve with a drizzle of maple syrup or a dusting of powdered sugar for an extra touch of sweetness. {{image_2}} You can add fun flavors to your Crème Brûlée French Toast. Chocolate is a great choice. You can use chocolate chips or a drizzle of chocolate sauce. Fresh fruit is another tasty addition. Strawberries, blueberries, and bananas work well. You can also mix fruit into the egg mix. It adds a fresh taste and color. Want to try something different? Add a splash of orange or almond extract for a unique twist. You can make this dish fit your needs. For a gluten-free option, use gluten-free bread. Many brands offer great gluten-free choices. If you want a dairy-free version, substitute almond milk or oat milk for whole milk. Use coconut cream instead of heavy cream. This keeps the creaminess while making it dairy-free. Just adjust the sugar if you use sweetened milk. Serving your Crème Brûlée French Toast can be fun! You can stack the slices high for a tall, impressive look. Add whipped cream on top for a treat. Fresh berries add color and flavor. For a fancy touch, sprinkle powdered sugar over the top. You could also serve it with maple syrup or a fruit compote on the side. This makes breakfast feel special. After you enjoy your Crème Brûlée French Toast, you might have some left. To store leftovers, let them cool completely first. Place the slices in an airtight container. Keep them in the fridge for up to three days. This way, they stay fresh and tasty. When you're ready to eat the leftovers, reheating is simple. Preheat your oven to 350°F (175°C). Place the French toast on a baking sheet. Cover it with foil to keep it moist. Heat for about 10-15 minutes. You can also use the microwave if you’re in a hurry. Just warm it for 30-60 seconds, but the oven gives better results. If you want to save some for later, freezing works well too. Wrap each slice in plastic wrap tightly. Then, place them in a freezer bag. They can last up to two months in the freezer. When you're ready to eat, thaw them in the fridge overnight. After that, reheat as mentioned earlier. Crème Brûlée French Toast is a sweet breakfast dish. It combines the creamy texture of crème brûlée with the classic French toast. You soak thick slices of brioche bread in a rich mixture of eggs, milk, and heavy cream. After soaking, you bake it until it is golden. Then, you top it with brown sugar and caramelize it for a crunchy finish. This dish is both decadent and comforting, perfect for special mornings. You can easily prepare this dish ahead of time. After you mix the egg mixture, pour it over the brioche slices. Cover the baking dish with plastic wrap and place it in the fridge. Let it soak for at least 2 hours or overnight for best results. This way, it’s ready to bake when you are. Just preheat your oven and bake it in the morning. You’ll enjoy a warm, tasty breakfast without stress. Yes, you can use different types of bread for this recipe. While brioche gives a rich flavor, you can try challah or French bread. These types also soak up the egg mixture well. Just make sure the bread is thickly sliced. Thin slices may not hold up during baking. Experiment with what you have on hand for a fun twist on this dish! We explored the key ingredients and step-by-step instructions for Crème Brûlée French Toast. I shared tips for perfect texture and common mistakes to avoid. You learned about different variations and storage options to keep your dish fresh. In conclusion, with a few simple steps and tweaks, you can make this dish shine. Experiment with flavors and enjoy every bite. Happy cooking!
    Crème Brûlée French Toast Delicious Morning Treat

Recent Drinks

  • To make Poisoned Apple Cider, you need these key items: - 4 cups apple cider - 1 small pumpkin, peeled and cubed - 2 cups dark red cranberries (fresh or frozen) - 1 teaspoon cinnamon - 1 teaspoon nutmeg - 1 teaspoon allspice These ingredients work together to create a warm, cozy drink. The apple cider forms the base. The pumpkin adds creaminess. Cranberries give a tart taste. Spices like cinnamon and nutmeg add warmth. Allspice adds depth, making this drink special. You can use these optional items to enhance the flavor: - 1 tablespoon brown sugar (optional) - 1 tablespoon vanilla extract Adding brown sugar can sweeten the cider a bit. Vanilla extract adds a nice aroma. These ingredients can make your cider taste even better. Feel free to adjust them based on your taste. Presentation is key for this spooky drink! For a fun touch, use: - 1/2 cup blackberries for garnish - Sprigs of rosemary for garnish Blackberries add a pop of color. Rosemary looks like little witchy sprigs. These garnishes make your cider look festive and inviting. Serve in spooky mugs for an extra thrill! {{ingredient_image_1}} To start, gather your ingredients. You need: - 4 cups apple cider - 1 small pumpkin, peeled and cubed - 2 cups dark red cranberries (fresh or frozen) - 1 teaspoon cinnamon - 1 teaspoon nutmeg - 1 teaspoon allspice - 1 tablespoon brown sugar (optional) - 1 tablespoon vanilla extract In a large pot, combine the apple cider, cubed pumpkin, and cranberries. The pumpkin adds a nice texture. The cranberries bring a tart balance. Next, add the cinnamon, nutmeg, allspice, and brown sugar if you choose. Stir well to mix everything together. Now, heat the pot over medium heat. Watch closely until it starts to simmer. This usually takes about 5 to 10 minutes. Once it simmers, reduce the heat to low and cover the pot. Let it simmer for about 30 minutes. This step is key. It lets the flavors meld together beautifully. You’ll notice a lovely aroma filling your kitchen. After 30 minutes, you need to blend the mixture. Use an immersion blender to puree it until smooth. If you don’t have one, transfer it to a regular blender. Do this in small batches to avoid spills. Once blended, return the smooth mixture to the pot. Stir in the vanilla extract for an extra layer of flavor. Heat it for another 10 minutes to warm it through. Now your poisoned apple cider is ready to serve! To make the best poisoned apple cider, balance is key. The tartness of cranberries goes well with sweet apple cider. Use fresh or frozen cranberries. The pumpkin adds creaminess and a rich taste. Spices like cinnamon, nutmeg, and allspice bring warmth. If you want more sweetness, add brown sugar. This helps round out the flavors. Don’t forget the vanilla extract! It enhances the overall taste and aroma. Using the right equipment helps achieve the best cider. A large pot is essential for cooking the mixture. An immersion blender makes it easy to puree the cider smoothly. If you don’t have one, a regular blender works too. Just be careful when transferring hot liquid. Prepare heat-resistant mugs for serving. They keep your drink warm and look great too. Make your cider look as good as it tastes! Serve it in spooky mugs. For extra flair, add blackberries on top. They look like little dark gems. A sprig of rosemary adds a creepy touch. For a foggy effect, place dry ice in a separate container. This gives the cider a bubbling potion look. Your guests will love the spooky vibe! Pro Tips Choose Fresh Ingredients: Opt for fresh cranberries and seasonal pumpkins to enhance the flavor and quality of your cider. Adjust Sweetness: Taste the mixture before serving and adjust the sweetness by adding more brown sugar if desired, depending on your taste preference. Garnish Creatively: Use additional spooky garnishes like gummy worms or spooky-shaped ice cubes to make your presentation even more festive. Make Ahead: This cider can be made a day in advance. Just reheat gently before serving, allowing the flavors to deepen even more. {{image_2}} You can change the flavor of your poisoned apple cider by swapping or adding ingredients. Try using pear cider instead of apple cider for a different taste. You can also add a splash of orange juice for a zesty twist. Want some spice? Toss in a few cloves or a slice of fresh ginger. These simple swaps can make your drink unique and fun. You can enjoy poisoned apple cider in two ways. For a non-alcoholic drink, just follow the recipe as is. It’s perfect for kids and anyone who wants a tasty treat. If you want a kick, try adding rum or bourbon. Just mix in about a cup when you heat the cider. This gives it a warm, cozy feel for adults. You can make your cider special for any holiday. For Halloween, keep the spooky theme with creepy garnishes like gummy worms or spooky mugs. During Thanksgiving, focus on flavors like maple syrup or caramel. For Christmas, add some peppermint extract or even some cranberries on top for a festive look. These variations keep your poisoned apple cider fun and fresh all year round! Store your poisoned apple cider in a clean glass jar or airtight container. Make sure it cools to room temperature first. Label the container with the date. This helps you remember when you made it. Keep it in the fridge to stay fresh. Avoid metal containers as they can change the flavor. When stored properly, your poisoned apple cider can last up to five days in the fridge. After that, it may spoil. Always check for any off smells or changes in color. If it looks or smells bad, throw it out. Safety first! When reheating, do it on low heat. This helps keep the flavors intact. Stir often to avoid hot spots. Heat until it is warm but not boiling. If you have leftovers, never reheat more than once. Enjoy your spooky drink safely! If apple cider is poisoned, you may feel sick. Common symptoms include nausea, vomiting, and stomach pain. You might also have headaches or dizziness. In serious cases, you could feel confused or have trouble breathing. If you notice any of these signs after drinking cider, seek help fast. To check if apple cider is safe, start with your senses. Look for strange colors or floating bits. Smell it; if it smells off, do not drink it. Taste a small amount. If it tastes sour or strange, it might be bad. Always buy cider from a trusted source to stay safe. If you think the cider is poisoned, stop drinking it right away. Call poison control or seek medical help. Tell them what you drank and when. Keep the cider container for testing if needed. Do not wait for symptoms to appear; act quickly! Yes, there have been news stories about poisoned apple cider. Some cases involved people getting sick after drinking unregulated cider from local farms. These cases remind us to be careful when enjoying seasonal drinks. Always check where your cider comes from to ensure it is safe. In this blog post, we covered the core ingredients for a tasty apple cider. You learned step-by-step how to prepare and simmer it to boost flavor. We also discussed tips for the best taste and fun ways to serve it. Variations let you create seasonal drinks too. Lastly, we tackled storage tips and answered common questions about cider safety. Enjoy your delicious apple cider, and remember, safety first!
    Poisoned Apple Cider Shocking Safety Tips Revealed
  • - 2 cups orange juice (freshly squeezed) - 1 cup sparkling water - 1 teaspoon ground cinnamon - 1 tablespoon honey or maple syrup - 1 orange (for garnish) - 2 cinnamon sticks (for garnish) - Ice cubes - Mint leaves (optional garnish) To make the Cinnamon Orange Cozy Mocktail, you need fresh orange juice. I suggest squeezing the oranges yourself for the best taste. You'll also need sparkling water to add some fizz. Ground cinnamon gives it that warm flavor we love. For sweetness, you can use honey or maple syrup. Taste it after mixing to see if you like it sweeter. Don't forget the garnishes! Slices of orange and cinnamon sticks make it look nice. Mint leaves add a fresh touch but are optional. Gather all these ingredients, and you’re ready to make a cozy drink that brightens your day! {{ingredient_image_1}} - First, grab a large pitcher. - Combine 2 cups of orange juice with 1 cup of sparkling water. - Add 1 teaspoon of ground cinnamon and 1 tablespoon of honey or maple syrup. - Stir the mix well until the honey or syrup dissolves completely. - This step helps the cinnamon blend in nicely. - Now, fill your serving glasses with ice cubes. - Carefully pour the orange mixture over the ice-filled glasses. - Make each drink special by garnishing with orange slices and a cinnamon stick. - If you want, add a few mint leaves for a fresh touch. - Serve your cozy mocktail right away and enjoy! To customize the sweetness of your Cinnamon Orange Cozy Mocktail, start with the honey or maple syrup. You can add one tablespoon, then taste it. If it needs more sweetness, add a little more. Remember, you can always add more sweetener, but you can't take it out. So, taste test before serving to get it just right. Garnishing makes your drink look nice. Use fresh orange slices to enhance the color. Adding a cinnamon stick brings warmth to the drink and makes it smell great. If you want a fresh touch, add mint leaves. They not only look good but also add a cool flavor. Arrange everything nicely in the glass to make your mocktail pop! Pro Tips Use Fresh Ingredients: Freshly squeezed orange juice enhances the flavor significantly compared to store-bought juice. Adjust Sweetness: Taste the mixture before serving and adjust the honey or maple syrup to your preferred sweetness level. Chill the Glasses: For an extra refreshing experience, chill your serving glasses in the freezer for 15 minutes before pouring the mocktail. Experiment with Garnishes: Feel free to add other garnishes like star anise or pomegranate seeds for a unique twist. {{image_2}} You can change the taste of your cozy mocktail by adding more spices. Try adding nutmeg for a warm, sweet note. Cloves can also add a unique flavor. Just a pinch of these spices can transform your drink. For sweetness, you have options. Use agave syrup, coconut sugar, or even stevia. Each sweetener adds its own twist. Adjust based on your taste. Always taste as you go to find the right balance. Seasonal fruits can make your mocktail even more special. In fall, add sliced apples or pears for a crisp touch. In summer, mix in fresh berries like strawberries or blueberries. They not only taste great but also look beautiful. You can also use seasonal spices. In winter, try ginger or allspice. They add warmth and depth to your drink. For spring, fresh herbs like basil can brighten the flavor. Experiment to find your favorite seasonal mix! To keep your Cinnamon Orange Cozy Mocktail fresh, store it in the fridge. Use an airtight container. A glass jar or a pitcher works great. If you have extra garnishes, store them separately. This prevents them from getting soggy. This mocktail is best served cold. If you want to refresh it, add ice. You can also mix in more sparkling water. For the best taste, drink it within two days. After that, the flavors may fade. Always check if it smells or tastes off before drinking. Can I make this mocktail ahead of time? Yes, you can. Make the drink mix ahead of time. Store it in the fridge. Just add ice and garnish when you serve. What are the health benefits of cinnamon and orange? Cinnamon helps with blood sugar control. It also has antioxidants. Oranges are high in vitamin C. They boost your immune system and keep your skin healthy. Is this recipe vegan-friendly? Yes, this recipe is vegan. Use maple syrup instead of honey for a vegan option. What snacks pair well with this mocktail? This mocktail goes great with light snacks. Try cheese and crackers, fruit platters, or veggie sticks. These snacks balance the sweetness of the drink. Can it be served at parties or gatherings? Absolutely! This mocktail is perfect for parties. It is easy to make and looks beautiful. Guests will love its fresh taste and cozy vibe. This blog post guides you through making a fresh cinnamon orange mocktail. We covered the simple ingredients and easy steps, plus tips for sweetness and garnish. You learned about flavor variations and how to store leftovers. Enjoy mixing this drink at home. It’s fun and healthy, perfect for any occasion. Try different spices and fruits to make it your own. You're ready to impress your friends with a tasty and eye-catching mocktail!
    Cinnamon Orange Cozy Mocktail Refreshing Drink Recipe
  • - Fresh raspberries - Raspberry syrup - Club soda - Coconut cream - Lime juice - Fresh mint leaves - Ice cubes Gathering the right ingredients is key. Start with fresh raspberries. They should be bright and firm. Next, get raspberry syrup. This adds sweetness and flavor. Use club soda for a fizzy lift. You will also need coconut cream. This makes your drink creamy and rich. Don't forget lime juice. It adds a nice zing that balances the sweetness. Fresh mint leaves give your drink a fresh touch. Finally, grab some ice cubes. They cool everything down. With these ingredients, you're ready to create a refreshing Raspberry Dream Dirty Soda. Each part plays a role in making this drink a summer favorite! Start by blending 1 cup of fresh raspberries with 1/2 cup of raspberry syrup. Blend until smooth. If you prefer no seeds, strain the mixture through a fine mesh sieve. This step gives you a smooth, bright raspberry puree. Next, take the raspberry puree and pour it into a large pitcher. Add 2 cups of club soda to the puree. Stir gently to mix. Then, squeeze in 1 tablespoon of lime juice. The lime adds a zesty kick to the drink. In a separate bowl, whip 1/2 cup of coconut cream. Use a hand mixer or whisk until it reaches a smooth and fluffy texture. This cream will top your drink and provide a nice contrast to the tart raspberry. Now, grab your glasses and fill them with ice cubes. Pour the raspberry soda mixture over the ice. Make sure each glass gets a nice amount. Finally, top each drink with a generous dollop of whipped coconut cream. For a final touch, garnish with fresh mint leaves. Enjoy your refreshing Raspberry Dream Dirty Soda! To make a great raspberry puree, choose ripe raspberries. Look for berries that are deep red and firm. Avoid any that are mushy or have dark spots. Ripe berries will give you the best flavor. To avoid seed chunks, blend the raspberries with raspberry syrup until smooth. Then, strain the mixture through a fine mesh sieve. This step helps you get a silky texture. Push the puree through with a spatula for best results. You can add more flavor to your drink easily. Consider mixing in a splash of vanilla or a hint of ginger. Both will give your drink a nice twist. Adjust the sweetness based on your taste. If you like it sweeter, add more raspberry syrup. If you prefer less sugar, use fresh lime juice to balance the sweetness. Serving your drink can be fun and creative. Use clear glasses to show off the vibrant colors. You can also layer the coconut cream on top for a beautiful look. For garnishing, add fresh mint leaves on top. They add a pop of color and a fresh scent. You might also consider adding a slice of lime on the rim of the glass for an extra touch. {{image_2}} You can switch up the fruits in your Raspberry Dream Dirty Soda. Try using other berries like strawberries or blueberries. These fruits add a fun twist and color to your drink. If you want a tropical vibe, use pineapple or mango. They give a refreshing taste that pairs well with the soda. If you want a non-dairy option, almond milk or oat cream works well. These alternatives keep your drink creamy without coconut. For a coconut-free choice, you can use soy or cashew cream. These will still add richness and flavor to your soda. You can make a fun cocktail version of this soda. Try adding light or dark rum for a kick. The rum blends nicely with the raspberry and lime flavors. Mix it well in a shaker for a smooth drink. A Raspberry Dream Dirty Soda with rum can be a great choice for summer parties. After making the raspberry puree, store it in the fridge. Use an airtight container for best results. The puree stays fresh for up to three days. If you want to keep it longer, freeze it. Pour the puree into ice cube trays. Once frozen, transfer the cubes to a bag. This method makes it easy to use later. Do not store the assembled drink in the fridge. The club soda will lose its fizz. Instead, prepare the drink just before serving. You can mix the raspberry soda and coconut cream separately. Keep them cool until you are ready to serve. This way, your drink will stay refreshing and bubbly. Fresh raspberries last about one week in the fridge. Watch for soft spots or mold as signs of spoilage. Raspberry syrup can last up to a month when stored in a cool, dark place. For club soda, check the expiration date on the can. Proper storage helps keep your ingredients fresh and tasty. Raspberry Dream Dirty Soda is a fun and fizzy drink. It blends fresh raspberries, raspberry syrup, and club soda. This drink also has a creamy touch from coconut cream. It is refreshing and perfect for hot days. Many people love it for its bright flavor. The drink became popular in recent years, often seen at summer parties and events. It has roots in the "dirty soda" trend that started in Utah. Yes, you can prepare parts of this drink ahead. You can make the raspberry puree and store it in the fridge for up to three days. Keep it in an airtight container. Mix the raspberry puree with the club soda right before serving for the best fizz. Do not whip the coconut cream until you are ready to serve. Whipped cream does not store well. If you want alternatives to raspberry syrup, consider these options: - Strawberry syrup for a different berry flavor. - Agave syrup for a natural sweetness. - Honey can also work, but it has a strong taste. You can also use fruit juice, like pomegranate or cherry, for a fruity twist. Adjust the sweetness to your liking. Raspberry Dream Dirty Soda has some healthy parts. Fresh raspberries are full of vitamins and fiber. The drink does contain added sugar from the syrup. If you want a healthier option, try these tips: - Use less raspberry syrup or a sugar-free version. - Replace coconut cream with lighter options like almond milk. - Add more fresh fruits for extra nutrients. In this blog post, we covered how to make a refreshing Raspberry Dream Dirty Soda. We explored the key ingredients and went step-by-step through blending raspberry puree, mixing, and adding the coconut cream. Tips on flavor and presentation help you enhance your drink. We also looked at fun variations and storage tips. Try these methods to impress your guests or enjoy a treat at home. This drink is simple, enjoyable, and perfect for any occasion.
    Raspberry Dream Dirty Soda Refreshing Summer Treat
  • To make a rich and creamy pumpkin hot chocolate, gather these key ingredients: - 2 cups milk (dairy or plant-based) - 1/2 cup of pumpkin puree (canned or fresh) - 1/4 cup semi-sweet chocolate chips - 2 tablespoons cocoa powder - 2 tablespoons sugar (or to taste) - 1 teaspoon vanilla extract - 1/2 teaspoon pumpkin pie spice (plus extra for garnish) These ingredients create a warm and cozy drink that makes the fall season special. You can enhance your pumpkin hot chocolate with some fun toppings: - Whipped cream (for topping) - Dark chocolate shavings or chocolate curls (for garnish) - A sprinkle of extra pumpkin pie spice These garnishes add flavor and make your drink look lovely. When picking your ingredients, focus on quality: - Choose fresh pumpkin puree for a brighter taste. - Select high-quality chocolate chips for a rich chocolate flavor. - Use whole milk for creaminess or a good plant-based milk for a lighter option. Quality ingredients make a noticeable difference in flavor. Always check labels for additives or preservatives. This helps ensure your drink is as healthy as it is tasty. Start by gathering your ingredients. You need milk, pumpkin puree, and a whisk. In a medium saucepan, combine 2 cups of milk and 1/2 cup of pumpkin puree. Whisk these together over medium heat. Keep mixing for about 3 to 5 minutes. You want the mixture warm and well blended. Be careful not to let it boil. Now, it’s time for the chocolate! Add 1/4 cup of semi-sweet chocolate chips, 2 tablespoons of cocoa powder, and 2 tablespoons of sugar to the pumpkin mix. Stir continuously for 2 to 3 minutes. The chocolate should melt nicely, making the drink smooth and rich. Next, stir in 1 teaspoon of vanilla extract and 1/2 teaspoon of pumpkin pie spice. Whisk until everything is combined and warm. Remove the saucepan from heat. Taste your hot chocolate and adjust the sweetness if you like. Pour the mixture into mugs. Top each mug with whipped cream. For a special touch, sprinkle some pumpkin pie spice on top. You can also add dark chocolate shavings or chocolate curls for extra flair. Enjoy your creamy fall delight! To make your pumpkin hot chocolate shine, think about adding flavors. A pinch of sea salt boosts sweetness. It balances the rich chocolate and creamy pumpkin. You can also try a dash of cinnamon or nutmeg. These spices add warmth and depth. If you want more chocolate, add extra chocolate chips. For a fun twist, stir in some caramel sauce for a sweet kick. Sweetness is key to a great hot chocolate. After mixing, taste your drink. If it’s not sweet enough, add sugar slowly. Try one tablespoon at a time. Stir well and taste again. You can also use honey or maple syrup for a natural option. Just remember to mix it in fully for even sweetness. Avoid cooking your mixture too fast. Medium heat is best to keep it smooth. Don’t let it boil; that can change the texture. If you add too much cocoa powder, it may taste bitter. Always whisk well to blend everything smoothly. Lastly, don’t skip the whipped cream! It adds a nice touch and makes it look fancy. {{image_2}} To make a vegan version of pumpkin hot chocolate, swap dairy milk for a plant-based milk. Almond, oat, or coconut milk works well. Use dairy-free chocolate chips for a rich taste. Follow the same steps in the recipe, and enjoy this creamy treat! If you want a dairy-free hot chocolate, simply choose non-dairy milk. Almond milk adds a nutty flavor. Coconut milk gives a rich, creamy texture. Soy milk is also a good choice. Each option keeps the drink smooth and delicious. Adjust the sweetness as you mix in the cocoa and chocolate. You can add fun flavors to your pumpkin hot chocolate! Try adding a splash of peppermint extract for a fresh twist. This pairs well with the pumpkin spice. For a sweeter touch, drizzle caramel syrup over the whipped cream. These add-ins make your drink feel special and festive. To store leftover pumpkin hot chocolate, let it cool first. Then, pour it into an airtight container. Make sure to seal it well to keep the flavors fresh. Store it in the fridge for up to three days. If you want to enjoy it later, you can freeze it. Just use a freezer-safe container. Leave some space at the top, as liquids expand when frozen. When you're ready to enjoy your hot chocolate, take it out of the fridge or freezer. If frozen, let it thaw in the fridge overnight. To reheat, pour it into a saucepan. Heat it over medium-low heat, stirring often. This helps it warm evenly without burning. If you prefer, you can use a microwave. Heat it in short bursts of 30 seconds, stirring in between. This way, it stays creamy and smooth. The shelf life of your ingredients varies. Milk lasts about a week after opening, while pumpkin puree is good for about a week once opened. Semi-sweet chocolate chips can last several months if stored well. Sugar and cocoa powder have a long shelf life. They stay fresh for years if kept dry and cool. Always check labels for specific dates, as freshness matters in your drink. To make one serving, simply halve the original recipe. Use 1 cup of milk and 1/4 cup of pumpkin puree. Add 2 tablespoons of chocolate chips, 1 tablespoon of cocoa powder, and 1 tablespoon of sugar. Mix these in a small saucepan over medium heat. Whisk until everything melts and blends well. This takes about 3-5 minutes. Pour into a mug, top with whipped cream, and sprinkle some pumpkin pie spice. Yes, you can use pumpkin pie filling. This filling has spices and sugar mixed in. It can add a nice flavor. Just remember to reduce the sugar in the recipe. Taste your drink first. Adjust the sweetness if needed. Pumpkin pie filling makes the drink sweeter and spicier. Pumpkin is rich in vitamins and minerals. It has a lot of vitamin A, which helps your eyes. It also contains fiber, which aids digestion. Pumpkin is low in calories, making it a healthy choice. You get antioxidants too, which help fight free radicals in your body. Enjoying this drink can add some health benefits to your cozy fall treat! This blog post covered how to make delicious pumpkin hot chocolate. We discussed essential ingredients and tips to choose the best ones. I shared easy steps to prepare, mix, and serve your drink. You learned how to enhance flavors and avoid common mistakes. We explored variations, like vegan options and seasonal add-ins. Finally, I provided storage tips and answered frequent questions. Enjoy creating this warm drink. It’s an easy way to savor fall flavors!
    Pumpkin Hot Chocolate Rich and Creamy Fall Delight

Footer

↑ back to top

More information

  • Drinks
  • Appetizer
  • Dinner
  • Desserts
  • About
  • Contact
  • Privacy Policy

Our Policies

  • Privacy Policy
  • GDPR Policy
  • Terms Of Use
  • Copyright Policy
  • Cookie Policy
  • Disclaimer

Copyright © 2025 cheftaling