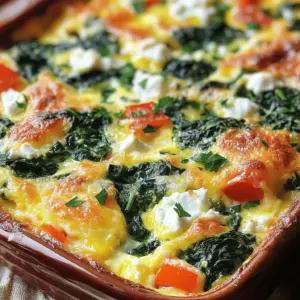
- Savory Breakfast Casserole Quick and Easy Recipe
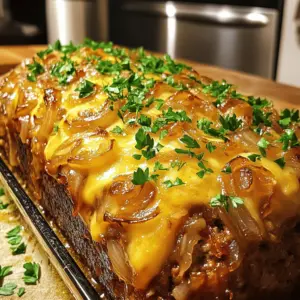
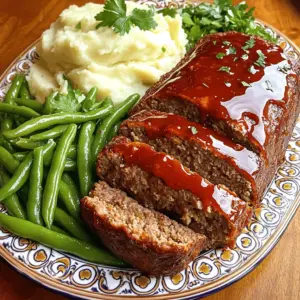
- French Onion Meatloaf Tasty and Easy Family Meal
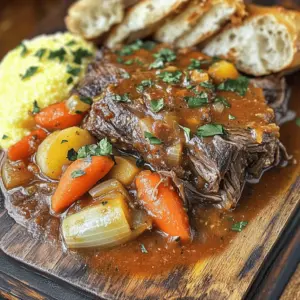
- Italian Pot Roast Irresistible and Flavorful Delight
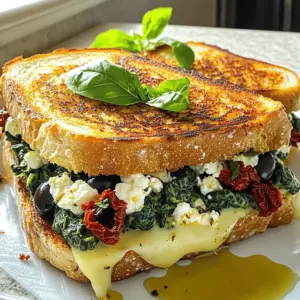
- Mediterranean Spinach Grilled Cheese Delight Recipe
- Sausage, Egg, and Cheese Breakfast Rolls Delightful Treat
- Breakfast Sliders Tempting and Easy to Make
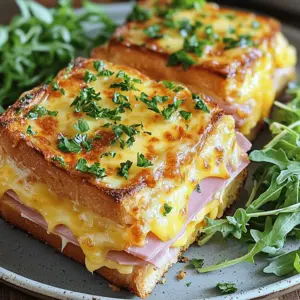
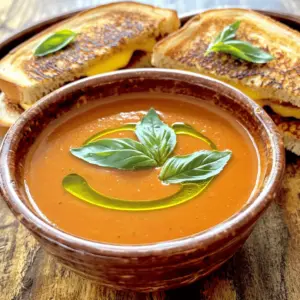
- Croque Monsieur Delightful Recipe for Easy Cooking
- No Bake Mini Banana Cream Pies Delightful Treat
- Boston Market Meatloaf Flavorful and Easy Recipe
- Pillsbury Biscuit Garlic Butter Cheese Bombs Delight
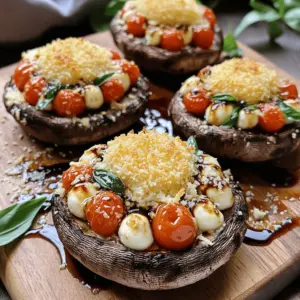
- Caprese Stuffed Portobello Mushrooms Tasty and Easy Dish
- Paprika Deep Recipe for Flavorful Roasted Chicken
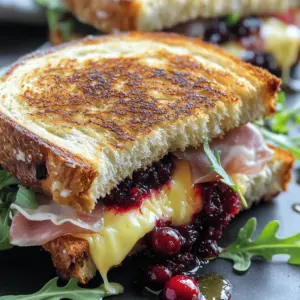
- Cranberry, Brie, and Prosciutto Grilled Cheese Delight
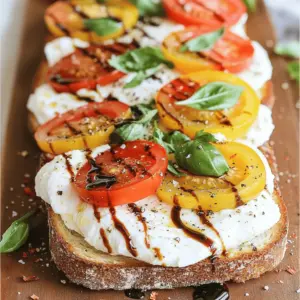
- Burrata-Carpese-Toast Irresistible Flavor Delight
- Philly Cheesesteak Sliders Flavor-Packed Party Treat
- Breakfast Casserole with Sausage Tasty Morning Delight
- Homemade Cupcakes Filled with Creamy Custard Delight
- Boston Cream Pie Cookies Delightful and Tasty Treats
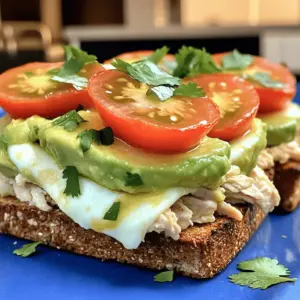
- Chicken Avocado Melt Sandwich Easy Flavorful Delight
- Caramel Flan Muffins Delightful and Easy Recipe
- Mini Crème Brûlée Cheesecakes Simple and Delightful Treat
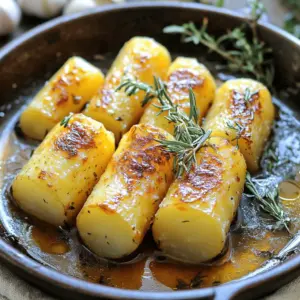
- Fondant Potatoes Recipes for Perfectly Tender Flavor
- Burrata Bruschetta Tasty and Simple Appetizer Recipe
- DIY Food & Drinks Tutorials Creative and Fun Recipes
- Easy Ham and Cheese Pinwheels with Puff Pastry Recipe
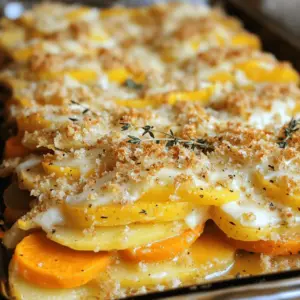
- Cheesy Root Vegetable Gratin Rich and Comforting Dish
- Crispy Parmesan Carrot Sticks Flavorful Healthy Snack
- Luscious Lemon-Lime Cherry Pistachio Cheesecake Recipe
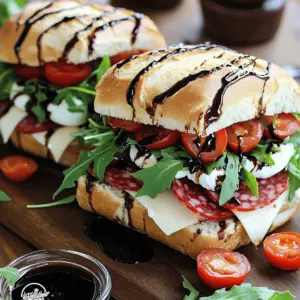
- Chopped Italian Sandwich Delightful Flavor Explosion
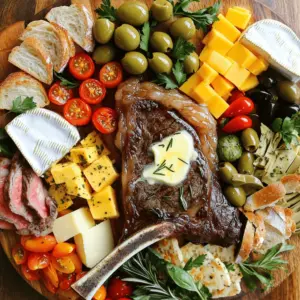
- How to Make a Tomahawk Steak Board Effortlessly
- Buffalo Chicken Stuffed Peppers Tasty Dinner Idea
- Stuffed Steak & Cheese Bread Savory Dinner Choice
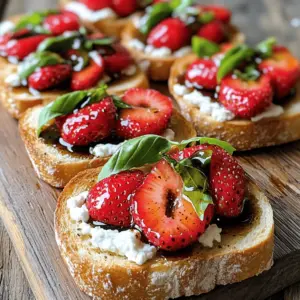
- Balsamic Strawberry and Goat Cheese Toast Delight
- BEST RECIPE For Mini Big Mac Cheeseburgers Delight
- Cheesy Garlic Chicken Wraps Easy and Tasty Dinner
- Savory Steak Bomb Sandwich Recipe for Flavor Lovers
- Cinnamon Donut Bread Savory and Simple Delight
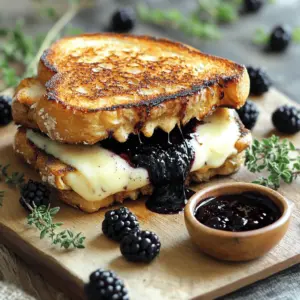
- Blackberry Balsamic and Brie Grilled Cheese Delight
- Chili Dog Craze Satisfy Your Cravings with Flavor
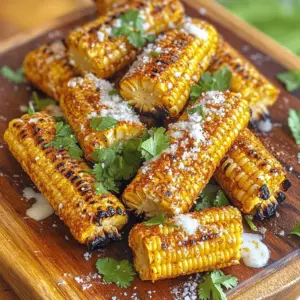
- Corn Ribs Recipe Perfect for Tasty Summer BBQs
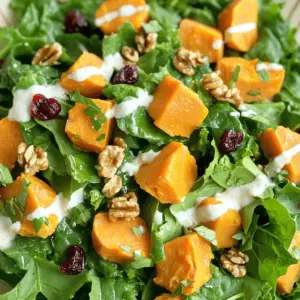
- Creamy Sweet Potato Salad Recipe with Leafy Greens
- Multifunction Eyebrow Pencil for Effortless Beauty