Chef Taling

  • Home
  • Recipe Index
    • Desserts
    • Dinner
    • Appetizer
    • Drinks
  • About
  • Contact
  • Privacy Policy
menu icon
go to homepage
  • Home
  • Recipe Index
    • Desserts
    • Dinner
    • Appetizer
    • Drinks
  • About
  • Contact
  • Privacy Policy
Indulge in the festive flavors of No Bake Peppermint Oreo Cheesecake! This easy dessert recipe combines creamy cheesecake with a crunchy Oreo base and a delightful peppermint twist, perfect for holiday gatherings. With just a few simple ingredients and minimal prep time, you can create a spectacular treat that will impress everyone. Click to discover the full recipe and bring sweet cheer to your table! #NoBakeDessert #PeppermintRecipe #HolidayBaking #CheesecakeLovers

search icon
Homepage link
  • Home
  • Recipe Index
    • Desserts
    • Dinner
    • Appetizer
    • Drinks
  • About
  • Contact
  • Privacy Policy
Indulge in the festive flavors of No Bake Peppermint Oreo Cheesecake! This easy dessert recipe combines creamy cheesecake with a crunchy Oreo base and a delightful peppermint twist, perfect for holiday gatherings. With just a few simple ingredients and minimal prep time, you can create a spectacular treat that will impress everyone. Click to discover the full recipe and bring sweet cheer to your table! #NoBakeDessert #PeppermintRecipe #HolidayBaking #CheesecakeLovers

×

No Bake Peppermint Oreo Cheesecake Delight Recipe

Published: Oct 1, 2025 · by Taling · Leave a Comment

WANT TO SAVE THIS RECIPE?

Indulge in the festive flavors of No Bake Peppermint Oreo Cheesecake! This easy dessert recipe combines creamy cheesecake with a crunchy Oreo base and a delightful peppermint twist, perfect for holiday gatherings. With just a few simple ingredients and minimal prep time, you can create a spectacular treat that will impress everyone. Click to discover the full recipe and bring sweet cheer to your table! #NoBakeDessert #PeppermintRecipe #HolidayBaking #CheesecakeLovers

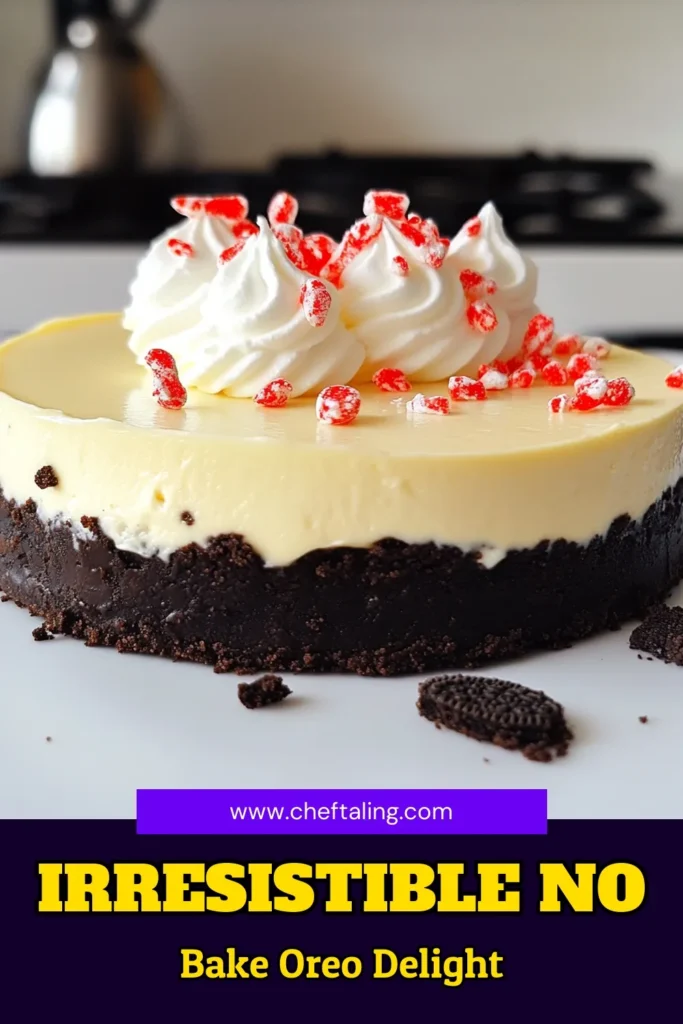
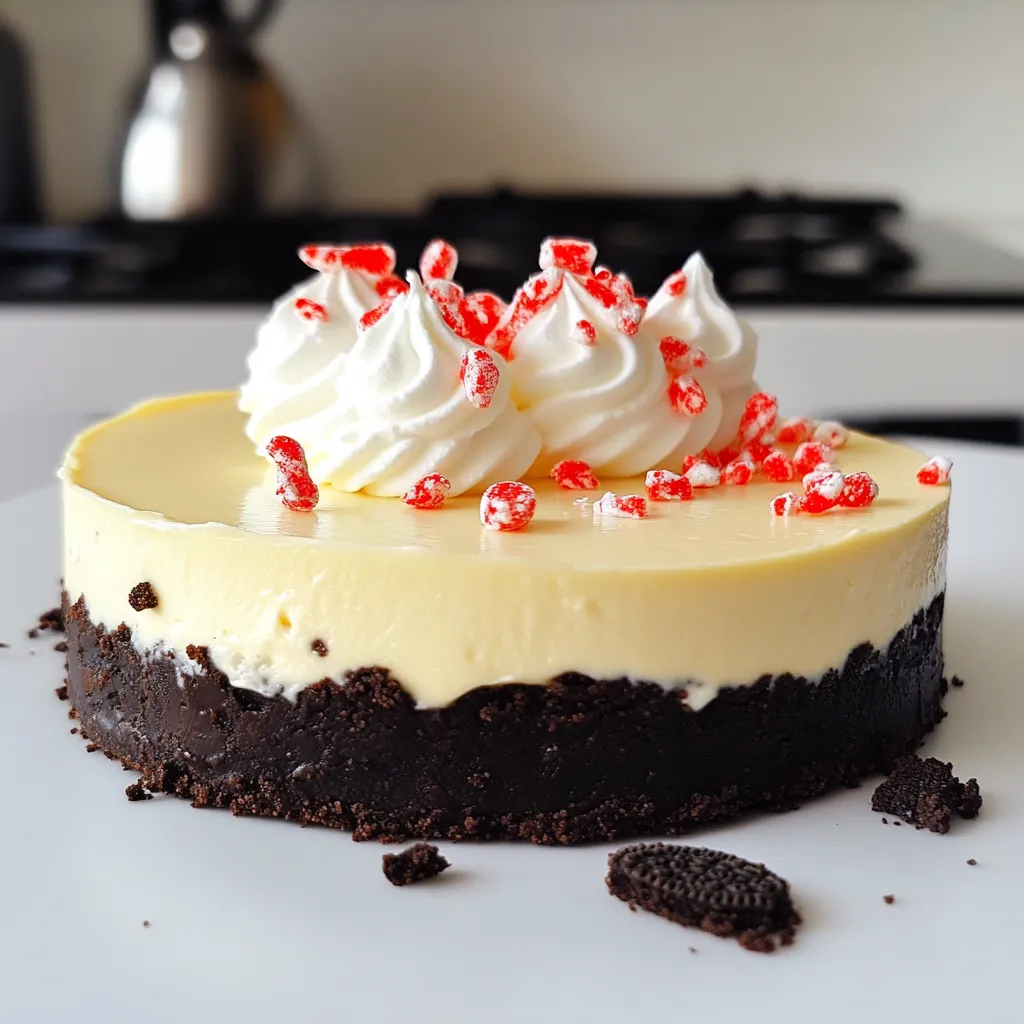
Craving a festive dessert that’s both easy and delicious? Look no further! My No Bake Peppermint Oreo Cheesecake Delight Recipe is a showstopper for any gathering. With a rich, creamy filling and a crunchy Oreo crust, this treat brings all the holiday cheer without the fuss of baking. Let’s dive into the simple steps that will make you the star of your next celebration! Ready to whip up something special?

- 24 Oreo cookies, crushed - ½ cup unsalted butter, melted - 16 oz cream cheese, softened - 1 cup powdered sugar - 1 teaspoon vanilla extract - 1 teaspoon peppermint extract - 1 cup heavy cream - 1 cup crushed peppermint candies (or candy canes) - Whipped cream for topping (optional) - Extra Oreo cookies for garnish (optional) The star of this cheesecake is the Oreo crust. It gives a sweet and crunchy base. The cream cheese filling is rich and creamy. The peppermint flavor brings a fresh twist. You mix the cream cheese with sugar and extracts. Heavy cream makes it light and fluffy. - 9-inch springform pan - Medium mixing bowl - Large mixing bowl - Electric mixer - Spatula - Plastic wrap These tools make your baking easy. The springform pan lets you remove the cheesecake easily. Mixing bowls help you combine your ingredients well. An electric mixer beats the cream cheese smoothly. A spatula ensures you mix well without mess. - Whipped cream - Crushed peppermint candies - Extra Oreo cookies Garnishes add fun and flair to your cheesecake. Whipped cream makes it look fancy. Crushed peppermint candies offer extra flavor. Extra Oreo cookies are perfect for a crunchy topping. You can also use a sprig of mint for color. To start, grab a medium bowl. Combine the crushed Oreo cookies and melted butter. Mix until it looks like wet sand. This will be your base. Next, press the mixture into the bottom of a 9-inch springform pan. Make sure to press down firmly for a sturdy crust. Once done, place the pan in the fridge. Let it chill while you prepare the filling. Now, take a large mixing bowl. Beat the softened cream cheese with an electric mixer. Keep mixing until it is smooth and creamy. Add the powdered sugar, vanilla extract, and peppermint extract. Mix these until they blend well. In another bowl, whip the heavy cream until stiff peaks form. Gently fold this whipped cream into the cream cheese mixture. Be careful not to deflate the whipped cream. Finally, add the crushed peppermint candies and fold them in evenly. Pour the cream cheese filling over the chilled Oreo crust. Use a spatula to spread it out evenly. Cover the cheesecake with plastic wrap. Put it back in the fridge for at least 4 hours, or overnight if you can wait. Once set, remove the cheesecake from the pan. If you like, top it with whipped cream and garnish with extra crushed Oreos or peppermint bits. Enjoy your delicious creation! To get a smooth cream cheese mixture, start with softened cream cheese. Take it out of the fridge 30 minutes before using. This way, it blends easier. Use an electric mixer on medium speed. Beat it until it is creamy and free of lumps. Add the powdered sugar slowly to avoid clumping. Mix until all the ingredients are smooth. To whip cream perfectly, use cold heavy cream. Chill your mixing bowl and beaters in the fridge for 10 minutes. Pour the heavy cream into the cold bowl. Start mixing on low speed, then increase to high. Stop mixing when stiff peaks form. This means the cream holds its shape. Be gentle when folding it into the cream cheese mixture. This keeps the whipped cream fluffy. Refrigerate your cheesecake for at least 4 hours, or overnight if you can wait. This time helps the cheesecake set properly. Cover it with plastic wrap to keep it fresh. Avoid opening the fridge often. Each time you open it, the temperature changes. Once set, remove it from the springform pan carefully. Enjoy your delicious cheesecake! {{image_2}} You can switch up the crust for fun. Use graham crackers for a classic flavor. Or try chocolate cookies for a richer taste. You can also use crushed nuts mixed with butter for a gluten-free option. This adds a nice crunch to every bite. Want to spice things up? Add chopped chocolate or different candies. You can mix in some crushed Oreos for extra texture. Try other extracts like almond or orange for a new twist. Each change can give your cheesecake a fresh taste. Make this cheesecake fit any holiday! For Christmas, add red and green sprinkles on top. For Valentine’s Day, use heart-shaped candies and pink whipped cream. In the summer, mix in fresh strawberries or blueberries. These ideas keep the dessert fun and festive all year long! To store your no bake peppermint Oreo cheesecake, cover it tightly. Use plastic wrap or aluminum foil. A sealed container also works well. Make sure to keep it in the fridge. This keeps it fresh and tasty. You can freeze leftovers for later. First, let the cheesecake chill fully. Then, slice it into pieces. Wrap each piece in plastic wrap and foil. Place the wrapped slices in a freezer-safe bag. They can stay frozen for up to three months. When you're ready to eat, thaw it in the fridge overnight. This cheesecake stays fresh in the fridge for about five days. After that, the taste may change. Always check for any off smells or changes in texture. If it smells funny or looks odd, it's best to toss it. Enjoy your cheesecake while it's fresh! To make this recipe gluten-free, use gluten-free Oreo cookies. Many brands offer gluten-free cookies that taste great. Check the label to ensure they fit your needs. You can still enjoy this delicious cheesecake without gluten. Yes, you can use different types of cream cheese. Neufchâtel cheese is a lighter option. It has less fat but still tastes creamy. You can also use vegan cream cheese for a dairy-free version. Each choice will change the flavor and texture slightly. If you don’t have peppermint extract, use mint extract instead. It has a similar flavor, though it is less sweet. You can also use fresh mint leaves for a natural taste. Just chop them finely and mix them in. You now know how to make a tasty No Bake Peppermint Oreo Cheesecake. We covered the key ingredients, tools, and optional garnishes to make it special. You learned step-by-step instructions for the crust and filling. I shared tips for a smooth mixture and perfect whipped cream. We explored variations to keep things exciting. Lastly, I gave storage tips to keep your cheesecake fresh. Enjoy making this easy dessert that brings a festive touch to any gathering!

Ingredients

Key Ingredients for No Bake Peppermint Oreo Cheesecake

  1. 24 Oreo cookies, crushed
  2. ½ cup unsalted butter, melted
  3. 16 oz cream cheese, softened
  4. 1 cup powdered sugar
  5. 1 teaspoon vanilla extract
  6. 1 teaspoon peppermint extract
  7. 1 cup heavy cream
  8. 1 cup crushed peppermint candies (or candy canes)
  9. Whipped cream for topping (optional)
  10. Extra Oreo cookies for garnish (optional)

The star of this cheesecake is the Oreo crust. It gives a sweet and crunchy base. The cream cheese filling is rich and creamy. The peppermint flavor brings a fresh twist. You mix the cream cheese with sugar and extracts. Heavy cream makes it light and fluffy.

Essential Tools and Equipment Needed

  1. 9-inch springform pan
  2. Medium mixing bowl
  3. Large mixing bowl
  4. Electric mixer
  5. Spatula
  6. Plastic wrap

These tools make your baking easy. The springform pan lets you remove the cheesecake easily. Mixing bowls help you combine your ingredients well. An electric mixer beats the cream cheese smoothly. A spatula ensures you mix well without mess.

Suggested Optional Garnishes

  1. Whipped cream
  2. Crushed peppermint candies
  3. Extra Oreo cookies

Garnishes add fun and flair to your cheesecake. Whipped cream makes it look fancy. Crushed peppermint candies offer extra flavor. Extra Oreo cookies are perfect for a crunchy topping. You can also use a sprig of mint for color.

Step-by-Step Instructions

Preparing the Oreo Crust

To start, grab a medium bowl. Combine the crushed Oreo cookies and melted butter. Mix until it looks like wet sand. This will be your base. Next, press the mixture into the bottom of a 9-inch springform pan. Make sure to press down firmly for a sturdy crust. Once done, place the pan in the fridge. Let it chill while you prepare the filling.

Making the Cream Cheese Filling

Now, take a large mixing bowl. Beat the softened cream cheese with an electric mixer. Keep mixing until it is smooth and creamy. Add the powdered sugar, vanilla extract, and peppermint extract. Mix these until they blend well. In another bowl, whip the heavy cream until stiff peaks form. Gently fold this whipped cream into the cream cheese mixture. Be careful not to deflate the whipped cream. Finally, add the crushed peppermint candies and fold them in evenly.

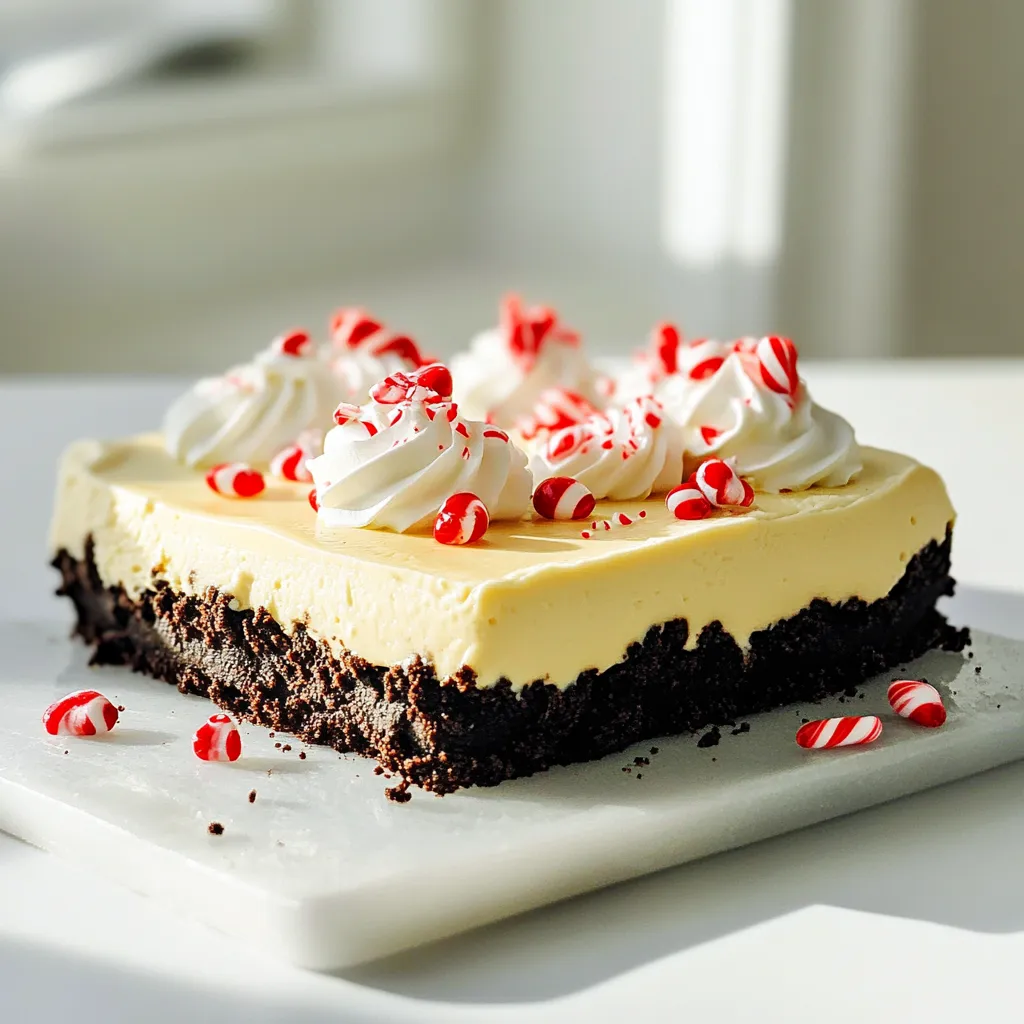
Assembling the Cheesecake

Pour the cream cheese filling over the chilled Oreo crust. Use a spatula to spread it out evenly. Cover the cheesecake with plastic wrap. Put it back in the fridge for at least 4 hours, or overnight if you can wait. Once set, remove the cheesecake from the pan. If you like, top it with whipped cream and garnish with extra crushed Oreos or peppermint bits. Enjoy your delicious creation!

Tips & Tricks

How to Ensure a Smooth Cream Cheese Mixture

To get a smooth cream cheese mixture, start with softened cream cheese. Take it out of the fridge 30 minutes before using. This way, it blends easier. Use an electric mixer on medium speed. Beat it until it is creamy and free of lumps. Add the powdered sugar slowly to avoid clumping. Mix until all the ingredients are smooth.

Techniques for Perfectly Whipped Cream

To whip cream perfectly, use cold heavy cream. Chill your mixing bowl and beaters in the fridge for 10 minutes. Pour the heavy cream into the cold bowl. Start mixing on low speed, then increase to high. Stop mixing when stiff peaks form. This means the cream holds its shape. Be gentle when folding it into the cream cheese mixture. This keeps the whipped cream fluffy.

Best Refrigeration Practices for Cheesecake

Refrigerate your cheesecake for at least 4 hours, or overnight if you can wait. This time helps the cheesecake set properly. Cover it with plastic wrap to keep it fresh. Avoid opening the fridge often. Each time you open it, the temperature changes. Once set, remove it from the springform pan carefully. Enjoy your delicious cheesecake!

Variations

Alternative Crust Ideas

You can switch up the crust for fun. Use graham crackers for a classic flavor. Or try chocolate cookies for a richer taste. You can also use crushed nuts mixed with butter for a gluten-free option. This adds a nice crunch to every bite.

Flavor Additions & Mix-ins

Want to spice things up? Add chopped chocolate or different candies. You can mix in some crushed Oreos for extra texture. Try other extracts like almond or orange for a new twist. Each change can give your cheesecake a fresh taste.

Seasonal Twists for Different Holidays

Make this cheesecake fit any holiday! For Christmas, add red and green sprinkles on top. For Valentine’s Day, use heart-shaped candies and pink whipped cream. In the summer, mix in fresh strawberries or blueberries. These ideas keep the dessert fun and festive all year long!

Storage Info

How to Store No Bake Cheesecake

To store your no bake peppermint Oreo cheesecake, cover it tightly. Use plastic wrap or aluminum foil. A sealed container also works well. Make sure to keep it in the fridge. This keeps it fresh and tasty.

Freezing Instructions for Leftovers

You can freeze leftovers for later. First, let the cheesecake chill fully. Then, slice it into pieces. Wrap each piece in plastic wrap and foil. Place the wrapped slices in a freezer-safe bag. They can stay frozen for up to three months. When you're ready to eat, thaw it in the fridge overnight.

Shelf Life and Freshness Tips

This cheesecake stays fresh in the fridge for about five days. After that, the taste may change. Always check for any off smells or changes in texture. If it smells funny or looks odd, it's best to toss it. Enjoy your cheesecake while it's fresh!

FAQs

How can I make this recipe gluten-free?

To make this recipe gluten-free, use gluten-free Oreo cookies. Many brands offer gluten-free cookies that taste great. Check the label to ensure they fit your needs. You can still enjoy this delicious cheesecake without gluten.

Can I use different types of cream cheese?

Yes, you can use different types of cream cheese. Neufchâtel cheese is a lighter option. It has less fat but still tastes creamy. You can also use vegan cream cheese for a dairy-free version. Each choice will change the flavor and texture slightly.

What can I substitute for peppermint extract?

If you don’t have peppermint extract, use mint extract instead. It has a similar flavor, though it is less sweet. You can also use fresh mint leaves for a natural taste. Just chop them finely and mix them in.

You now know how to make a tasty No Bake Peppermint Oreo Cheesecake. We covered the key ingredients, tools, and optional garnishes to make it special. You learned step-by-step instructions for the crust and filling. I shared tips for a smooth mixture and perfect whipped cream. We explored variations to keep things exciting. Lastly, I gave storage tips to keep your cheesecake fresh.

Enjoy making this easy dessert that brings a festive touch to any gathering!

- 24 Oreo cookies, crushed - ½ cup unsalted butter, melted - 16 oz cream cheese, softened - 1 cup powdered sugar - 1 teaspoon vanilla extract - 1 teaspoon peppermint extract - 1 cup heavy cream - 1 cup crushed peppermint candies (or candy canes) - Whipped cream for topping (optional) - Extra Oreo cookies for garnish (optional) The star of this cheesecake is the Oreo crust. It gives a sweet and crunchy base. The cream cheese filling is rich and creamy. The peppermint flavor brings a fresh twist. You mix the cream cheese with sugar and extracts. Heavy cream makes it light and fluffy. - 9-inch springform pan - Medium mixing bowl - Large mixing bowl - Electric mixer - Spatula - Plastic wrap These tools make your baking easy. The springform pan lets you remove the cheesecake easily. Mixing bowls help you combine your ingredients well. An electric mixer beats the cream cheese smoothly. A spatula ensures you mix well without mess. - Whipped cream - Crushed peppermint candies - Extra Oreo cookies Garnishes add fun and flair to your cheesecake. Whipped cream makes it look fancy. Crushed peppermint candies offer extra flavor. Extra Oreo cookies are perfect for a crunchy topping. You can also use a sprig of mint for color. To start, grab a medium bowl. Combine the crushed Oreo cookies and melted butter. Mix until it looks like wet sand. This will be your base. Next, press the mixture into the bottom of a 9-inch springform pan. Make sure to press down firmly for a sturdy crust. Once done, place the pan in the fridge. Let it chill while you prepare the filling. Now, take a large mixing bowl. Beat the softened cream cheese with an electric mixer. Keep mixing until it is smooth and creamy. Add the powdered sugar, vanilla extract, and peppermint extract. Mix these until they blend well. In another bowl, whip the heavy cream until stiff peaks form. Gently fold this whipped cream into the cream cheese mixture. Be careful not to deflate the whipped cream. Finally, add the crushed peppermint candies and fold them in evenly. Pour the cream cheese filling over the chilled Oreo crust. Use a spatula to spread it out evenly. Cover the cheesecake with plastic wrap. Put it back in the fridge for at least 4 hours, or overnight if you can wait. Once set, remove the cheesecake from the pan. If you like, top it with whipped cream and garnish with extra crushed Oreos or peppermint bits. Enjoy your delicious creation! To get a smooth cream cheese mixture, start with softened cream cheese. Take it out of the fridge 30 minutes before using. This way, it blends easier. Use an electric mixer on medium speed. Beat it until it is creamy and free of lumps. Add the powdered sugar slowly to avoid clumping. Mix until all the ingredients are smooth. To whip cream perfectly, use cold heavy cream. Chill your mixing bowl and beaters in the fridge for 10 minutes. Pour the heavy cream into the cold bowl. Start mixing on low speed, then increase to high. Stop mixing when stiff peaks form. This means the cream holds its shape. Be gentle when folding it into the cream cheese mixture. This keeps the whipped cream fluffy. Refrigerate your cheesecake for at least 4 hours, or overnight if you can wait. This time helps the cheesecake set properly. Cover it with plastic wrap to keep it fresh. Avoid opening the fridge often. Each time you open it, the temperature changes. Once set, remove it from the springform pan carefully. Enjoy your delicious cheesecake! {{image_2}} You can switch up the crust for fun. Use graham crackers for a classic flavor. Or try chocolate cookies for a richer taste. You can also use crushed nuts mixed with butter for a gluten-free option. This adds a nice crunch to every bite. Want to spice things up? Add chopped chocolate or different candies. You can mix in some crushed Oreos for extra texture. Try other extracts like almond or orange for a new twist. Each change can give your cheesecake a fresh taste. Make this cheesecake fit any holiday! For Christmas, add red and green sprinkles on top. For Valentine’s Day, use heart-shaped candies and pink whipped cream. In the summer, mix in fresh strawberries or blueberries. These ideas keep the dessert fun and festive all year long! To store your no bake peppermint Oreo cheesecake, cover it tightly. Use plastic wrap or aluminum foil. A sealed container also works well. Make sure to keep it in the fridge. This keeps it fresh and tasty. You can freeze leftovers for later. First, let the cheesecake chill fully. Then, slice it into pieces. Wrap each piece in plastic wrap and foil. Place the wrapped slices in a freezer-safe bag. They can stay frozen for up to three months. When you're ready to eat, thaw it in the fridge overnight. This cheesecake stays fresh in the fridge for about five days. After that, the taste may change. Always check for any off smells or changes in texture. If it smells funny or looks odd, it's best to toss it. Enjoy your cheesecake while it's fresh! To make this recipe gluten-free, use gluten-free Oreo cookies. Many brands offer gluten-free cookies that taste great. Check the label to ensure they fit your needs. You can still enjoy this delicious cheesecake without gluten. Yes, you can use different types of cream cheese. Neufchâtel cheese is a lighter option. It has less fat but still tastes creamy. You can also use vegan cream cheese for a dairy-free version. Each choice will change the flavor and texture slightly. If you don’t have peppermint extract, use mint extract instead. It has a similar flavor, though it is less sweet. You can also use fresh mint leaves for a natural taste. Just chop them finely and mix them in. You now know how to make a tasty No Bake Peppermint Oreo Cheesecake. We covered the key ingredients, tools, and optional garnishes to make it special. You learned step-by-step instructions for the crust and filling. I shared tips for a smooth mixture and perfect whipped cream. We explored variations to keep things exciting. Lastly, I gave storage tips to keep your cheesecake fresh. Enjoy making this easy dessert that brings a festive touch to any gathering!

No Bake Peppermint Oreo Cheesecake

Indulge in the festive flavors of No Bake Peppermint Oreo Cheesecake! This easy dessert recipe combines creamy cheesecake with a crunchy Oreo base and a delightful peppermint twist, perfect for holiday gatherings. With just a few simple ingredients and minimal prep time, you can create a spectacular treat that will impress everyone. Click to discover the full recipe and bring sweet cheer to your table! #NoBakeDessert #PeppermintRecipe #HolidayBaking #CheesecakeLovers
Print Recipe Pin Recipe

Ingredients
  

24 Oreo cookies, crushed

½ cup unsalted butter, melted

16 oz cream cheese, softened

1 cup powdered sugar

1 teaspoon vanilla extract

1 teaspoon peppermint extract

1 cup heavy cream

1 cup crushed peppermint candies (or candy canes)

Whipped cream for topping (optional)

Extra Oreo cookies for garnish (optional)

Instructions
 

In a medium bowl, combine the crushed Oreo cookies and melted butter until the mixture resembles wet sand.

    Press the Oreo mixture firmly into the bottom of a 9-inch springform pan to form an even crust. Place the pan in the refrigerator to set while preparing the filling.

      In a large mixing bowl, beat the softened cream cheese until smooth and creamy using an electric mixer. Add the powdered sugar, vanilla extract, and peppermint extract, mixing until well combined.

        In a separate bowl, whip the heavy cream until stiff peaks form. Gently fold the whipped cream into the cream cheese mixture until combined, being careful not to deflate the whipped cream.

          Add the crushed peppermint candies to the mixture and gently fold them in to distribute evenly.

            Pour the cheesecake filling over the chilled Oreo crust and spread it out evenly using a spatula.

              Cover the cheesecake with plastic wrap and refrigerate for at least 4 hours (or overnight) until set.

                Once set, remove the cheesecake from the springform pan. If desired, top with whipped cream and garnish with additional crushed Oreo cookies or peppermint pieces.

                  Prep Time, Total Time, Servings: 20 minutes | 4 hours chilling time | 8 servings

                    - Presentation Tips: Serve slices on festive plates, drizzled with a chocolate sauce, and garnish with a sprig of mint or additional crushed peppermint for a pop of color.

                      Related Recipes

                      • - 3 ripe bananas, mashed - 1/2 cup unsalted butter, melted - 3/4 cup brown sugar - 1 large egg, beaten - 1 teaspoon vanilla extract - 1 teaspoon baking soda - 1/4 teaspoon salt - 1 1/2 cups all-purpose flour - 1/2 cup chocolate chips - 1/4 cup chopped walnuts (optional) - 1/2 teaspoon cinnamon Gather these ingredients before you start baking. Ripe bananas are key for a sweet and moist bread. Their flavor shines through, making it a treat. Melted butter gives a rich taste, while brown sugar adds depth. The egg helps bind everything together. Vanilla extract lifts the flavors, making them bright. Baking soda acts as a leavening agent, giving the bread a nice rise. Salt enhances all the sweetness in the mix. All-purpose flour forms the base of your batter. Chocolate chips add a delightful touch. Choose semi-sweet or dark based on your taste. If you love nuts, walnuts bring a nice crunch and extra flavor. Lastly, a hint of cinnamon can elevate the whole dish. This simple list packs a punch. Each ingredient plays a vital role in creating your bakery-style delight. Happy baking! - Preheat oven to 350°F (175°C). - Grease a 9x5 inch loaf pan. - In a large bowl, combine mashed bananas and melted butter. Mix until smooth. - Add brown sugar, egg, and vanilla extract. Stir well to blend. - Sprinkle in baking soda and salt. Mix gently to combine. - Gradually add flour and cinnamon. Stir just until no dry flour remains. - Carefully fold in chocolate chips and walnuts, if you choose to use them. - Pour the batter into the prepared loaf pan. Smooth the top with a spatula. - Bake for 60-65 minutes. A toothpick should come out clean when done. - Cool the banana bread in the pan for about 10 minutes. Then, transfer it to a wire rack to cool completely. To get that perfect bakery-style texture, start with your ingredients. Use room temperature butter and eggs. This helps your banana bread rise better. Cold ingredients can make the bread dense. Mix your batter gently. Over-mixing can lead to tough bread. Once you add flour, stir just until combined. A few lumps are fine. For a richer taste, try different types of chocolate. Semi-sweet chocolate chips give a classic touch. Dark chocolate adds a deep flavor. You can even mix both! Cinnamon is another great addition. Just half a teaspoon can boost the flavor. It pairs well with bananas and chocolate. When slicing, use a serrated knife for clean cuts. Cut thick pieces for a more rustic look. Serve your banana bread on a nice platter. Dust it with powdered sugar for charm. A dollop of whipped cream or a scoop of vanilla ice cream makes it even better! {{image_2}} If you want a nut-free banana bread, simply skip the walnuts. This keeps your loaf soft and delicious. The texture will still be great without them. You can enjoy the rich chocolate and banana flavor without any crunch. This option is perfect for kids or those with nut allergies. For those needing gluten-free options, use a gluten-free flour blend. Many blends work well in this recipe. Just replace the all-purpose flour with the same amount of gluten-free flour. This allows you to enjoy banana bread without gluten. If you want a vegan version, substitute the egg with a flaxseed egg. To make a flaxseed egg, mix 1 tablespoon of flaxseed meal with 2.5 tablespoons of water. Let it sit for a few minutes until it thickens. You can also use plant-based butter instead of regular butter. This keeps your banana bread tasty and friendly for all diets. You can jazz up your banana bread with dried fruits like raisins or cranberries. These add sweetness and chewiness. Another idea is to mix in spices like nutmeg or allspice for warmth. Just a pinch can change the whole flavor. Get creative and let your taste guide you! To keep your banana bread fresh, wrap it tightly with plastic wrap. This helps prevent it from drying out. You can also place it in an airtight container. Store it at room temperature for up to three days. If you want it to last longer, consider refrigerating it. Just remember that chilling can change the texture a bit. To freeze banana bread, let it cool completely. Then, wrap it in plastic wrap and foil. This extra layer helps keep the bread moist. Place the wrapped bread in a freezer bag. You can freeze it for up to three months. When you’re ready to eat it, take it out and let it thaw at room temperature. For a warm slice, you can pop it in the oven at a low temp for a few minutes. Banana bread can stay fresh at room temperature for about three days. If you keep it in the fridge, it can last up to a week. However, the best taste comes from enjoying it fresh. Always check for signs of spoilage, like a sour smell or mold, before eating. Yes, you can use frozen bananas. They work well in banana bread. When using frozen bananas, let them thaw first. This helps to remove excess water. You can mash them easily once thawed. The flavor stays rich and sweet, just like fresh bananas. To check if your banana bread is done, use a toothpick. Insert the toothpick into the center of the loaf. If it comes out clean, your bread is ready. If there are wet crumbs, bake for a few more minutes. Keep checking until the toothpick is clean. This method works great for all banana breads. Yes, you can replace brown sugar with white sugar. This change will alter the flavor and texture slightly. Brown sugar adds a deeper flavor and moisture. White sugar will make your bread a bit lighter. If you want a more caramel taste, stick with brown sugar. This blog post covered all you need to make perfect banana bread. We looked at essential ingredients, step-by-step instructions, and helpful tips. From mixing to baking, these steps guide you easily. You also learned variations to fit your taste and how to store your creation. Remember, with simple tweaks, you can make it your own. Enjoy every slice of your warm, homemade banana bread. It’s a treat worth sharing! Happy baking!
                        Chocolate Chip Banana Bread Bakery Style Delight
                      • To create the pumpkin cream cheese roll, you'll need these key ingredients: - 3/4 cup all-purpose flour - 1/2 teaspoon baking powder - 1 teaspoon baking soda - 1 teaspoon ground cinnamon - 1/2 teaspoon ground nutmeg - 1/4 teaspoon ground ginger - 1/4 teaspoon salt - 1 cup granulated sugar - 3 large eggs - 1 cup canned pumpkin puree - 1 teaspoon vanilla extract - 8 oz cream cheese, softened - 1/4 cup unsalted butter, softened - 2 cups powdered sugar - 1 teaspoon vanilla extract (for the frosting) You can add your twist to this recipe with these optional ingredients: - Chopped nuts like walnuts or pecans for crunch - Chocolate chips for a sweet surprise - A splash of maple syrup for added flavor - Cream cheese with herbs for a savory twist If you run out of an ingredient, here are some swaps: - Use whole wheat flour instead of all-purpose flour for a healthier option. - Replace granulated sugar with coconut sugar for a lower glycemic index. - If you have no cream cheese, Greek yogurt can work in a pinch. - Swap eggs with flaxseed meal mixed with water for a vegan option. These ingredients help you make a great pumpkin cream cheese roll. Each option brings its taste and flair to this delightful dessert. First, set your oven to 375°F (190°C). Grab a 15x10-inch jelly roll pan. Line it with parchment paper. Lightly grease the paper with non-stick spray. This helps the cake release easily. In a medium bowl, whisk together flour, baking powder, baking soda, cinnamon, nutmeg, ginger, and salt. Mix well and set the bowl aside. This mix gives the cake its warm fall flavor. In a large bowl, beat the sugar and eggs until light and fluffy. This takes about 3-4 minutes. Next, add the pumpkin puree and 1 teaspoon of vanilla. Mix until everything combines well. Gradually fold in the dry ingredients. Be gentle; don't overmix. Pour the batter into your prepared pan. Spread it evenly with a spatula. Bake for 15 minutes. Check if it's done by lightly pressing the cake. It should spring back. While the cake bakes, prepare the filling. In a medium bowl, beat the softened cream cheese and butter until smooth. Slowly add powdered sugar and 1 teaspoon of vanilla. Mix until creamy and well combined. Once the cake is done, carefully flip it onto a clean kitchen towel dusted with powdered sugar. Remove the parchment paper. Start at one end and gently roll the cake with the towel. Let it cool completely in this rolled shape. After cooling, unroll the cake carefully. Spread the cream cheese filling evenly over the cake. Roll the cake back up without the towel. Keep the seam side down. Wrap it in plastic wrap and chill for at least one hour. When ready, slice the roll into pieces. Dust with more powdered sugar if you like. Serve it on a pretty platter with a sprinkle of cinnamon or fresh mint leaves for a nice touch. Enjoy this delightful fall treat! To keep your pumpkin cream cheese roll from cracking, follow these steps: - Use Parchment Paper: Line your pan with parchment paper. This helps the cake slide out easily. - Cool on a Towel: After baking, flip the cake onto a clean, powdered sugar-dusted towel. This helps keep it moist. - Roll While Warm: Roll the cake while it’s still warm. This makes it flexible and less likely to crack. If cracks do happen, don’t worry! You can hide them with frosting later. The texture of your roll is key for a great dessert. Here’s how to get it right: - Mix Gently: When adding dry ingredients, fold them in slowly. Overmixing makes the cake tough. - Check for Doneness: Bake until the cake springs back. If it’s too soft, it won’t hold its shape. - Cool Completely: Allow the cake to cool fully before adding the cream cheese filling. This prevents melting and sogginess in the filling. These steps ensure your roll is soft and fluffy, just like it should be. Getting your ingredients ready helps your baking go smoothly: - Room Temperature Ingredients: Use eggs and cream cheese at room temperature. This helps them blend better. - Measure Accurately: Use a kitchen scale or measuring cups for precise amounts. Baking is a science. - Sift Dry Ingredients: Sifting the flour and spices removes lumps. It also adds air, which helps the cake rise. Following these tips will help you create a delightful pumpkin cream cheese roll that impresses everyone. {{image_2}} You can make a gluten-free version of this dessert. Replace all-purpose flour with a gluten-free blend. Make sure the blend has a good mix of starches and flours. Use 3/4 cup of this mix in place of regular flour. The texture may differ slightly, but it will still taste amazing. To create a vegan pumpkin cream cheese roll, substitute eggs with flaxseed meal. Mix 1 tablespoon of flaxseed meal with 3 tablespoons of water for each egg. Let it sit until it thickens. For the cream cheese filling, use a vegan cream cheese alternative mixed with coconut butter. This gives a rich flavor without dairy. You can add fun flavors to your pumpkin cream cheese roll. For a chocolate twist, stir in 1/4 cup of cocoa powder into the batter. This makes a chocolate-pumpkin delight. If you prefer spices, try adding allspice or cardamom. Just a pinch can change the whole vibe of the roll. These variations keep your dessert exciting and unique! Store leftover pumpkin cream cheese roll in the fridge. Wrap it tightly in plastic wrap. This keeps it fresh and moist. You can also place it in an airtight container. It will last for about 3 to 5 days in the fridge. Make sure to slice it before serving. This way, it’s easy to grab a piece whenever you want a tasty treat. You can freeze the pumpkin cream cheese roll for longer storage. To do this, wrap it tightly in plastic wrap. Then, place it in a freezer bag or container. This helps to prevent freezer burn. The roll will stay fresh in the freezer for up to 2 months. When you're ready to enjoy it, just take it out and let it thaw in the fridge overnight. To reheat the pumpkin cream cheese roll, you have a couple of options. For a quick method, slice it and place it in the microwave for about 10-15 seconds. This warms it up nicely without drying it out. If you prefer, you can reheat slices in an oven. Preheat the oven to 350°F (175°C) and place the slices on a baking sheet. Heat for about 5-10 minutes. Enjoy it warm for a cozy fall dessert! Yes, you can use fresh pumpkin. You need to cook and puree it first. Start with about 1 1/4 pounds of fresh pumpkin. Cut it in half, remove the seeds, and roast it until soft. Once cooked, scoop out the flesh and blend until smooth. This gives a fresh taste to your roll. To prevent the roll from breaking, be gentle when rolling it. Use a clean kitchen towel dusted with powdered sugar. After baking, flip the cake onto the towel, remove the parchment, and roll it up while it’s still warm. Allow it to cool in this shape. This helps keep the cake soft and flexible. You can serve it with whipped cream or a scoop of vanilla ice cream. A sprinkle of cinnamon adds warmth and flavor. Some like to pair it with coffee or chai tea. Fresh mint leaves can also add a nice touch and color. The pumpkin cream cheese roll lasts about 3 to 5 days in the fridge. Make sure to wrap it well in plastic wrap. This keeps it fresh and moist. If you want it to last longer, consider freezing it. You learned how to make a great pumpkin cream cheese roll. We covered essential ingredients and tips for the best texture. You can explore variations, like gluten-free or vegan options. Storing leftovers and reheating are easy with the right steps. Remember, practice makes perfect in baking. Embrace your creativity, and enjoy your tasty results. Now, gather your ingredients and start baking!
                        Pumpkin Cream Cheese Roll Delightful Fall Dessert Recipe
                      • - 4 cups Rice Krispies cereal - 3 tablespoons unsalted butter - 1 package (10 oz) mini marshmallows - 1 teaspoon vanilla extract - 1 teaspoon pumpkin pie spice - 1 cup pumpkin puree - Pinch of salt These ingredients create a tasty treat. The Rice Krispies give crunch, while the marshmallows add chewiness. Butter helps everything stick together, and pumpkin puree provides a rich flavor. Vanilla and pumpkin pie spice bring warmth to each bite. - Orange and yellow sprinkles Adding sprinkles makes the treats festive. It is a fun way to enjoy these treats, especially for holidays. You can choose any color you like. Sprinkles add color and a bit of extra sweetness. These treats are not gluten-free due to Rice Krispies, which may contain gluten. To make them gluten-free, look for gluten-free Rice Krispies. They also contain dairy from the butter. For a dairy-free option, try using a plant-based butter. First, grab a large saucepan. Place it on low heat. Add 3 tablespoons of unsalted butter. Watch it melt slowly. Once it melts, toss in the whole package of mini marshmallows. Stir them with a spatula. Keep stirring until they melt and become smooth. This part takes just a few minutes. After melting, take the saucepan off the heat. Now, add 1 teaspoon of vanilla extract. Next, add 1 teaspoon of pumpkin pie spice. Mix these in well until combined. Then, add 1 cup of pumpkin puree. Make sure to stir until there are no lumps. This step makes your treats taste like fall! Gradually, add 4 cups of Rice Krispies cereal. Gently fold it into the mixture. You want every piece coated well. It helps to use a spatula or your hands, lightly greased. Once mixed, line a 9x9 inch baking pan with parchment paper. Pour the mixture into the pan. Press it down firmly with the back of the spatula. You want an even layer. Then, if you like, sprinkle some orange and yellow sprinkles on top. Let the treats cool for at least 30 minutes. After cooling, cut them into squares or rectangles. Enjoy! To make the best Pumpkin Rice Krispie Treats, focus on texture. Start by melting the butter and marshmallows slowly. This keeps them smooth. If you rush, the mix may clump. After melting, mix in the pumpkin puree well. This adds moisture and flavor. If the mixture feels too sticky, add a bit more Rice Krispies. This helps balance the texture. When mixing the Rice Krispies, take your time. Gently fold the cereal into the melted marshmallow mix. Use a rubber spatula to reach all corners. If you use your hands, lightly grease them. This will stop the mix from sticking. Make sure every piece of cereal is coated. This creates a better flavor in each bite. Cutting the treats right takes a little care. Let them cool for at least 30 minutes. This helps them hold their shape. Use a sharp knife for clean edges. Lightly grease the knife to prevent sticking. Cut them into squares or rectangles based on your preference. For a fun touch, top with colorful sprinkles before cutting. Enjoy the fun shapes! {{image_2}} You can add chocolate or peanut butter for a fun twist. Just melt 1 cup of chocolate chips or 1/2 cup of peanut butter with the marshmallows. Stir them in until smooth. These flavors mix well with pumpkin. The result is a richer treat that kids will love. You can also drizzle melted chocolate on top for extra flair. Adding nuts or seeds boosts texture and flavor. Try 1/2 cup of chopped pecans or walnuts. You can also use pumpkin seeds for a seasonal touch. Stir them in with the Rice Krispies. This adds crunch and nutrition to your treats. Just be careful if serving to little ones or guests with allergies. You can mix in other flavors to change things up. Consider using 1 teaspoon of cinnamon or maple syrup for a sweet twist. A splash of almond extract can add a nice touch. Experimenting with different flavors keeps it exciting. You might find a new favorite combo that everyone enjoys! You can store your Pumpkin Rice Krispie Treats in an airtight container. Keep them at room temperature for up to three days. If you live in a warm area, consider placing them in the fridge. This keeps them fresh and chewy for longer. To freeze these treats, cut them into squares first. Wrap each square in plastic wrap. Place the wrapped treats in a freezer-safe bag or container. They can last in the freezer for up to two months. When you want to enjoy them, let them thaw at room temperature for about 30 minutes. Always keep your treats sealed tightly to avoid air exposure. This helps prevent them from getting hard or stale. If they start to lose their softness, you can microwave them for a few seconds to regain some chewiness. Enjoy your treats while they are fresh for the best taste! Yes, you can use homemade marshmallows. They add a unique touch. Just make sure they are soft and fluffy. Melt them the same way as the store-bought ones. This will create a nice, gooey base for your treats. To make these treats vegan, swap out the butter for coconut oil or vegan butter. Use vegan marshmallows instead of regular ones. These changes keep the flavor and texture while being plant-based. Enjoy your vegan Pumpkin Rice Krispie Treats just as much! If you need a substitute for Rice Krispies, try using puffed rice or cornflakes. You can even use crispy rice cereal made from brown rice for a healthier option. The key is to keep the texture light and crunchy. This way, your treats will still turn out delicious! In this article, you learned how to make delicious Pumpkin Rice Krispie Treats. We covered key ingredients, step-by-step instructions, and tips for perfect treats. You can mix in flavors like chocolate or nuts and store your treats fresh. Keep these ideas in mind when you create your own treats. Enjoy your fun, tasty snacks!
                        Pumpkin Rice Krispie Treats Simple and Tasty Recipe
                      • - 2 cans (16 oz each) refrigerated biscuit dough - 1 cup apple butter - 1/2 cup brown sugar, packed - 3 teaspoons ground cinnamon - 1/4 cup granulated sugar - 1/2 cup unsalted butter, melted - 1 cup chopped apples (preferably Granny Smith) - 1/2 cup chopped walnuts or pecans (optional) - 1 pinch of salt When I create Apple Butter Monkey Bread, I love using fresh ingredients. The first key ingredient is the biscuit dough. I use two cans of refrigerated dough to save time. This dough provides the base for the sweet and sticky goodness. Next, I grab a cup of apple butter. The apple butter adds depth and a rich flavor. It turns the dough into an irresistible treat. Brown sugar adds sweetness. I use half a cup packed to give that caramel-like flavor. Cinnamon plays a big role in this recipe. I add three teaspoons for warmth and spice. Granulated sugar, about a quarter cup, mixes with the brown sugar and cinnamon for a sweet coating. Melted unsalted butter is essential. I use half a cup to help the sugar and cinnamon stick to the dough. Then, I chop one cup of Granny Smith apples for a tart contrast. If you like nuts, I recommend adding half a cup of walnuts or pecans. They add crunch and extra flavor. Finally, I include a pinch of salt to balance everything. These ingredients come together to create a delightful dish. Each bite is full of flavor and texture. You will find that this monkey bread is not only tasty but also fun to share. - Preheat your oven to 350°F (175°C). - Grease a bundt pan with non-stick spray or butter. Start by getting your oven ready. Preheating it ensures even baking. A hot oven helps the dough rise nicely. Greasing the bundt pan prevents sticking. You want your monkey bread to come out whole and beautiful. - Mix brown sugar, granulated sugar, and cinnamon in a bowl. - Cut the biscuit dough into quarters. In a small bowl, mix the brown sugar, granulated sugar, and cinnamon. Set this aside. This mix brings sweetness and warmth to your bread. Next, take the biscuit dough. Cut each biscuit into quarters. This makes it easier to coat and layer. - Mix apple butter with melted butter. - Toss the biscuit pieces with the apple butter mixture. - Add chopped apples and nuts, if using. Now, in another bowl, mix the melted butter with the apple butter. This blend is the magic sauce. Drizzle this mixture over your biscuit pieces. Toss them gently until they are well-coated. If you like, add in your chopped apples and nuts. This adds texture and flavor. - Sprinkle half of the sugar-cinnamon mixture. - Layer the biscuit mix in the bundt pan. - Bake for 30-35 minutes, or until golden. Take half of your sugar-cinnamon mix and sprinkle it over the coated biscuit pieces. Toss again to coat. Now it’s time to layer. Place the biscuit mix in the greased bundt pan. Sprinkle any remaining sugar mixture between layers. Bake for 30-35 minutes. Check for doneness by looking for a golden brown top. To make your Apple Butter Monkey Bread shine, start with the right apples. I recommend using Granny Smith apples. They add a lovely tartness that balances the sweetness of the apple butter. If you want it sweeter, you can adjust the sugar levels. Add a bit more brown sugar or granulated sugar to your mix. Just remember, too much sugar can make it overly sweet. To check if your monkey bread is done, use a toothpick. Insert it in the center. If it comes out clean, your bread is ready. For a golden top, keep an eye on your oven. You want it to be a nice brown color, not too dark. If it starts to brown too quickly, cover it with foil. This will help it bake evenly. This treat is best served warm. The gooey apple butter pulls apart easily when it's hot. You can also serve it cold, but the flavors shine when warm. For drinks, try pairing it with hot cider or coffee. You can also add toppings like whipped cream or a drizzle of caramel for extra fun! {{image_2}} You can easily customize your Apple Butter Monkey Bread. Adding spices like nutmeg or cloves brings warmth and depth. These spices enhance the apple flavor and make it cozy. You can also switch up your butters. Try using maple butter for a sweet twist. It adds a rich, earthy taste that pairs well with apple butter. Think about drizzling your monkey bread with caramel or icing. These toppings add a sticky sweetness that makes each bite special. You can also add seasonal fruits like pears or cranberries. These fruits can bring a fresh burst of flavor and color to your dish. Their tartness balances the sweetness of the bread. If you need gluten-free options, substitute the biscuit dough with gluten-free dough. There are many brands available that taste great. For those wanting a vegan version, use plant-based butter and almond milk instead of regular butter. You can still enjoy the same gooey goodness while keeping it plant-based. To keep your Apple Butter Monkey Bread fresh, store it in the fridge. Place the cooled bread in an airtight container. You can also wrap it tightly in plastic wrap. This method helps lock in moisture and flavor. Aim to eat it within three days for the best taste. To reheat, place the bread in the oven at 350°F (175°C). Cover it with foil to keep it moist. Heat for about 10-15 minutes. You can also use the microwave. Heat it in short bursts, about 20 seconds at a time. Check often to avoid drying it out. You can freeze Apple Butter Monkey Bread if you want to save some for later. First, let it cool completely. Then, wrap it well in plastic wrap and foil. This helps prevent freezer burn. It can last for about three months in the freezer. To thaw, move it to the fridge overnight. If you’re in a hurry, let it sit at room temperature for a couple of hours. Once thawed, reheat it as mentioned before. Enjoy this sweet treat any time! Monkey bread is a fun and tasty pull-apart bread. It uses biscuit dough, coated in sweet layers. You bake it in a bundt pan, which gives it a lovely shape. Each piece is soft, gooey, and filled with flavor. You can also add spices and fruits for extra taste. Yes, you can prep this monkey bread ahead. Cut the biscuit dough into pieces. Mix with apple butter and spices, then place in the bundt pan. Cover it and put it in the fridge. Bake it fresh when you're ready to serve. This way, you save time on busy days. Using homemade apple butter is great! It tastes fresh and rich. You can control the sweetness and spices. Store-bought apple butter is fine, but homemade often has more flavor. If you have the time, making your own is worth it. No, adding nuts is not a must. You can skip them if you have nut allergies. You can also use seeds, like sunflower or pumpkin. They add a nice crunch without nuts. Enjoy this sweet treat just the way you like it! In this article, I shared a delicious recipe for apple butter monkey bread. We explored the key ingredients and detailed steps to prepare it perfectly. I also offered tips for flavor and baking, along with suggestions for variations and storage. This dish is a fun treat for all ages. Whether you share it warm or cold, its flavors will delight everyone. Enjoy making this recipe and feel free to get creative with it!
                        Apple Butter Monkey Bread Irresistible Sweet Treat

                      WANT TO SAVE THIS RECIPE?

                      Leave a Reply Cancel reply

                      Your email address will not be published. Required fields are marked *

                      Recipe Rating


                      Indulge in the festive flavors of No Bake Peppermint Oreo Cheesecake! This easy dessert recipe combines creamy cheesecake with a crunchy Oreo base and a delightful peppermint twist, perfect for holiday gatherings. With just a few simple ingredients and minimal prep time, you can create a spectacular treat that will impress everyone. Click to discover the full recipe and bring sweet cheer to your table! #NoBakeDessert #PeppermintRecipe #HolidayBaking #CheesecakeLovers

                      Hi I’m Taling

                      I love sharing perfected dishes from my kitchen. I’m sure they’ll earn a spot in your heart. Let’s savor this journey together!.

                      More about me

                      Recent Desserts

                      • - 24 Oreo cookies, crushed - ½ cup unsalted butter, melted - 16 oz cream cheese, softened - 1 cup powdered sugar - 1 teaspoon vanilla extract - 1 teaspoon peppermint extract - 1 cup heavy cream - 1 cup crushed peppermint candies (or candy canes) - Whipped cream for topping (optional) - Extra Oreo cookies for garnish (optional) The star of this cheesecake is the Oreo crust. It gives a sweet and crunchy base. The cream cheese filling is rich and creamy. The peppermint flavor brings a fresh twist. You mix the cream cheese with sugar and extracts. Heavy cream makes it light and fluffy. - 9-inch springform pan - Medium mixing bowl - Large mixing bowl - Electric mixer - Spatula - Plastic wrap These tools make your baking easy. The springform pan lets you remove the cheesecake easily. Mixing bowls help you combine your ingredients well. An electric mixer beats the cream cheese smoothly. A spatula ensures you mix well without mess. - Whipped cream - Crushed peppermint candies - Extra Oreo cookies Garnishes add fun and flair to your cheesecake. Whipped cream makes it look fancy. Crushed peppermint candies offer extra flavor. Extra Oreo cookies are perfect for a crunchy topping. You can also use a sprig of mint for color. To start, grab a medium bowl. Combine the crushed Oreo cookies and melted butter. Mix until it looks like wet sand. This will be your base. Next, press the mixture into the bottom of a 9-inch springform pan. Make sure to press down firmly for a sturdy crust. Once done, place the pan in the fridge. Let it chill while you prepare the filling. Now, take a large mixing bowl. Beat the softened cream cheese with an electric mixer. Keep mixing until it is smooth and creamy. Add the powdered sugar, vanilla extract, and peppermint extract. Mix these until they blend well. In another bowl, whip the heavy cream until stiff peaks form. Gently fold this whipped cream into the cream cheese mixture. Be careful not to deflate the whipped cream. Finally, add the crushed peppermint candies and fold them in evenly. Pour the cream cheese filling over the chilled Oreo crust. Use a spatula to spread it out evenly. Cover the cheesecake with plastic wrap. Put it back in the fridge for at least 4 hours, or overnight if you can wait. Once set, remove the cheesecake from the pan. If you like, top it with whipped cream and garnish with extra crushed Oreos or peppermint bits. Enjoy your delicious creation! To get a smooth cream cheese mixture, start with softened cream cheese. Take it out of the fridge 30 minutes before using. This way, it blends easier. Use an electric mixer on medium speed. Beat it until it is creamy and free of lumps. Add the powdered sugar slowly to avoid clumping. Mix until all the ingredients are smooth. To whip cream perfectly, use cold heavy cream. Chill your mixing bowl and beaters in the fridge for 10 minutes. Pour the heavy cream into the cold bowl. Start mixing on low speed, then increase to high. Stop mixing when stiff peaks form. This means the cream holds its shape. Be gentle when folding it into the cream cheese mixture. This keeps the whipped cream fluffy. Refrigerate your cheesecake for at least 4 hours, or overnight if you can wait. This time helps the cheesecake set properly. Cover it with plastic wrap to keep it fresh. Avoid opening the fridge often. Each time you open it, the temperature changes. Once set, remove it from the springform pan carefully. Enjoy your delicious cheesecake! {{image_2}} You can switch up the crust for fun. Use graham crackers for a classic flavor. Or try chocolate cookies for a richer taste. You can also use crushed nuts mixed with butter for a gluten-free option. This adds a nice crunch to every bite. Want to spice things up? Add chopped chocolate or different candies. You can mix in some crushed Oreos for extra texture. Try other extracts like almond or orange for a new twist. Each change can give your cheesecake a fresh taste. Make this cheesecake fit any holiday! For Christmas, add red and green sprinkles on top. For Valentine’s Day, use heart-shaped candies and pink whipped cream. In the summer, mix in fresh strawberries or blueberries. These ideas keep the dessert fun and festive all year long! To store your no bake peppermint Oreo cheesecake, cover it tightly. Use plastic wrap or aluminum foil. A sealed container also works well. Make sure to keep it in the fridge. This keeps it fresh and tasty. You can freeze leftovers for later. First, let the cheesecake chill fully. Then, slice it into pieces. Wrap each piece in plastic wrap and foil. Place the wrapped slices in a freezer-safe bag. They can stay frozen for up to three months. When you're ready to eat, thaw it in the fridge overnight. This cheesecake stays fresh in the fridge for about five days. After that, the taste may change. Always check for any off smells or changes in texture. If it smells funny or looks odd, it's best to toss it. Enjoy your cheesecake while it's fresh! To make this recipe gluten-free, use gluten-free Oreo cookies. Many brands offer gluten-free cookies that taste great. Check the label to ensure they fit your needs. You can still enjoy this delicious cheesecake without gluten. Yes, you can use different types of cream cheese. Neufchâtel cheese is a lighter option. It has less fat but still tastes creamy. You can also use vegan cream cheese for a dairy-free version. Each choice will change the flavor and texture slightly. If you don’t have peppermint extract, use mint extract instead. It has a similar flavor, though it is less sweet. You can also use fresh mint leaves for a natural taste. Just chop them finely and mix them in. You now know how to make a tasty No Bake Peppermint Oreo Cheesecake. We covered the key ingredients, tools, and optional garnishes to make it special. You learned step-by-step instructions for the crust and filling. I shared tips for a smooth mixture and perfect whipped cream. We explored variations to keep things exciting. Lastly, I gave storage tips to keep your cheesecake fresh. Enjoy making this easy dessert that brings a festive touch to any gathering!
                        No Bake Peppermint Oreo Cheesecake Delight Recipe
                      • To make caramel apple Rice Krispie treats, you will need: - 4 cups Rice Krispies cereal - 1 cup mini marshmallows - 3 tablespoons unsalted butter - 1 cup caramel sauce (store-bought or homemade) - 1 large apple, peeled and diced (preferably Granny Smith for tartness) - ½ teaspoon cinnamon - ½ cup chopped walnuts or pecans (optional) - ¼ cup chocolate chips (optional, for drizzling on top) You can swap the Rice Krispies with any puffed rice cereal. If you want a nut-free option, skip the walnuts or pecans. You can use any apple you like, but Granny Smith gives the best tart flavor. For a healthier version, use natural caramel sauce made with dates. If you don’t have chocolate chips, melted peanut butter can add a tasty drizzle too. Using high-quality ingredients makes a big difference in taste. Fresh apples have a crisp bite and sweet flavor that enhances the treats. Good caramel sauce, whether homemade or store-bought, adds rich, buttery notes. Always choose unsalted butter to control the saltiness. The best mini marshmallows melt well, giving you a smooth texture. Quality nuts add crunch and depth, while dark chocolate can elevate the overall flavor. Remember, great ingredients lead to great snacks! 1. Start by melting the butter in a large saucepan over low heat. This step is key for a smooth mix. 2. Once the butter melts, add the mini marshmallows. Stir them until they are completely melted and smooth. 3. Remove the pan from heat. Mix in the caramel sauce well until it blends with the marshmallows. 4. Add the Rice Krispies cereal to this mixture. Gently fold it in using a spatula until every piece is coated. 5. Dice the apple and stir it into the mixture along with cinnamon and nuts if you choose to add them. 6. Lightly grease a 9x13-inch baking dish. Pour the mixture in and press it down to create a flat layer. 7. If you like, melt chocolate chips in the microwave. Drizzle this over the pressed treats for extra sweetness. 8. Allow the treats to cool for about 30 minutes at room temperature. This helps them set properly. 9. After cooling, cut them into squares or rectangles for serving. To get the best texture, work quickly when mixing. Marshmallows can cool and harden fast. Make sure to fold gently when adding the Rice Krispies. This keeps them crunchy. If you press too hard, the treats can become too dense. If your treats are too sticky, you may not have used enough butter. This can lead to a messy result. If they are too hard, you might have overcooked the marshmallows. Keep an eye on them while melting. If they don’t set, let them cool longer and try again. To keep your Caramel Apple Rice Krispie Treats fresh, wrap them tightly in plastic wrap. Place them in an airtight container. This will prevent them from getting hard or stale. Store them at room temperature for up to three days. If you want to keep them longer, freeze them. Just make sure to separate layers with parchment paper. These treats shine at parties or as after-school snacks. You can cut them into fun shapes using cookie cutters. Pair them with a scoop of vanilla ice cream for a sweet treat. They also go well with hot apple cider or a warm cup of tea. Kids love them, and adults do too! Want to add a twist? Try adding dried fruit like cranberries or raisins. You can also mix in some shredded coconut for a tropical flair. If you love chocolate, stir in some chocolate chips or drizzle melted chocolate on top. Each of these options gives your treats a new flavor and texture. {{image_2}} You can give your Caramel Apple Rice Krispie Treats a twist with fun flavors. Adding chocolate chips is an easy way to make these treats richer. Just melt some chocolate and drizzle it on top. You can also mix in nuts like walnuts or pecans for extra crunch. This adds flavor and texture, making each bite exciting. If you want a lighter version, try using less butter. You can substitute the butter with coconut oil. This change keeps the taste while reducing fat. Use homemade caramel sauce with less sugar for a healthier option. You can also add more apples. This adds fiber and makes the treat feel fresh and light. You can change these treats to fit the season. In fall, use pumpkin spice instead of cinnamon for a cozy vibe. During the holidays, add crushed peppermint for a festive twist. You can also use dried cranberries or raisins to add color and flavor. These small changes keep your treats fun and exciting all year long! To keep your Caramel Apple Rice Krispie Treats fresh, store them in an airtight container. This keeps air out and moisture in, helping them stay soft. You can layer the treats with parchment paper. This prevents sticking and makes it easy to grab a piece later. Avoid storing them in the fridge. The cold air can make them hard. These treats usually last about a week at room temperature. If you want to keep them longer, freeze them. Wrap each piece in plastic wrap, then place in a freezer bag. They can last up to three months in the freezer. When you want to eat them, just thaw at room temperature for a few hours. If your treats do get a bit hard, you can soften them. Place a piece of wax paper over them and microwave for 10-15 seconds. This helps them regain some of their chewy texture. Just be careful not to overheat, or they could melt. Enjoy your tasty snacks! Yes, you can make these treats ahead of time. Just store them in an airtight container. They stay fresh for about three days at room temperature. For longer storage, put them in the fridge. Just remember, they may get a bit harder. If you want them soft again, let them sit at room temperature for a while before serving. I recommend using Granny Smith apples for this recipe. They are tart and crunchy. Their flavor balances the sweetness of the caramel and marshmallows. If you like sweeter apples, you can try Honeycrisp or Fuji. Just keep in mind that the taste will be sweeter overall. To keep the treats soft, follow a few simple tips. First, do not overcook the marshmallows. Melt them just until smooth. Second, mix in the Rice Krispies gently. If you press too hard, they will get dense. Lastly, store them properly in an airtight container. This keeps moisture in and helps maintain their softness. This blog covered important aspects of making Rice Krispie treats. We explored the best ingredients, tips for great texture, and common troubles. I shared ways to store leftovers and suggested fun variations to try. Remember, ingredient quality truly matters for flavor. Use this guide to enjoy tasty treats that you can make and share with ease. Happy cooking, and may every bite bring you joy!
                        Caramel Apple Rice Krispie Treats Delightful Snack
                      • - 8 oz cream cheese, softened - 1 cup powdered sugar - 1 teaspoon vanilla extract - 1 cup whipped cream - 1 medium apple, diced (preferably Granny Smith) - ½ cup caramel sauce (store-bought or homemade) - ¼ cup chopped nuts (such as pecans or walnuts, optional) - Sliced apples, graham crackers, or pretzels for dipping I love using Granny Smith apples for this dip. Their tartness balances the sweet caramel and rich cream cheese. Other great options include Honeycrisp and Fuji apples. These apples add a nice crunch and juicy flavor. You can customize this dip further! Try adding chocolate chips for extra sweetness. A sprinkle of cinnamon gives a warm spice note. If you want more texture, mix in some crushed graham crackers. These add a nice crunch and depth to the dip. To begin, gather your ingredients. You need 8 oz of softened cream cheese, 1 cup of powdered sugar, and 1 teaspoon of vanilla extract. In a large bowl, use a hand mixer to beat the cream cheese until it is smooth. This step is key for a creamy dip. Next, slowly add the powdered sugar and vanilla. Mix until everything is well combined. Now, it’s time to make this dip fluffy. Gently fold in 1 cup of whipped cream. This adds lightness to our dip. After that, carefully add 1 medium diced apple. I prefer Granny Smith for its tartness. If you like, you can also mix in ¼ cup of chopped nuts for a crunchy twist. Now for the fun part! In a serving dish, spread the cheesecake mixture evenly. Drizzle ½ cup of caramel sauce all over the top. The golden caramel makes it look amazing! If you added nuts, sprinkle them on top. Serve this dip right away with sliced apples, graham crackers, or pretzels. Each bite is a sweet treat! To make your dip creamy, start with soft cream cheese. I let mine sit out for about 30 minutes. Then, beat it with a hand mixer until it is smooth. Add powdered sugar slowly. This helps it blend well. Mix in vanilla extract for extra flavor. Next, you want to fold in whipped cream gently. This keeps the dip light and fluffy. If you mix too hard, it can lose that nice texture. When dicing apples, choose a firm apple like Granny Smith. This type stays crisp and tangy. Wash the apple first, then cut it into quarters. Remove the core and seeds. Slice each quarter into thin pieces. Then, chop those slices into small cubes. Aim for even sizes so they mix well. This way, every bite has a bit of apple. Toss the diced apples in a little lemon juice to keep them fresh and bright. For serving, choose a nice dish to show off your dip. Spread the cheesecake mixture evenly in the dish. Drizzle caramel sauce over the top. You can create a fun design with the sauce. If you like, sprinkle chopped nuts on top for crunch. Use colorful sliced apples, graham crackers, or pretzels for dipping. Arrange them nicely around the dip. This makes it look inviting and fun. Enjoy your treat with friends or family! {{image_2}} You can easily change the flavor of this dip. Want a chocolate twist? Add some cocoa powder to the cream cheese mix. You can also drizzle chocolate syrup on top for extra sweetness. If you like spices, try adding cinnamon or nutmeg. These spices make the dip warm and cozy, perfect for fall. If you want a lighter dip, there are ways to cut back on sugar. Use a sugar substitute for the powdered sugar. You could also swap the whipped cream for Greek yogurt. This gives you the creaminess without all the calories. This way, you enjoy taste without feeling guilty. Feel free to play with the nuts in this recipe. Pecans and walnuts are great, but almonds or hazelnuts work well too. You can also skip the nuts if you have nut allergies. Instead, sprinkle some granola on top for a nice crunch. This gives you options and lets everyone enjoy the dip! To keep your caramel apple cheesecake dip fresh, store it in an airtight container. This helps keep the dip creamy and delicious. Make sure to cover the surface with plastic wrap before sealing the lid. This extra step prevents air from getting in and helps maintain the flavor. You can keep this dip in the fridge for up to three days. After that, the apples may start to brown, and the dip may lose its creaminess. Always check for any off smells or changes in texture before eating leftovers. Freezing caramel apple cheesecake dip is not recommended. The cream cheese and whipped cream can change in texture when thawed. If you need to store it longer, consider freezing the dip without the apples. When you’re ready to enjoy it, thaw in the fridge overnight and fold in fresh apple pieces before serving. Yes, you can make this dip ahead of time. I suggest mixing everything but the caramel sauce. Store the dip in the fridge for up to two days. Just before serving, drizzle the caramel on top. This keeps the dip fresh and creamy. Making homemade caramel sauce is easy! Here’s a quick method: - Ingredients: - 1 cup sugar - 6 tablespoons butter - ½ cup heavy cream - Steps: 1. In a pot, heat sugar over medium heat. Stir until it melts and turns golden brown. 2. Add the butter and mix until it melts. 3. Slowly pour in the cream, stirring constantly. 4. Remove from heat and let it cool. This sauce adds a rich, sweet taste to your dip. You have many options for dipping! Here are some great choices: - Graham crackers - Pretzels - Vanilla wafers - Sliced strawberries - Biscotti These options offer a fun twist to enjoy your creamy dip. This blog post covered how to create a delicious caramel apple cheesecake dip. You learned about the key ingredients and recommended apple types. I shared tips for the best texture and how to serve it well. We explored flavor variations and healthy swaps for your needs. Remember, you can store leftovers safely and even freeze the dip. Enjoy customizing this treat to suit your taste. With these ideas and tips, you can impress everyone at your next gathering. Happy dipping!
                        Caramel Apple Cheesecake Dip Irresistibly Creamy Treat
                      • - 1 cup unsalted butter - 1 cup pumpkin puree - 1 ½ cups granulated sugar - ½ cup brown sugar, packed - 2 large eggs - 1 teaspoon vanilla extract - 3 cups all-purpose flour - 1 teaspoon baking soda - 1 teaspoon cream of tartar - ½ teaspoon salt - 1 tablespoon pumpkin spice - ¼ cup granulated sugar (for rolling) - 1 tablespoon cinnamon (for rolling) I use common measurements like cups and teaspoons. This keeps it simple. When baking, precise measurements matter. A cup of flour is not the same as a cup of brown sugar. Use dry measuring cups for solids and liquid measuring cups for liquids. Pumpkin puree is key here. You can use store-bought or homemade puree. If you can’t find pumpkin spice, mix cinnamon, nutmeg, and ginger instead. Brown butter adds a rich flavor. If you prefer, use regular unsalted butter. This will change the taste, but it will still be good. Feel free to experiment with flavors. You can add chocolate chips or nuts if you like. Always taste as you go. This makes your baking more fun and personal! First, set your oven to 350°F (175°C). Grease a 9x13 inch baking pan or line it with parchment paper. This helps the bars come out easily. Next, take 1 cup of unsalted butter and melt it in a medium saucepan over medium heat. Stir it often. Watch as it foams up, then turns golden brown. This should take about 5-7 minutes. Once it smells nutty, remove it from heat and let it cool down a little. In a big mixing bowl, mix the browned butter, 1 cup pumpkin puree, 1 ½ cups granulated sugar, and ½ cup packed brown sugar. Beat this mixture until it looks smooth. Now, add in 2 large eggs and 1 teaspoon vanilla extract. Mix until everything is well combined. In a different bowl, whisk together 3 cups of all-purpose flour, 1 teaspoon baking soda, 1 teaspoon cream of tartar, ½ teaspoon salt, and 1 tablespoon pumpkin spice. This will be your dry mix. Slowly add the dry mix into the wet mix. Stir gently until everything comes together. Do not overmix. A few lumps are okay. Pour the batter into your prepared baking pan, spreading it evenly with a spatula. In a small bowl, mix ¼ cup granulated sugar with 1 tablespoon cinnamon. Sprinkle this mix on top of the batter. Bake the bars for 25-30 minutes. Use a toothpick to check if they are done. If it comes out clean, they are ready. After baking, let the bars cool in the pan for about 10 minutes. Then, move them to a wire rack to cool completely. Cut them into squares and serve. For a nice touch, you can dust them with powdered sugar or drizzle caramel sauce on top. Enjoy! To make brown butter, you need to watch it closely. Start with unsalted butter in a medium saucepan. Heat it on medium. Stir it often. Look for foaming, a golden color, and a nutty smell. This process takes about 5-7 minutes. If it burns, you must start over. Brown butter adds a rich flavor to the bars. One common mistake is overmixing the batter. After you combine the wet and dry ingredients, mix until just blended. A few lumps are okay. Overmixing can make the bars tough and chewy instead of soft. Also, make sure to measure your ingredients accurately. Too much flour makes the bars dry. To serve your bars beautifully, use a rustic wooden platter. Dust the tops lightly with powdered sugar. For a fun twist, drizzle caramel sauce on top. This adds a nice touch and makes the bars look more inviting. A few pecans or walnuts can add texture and elegance. {{image_2}} You can make these bars even better by adding chocolate chips. I like to use semi-sweet chocolate chips for a rich taste. Just fold in about one cup of chocolate chips to the batter before you pour it into the pan. The warm, gooey chocolate complements the pumpkin flavor perfectly. If you want a nut-free treat, you're in luck! This recipe does not call for nuts. If you want to add some crunch, try using pumpkin seeds or sunflower seeds instead. They add a nice texture while keeping it safe for those with nut allergies. To make these bars gluten-free, swap the all-purpose flour for a gluten-free blend. Look for a blend that includes xanthan gum for the best results. The texture will still be soft and chewy, just like the original. Enjoy your gluten-free treat without missing out on flavor! Store your Brown Butter Pumpkin Snickerdoodle Bars in an airtight container. Place parchment paper between layers to keep them fresh. Keep the bars at room temperature for up to three days. If you want them to last longer, refrigerate them. They can stay good for up to a week in the fridge. To freeze the bars, first let them cool completely. Cut them into squares. Wrap each square in plastic wrap, then place them in a freezer bag. Label the bag with the date. These bars can last in the freezer for up to three months. When you’re ready to eat them, thaw them overnight in the fridge. Reheating is simple. Preheat your oven to 350°F (175°C). Place the bars on a baking sheet. Heat them for about 10 minutes, or until warm. You can also use a microwave. Heat each square for 15-20 seconds. Enjoy them warm for a cozy treat! Yes, you can use canned pumpkin puree. It saves time and gives great flavor. Just make sure it is pure pumpkin and not a pie filling. You can check if the bars are done by inserting a toothpick. If it comes out clean, they are ready. The edges will look slightly golden, and the center will feel set. These bars pair well with vanilla ice cream or whipped cream. You can add a drizzle of caramel sauce for extra sweetness. The bars last about 3 to 5 days when stored in an airtight container. Keep them at room temperature. If you want to store them longer, you can freeze them. Yes, you can make these bars ahead of time. They taste great after a day or two. Just store them properly to keep them fresh. This blog post covered the main aspects of creating delicious bars. You learned about key ingredients and their measurements, along with special substitutions. I provided step-by-step instructions for every part of the baking process. Useful tips helped you avoid common mistakes and improve presentation. Variations allow you to customize your bars, while storage info keeps them fresh. With this knowledge, you can bake with confidence and enjoy your treats!
                        Brown Butter Pumpkin Snickerdoodle Bars Delight

                      Recent Drinks

                      • To make Pumpkin Spice White Hot Chocolate, you need simple and tasty ingredients. Each one adds a special touch to this cozy drink. Here’s what you’ll need: - 2 cups whole milk - 1 cup heavy cream - 1 cup white chocolate chips - ½ cup pumpkin puree - 1 teaspoon vanilla extract - 1 teaspoon pumpkin spice mix - A pinch of salt - Whipped cream, for topping - Ground cinnamon or extra pumpkin spice, for garnish Whole milk and heavy cream make the drink rich and creamy. White chocolate chips melt into a sweet base. Pumpkin puree gives it a warm flavor. Vanilla extract adds a lovely aroma. Pumpkin spice mix brings in classic fall flavors. Just a pinch of salt enhances all the tastes. Lastly, whipped cream and a sprinkle of cinnamon or pumpkin spice make it pretty. Once you gather these ingredients, you’re ready to create a delicious drink that warms your heart. You can enjoy it alone or share it with friends and family. Each sip will remind you of cozy fall days. Making Pumpkin Spice White Hot Chocolate is easy and fun. Gather all your ingredients first. You will need whole milk, heavy cream, white chocolate chips, pumpkin puree, vanilla extract, pumpkin spice mix, a pinch of salt, whipped cream, and ground cinnamon or extra pumpkin spice for garnish. This recipe takes about 10 minutes to prep and 15 minutes in total. You can serve four people, so share it with friends or family! Start by pouring 2 cups of whole milk and 1 cup of heavy cream into a medium saucepan. Set your stove to medium heat. Stir the mixture gently. Heat it until it feels warm but do not let it boil. This step is important because boiling can change the texture. Once your milk and cream are warm, add 1 cup of white chocolate chips. Use a whisk and stir continuously. This will help the chocolate melt evenly into the milk. Keep whisking until the mixture is smooth and creamy. Next, stir in ½ cup of pumpkin puree, 1 teaspoon of vanilla extract, 1 teaspoon of pumpkin spice mix, and a pinch of salt. Make sure everything blends well. Once it's creamy and heated, remove the saucepan from the heat. Now, pour your hot chocolate into mugs. Top each serving with whipped cream. Finish by sprinkling ground cinnamon or extra pumpkin spice on top. Enjoy your delicious drink! To make your Pumpkin Spice White Hot Chocolate super creamy, use whole milk and heavy cream. These two ingredients work great together. They add richness that makes each sip feel like a warm hug. Heat them gently in a saucepan, but don’t let them boil. Boiling can change the texture and make it less smooth. Stir often to keep the mixture even and creamy. Everyone has different tastes. If you like your drink sweeter, add more white chocolate chips. Start with an extra tablespoon, then taste it. If it needs more, keep adding a little at a time. For those who prefer less sweetness, cut back on the white chocolate. You can also use less pumpkin puree. This will keep the flavor strong but make it less sweet. Whipped cream makes this drink even better! To get the best whipped cream, use heavy cream. Beat it until it forms stiff peaks. This means it should hold its shape well. You can add a bit of sugar or vanilla for extra flavor. Once your hot chocolate is in the mug, top it with a big scoop of whipped cream. Don’t forget to sprinkle a bit of ground cinnamon or pumpkin spice on top. This adds a nice touch and enhances the fall flavors. {{image_2}} If you want a dairy-free option, try using almond milk or oat milk. These milks create a creamy base without dairy. You can also swap out the heavy cream for coconut cream. It adds richness and a light coconut flavor. For the white chocolate, look for dairy-free chips. They melt well and keep the sweet taste. You can mix in some maple syrup for extra sweetness. It adds a nice fall flavor. Want a little heat? Add a pinch of cayenne pepper or a dash of chili powder. It gives a fun kick to your drink. You can also stir in some caramel sauce for a sweet twist. A splash of flavored extracts, like hazelnut or almond, can also elevate the taste. This drink is perfect for fall gatherings. Serve it at Halloween parties in cute mugs. You can even top it with marshmallows for a fun touch. For Thanksgiving, offer it as a warm drink option. Add a sprinkle of nutmeg on top for a festive look. You can create a hot chocolate bar with toppings like crushed cookies or chocolate shavings. This way, everyone can customize their own cup. You can store leftover Pumpkin Spice White Hot Chocolate in an airtight container. Let it cool first. Then, place it in the fridge. This keeps it fresh for later. To reheat, pour the hot chocolate into a saucepan. Heat over low heat. Stir it gently to avoid burning. You can also use the microwave. Heat it in short bursts. Stir in between to ensure even warming. Stored correctly, this treat lasts about three days in the fridge. For best taste, consume it within this time. If you see any changes in texture or smell, toss it out. Always trust your senses! Yes, you can make this drink vegan. Use almond milk or oat milk instead of whole milk and heavy cream. Replace white chocolate chips with dairy-free options. Pumpkin puree fits well in vegan recipes. If you can't find pumpkin puree, use butternut squash puree or sweet potato puree. Both options give a similar flavor and texture. You may also blend cooked pumpkin for a fresh taste. To add more spice, increase the pumpkin spice mix to two teaspoons. You can also add a pinch of cayenne pepper or more cinnamon for an extra kick. Adjust to your taste! Absolutely! Almond milk, soy milk, or coconut milk all work well. Choose a creamy milk alternative to maintain a rich texture. Just ensure it is unsweetened for better flavor balance. For garnishes, whipped cream is a must. You can sprinkle ground cinnamon or extra pumpkin spice on top. Chocolate shavings or caramel drizzle can add a fun twist. Enjoy your tasty drink! This blog post detailed how to make a delicious Pumpkin Spice White Hot Chocolate. We covered essential ingredients, simple steps, and helpful tips. You learned how to achieve creamy texture and customize sweetness. We shared dairy-free ideas and perfect serving suggestions for seasonal gatherings. In closing, enjoy crafting this cozy drink at home. It’s perfect for chilly days and gatherings. Your taste buds will thank you!
                        Pumpkin Spice White Hot Chocolate Creamy Delight
                      • To make Pumpkin Spice Whipped Coffee, gather these ingredients: - 2 tablespoons instant coffee - 2 tablespoons sugar - 2 tablespoons hot water - ¼ cup milk (dairy or non-dairy) - ¼ teaspoon pumpkin spice (plus extra for garnish) - 1 tablespoon pumpkin puree - Whipped cream (optional, for topping) Having the right ingredients makes your coffee special. I love how these simple items blend to create a delightful drink. You can add fun toppings to your whipped coffee. Some great options include: - Whipped cream - Extra pumpkin spice - Chocolate shavings - Caramel drizzle Toppings add flavor and make your drink look fancy. I recommend using whipped cream and a sprinkle of pumpkin spice for a festive touch. If you want to switch things up, here are some easy swaps: - Use brown sugar instead of white sugar for a richer flavor. - Coconut milk or almond milk work well if you’re avoiding dairy. - Try cinnamon instead of pumpkin spice for a different taste. These substitutions let you customize the drink to your taste. Enjoy experimenting with flavors! To make pumpkin spice whipped coffee, gather your ingredients first. This simple recipe takes just ten minutes. You'll enjoy a delightful coffee treat with warm pumpkin flavors. 1. In a medium bowl, combine: - 2 tablespoons instant coffee - 2 tablespoons sugar - 2 tablespoons hot water Mix these together well. 2. Use an electric mixer or a whisk. Beat the mixture on high speed. This should take about 2-4 minutes. You want it light and fluffy, like whipped cream. 3. In a separate container, heat: - ¼ cup milk (dairy or non-dairy) Heat until steaming but not boiling. If using non-dairy milk, ensure it’s frothy. 4. Stir in: - ¼ teaspoon pumpkin spice - 1 tablespoon pumpkin puree Mix these into the heated milk until fully combined. 5. In a glass, pour in the pumpkin mixture first. Next, add the whipped coffee on top. 6. You can gently fold the whipped coffee into the pumpkin milk for a marbled look. Or, leave it layered for a pretty presentation. 7. If you'd like, top with whipped cream. Sprinkle a pinch of pumpkin spice for an extra festive touch. Enjoy your pumpkin spice whipped coffee warm. It makes a perfect fall treat. Pair it with a slice of pumpkin bread or a cozy blanket. Share it with friends for a delightful coffee break! To make your whipped coffee fluffy, use instant coffee. Mix it with sugar and hot water. Beat the mix on high speed for about 2-4 minutes. You want it to look light and airy. If you don’t have an electric mixer, a whisk works too, but it takes longer. Aim for stiff peaks, like whipped cream. To boost the taste, use fresh pumpkin spice. Add a touch more if you like spice. Pumpkin puree also helps bring out the pumpkin flavor. If you want it sweeter, add extra sugar to taste. Heating the milk until it's steaming helps mix the spices well, making each sip flavorful. Don’t skip the instant coffee. Regular coffee won’t whip up like instant. Avoid using cold milk, as it won’t blend well. If you overbeat the coffee mix, it can become grainy. Also, don’t forget to garnish. A sprinkle of pumpkin spice on top makes it look pretty and adds flavor. {{image_2}} You can change the flavor of your Pumpkin Spice Whipped Coffee by adding new ingredients. Here are some fun ideas: - Vanilla Extract: A splash of vanilla adds warmth. - Cocoa Powder: Mix in cocoa for a chocolate twist. - Caramel Sauce: Drizzle caramel for extra sweetness and richness. - Nutmeg or Cinnamon: These spices can deepen the fall flavor. Each add-in creates a unique drink. Feel free to experiment! You can adjust the sweetness to fit your taste. The basic recipe calls for two tablespoons of sugar. Here are some tips: - Less Sweet: Start with one tablespoon of sugar. - More Sweet: Add up to three tablespoons if you like it sweeter. - Natural Sweeteners: Try honey, maple syrup, or agave for a different flavor. Taste as you mix. Make it just right for you! You can make this drink dairy-free and vegan easily. Here are some options: - Milk Choices: Use almond milk, oat milk, or coconut milk instead of dairy milk. - Whipped Topping: Look for dairy-free whipped cream at the store. - Sugar Substitutes: Use coconut sugar or maple syrup if preferred. These swaps will keep the drink delicious and suitable for all diets. Enjoy your tasty Pumpkin Spice Whipped Coffee! To store any leftovers, place them in a sealed container. You can keep it in the fridge for up to two days. If you want to enjoy it later, make sure to store the whipped coffee and pumpkin milk separately. This helps keep each part fresh. When you're ready to enjoy your coffee again, heat the pumpkin milk gently. Use a microwave or a small pot on low heat. Stir it well to mix any settled pumpkin spice. Avoid boiling the milk, as it can change the taste. For the best taste, drink your Pumpkin Spice Whipped Coffee fresh. If you have leftovers, consume them within two days. Make sure to seal the container tightly. This keeps out air and other smells, helping preserve its yummy flavor. Yes, you can use brewed coffee instead. Just make a strong cup. Use about ½ cup of brewed coffee in place of the instant coffee. It may not whip up as fluffy, but it will still taste great. You can prepare the whipped coffee and pumpkin milk separately. Store them in airtight containers in the fridge. When you're ready to enjoy, combine them and serve cold or heat the milk. This way, you save time on busy mornings. The best milk depends on your taste. Dairy milk gives a rich flavor. Almond milk or oat milk works well too for a lighter taste. Choose what fits your diet and enjoy it! This blog post outlined the key ingredients and steps for making Pumpkin Spice Whipped Coffee. You learned about optional toppings, ingredient swaps, and how to perfect the whipped texture. There are tips to enhance flavor and avoid common mistakes. You can customize flavors and ensure the drink fits your diet. Lastly, I shared how to store leftovers and answer common questions. With this knowledge, you can enjoy a sweet, creamy treat. Get creative and make it your own!
                        Pumpkin Spice Whipped Coffee Delightful Fall Treat
                      • - 1 ripe banana - 2 tablespoons natural peanut butter - 1 cup unsweetened almond milk (or any milk of choice) - 1 scoop vanilla protein powder (plant-based or whey) - 1 tablespoon chia seeds - 1 teaspoon honey (optional for sweetness) - A pinch of cinnamon - Ice cubes (optional, for a thicker texture) Gather these simple items before you start. A ripe banana gives natural sweetness and creaminess. Use two tablespoons of natural peanut butter for a rich flavor. Almond milk is my go-to, but any milk you love works great. The protein powder adds a boost of nutrition. Choose vanilla to match the banana. Chia seeds are tiny but mighty. They add fiber and help keep you full. If you like it sweeter, add honey, but it’s not a must. A pinch of cinnamon brings warmth and depth to this drink. For a thicker texture, toss in some ice cubes. This smoothie is flexible, so feel free to mix and match based on your taste. Now, let's blend it all together! 1. Start by peeling the ripe banana. Break it into small chunks. 2. In a blender, combine the banana chunks, natural peanut butter, almond milk, protein powder, chia seeds, and a pinch of cinnamon. 3. If you like a colder and thicker smoothie, add some ice cubes. 1. Blend all the ingredients on high speed. Keep blending until you have a smooth and creamy mix. 2. Stop the blender and taste your smoothie. If you want it sweeter, add honey. Blend again for a few seconds to mix. 1. Pour the smoothie into a tall glass. Enjoy it right away for the best taste and creaminess. 2. For a fun twist, you can top it with extra chia seeds or banana slices. This makes it look pretty too! To get the perfect texture, use a ripe banana. A ripe banana makes the smoothie creamy. Add ice cubes if you want it thicker. If you prefer a smoother drink, blend longer. Scrape the sides of the blender to mix all the ingredients well. This ensures a silky-smooth result. If your smoothie tastes too bland, add honey or more banana. Start with a teaspoon of honey. Blend and taste again. You can always add more honey if needed. This way, you control the sweetness to match your taste. Remember, ripe bananas also add natural sweetness. Use a high-speed blender for the best results. A strong blender breaks down the ingredients quickly. If you have a less powerful blender, blend in stages. Start with the liquids first, then add the solids. This helps everything mix better. Make sure your blender is clean for the best flavor. {{image_2}} You can switch the peanut butter for other nut butters. Almond butter offers a nutty taste. Cashew butter is creamy and sweet. Sunflower seed butter is a great choice for allergies. Each nut butter brings its own flavor and health benefits. Experiment to find your favorite. You can add many fruits to the smoothie. Frozen berries add sweetness and color. Spinach or kale boosts nutrition without changing the taste. Try mango for a tropical twist. Each fruit adds vitamins and makes the smoothie fun. Mix and match to discover new flavors. Choosing the right protein powder is key. Plant-based powders are great for vegan diets. Whey protein is popular for muscle recovery. Look for flavors that match your taste, like chocolate or vanilla. The right powder can enhance the smoothie’s flavor and nutrition. Test different types to see what you prefer. Store any leftover smoothie in an airtight container. You want to keep it fresh. Place it in the fridge right after making it. It will stay good for about one day. When you are ready to drink it again, shake or stir well. This helps mix any settled ingredients. You can freeze your smoothie for later. Pour it into ice cube trays or freezer-safe bags. This way, you can grab a portion whenever you want. To use, thaw the smoothie overnight in the fridge. You can also blend it again for a fresh taste. In the fridge, your smoothie lasts about 24 hours. In the freezer, it can last up to three months. Just remember, the sooner you drink it, the better the taste and texture will be! Yes, this smoothie is gluten-free. All the ingredients listed are naturally free from gluten. The peanut butter, banana, almond milk, protein powder, chia seeds, and honey do not contain gluten. Always check labels if you use store-bought items to confirm they are gluten-free. Absolutely! To make this smoothie vegan, simply use plant-based protein powder. Ensure your peanut butter is also free from animal products. Replace honey with maple syrup or agave nectar for sweetness. All other ingredients are already vegan-friendly. This smoothie offers many health benefits. It provides protein from the peanut butter and protein powder, which helps build muscle. Bananas add potassium, good for heart health. Chia seeds are packed with fiber, aiding digestion. Almond milk is low in calories and rich in vitamins. Yes, you can use various milk types. Cow’s milk will add creaminess and protein. Soy milk is a great option for extra protein. Coconut milk gives a tropical flavor. Each milk option changes the taste and texture slightly, so choose what you enjoy best. This smoothie recipe combines simple ingredients for great taste and nutrition. You learned step-by-step how to prepare it and tips for perfect texture. Variations let you customize your drink to fit your taste. Remember to store leftovers properly for later enjoyment. Smoothies can be healthy and fun. Try new mixtures to find what you love best. Keep experimenting and enjoy your delicious creations!
                        Peanut Butter Banana Protein Smoothie Easy Recipe
                      • To make a delicious Turmeric Golden Milk Latte, gather these simple ingredients: - 2 cups almond milk (or your preferred milk) - 1 teaspoon ground turmeric - ½ teaspoon ground ginger - ¼ teaspoon cinnamon - 1 tablespoon honey or maple syrup (adjust to taste) - Pinch of black pepper - ½ teaspoon vanilla extract - Optional: a sprinkle of nutmeg for garnish - Almond Milk: This milk is low in calories and rich in vitamins. It helps with heart health. - Turmeric: This spice has curcumin, known for its anti-inflammatory properties. It may help improve brain function. - Ginger: Ginger can help with digestion and nausea. It adds a nice warmth to the drink. - Cinnamon: This spice is rich in antioxidants. It may help lower blood sugar and improve heart health. - Honey or Maple Syrup: Both sweeteners can boost energy. They also provide antioxidants. - Black Pepper: This spice enhances turmeric absorption. It makes the drink more effective. - Vanilla Extract: It adds flavor and can help reduce stress. - Nutmeg: This spice is optional, but it adds warmth and a nice aroma. - Milk Options: You can use oat milk, soy milk, or coconut milk for different flavors. - Sweeteners: If you prefer, try agave syrup or stevia as sugar-free options. - Spices: Experiment with cardamom or cloves for added flavor. - Nutmeg: You can skip it if you don't like nutmeg, or use a touch of cocoa powder instead. 1. Start by taking a small saucepan. 2. Add 2 cups of almond milk to the pan. 3. Measure and add 1 teaspoon of ground turmeric. 4. Next, add ½ teaspoon of ground ginger. 5. Sprinkle in ¼ teaspoon of cinnamon. 6. Sweeten your drink with 1 tablespoon of honey or maple syrup. 7. Don't forget a pinch of black pepper for better absorption of turmeric. 8. Lastly, add ½ teaspoon of vanilla extract. 9. Whisk all the ingredients well in the pan. 10. Place the saucepan on medium heat. 11. Gently warm the mixture while stirring often. 12. Keep an eye on it; do not let it boil. 13. After about 5-7 minutes, it should be hot enough. 14. Remove the pan from heat and let it cool slightly. 15. If you want a frothy drink, use a milk frother or whisk it quickly. 16. Pour the golden milk into your favorite mugs. 17. Optionally, sprinkle a bit of nutmeg on top for a nice touch. 18. Serve warm and enjoy this comforting drink! - Always use a whisk to blend the spices into the milk. - Whisking helps mix the turmeric and other spices evenly. - When heating, keep the heat low to avoid scalding the milk. - Stir often to prevent sticking at the bottom of the pan. - If you see steam but no bubbles, you are at the right temperature. - A milk frother works wonders for a smooth, frothy finish. - If you don’t have a frother, whisk vigorously by hand. - Frothing adds air, giving the latte a creamy feel. - The more you froth, the lighter and fluffier your drink will become. - For an extra touch, froth some almond milk separately and top your latte with it. You can mix spices to make your turmeric latte tastier. Try adding a pinch of nutmeg or a dash of cardamom. These spices add warmth to the drink. You can also use fresh ginger instead of ground ginger. This will give your latte a bright, zesty kick. Just remember, fresh ginger may need more time to steep. Many people rush the heating process. Always warm your milk slowly over medium heat. If you boil it, the spices can lose flavor. Another mistake is not blending the spices well. Make sure to whisk the mixture thoroughly. This helps avoid clumps of turmeric or ginger. Lastly, avoid skipping the black pepper. It helps your body absorb turmeric better. Sweetness is personal. Start with one tablespoon of honey or maple syrup. Taste your latte and add more if you like it sweeter. For creaminess, use full-fat coconut milk for a richer feel. Almond milk is lighter but still delicious. You can also mix almond and coconut milk for the best of both worlds. {{image_2}} You can easily make this latte vegan. Just use almond milk, coconut milk, or oat milk. These milks work great in this recipe. They keep the drink creamy and delicious. If you want a nut-free option, oat milk is the best choice. It blends well with turmeric and spices. To make an iced version, start with brewed turmeric milk. Follow the same steps but let it cool. Pour over ice instead of serving warm. This drink is refreshing on hot days. You can also add some ice cream for a treat! You can mix and match flavors for fun. Try adding matcha for a green twist. This adds a fresh taste and boosts energy. You can also use cocoa for a chocolatey version. The cocoa pairs well with turmeric and spices. For a special touch, add a dash of vanilla extract. This enhances the overall flavor and aroma. To store leftover turmeric golden milk, let it cool first. Then, pour it into an airtight container. Keep it in the fridge for up to three days. This way, you can enjoy the drink again without losing its flavor. When reheating your golden milk, do it gently. Pour it into a small saucepan. Heat it over low to medium heat. Stir it often to avoid burning. Never let it boil, as this can change the taste and texture. You can also use a microwave. Heat in short bursts, stirring in between. Turmeric golden milk lasts about three days in the fridge. Check for signs of spoilage. If it smells sour or has any mold, discard it. Always trust your senses. If it looks or smells off, it’s best to throw it away. Turmeric has many health benefits. It is known for its bright yellow color and active compound called curcumin. Curcumin may help reduce inflammation. It can also support joint health. Some studies suggest it may boost your mood. Turmeric might even help with digestion. Drinking turmeric may also support your immune system. Yes, you can use any milk you like. Almond milk is great, but coconut milk adds creaminess. Oat milk is a good choice for a thicker texture. If you prefer dairy, whole or skim milk works too. Just remember, different types of milk will change the flavor a bit. To make this recipe sugar-free, skip the honey or maple syrup. You can use a sugar substitute like stevia or monk fruit instead. These options will give you sweetness without the calories. Just adjust the amount to your taste. Yes, it is safe for most people to have turmeric daily. Using it in cooking or drinks is a great way to enjoy its benefits. However, if you have health issues or take certain medications, check with a doctor first. Moderation is key, as with any food. In this blog post, we explored the ingredients and health benefits of Turmeric Golden Milk. I shared step-by-step instructions for making it frothy and delicious. We also discovered tips, tricks, and variations to enhance your drink. Proper storage and reheating advice can help you enjoy leftovers. Remember, turmeric offers many health benefits, so enjoy this drink often. Use alternative ingredients if you prefer. With these ideas, you can create the perfect golden milk to suit your taste and health needs. Enjoy your journey to wellness!
                        Turmeric Golden Milk Latte Simple and Creamy Recipe

                      Footer

                      Indulge in the festive flavors of No Bake Peppermint Oreo Cheesecake! This easy dessert recipe combines creamy cheesecake with a crunchy Oreo base and a delightful peppermint twist, perfect for holiday gatherings. With just a few simple ingredients and minimal prep time, you can create a spectacular treat that will impress everyone. Click to discover the full recipe and bring sweet cheer to your table! #NoBakeDessert #PeppermintRecipe #HolidayBaking #CheesecakeLovers
                      ↑ back to top

                      More information

                      • Drinks
                      • Appetizer
                      • Dinner
                      • Desserts
                      • About
                      • Contact
                      • Privacy Policy

                      Our Policies

                      • Privacy Policy
                      • GDPR Policy
                      • Terms Of Use
                      • Copyright Policy
                      • Cookie Policy
                      • Disclaimer

                      Copyright © 2025 cheftaling