Are you ready to take dessert to the next level? S’mores Brownie Bars combine rich chocolate, gooey marshmallows, and crunchy graham crackers. This treat will make your taste buds dance! In this post, I will walk you through easy steps to create this dessert delight at home. You don’t need special skills, just love for sweets! Let’s dive into the ingredients and get baking!
Ingredients
Detailed List of Ingredients
To make S’mores Brownie Bars, gather these ingredients:
– 1 cup unsalted butter, melted
– 1 ¼ cups granulated sugar
– 1 cup packed brown sugar
– 4 large eggs
– 1 teaspoon vanilla extract
– 1 cup all-purpose flour
– ½ cup unsweetened cocoa powder
– 1 teaspoon baking powder
– ½ teaspoon salt
– 1 cup milk chocolate chips
– 1 cup mini marshmallows
– 1 cup crushed graham crackers (about 8 full sheets)
– Extra chocolate and marshmallows for topping
These ingredients blend together to create a rich and gooey dessert. The butter brings moisture, while the sugars add sweetness. Eggs help bind the mix, creating a soft texture. Flour and cocoa powder create the brownie base. Baking powder gives it lift, and salt enhances flavor.
Chocolate chips add richness, and marshmallows bring that classic S’mores taste. Graham crackers provide crunch and structure. The extra toppings make it even more fun and delicious.
Step-by-Step Instructions
Prepping the Oven and Baking Pan
– Preheat the oven to 350°F (175°C). This heat is perfect for baking.
– Grease a 9×13 inch baking pan or use parchment paper. This helps with easy removal.
Mixing Wet Ingredients
– In a large bowl, whisk together the melted butter, granulated sugar, and brown sugar. Mix until smooth.
– Add the eggs one at a time. Make sure to mix well after each egg. Stir in the vanilla extract for flavor.
Combining Dry Ingredients
– In another bowl, sift together the flour, cocoa powder, baking powder, and salt. This helps avoid lumps.
– Gradually fold the dry mix into the wet ingredients. Be gentle so you don’t overmix.
– Now, fold in the milk chocolate chips and crushed graham crackers. Save a bit of each for topping later.
This step-by-step guide leads you to tasty S’mores Brownie Bars.Enjoy the process and the sweet, gooey result!
Tips & Tricks
Perfecting the Brownie Texture
To make your brownies great, avoid overmixing the batter. When you mix too much, the brownies can turn tough. Mix only until you see the dry ingredients blend in. This keeps them soft and fudgy.
To achieve a fudgy brownie, use melted butter instead of softened butter. Melted butter helps create that rich, moist texture. You can also add an extra egg for more moisture.
Ensuring Proper Marshmallow Topping
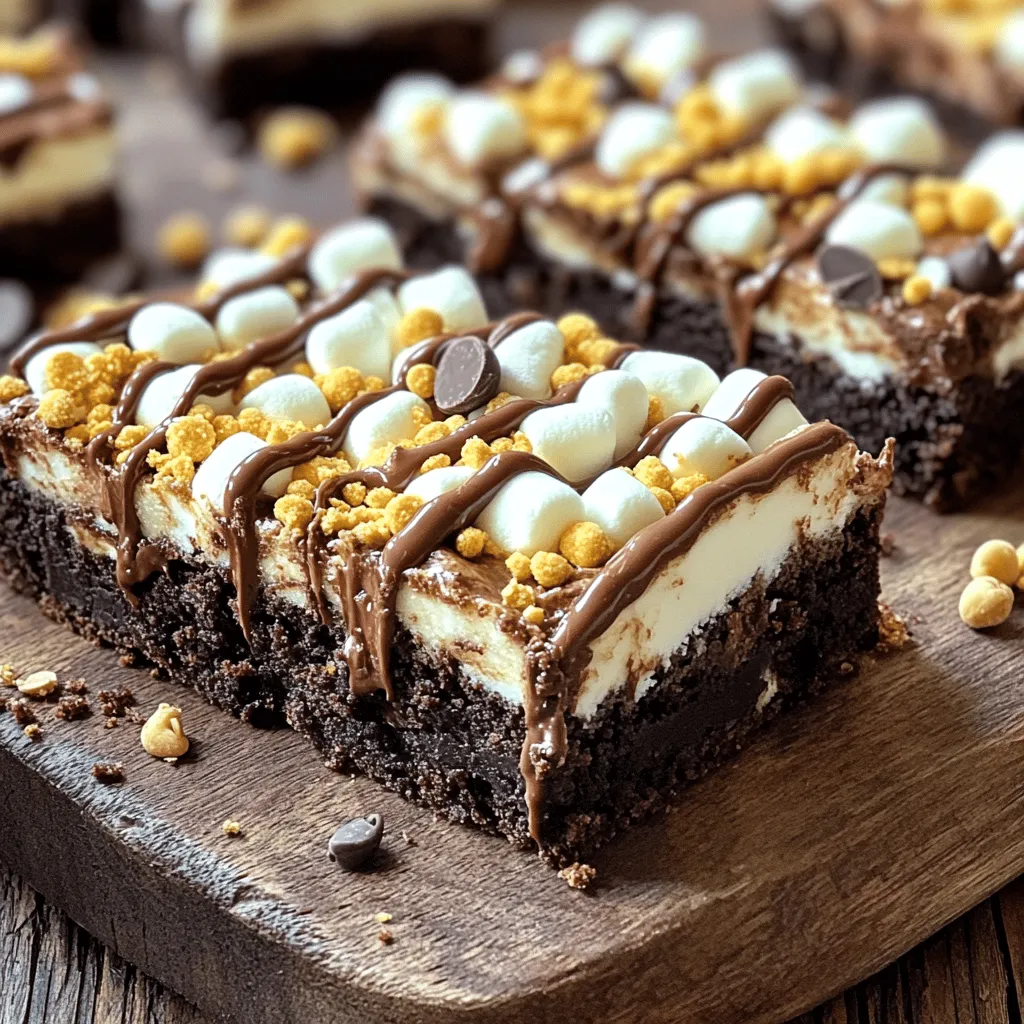
Timing is key for the marshmallows. Add them after baking for 25 minutes. This gives them time to melt but not burn.
To get a golden, gooey top, bake the marshmallows for just 5-7 more minutes. Keep an eye on them! You want them to puff up and turn light brown. The gooey marshmallows add that classic s’mores flavor.
Variations
Customizing the Flavors
You can make S’mores brownie bars even better by adding your favorite nuts. Walnuts or pecans add a nice crunch. You can also try different types of chocolate. Dark chocolate or white chocolate will give a new twist to your bars. If you want, you can also use flavored extracts. Almond or mint extracts can add a fun layer of flavor to the mix.
Alternative Presentation Ideas
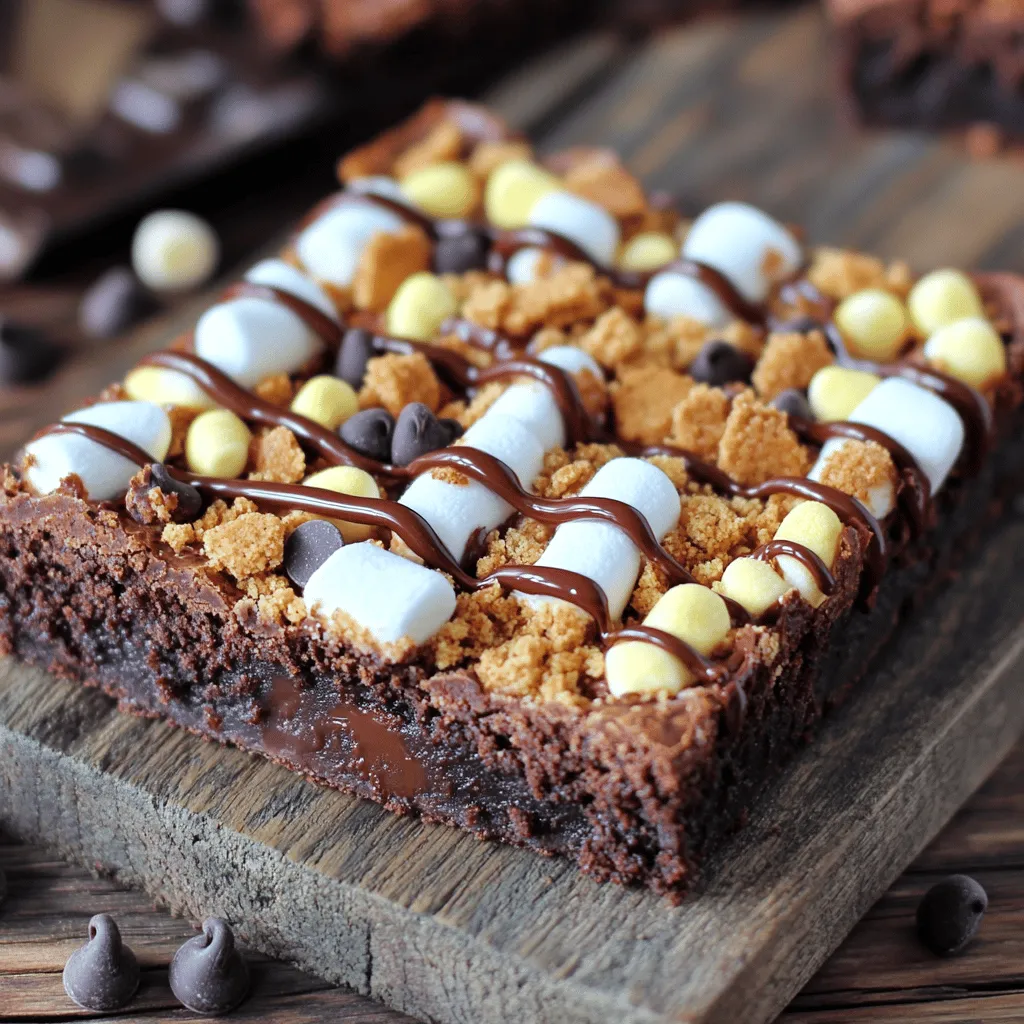
When serving S’mores brownie bars at parties, think about fun ways to present them. Stack the bars on a rustic wooden board. Drizzle melted chocolate on top for a tasty look. You can also sprinkle mini marshmallows and graham cracker crumbs around the plate. This makes a great campfire vibe! You can layer the bars in a clear jar for a cute gift or treat. It’s a fun way to show off the layers of chocolate and marshmallows.
Storage Info
Best Practices for Storing Brownie Bars
To keep your S’mores brownie bars fresh, let them cool completely. This step is key. If you store them while warm, they can become soggy. Once cool, cut them into bars.
Use an airtight container for storage. A glass or plastic container works great. You can also layer parchment paper between the bars to prevent sticking. This keeps them fresh and easy to grab.
Reheating Tips
If you want to enjoy them warm, reheating is simple. Place a bar on a microwave-safe plate. Heat for about 10 to 15 seconds. This warms the chocolate and marshmallows nicely.
If you store your bars in the fridge, they may become firm. You can leave them at room temperature for a bit before eating. This helps soften them up. Enjoy your S’mores brownie bars at their best!
FAQs
How long do S’mores Brownie Bars last?
S’mores Brownie Bars can last about five days. Store them in an airtight container. They stay fresh at room temperature. If you keep them in the fridge, they may last up to a week. Just remember, they taste best fresh!
Can I freeze S’mores Brownie Bars?
Yes, you can freeze S’mores Brownie Bars! Wrap them tightly in plastic wrap. Then, place them in a freezer bag. They can stay frozen for up to three months. When you’re ready to eat, let them thaw in the fridge overnight.
What if I don’t have chocolate chips?
If you don’t have chocolate chips, you can use chopped chocolate bars. Or, try using a mix of white chocolate or butterscotch chips. Even cocoa powder can work in a pinch. Your bars will still be tasty and sweet!
How can I make these gluten-free?
To make these bars gluten-free, swap all-purpose flour with gluten-free flour. Many brands work well as a substitute. Just check the package for best results. Also, ensure that your chocolate chips and graham crackers are gluten-free.Enjoy your baking!
Making S’mores Brownie Bars is fun and easy. We covered important ingredients and steps. You learned to mix, bake, and achieve the perfect texture. Customizing flavors and toppings lets you be creative. Remember to store bars properly for long-lasting enjoyment. Following these tips ensures your brownies taste great each time. Now you are ready to impress friends and family with your delicious treats. Enjoy your baking journey!


