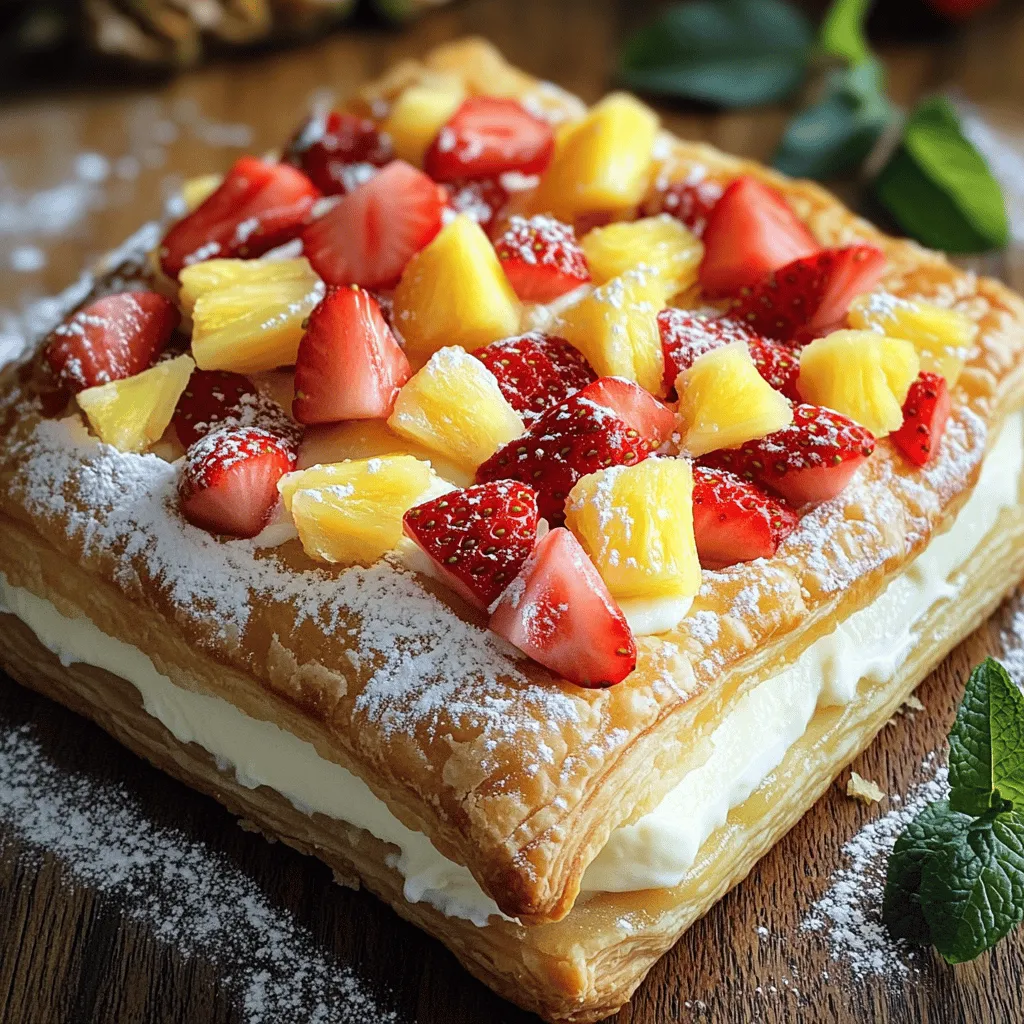
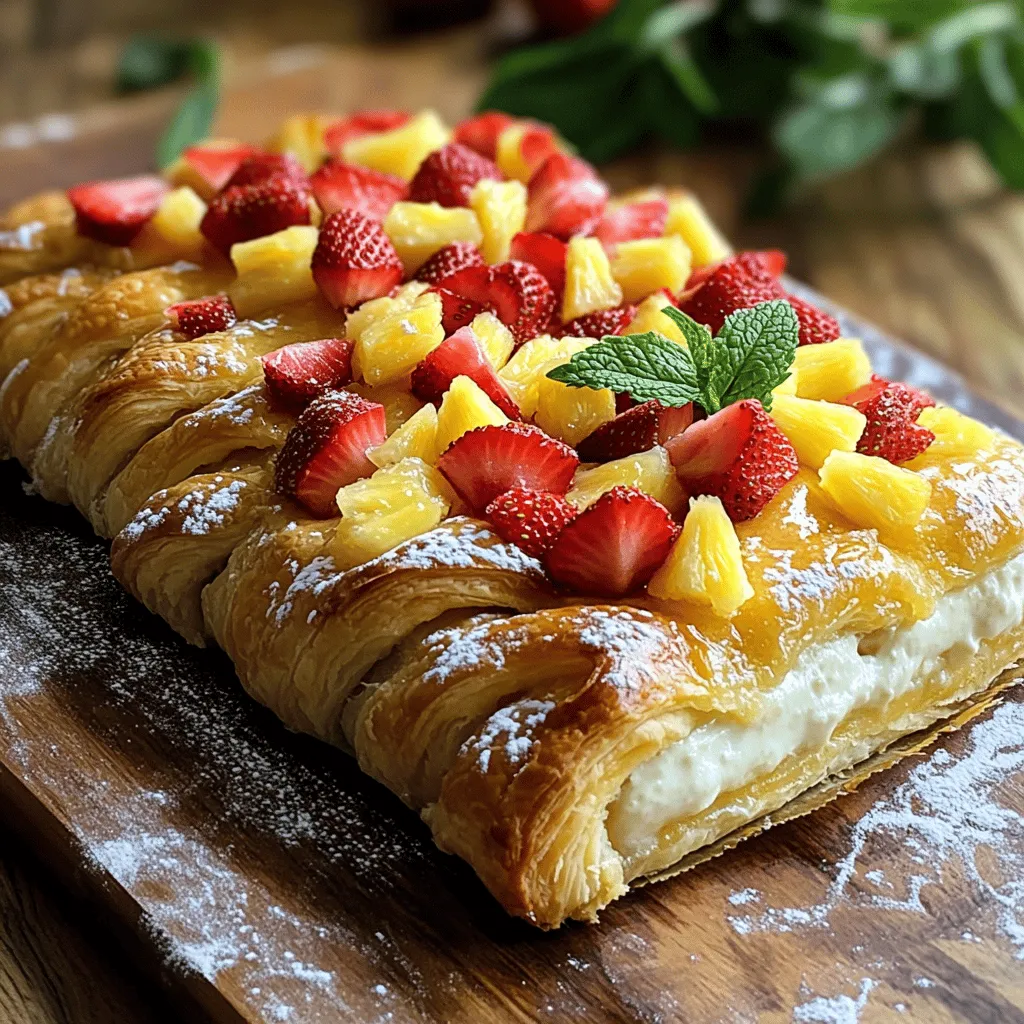
Are you ready to delight your taste buds? The King’s Hawaiian Cheesecake Danish combines sweet, fluffy bread with creamy cheesecake filling for a treat you can’t resist. This easy recipe allows you to customize flavors and toppings, making it perfect for any occasion. Whether you’re a baking pro or just starting out, I’ll guide you step-by-step to create this scrumptious delight. Let’s dive into the fun of baking together!
Ingredients
Key Ingredients for King’s Hawaiian Cheesecake Danish
For this tasty treat, you need a few key items:
– 1 package (11 oz) King’s Hawaiian Sweet Rolls
– 8 oz cream cheese, softened
– ½ cup powdered sugar
– 1 teaspoon vanilla extract
– ½ teaspoon lemon juice
– ½ cup fresh strawberries, diced
– ¼ cup fresh pineapple, diced
– 1 tablespoon all-purpose flour (for dusting)
– 1 egg, beaten (for egg wash)
– Fresh mint leaves for garnish (optional)
These key ingredients come together for a delightful blend of flavors and textures. The King’s Hawaiian Sweet Rolls provide a soft, sweet base, while the cream cheese filling adds a rich, creamy touch.
Optional Ingredients for Customization
You can make this Danish even more special by adding some optional ingredients:
– Other fruits like blueberries or raspberries
– A sprinkle of cinnamon for warmth
– Nuts for crunch, like chopped pecans or almonds
Feel free to mix and match these extras. You can create a version that suits your taste.
Substitutions and Dietary Considerations
If you have dietary needs, here are some smart swaps:
– Use dairy-free cream cheese for a vegan option.
– Swap powdered sugar with a sugar substitute if needed.
– Choose gluten-free sweet rolls to cater to gluten-free diets.
These substitutions ensure everyone can enjoy this amazing dessert. Always check labels to confirm products fit your dietary needs.
Step-by-Step Instructions
Preparation for the Danish
Start by prepping your workspace. Dust a flat surface with a little flour. Unwrap the King’s Hawaiian Sweet Rolls. Pull the rolls apart gently. Lay them side by side to form a rectangle. This will create a perfect pastry base for your Danish.
Making the Cheesecake Filling
Next, grab a mixing bowl. Beat the softened cream cheese until it’s smooth. Add in the powdered sugar, vanilla extract, and lemon juice. Mix it all together until you have a creamy filling. This step is key for a rich cheesecake taste.
Assembly and Baking Process
Spread the cream cheese mixture evenly across the rolls. Be sure to leave a small border around the edges. Now, top the filling with diced strawberries and pineapple. Fold the edges over the filling slightly to seal it in. Pinch the edges to keep everything snug. Brush the top with the beaten egg. This will give your Danish a nice golden color.
Place your assembled Danish on the baking sheet. Bake it in the preheated oven for about 20 to 25 minutes. Keep an eye on it until it turns golden brown. Once done, let it cool for about 10 minutes. Then slice it into squares and serve. Enjoy this sweet and fruity delight!
Tips & Tricks
Perfecting the Danish Texture
To get the best Danish, keep the dough light. Use King’s Hawaiian Sweet Rolls as your base. These rolls are soft and sweet, which adds great flavor. When you pull them apart, don’t squish them too much. Lay them side by side gently. This helps keep the air in, making the final product fluffy.
Ensuring the Filling is Creamy
The creamy filling is key to a great Danish. Start with room-temperature cream cheese. This helps it mix well. Beat it until smooth before adding any sugar or flavors. Mix in powdered sugar, vanilla extract, and lemon juice until it’s all blended. You want it to be silky, so there are no lumps.
How to Achieve a Golden Finish
A golden color makes your Danish look tasty. Before baking, brush the edges with a beaten egg. This gives it a nice shine. Bake it in a preheated oven at 350°F. Watch for about 20-25 minutes. When it turns golden brown, it’s ready. The heat will make the outside crispy while keeping the inside soft.Enjoy your baking!
Variations
Flavor Variations for the Filling
You can change the filling to suit your taste. Try using flavored cream cheese, like strawberry or vanilla. You can also mix in a hint of almond extract for a nice twist. If you love chocolate, add cocoa powder to the cream cheese mix. This will make a rich, chocolate cheesecake Danish!
Alternative Fruits and Toppings
Fruits can change your Danish too. Instead of strawberries and pineapple, use blueberries or raspberries. You can also add banana slices for a tropical vibe. Top your Danish with shredded coconut or a drizzle of honey for extra flavor. Don’t forget to sprinkle some nuts for crunch if you like!
Vegan or Gluten-Free Options
If you want a vegan version, swap cream cheese for a plant-based option. Use coconut cream or cashew cream for the filling. Choose gluten-free sweet rolls to make it gluten-free. Check labels to ensure all ingredients meet your dietary needs. Making these swaps keeps your King’s Hawaiian Cheesecake Danish delicious for everyone!
Storage Info
How to Store Leftovers
To keep your King’s Hawaiian Cheesecake Danish fresh, store it in an airtight container. Place a piece of parchment paper between layers to avoid sticking. This will help maintain its soft texture. Keep it in the fridge for up to three days.
Freezing and Reheating Tips
If you want to save some for later, freezing works well. Wrap each piece in plastic wrap, then place them in a freezer bag. Make sure to squeeze out all the air. Your Danish can stay fresh in the freezer for up to a month. To reheat, simply thaw it in the fridge overnight. Then, warm it in the oven at 350°F for about 10 minutes.
Best Practices for Maintaining Freshness
For the best taste, enjoy your Danish within a few days. If you freeze it, make sure to reheat it gently. This keeps the filling creamy and the dough soft. Avoid using the microwave, as it can make the pastry tough.
FAQs
Can I use different types of bread for this recipe?
Yes, you can use other types of bread. However, King’s Hawaiian rolls give a sweet taste. You can try brioche or croissants. These will change the flavor but still taste great. Just ensure the bread is soft and fluffy for the best texture.
How long will the King’s Hawaiian Cheesecake Danish last?
The Danish will last about 2-3 days when stored in an airtight container. It is best to keep it at room temperature. If you want to keep it longer, you can freeze it. Just wrap it tightly and store it in the freezer for up to a month.
Is this recipe suitable for special dietary needs?
This recipe is not gluten-free due to the rolls. You can make it gluten-free by using gluten-free bread. For dairy-free options, use vegan cream cheese. Adjust the recipe to fit your needs while keeping the flavors bright and tasty.
You now have a complete guide to making a King’s Hawaiian Cheesecake Danish. We covered key ingredients, helpful steps, and tips for perfecting your dish. Remember, customizing your Danish makes it special. Use your favorite fruits or choose vegan options. Store leftovers well to keep them fresh. With this recipe, you can enjoy creamy, tasty goodness at home. Try it out, and you’ll see how fun and easy baking can be. Enjoy every bite of your creation!
