Introduction
Cinnamon rolls are a beloved treat that brings a sense of warmth and comfort to many. Their sweet aroma wafting through the kitchen is enough to evoke nostalgic memories of family gatherings, holiday celebrations, and cozy brunches. While you can easily find cinnamon rolls in bakeries or grocery stores, nothing compares to the satisfaction of making them from scratch in your own kitchen. Homemade cinnamon rolls are more than just a delicious pastry; they are a culinary project that can be a rewarding experience, turning ordinary weekends into extraordinary ones.
In this recipe, we will guide you through the process of creating heavenly cinnamon rolls that are soft, fluffy, and dripping with a sweet glaze. Whether you’re a seasoned baker or a novice in the kitchen, this simple yet delightful recipe will allow you to create a batch of cinnamon rolls that will impress family and friends alike. Get ready to embark on a baking adventure that not only results in a delicious treat but also fills your home with a sense of joy and accomplishment.
The Magic of Cinnamon Rolls
The history of cinnamon rolls is as rich and layered as the pastries themselves. Originating in Northern Europe, cinnamon rolls are believed to have first appeared in Sweden, where they are known as “kanelbullar.” The Swedes take great pride in their cinnamon rolls, often enjoying them during “fika,” a cherished coffee break that emphasizes the importance of taking time to relax and enjoy good company over a cup of coffee and a sweet treat. The tradition of cinnamon rolls has since spread across the globe, with variations and adaptations emerging in different cultures. In the United States, for example, they are often enjoyed for breakfast or brunch, generously topped with cream cheese icing.
Cinnamon rolls have become a staple in many households due to their versatility. They can be served warm from the oven or reheated for a delightful afternoon snack, making them the perfect treat for any time of day. The combination of soft dough, rich filling, and sweet glaze creates a delightful experience that satisfies both the palate and the soul. This is why cinnamon rolls are a favorite for breakfast, brunch, or even dessert; they can be enjoyed in a variety of settings, whether it be a quiet morning at home or a festive gathering with friends.
Understanding the Ingredients
To create the perfect heavenly cinnamon rolls, it’s essential to understand the role of each ingredient in the recipe. Let’s break down the main components that come together to make these delicious pastries:
1. All-Purpose Flour: The foundation of the dough, all-purpose flour provides the structure necessary for the cinnamon rolls. It contains a moderate amount of protein, which helps create the gluten that gives the dough its elasticity and chewiness.
2. Active Dry Yeast: This is the magic ingredient that makes your cinnamon rolls rise. Yeast ferments the sugars in the dough, producing carbon dioxide that causes the dough to expand and become light and fluffy. Ensuring that your yeast is fresh and properly activated is crucial for achieving the desired texture.
3. Warm Milk: Milk adds moisture to the dough, contributing to its softness. When warmed to a temperature between 110°F and 115°F, it helps activate the yeast, promoting a successful rise.
4. Granulated and Brown Sugars: These sugars provide sweetness to the dough and filling. Brown sugar, in particular, adds a hint of caramel flavor due to its molasses content, enhancing the overall taste of the rolls.
5. Butter: A key ingredient for flavor and richness, butter is incorporated into both the dough and the filling. It helps create a tender texture and adds a deliciously rich taste.
6. Eggs: Eggs act as a binding agent in the dough, helping to hold everything together while also adding moisture. They contribute to the richness of the rolls and help achieve a beautiful golden color.
7. Vanilla Extract: A splash of vanilla extract enhances the overall flavor profile of the cinnamon rolls, adding a subtle sweetness that complements the other ingredients.
8. Ground Cinnamon: The star of the show, ground cinnamon is the essential spice that gives cinnamon rolls their signature flavor. It adds warmth and depth, making each bite a delightful experience.
9. Powdered Sugar and Milk: These ingredients come together to create the sweet icing that drizzles over the finished rolls. The powdered sugar provides sweetness, while the milk helps achieve the desired consistency for the glaze.
When selecting ingredients for your cinnamon rolls, opt for high-quality options whenever possible. Freshly ground spices, real butter, and organic sugars can elevate the flavor of your rolls and make a noticeable difference in the final product.
Step-by-Step Instructions
Preparing the Dough
Now that you understand the importance of each ingredient, it’s time to dive into the step-by-step process of making your heavenly cinnamon rolls!
Activating the Yeast
The first step in creating your cinnamon rolls is activating the yeast. This is a crucial part of the process, as it ensures that your dough will rise properly. In a small bowl, combine 1 cup of warm milk (heated to about 110°F to 115°F) with 2 ¼ teaspoons of active dry yeast and 1 tablespoon of granulated sugar. Stir gently to combine and let the mixture sit for about 5–10 minutes, or until it becomes frothy. This frothiness indicates that the yeast is alive and ready to work its magic in your dough.
Mixing the Ingredients
Once your yeast is activated, it’s time to mix the ingredients. In a large mixing bowl, combine 4 cups of all-purpose flour, ½ cup of granulated sugar, and 1 teaspoon of salt. Whisk these dry ingredients together until well combined. Next, create a well in the center of the flour mixture and add the activated yeast mixture, 2 large eggs, and ½ cup of melted butter.
Using a wooden spoon or a stand mixer with a dough hook, mix the ingredients until they come together to form a rough dough. If the dough appears too sticky, you can add a little more flour, one tablespoon at a time, until it reaches a manageable consistency.
Kneading the Dough
Kneading is an essential step in developing the gluten structure of your dough, resulting in a light and fluffy texture. Turn the dough out onto a lightly floured surface and knead it for about 8–10 minutes, or until it becomes smooth and elastic. You can also knead the dough using a stand mixer on low speed for about 5–7 minutes. The dough should bounce back when gently pressed with your finger.
First Rise
After kneading, shape the dough into a ball and place it in a large, greased bowl. Cover the bowl with a clean kitchen towel or plastic wrap to prevent drafts. Allow the dough to rise in a warm, draft-free area for about 1 to 1.5 hours, or until it has doubled in size. This fermentation process is crucial for developing the flavors and light texture of your cinnamon rolls.
As the dough rises, take a moment to enjoy the anticipation of the heavenly cinnamon rolls that are soon to come. The warmth of the kitchen and the aroma of the rising dough create a comforting atmosphere that is an integral part of the baking experience.
—
This marks the end of the first part of our detailed guide to making heavenly cinnamon rolls. The combination of history, understanding the ingredients, and the initial steps of the recipe sets the stage for creating these delightful pastries. Stay tuned for the next part, where we’ll delve into the filling, rolling, baking, and icing of your cinnamon rolls, ensuring that they turn out perfectly every time.
Ideal Conditions for Dough Rising
Achieving the perfect cinnamon roll starts with the dough, and the first step to success is ensuring it rises properly. For optimal dough rising, the environment plays a crucial role. The ideal temperature for yeast activation is between 75°F and 85°F (24°C to 29°C). If your kitchen is too cold, you can create a warm spot by preheating your oven to the lowest setting for just a couple of minutes, then turning it off before placing the dough inside. Another excellent method is to fill a bowl with hot water and place it in the oven alongside the dough; the steam will help create a warm and humid environment that yeast loves.
Rolling and Filling the Dough
Once the dough has risen beautifully, it’s time to roll it out and fill it. Begin by lightly flouring your work surface to prevent sticking. Gently punch down the dough to release air bubbles, then turn it out onto the floured surface. Using a rolling pin, roll the dough into a rectangle about ¼ inch thick.
Techniques for Rolling Out the Dough Uniformly
To achieve a uniform thickness, focus on applying even pressure with your rolling pin. Start from the center of the dough and roll outwards, rotating the dough a quarter turn after each roll to maintain a consistent shape. If you notice the dough shrinking back, let it rest for a few minutes. This relaxation period allows the gluten to unwind, making it easier to roll out.
Creating a Flavorful Filling: Proper Distribution of Sugar and Cinnamon
For the filling, combine brown sugar and ground cinnamon in a bowl. Brown sugar adds moisture and a rich flavor, while cinnamon provides that signature warmth. Once you’ve rolled the dough out, evenly spread softened butter across the surface, leaving a small border around the edges. Then, sprinkle the cinnamon-sugar mixture generously over the buttered dough. Make sure to distribute the filling uniformly to ensure each roll has the perfect amount of flavor.
Shaping the Rolls
After filling the dough, it’s time to shape the rolls. Starting from one long edge, carefully roll the dough away from you, creating a tight cylinder. The tighter the roll, the better the final shape of your cinnamon rolls will be. Pinch the seam to seal it and prevent the filling from escaping during baking.
Tips for Cutting Even Slices for Uniform Baking
To cut your rolls evenly, use a sharp knife or a piece of unflavored dental floss. If you opt for a knife, avoid sawing back and forth, which can squish the rolls. Instead, apply gentle downward pressure to slice through the dough. For dental floss, slide the floss under the roll, cross the ends over the top, and pull to cut cleanly. Aim for slices about 1 to 1.5 inches thick for even baking.
Second Rise: Importance of Patience and Timing
Once cut, place the rolls in a greased baking dish, leaving some space between them to allow for expansion. Cover the dish with a clean kitchen towel and let the rolls rise again in a warm environment for about 30 to 45 minutes. This second rise is crucial: it not only allows the rolls to puff up beautifully but also enhances their texture.
How the Second Rise Affects the Final Texture
During the second rise, the yeast continues to ferment, producing carbon dioxide that creates air pockets in the dough. This process results in soft, fluffy rolls that pull apart easily. Be patient—rushing this rise can lead to denser rolls that lack the desired lightness.
Baking the Cinnamon Rolls
Prepping the Oven: Ideal Baking Conditions
As the rolls rise, preheat your oven to 350°F (175°C). This temperature ensures that the cinnamon rolls bake evenly and develop a golden-brown crust.
Baking Process: What to Look for in Color and Texture
When the oven is ready, bake the rolls for 25 to 30 minutes. Keep an eye on them; they should be golden brown on top and slightly puffed. A good indicator of doneness is when the rolls start to pull away from the sides of the pan. If you have a thermometer, the internal temperature should read around 190°F (88°C).
Cooling the Rolls: Importance of Cooling Before Icing
Once baked, remove the rolls from the oven and let them cool in the pan for about 10 minutes. This cooling period is essential before icing; if they are too hot, the icing will melt and run off. Cooling allows the rolls to set, keeping their fluffy texture intact.
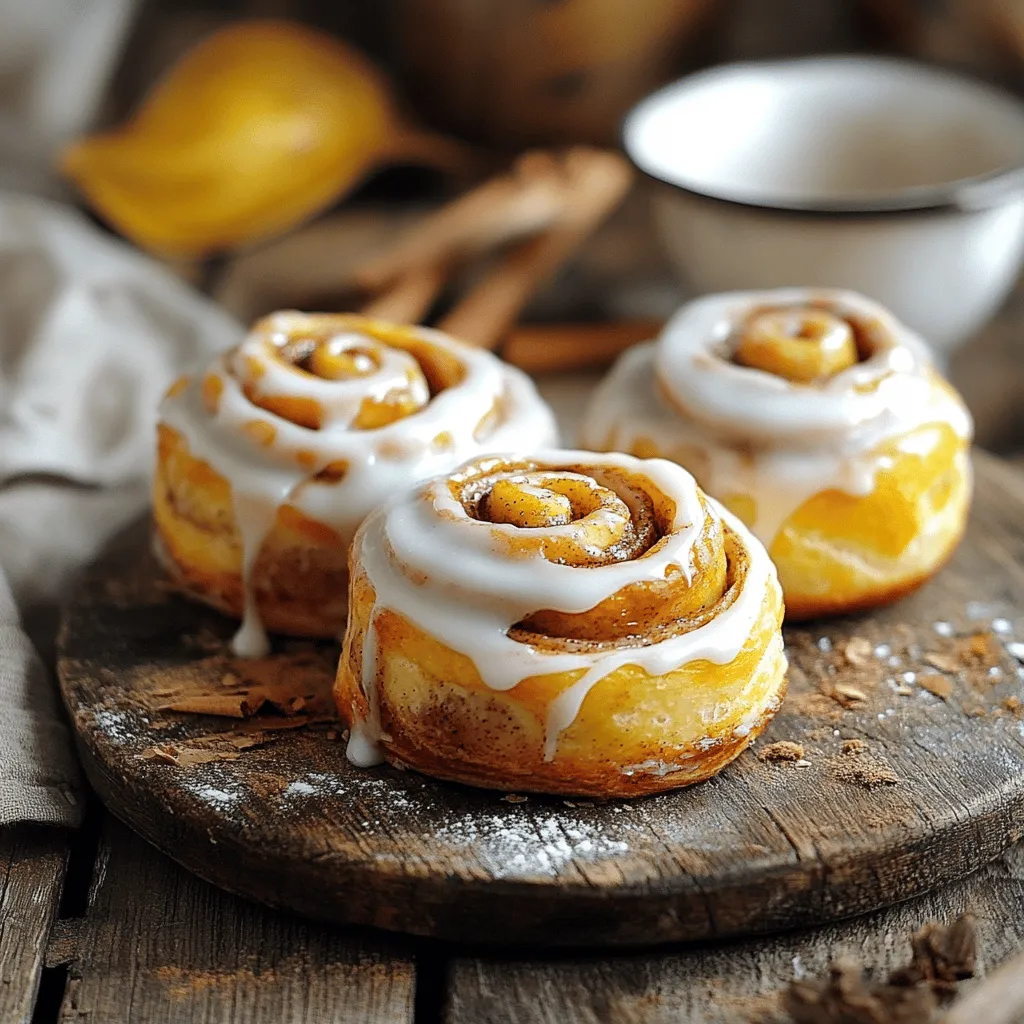
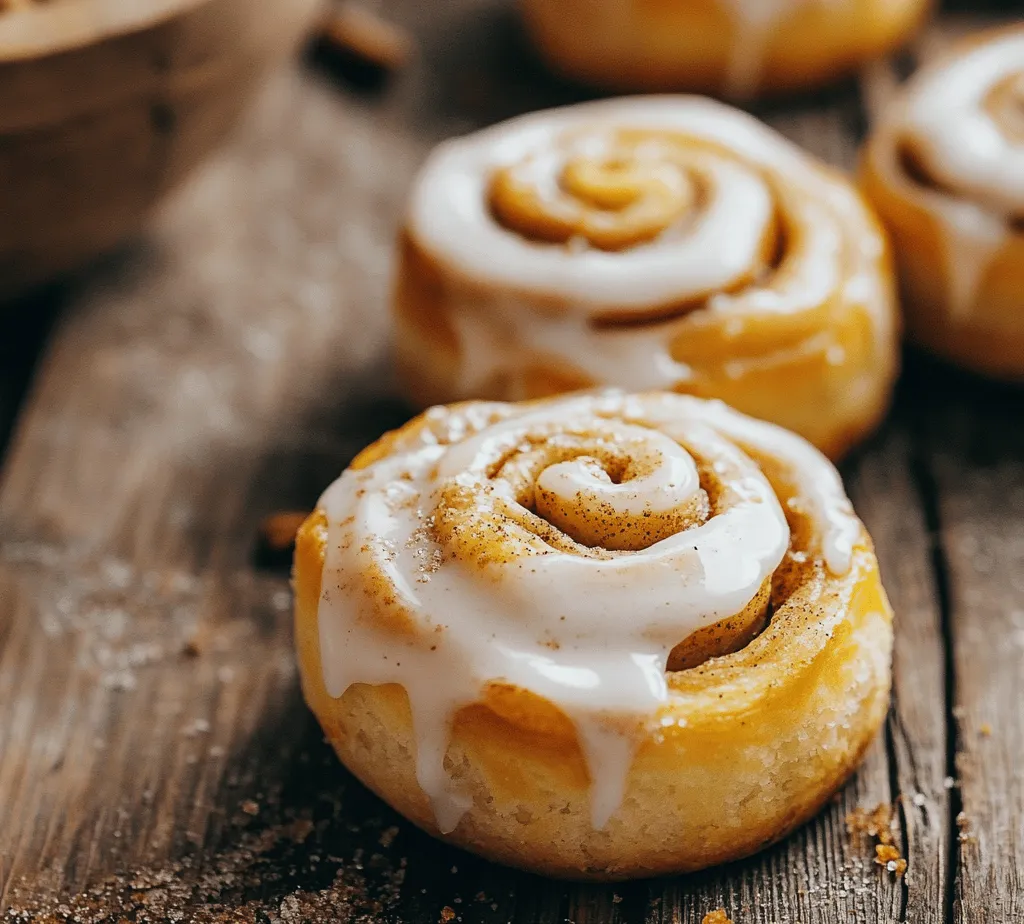
Making the Icing
Ingredients and Method for Preparing the Icing
While the rolls cool, you can prepare the icing. For a classic cream cheese icing, you’ll need:
– 4 oz (113g) cream cheese, softened
– ¼ cup (60g) unsalted butter, softened
– 1 cup (120g) powdered sugar
– 1 teaspoon vanilla extract
– A splash of milk, if needed for consistency
In a medium bowl, beat the cream cheese and butter together until smooth and creamy. Gradually add in the powdered sugar, mixing until fully incorporated. Stir in the vanilla extract, and if the icing is too thick, add a splash of milk until you reach your desired consistency.
Tips for Achieving the Perfect Consistency and Flavor
The key to great icing is balance. If you prefer a sweeter icing, add more powdered sugar, but if you want a tangier flavor, increase the cream cheese. For a subtle twist, consider adding a dash of cinnamon or a splash of maple syrup for extra flavor.
Drizzling Techniques for a Professional Finish
To achieve a beautiful, drizzled effect, use a spoon or a piping bag fitted with a small round tip. Drizzle the icing generously over the warm rolls, allowing it to cascade down the sides for a professional presentation. If you choose to use a piping bag, make sure the icing is thick enough to hold its shape but still fluid enough to flow easily.
Serving Suggestions
Best Ways to Serve Cinnamon Rolls: Warm vs. Room Temperature
Cinnamon rolls are best enjoyed warm, straight from the oven, when they’re at their softest and most delicious. However, they are also delightful at room temperature, making them a perfect treat for brunch gatherings.
Pairing Options: Coffee, Tea, or Other Beverages
Pair your homemade cinnamon rolls with a steaming cup of coffee or tea. The warmth of the beverage complements the sweetness of the rolls beautifully. For a more indulgent experience, consider serving them with a glass of milk or even a flavored latte.
Creative Serving Ideas: Toppings and Variations
While classic cinnamon rolls are delicious on their own, you can elevate your serving experience with creative toppings. Consider adding chopped nuts, such as pecans or walnuts, for a crunchy texture. Fresh fruit like sliced bananas or berries can also brighten the dish. For a gourmet touch, sprinkle with sea salt or drizzle with caramel sauce for an extra layer of flavor.
Storage and Reheating
How to Properly Store Leftover Cinnamon Rolls
If you have leftover cinnamon rolls, store them in an airtight container at room temperature for up to two days. To keep them fresh longer, you can refrigerate them for up to a week. If you want to save them for a longer period, consider freezing them. Wrap each roll tightly in plastic wrap and place them in a freezer-safe bag. They can be stored in the freezer for up to three months.
Best Methods for Reheating to Maintain Freshness
To reheat cinnamon rolls, remove them from the refrigerator or freezer and let them come to room temperature. For refrigerated rolls, you can microwave them for about 20-30 seconds. For frozen rolls, thaw them overnight in the refrigerator, then warm them in the oven at 350°F (175°C) for about 10-15 minutes until heated through.
Conclusion
Homemade cinnamon rolls are a delightful treat that brings joy and warmth to any occasion. The process of creating these fluffy, sweet rolls is rewarding, and the satisfaction of sharing them with friends and family is unparalleled. This recipe not only fills your home with the enticing aroma of cinnamon and sugar but also creates lasting memories around the table.
We encourage you to try this heavenly cinnamon roll recipe and witness the smiles it brings to your loved ones. Whether enjoyed fresh out of the oven or savored later, these rolls embody the comfort and happiness of homemade baking. Embrace the timeless appeal of this classic treat and share your experience with others—there’s nothing quite like the joy of enjoying delicious cinnamon rolls together.


