Introduction
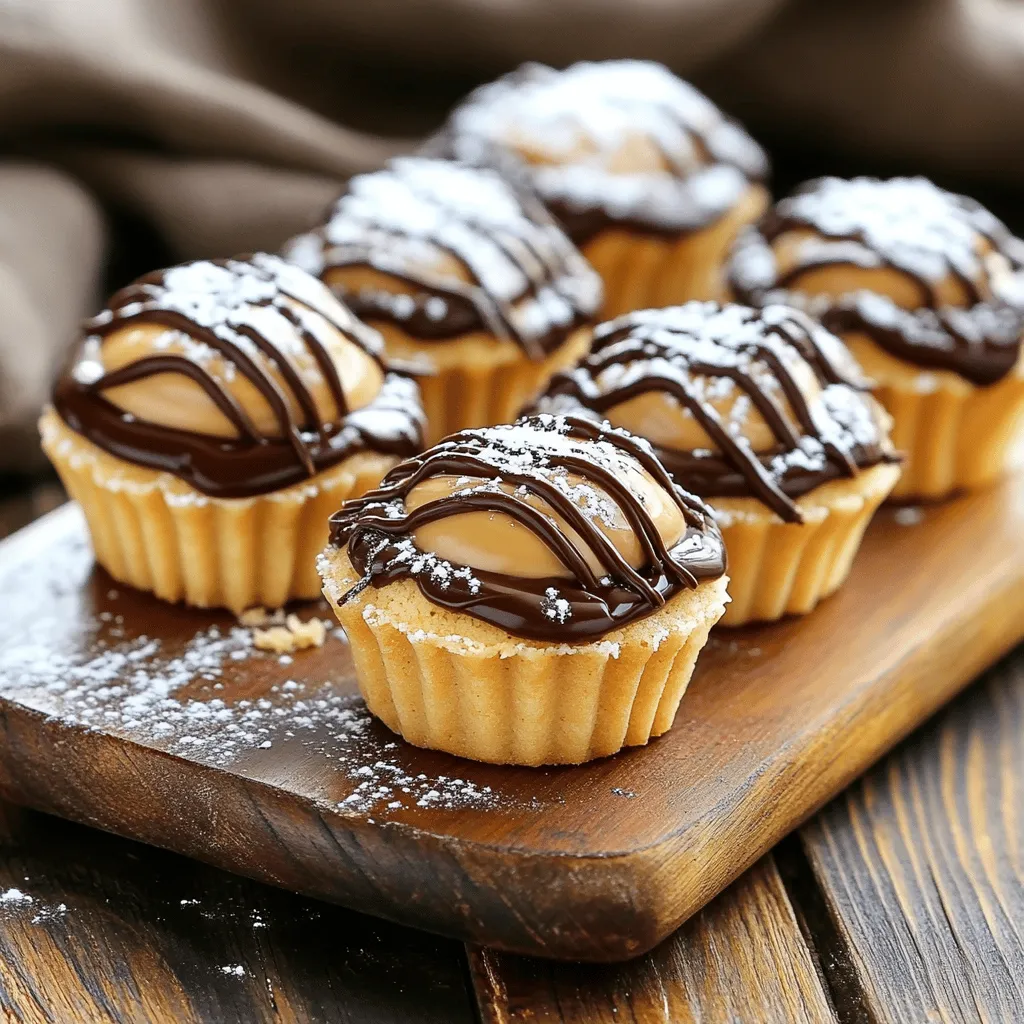
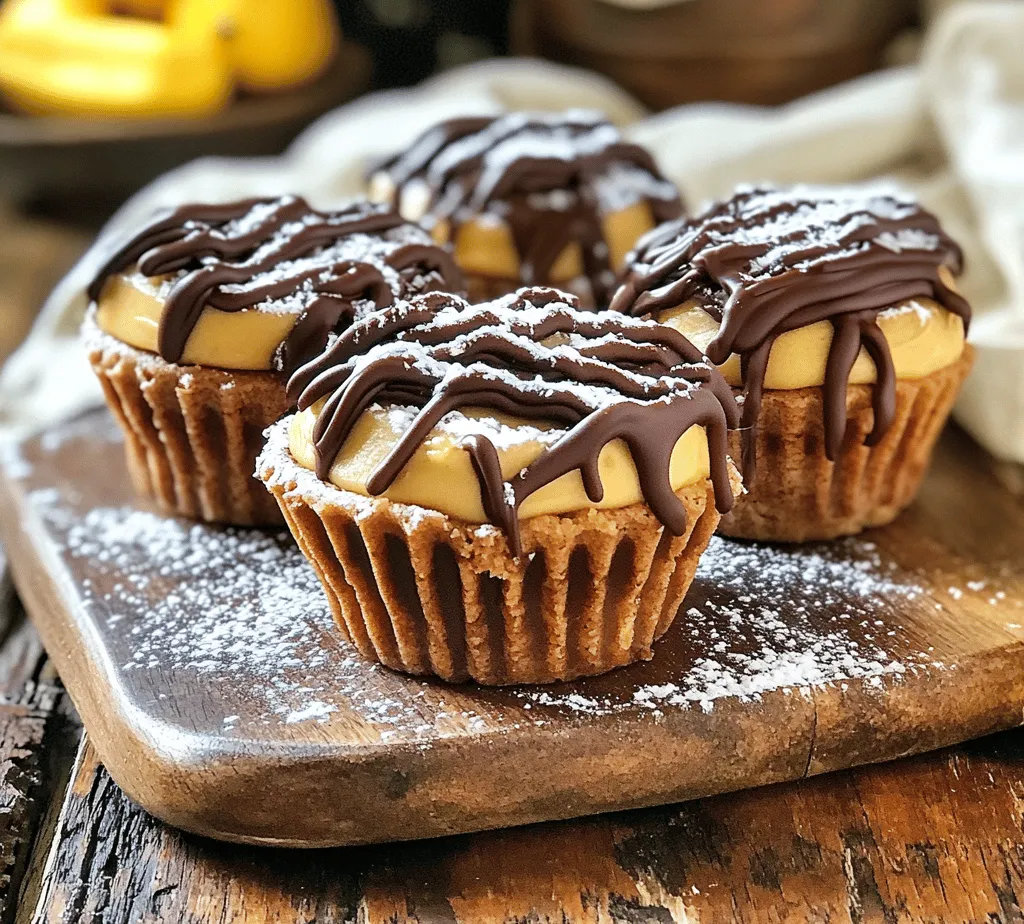
Indulging in a delightful treat can brighten any day, and what better way to satisfy your sweet tooth than with homemade Chocolate Peanut Butter Cookie Cups? These mini masterpieces combine the rich flavors of chocolate and creamy peanut butter in a fun, bite-sized format. The combination of a soft, buttery cookie shell filled with luscious peanut butter and topped with semi-sweet chocolate chips creates a dessert that is both comforting and decadent. Whether you’re hosting a gathering, looking for a special treat to bring to a friend, or simply want to treat yourself, these cookie cups are guaranteed to impress.
In this blog post, we will guide you through each step of the recipe while offering insights into the ingredients and techniques that make these cookie cups a must-try for any dessert lover. From understanding the role of each ingredient to a detailed walkthrough of the preparation steps, you’ll discover everything you need to know to create these delectable treats in your own kitchen.
Understanding the Ingredients
Before diving into the preparation process, let’s explore the essential components that create the perfect cookie cup. Each ingredient plays a vital role in achieving the ideal texture and flavor balance that makes these treats irresistible.
All-Purpose Flour
All-purpose flour is the foundation of our cookie cups, providing the necessary structure. It helps to create a stable base that holds the cookie cup shape while allowing for a tender crumb. For the best results, measure the flour accurately, as too much can lead to dry cookie cups.
Baking Soda
Baking soda serves as the leavening agent in this recipe, promoting a light and airy texture. When combined with the acidic elements in the dough, it creates carbon dioxide bubbles that help the cookie cups rise in the oven. Be sure to use fresh baking soda for optimal effectiveness.
Salt
Salt is crucial for enhancing flavors and balancing sweetness. It helps to bring out the richness of the chocolate and peanut butter, making each bite more satisfying. A small pinch goes a long way in elevating the overall taste of the cookie cups.
Unsalted Butter
Unsalted butter is the source of richness in our cookie cup dough. It contributes to the creamy texture and rich flavor. Using unsalted butter also allows you to control the amount of salt in the recipe, ensuring the perfect balance.
Granulated Sugar vs. Brown Sugar
In this recipe, we use a blend of granulated sugar and brown sugar to achieve the perfect texture and flavor. Granulated sugar adds sweetness and contributes to a crisper edge, while brown sugar, which contains molasses, provides moisture and a deeper flavor profile. This combination results in cookie cups that are soft in the center with slightly crisp edges.
The Role of Eggs
Eggs act as a binding agent, holding the ingredients together and providing moisture. They also contribute to the overall structure and richness of the cookie cups. For best results, use large eggs at room temperature.
Vanilla Extract
Vanilla extract elevates the overall flavor profile of the cookie cups, adding a warm, aromatic essence. It’s a simple yet powerful ingredient that enhances the sweetness of the dough and complements the chocolate and peanut butter.
Creamy Peanut Butter
The star filling of our cookie cups is creamy peanut butter. Its rich and velvety texture provides a delightful contrast to the cookie shell. You can opt for smooth or crunchy peanut butter, depending on your preference. Ensure that the peanut butter is at room temperature for easier mixing and filling.
Semi-Sweet Chocolate Chips
Semi-sweet chocolate chips are the finishing touch that adds a layer of decadence to our cookie cups. They melt beautifully when baked, creating a luscious topping that pairs perfectly with the peanut butter filling. For those who prefer a different flavor, dark chocolate or milk chocolate chips can also be used.
Optional Powdered Sugar
For an aesthetic finish, you may choose to sprinkle powdered sugar on top of the cookie cups before serving. This adds a touch of sweetness and creates an appealing contrast against the chocolate. While it’s not essential, it can elevate the presentation of your treats.
Preparation Steps for Chocolate Peanut Butter Cookie Cups
Now that we’ve covered the ingredients, let’s dive into the preparation process for these delicious cookie cups. Follow these steps closely to ensure that your cookie cups turn out perfectly every time.
Preheating the Oven
The first step in any baking endeavor is preheating the oven. Set your oven to 350°F (175°C) and allow it to heat fully before placing your cookie cups inside. Preheating ensures that your cookies bake evenly and achieve the right texture.
Preparing the Dough
1. Gather Your Ingredients: Before you start mixing, gather all your ingredients in one place. This will make the process smoother and help you keep track of what you’ve added.
2. Mix the Dry Ingredients: In a medium-sized bowl, whisk together the all-purpose flour, baking soda, and salt. This step helps to evenly distribute the leavening agent and salt throughout the flour, preventing any clumps.
3. Cream the Butter and Sugars: In a large mixing bowl, use an electric mixer to cream together the unsalted butter, granulated sugar, and brown sugar until the mixture is light and fluffy. This process usually takes about 2-3 minutes and incorporates air into the mixture, which will help create a tender cookie cup.
4. Add the Eggs and Vanilla: Beat in the large egg and vanilla extract until fully incorporated. The mixture should appear smooth and creamy.
5. Combine Wet and Dry Ingredients: Gradually add the dry ingredient mixture to the wet ingredients, mixing on low speed until just combined. Be careful not to overmix, as this can lead to tough cookie cups.
Forming the Cookie Cups
1. Prepare the Muffin Tin: Lightly grease a muffin tin or use muffin liners to prevent sticking. This step is crucial, as the cookie cups can be difficult to remove if they stick to the pan.
2. Shape the Cookie Cups: Using a cookie scoop or spoon, portion out the cookie dough and place it into each muffin cup, filling them about ⅔ full. You want to ensure there is enough space for the cookie cups to expand while baking.
3. Create a Well for the Filling: Once all the dough is in the muffin tin, use your fingers or the back of a small measuring spoon to create a well in the center of each cookie cup. Be careful not to press too hard; you want just enough space to hold the peanut butter filling.
4. Bake: Place the muffin tin in the preheated oven and bake for 10-12 minutes, or until the edges are golden brown and the centers appear set. Keep an eye on them to avoid overbaking, which can lead to dry cookie cups.
5. Cooling Time: After baking, remove the muffin tin from the oven and allow the cookie cups to cool in the pan for about 5 minutes. This will help them firm up a bit before removing them.
With the preparation steps outlined, you’re well on your way to creating these delicious Chocolate Peanut Butter Cookie Cups. Stay tuned for the next part, where we will delve into filling the cookie cups with creamy peanut butter and adding the final touches for a truly indulgent dessert experience.
Adding the Peanut Butter: Creating the Perfect Well for Filling
After your cookie cups have baked to a golden perfection, it’s time to focus on the star ingredient: peanut butter. To create the ideal well for filling, you’ll want to use the back of a measuring spoon or a small round object, like the bottom of a shot glass. While the cookie cups are still warm, gently press the center of each cup down. Be careful not to push too hard; you want to create a well without breaking through the bottom. This step is crucial, as it allows enough space for the peanut butter to sit and melt slightly into the warm cookie, enhancing the overall flavor and texture.
For the peanut butter filling, choose a creamy variety for the best results. You can opt for classic peanut butter, or for a twist, consider using a flavored option like honey-roasted or chocolate peanut butter. Spoon a generous amount into each well, allowing it to ooze slightly over the edges for a delightful presentation.
Melting the Chocolate: Techniques for a Smooth Drizzle
The final touch to your cookie cups is the chocolate drizzle, which adds both flavor and visual appeal. To achieve a smooth and glossy chocolate drizzle, start by selecting high-quality chocolate chips or baking chocolate. Dark chocolate pairs excellently with the sweetness of peanut butter, but feel free to use milk chocolate or white chocolate depending on your preference.
Melting Techniques:
1. Double Boiler Method: Place a heatproof bowl over a pot of simmering water. Make sure the bowl doesn’t touch the water. Add the chocolate to the bowl and stir continuously until melted and smooth. This method allows for gentle heating, reducing the risk of burning the chocolate.
2. Microwave Method: Place chocolate in a microwave-safe bowl and heat in 30-second intervals, stirring in between. Be cautious not to overheat, as chocolate can seize quickly. Once melted, let it cool slightly before drizzling over the cookie cups.
Using a small piping bag or a fork, drizzle the melted chocolate over the peanut butter-filled cookie cups, creating a beautiful pattern. Allow the chocolate to set for a few minutes before moving on to the next step.
Chilling and Final Presentation: The Importance of Cooling for Flavor Development
After you’ve drizzled the chocolate, it’s time to let the cookie cups cool completely. This step not only ensures that the chocolate sets properly but also allows the flavors to meld together. For the best results, place your cookie cups in the refrigerator for about 30 minutes. This cooling period helps the peanut butter and chocolate firm up, creating a delightful contrast with the warm, soft cookie.
When ready to serve, consider presenting your cookie cups on a decorative platter. You can sprinkle some chopped peanuts or sea salt on top for added texture and visual appeal. For an elegant touch, use a dusting of powdered sugar around the cookie cups, or serve them with a scoop of vanilla ice cream on the side for an indulgent dessert experience.
Baking Techniques and Tips
To ensure your Chocolate Peanut Butter Cookie Cups turn out perfectly every time, consider these expert baking tips:
The Importance of Ingredient Temperature: Why Softened Butter Matters
Using softened butter is vital for achieving the right texture in your cookie dough. Room-temperature butter incorporates air when creamed with sugar, resulting in a lighter and fluffier cookie. To soften butter quickly, cut it into small pieces and let it sit at room temperature for about 15-20 minutes, or microwave it for 10 seconds, ensuring it remains cool to the touch.
How to Properly Measure Flour: Preventing Dense Cookies
Measuring flour accurately is essential for the success of your cookies. To prevent dense cookies, spoon the flour into your measuring cup using a spoon, then level it off with a knife. Avoid scooping directly from the bag, as this can compact the flour and lead to an excess amount, resulting in dry cookies. For even more precision, consider using a kitchen scale to measure flour by weight.
Achieving the Perfect Bake: Knowing When Your Cookie Cups Are Done
Baking times can vary based on your oven, so keep a close eye on your cookie cups as they bake. Generally, they should take about 10-12 minutes. You’ll know they’re done when the edges are set and lightly golden, but the centers should still appear soft. They will continue to cook slightly after being removed from the oven, so it’s better to underbake them slightly than to overbake.
Creative Variations: Experimenting with Different Nut Butters or Chocolates
Don’t hesitate to get creative! While peanut butter is a classic choice, you can experiment with other nut butters like almond butter, cashew butter, or even sunflower seed butter for a nut-free alternative. Each nut butter will bring a unique flavor and texture to your cookie cups. Similarly, try using different types of chocolate—such as white, dark, or even flavored chocolates—to customize your treats further.
Nutritional Insights
When indulging in Chocolate Peanut Butter Cookie Cups, it’s important to consider their nutritional value. Here’s a breakdown of what you can expect from a single cookie cup:
– Calories: Approximately 150-200 calories per cookie cup, depending on the size and specific ingredients used.
– Fat: While these cookie cups do contain fats from the peanut butter and chocolate, they also offer healthy fats that are beneficial in moderation.
– Protein: Peanut butter adds a nice protein boost, making these treats a bit more satisfying than traditional cookies.
– Sugar: Like most desserts, they do contain sugar, but you can control this by adjusting the amount of chocolate drizzle or choosing a darker chocolate with less sugar.
If you’re looking to make healthier modifications, consider using natural peanut butter without added sugars, substituting half of the all-purpose flour with whole wheat flour, or using coconut sugar instead of regular sugar. These changes can help enhance the nutritional profile while still delivering delicious flavor.
Serving Suggestions
Chocolate Peanut Butter Cookie Cups are versatile and can be enjoyed in various settings. Here are some ideas for serving them:
Perfect for Parties: How to Present Them Beautifully
These cookie cups make a stunning addition to any dessert table. Arrange them on a tiered stand or a decorative platter. For an extra special touch, garnish the platter with fresh berries or mint leaves for color. You could also create a cookie bar, allowing guests to choose their toppings, such as extra chocolate drizzle, chopped nuts, or sprinkles.
Pairing Suggestions: Beverages That Complement the Flavors
To elevate your dessert experience, consider pairing your cookie cups with complementary beverages. A glass of cold milk is a classic choice, but for adults, a rich coffee or espresso can enhance the flavors beautifully. If you prefer something sweeter, serve them alongside a creamy vanilla or chocolate milkshake for a decadent treat.
Storage Tips: How to Keep Them Fresh for Longer
If you happen to have any cookie cups left over (which is unlikely, given their deliciousness), store them in an airtight container at room temperature for up to three days. For longer storage, you can freeze them; simply place them in a single layer on a baking sheet until frozen, then transfer them to a freezer-safe container. They should keep well for up to three months. To enjoy them later, simply thaw them at room temperature for a few hours or pop them in the microwave for a few seconds.
Conclusion
Chocolate Peanut Butter Cookie Cups are a delightful dessert that brings joy and satisfaction with every bite. By following this comprehensive guide, you can create these tasty treats in your own kitchen, enriching your dessert repertoire. The combination of flavors and textures makes them perfect for any occasion, from casual family gatherings to festive celebrations. With the right techniques and ingredients, you can ensure a successful baking experience that will leave everyone asking for seconds. Enjoy the process and savor the delicious results!


