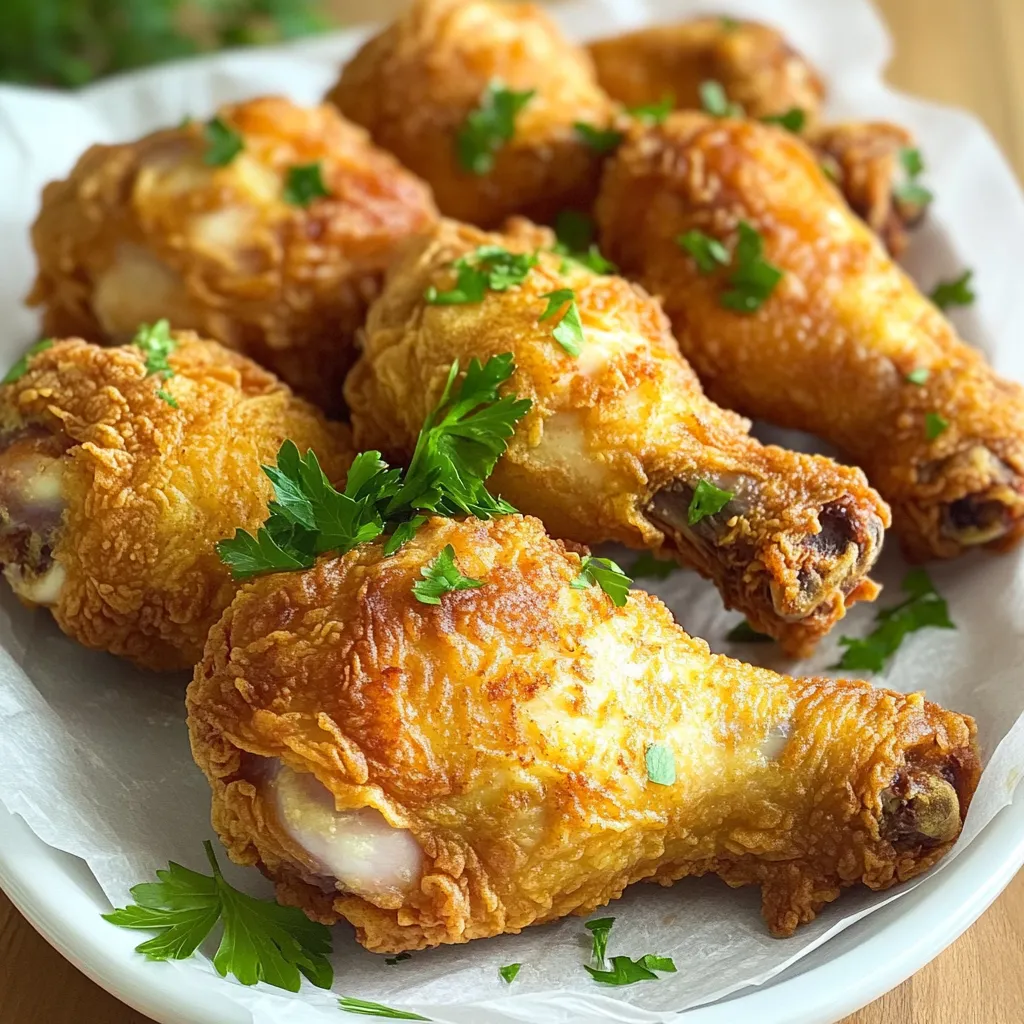
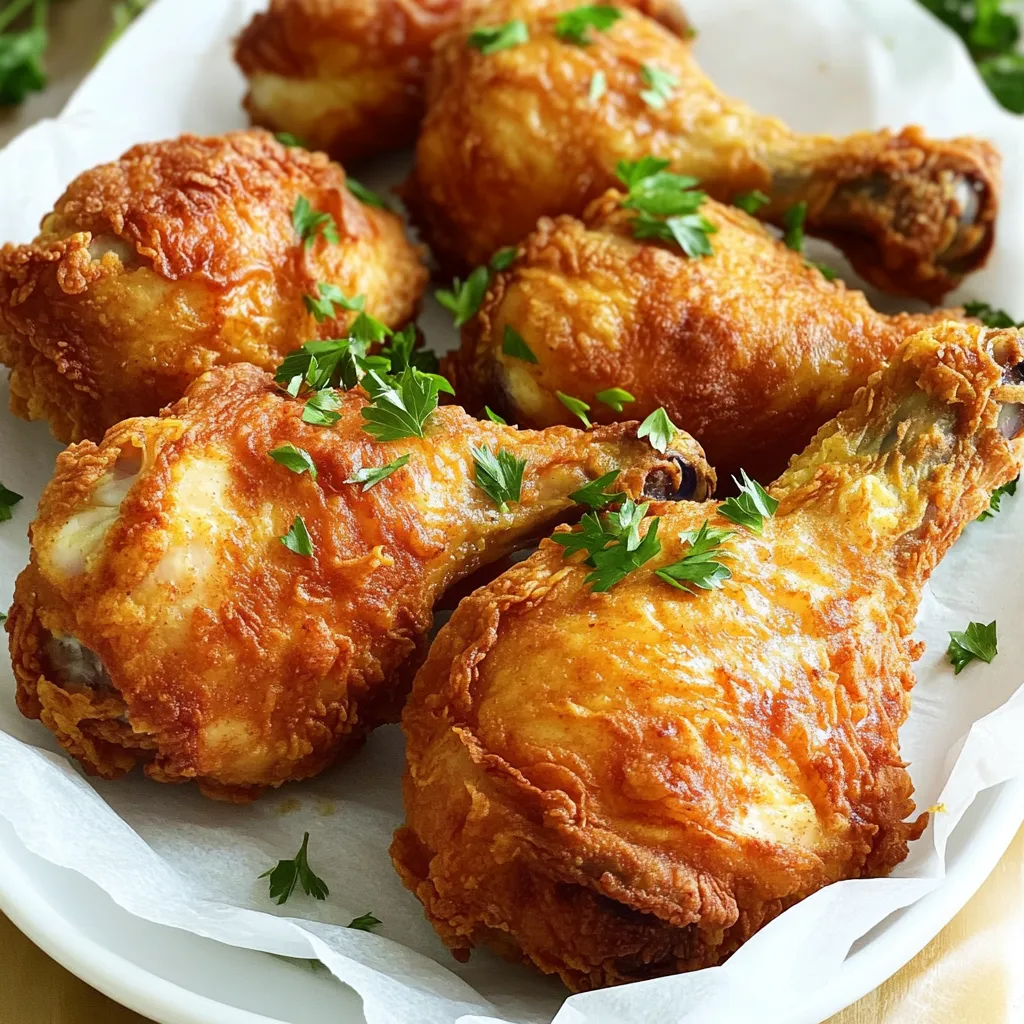
Welcome to the ultimate guide for making Crispy Southern Buttermilk Fried Chicken! If you crave a crunchy, juicy bite, you’re in the right place. I’ll show you how to marinate chicken in buttermilk, season it well, and fry it to golden perfection. Plus, I’ll share tips to ensure your chicken always turns out crispy. Get ready to impress your family and friends with this Southern classic!
Ingredients
Chicken
- 4 large chicken thighs, bone-in and skin-on
- 4 large chicken drumsticks
For the best flavor, use bone-in and skin-on chicken. The skin helps keep the meat juicy. It also gives you that nice crunch you crave. I love using thighs and drumsticks for their rich taste.
Buttermilk and Seasoning
- 2 cups buttermilk
- 1 tablespoon hot sauce (optional)
- 2 cups all-purpose flour
- 1 teaspoon paprika
- 1 teaspoon garlic powder
- 1 teaspoon onion powder
- 1 teaspoon cayenne pepper (adjust to taste)
- 1 teaspoon salt
- ½ teaspoon black pepper
Buttermilk is key for this recipe. It tenderizes the chicken and adds a tangy flavor. Mixing in hot sauce gives it a nice kick. The seasoned flour creates a crispy crust. Combine the spices well to coat every piece evenly.
Cooking Oil
- Vegetable oil for frying
Choose vegetable oil for frying. It has a high smoke point. This means you can heat it without burning. A deep skillet or cast-iron pan works best. This helps you get that perfect golden brown color.
Step-by-Step Instructions
Marinating the Chicken
First, grab a large bowl. Pour in 2 cups of buttermilk. If you like a kick, add 1 tablespoon of hot sauce. This step makes your chicken juicy and flavorful. Place the chicken thighs and drumsticks in the bowl. Make sure they are fully covered. Cover the bowl with plastic wrap and refrigerate. Let the chicken marinate for at least 4 hours. For best results, let it sit overnight. This gives the flavors time to soak in.
Preparing the Seasoned Flour
In another bowl, mix 2 cups of all-purpose flour. Add 1 teaspoon of paprika, 1 teaspoon of garlic powder, and 1 teaspoon of onion powder. Next, sprinkle in 1 teaspoon of cayenne pepper, 1 teaspoon of salt, and ½ teaspoon of black pepper. This mix will give your chicken that tasty kick. Whisk everything together until it is well combined. Set this seasoned flour aside for later.
Frying the Chicken
Heat about 1 inch of vegetable oil in a large skillet. Get the oil to 350°F (175°C). Carefully take the chicken out of the buttermilk. Let any extra buttermilk drip off. Dredge each piece in the seasoned flour. Press down to make sure the flour sticks. Shake off any extra flour. Now, add chicken pieces to the hot oil. Start with the thighs, then add the drumsticks. Do not overcrowd the pan. Fry the chicken for 12-15 minutes on one side. Flip it and fry for another 10-12 minutes. The chicken should look golden brown and crispy. Make sure the inside reaches 165°F (75°C).
Use a slotted spoon to lift the chicken out. Place it on a wire rack or a plate with paper towels. This helps drain the oil. Let the chicken rest for 5-10 minutes before serving. This keeps it juicy and crispy.
Tips & Tricks
Achieving Perfect Crispiness
To get that perfect crunch, you must start with good prep. Before you fry, let the chicken soak in buttermilk. This helps keep it moist. The buttermilk adds flavor and tenderizes the meat. After marinating, coat each piece well in the seasoned flour. Press down firmly to ensure it sticks. The oil should be hot, around 350°F. This hot oil cooks the chicken fast, sealing in the juices.
Avoiding Overcrowding in the Pan
Do not crowd the pan when frying. If you add too much chicken at once, the temperature drops. This makes your chicken soggy instead of crispy. Fry in batches to keep the oil hot. Give each piece space to cook evenly. You want that golden color on every side.
Resting the Chicken Before Serving
After frying, let the chicken rest for 5-10 minutes. This step is key. It allows the juices to settle inside the meat. If you cut into it too soon, all those tasty juices run out. Resting also keeps the coating crispy. Use a wire rack or paper towels to drain the excess oil. This ensures your chicken stays delicious until it's time to eat.
Variations
Adding Spices for Extra Flavor
You can boost the flavor of your fried chicken by adding more spices. Try adding cumin or smoked paprika for an earthy taste. A pinch of thyme or oregano can also give your chicken a nice twist. If you like heat, add more cayenne or chili powder. You can even mix in some lemon zest for a fresh kick. Experiment with your favorite spices to make it your own.
Alternative Cooking Methods (Oven-Baking)
Not everyone loves frying. You can bake your chicken for a healthier option. Preheat your oven to 425°F (220°C). After dredging the chicken, place it on a wire rack over a baking sheet. This allows hot air to circulate all around the chicken. Bake for about 30-35 minutes. Flip halfway through to get that crispy texture. You'll still enjoy a tasty meal without the extra oil.
Serving Suggestions
Pair your crispy chicken with classic Southern sides. Coleslaw adds crunch and creaminess. Cornbread is a perfect match for soaking up juices. You can also serve it with mashed potatoes for a hearty meal. Don't forget a tangy dipping sauce like ranch or honey mustard. These sides will make your meal feel like a true Southern feast!
Storage Info
Storing Leftovers
After enjoying your crispy chicken, let it cool. Place the chicken in an airtight container. Make sure to separate layers with parchment paper. This keeps the chicken from sticking together. Store it in the fridge for up to four days. The flavor stays great, and the chicken stays safe to eat.
Reheating Fried Chicken
To reheat the chicken, use the oven for the best results. Preheat the oven to 375°F (190°C). Place the chicken on a wire rack over a baking sheet. This helps the heat circulate all around. Bake for about 15-20 minutes or until hot. The skin will turn crispy again. You can also reheat it in an air fryer if you have one. Set it to 350°F (175°C) and heat for about 8-10 minutes.
Freezing for Future Use
If you have extra chicken, freezing is a great option. Wrap each piece tightly in plastic wrap. Then place them in a freezer-safe bag or container. Remove as much air as possible to prevent freezer burn. You can freeze the chicken for up to three months. To eat, thaw it overnight in the fridge before reheating. This keeps the chicken juicy and tasty.
FAQs
What can I use instead of buttermilk?
You can use regular milk with vinegar or lemon juice. Mix one cup of milk with one tablespoon of vinegar or lemon juice. Let it sit for five minutes to thicken. This gives you a similar tangy taste. You can also use yogurt mixed with water. This keeps your chicken moist and tasty.
How do I know when the chicken is done frying?
Check the chicken's color and temperature. It should be golden brown and crispy. Use a meat thermometer to check the inside. The chicken should reach 165°F (75°C) for safety. If you don't have a thermometer, cut into the thickest part. The juices should run clear. No pink meat means it's done!
Can I make this recipe gluten-free?
Yes, you can! Use gluten-free flour instead of all-purpose flour. Many brands offer blends that work well for frying. You can also try almond flour or rice flour. Both give a nice crunch. Just make sure to check labels for any hidden gluten. Enjoy your crispy chicken worry-free!
This chicken recipe shows you how to create crispy, tasty fried chicken. We covered the best ingredients, like chicken, buttermilk, and cooking oil. I shared steps on marinating, seasoning, and frying. Plus, you learned tips for extra crispiness and avoiding overcrowding. Variations let you try different spices or cooking methods, like oven-baking. Storing and reheating tips help you save leftovers too. Enjoy making and sharing this delicious dish! You now have the tools to impress anyone with your fried chicken.