Are you ready to enjoy a delicious treat that screams fall? These Chocolate Dipped Pumpkin Biscotti are the perfect mix of sweet and spice. With simple steps, you can impress friends and family with these crispy delights. I’ll guide you through easy directions and helpful tips to make the best biscotti ever. Grab your apron, and let’s dive into the world of flavors with this irresistible recipe!
Ingredients
The right ingredients make all the difference in creating tasty Chocolate Dipped Pumpkin Biscotti. Here’s what you need to gather for this scrumptious treat:
– 1 cup canned pumpkin puree
– ¾ cup sugar
– ½ cup vegetable oil
– 2 large eggs
– 2 teaspoons vanilla extract
– 2 ½ cups all-purpose flour
– 1 teaspoon baking powder
– ½ teaspoon baking soda
– 1 teaspoon ground cinnamon
– ½ teaspoon ground nutmeg
– ¼ teaspoon ground ginger
– ½ teaspoon salt
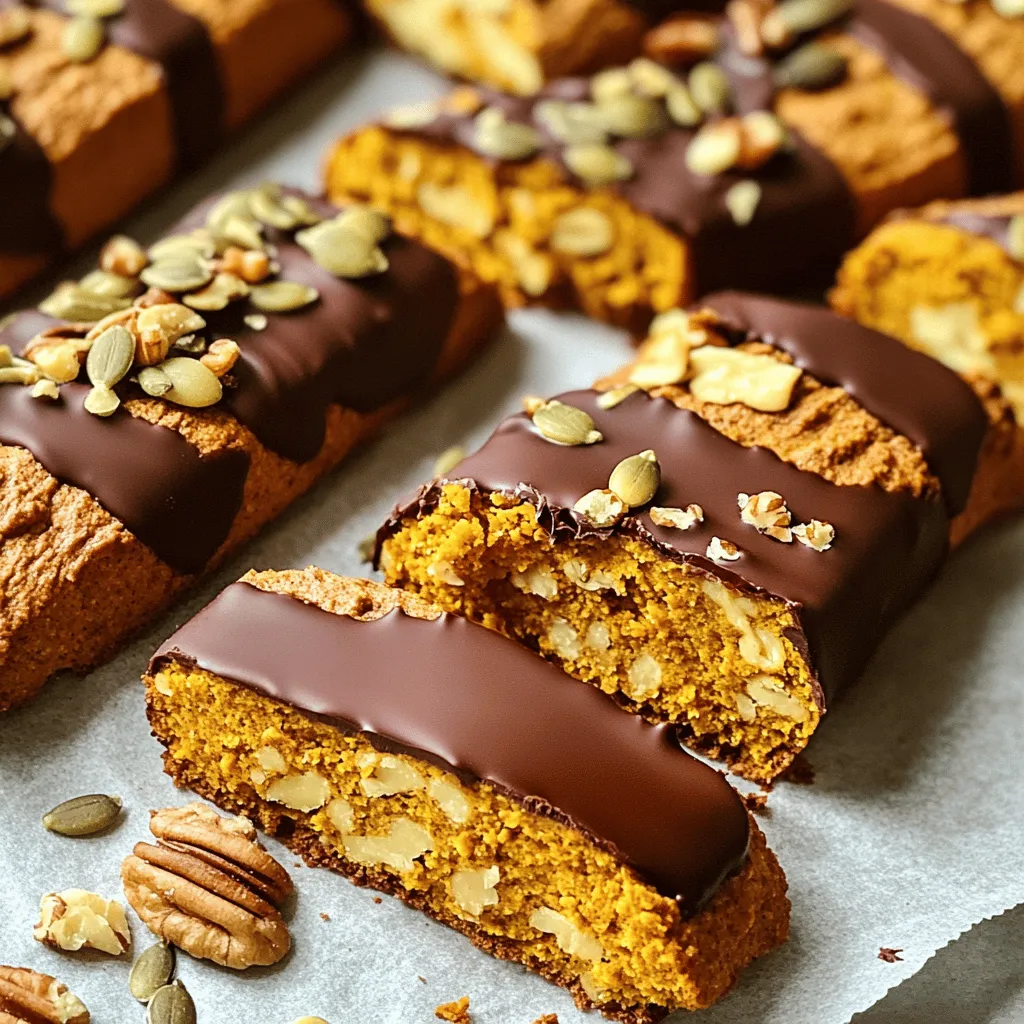
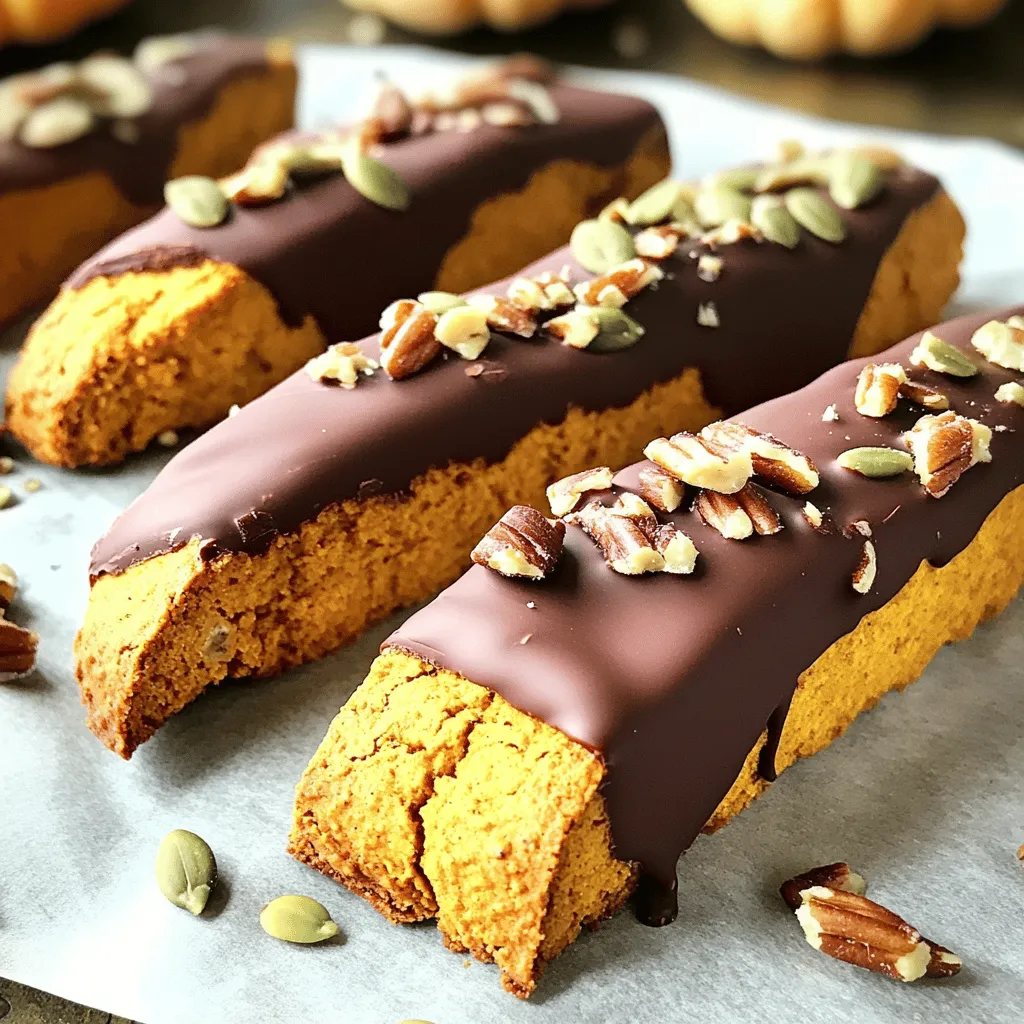
– 1 cup semi-sweet chocolate chips
– Optional: Chopped nuts or pumpkin seeds for topping
Canned pumpkin puree gives the biscotti a rich flavor and moisture. Sugar adds sweetness and helps create a nice crust. The vegetable oil keeps the biscotti tender. Eggs bind everything together and add structure.
Vanilla extract brings warmth and depth. All-purpose flour provides the base, while baking powder and baking soda help the dough rise. Ground cinnamon, nutmeg, and ginger create that cozy fall flavor. Salt balances the sweetness.
Semi-sweet chocolate chips provide the perfect chocolatey finish. You can add chopped nuts or pumpkin seeds for extra crunch if you like. Each ingredient plays a key role in making these biscotti a delightful treat.
Step-by-Step Instructions
Preheat the Oven and Prepare Baking Sheet
Start by preheating your oven to 350°F (175°C). This step is key to ensure even baking. Line a baking sheet with parchment paper. This helps prevent sticking and makes cleanup easy.
Mix the Wet Ingredients
In a large bowl, combine 1 cup of canned pumpkin puree, ¾ cup of sugar, ½ cup of vegetable oil, 2 large eggs, and 2 teaspoons of vanilla extract. Whisk these ingredients together until smooth. This mixture will bring moisture and flavor to your biscotti.
Combine Dry Ingredients
In another bowl, mix 2 ½ cups of all-purpose flour, 1 teaspoon of baking powder, ½ teaspoon of baking soda, 1 teaspoon of ground cinnamon, ½ teaspoon of ground nutmeg, ¼ teaspoon of ground ginger, and ½ teaspoon of salt. Whisk these dry ingredients together. This blend gives the biscotti structure and spice.
Form Biscotti Logs
Gradually add the dry ingredients to the wet mixture. Stir gently until you see no dry flour. Do not overmix! Divide the dough into two equal parts. Shape each half into a log about 12 inches long and 3 inches wide. Place these logs on your prepared baking sheet with space in between.
Bake the Biscotti Logs
Bake the logs in your preheated oven for 25-30 minutes. They should look golden and firm when done. After baking, let them cool for about 15 minutes. This cooling time makes slicing easier.
Slice and Bake Again
Once cooled, take a serrated knife and slice each log diagonally into 1-inch thick slices. Arrange the slices cut-side down on the baking sheet. Return them to the oven for another 15-20 minutes. This second bake makes them crisp and delightful.
Melt Chocolate and Dip Biscotti
While the biscotti cool, melt 1 cup of semi-sweet chocolate chips. Use a microwave-safe bowl and heat in 30-second bursts, stirring in between. Once smooth, dip one end of each biscotti into the melted chocolate. Let the excess drip off. If you like, sprinkle chopped nuts or pumpkin seeds on top while the chocolate is still wet. Finally, place the dipped biscotti on parchment paper to let the chocolate set.
Tips & Tricks
Pro Tips for Perfect Biscotti
To get the right texture, use fresh canned pumpkin puree. This makes your biscotti moist and flavorful. Mix the wet and dry ingredients until just combined. Overmixing can lead to tough biscotti. To achieve crispiness, slice the logs thinly. A serrated knife works best for clean cuts. Bake the sliced biscotti twice for that satisfying crunch.
Storage Tips
Store your biscotti in an airtight container. This keeps them fresh and tasty. They last up to two weeks at room temperature. You can also freeze them for longer storage. Just place them in a freezer bag, and they will be good for three months. When ready, thaw them at room temperature.
Serving Suggestions
Pair these biscotti with coffee or tea. They make a lovely treat for afternoon breaks. You can also gift them to friends. Put them in a pretty box, and they will love the thought. For extra flair, add a ribbon to the box. Enjoy sharing your delicious creation with others!
Variations
Gluten-Free Options
You can make these biscotti gluten-free! Just swap the all-purpose flour with a gluten-free blend. Look for one that works well in baking. You can use 2 ½ cups of this blend. Make sure it has xanthan gum in it, as it helps with texture. This swap keeps the taste and crunch you love.
Flavor Variations
Want to spice things up? You can add more flavor! Try one teaspoon of pumpkin spice for a warm touch. You might also like to add a splash of almond extract or maple extract for a twist. As for the chocolate, you can use white chocolate or dark chocolate instead of semi-sweet. Each choice gives a new taste to your biscotti.
Nut-Free Adaptations
If you need a nut-free version, that’s easy! Just skip any nuts or seeds you might want to add on top. You can also use sunflower seeds or pumpkin seeds if you want a crunch without nuts. Look for chocolate that is nut-free, too. Enjoy the same great biscotti without worry!
Printable Recipe Card
Downloadable Recipe Card for Easy Access
You can get a handy printable recipe card for chocolate dipped pumpkin biscotti. This card helps you keep all your ingredients and steps in one place. You can print it out or save it on your phone. This makes cooking easy and fun!
How to Use the Printable Recipe Card
Using the recipe card is simple. First, gather all your ingredients. The card lists everything you need. Next, follow the steps on the card. It gives you clear instructions, so you won’t miss any steps. You can check off each step as you go. This keeps you on track and makes cooking less stressful.
Benefits of Having a Printable Version
Having a printable version offers many benefits. It allows you to save time while cooking. You won’t need to search your phone or computer for the recipe. Plus, you can jot down notes or changes for next time. If you like to cook with friends, a printed card helps everyone see the steps together. It’s a fun way to share the joy of cooking!
FAQs
What is the best way to store Chocolate Dipped Pumpkin Biscotti?
Store your biscotti in an airtight container. This keeps them fresh and crisp. You can also use wax paper between layers to avoid sticking. Biscotti can stay fresh for up to two weeks on the counter.
Can I make these biscotti in advance?
Yes, you can make them ahead of time. Biscotti actually taste better after a day or two. Just store them as mentioned above. This makes them perfect for events or gifts.
How can I make this recipe dairy-free?
To make it dairy-free, simply swap the semi-sweet chocolate chips for dairy-free chocolate. You can also use plant-based oil instead of vegetable oil if needed. This keeps the flavor while fitting your diet.
What other toppings can I use besides chocolate?
You can try white chocolate or even dark chocolate for a twist. Chopped nuts or pumpkin seeds add extra crunch. You could also sprinkle cinnamon sugar on top before baking for added flavor.
How long do these biscotti take to bake?
The first bake takes about 25-30 minutes. After slicing, you will bake them again for 15-20 minutes. This two-step baking makes them crunchy and perfect for dipping.
Can I use different types of pumpkin puree?
Yes, you can use homemade pumpkin puree or different brands. Just make sure it is pure pumpkin and not a pie filling. The flavor will be just as good, and it gives you options!
This guide shares how to make tasty chocolate-dipped pumpkin biscotti. You learned about the key ingredients, step-by-step instructions, and helpful tips for perfect results. I covered variations for gluten-free, nut-free, and different flavors. Use the printable recipe card for easy access.
Biscotti are great for sharing or a cozy treat with your favorite drink. Enjoy making this fun recipe and impress your friends with your baking skills!


