- Cod with Ratatouille Flavorful and Simple Recipe
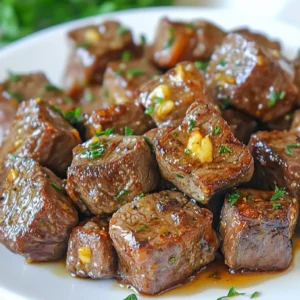
- High-Protein Garlic Butter Steak Bites Flavorful Treat
- Garlic Butter Lobster Tails Savory Delight Recipe
- Tofu Satay with Peanut Sauce Bold Flavor Delight
- Easy Baked Churro Bites Quick and Tasty Snack
- Butternut Squash Stuffed Shells Savory and Easy Meal
- Crispy Nashville Hot Mozzarella Sticks Flavor Blast
- Easy Blueberry Cheesecake with Berry Sauce Delight
- Crispy Shrimp Tempura Perfectly Fried and Delicious
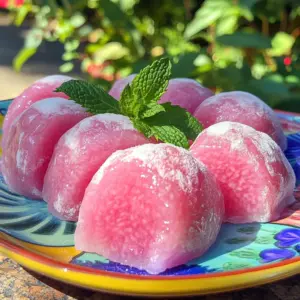
- Watermelon Mochi Delightful and Easy Recipe
- Delicious Vegan Lobster Roll Flavorful and Easy Recipe
- Easy Baked Garlic Butter Potatoes Flavorful and Simple
- Savory Garlic Chicken in Creamy Sauce Delight
- Juicy Steak with Creamy Garlic Sauce Tasty Delight
- Potato Gnocchi Beef Stew Hearty and Comforting Dish
- Raspberry Muffins with White Chocolate Delightful Treat
- Cheesy Taco Pinwheels Quick and Simple Snack Delight
- Delicious Cheesecake Deviled Strawberries Simple Treat
- Hawaiian Roll French Toast Delightful Breakfast Idea
- Sriracha Glazed Almonds Simple and Flavorful Snack
- Crispy Lemon Potatoes with Dill Ricotta Delight
- Mongolian Chicken Stir-Fry Flavorful and Easy Meal
- Caribbean Chicken and Rice Flavorful One-Pot Dish
- Lemon Blueberry Sheet Cake Simple and Delicious Recipe
- Honey Pepper Chicken Mac and Cheese Delightful Recipe
- Chocolate Orange Cheesecake Delightful Dessert Recipe
- Creamy Chicken Ranch Pasta Quick and Delicious Recipe
- Gochujang Chickpea Soup Flavorful Healthy Delight
- Hearty Beef Stew Savory Comfort in a Bowl
- Baileys Irish Cream Cupcakes Decadent Dessert Delight
- Chicken Alfredo Garlic Bread Bowls Delicious Dinner Idea
- Honey Sriracha Brussels Sprouts Savory Flavor Bomb
- Double Cheesy Smash Burger Flavorful Cooking Guide
- Hawaiian Garlic Shrimp Flavorful and Simple Recipe
- Pizza Chips Crunchy and Flavorful Snack Idea
- Savory Pecan Upside Down Cake Delightful Treat Recipe
- Cheesy Garlic Crescent Rolls Easy and Flavorful Snack
- Tropical Mango Cheesecake Delightful and Refreshing Bite
- No Bake Mini Egg Cheesecake Easy and Delicious Treat
- Vegan Moroccan Stew Hearty and Spicy Delight
- Pistachio Cream and Chocolate Chip Cookies Delight
- Crispy Oven-Baked Sweet Potato Fries Simple Treat

![- 4 cod fillets (about 6 oz each) - 2 tablespoons olive oil (for cod) - 1 cup breadcrumbs - 1/4 cup grated Parmesan cheese - 2 tablespoons fresh parsley, chopped - 2 tablespoons fresh basil, chopped - 1 teaspoon garlic powder - Salt and pepper, to taste - 1 medium eggplant, diced - 1 zucchini, diced - 1 bell pepper (red or yellow), diced - 1 onion, diced - 2 cloves garlic, minced - 1 can (14 oz) diced tomatoes (no salt added) - 1 teaspoon dried thyme - 1 teaspoon dried oregano - Pinch of red pepper flakes (optional) - Calories: Approx. 350 per serving - Protein: 30g - Fat: 12g - Carbohydrates: 30g In this recipe, I combine fresh cod with a colorful and tasty ratatouille. For the cod, I use fillets that are about 6 ounces each. They are perfect to soak up flavors. I coat them with olive oil, breadcrumbs, and cheese. This gives each piece a crispy and savory crust. For the ratatouille, I pick fresh vegetables. Eggplant, zucchini, bell pepper, onion, and tomatoes work best. I love to add garlic and herbs for extra flavor. The spices like thyme and oregano bring warmth and depth to the dish. This recipe is packed with nutrients. Cod offers lean protein, while the ratatouille provides vitamins and fiber. Each bite is not only delicious but also good for you. You can find the full recipe to follow along easily. Enjoy cooking! - Preheat your oven to 400°F (200°C). - Heat 2 tablespoons of olive oil in a skillet. Sauté the diced onion until it turns translucent, about 3-4 minutes. - Next, add the diced eggplant, zucchini, and bell pepper. Cook these for 5-7 minutes, stirring occasionally. - Stir in the minced garlic, diced tomatoes, thyme, oregano, and a pinch of salt and pepper. - Allow it to simmer for 10-15 minutes until the vegetables become tender. The tomatoes will add a nice sauce to the mix. - In a bowl, mix breadcrumbs, grated Parmesan, parsley, basil, garlic powder, salt, and pepper. - Coat each cod fillet with olive oil. Press the breadcrumb mixture onto each fillet, ensuring they are well-covered. - Place the cod on a baking sheet lined with parchment paper. Bake for 12-15 minutes. The cod should flake easily and the topping should look golden. Serve the cod on a bed of ratatouille for a flavorful meal. For the full recipe, check the details provided above. - Use a light hand when coating with the breadcrumb mix. This keeps it even. - Keep an eye on the baking time. Overcooked cod can turn dry. - Try seasonal vegetables for more flavor. Fresh veggies have the best taste. - Add fresh herbs like basil or parsley near the end. This boosts aroma. - Serve with crusty bread for a nice bite. A light salad pairs well too. - Garnish your plate with fresh herbs. It adds color and makes it pretty. Enjoy making your Cod with Ratatouille! For the full recipe, check out the [Full Recipe]. {{image_2}} You can switch the cod for other white fish like haddock or tilapia. Both options work well and add their unique taste. If you prefer a vegetarian meal, just leave out the cod entirely. The ratatouille stands strong on its own. For a Mediterranean twist, add olives or capers to your ratatouille. They bring a salty richness that enhances the dish. You can also add a splash of balsamic vinegar. This provides a nice depth of flavor that balances the vegetables. Grilling the cod gives it a smoky flavor that many enjoy. Just brush the fillets with olive oil and place them on the grill. For the ratatouille, consider using a slow cooker. This method allows the flavors to blend beautifully, creating a rich and satisfying dish. Try these variations to make the recipe your own. For the full recipe, check the section above! Store any leftover cod and ratatouille in an airtight container. This helps keep the food fresh. Make sure to eat it within 3 days for the best taste. If you have more leftovers, freezing is a great option. Freeze the cod and ratatouille separately. This method keeps each part at its best. Use them within 2 months for optimal flavor. When it's time to eat again, gently reheat the dish in the oven. This method keeps the texture nice and flaky. Avoid using the microwave, as it can make the cod rubbery. Enjoy your meal as if it were fresh! Yes, you can prepare the ratatouille and the cod separately. Cook the ratatouille a few hours in advance. Store it in the fridge. When ready, just reheat it. You can coat the cod fillets and bake them fresh. This keeps the cod crispy. Yes, cod is a great choice for meals. It is low in calories and high in protein. This makes it perfect for a balanced diet. Cod also provides essential nutrients. It supports muscle growth and overall health. Consider serving a simple green salad. A light salad adds freshness to the meal. You can also try steamed vegetables. They complement the flavors of cod and ratatouille well. Enjoy your meal with crusty bread for an extra treat! For the full recipe, refer to the section above. This blog post covered how to prepare cod with ratatouille. I shared the needed ingredients and clear steps to make this tasty dish. You learned tips to enhance flavors and options for variations. Storage info helps keep leftovers fresh. Cooking at home not only saves money but also brings joy. Try this recipe to enjoy healthy and flavorful meals. Your kitchen can bring you great meals and smiles!](https://cheftaling.com/wp-content/uploads/2025/05/b266ba80-7d1a-448b-b603-9315a286530f-300x300.webp)
. To prep lobster tails, grab kitchen scissors. Cut the top shell down the center. Stop just before the tail fins. This keeps the tail intact. Next, use your fingers to gently pry the shell open. Be careful here; you want to do this slowly. Handling lobster can be tricky. Always wash your hands after touching raw seafood. If you use gloves, that works too. Now, let's make the garlic butter sauce. Start with a small saucepan. Melt the unsalted butter over medium heat. Add the minced garlic after the butter melts. Sauté it for 1-2 minutes. You want the garlic fragrant but not browned. Browned garlic can taste bitter, and we don’t want that. Once done, take it off the heat. Stir in fresh lemon juice, paprika, salt, and pepper. This mix will add a burst of flavor to the lobster. Preheat your oven to 400°F (200°C). Place the lobster tails on a baking sheet. Make sure the flesh side is up. Brush them with the garlic butter sauce. Drizzle some sauce inside the shells too. This helps keep the meat juicy. Bake the tails for 12-15 minutes. Check for doneness; the flesh should look opaque and firm. Halfway through, baste them with more garlic butter. This adds extra flavor and moisture. Once done, sprinkle with fresh parsley and serve with lemon wedges for a zesty touch. For the full recipe, check the beginning of the article. When you want the best lobster tails, look for a few key signs of freshness: - The shells should feel firm and hard. - Look for shiny and moist tails. - Fresh tails have a mild ocean scent, not a strong or fishy smell. For purchasing, your best sources are local fish markets or trusted grocery stores. Online seafood markets also offer quality options. Always check reviews to ensure freshness and quality. While baking is a classic method, other cooking styles can enhance your lobster tails: - Grilling gives a smoky flavor. Brush the tails with garlic butter and grill them for about 8-10 minutes. - Broiling cooks the tails quickly. Place them under the broiler for 6-8 minutes, keeping an eye on them. Remember, cooking times depend on tail size. For smaller tails, reduce the cooking time. Larger tails may need a few extra minutes to cook through. To make your garlic butter lobster tails shine, consider these side dishes: - Garlic bread pairs well with the buttery taste. - A fresh green salad adds crunch and balance. - Roasted vegetables bring a nice contrast to the meal. For beverages, try these options: - A crisp white wine like Sauvignon Blanc enhances the flavors. - Sparkling water with lemon is a refreshing choice if you prefer non-alcoholic drinks. Enjoy your meal and explore the [Full Recipe] for complete details! {{image_2}} You can spice up your garlic butter for lobster tails in many ways. Adding fresh herbs, like thyme or basil, gives a nice twist. You can also try red pepper flakes for heat. For a citrus kick, mix in some lime zest. Different flavored butters can also enhance your dish. Consider mixing in smoked paprika for a smoky taste. Or, try herb-infused butter by blending in fresh dill or chives. Each choice adds a unique flavor to the lobster tails, making your meal exciting. Grilling garlic butter lobster tails creates a smoky flavor. Just brush your tails with garlic butter and place them on the grill. Grill over medium heat for about 6-8 minutes. This method gives a nice char and enhances the taste. Boiling is another option. Boil the lobster tails for about 5-7 minutes. After boiling, baste with your garlic butter. This method keeps the tails tender and juicy. Adjust your cooking time based on the size of the tails for best results. For more details on preparing garlic butter lobster tails, check the Full Recipe. To keep your garlic butter lobster tails fresh, store them in the refrigerator. Place the leftovers in an airtight container. This will help prevent any odors from mixing with other foods. Use the leftovers within two days for the best taste. If you want to save them longer, freezing is a good option. Wrap each lobster tail tightly in plastic wrap. Then, place them in a freezer bag. Make sure to remove as much air as possible. This helps prevent freezer burn and keeps the flavors intact. You can freeze lobster tails for up to three months. When reheating lobster tails, you want to keep them moist. The best methods include using the oven or steaming. For the oven, preheat it to 350°F (175°C). Place the lobster tails in a baking dish with a bit of water. Cover the dish with foil to trap steam. Heat them for about 10-15 minutes. If you choose steaming, fill a pot with a small amount of water. Place a steamer basket inside and bring the water to a simmer. Add the lobster tails to the basket, cover, and steam for 5-7 minutes. Both methods help maintain the lobster's tender texture. Avoid using the microwave as it can dry out the meat quickly. Enjoy your leftovers just as much as the first time! You can tell when lobster tails are done by looking at the meat. The flesh should turn from translucent to opaque. It will also feel firm when you touch it. A good way to check is by using a meat thermometer. The internal temperature should reach 140°F (60°C). If you see the meat curling away from the shell, that’s another sign it is cooked. Yes, you can use frozen lobster tails! Just make sure to thaw them first. The best way to thaw is in the fridge overnight. If you're short on time, you can put them in cold water for about 30 minutes. Cooking frozen lobster tails is similar to fresh ones, but they may need a minute or two longer in the oven. Always check the doneness carefully to avoid overcooking. If you want to avoid butter, there are great options. You can use olive oil for a lighter taste. Coconut oil also works well and adds a hint of sweetness. For a dairy-free option, try vegan butter. You can also use ghee for a rich flavor without dairy. Each option gives a nice twist to the garlic butter sauce in the Full Recipe. You can create a delicious garlic butter lobster meal using simple ingredients and steps. Start with fresh lobster tails and prepare a rich garlic butter sauce. Remember to check for freshness, and consider alternatives like grilling. Store leftovers properly to enjoy later. This dish is a perfect treat for any occasion. With practice, you’ll impress friends with your cooking. Enjoy experimenting with different flavors and techniques to make it your own. Bon appétit!](https://cheftaling.com/wp-content/uploads/2025/05/76ae57ed-5098-4e09-8c1e-78d7a16e73f6-300x300.webp)


![- 12 jumbo pasta shells - 2 cups butternut squash, peeled and cubed - 1 cup ricotta cheese - 1 cup spinach, chopped - 1 cup shredded mozzarella cheese, divided - 1/2 cup grated Parmesan cheese - 1 teaspoon garlic powder - 1/2 teaspoon nutmeg - 1 tablespoon olive oil - Salt and pepper to taste - 2 cups marinara sauce - Fresh basil leaves for garnish Butternut squash stuffed shells are a great meal. They are tasty and easy to make. This dish combines creamy cheese with sweet butternut squash. The flavors blend well, making every bite a joy. You can find all these ingredients in your local store. Each serving has about 400 calories. You get around 15 grams of protein and plenty of vitamins. The butternut squash adds fiber and antioxidants. This makes the dish not just yummy but healthy too. To make this dish, you will need some basic tools: - Baking dish - Large pot - Saucepan - Mixing bowl These tools help in cooking and combining the ingredients well. They make the process smooth and fun. For the complete recipe, check the [Full Recipe]. 1. Preheat your oven to 375°F (190°C). This makes sure your shells cook evenly. 2. In a large pot, bring salted water to a boil. Add your jumbo pasta shells. Cook them until they are al dente, or firm. This usually takes about 10-12 minutes. 3. Once cooked, drain the shells and set them aside. Be gentle so they don’t break. 1. In a saucepan, heat 1 tablespoon of olive oil over medium heat. 2. Add 2 cups of cubed butternut squash. Season it with salt, pepper, and 1/2 teaspoon of nutmeg. 3. Sauté the squash for about 10 minutes. It should become soft and tender. 4. In a mixing bowl, combine the sautéed squash with 1 cup of ricotta cheese, 1 cup of chopped spinach, 1/2 cup of grated Parmesan, and 1 teaspoon of garlic powder. 5. Mix everything until it's well combined. This filling will be rich and creamy. 1. Using a spoon, carefully fill each cooked pasta shell with the butternut squash mixture. 2. Place the stuffed shells in a greased baking dish. 3. Pour 2 cups of marinara sauce over the shells. Make sure each shell is covered well. 4. Sprinkle the remaining 1/2 cup of shredded mozzarella cheese on top. 5. Cover the dish with aluminum foil and bake for 20 minutes. 6. Remove the foil and bake for an additional 10-15 minutes until the cheese is bubbly and golden. 7. Let the shells cool for a few minutes before serving. Garnish with fresh basil leaves on top. Now you have a delicious meal ready to enjoy! For the full recipe, check the details above. To prevent shells from sticking, use a large pot. Boil a lot of salted water. Stir the shells gently as they cook. Drain them but do not rinse. Rinsing can wash away the starch that helps sauce stick. Cook them until they are al dente, firm but not hard. This way, they won't overcook when you bake them later. Adding spices can make a big difference. Try using fresh thyme or sage for a warm touch. You can also sprinkle in some chili flakes for heat. If you like garlic, add more garlic powder or fresh minced garlic. Mixing in some lemon zest can brighten the flavor. Each of these little tweaks can elevate your dish. One big mistake is overfilling the shells. If you pack them too tight, they may burst when baking. Another mistake is not seasoning the filling. Make sure to add salt and pepper to the squash mixture. Finally, don’t skip covering the dish with foil at first. This helps steam the shells and keep them moist. {{image_2}} You can mix up the filling in several fun ways. Try mushrooms for a hearty bite. They add a nice earthiness. Ricotta cheese works well too. It gives a creamy texture. You can also blend in fresh herbs like basil or thyme. These herbs add a burst of flavor. Feel free to get creative with your choice of ingredients! You can change the sauce for a new taste. Alfredo sauce adds a rich, creamy layer. Pesto gives a fresh, herby kick. If you prefer something lighter, use a creamy béchamel. This sauce will make your meal feel fancy! Each sauce brings out different flavors in the dish. Experiment to find your favorite! Making dietary changes is simple. For a vegetarian option, keep the ricotta and veggies. To go vegan, swap the ricotta for a plant-based alternative. You can also use nutritional yeast for a cheesy taste. If you're gluten-free, choose gluten-free pasta shells. This way, everyone can enjoy the meal! To keep your butternut squash stuffed shells fresh, store them in an airtight container. Place a layer of plastic wrap over the shells before sealing the lid. This helps prevent moisture loss. Store them in the fridge for up to 3 days. If you want to save them longer, you can freeze them. Just make sure to use a freezer-safe container. They will last for about 2 months in the freezer. When ready to eat your leftovers, reheat them gently. Preheat your oven to 350°F (175°C). Place the stuffed shells in a baking dish. Cover the dish with foil to keep the moisture in. Heat them for about 20 minutes. If you want the cheese to be bubbly, remove the foil for the last 5 minutes. You can also reheat them in the microwave if you're short on time. Just heat in short bursts, checking every minute to avoid overcooking. Meal prepping butternut squash stuffed shells is simple and smart. You can make a big batch and store them. Prepare the filling and stuff the shells. Then, freeze them before baking. This way, you can bake them fresh when you're ready. Just remember to add extra time for baking if they are frozen. You can also prep the filling a day ahead. Keep it in the fridge and stuff the shells when you're ready to cook. Stuffed shells can last about 3 to 5 days in the fridge. Store them in an airtight container. Make sure they are cooled before putting them away. If you want to keep them longer, consider freezing them. This helps keep the flavors fresh. Yes, you can freeze butternut squash stuffed shells. To freeze, let them cool completely. Place them in a freezer-safe dish. Cover them tightly with foil or plastic wrap. When ready to eat, thaw them overnight in the fridge. Bake them at 375°F until hot. This method keeps them tasty and easy to enjoy. You can serve butternut squash stuffed shells with a side salad or garlic bread. A light green salad adds freshness. For a drink, a glass of white wine pairs nicely. A crisp Sauvignon Blanc or a light Pinot Grigio works well. Try to keep the meal balanced for best results. In this article, we explored a delicious butternut squash stuffed shell recipe. You learned about the main ingredients, cooking tips, and various ways to modify this dish. We covered storage and reheating methods to ensure your leftovers stay tasty. Remember, cooking is about experimenting and enjoying the process. Don’t be afraid to make this dish your own. Whether you pick different fillings or sauces, the possibilities are endless. Enjoy your meal and happy cooking!](https://cheftaling.com/wp-content/uploads/2025/05/1d96ab5c-7487-4adc-97f2-068947eb67b3-300x300.webp)


![- 2 ribeye steaks (1-inch thick) - Salt and black pepper to taste - 2 tablespoons olive oil - 4 cloves garlic, minced - 1 cup heavy cream - ½ cup beef broth - 1 teaspoon Dijon mustard - ¼ cup grated Parmesan cheese - 1 tablespoon fresh parsley, chopped (for garnish) When you gather these ingredients, you set the stage for a great meal. Ribeye steaks are juicy and full of flavor. The olive oil helps you sear them perfectly. Seasoning with salt and pepper enhances the taste. Fresh garlic brings a rich aroma to the sauce. Heavy cream makes it silky smooth. Beef broth adds depth, while Dijon mustard gives a nice kick. Parmesan cheese rounds out the sauce with a savory touch. If you want, add fresh parsley for brightness. This mix makes your steak shine. For the full recipe, check out the detailed instructions. Start by taking the ribeye steaks out of the fridge. Let them sit for about 30 minutes to warm up. This helps the steak cook evenly. Next, pat them dry with paper towels. Season both sides well with salt and black pepper. Don’t be shy! This makes the steak tasty. Heat a large skillet over medium-high heat. Add two tablespoons of olive oil and let it get hot. Once the oil shimmers, place the steaks in the skillet. Sear each side for 3-4 minutes. Look for a nice golden-brown crust. Use a meat thermometer to check doneness; aim for 130°F for medium-rare. Once done, remove the steaks and let them rest on a plate. This helps keep them juicy. In the same skillet, lower the heat to medium. Add the minced garlic and sauté for about 30 seconds. You want it to be fragrant but not burnt. Pour in the beef broth and scrape any brown bits off the bottom. This adds flavor! Let it simmer for 2-3 minutes. Then, add in the heavy cream and Dijon mustard. Stir well to mix everything. Continue to cook the sauce for 4-5 minutes until it thickens. Stir in the grated Parmesan cheese until melted and smooth. Taste it and add more salt or pepper if needed. Now, slice the rested steaks against the grain. Place them on a plate and drizzle the creamy garlic sauce over the top. Finish with a sprinkle of fresh parsley for color. Enjoy your Juicy Steak with Creamy Garlic Sauce! For the [Full Recipe], refer to the section above. To get the perfect steak doneness, you need a meat thermometer. For medium-rare, aim for 130°F. Insert the thermometer into the thickest part of the steak. If you like it more done, cook until it reaches 140°F for medium and 160°F for medium-well. Also, let the steak rest after cooking. This helps the juices spread throughout the meat. Resting for five to ten minutes makes a big difference. You want your creamy garlic sauce to be just right. To thicken it, cook it longer over medium heat. Add a bit of flour or cornstarch if needed. Just mix it with cold water first before adding it to the sauce. This will help prevent lumps. If your sauce gets too thick, simply whisk in a splash of beef broth or cream. This keeps it smooth and creamy. Having the right tools helps a lot. Here are the must-haves for this recipe: - A good meat thermometer - A large skillet for searing - A whisk for the sauce - A cutting board for resting the steak - A sharp knife for slicing These tools will help you cook and serve your steak with ease. For the full recipe, check the earlier section. {{image_2}} You can use many cuts for this dish. Ribeye is great, but other options work too. Sirloin gives a leaner bite. Flank steak offers a nice, beefy taste and is easy to cook. T-bone is tender and flavorful. If you want a unique flavor, try skirt steak. It has a rich, beefy taste and works well with the sauce. If you want a vegetarian sauce, swap beef broth for vegetable broth. This keeps the creaminess while adding a new flavor. You can also add sautéed mushrooms for a meaty texture. Another option is to use cashew cream. It creates a rich sauce without dairy. Blend soaked cashews with water for a smooth finish. You can change the flavor of the sauce with herbs and spices. Fresh thyme or rosemary adds a nice touch. Just chop them finely and stir them in. If you like heat, add a pinch of red pepper flakes for some kick. For a twist, try adding a splash of lemon juice for brightness. All these changes can make your dish unique and exciting. For the full recipe, check out the Juicy Steak with Creamy Garlic Sauce. After your meal, let the steak cool down. Place it in an airtight container. Cover it tightly to keep it fresh. You can store it in the fridge for up to three days. If you want to keep it longer, consider freezing it. To freeze, wrap the steak tightly in plastic wrap. Then place it in a freezer bag. Make sure to remove as much air as possible. You can freeze it for up to three months. When you're ready to eat, thaw it in the fridge overnight. To reheat, use a skillet over low heat. This keeps the steak juicy. Store any leftover creamy garlic sauce in a separate airtight container. It can last in the fridge for about a week. If you freeze it, use a freezer-safe container. The sauce will keep well for up to three months. When ready to use, thaw it in the fridge. Reheat it gently on the stove, stirring often to bring back its rich flavor. For the full recipe, check out the details above. To make your steak more tender, start with good cuts like ribeye. Letting the steak sit at room temperature for 30 minutes helps. Season it well with salt and pepper. You can also marinate the steak for added flavor and tenderness. Try using ingredients like olive oil, vinegar, or citrus juice in your marinade. After cooking, let the steak rest for a few minutes. This helps the juices stay inside the meat, keeping it moist and tender. Yes, you can use different types of cheese in the creamy garlic sauce. Parmesan adds a nice, nutty flavor. If you want something sharper, try aged cheddar or fontina. For a richer taste, blue cheese works great too. Just remember to adjust the amount according to your taste. Each cheese brings its own twist to the sauce, making it fun to experiment. Several sides go well with juicy steak and creamy garlic sauce. You could serve it with creamy mashed potatoes, which soak up the sauce perfectly. Sautéed vegetables like green beans or asparagus add freshness to the plate. A crisp salad with vinaigrette can balance the richness of the steak. You might also enjoy garlic bread to mop up any leftover sauce. Choosing sides adds color and flavor to your meal. Let your steak rest for about 5 to 10 minutes after cooking. This time allows the juices to redistribute throughout the meat. If you cut into it right away, the juices will run out, making it dry. Resting keeps your steak juicy and flavorful. Cover it loosely with foil while resting to keep it warm. This blog post covered how to make juicy steak with creamy garlic sauce. We discussed the main ingredients and optional flavors for a rich taste. I shared step-by-step instructions to cook both the steak and sauce perfectly. You learned tips for doneness and how to store leftovers. Remember, you can switch up cuts or add herbs for variety. With these ideas, you can create a delicious meal every time. Enjoy cooking and experimenting with your favorite flavors!](https://cheftaling.com/wp-content/uploads/2025/05/a512f86e-a339-40b5-887c-01b574479362-300x300.webp)
![- 1 pound beef chuck, cut into 1-inch cubes - 1 package (16 oz) potato gnocchi - 4 cups beef broth - 1 tablespoon olive oil - 1 teaspoon dried thyme - 1 bay leaf - 1 onion, diced - 3 cloves garlic, minced - 3 carrots, sliced - 2 stalks celery, sliced - 2 cups potatoes, diced - 1 cup frozen peas Gather these ingredients before you start cooking. Each one plays a key role in creating the deep flavor of this stew. The beef chuck adds richness, while the broth brings warmth. The gnocchi gives a delightful texture. The veggies brighten the dish and add nutrition. Using fresh ingredients makes a big difference. The aroma of diced onion and minced garlic fills your kitchen with comfort. Carrots and celery bring sweetness and crunch. Potatoes add heartiness, and peas add a pop of color. For the full recipe, check out the detailed steps to bring this hearty dish to life. Sautéing the Aromatics Start by heating 1 tablespoon of olive oil in a large pot. Use medium heat. Next, add 1 diced onion and 3 minced garlic cloves. Cook for 3 to 4 minutes until the onion turns soft and clear. This step builds a strong flavor base. Browning the Beef Now, add 1 pound of beef chuck cut into 1-inch cubes. Sprinkle salt and pepper over the beef. Brown the meat on all sides for about 5 to 6 minutes. This gives the beef a nice crust and locks in juices. Adding Vegetables and Broth Once the beef is browned, toss in 3 sliced carrots, 2 sliced stalks of celery, and 2 cups of diced potatoes. Stir and cook for another 5 minutes. This softens the vegetables a bit. After that, pour in 4 cups of beef broth. Add 1 teaspoon of dried thyme and 1 bay leaf. Bring the mix to a boil. Simmering for Tenderness Reduce the heat to low and cover the pot. Let it simmer for 1.5 hours. This slow cooking helps the beef become tender. Stir occasionally to prevent sticking. Incorporating Gnocchi After the beef is tender, it’s time to bring in the star of the dish. Add 1 package (16 oz) of potato gnocchi to the pot. Cook for 2 to 3 minutes. Watch for the gnocchi to float to the top; that means they are done. Adjusting Seasoning and Serving Next, stir in 1 cup of frozen peas. Cook for another 2 minutes. Taste the stew and adjust the salt and pepper as needed. Finally, remove the bay leaf before serving. For a lovely touch, garnish with fresh parsley. Enjoy this hearty meal with crusty bread. For the full recipe, check out [Full Recipe]. - Using Fresh Herbs Fresh herbs can make a big impact. I love adding fresh thyme at the end. It adds brightness. You can also try fresh rosemary for a rich taste. - Adjusting Saltiness Taste your stew before serving. If it's too salty, add a little more broth or water. This helps balance the flavors. - How to Brown Meat Perfectly Start with a hot pan and dry beef. This helps create a nice crust. Don’t overcrowd the pan; brown the beef in batches if needed. - Preventing Gnocchi from Becoming Mushy Add gnocchi near the end of cooking. This keeps them firm. Cook them just until they float, which takes only a few minutes. - Serving Suggestions Serve your stew in deep bowls. This makes it feel hearty. Pair it with crusty bread for dipping. - Garnishing with Fresh Parsley Top with chopped fresh parsley for color. It also adds a fresh taste. This simple step makes your dish look inviting. Check out the Full Recipe for more tips! {{image_2}} You can swap beef chuck for chicken or turkey. These meats cook faster. They also cut down on the fat. If you want a plant-based choice, use mushrooms. They add a nice umami flavor. Feel free to add more veggies. Peppers, zucchini, and green beans work great. They add color and nutrition. Just chop them up and toss them in with the other veggies. If you need gluten-free gnocchi, look for alternatives made from rice or corn. Many stores carry these options now. They taste good and keep the dish hearty. To make a vegetarian stew, skip the beef. Instead, use vegetable broth and add lentils. They add protein and fiber. You can also use chickpeas for a different flavor. Want some spice? Add jalapeños or crushed red pepper flakes. Start with a small amount, then taste. You can always add more if you want it hotter. For a meaty kick, try adding spicy sausage. Cook it before adding the other ingredients. The flavor will seep into the stew, making it even better. For the full recipe, check out the Gnocchi & Beef Bliss Stew. - How to Store Leftovers After your meal, let the stew cool down. Pour it into a bowl or container. Make sure to cover it tightly with a lid or plastic wrap to keep it fresh. - Best Containers for Storage Use glass or plastic containers with tight lids. These containers avoid leaks and keep the stew fresh. Avoid metal containers, as they can react with the food. - Freezing the Stew To freeze the stew, let it cool completely. Use freezer-safe bags or containers. Remove as much air as possible to avoid freezer burn. Label each bag with the date for easy tracking. - Reheating Instructions To reheat, thaw the stew overnight in the fridge. Heat it on the stove over low heat, stirring often. If it seems thick, add a little beef broth or water to loosen it. - How Long Can It Last in the Fridge? In the fridge, the stew can last about 3 to 4 days. If you notice any signs of spoilage, discard it. - Signs of Spoilage Watch for changes in color or smell. If the stew has an off smell or a strange texture, do not eat it. Always trust your senses when checking food freshness. Cooking potato gnocchi in stew is quick. Once your stew simmers for about 1.5 hours, add the gnocchi. They need just 2-3 minutes to cook. You know they are done when they float. This makes gnocchi perfect for busy nights. Yes, you can use a slow cooker! Start by browning the beef and veggies on the stove. Then, add all your ingredients to the slow cooker. Cook on low for 6-8 hours or high for 3-4 hours. Add the gnocchi 30 minutes before serving. This will keep them tender and tasty. This stew pairs well with many sides. Here are some ideas: - Crusty bread for dipping - A fresh green salad - Steamed veggies for a light touch - Garlic bread for extra flavor These sides will enhance your meal, making it even more satisfying. Enjoy! This beef stew with potato gnocchi brings together rich flavors and yummy textures. We discussed key ingredients like chuck beef, gnocchi, and fresh veggies, enhancing every bite. You learned the steps to prepare it perfectly and explored tips to boost flavor. Variations make it fun, while storage advice keeps your leftovers fresh. Now, you can whip up this dish anytime! Enjoy the warmth and comfort this stew offers. It’s not just a meal; it's a satisfying experience.](https://cheftaling.com/wp-content/uploads/2025/05/8db2f997-8013-4c1f-9ecb-a2abf5d218b7-300x300.webp)

![Cheesy Taco Pinwheels are tasty and fun to make. They blend bold flavors with creamy cheese. You can enjoy them as a snack or party treat. This recipe is quick and easy, taking only 45 minutes to prepare. To make Cheesy Taco Pinwheels, you'll need: - 4 large flour tortillas - 1 cup cream cheese, softened - 1 cup shredded cheddar cheese - 1 cup cooked ground beef (seasoned with taco seasoning) - 1/2 cup black beans, rinsed and drained - 1/2 cup diced tomatoes (fresh or canned) - 1/4 cup finely chopped green onions - 1/2 teaspoon garlic powder - 1/2 teaspoon chili powder - Salt and pepper to taste - Optional: Sour cream and salsa for dipping You can swap some items for what you have at home. Use Greek yogurt instead of cream cheese for a lighter option. If you want a meat-free dish, try using lentils or diced veggies instead of beef. You can also switch cheddar cheese for pepper jack cheese for a spicy kick. If you don’t have tortillas, use lettuce leaves for a low-carb twist. Start by mixing the filling. In a medium bowl, combine cream cheese and shredded cheddar cheese. Add garlic powder and chili powder next. Season with salt and pepper to taste. Mix well until everything is smooth. This blend gives your pinwheels that creamy, cheesy goodness. Now it’s time to assemble. Lay a tortilla flat on your clean surface. Spread a generous layer of the cheese mixture across the tortilla. Evenly sprinkle ground beef, black beans, diced tomatoes, and green onions on top. These ingredients bring texture and flavor. Roll the tortilla tightly from one end. Make sure the filling stays inside as you roll. Repeat this for each tortilla until all are filled. Wrap each rolled tortilla in plastic wrap. This helps them firm up in the fridge. Chill for at least 30 minutes. Once chilled, take them out and slice each roll into 1-inch thick pieces. A sharp knife helps make clean cuts. Arrange the pinwheels on a platter. Serve with sour cream and salsa for a tasty dip. You now have a fun snack ready to enjoy! For the complete recipe, check the Full Recipe section. To make great rolls, use fresh tortillas. They flex better and hold the filling. Spread the cheese mixture evenly across the tortilla. Leave a small edge clear for easy rolling. Start rolling from one end, keeping the filling tight. This helps the pinwheels stay together when sliced. You can make these pinwheels ahead of time. After rolling them, wrap each log in plastic wrap. Refrigerate them for up to 24 hours. Chilling firms them up, making slicing easier. If you want to serve them later, just slice and plate them right before guests arrive. Serve Cheesy Taco Pinwheels as a fun snack or appetizer. Pair them with sour cream and salsa for dipping. You can also add guacamole for a creamy touch. For a twist, try serving with a spicy ranch dressing. These pinwheels are a hit at parties or game days! For the full recipe, check this out: [Full Recipe]. {{image_2}} You can easily make Cheesy Taco Pinwheels vegetarian. Swap the ground beef for more beans or veggies. Try adding sautéed peppers, corn, or zucchini. You can also use tofu for protein. Keep the cream cheese and cheddar for that cheesy taste. Want to change the flavor? Mix it up! Use different cheeses like pepper jack or feta. Add spices like cumin or smoked paprika for a kick. You can create a southwest version with avocado and beans. For a Mediterranean twist, try olives and sun-dried tomatoes. If you want a lighter snack, use whole wheat tortillas. You can also replace cream cheese with Greek yogurt. It adds protein and cuts calories. Add more fresh veggies, like spinach or cucumbers, to boost flavor and nutrition. Explore these options to make Cheesy Taco Pinwheels fit your needs! Store any leftover Cheesy Taco Pinwheels in an airtight container. Make sure they are completely cool before sealing. Refrigerate them for up to three days. This keeps them fresh and tasty. When you want to eat them again, just take out what you need. You can freeze these pinwheels for later use. After slicing, arrange the pieces on a baking sheet. This helps them freeze without sticking together. Once frozen, transfer them to a freezer-safe bag. They can last up to two months in the freezer. When you’re ready to enjoy, just thaw them in the fridge overnight. To reheat pinwheels, use an oven or microwave. For the oven, preheat to 350°F (175°C). Place pinwheels on a baking sheet and heat for about 10 minutes. If using a microwave, heat them for 30 seconds to 1 minute. Check to ensure they are warm all the way through. Enjoy your snack warm! Yes, you can use corn tortillas. They add a nice twist to the pinwheels. Corn tortillas can be smaller and less flexible. Warm them slightly before using. This helps them roll easily without breaking. You can keep Cheesy Taco Pinwheels in the fridge for up to three days. Make sure to store them in an airtight container. If you want, you can freeze them for up to three months. Just remember to slice them first for easy serving later. Sour cream and salsa are classic dips for these pinwheels. You can also try guacamole for a fresh taste. For a spicy kick, serve with jalapeño ranch dressing. Each dip adds a fun flavor that enhances the cheesy goodness. This blog post guided you through making Cheesy Taco Pinwheels. You learned the needed ingredients, how to prepare the filling, and the best ways to assemble and chill. I shared tips for perfect rolls and how to store leftovers. We explored tasty variations, including vegetarian options. Remember, these pinwheels are great for snacks or parties. Experiment with flavors and enjoy these bites! Keep this guide handy for the next time you want an easy and fun recipe.](https://cheftaling.com/wp-content/uploads/2025/05/d01ff38e-4188-40fc-959e-268768d483dc-300x300.webp)

![- 8 Hawaiian rolls, sliced in half - 4 large eggs - 1 cup milk - 1 teaspoon vanilla extract - 1 teaspoon ground cinnamon - 2 tablespoons brown sugar - 2 tablespoons butter Hawaiian rolls bring a sweet flavor to this dish. Their soft texture makes them perfect for soaking in the egg mixture. You will need four large eggs and a cup of milk. This mix creates a rich base for the French toast. Vanilla extract adds a lovely aroma, while ground cinnamon gives warmth. Brown sugar sweetens the mix and adds depth. - Fresh pineapple slices - Maple syrup - Shredded coconut Garnishes can elevate your Hawaiian roll French toast. Fresh pineapple slices add a tropical touch. Maple syrup brings sweetness and richness. For a fun twist, sprinkle some shredded coconut on top. These options let you play with flavors and textures. Feel free to mix and match based on your taste. For the full recipe, check out [Full Recipe]. To start, gather your ingredients. You will need eggs, milk, vanilla extract, ground cinnamon, and brown sugar. In a large bowl, crack open the eggs. Add the milk, vanilla extract, ground cinnamon, and brown sugar. Use a whisk to mix them well. Make sure there are no lumps. Proper mixing helps the flavors blend together. It also ensures that each bite is tasty. Next, heat your griddle or skillet over medium heat. Add a tablespoon of butter and let it melt. While it melts, take the sliced Hawaiian rolls. Dip each piece into the egg mixture. Make sure both sides are coated well. This is important for even cooking. Place the rolls on the hot griddle. Cook them for about 2-3 minutes on each side. Look for a golden brown color. If needed, add more butter while cooking. Once cooked, take the French toast off the heat. Place it on a plate. For a fun twist, grill fresh pineapple slices in a separate pan. This will add a tropical taste. Drizzle the warm French toast with maple syrup. Garnish with fresh pineapple slices and shredded coconut if you like. This adds color and flavor to your dish. For the full recipe, check the earlier section. Enjoy your delightful breakfast! To get the best texture for your French toast, focus on the egg mixture. The right consistency is key. You want it smooth but not too thick. Combine eggs, milk, vanilla, cinnamon, and brown sugar until mixed well. A good rule is to use one egg for every half cup of milk. This mix gives your rolls a rich flavor. When cooking, you can choose between a griddle and a skillet. Both work well, but a griddle cooks more evenly. Ensure it’s hot before adding butter. You want a nice sizzle when you place the Hawaiian rolls on it. This sound means you will get that golden finish you crave. Adding spices can make your French toast pop. Nutmeg is a fantastic option. Just a pinch can add warmth. You can also try other flavors. Consider a splash of coconut milk for a tropical twist. This change makes every bite exciting. You might want to mix in some citrus zest too. A bit of orange or lemon zest brightens the taste. It gives a fresh kick that goes well with the sweetness of the rolls. One major mistake is over-soaking the Hawaiian rolls. If you leave them in the egg mixture too long, they can become soggy. A quick dip on both sides works best. This method keeps them fluffy and light. Cooking can be tricky too. Uneven cooking happens if the heat is too high or low. Keep your skillet or griddle at medium heat. This setting helps cook the rolls evenly. You want a beautiful golden brown on both sides. For more tips, check out the Full Recipe. {{image_2}} You can make Hawaiian Roll French Toast even better by adding a filling. Think about cream cheese, Nutella, or fruit spreads. These add flavor and texture, making each bite special. To prepare, cut a pocket in the roll. Spread your chosen filling inside. Then, dip and cook as usual. This method keeps the filling warm and gooey. Fruits add a bright touch to your French toast. You can use bananas, mangoes, or berries. Mixing these fruits gives a fun twist. Try combining strawberries and bananas for a classic combo. Or go bold with pineapple and coconut. These fresh toppings make your meal feel like a tropical vacation. Not all French toast needs to be sweet. You can make a savory version too. Try adding cooked bacon or ham inside the rolls. You can sprinkle cheese on top for extra flavor. Cook it on a skillet or griddle, just like the sweet version. This way, you enjoy both sweet and savory tastes in one dish. To keep your Hawaiian Roll French Toast fresh, store it in the fridge. Place it in an airtight container. This helps to avoid drying out. You can also wrap it tightly in plastic wrap. It stays good for about three days. For longer storage, freeze it. - Refrigerator Storage Guidelines - Place in an airtight container - Keep for up to three days - Freezing Methods - Wrap each slice in plastic wrap - Use a freezer-safe bag - Store for up to three months To enjoy your French toast again, you need to reheat it correctly. The oven is best for keeping it crispy. Preheat your oven to 350°F (175°C). Place the French toast on a baking sheet. Bake for about 10 minutes. If you prefer a skillet, heat it over medium. Add a little butter and warm each side for 2-3 minutes. - Best Practices for Reheating in Oven or Skillet - Oven: Bake at 350°F for 10 minutes - Skillet: Warm on medium heat for 2-3 minutes per side Knowing how long your French toast lasts is key. In the fridge, it’s good for about three days. If frozen, it lasts longer, up to three months. Always check for any signs of spoilage before eating. - Shelf Life of Stored French Toast - Refrigerated: Up to three days - Frozen: Up to three months Yes, you can make Hawaiian Roll French Toast ahead of time. To do this, prepare the French toast as usual. Let it cool after cooking. Then, store it in an airtight container in the fridge. You can keep it for one to two days. When you're ready to eat, reheat it in a skillet or oven. This way, you save time in the morning. Absolutely! You can use regular bread if you like. White bread or brioche works well too. Just make sure the bread is thick enough to hold the egg mixture. This helps keep your French toast fluffy and soft. Don’t be afraid to experiment with different types of bread! You can serve many things with Hawaiian Roll French Toast. Fresh fruit like bananas, strawberries, or berries adds color and taste. You can also serve crispy bacon or sausage for a savory touch. If you want a tropical vibe, try adding grilled pineapple or coconut. Maple syrup is a must for drizzling on top. These pairings make a great brunch spread! For the full recipe, check out the details above. Hawaiian Roll French Toast is a tasty dish made with simple ingredients. You mix eggs, milk, and spices, then soak Hawaiian rolls. You cook them on a hot griddle and serve them with fresh toppings. Remember to avoid common mistakes like over-soaking the rolls. You can even get creative by stuffing them or adding fruits. Store leftovers in the fridge, and they’ll taste great later. Enjoy this fun twist on a classic breakfast!](https://cheftaling.com/wp-content/uploads/2025/05/0ade56f9-beef-44d9-8234-30e44b7b0c76-300x300.webp)
![- 2 cups raw almonds - 3 tablespoons honey - 2 tablespoons Sriracha sauce - 1 tablespoon soy sauce - 1 teaspoon garlic powder - 1 teaspoon smoked paprika - 1/2 teaspoon salt - 1 tablespoon olive oil For the best Sriracha, I recommend Huy Fong Foods. Their sauce has a great balance of spice and flavor. For almonds, look for local brands. Buying local often means fresher nuts. Check farmers' markets for options. If you need an alternative to honey, try maple syrup or agave nectar. Both are sweet and work well. If you want low-sodium soy sauce, look for brands like Tamari. It has great flavor without the extra salt. 1. First, preheat your oven to 350°F (175°C). This helps the almonds cook evenly. 2. Line a baking sheet with parchment paper. This keeps the almonds from sticking. 3. In a medium mixing bowl, whisk together honey, Sriracha, soy sauce, garlic powder, smoked paprika, and salt. Mix until smooth. This glaze gives the almonds their flavor. 1. Add the raw almonds to the bowl with the glaze. 2. Pour olive oil over the almonds. Toss everything well. Make sure all almonds get coated evenly. This step is key for flavor. If some nuts miss the glaze, they won’t taste as good. 1. Spread the coated almonds on the prepared baking sheet in a single layer. 2. Bake in the preheated oven for about 15 to 20 minutes. Stir halfway through to help them cook evenly. 3. Watch them closely to avoid burning. You want them golden brown and fragrant. 4. Once done, take them out and let them cool on the baking sheet. The glaze will harden as they cool. Enjoy your delicious Sriracha glazed almonds! For the full recipe, check [Full Recipe]. To get that crunchy coating, coat the almonds evenly. Make sure the glaze covers every almond. This ensures each one gets that spicy-sweet flavor. Stir them well in the bowl before baking. A common mistake is to skip stirring during baking. Stir halfway through to cook evenly. Keep an eye on them to prevent burning. If you see them darkening too fast, take them out early. For a beautiful presentation, serve the Sriracha glazed almonds in a small bowl. Add a sprinkle of sesame seeds and chopped green onions on top. This adds color and flavor. Pair these almonds with a cold drink. They go well with beer, iced tea, or a fruity soda. These drinks balance the heat and sweetness of the almonds. Store your glazed almonds in an airtight container. This keeps them fresh and crunchy. Glass jars or plastic containers work well. Do not store them in a warm or moist place. A cool, dry pantry is best. They can last up to two weeks if stored right. Enjoy your Sriracha glazed almonds as a tasty snack anytime! {{image_2}} Flavor customizations can make Sriracha glazed almonds your own. You can easily add spices for an extra kick. Consider cayenne pepper or chili powder. These spices can boost the heat level. Use just a pinch to start, then adjust to taste. You can also switch up the nuts. While almonds are great, try cashews or pecans. Each nut brings a unique flavor and texture. Roasting different nuts can create fresh and exciting snacks. Next, let’s talk about dietary adaptations. These almonds are naturally gluten-free. If you need to avoid gluten, you can use tamari instead of soy sauce. Tamari works well and keeps the flavor intact. For a vegan-friendly option, swap honey with maple syrup or agave. Both options add sweetness without animal products. Just make sure to adjust the amount to match your taste. Seasonal variants can add fun to your snack. During the holidays, think about adding cinnamon or nutmeg. These spices can make the almonds feel festive and warm. At parties, you can make festive versions by mixing in dried fruits. Dried cranberries or apricots add sweetness and color. This makes your snack a real showstopper. Try these variations to keep your Sriracha glazed almonds exciting and tasty. For the full recipe, check back to the main section. Sriracha glazed almonds last about 1 to 2 weeks when stored properly. Keep them in an airtight container at room temperature. Avoid warm or humid places, as this can make them lose crunch. For the best flavor and texture, try to eat them within the first week. You can reheat leftovers, but it’s not always necessary. If you want them warm, use an oven. Set it to 350°F (175°C) and spread the almonds on a baking sheet. Heat for about 5-10 minutes. This brings back their crunch. Just watch closely to prevent burning. Yes, Sriracha glazed almonds can be frozen. Place them in a freezer-safe bag or container. They stay good for about 3 months in the freezer. When you’re ready to use them, take out the amount you need. Let them thaw at room temperature for about 30 minutes. You can also reheat them in the oven for extra crispiness. Sriracha sauce is a hot sauce made from chili peppers, vinegar, garlic, sugar, and salt. It comes from Thailand. The name Sriracha refers to the town where it first appeared. This sauce has a bright red color and a bold, spicy flavor. It adds zest to many dishes and snacks. Yes, you can use different nuts. Cashews, pecans, or walnuts work well. Each nut has its unique taste and texture. Cashews are creamier, while pecans have a rich flavor. Feel free to mix and match to find your favorite! These glazed almonds pack a punch! The heat from Sriracha can be strong. If you love spice, you’ll enjoy them. For milder heat, use less Sriracha in the glaze. You can also add more honey to balance the spice. You can make the glaze sweeter by adding more honey. This will change the flavor a bit. For a less sweet version, reduce the honey. Experiment to find the flavor that suits you best! Sriracha glazed almonds go great with Asian-inspired dishes. Try them with stir-fries, sushi, or noodle bowls. They also make a fun snack at parties. Serve them with drinks for a tasty treat. For a twist, pair them with cheese or fresh fruit. To wrap up, we covered how to make Sriracha glazed almonds. You learned about key ingredients, like raw almonds and honey. We also shared tips for perfecting your glaze and keeping these snacks fresh. Don't forget the fun variations you can try, from spice additions to seasonal flavors. Enjoy these snacks at parties or with drinks. By following these steps, you'll create tasty treats that impress everyone! Making simple adjustments can lead to new favorite recipes. Happy snacking!](https://cheftaling.com/wp-content/uploads/2025/05/8e8b8fa4-9112-4c7c-86e5-3953cab055ec-300x300.webp)
![To make crispy lemon potatoes with dill ricotta, gather these ingredients: - 1.5 pounds baby potatoes, halved - 3 tablespoons olive oil - 2 cloves garlic, minced - Zest of 1 lemon - Juice of 1 lemon - 1 teaspoon salt - ½ teaspoon black pepper - 1 teaspoon dried oregano - Fresh dill, for garnish - 1 cup ricotta cheese - 2 tablespoons fresh dill, finely chopped - Salt and pepper to taste If you need to make swaps, here are some ideas: - Use Yukon gold potatoes instead of baby potatoes for a buttery taste. - Swap olive oil for avocado oil for a different flavor. - Greek yogurt can replace ricotta for a lighter option. - Fresh herbs like parsley can stand in for dill if you prefer. Choosing the right ingredients makes a big difference. Here’s what to look for: - Pick firm, smooth baby potatoes with no blemishes. - Fresh dill should smell bright and have vibrant green color. - Look for ricotta with a creamy texture; it should not be dry. - Use fresh lemons for the best zest and juice flavor. - Always choose high-quality oil for richer taste in your dish. For the full recipe, check out the [Full Recipe]. To start, gather your ingredients. You need: - 1.5 pounds baby potatoes, halved - 3 tablespoons olive oil - 2 cloves garlic, minced - Zest of 1 lemon - Juice of 1 lemon - 1 teaspoon salt - ½ teaspoon black pepper - 1 teaspoon dried oregano - Fresh dill, for garnish - 1 cup ricotta cheese - 2 tablespoons fresh dill, finely chopped - Salt and pepper to taste First, preheat your oven to 425°F (220°C). In a large bowl, mix the halved baby potatoes with olive oil, minced garlic, lemon zest, lemon juice, salt, black pepper, and dried oregano. Make sure the potatoes are well-coated. Next, spread them on a baking sheet. Keep them in a single layer with space in between. This helps them get crispy. Roast the potatoes in the preheated oven for 25 to 30 minutes. Flip them halfway through to ensure even cooking. Look for a golden brown color. The right heat and space will give you that perfect crunch. While the potatoes cook, prepare the dill ricotta. In a medium bowl, mix the ricotta cheese with finely chopped dill. Add salt and pepper to taste. This creamy mix pairs perfectly with the crispy potatoes. Once the potatoes are out of the oven, let them cool for a couple of minutes. Serve them warm, topped with the dill ricotta and fresh dill for garnish. These crispy lemon potatoes make a great side dish. Try them with grilled chicken or fish. They also fit well in a brunch spread. You can even enjoy them as a snack! For more details, check the Full Recipe. To make your Crispy Lemon Potatoes the best they can be, you need to focus on a few key steps. First, always cut the potatoes into even halves. This helps them cook at the same rate. Next, coat them well in olive oil. Oil helps create that crisp golden crust we all love. Spread the potatoes out on your baking sheet. Don’t crowd them! Give each piece room to breathe. If they touch, they will steam instead of crisp. Flip them halfway through cooking to ensure even browning. Having the right tools can make your cooking easier and fun. Here’s what you need: - Large mixing bowl - Baking sheet - Parchment paper (optional, for easy cleanup) - Sharp knife - Cutting board - Spatula for flipping These tools help you prepare and cook the potatoes properly. A sharp knife will make cutting easy. A good baking sheet allows for even heat distribution. Everyone makes mistakes, but you can learn from them. Here are some to watch out for: - Using cold potatoes: Always use room temperature potatoes for better cooking. - Not drying potatoes: If the potatoes are wet, they won’t crisp up well. - Skipping the flipping step: Flipping helps create a nice, even crust. - Overcrowding the pan: If the potatoes are too close, they will steam instead of roast. By avoiding these mistakes, you’ll enjoy perfect crispy potatoes every time. For more details, check the Full Recipe. {{image_2}} You can easily change the taste of your crispy lemon potatoes. Try adding herbs like rosemary or thyme for a new twist. You can also mix in spices like smoked paprika or cumin for a different flavor. For a bit of heat, add red pepper flakes. If you want a touch of sweetness, sprinkle some honey or maple syrup before roasting. These small changes can make your dish feel fresh and exciting. While dill ricotta is tasty, there are other great options. You could use a tangy yogurt sauce or tzatziki for a cool dip. For a creamier touch, try sour cream mixed with chives. If you like something spicy, a sriracha aioli adds heat and flavor. You can also top the potatoes with feta cheese or a sprinkle of parmesan for an extra kick. For a vegan twist, swap the ricotta for a cashew cream. Soak cashews, then blend them with lemon juice, garlic, and herbs. This mix gives you a creamy, dairy-free option. You can also use silken tofu blended smooth with lemon and dill for a similar taste. This way, everyone can enjoy the crispy lemon potatoes, no matter their diet. For the full recipe, check out the Crispy Lemon Potatoes with Dill Ricotta. To keep your crispy lemon potatoes fresh, let them cool first. Place them in an airtight container. Store them in the fridge if you plan to eat them within three days. For best flavor, do not stack them too tightly. This way, they won’t lose their crunch. When you’re ready to enjoy the leftovers, don’t microwave them! Instead, use your oven or air fryer. Preheat your oven to 400°F (200°C). Spread the potatoes on a baking sheet. Bake for about 10-15 minutes until they are hot and crispy again. You can also use an air fryer for about 5-7 minutes. If you want to save them for later, you can freeze the potatoes. First, let them cool completely. Then, spread them out on a baking sheet. Freeze them for 1-2 hours until firm. After that, transfer them to a freezer bag. They can last up to three months. When you’re ready to eat, just reheat them as mentioned above. This way, your crispy lemon potatoes with dill ricotta will taste great even after storage! For the complete recipe, check out the Full Recipe. To make your potatoes crispier, make sure they are dry before cooking. After rinsing, pat them dry with a towel. Using a hot oven helps too. Roast them at 425°F (220°C) as the recipe suggests. Spread the potatoes out on the baking sheet. Give them space so they don’t steam. Flip them halfway through cooking to get even crispness. Yes, you can use different types of potatoes. Yukon Golds and reds work well. They have a creamy texture and hold up during cooking. Just remember, larger potatoes may need more time to cook. Cut them into smaller, even pieces for best results. If you don’t have dill ricotta, try using plain ricotta with fresh herbs. You can mix in chives or parsley for a different flavor. Cream cheese could also work, but you may want to thin it out with some milk. Greek yogurt is a great option too. It adds a nice tang and creaminess. For the full recipe, check out the section above. In this post, we explored key ingredients for a perfect dish. We discussed ingredient substitutions and tips on selecting quality items. Step-by-step, I provided cooking instructions for that crispy texture and serving ideas to impress. You learned essential tools to use and common mistakes to avoid. Don’t forget variations for added flavor and how to store leftovers. Keep your cooking fun and simple. With these tips, you’ll serve up delicious meals every time. Enjoy your cooking journey!](https://cheftaling.com/wp-content/uploads/2025/05/72e14973-1bf3-41e8-9d53-3434c6fde3a4-300x300.webp)

![To make Caribbean Chicken and Rice, you need these fresh ingredients: - 4 chicken thighs, bone-in and skin-on - 1 cup basmati rice - 1 can (15 oz) coconut milk - 1 cup chicken broth - 1 onion, finely chopped - 3 cloves garlic, minced - 1 red bell pepper, diced - 1 tablespoon fresh ginger, grated - 1 teaspoon allspice - 1 teaspoon cumin - ½ teaspoon turmeric - 1 lime, juiced - 2 tablespoons olive oil - Salt and pepper to taste - Fresh cilantro, chopped (for garnish) Using fresh ingredients is key to this dish. Fresh chicken gives great flavor and tenderness. Fresh herbs, like cilantro, add brightness. Fresh vegetables bring crunch and sweetness. Even fresh spices can change the taste. They can turn a simple dish into something special. I always encourage using what's in season. Seasonal produce tastes better and is often cheaper. You can boost the flavor with some optional ingredients. Consider adding: - 1-2 jalapeños for heat - ½ cup peas for sweetness - A splash of soy sauce for umami - Pineapple chunks for a tropical twist These extras can change the dish and make it more unique. Feel free to get creative! You can mix and match based on what you love. Start by marinating the chicken. In a bowl, mix lime juice, ginger, allspice, cumin, turmeric, salt, and pepper. Add the chicken thighs to this mix. Make sure each piece is coated well. Cover the bowl and let it sit for at least 30 minutes. This step boosts the chicken’s flavor. You can marinate it longer if you have time. Next, heat olive oil in a large skillet or Dutch oven over medium-high heat. Once the oil is hot, add the marinated chicken, skin-side down. Sear the chicken for about 5-7 minutes until it turns golden brown. Then, flip it over and brown the other side for another 5 minutes. Remove the chicken from the skillet and set it aside. This searing locks in juices and gives a nice color. In the same skillet, add chopped onion, garlic, and red bell pepper. Sauté them for about 3-4 minutes until they soften. This step adds great aroma to the dish. Now, stir in the basmati rice. Cook it for 1-2 minutes so it toasts slightly. This helps enhance the rice's flavor. Next, pour in the coconut milk and chicken broth. Stir everything to combine well. Bring this mixture to a gentle simmer. Return the seared chicken thighs to the skillet, skin-side up. Nestle them into the rice mixture. Cover the skillet and reduce the heat to low. Cook for 25-30 minutes. This allows the rice to absorb flavors and become tender. Make sure the chicken reaches an internal temperature of 165°F (75°C). Once cooked, remove from heat and let it sit, covered, for 5 minutes. Fluff the rice gently with a fork, mixing it with the chicken. Finally, garnish with fresh chopped cilantro before serving. You can find the complete instructions for this flavorful dish in the Full Recipe. To get real Caribbean flavor, use fresh ingredients. They make a big difference. Fresh herbs like cilantro and thyme add brightness. Use spices like allspice and cumin for warmth and depth. For a kick, add scotch bonnet peppers. If you cannot find them, use jalapeños as a milder option. Always marinate your chicken. This step allows flavors to soak in and makes it juicy. One common mistake is not marinating the chicken long enough. Thirty minutes is the minimum. For better taste, marinate overnight. Another mistake is cooking the rice too long. Keep an eye on it. Overcooking makes it mushy. Remember to fluff the rice gently. This keeps grains separate. Lastly, don’t skip the garnishing step. Fresh cilantro adds color and flavor. Use a large skillet or a Dutch oven for this dish. These pans help cook everything evenly. A wooden spoon is great for stirring. It won’t scratch your pan. Use a meat thermometer to check chicken doneness. You want it to reach 165°F (75°C). This ensures it is safe to eat. A lid is also important. It helps trap steam for fluffy rice. For more details, check out the Full Recipe. {{image_2}} You can easily turn Caribbean Chicken and Rice into a vegetarian dish. Swap the chicken for chickpeas or tofu. Use vegetable broth instead of chicken broth. The coconut milk adds creaminess and flavor. Add more veggies like zucchini, carrots, or peas. This way, you keep the vibrant taste while making it meat-free. If you love heat, add some spice to your dish. Use chili powder or cayenne pepper in the marinade. You can also toss in some diced jalapeños or habaneros when you sauté the veggies. For a smoky flavor, add smoked paprika. This will give your dish a fiery kick while still tasting amazing. While basmati rice is great, you can try other types. Jasmine rice works well for a fragrant twist. Brown rice is a healthy option and adds a nutty flavor. Quinoa is another alternative for a protein boost. Just adjust your cooking time and liquid amounts based on the rice you choose. Each type brings its own unique taste and texture to your dish. For the full recipe, check out Caribbean Chicken and Rice. After cooking, let the Caribbean chicken and rice cool down. Once cooled, store it in a container. Make sure to seal it tightly. This dish will stay fresh in the fridge for up to three days. When you’re ready to eat, check the smell and look for any signs of spoilage. You can freeze Caribbean chicken and rice for later use. Place the cooled dish in an airtight container. It’s best to store it in single servings for easy thawing. This meal can last in the freezer for about three months. When you’re ready to enjoy it, just thaw it overnight in the fridge. To reheat, you can use the microwave or stovetop. If using the microwave, cover the dish to keep moisture in. Heat in short bursts, stirring in between. If using the stovetop, add a splash of chicken broth. This keeps the dish moist. Heat over low until warmed through. Enjoy your flavorful one-pot dish! For the full recipe, check out the [Full Recipe]. Caribbean Chicken and Rice has roots in many Caribbean islands. It blends African, Spanish, and indigenous flavors. This dish reflects the region's rich history and diverse culture. You can find variations in places like Jamaica, Puerto Rico, and Trinidad. Each island adds its unique twist, using local spices and cooking methods. The use of coconut milk, rice, and chicken connects many Caribbean communities. Yes, you can use various cuts of chicken for this dish. Chicken thighs add rich flavor and moisture. However, chicken breasts work well too if you prefer leaner meat. You can also try wings or drumsticks. Just remember to adjust cooking times to ensure everything cooks evenly. The key is to keep the skin on for added flavor and crispiness. You can make Caribbean Chicken and Rice healthier with a few easy swaps. First, use less coconut milk or choose light coconut milk. This will cut down on fat and calories. Second, add more vegetables to increase fiber and nutrients. Bell peppers, peas, or spinach are great options. You can also use brown rice instead of white for more health benefits. Finally, reduce the amount of salt in your seasoning. This way, you keep the flavor without the added sodium. Check the [Full Recipe](#) for more tips! This blog post covered all you need to know about Caribbean Chicken and Rice. We explored the right ingredients, the marinating process, and cooking techniques. I shared tips for authentic flavors and common mistakes to avoid. You can also find tasty variations and storage tips. Remember, using fresh ingredients makes a huge difference. Enjoy trying different spices and rice types to create your perfect dish. I hope you feel ready to cook and enjoy this delicious meal!](https://cheftaling.com/wp-content/uploads/2025/05/e9618468-2cc9-4470-88f8-6f7551140f3c-300x300.webp)


![- 1 ½ cups chocolate cookie crumbs - 16 oz cream cheese, softened - ¼ cup fresh orange juice - 1 cup semi-sweet chocolate chips These main ingredients create the base for your delicious cheesecake. The chocolate cookie crumbs form a tasty crust, while the cream cheese gives it a rich texture. Fresh orange juice adds a bright, zesty flavor that complements the chocolate. Semi-sweet chocolate chips enhance the chocolatey taste, making every bite delightful. - 1 cup whipped cream - Orange slices - Chocolate shavings Using optional garnishes makes your cheesecake look and taste even better. Whipped cream adds a light touch. Orange slices give a fresh pop of color. Chocolate shavings add a nice, elegant finish. Feel free to mix and match these garnishes to make the dessert your own. - 9-inch springform pan - Electric mixer - Microwave or double boiler Having the right equipment is key for this recipe. A 9-inch springform pan helps you easily remove the cheesecake after baking. An electric mixer makes blending the cream cheese quick and easy. Use a microwave or double boiler to melt chocolate smoothly without burning it. These tools will ensure your cheesecake turns out perfectly. For the full recipe, check out [Full Recipe]. Set your oven to 325°F (160°C). Preheating helps the cheesecake cook evenly. In a medium bowl, mix 1 ½ cups of chocolate cookie crumbs with ½ cup of melted unsalted butter. Use a fork to blend until the crumbs look wet. Press this mixture firmly into the bottom of a 9-inch springform pan. Bake for 10 minutes. Let it cool before adding the filling. In a large mixing bowl, beat 16 oz of softened cream cheese with ½ cup of granulated sugar. Use an electric mixer for a smooth and creamy texture. This step is key for a rich filling. Add 2 large eggs to the cream cheese mix, one at a time. Mix well after each egg. Then, add 1 teaspoon of vanilla extract, the zest of 1 large orange, and ¼ cup of fresh orange juice. Blend until smooth. In a microwave or double boiler, melt 1 cup of semi-sweet chocolate chips. If using the microwave, heat in short bursts to avoid burning. Stir until smooth and let it cool slightly. Fold the melted chocolate into the cream cheese mixture. Pour the cheesecake filling over the cooled crust. Smooth the top using a spatula. Bake for 45-50 minutes or until the edges are set, and the center jiggles slightly. Turn off the oven and crack the door open. Let the cheesecake cool inside for about an hour. Refrigerate for at least 4 hours or overnight for best results. You can find the complete guide to this delicious recipe in the Full Recipe section. Enjoy your baking adventure! To prevent cracks in your cheesecake, keep the oven door closed. Sudden temperature changes can cause cracks. Also, bake your cheesecake in a water bath. This keeps the heat even and moist. Wrap the springform pan in foil to avoid water leaks. This simple trick helps create a smooth surface. Using room temperature ingredients is key for a smooth cheesecake. Cold cream cheese can lead to lumps. Let the cream cheese sit out for about 30 minutes before mixing. This simple step makes a big difference. Warm eggs blend better too, so let them sit as well. For the best taste, serve your cheesecake with fresh whipped cream. It adds lightness and pairs well with chocolate and orange. You can also add orange slices and chocolate shavings on top. These garnishes make your dessert look beautiful and inviting. Enjoy your delightful cheesecake with a cup of coffee or tea for a perfect treat. {{image_2}} You can change up the flavors in your cheesecake. If you like berries, use raspberry instead of orange. Mix in lemon juice and zest for a fresh twist. You can also try mango or coconut for a tropical vibe. Each flavor adds its own touch and keeps things exciting. The crust can be fun to play with too. Instead of chocolate cookie crumbs, use graham crackers. For a gluten-free option, almond flour works well. You could even use crushed nuts for a crunchy base. Each choice gives your cheesecake a new taste and texture. If you want to skip baking, a no-bake cheesecake is easy. Start by mixing cream cheese and sugar until smooth. Then, fold in whipped cream for a light texture. Instead of baking, chill it in the fridge for at least four hours. This gives it a creamy, soft feel. You can still use the same toppings for a delicious finish. For more details, check the Full Recipe. After you make the Chocolate Orange Cheesecake, you need to store it right. I suggest placing it in the fridge. Use a tight cover or plastic wrap. This keeps it fresh and tasty. Leftovers can last about five days in the fridge. Want to save some for later? You can freeze the cheesecake! Cut it into slices first. Wrap each slice in plastic wrap, then place them in a freezer bag. This way, you can enjoy a slice anytime. It stays good in the freezer for about three months. How long will your cheesecake last? In the fridge, it lasts about five days. If you freeze it, you can keep it for about three months. Always check for signs of spoilage, like off smells or discoloration. Enjoy your delightful dessert! For the full recipe, see the section above. To get a creamy texture, use room temperature cream cheese. Cold cream cheese will not mix well. Blend the cream cheese and sugar until you see no lumps. Mix slowly, so you do not add too much air. Overmixing can make the cheesecake dense. Yes, you can use mascarpone or ricotta cheese. These will change the taste and texture a bit. For a lighter option, try Greek yogurt. It will add a nice tang, but it may not be as rich. If your cheesecake cracks, don’t worry! You can cover it with whipped cream or chocolate ganache. To prevent cracks, cool your cheesecake slowly. Leave it in the oven with the door slightly open for an hour after baking. This helps avoid sudden temperature changes. Check for a slight jiggle in the center. The edges should be set, but the middle can move a bit. It will firm up as it cools. Another tip is to use a toothpick. Insert it into the edge, and it should come out clean for doneness. Creating a cheesecake involves simple steps using key ingredients like chocolate cookie crumbs and cream cheese. Optional garnishes like whipped cream add flair. I shared tips for texture and baking that enhance the result. You can also try fun variations, whether you prefer raspberry or lemon flavors. Remember to store leftovers properly to enjoy your dessert longer. With these methods and insights, you can make a delightful cheesecake and wow your friends and family. Happy baking!](https://cheftaling.com/wp-content/uploads/2025/05/36146485-df80-4df9-89fe-099f54c08c44-300x300.webp)
![- 2 cups penne pasta - 1 lb chicken breast, diced - 1 tablespoon olive oil - 1 packet ranch seasoning mix - 1 cup heavy cream - 1 cup chicken broth - 1 cup cherry tomatoes, halved - 1 cup spinach, chopped - ½ cup grated Parmesan cheese - Salt and pepper to taste - Fresh parsley for garnish - Alternatives for chicken: You can use turkey or even tofu for a tasty swap. - Dairy-free options: Use coconut cream or almond milk for a lighter sauce. - Gluten-free pasta choices: Swap penne with rice pasta or gluten-free penne. - Choosing fresh produce: Look for vibrant colors and firm textures in tomatoes and spinach. - Best type of pasta for this recipe: Penne holds sauce well with its ridges. - Quality of chicken and its impact on flavor: Fresh, free-range chicken adds depth to your dish. I hope this guide helps you select the best ingredients for making your Creamy Chicken Ranch Pasta from the [Full Recipe]. Cooking the pasta Start by boiling a large pot of salted water. Add 2 cups of penne pasta. Cook it for about 9-11 minutes, or until it's al dente. Drain the pasta and set it aside. Preparing the chicken While the pasta cooks, take 1 pound of diced chicken breast. Heat 1 tablespoon of olive oil in a large skillet over medium heat. Add the chicken, season with salt and pepper, and cook it for 5-7 minutes. The chicken should be browned and cooked through. Combining flavors in the skillet Once your chicken is cooked, sprinkle the ranch seasoning mix over it. Stir well and cook for an extra 1-2 minutes. This step brings out the rich ranch flavor. Then, pour in 1 cup of chicken broth and 1 cup of heavy cream. Stir until everything mixes nicely. Let it simmer for about 5 minutes to thicken. Adjusting cooking times for doneness After the sauce thickens, toss in 1 cup of halved cherry tomatoes and 1 cup of chopped spinach. Stir until the spinach wilts and the tomatoes soften, which takes 2-3 minutes. This adds color and nutrition. Incorporating cheese Next, add the cooked pasta to the skillet. Toss all the ingredients together until the pasta is coated in the creamy sauce. Now, mix in ½ cup of grated Parmesan cheese. Stir until the cheese melts and blends well. Taste and adjust with more salt and pepper if needed. Serving recommendations Serve the creamy chicken ranch pasta warm. Garnish with fresh parsley for a nice touch. You can also pair it with a fresh salad or some crusty bread. For the full recipe, check the details above. To get the best creamy texture, use heavy cream. It makes the sauce rich and smooth. If you want it even creamier, add more cream. You can also blend in some cream cheese for extra thickness. For seasoning, taste as you go. You might want to add more ranch mix, salt, or pepper. Adjust it to suit your taste. Searing the chicken is key for flavor. Make sure your skillet is hot before adding the chicken. This helps brown the meat and lock in juices. Cook until golden brown on all sides. For wilting spinach, add it at the end of cooking. Just toss it in the skillet until it shrinks and brightens. This keeps it fresh and vibrant. Prepare your ingredients ahead of time. Dice the chicken and chop the spinach before you start cooking. This saves time and makes cooking smoother. While the pasta cooks, you can start on the sauce. Keep an eye on both pots, and stir the sauce often. Multitasking helps you finish the dish quickly and enjoy a hot meal. {{image_2}} You can easily customize this dish with fun add-ins. Here are some great ideas: - Optional vegetables: Try adding bell peppers, zucchini, or mushrooms for extra flavor and color. - Protein substitutions: Swap the chicken for shrimp, turkey, or even tofu for a different taste. Want to kick it up a notch? Here are some flavor enhancers to consider: - Additional seasonings to try: Mix in garlic powder, onion powder, or Italian seasoning for a flavor boost. - Sauce variations for different tastes: Use Alfredo sauce or a marinara sauce base instead of ranch for a new twist. You can easily adapt this recipe to fit different diets: - Low-carb options: Replace the penne pasta with zucchini noodles or spaghetti squash. - Vegan adaptations: Use plant-based chicken, coconut cream, and nutritional yeast for a creamy, dairy-free dish. For the full recipe, check out the complete guide to Creamy Chicken Ranch Pasta. Feel free to get creative! To keep your Creamy Chicken Ranch Pasta fresh, follow these tips: - Place leftovers in an airtight container. - Allow the pasta to cool before sealing. - Store in the fridge right away. This dish stays good in the fridge for about 3 to 4 days. After that, it may lose flavor and texture. When you want to enjoy your leftovers, you can choose between microwaving or stovetop reheating. - Microwaving: Place the pasta in a microwave-safe bowl. Add a splash of milk or cream to keep it moist. Heat for 1-2 minutes, stirring halfway. - Stovetop reheating: Warm the pasta in a skillet over low heat. Stir often and add a little cream if it gets too thick. These methods help keep the creamy texture you love. If you want to save some for later, freezing is a great option. - Let the pasta cool completely. - Transfer it to a freezer-safe container or bag. Squeeze out air to prevent freezer burn. To enjoy it later, thaw overnight in the fridge. When ready, reheat it using the stovetop method for best results. This way, you’ll have a tasty meal ready to go! For the full recipe, check out the details above! How can I make Creamy Chicken Ranch Pasta ahead of time? You can cook the pasta and chicken in advance. Store them in separate containers. When ready to serve, combine them in a skillet with the sauce. This keeps your dish fresh and tasty. Can I make this recipe in a slow cooker? Yes, you can! Cook the chicken and broth in the slow cooker for about 4 hours on low. Then, stir in the cream and other ingredients. Let it cook for another 30 minutes. This method gives great flavor! What are the variations of ranch seasoning? Ranch seasoning comes in many forms. You can find packets, jars, or homemade blends. Some may include garlic powder or herbs. These variations can add unique flavors to your dish. How can I reduce cooking time? To save time, use pre-cooked chicken or rotisserie chicken. This allows you to skip the cooking step. You can also use quick-cook pasta. It cooks in just a few minutes! What if my pasta isn't cooked al dente? If your pasta is too soft, don't worry! It will still taste good in the dish. Just remember for next time to watch the cooking time closely. Can I use a different type of cheese? Absolutely! You can use mozzarella, cheddar, or even cream cheese. Each cheese gives a different taste. Choose what you like best! What can I substitute for heavy cream? You can use milk mixed with cornstarch as a thickener. Coconut cream is another great choice. It adds a nice flavor and keeps it creamy! This blog post guides you through making Creamy Chicken Ranch Pasta, covering essential ingredients, cooking techniques, and expert tips. You can choose substitutes to fit dietary needs and learn storage methods to maximize freshness. In this simple dish, flavor and texture shine. You can customize it to your taste while enjoying a mix of creamy goodness and vibrant veggies. With this knowledge, you can create a meal that delights everyone at the table. Happy cooking!](https://cheftaling.com/wp-content/uploads/2025/05/168efe92-a9df-4332-98c6-b2750f7c28af-300x300.webp)
![- 1 can (15 oz) chickpeas, drained and rinsed - 1 tablespoon gochujang (Korean chili paste) - 1 medium onion, chopped - 2 cloves garlic, minced - 1 inch ginger, grated - 2 carrots, diced - 1 celery stalk, diced - 1 red bell pepper, diced - 4 cups vegetable broth - 1 cup coconut milk - 2 tablespoons soy sauce - 1 tablespoon sesame oil - Salt and pepper to taste - Fresh cilantro, for garnish - Lime wedges, for serving When selecting ingredients, focus on freshness and quality. Choose chickpeas that are firm and dry. For vegetables, look for vibrant colors and firm textures. Fresh ginger should feel smooth and not shriveled. Gochujang can enhance your soup with its unique heat and flavor. Look for it in Asian markets or the international aisle of your grocery store. This ensures you get the best taste in your dish. Always use low-sodium vegetable broth for a healthier option. It allows you to control the salt level better. Coconut milk should be full-fat for creaminess. This gives the soup a rich texture and flavor. Enjoy making this soup with great ingredients for a delightful meal. You can find the full recipe above. 1. Start by heating sesame oil in a large pot over medium heat. 2. Add the chopped onion and sauté until it turns clear, about 5 minutes. 3. Stir in minced garlic and grated ginger. Cook for 1-2 minutes until you smell the aroma. 4. Next, add diced carrots, celery, and red bell pepper. Cook for 5-7 minutes, stirring often until the veggies soften. 5. Mix in the gochujang and let it cook for one minute to release its flavor. 6. Now, add drained chickpeas, vegetable broth, and soy sauce. Bring it to a boil, then reduce the heat to a simmer. 7. Allow the soup to simmer for 15-20 minutes, letting all the flavors blend. 8. Stir in the coconut milk and season with salt and pepper to your taste. Let it simmer for another 5 minutes until it’s hot. For optimal cooking, keep an eye on the heat. Stir often to avoid burning. This soup cooks well without rushing, so patience is key. This soup shines with fresh toppings. Here are some ideas: - Garnish with fresh cilantro for a burst of flavor. - Serve lime wedges on the side for a zesty kick. Pair the soup with a light drink. A crisp sparkling water or a refreshing iced tea works great. You can find the full recipe at the [Full Recipe] link for more details. To enhance the flavor of your Gochujang chickpea soup, use fresh ingredients. Fresh onions, garlic, and ginger bring depth to your dish. Sauté them until they smell great. This step builds a strong base for your soup. Adding gochujang is key. Mix it in after you soften the veggies. This allows its rich taste to shine. When you add coconut milk, it gives the soup a creamy texture. Stir it in at the end for the best results. For texture, ensure your vegetables are cut evenly. This helps them cook at the same rate. You want soft veggies but not mushy ones. If you like a thicker soup, blend a part of it. This adds creaminess while keeping some whole chickpeas. One common mistake is adding too much gochujang. Start with one tablespoon. You can always add more if you like it spicier. Another mistake is not using enough broth. The soup needs enough liquid to balance the spices. When cooking, avoid high heat. Cooking on medium allows flavors to develop. If you rush, your soup may taste flat. For ingredient swaps, if you don’t have chickpeas, use lentils. They cook faster and still taste great. Remember, fresh herbs like cilantro should be added last. This keeps their flavor bright. Using stale spices can dull your soup, so check your pantry. Follow these tips, and you’ll enjoy a delicious Gochujang chickpea soup. For the full recipe, refer to the recipe section. {{image_2}} If you want to swap chickpeas, try using lentils or white beans. Lentils cook fast and add protein. White beans give a creamy texture. Both options keep the soup hearty and filling. For a spicy kick, consider adding diced jalapeños or crushed red pepper flakes. These ingredients boost heat and enhance the soup's flavor profile. You can also mix in some diced sweet potatoes for a sweet contrast. To make your soup even better, think about herbs and spices. Fresh cilantro adds brightness and freshness. You might also try basil or parsley for a different taste. For more depth, enhance your broth base. You can use mushroom broth instead of vegetable broth. This change adds umami and richness. Another tip is to squeeze fresh lime juice into the soup before serving. It gives a zesty finish that brightens all the flavors. For the full recipe, check out the details above. Store any leftover gochujang chickpea soup in an airtight container. This helps keep it fresh. Allow the soup to cool before sealing the container. It will last in the fridge for about 3 to 4 days. The flavors will deepen as it sits, making it even tastier. To freeze your soup, let it cool completely. Pour it into freezer-safe bags or containers. Leave some space at the top, as the soup will expand when frozen. Your soup can stay good in the freezer for up to 3 months. When you want to reheat, move the soup to the fridge the night before. This will help it thaw slowly. Reheat it on the stove over low heat. Stir often to prevent it from sticking. If it seems too thick, add a splash of vegetable broth or water. Enjoy your meal! For the full recipe, check out the complete guide to making this flavorful dish. Can I make this soup ahead of time? Yes, you can make this soup ahead of time. It tastes even better the next day. Just store it in an airtight container in the fridge. When you are ready to eat, heat it gently on the stove. What is gochujang, and where can I find it? Gochujang is a spicy Korean chili paste. It adds a deep flavor and heat to dishes. You can find it in most grocery stores, usually in the international aisle. You can also find it in Asian markets or online. Overview of calories and macronutrients This soup is not only tasty but also healthy. One serving has about 300 calories. It includes protein, fiber, and healthy fats. Here’s a quick breakdown: - Protein: 10g - Carbohydrates: 40g - Fat: 12g Health benefits of the main ingredients - Chickpeas: High in protein and fiber, great for digestion. - Coconut milk: Provides healthy fats that support heart health. - Vegetables: Packed with vitamins and minerals for overall wellness. - Gochujang: Contains antioxidants and may boost metabolism. This soup is a flavorful healthy delight packed with nutrients. Check out the Full Recipe for a delicious meal! This blog post detailed the key ingredients, cooking steps, and tips to make a delicious soup. We discussed how to choose quality ingredients and avoid common cooking mistakes. You saw variations for dietary needs and learned how to store leftovers for later use. Understanding these steps will help you create tasty meals with ease. Enjoy experimenting and sharing delicious flavors with others. Happy cooking!](https://cheftaling.com/wp-content/uploads/2025/05/f043bbf0-d46f-46ca-b80c-f4a4fc6fec8e-300x300.webp)


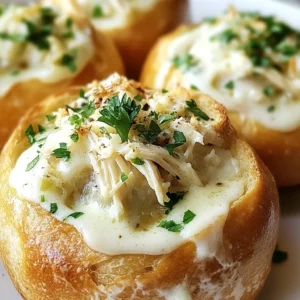


![Here’s what you need to make Hawaiian garlic shrimp. Gather these items before you start cooking. - 1 pound large shrimp, peeled and deveined - 4 tablespoons unsalted butter - 4 tablespoons olive oil - 6 cloves garlic, minced - 1 teaspoon red pepper flakes - 1 teaspoon smoked paprika - Salt and pepper, to taste - Juice and zest of 1 lemon - Fresh parsley, chopped (for garnish) - Cooked jasmine rice (for serving) Each ingredient plays a key role. The shrimp bring a sweet taste and firm texture. Butter and olive oil create a rich base for the sauce. Garlic adds a strong aroma and flavor. Red pepper flakes give a slight kick, while smoked paprika adds depth. The lemon juice brightens the dish, and parsley adds freshness. You can serve this dish over jasmine rice to soak up the sauce. If you want to see the full recipe, check out Hawaiian Garlic Shrimp. - Preheat the skillet with olive oil and butter. - Sauté garlic and spices. - Add shrimp and seasonings. Start by heating 4 tablespoons of olive oil and 2 tablespoons of unsalted butter in a large skillet over medium heat. Wait until it melts and begins to sizzle. This step is key. The hot oil and butter will help the garlic cook perfectly. Next, add 6 cloves of minced garlic to the skillet. Stir it for about one minute. You want it fragrant but not burnt. This is the base of your flavor. After that, toss in 1 teaspoon of red pepper flakes and 1 teaspoon of smoked paprika. Let them cook for about 30 seconds to release their flavors. Now, it's time to add the shrimp. Use 1 pound of large shrimp that are peeled and deveined. Season them with salt and pepper. Cook for about 2-3 minutes on each side. You want them to turn pink and opaque. This means they are done cooking. - Cook shrimp until pink and opaque. - Incorporate remaining ingredients. Once the shrimp are nearly cooked, it's time to add the rest. Squeeze in the juice of 1 lemon and add its zest. Toss everything together well. Make sure the shrimp are well-coated in the buttery sauce. This adds a bright, fresh taste. After mixing, remove the skillet from the heat. Let it sit for a minute. This allows the flavors to meld. - Plate shrimp over jasmine rice. - Garnish for presentation. For serving, place the garlic shrimp over a bed of cooked jasmine rice. This rice soaks up the delicious sauce. It also makes a lovely base for the shrimp. Finally, garnish your dish with fresh chopped parsley. This adds color and a touch of freshness. Enjoy the vibrant flavors of your Hawaiian garlic shrimp! Check out the Full Recipe for more details. - Recommended shrimp sizes and types: I love using large shrimp for this dish. They stay juicy and tender. Look for shrimp labeled as "21-25 count." They are perfect for quick cooking. You can use fresh or frozen shrimp, but ensure they are peeled and deveined for ease. - Avoiding overcooking shrimp: Shrimp cook fast. When they turn pink and opaque, they are done. It takes about 2-3 minutes per side. Watch carefully; overcooked shrimp become rubbery. If you see them curling tightly, it’s a sign to take them off the heat. - Adding more spices or herbs: Want extra flavor? Try adding cayenne for heat. You can also use fresh herbs like basil or cilantro for a fresh twist. A pinch of thyme or oregano adds depth too. Feel free to experiment based on your taste. - Suggested side dishes: Serve your Hawaiian garlic shrimp with jasmine rice. It soaks up the sauce well. You can also pair it with a simple salad or some steamed vegetables. A side of crusty bread works great too, perfect for dipping! - Best practices for plating: For a beautiful presentation, place the shrimp over a mound of jasmine rice. Drizzle some of that buttery sauce on top. Add a sprinkle of fresh parsley for color. This makes your meal look as good as it tastes. - Pairing with drinks: A light, crisp white wine pairs well with garlic shrimp. Think Sauvignon Blanc or Pinot Grigio. If you prefer non-alcoholic drinks, try coconut water or a refreshing lemonade. Both enhance the tropical vibe of this dish. For the full recipe, check out the [Full Recipe]. {{image_2}} You can switch up the protein in your Hawaiian garlic shrimp. Instead of shrimp, try chicken or tofu. Both options work well with the garlic and butter sauce. Chicken cooks similarly and absorbs flavors nicely. Tofu is great for a lighter, plant-based meal. Just make sure to press it to remove excess moisture. If you need a dairy-free choice, use coconut oil instead of butter. It adds a nice tropical flavor. You can also skip the butter altogether and use more olive oil. This keeps the dish rich and tasty without dairy. Hawaiian garlic shrimp has many tasty versions. In Hawaii, you might find variations that include local spices or fresh fish. Some recipes add a hint of sweetness with pineapple or mango. Others use local herbs like green onion or cilantro. Each adds a unique twist that reflects the islands' flavors. Globally, chefs give this dish their own spin. In Spain, you might see a version with chorizo for added spice. In Thailand, cooks may use fish sauce and lime for a zesty kick. Each region has its take, making garlic shrimp a versatile dish. Using seasonal ingredients changes the dish's flavor. Fresh herbs like basil or cilantro can brighten the dish in summer. Autumn brings a chance to add roasted vegetables, like bell peppers or zucchini. They add color and nutrition. Adjusting spice levels can also make a big difference. If you love heat, boost the red pepper flakes. For a milder dish, cut back on spices. This lets you tailor the recipe to your taste. Feel free to explore these variations while making your Hawaiian garlic shrimp. You can find the full recipe above to guide you on your cooking journey. To keep your Hawaiian garlic shrimp fresh, store it properly. Place the shrimp in an airtight container. This helps keep moisture in and odors out. You can safely store it in the fridge for up to two days. If you want to enjoy it later, consider freezing it. Freezing leftover shrimp is simple. First, let it cool to room temperature. Then, place the shrimp in a freezer-safe bag or container. Remove as much air as possible to prevent freezer burn. You can freeze it for up to three months. When you’re ready to enjoy it again, thaw it in the fridge overnight. This keeps it safe and tasty. Reheating shrimp can be tricky. To keep it juicy, use gentle heat. A skillet works well, just add a bit of oil or butter. Heat it over low to medium heat. Stir often and cook just until warm. This prevents rubbery shrimp. You can also reheat in the microwave. Use a covered dish and heat in short intervals. Check often to avoid overcooking. Enjoy your flavorful dish with jasmine rice from the Full Recipe! How to choose the best shrimp for this recipe? Choose large shrimp for this dish. Look for shrimp that are firm and have a slight sheen. Fresh shrimp should smell like the ocean, not fishy. You can use frozen shrimp too; just thaw them before cooking. Can I make Hawaiian Garlic Shrimp in advance? Yes, you can prepare Hawaiian Garlic Shrimp in advance. Cook the shrimp and let them cool. Store in an airtight container in the fridge for up to two days. Reheat gently on the stove before serving. What can I substitute for lemon juice? If you don't have lemon juice, you can use lime juice. Vinegar can work, but use it sparingly. Both options will give you a nice tang. Is this dish gluten-free? Yes, Hawaiian Garlic Shrimp is gluten-free. The ingredients used do not contain wheat or gluten. Always check labels to ensure no hidden gluten in sauces or seasonings. Can it be made dairy-free? Yes! You can replace butter with a dairy-free alternative, like coconut oil or vegan butter. This keeps the dish creamy without dairy. What is the best way to prevent shrimp from sticking? To prevent shrimp from sticking, make sure your pan and oil are hot before adding shrimp. This helps to sear them quickly. Do not overcrowd the pan; cook in batches if needed. How to tell when shrimp are done cooking? Shrimp are done when they turn pink and opaque. They should curl into a "C" shape. Overcooking can make them tough, so watch closely! This blog post shared a simple recipe for garlic shrimp. You learned about the key ingredients, step-by-step cooking, and helpful tips. I covered variations, storage, and answers to common questions. Now, you have all you need to create a delicious dish. Try it out, experiment with flavors, and make it your own. Enjoy your cooking journey and impress your friends and family with this tasty recipe.](https://cheftaling.com/wp-content/uploads/2025/05/184ff97d-8542-4b23-bffb-77726de3fdfe-300x300.webp)

![- 1 cup pecan halves - 1/4 cup unsalted butter - 1/2 cup brown sugar - 1 cup granulated sugar - 1/2 cup vegetable oil - 3 large eggs - 1 teaspoon vanilla extract - 2 cups all-purpose flour - 1 tablespoon baking powder - 1/2 teaspoon salt - 1 cup buttermilk - 1/2 teaspoon ground cinnamon Pecans are the stars of this cake. Their rich, nutty flavor adds depth. Unsalted butter gives the cake moisture. Brown sugar adds sweetness and a hint of caramel. Granulated sugar helps the cake rise and brown nicely. Vegetable oil ensures the cake stays moist. Eggs bind the mixture and add richness. Vanilla extract gives a warm, inviting aroma. All-purpose flour is the base, giving structure. Baking powder helps the cake rise, while salt enhances all flavors. Buttermilk adds a tangy flavor and makes the cake tender. Ground cinnamon gives a warm spice note. You can swap pecans for walnuts or almonds for a different taste. Use coconut oil instead of vegetable oil for a hint of coconut flavor. If you don’t have buttermilk, mix milk with a tablespoon of vinegar. For a dairy-free option, use almond milk with vinegar. You could also replace eggs with flaxseed meal mixed with water for a vegan cake. First, gather your ingredients. You need pecan halves, butter, brown sugar, granulated sugar, vegetable oil, eggs, vanilla extract, flour, baking powder, salt, buttermilk, and ground cinnamon. Next, preheat your oven to 350°F (175°C). This step is key to baking a great cake. Grease a 9-inch round cake pan with butter or oil. This helps the cake release easily later. In a medium saucepan over low heat, melt the butter and brown sugar. Stir them together until they bubble a bit. Pour this mixture into the bottom of your prepared cake pan. Now, arrange the pecans in a circle on top of the butter-sugar mix. Press them down gently. This makes a lovely design for when you flip the cake later. In a large bowl, combine the granulated sugar and vegetable oil. Mix them until they blend well. Add the eggs one by one, mixing well after each. Then stir in the vanilla extract. In another bowl, whisk your flour, baking powder, salt, and cinnamon. Now, alternate adding the dry mix and buttermilk to the sugar mixture. Start with the dry ingredients and end with them. Mix until just combined to keep the cake fluffy. Pour the batter over the pecans in the pan. Bake it in the preheated oven for 35-40 minutes. Check if it's done by inserting a toothpick into the center. It should come out clean. After baking, remove the pan from the oven. Let it cool for about 10 minutes. This cooling time is crucial for easy flipping. To invert the cake, place a serving plate over the pan. Carefully flip the pan upside down. Lift it off slowly to let the pecans and syrup drizzle over the cake. Let the cake cool completely before slicing. This will help you serve neat slices. Enjoy your delicious pecan upside down cake! You can find the full recipe in the earlier section. When making your pecan upside down cake, avoid overmixing the batter. Overmixing can lead to a tough cake. Mix just until the ingredients are combined. Another common mistake is not greasing the pan well. A sticky cake can ruin your beautiful design. Make sure to coat the pan with butter or cooking spray. For the best batter, use room temperature eggs and buttermilk. This helps with even mixing and a smoother texture. Start by mixing the sugar and oil well. This creates a fluffy base for your cake. Add eggs one at a time and mix well. This step is key for a rich flavor. To achieve a fluffy cake, fold dry ingredients gently into the wet mixture. Use a spatula and make slow, sweeping motions. This keeps air in the batter, making the cake light. Also, make sure to not skip the baking powder. It’s essential for that perfect rise. Finally, baking at the right temperature is crucial. An oven thermometer can help ensure accuracy. For the full recipe, check out the Pecan Paradise Upside Down Cake . {{image_2}} You can switch out pecans for other nuts. Walnuts or almonds work great too. Each nut brings its own taste and crunch. If you want a milder flavor, try hazelnuts. Just chop them up and use the same amount. You can add extra flavors to make this cake unique. For a chocolate twist, mix in some cocoa powder. A half-cup will do. If you love citrus, add some lemon or orange zest. This will brighten the cake and add freshness. You can also drizzle a bit of citrus juice over the cake before serving. To make this cake gluten-free, swap regular flour for almond or coconut flour. You can also use a gluten-free blend. For a dairy-free cake, use almond milk or coconut milk in place of buttermilk. Just remember to add a bit of apple cider vinegar for tang. These swaps keep the taste and texture delicious. For the full recipe, check out the link. To keep your pecan upside down cake fresh, store it in an airtight container. This will help keep moisture in and prevent it from drying out. Place the cake at room temperature for up to three days. If you prefer it chilled, you can refrigerate it. Just remember to bring it back to room temperature before serving for the best taste. You can freeze this cake to enjoy later. First, let the cake cool completely. Wrap it well in plastic wrap and then in aluminum foil. This helps prevent freezer burn. Freeze it for up to three months. When you're ready to eat, thaw it in the fridge overnight. To reheat your pecan upside down cake, slice it into pieces. Place the slices on a microwave-safe plate. Heat them in the microwave for about 15-20 seconds. If you prefer it warm from the oven, preheat the oven to 350°F (175°C). Bake the slices for about 5-10 minutes. This warms the cake without drying it out. For the complete recipe, check out the [Full Recipe]. Pecan Upside Down Cake stays fresh for about three days at room temperature. To keep it longer, store it in the fridge. It can last up to a week when chilled. The flavor might change slightly as it sits, but it will still taste good. Yes, you can make this cake ahead of time. Bake it, then let it cool. Once it's cool, wrap it tightly in plastic wrap or foil. It will keep well for up to two days at room temperature. For longer storage, place it in the fridge. Just remember to bring it to room temp before serving for the best taste. Serve your Pecan Upside Down Cake warm or at room temperature. The caramelized pecans on top look beautiful. You can add a scoop of vanilla ice cream or whipped cream on the side for extra flavor. This cake is perfect for special occasions or a cozy dessert after dinner. For the complete recipe, check out the Full Recipe section. This blog talked about making a delicious Pecan Upside Down Cake. We covered key ingredients, substitutions, and how to prepare and bake the cake. I shared tips to avoid mistakes and create a fluffy texture. You learned about tasty variations and how to store your cake properly. In conclusion, with these steps and tips, you can easily make a great cake. Enjoy it with friends or family, and savor the smiles it brings!](https://cheftaling.com/wp-content/uploads/2025/05/851e8e65-8d14-4ae1-84bb-03375c3b9246-300x300.webp)
. This will give you all the details you need to make this tasty snack! We explored the tasty journey of making Cheesy Garlic Crescent Rolls. We covered key ingredients, possible substitutes, and essential tools. You learned step-by-step instructions for preparation, assembly, and baking. Tips for perfecting the filling and achieving a golden color were shared. We also discussed variations, storage, and relevant FAQs. Embrace your creativity and make these rolls your own. Enjoy the fun of cooking and sharing!](https://cheftaling.com/wp-content/uploads/2025/05/b7367164-8c94-4da0-989a-e1c7f7a6efd4-300x300.webp)

![For my No Bake Mini Egg Cheesecakes, I use these simple ingredients: - 1 cup crushed graham crackers - 1/4 cup unsalted butter, melted - 2 cups cream cheese, softened - 1 cup powdered sugar - 1 teaspoon vanilla extract - 1 cup heavy cream - 1/2 cup mini chocolate or caramel eggs (for decoration) - Optional: Whipped cream for serving You can swap graham crackers with digestive biscuits for a different taste. If you don’t have unsalted butter, salted butter works too. For a lighter version, use low-fat cream cheese. You can also replace heavy cream with a non-dairy whipped topping. If you want to cut sugar, use a sugar substitute like stevia or erythritol. Mini eggs can be switched with fruit or nuts for unique flavors. Each ingredient plays a key role in this cheesecake. The graham crackers form a crunchy base. The butter helps hold the crust together. Cream cheese gives the cheesecake its creamy texture and rich flavor. Powdered sugar sweetens the mix and helps it blend smoothly. Vanilla extract adds a lovely aroma. Heavy cream makes the filling light and fluffy. Finally, mini chocolate or caramel eggs make the dessert fun and festive. They also add a sweet bite on top of the rich cheesecake. For the complete recipe, check the [Full Recipe]. To start, gather your ingredients. You will need 1 cup of crushed graham crackers and 1/4 cup of melted butter. Mix them in a medium bowl. Make sure the crumbs are well-coated with butter. This mix will form the base of your cheesecake. Line a muffin tin with cupcake liners. Press about 2 tablespoons of the graham cracker mix into the bottom of each liner. This step is key for a sturdy crust. Set aside the muffin tin while you work on the filling. Now, let’s make the filling. In a large mixing bowl, beat 2 cups of softened cream cheese until smooth. Add 1 cup of powdered sugar and 1 teaspoon of vanilla extract. Mix until everything blends well. In a separate bowl, whip 1 cup of heavy cream until you see soft peaks. This will add lightness to your filling. Gently fold the whipped cream into the cream cheese mixture. Be careful not to deflate the whipped cream too much. This step creates a fluffy texture for your cheesecake. Next, it’s time to assemble. Spoon the cheesecake filling into each cupcake liner over the graham cracker crust. Spread it evenly, filling each liner to the top. Give the tin a light tap on the counter. This helps level out the filling and remove any air bubbles. Place the mini cheesecakes in the fridge for at least 4 hours. They need time to set properly. Once set, carefully remove them from the muffin tin. Peel away the liners gently. Top each mini cheesecake with mini chocolate or caramel eggs for a fun touch. Optionally, serve with a dollop of whipped cream for extra creaminess. For the full recipe, check the earlier section. To make the perfect whipped cream, start with cold heavy cream. Use a clean bowl and beaters. Whip on medium speed until soft peaks form. This takes about 3 to 5 minutes. Don’t over-whip, or it can turn into butter. If you want a sweeter taste, add sugar as you whip. A little vanilla extract adds flavor, too. One common mistake is not using room temperature cream cheese. Cold cream cheese won’t mix well. It can make your filling lumpy. Another mistake is overfilling the cupcake liners. Leave some space for the filling to expand. Finally, don’t skip chilling time. Letting the cheesecakes set is key for the best texture. Garnishing your mini cheesecakes makes them look special. Use mini chocolate or caramel eggs for a fun touch. Fresh fruit like strawberries or raspberries adds color. You can also drizzle chocolate sauce on top. For a fancy touch, add a dollop of whipped cream. This makes the dessert even more inviting. You can find the full recipe here. {{image_2}} You can really have fun with toppings! Try using fresh fruit like strawberries or raspberries. They add a nice pop of color and flavor. You can also use crushed cookies like Oreos for a chocolate twist. If you want something unique, consider adding a drizzle of caramel or chocolate sauce. This makes each bite even more special. You can change the sweetness to fit your taste. If you like it less sweet, reduce the powdered sugar in the filling. You can also swap out the vanilla for almond extract. Almond gives a warm, nutty flavor that many enjoy. Adding lemon juice can brighten the taste, too. Just a teaspoon can make a big difference. These mini cheesecakes work for any event! For birthdays, use colorful sprinkles on top. For holidays, like Easter, stick with pastel-colored eggs. You can even make them for a summer picnic. Just serve them with fresh berries and mint leaves. They are easy to transport and always a hit. Check out the Full Recipe for more ideas on how to customize your mini egg cheesecakes! To keep your mini egg cheesecakes fresh, place them in an airtight container. Store them in the fridge for up to five days. Make sure each cheesecake is covered to prevent drying out. You can freeze these treats too! After they set, wrap each cheesecake in plastic wrap. Place them in a freezer-safe bag or container. They will stay good for up to three months. When you want to eat one, just thaw it in the fridge overnight. To keep the best flavor and texture, avoid refreezing them. Always thaw them gently in the fridge. This way, they stay creamy and delicious. If you plan to freeze them, skip adding toppings until you are ready to serve. This keeps your mini cheesecakes looking fresh and tasty. For the full recipe, check out the previous sections. You can't use real eggs in this no-bake cheesecake. The recipe uses mini chocolate or caramel eggs for decoration only. These candies give a fun touch and sweet flavor. You can also try different kinds of toppings, like fruit or nuts, instead of eggs. These mini cheesecakes stay fresh in the fridge for about five days. Just keep them in an airtight container. After that, they might lose their creamy texture. If you want to enjoy them later, consider freezing them. Yes! You can make this recipe dairy-free. Use dairy-free cream cheese and coconut cream instead of heavy cream. Both will give you a delicious taste and creamy texture. Check labels to ensure other ingredients are dairy-free. We explored the key ingredients needed for tasty mini egg cheesecakes and their roles. I shared step-by-step instructions for making the crust and filling, plus tips for great whipped cream. We also discussed how to avoid mistakes and offered garnishing ideas. For variety, I covered alternative toppings and sweetness adjustments. Lastly, I provided storage tips to keep your treats fresh. Now, you can confidently create these mini cheesecakes for any occasion. Your friends and family will love them!](https://cheftaling.com/wp-content/uploads/2025/05/c667235d-cd5f-4de6-a140-386eb558e746-300x300.webp)