Chef Taling

  • Recipes
    • Dinner
    • Desserts
    • Appetizer
    • Drinks
  • Privacy Policy
  • Contact
  • About
menu icon
go to homepage
  • Recipes
    • Dinner
    • Desserts
    • Appetizer
    • Drinks
  • Privacy Policy
  • Contact
  • About
Indulge in the mouthwatering delight of Birria Nachos, where savory birria meets crispy tortilla chips for a sensational flavor explosion. This recipe showcases tender, seasoned meat layered with gooey cheese and fresh toppings that elevate any gathering. Perfect for game days or family dinners, our step-by-step guide makes it easy to impress your guests. Click to discover the full recipe and bring this delicious fusion dish to your table!

search icon
Homepage link
  • Recipes
    • Dinner
    • Desserts
    • Appetizer
    • Drinks
  • Privacy Policy
  • Contact
  • About
Indulge in the mouthwatering delight of Birria Nachos, where savory birria meets crispy tortilla chips for a sensational flavor explosion. This recipe showcases tender, seasoned meat layered with gooey cheese and fresh toppings that elevate any gathering. Perfect for game days or family dinners, our step-by-step guide makes it easy to impress your guests. Click to discover the full recipe and bring this delicious fusion dish to your table!

×

Birria Nachos Recipe

Published: Feb 10, 2025 · by Taling · Leave a Comment

WANT TO SAVE THIS RECIPE?

Indulge in the mouthwatering delight of Birria Nachos, where savory birria meets crispy tortilla chips for a sensational flavor explosion. This recipe showcases tender, seasoned meat layered with gooey cheese and fresh toppings that elevate any gathering. Perfect for game days or family dinners, our step-by-step guide makes it easy to impress your guests. Click to discover the full recipe and bring this delicious fusion dish to your table!

Introduction

Birria nachos are a vibrant fusion dish that combines the rich and savory flavors of traditional Mexican birria with the comforting appeal of American nachos. As food enthusiasts increasingly seek inventive ways to savor classic recipes, birria nachos have surged in popularity. This delectable dish takes the familiar crunch of tortilla chips and elevates it to new heights with the succulent, seasoned meat and aromatic broth that birria is known for.

Birria nachos are a vibrant fusion dish that combines the rich and savory flavors of traditional Mexican birria with the comforting appeal of American nachos. As food enthusiasts increasingly seek inventive ways to savor classic recipes, birria nachos have surged in popularity. This delectable dish takes the familiar crunch of tortilla chips and elevates it to new heights with the succulent, seasoned meat and aromatic broth that birria is known for.

The magic of birria nachos lies in the harmonious blend of textures and flavors. As you bite into the crispy tortilla chips, you are met with the tenderness of the birria meat, enveloped in a warm, flavorful sauce. Fresh toppings like diced tomatoes, jalapeños, and creamy cheese add balance and complexity, making it a show-stopping appetizer or a hearty main course. For the best results, using quality ingredients is paramount; fresh vegetables, authentic cheese, and well-prepared birria will ensure that every bite is a celebration of flavor.

Understanding Birria

Birria has a rich history within Mexican cuisine, originating from the state of Jalisco. Traditionally, it is a celebratory dish often served at special occasions, weddings, and family gatherings. The origins of birria can be traced back to the indigenous peoples of Mexico, who used various meats and spices to create a stew that is both hearty and flavorful. While birria is commonly made with beef, it can also be prepared using lamb or goat, allowing for variations that reflect regional tastes and preferences.

The preparation of birria involves marinating the meat in a blend of spices and herbs, including dried chiles, garlic, cumin, and oregano, which infuse the meat with robust flavors. The marinated meat is then slow-cooked until tender, often in a broth made from the same spices and chiles used in the marinade. This broth, known as “consomé,” is a crucial component of birria; it not only adds moisture to the meat but also serves as a flavorful dipping sauce when serving the dish. This method of preparation highlights the cultural significance of birria as a dish meant to be shared and enjoyed in communal settings.

The versatility of birria has led to many regional variations, with each interpretation bringing its unique flair. In recent years, birria tacos have taken the culinary world by storm, with their crispy edges and juicy fillings. Now, birria nachos are gaining traction as an exciting twist that showcases the beloved flavors of birria in a new format.

Key Ingredients for Birria Nachos

To prepare a truly unforgettable plate of birria nachos, understanding the key ingredients and their roles in the dish is essential. Each component contributes to the overall flavor profile, texture, and presentation.

1. Cooked Birria Meat (Beef or Lamb): The star of the dish, the birria meat, should be tender and flavorful. Beef brisket or lamb shank are popular choices, as they become beautifully tender when slow-cooked. The meat should be shredded to allow for even distribution over the nachos, ensuring every bite is packed with flavor.

2. Birria Broth: This rich, aromatic broth is the essence of birria. It adds moisture and depth to the dish, allowing the flavors to meld beautifully. Drizzling some of the broth over the nachos not only enhances the taste but also keeps the tortilla chips from becoming too dry.

3. Tortilla Corn Chips: The foundation of the nachos, tortilla chips provide that necessary crunch. Opt for thick, sturdy chips that can hold up to the weight of the toppings. Homemade chips can be made by frying or baking corn tortillas, offering a fresher alternative to store-bought options.

4. Oaxaca Cheese (or Mozzarella): This meltable cheese is essential for achieving the gooey, cheesy texture that nachos are known for. Oaxaca cheese has a mild flavor that complements the spices in the birria without overpowering them. If Oaxaca cheese is unavailable, mozzarella is a suitable substitute.

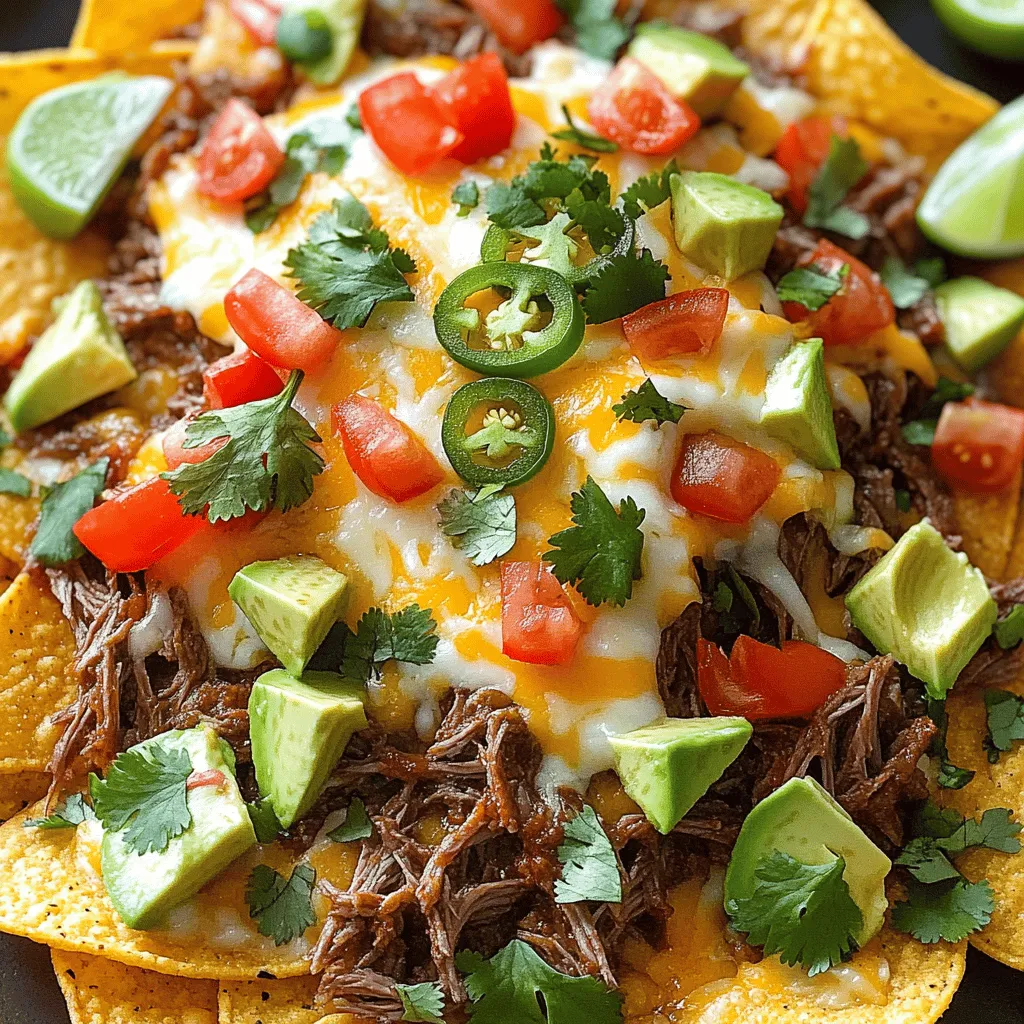
5. Fresh Vegetables: Adding diced tomatoes, red onion, jalapeño, and avocado not only enhances the visual appeal of the nachos but also adds freshness and crunch. These toppings provide a contrast to the richness of the birria and cheese, creating a well-rounded dish.

6. Cilantro: Fresh cilantro adds a burst of herbaceous flavor and a pop of color to the nachos. Its aromatic qualities brighten the dish, balancing the richness of the cheese and meat.

7. Lime: A squeeze of lime juice brings acidity to the dish, cutting through the richness and enhancing the overall flavor. Lime pairs beautifully with the spices of the birria, adding a zesty finish.

8. Optional Toppings (Sour Cream or Crema): For those who enjoy a creamy element, sour cream or Mexican crema can be drizzled on top. This adds richness and smoothness, creating an indulgent experience.

Step-by-Step Instructions to Make Birria Nachos

Preparation of the Birria Sauce

To prepare the birria sauce, you’ll want to start with a well-made birria broth if you are not using leftovers. If you have leftover birria from a previous meal, you can simply shred the meat and use the broth to enhance the nachos. However, making a fresh batch of birria can be a rewarding experience.

1. Gather Ingredients for Birria Broth:

  1. 3-4 dried guajillo chiles
  2. 2-3 dried ancho chiles
  3. 1 cup beef broth or water
  4. 2 cloves of garlic
  5. 1 teaspoon cumin
  6. 1 teaspoon oregano
  7. Salt and pepper to taste
  8. 2 pounds beef (like chuck roast or brisket)

2. Prepare the Chiles:

  1. Toast the dried guajillo and ancho chiles in a dry skillet over medium heat for 1-2 minutes until fragrant. Be careful not to burn them, as this can impart a bitter taste.
  2. Remove the stems and seeds from the chiles and place them in a blender.

3. Blend the Sauce:

  1. To the blender, add the garlic, cumin, oregano, and beef broth or water. Blend until smooth, creating a vibrant red sauce.

4. Marinate the Meat:

  1. Place the beef in a large bowl or resealable bag and pour the blended sauce over it. Ensure the meat is well-coated and let it marinate for at least an hour, or preferably overnight, in the refrigerator.

5. Cook the Meat:

  1. Transfer the marinated meat to a slow cooker or a large pot. Add enough beef broth or water to cover the meat and bring it to a boil. Reduce the heat to low and let it simmer for 3-4 hours, or until the meat is fork-tender. If using a slow cooker, cook on low for 6-8 hours.

By following these initial steps to prepare the birria, you are setting the foundation for a delicious and satisfying plate of nachos. The next steps will involve assembling the nachos using the cooked birria, fresh toppings, and cheese, creating a dish that is sure to impress friends and family alike.

Birria nachos are a vibrant fusion dish that combines the rich and savory flavors of traditional Mexican birria with the comforting appeal of American nachos. As food enthusiasts increasingly seek inventive ways to savor classic recipes, birria nachos have surged in popularity. This delectable dish takes the familiar crunch of tortilla chips and elevates it to new heights with the succulent, seasoned meat and aromatic broth that birria is known for.

Importance of Simmering for Flavor Extraction

To create truly exceptional Birria Nachos, the foundation lies in the simmering process. This technique is essential for extracting deep flavors from the spices, herbs, and meat used in the birria. When simmering, the ingredients meld together, allowing the rich, savory notes to develop fully. The low and slow cooking method not only tenderizes the meat but also creates a robust broth that can be drizzled over the nachos or served as a dipping sauce. Aim for a simmering time of at least two hours, ensuring that the flavors have time to marry and intensify.

Layering the Nachos

Layering your nachos correctly can make all the difference between a soggy plate and an outstanding dish. Start with a sturdy base of tortilla chips, ensuring they are spread out in a single layer on a baking sheet. This not only allows for even cooking but also helps maintain crispiness.

For optimal flavor distribution, follow these layering techniques:

1. Single Layering: Avoid stacking chips on top of one another. A single layer guarantees that each chip receives an equitable amount of toppings while allowing heat to circulate freely, producing a crisp texture.

2. Strategic Placement: When adding toppings, think about how flavors will interact. Start with a layer of cheese, followed by the birria meat, and then the second layer of cheese on top. This technique helps to lock in the flavors as the cheese melts.

Adding Meat and Cheese

The combination of meat and cheese is crucial for a satisfying bite of Birria Nachos. Here are some tips to maximize cheese melt and flavor integration:

  1. Use a Blend: Combine different types of cheese for a more complex flavor profile. Cheddar, Monterey Jack, and Oaxaca cheese are excellent options, providing both meltability and taste.
  2. Preheat the Cheese: If you want to ensure a gooey melt, consider warming the cheese slightly before adding it to your nachos. This small step can make a significant difference in texture.
  3. Don’t Skimp on the Meat: Generously layer the birria meat across the nachos. This not only enhances the overall flavor but also provides a hearty component to balance the cheese.

Baking to Perfection

To achieve perfectly melted cheese and crisp nachos, it’s essential to bake at the right temperature and for the appropriate amount of time.

  1. Oven Temperature: Preheat your oven to 350°F (175°C). This temperature allows the cheese to melt thoroughly without burning the chips.
  2. Baking Time: Bake the nachos for about 10-15 minutes, keeping an eye on them to prevent overcooking. The cheese should be bubbly and slightly golden, while the chips should remain crisp.

Garnishing and Assembling

Once your nachos come out of the oven, it’s time to elevate the dish with fresh ingredients.

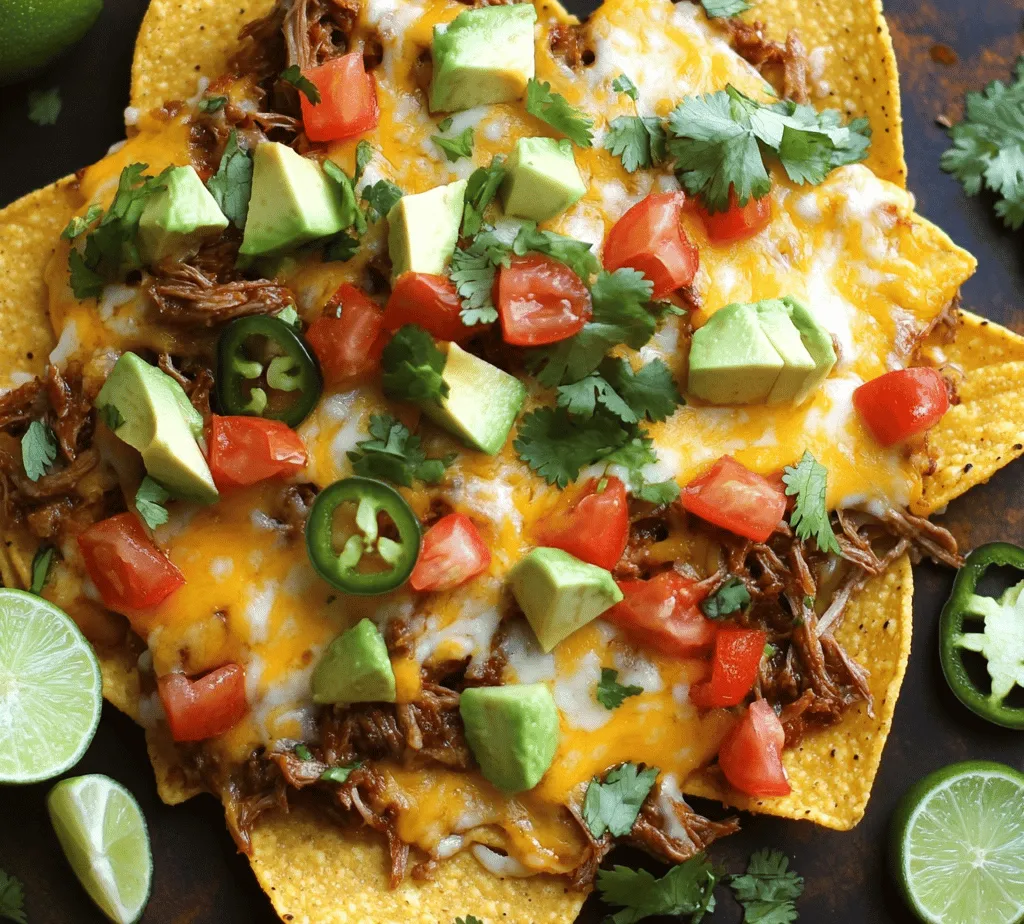
  1. Fresh Ingredients: Adding fresh toppings like diced tomatoes, chopped cilantro, and sliced jalapeños after baking creates a vibrant flavor contrast. These ingredients not only enhance the taste but also add a pop of color to your dish.
  2. Creative Presentation: Serve your Birria Nachos on a large platter or in individual bowls. Drizzle some of the reserved birria broth over the top for an inviting presentation that encourages dipping.

Serving Suggestions for Birria Nachos

Birria Nachos are perfect for various occasions. Here are some ideal scenarios for serving:

  1. Game Day Gatherings: These nachos are a crowd-pleaser and can serve as a fantastic snack during sports events.
  2. Family Get-Togethers: Whether it’s a casual dinner or a festive celebration, Birria Nachos bring a sense of fun and sharing to the table.
  3. Pairing Suggestions: Consider pairing your nachos with refreshing beverages like a chilled Mexican lager, margaritas, or even homemade horchata. These drinks complement the rich flavors of the nachos beautifully.
  4. Side Dishes: Elevate the meal experience with sides like guacamole, pico de gallo, or a fresh salad. These dishes not only enhance the overall meal but also provide a variety of textures and flavors.

Nutritional Information

When indulging in Birria Nachos, it’s essential to appreciate the nutritional benefits of the ingredients used.

  1. Protein-Rich: The birria meat contributes a significant amount of protein, vital for muscle repair and growth, making this dish a hearty option.
  2. Healthy Fats: Cheese provides healthy fats, which can help keep you satiated. Choosing lower-fat cheese options can balance the nutritional profile without sacrificing flavor.
  3. Carbohydrates: The tortilla chips deliver carbohydrates, providing the energy necessary for an active lifestyle. Opt for whole grain or baked chips for a healthier choice.

In summary, Birria Nachos are a delicious, protein-packed dish that balances fats and carbohydrates, making them a delightful treat when enjoyed in moderation.

Conclusion

Birria Nachos are not just a dish; they are a celebration of flavors and textures, offering a delicious twist on traditional nachos. The combination of slow-simmered birria, melty cheese, and fresh toppings creates a culinary experience that is both satisfying and exciting.

We encourage you to try this recipe and treat your taste buds to a flavorful adventure. Don’t stop here; explore other birria-based dishes for a deeper understanding of this traditional Mexican favorite. Whether you’re hosting a party or just craving something unique, Birria Nachos are sure to impress. Enjoy the process of cooking and the joy of sharing these delectable nachos with friends and family!

Birria nachos are a vibrant fusion dish that combines the rich and savory flavors of traditional Mexican birria with the comforting appeal of American nachos. As food enthusiasts increasingly seek inventive ways to savor classic recipes, birria nachos have surged in popularity. This delectable dish takes the familiar crunch of tortilla chips and elevates it to new heights with the succulent, seasoned meat and aromatic broth that birria is known for.

Birria Nachos

Indulge in the mouthwatering delight of Birria Nachos, where savory birria meets crispy tortilla chips for a sensational flavor explosion. This recipe showcases tender, seasoned meat layered with gooey cheese and fresh toppings that elevate any gathering. Perfect for game days or family dinners, our step-by-step guide makes it easy to impress your guests.
Print Recipe Pin Recipe

Ingredients
  

2 cups cooked birria meat (beef or lamb), shredded

1 cup birria broth

1 bag of tortilla corn chips

1 cup shredded Oaxaca cheese (or mozzarella)

1 cup diced tomatoes

½ cup diced red onion

1 jalapeño, sliced

½ cup chopped fresh cilantro

1 avocado, diced

1 lime, cut into wedges

Salt and freshly ground black pepper to taste

Optional: sour cream or crema for drizzling

Instructions
 

Prepare the Birria Sauce: If you have leftover birria broth, heat it gently in a saucepan over medium heat. If you need to make some, simmer the beef or lamb bones (or additional meat, if desired) in water along with garlic, bay leaves, cumin, and chili powder until fragrant, and then strain.

    Layer the Nachos: Preheat your oven to 375°F (190°C). On a large baking sheet, spread the tortilla chips evenly in a single layer. Drizzle a few tablespoons of the warm birria broth over the chips.

      Add the Meat and Cheese: Evenly scatter the shredded birria meat over the tortilla chips. Follow up with a generous sprinkling of Oaxaca cheese. Make sure the meat and cheese cover as many chips as possible.

        Bake: Place the nachos in the preheated oven and bake for about 10-12 minutes, or until the cheese is melted and bubbly.

          Garnish and Assemble: Once baked, remove the nachos from the oven. Immediately top with diced tomatoes, red onion, jalapeño slices, and diced avocado.

            Add Freshness: Sprinkle the chopped cilantro over the top and season with salt and pepper to taste.

              Serve: Arrange lime wedges on the side and drizzle with sour cream or crema if desired. Serve hot and enjoy!

                Prep Time: 15 minutes | Total Time: 30 minutes | Servings: 4

                  Related Recipes

                  • - 2 cups all-purpose flour - 1 packet (2 ¼ teaspoons) active dry yeast - ¾ cup warm water (110°F/45°C) - 1 tablespoon sugar - 1 teaspoon salt - 2 tablespoons olive oil - 3 tablespoons unsalted butter, melted - 4 cloves garlic, minced - ½ cup grated Parmesan cheese - 1 teaspoon dried parsley - ½ teaspoon garlic powder - Pinch of red pepper flakes (optional) These ingredients are the key to making your garlic parmesan knotted breadsticks shine. The all-purpose flour gives the breadsticks their structure, while the active dry yeast helps them rise. Warm water activates the yeast, creating those lovely bubbles. Sugar feeds the yeast, making it happy and frothy. Salt helps balance the flavors. Adding olive oil keeps the dough moist and gives it a nice texture. The unsalted butter, garlic, and Parmesan cheese bring rich flavors to every bite. Dried parsley adds a touch of color and freshness. Garlic powder gives an extra hint of garlic, while red pepper flakes can add a subtle kick if you like heat. Each ingredient plays a role in making these breadsticks delicious and easy to love. Gather these items, and you are ready to begin your baking adventure! Start by getting a small bowl. Add warm water, sugar, and yeast to it. Stir gently. Let this mixture sit for 5 to 10 minutes. You want it to get frothy. This means the yeast is active and ready to work. Next, grab a large mixing bowl. In this bowl, whisk together the flour and salt. Once the yeast mixture is frothy, pour it into the flour mix. Add the olive oil too. Stir until you see a rough dough form. Now, transfer this dough to a floured surface. Knead the dough for about 5 to 7 minutes. You want it to feel smooth and elastic. After kneading, place the dough in a lightly oiled bowl. Cover it with a clean kitchen towel. Let it rise in a warm spot for about 1 hour. The dough should double in size. Once the dough has risen, it’s time to shape it. Punch it down to release some air. Now, divide the dough into 10 equal pieces. Roll each piece into a long rope, about 8 inches long. Take each rope and tie it into a knot. Place these knotted breadsticks on a baking sheet lined with parchment paper. Before baking, preheat your oven to 375°F (190°C). In a small bowl, mix melted butter, minced garlic, garlic powder, and parsley. Brush this mixture generously over each breadstick. Now, sprinkle the grated Parmesan cheese on top. If you like heat, add a pinch of red pepper flakes. Bake the breadsticks for about 15 to 18 minutes. They should turn golden brown. Once baked, take them out and let them cool slightly before serving. To get the best dough, start with warm water. It should feel like a warm bath, around 110°F. Mix the warm water, sugar, and yeast in a small bowl. Let it sit for 5-10 minutes. You want it frothy. This shows the yeast is alive. When you mix it with flour, it will rise well. Use all-purpose flour for a soft texture. Knead the dough for 5-7 minutes. It should feel smooth and elastic. This helps create the right texture for your breadsticks. When shaping the breadsticks, divide the dough into equal pieces. Aim for ten pieces for perfect size. Roll each piece into a long rope, about 8 inches. Don't rush; take your time. Tie each rope into a knot. If you find it hard, practice makes perfect! Place them on a baking sheet lined with parchment paper. This helps them bake evenly. The flavor comes from garlic and Parmesan. Use fresh garlic for the best taste. Mince it finely and mix it with melted butter. Add garlic powder for more garlic flavor. Sprinkle dried parsley for color. For a kick, add a pinch of red pepper flakes. Brush this mix over the knots before baking. The melted butter will soak in, giving rich flavor. Don’t skip the Parmesan cheese on top. It will add a nice, salty crunch. {{image_2}} You can change up the flavor of your breadsticks by adding herbs or spices. Try mixing in fresh basil or oregano into the dough. You can also sprinkle some Italian seasoning on top before baking. If you want a kick, add a pinch of cayenne pepper to the garlic butter. These small tweaks can bring big changes to taste! While Parmesan is delicious, you can use other cheeses too. Romano gives a sharp taste, while mozzarella makes them cheesy and gooey. Crumbled feta adds a tangy twist. Experiment with your favorite cheeses to find what you love most. Mixing cheeses can create unique flavors that excite your taste buds. If you need gluten-free breadsticks, you can use a gluten-free flour blend. Look for blends that include xanthan gum, which helps with texture. Follow the same steps in the recipe. Just make sure to check your yeast to ensure it is gluten-free. You won't miss the gluten with these tasty options! To store your leftover garlic Parmesan knotted breadsticks, let them cool down first. Place them in an airtight container. You can also wrap them in plastic wrap for extra protection. Keep the container at room temperature for up to two days. If you want to keep them longer, the fridge is a good option. Just remember, they may lose some of their softness. To reheat the breadsticks, a quick method involves using the oven. Preheat your oven to 350°F (175°C). Place the breadsticks on a baking sheet. Heat them for about 5-7 minutes. If you prefer a microwave, pop them in for about 15-20 seconds. However, the oven gives a better texture. You want them warm but not hard. Freezing your breadsticks is easy and smart. First, let them cool completely. Then, wrap each breadstick in plastic wrap. Place them in a freezer bag or airtight container. They can stay in the freezer for up to three months. When you want to eat them, just thaw them in the fridge overnight. Reheat them in the oven to bring back that fresh taste. Yes, you can make the dough ahead of time. After you knead it, place it in a bowl. Cover it with plastic wrap and put it in the fridge. This will slow the rise. You can keep it there for up to 24 hours. When you are ready, let it sit at room temperature for about 30 minutes. Then, shape and bake as usual. This method can add more flavor to your breadsticks. To check if the breadsticks are done, look for a golden brown color. The edges should be crisp. You can also tap the bottom of a breadstick; it should sound hollow. If you have a food thermometer, the internal temperature should reach 190°F (88°C). If they are not done, bake for a few more minutes and check again. Garlic parmesan knotted breadsticks pair well with many dishes. Here are some ideas: - Soups: Tomato soup or minestrone work great. - Salads: A fresh garden salad adds a nice crunch. - Dips: Serve with marinara sauce or garlic butter for extra flavor. - Pasta: They complement spaghetti or fettuccine nicely. These options will make your meal even better. Enjoy experimenting! This blog post detailed how to make garlic Parmesan knotted breadsticks. We covered all the ingredients needed, simple steps to follow, and tips for perfect results. You learned about variations to suit your taste and how to store or reheat any leftovers. Cooking can be fun, and making these breadsticks is easy. Try them at your next meal. Enjoy the warm, cheesy goodness. You will impress your family and friends!
                    Garlic Parmesan Knotted Breadsticks Tasty and Simple
                  • To create a Grilled Peach Burrata Arugula Salad, you will need the following fresh ingredients: - 4 ripe peaches, halved and pitted - 2 tablespoons olive oil, divided - Salt and pepper to taste - 4 cups fresh arugula, washed and dried - 8 oz burrata cheese - 1/4 cup balsamic glaze - 1/4 cup toasted walnuts, roughly chopped - Fresh basil leaves for garnish These ingredients come together to create a dish that bursts with flavor. The ripe peaches add sweetness, while the burrata brings creaminess. Fresh arugula provides a peppery kick, and the balsamic glaze adds a tangy finish. Toasted walnuts give a satisfying crunch, and fresh basil elevates the aroma. When choosing ripe peaches, look for fruit that feels slightly soft but not mushy. This ensures they grill perfectly. Using quality olive oil enhances the whole dish. It’s worth it to pick a good one! Each ingredient plays a role, making this salad a delightful blend of tastes and textures. I love how simple ingredients can create such a gourmet experience. Enjoy the process of gathering and preparing them! First, you need to preheat your grill. Set it to medium-high heat. This step is key for perfect grilling. Next, take your ripe peaches. Halve them and remove the pits. Brush the cut sides with olive oil and sprinkle them with salt and pepper. This will help enhance their flavor. Place the peaches cut-side down on the hot grill. Grill them for about 4 to 5 minutes. You want nice grill marks and softer fruit. Once done, take them off the grill and allow them to cool for a bit. Now, grab a large salad bowl. Toss your fresh arugula with the remaining olive oil. Add a pinch of salt and pepper. Mix until the arugula is lightly coated. For plating, spread the arugula on a large serving platter. This sets the stage for the beautiful toppings. Tear the burrata cheese into smaller pieces. Place it gently on top of the arugula. The creamy cheese pairs so well with the salad. Now, arrange the grilled peach halves around the burrata. The warm peaches add a lovely contrast. Drizzle balsamic glaze over the salad. It adds sweetness and tang, making every bite delicious. Finally, sprinkle the toasted walnuts for some crunch. Don’t forget to garnish with fresh basil leaves. They add a bright and aromatic touch. Enjoy your vibrant salad! To grill peaches well, set your grill to medium-high heat. This temperature helps the peaches cook evenly while getting nice grill marks. To check if they are done, look for soft flesh and good grill marks after about 4-5 minutes. Gently press on the peach; it should feel tender but not mushy. Adding a pinch of cinnamon or a drizzle of honey can boost the peach flavor. If you want to try something different, swap the walnuts for pecans or almonds. You can also add feta cheese instead of burrata for a saltier taste. Plating your salad can make it look extra special. Spread the arugula on a big platter first. Tear the burrata into pieces and place it in the center. Arrange the grilled peaches around it for a colorful display. Use fresh basil leaves as a garnish for a pop of green and fresh aroma. {{image_2}} You can swap burrata cheese for other creamy cheeses. Try fresh mozzarella or goat cheese. Both add a nice touch. If you want a vegan option, use cashew cream or tofu. You can also change the nuts. Instead of walnuts, try pecans or almonds. You can even use pumpkin seeds for a different crunch. Each nut brings its unique flavor. Seasonal fruits make your salad exciting. In summer, use ripe peaches. In fall, add apples or pears. You can also toss in berries in spring. If you need to adjust for diets, make it gluten-free by skipping the nuts. For a vegan touch, skip the cheese and add avocado. Both options keep it fresh and tasty. Changing the vinegar can change the whole dish. Use apple cider vinegar for a fruity kick. Red wine vinegar adds depth. You can also tweak the sweet and savory balance. Add honey to the balsamic glaze for extra sweetness. For a salty punch, sprinkle on feta cheese. Each tweak creates a new flavor experience. To keep your salad fresh, store leftovers in the fridge right away. Use an airtight container for the best results. This helps prevent air from getting in and keeps your salad tasty. Make sure to keep the grilled peaches and burrata separate from the arugula. This stops the arugula from getting soggy. If you want to enjoy your grilled peaches again, reheat them gently. The best way is to use a microwave on low power. Heat them for about 20-30 seconds. You can also warm them in a pan over low heat. Be careful not to overcook them; you want to keep their soft texture. The salad can last in the fridge for about 2-3 days. The arugula stays fresh for around 1-2 days, while the grilled peaches can last for 2-3 days too. Watch for any signs of spoilage, like a sour smell or slimy texture. If you see these signs, it’s best to toss the salad. Yes, you can prep this salad ahead of time. You can grill the peaches and store them in the fridge for up to two days. Keep the arugula separate to maintain its crispness. You can also tear the burrata cheese and keep it in an airtight container. Combine everything just before serving to keep it fresh. This salad pairs well with grilled chicken or fish. You can also serve it alongside crusty bread or a light soup. A glass of chilled white wine complements the flavors nicely. For a fun twist, try it with some spicy shrimp for a flavor kick. Look for peaches that are firm but yield slightly when you press them. They should have a sweet scent and vibrant color. Avoid peaches with bruises or dark spots. If they are not ripe, you can leave them out at room temperature for a few days to ripen. This blog post showed how to make a Grilled Peach Burrata Arugula Salad. We covered ingredients, preparations, and helpful tips to elevate your dish. You learned about grilling techniques, ideal flavor pairings, and creative presentation ideas. With these steps, your salad can be a hit. Don’t hesitate to try different ingredients or methods to make it your own. Enjoy grilling and sharing this tasty salad with friends or family!
                    Grilled Peach Burrata Arugula Salad Delightful Dish
                  • To make Chili Lime Air Fryer Chickpeas, you need just a few key ingredients: - 1 can (15 oz) chickpeas, drained and rinsed - 2 tablespoons olive oil - 1 teaspoon chili powder - 1 teaspoon smoked paprika - 1/2 teaspoon cumin - 1/2 teaspoon garlic powder - Zest of 1 lime - Juice of 1 lime - Salt to taste - Fresh cilantro for garnish (optional) These simple items come together to create a crunchy snack with a zesty kick. The chickpeas are the star. They offer protein and fiber, making them a healthy choice. I recommend using a can of organic chickpeas, like Eden Foods or Goya. These brands provide great taste and quality. Look for those that have no added salt. This way, you control the flavor and the health benefits. Always choose chickpeas that are firm and plump for the best texture. You can play around with spices to make this recipe your own. Here are some ideas: - Add cayenne pepper for extra heat. - Use onion powder for a sweeter taste. - Try smoked sea salt for more depth. - Add lime zest and juice for a brighter flavor. Feel free to mix and match spices based on your taste. Each variation brings a new twist to these tasty chickpeas. Start by preheating your air fryer to 400°F (200°C). This step takes about 5 minutes. Preheating helps the chickpeas cook evenly and get crispy. It’s an easy step that makes a big difference in the final taste. While your air fryer warms up, grab a mixing bowl. Drain and rinse 1 can of chickpeas. Make sure they are dry; this helps them crisp up better. Add 2 tablespoons of olive oil to the chickpeas. Then, mix in 1 teaspoon of chili powder, 1 teaspoon of smoked paprika, 1/2 teaspoon of cumin, and 1/2 teaspoon of garlic powder. For a fresh zing, add the zest and juice of 1 lime. Toss everything together until the chickpeas are fully coated. Don’t forget to add salt to taste. Now, it’s time to cook! Carefully place the chickpeas in the air fryer basket. Keep them in a single layer to help them crisp up. If your air fryer is small, you may need to cook in batches. Set your timer for 15-20 minutes. Shake the basket halfway through for even cooking. When done, the chickpeas should be crispy and golden brown. Let them cool for a few minutes before serving. If you like, add some fresh cilantro on top for a pop of color and flavor. Enjoy your healthy snack! To get those chickpeas perfectly crispy, start with dry chickpeas. Drain and rinse them well. After rinsing, pat them dry with a paper towel. Any moisture will stop them from crisping up. Toss them evenly with olive oil and spices. Aim for a light coating, not too much oil. This helps them cook perfectly in the air fryer. Cook them at 400°F for 15-20 minutes. Shake the basket halfway through to ensure even cooking. One common mistake is not drying the chickpeas enough. Wet chickpeas will not crisp up. Another mistake is overcrowding the air fryer basket. If you put too many in at once, they will steam instead of fry. Also, avoid skipping the lime juice and zest. They add a fresh flavor that brightens the dish. Lastly, do not skip shaking the basket. This step helps them cook evenly. You can easily boost the flavor of your chickpeas. Try adding a dash of cayenne for heat or smoked paprika for depth. Fresh herbs like cilantro enhance the taste. You can also mix in nutritional yeast for a cheesy flavor. If you like zest, add more lime or even lemon juice. These small tweaks can elevate your snack to a new level. {{image_2}} To make your chickpeas spicier, add more chili powder. You can also try cayenne pepper. Start with just a pinch, and adjust to your taste. The heat will blend well with the lime. This kick adds excitement to each bite. You can even add some diced jalapeños for extra flavor. Just remember to remove the seeds if you want less heat! If you love herbs, add fresh or dried ones. Try oregano, thyme, or even basil. Mix these herbs into your chickpeas before cooking. This will give them a fresh, earthy flavor. You can also add a bit of lemon zest for a twist. The herbs will complement the lime and chili well. If you're watching your oil intake, skip the olive oil. Rinse and dry the chickpeas well. Toss them with the spices, lime zest, and lime juice. Use parchment paper in your air fryer basket to prevent sticking. Cook them as usual. You will still get crispy, tasty chickpeas without the oil. This way, you enjoy a healthy snack without losing flavor. To store leftover chickpeas, let them cool first. Place them in an airtight container. Keep them in the fridge for up to three days. Make sure to seal the container well. This keeps them fresh and tasty. If you notice any moisture, dry them gently with a paper towel before storing. This helps maintain their crispiness. When you want to eat your leftover chickpeas, reheat them in the air fryer. Set the air fryer to 350°F (175°C). Place the chickpeas in the basket in a single layer. Heat them for about 5-7 minutes. Shake the basket halfway through to ensure even heating. This method keeps them crispy, just like when they were fresh! You can freeze chili lime chickpeas, but they may lose some crunch. To freeze, let them cool completely. Spread them out on a baking sheet in a single layer. Freeze for a few hours until solid. Then, transfer them to a freezer-safe bag. Remove as much air as possible. They can stay frozen for up to three months. When ready to eat, thaw them in the fridge and reheat in the air fryer. You can serve Chili Lime Air Fryer Chickpeas with many dishes. They make a great snack on their own. You can also add them to salads for crunch. Try them in grain bowls for extra protein. They pair well with salsa or guacamole too. You can even toss them on tacos for a spicy kick! Chili Lime Air Fryer Chickpeas stay fresh for about three days. Store them in an airtight container at room temperature. They can lose their crispiness if left in the fridge. If you want them crisp again, just pop them back in the air fryer for a few minutes. Yes, you can use dried chickpeas instead of canned. However, you will need to soak and cook them first. Soak them overnight in water. Then, boil them until soft. Once cooked, drain and rinse before following the air fryer steps. This way, you can enjoy a fresher taste! You now know how to make delicious chili lime air fryer chickpeas. We explored essential ingredients, cooking steps, and helpful tips for crispiness. You learned about flavor variations and how to store leftovers effectively. In conclusion, these chickpeas offer a tasty snack or side dish. They're easy to make, fun to customize, and great for sharing. Enjoy your cooking adventure!
                    Chili Lime Air Fryer Chickpeas Crispy Healthy Snack
                  • To make Cucumber Dill Tuna Salad Wraps, gather these main ingredients: - 2 cans of tuna in water, drained - 1 cup Greek yogurt - 2 tablespoons Dijon mustard - 1 tablespoon lemon juice - 1 small cucumber, finely diced - 1/4 cup red onion, finely chopped - 1/4 cup fresh dill, chopped - Salt and black pepper to taste - 4 large lettuce leaves (Romaine or butter lettuce) These ingredients create a creamy, fresh salad that packs a punch of flavor. The Greek yogurt gives a nice tang. The tuna provides protein, while the cucumber adds crunch. Fresh dill brings a burst of flavor. You can enhance your wraps with some optional garnishes: - Sliced tomatoes - Sliced avocado These add-ons not only improve the taste but also add visual appeal. Sliced tomatoes offer sweetness, while avocado adds creaminess. This recipe is quite flexible. If you have dietary needs, here are some substitutions: - Swap Greek yogurt with a dairy-free yogurt for a vegan option. - Use canned chicken instead of tuna for a different protein. - Replace lettuce leaves with collard greens for a sturdier wrap. Consider these options to fit your diet. Enjoy making it your own! First, gather your ingredients. You need two cans of tuna, drained. In a medium bowl, add the tuna, one cup of Greek yogurt, two tablespoons of Dijon mustard, and one tablespoon of lemon juice. Mix these well. This creates a creamy base for your salad. Next, fold in one small cucumber, finely diced, and a quarter cup of red onion, finely chopped. Add a quarter cup of fresh dill for flavor. Mix gently. This keeps the tuna chunky and delicious. Finally, season with salt and black pepper to taste. Taste it and adjust as needed. Now, take a large lettuce leaf. Romaine or butter lettuce works best. Place the leaf on a clean surface or plate. Spoon a generous amount of your tuna salad mixture onto the center. If you want extra flavor, add sliced tomatoes and avocado on top. Then, fold the sides of the lettuce leaf over the filling. Roll it up from the bottom to form a wrap. If it feels loose, use a toothpick to hold it. Repeat this process with the remaining leaves and tuna salad mixture. Arrange your wraps on a nice platter. For a pop of color, garnish with extra dill. You can also add lemon wedges on the side. This adds a fresh touch and brightens the meal. Serving it this way makes it look appealing and ready to enjoy! To make your tuna salad shine, use fresh herbs. I love adding plenty of dill for a bright taste. Fresh dill gives a crisp and clean flavor that pairs well with tuna. You can also adjust the lemon juice to your liking. A bit more juice adds zing and keeps it fresh. Don't forget to taste as you mix. This will help you find the perfect balance. Store any leftover tuna salad in an airtight container. Keep it in the fridge for up to three days. If you add tomatoes or avocado, eat it right away. These ingredients do not store well. You can also freeze the salad for later. Just be aware that the texture may change. You can prep this tuna salad ahead of time. Mix the salad and keep it in the fridge for quick meals. Just wait to assemble the wraps until you are ready to eat. This keeps the lettuce crisp and fresh. If you want to save time, wash and cut your lettuce leaves in advance. This way, you can grab and go! {{image_2}} You can switch the tuna for other proteins. Canned chicken works great. It has a mild taste. You can also try canned salmon for a richer flavor. For a vegetarian option, use chickpeas. Just mash them up well. Each choice gives you a unique taste. Lettuce is not your only option. You can use collard greens or Swiss chard. They add a nice crunch and flavor. Tortillas work too if you want a different wrap. Whole grain or spinach wraps can add color. Each green brings a new twist to your meal. Add more flavor easily! Chopped celery gives a nice crunch. You can mix in capers for a briny taste. If you like spice, try jalapeños or red pepper flakes. For sweetness, add diced apples or grapes. These changes let you create your own special wrap. Each serving of Cucumber Dill Tuna Salad Wrap contains about 200 calories. The main ingredients add healthy fats and proteins, which help maintain energy levels. If you add tomatoes and avocado, the calories may rise slightly but also increase nutrients. The ingredients in this wrap offer several health benefits: - Tuna is a great source of lean protein. It helps build and repair muscles. - Greek yogurt provides calcium and probiotics, which aid digestion. - Cucumber is hydrating and low in calories, making it a great snack. - Dill may help with digestion and adds flavor without extra calories. - Lettuce is low in calories and high in fiber, which can keep you full longer. The macronutrient profile for one serving includes: - Protein: Approximately 25 grams from tuna and yogurt. - Carbohydrates: Around 10 grams, mainly from vegetables. - Fats: About 7 grams, mostly from the yogurt and optional avocado. This balanced profile makes the wraps a smart meal choice for lunch or dinner. Yes, you can use canned chicken. It works well in this recipe. Just drain and mix it like you would with tuna. The taste will be different, but still tasty. The Greek yogurt and mustard will keep it moist and flavorful. You can store the tuna salad in the fridge for up to three days. Make sure to keep it in an airtight container. The flavors actually blend better after a day. Just stir it well before eating again. If it looks or smells off, it’s best to toss it. Several sides go well with the wraps. Here are a few ideas: - Fresh fruit salad - Veggie sticks with hummus - A light soup, like tomato or cucumber - Whole grain crackers These sides add more color and nutrition to your meal. Enjoy the wraps with something crunchy or refreshing for balance! This article covered how to make tasty cucumber dill tuna salad wraps. We explored the main ingredients, optional garnishes, and helpful tips for easy prep and storage. I shared fun variations and key nutritional info to help you enjoy this dish. Remember, mixing flavors and trying different proteins can keep it fresh. These wraps are not just simple but also a healthy choice. Now, it’s time to create your own version and enjoy!
                    Cucumber Dill Tuna Salad Wraps Fresh and Tasty Meal

                  WANT TO SAVE THIS RECIPE?

                  Leave a Reply Cancel reply

                  Your email address will not be published. Required fields are marked *

                  Recipe Rating


                  Indulge in the mouthwatering delight of Birria Nachos, where savory birria meets crispy tortilla chips for a sensational flavor explosion. This recipe showcases tender, seasoned meat layered with gooey cheese and fresh toppings that elevate any gathering. Perfect for game days or family dinners, our step-by-step guide makes it easy to impress your guests. Click to discover the full recipe and bring this delicious fusion dish to your table!

                  Hi I’m Taling

                  I love sharing perfected dishes from my kitchen. I’m sure they’ll earn a spot in your heart. Let’s savor this journey together!.

                  More about me

                  Recent Desserts

                  • - 2 cups fresh blueberries - 1 cup Greek yogurt (vanilla or plain) - ¼ cup honey or maple syrup - ½ cup coconut milk - Juice of 1 lemon - Zest of 1 lemon - A pinch of salt To make Blueberry Lemon Yogurt Popsicles, gather these fresh ingredients. You need ripe blueberries for the best flavor. Greek yogurt adds creaminess and protein. Honey or maple syrup sweetens the pops. Coconut milk gives a smooth texture and a hint of tropical taste. The juice and zest of one lemon bring a bright, zesty kick. Finally, a pinch of salt enhances all the flavors. Using fresh blueberries is key. They burst with juice and add natural sweetness. If you can’t find fresh berries, frozen ones work too, but they may change the texture slightly. Greek yogurt is a great choice, as it thickens the mix and gives a nice tang. If you prefer a dairy-free option, try a plant-based yogurt. When sweetening, adjust to your taste. Honey has a floral note, while maple syrup offers a richer flavor. The coconut milk adds creaminess and helps with freezing. Lemon juice brightens the pops, while lemon zest adds a fragrant touch. The pinch of salt balances the sweetness and highlights the flavors. Make sure to measure carefully for the best results. Once you have these ingredients, you’re ready to blend and create a delightful summer treat! 1. Combine the fresh blueberries, Greek yogurt, honey (or maple syrup), coconut milk, lemon juice, lemon zest, and a pinch of salt in a blender. 2. Blend the mixture until it is smooth and creamy. You want a nice, consistent texture. 3. Taste the mixture and adjust the sweetness if needed. Add more honey or maple syrup if you like it sweeter. 1. Pour the blueberry yogurt mixture into popsicle molds. Fill them about ¾ full to allow for expansion as they freeze. 2. Insert sticks into the molds. Gently tap the molds on the counter to remove any air bubbles. 3. Freeze the popsicles for at least 4-6 hours, or until they are completely solid. 1. To release the popsicles, run warm water over the outside of the molds for a few seconds. This will help loosen them. 2. Serve the popsicles on a colorful platter. For a fun look, garnish with whole blueberries and a sprinkle of lemon zest. - Best practices for blending ingredients: Start with the blueberries at the bottom. This helps them blend better. Add yogurt and coconut milk next. Blend on a low speed first, then increase to high. This method makes the mixture smooth and creamy. - How to achieve creamier popsicles: Use full-fat Greek yogurt for the best texture. It adds richness and creaminess. Coconut milk also helps. If you want extra creaminess, add more coconut milk or yogurt. - Filling molds too full: Always fill molds about ¾ full. The mixture expands when frozen. If you fill them too full, they overflow and create a mess. - Over-blending or under-blending: Blend just until smooth. Over-blending can make the popsicles icy. Under-blending leaves chunks of fruit. Aim for a nice, even consistency. - Sweetening alternatives: Honey and maple syrup are great options. You can also use agave syrup or stevia. Taste the mix before pouring into molds. Adjust sweetness to your liking. - Balancing flavors with citrus: Lemon juice brightens the flavor. The zest adds a nice touch. If the mixture tastes too sweet, add a bit more lemon juice. This balances the flavors nicely. {{image_2}} You can make these popsicles even more fun! Add other fruits like strawberries or raspberries. These fruits mix well with blueberries. They bring a new taste and color. You can also infuse herbs like mint or basil. Just add a few leaves when blending. This adds a fresh twist to your treats. Need dairy-free options? Use almond milk or oat milk instead of coconut milk. Swap the Greek yogurt for dairy-free yogurt. For a low-sugar version, use less honey or maple syrup. You can also try stevia or monk fruit sweetener. These options keep your popsicles tasty and light. Get creative with your popsicles! Make holiday-themed treats by adding festive colors. For example, use red fruits for Christmas or orange for Halloween. You can also create colorful swirls. Blend purees of different fruits and layer them in your molds. This not only looks great but tastes amazing too! Freezing popsicles requires some care to keep them tasty. First, make sure your popsicle molds are clean and dry before filling. This helps avoid any odd flavors. Fill the molds about three-quarters full. This allows space for the mixture to expand when frozen. Once filled, insert the sticks carefully. If you tap them on the counter, it helps release air bubbles. To maintain flavor and texture, wrap the molds tightly in plastic wrap after freezing. This prevents ice crystals from forming. Ice crystals can ruin the smooth texture you want in your popsicles. Blueberry lemon yogurt popsicles can last up to three months in the freezer if stored well. After that, they may lose flavor or texture. Check for signs of freezer burn, like white patches or dryness. If you see these, it’s best to toss them out. Cleaning your popsicle molds is simple. Rinse them with warm, soapy water and let them dry completely. Avoid using harsh scrubbers that might scratch them. Store molds in a cool, dry place to keep them in good shape. If you don’t have popsicle molds, use small cups or ice cube trays. Just insert wooden sticks or spoons in the center. These alternatives work well and are easy to find at home. I recommend using Greek yogurt for these popsicles. It has a thick texture and gives a creamy taste. Regular yogurt works too, but it may be thinner. Greek yogurt also adds protein, making the popsicles more filling. If you want a twist, try vanilla Greek yogurt for added flavor. Yes, you can use frozen blueberries. They are convenient and still tasty. Frozen berries may make your popsicles a bit looser when blended. Fresh blueberries offer a bright flavor and nice texture. If you use frozen berries, let them thaw for a few minutes before blending. The popsicles need at least 4-6 hours to freeze completely. If you want them to be extra firm, leave them in the freezer overnight. This way, they are ready for hot summer days. Be patient, as the waiting makes the treat even better! You can definitely make these popsicles without added sugar. Use ripe fruit for natural sweetness. You can also try mashed bananas or pureed dates. If you want a little sweetness, use honey or maple syrup. Just remember, different sweeteners can change the taste. You can make tasty and healthy popsicles using fresh ingredients. Blend blueberries, Greek yogurt, honey, and lemon for a creamy treat. Fill molds, freeze, and enjoy! Remember to balance flavors and avoid overfilling molds. Get creative with variations to keep things fun. These popsicles are easy to store and last long in the freezer. You now have the skills to make refreshing popsicles anytime! Enjoy experimenting with flavors and impress your friends and family.
                    Blueberry Lemon Yogurt Popsicles Refreshing Summer Treat
                  • To make Vegan Caramel Apple Overnight Oats, gather these simple items: - 1 cup rolled oats - 1 ½ cups almond milk (or any plant-based milk) - 1 medium apple, diced (preferably a sweeter variety like Fuji or Honeycrisp) - 2 tablespoons maple syrup - 1 tablespoon almond butter - 1 teaspoon cinnamon - ½ teaspoon vanilla extract - 2 tablespoons coconut sugar (for the caramel flavor) - ¼ cup chopped nuts (walnuts or pecans) - A pinch of sea salt You can easily swap out some ingredients if needed. Use oat milk or soy milk instead of almond milk. Peanut butter works well if you don’t have almond butter. For a sweeter taste, try agave syrup in place of maple syrup. You can also replace coconut sugar with brown sugar if that’s what you have on hand. The key is to keep it plant-based while matching your taste. When selecting apples, look for varieties that are sweet and crisp. Fuji and Honeycrisp are my top picks. They add a nice sweetness to the oats. Choose apples that are firm and free from blemishes. If you like a tart flavor, try Granny Smith apples. They balance the sweetness from the other ingredients well. Always wash your apples before using them, as this keeps your dish fresh and clean. Start by grabbing a mixing bowl. Add 1 cup of rolled oats and 1 ½ cups of almond milk. Pour in 2 tablespoons of maple syrup and 1 tablespoon of almond butter. Next, sprinkle in 1 teaspoon of cinnamon and ½ teaspoon of vanilla extract. Mix well until everything blends together. Now, fold in 1 diced apple and ¼ cup of chopped nuts. Save some apple and nuts for later. This mixture is the base for your oats. Take your oat mixture and spoon it into jars or bowls. To make it fun, create layers. Add some of the oat mix, then a layer of chopped apple, and a sprinkle of coconut sugar. Repeat this until the jars are full. This method makes your oats look pretty and tasty. You can see the different layers when you serve them. Cover the jars with lids or plastic wrap and place them in the fridge. Let them chill overnight or for at least 4 hours. This is key for thickening the oats and blending the flavors. In the morning, stir the oats. If they seem too thick, splash in more almond milk. This helps you get the right texture. Enjoy them topped with the reserved apple pieces, nuts, and a drizzle of maple syrup for extra sweetness. To make your oats creamy, use rolled oats instead of instant oats. Rolled oats soak up liquid well and create a smooth texture. Use almond milk, or any plant-based milk you like. A good ratio is 1 cup of oats to 1.5 cups of milk. This helps the oats soften overnight. Stir well to mix everything together. If your oats are too thick in the morning, just add a splash of milk. Sweetness is key in your vegan caramel apple overnight oats. Start with 2 tablespoons of maple syrup. You can add more if you want it sweeter. The coconut sugar adds a nice caramel flavor, so don’t skip it! You can also add more cinnamon for extra warmth. Taste your mixture before refrigerating. Adjust the flavors to match your preferences. Presentation makes a dish more fun. Serve your oats in clear jars to show off the layers. Top with extra diced apples and a sprinkle of cinnamon. Chopped nuts add crunch and a nice look. A drizzle of maple syrup on top makes it even better. You can also add a few chocolate chips for a sweet touch. Enjoy the beautiful colors and textures! {{image_2}} You can change the flavor of your vegan caramel apple overnight oats with the seasons. In autumn, use spiced apples with nutmeg or cloves. In winter, add warm vanilla and a touch of maple. In spring, try fresh berries to add brightness. For summer, mix in diced peaches or plums for a juicy twist. Each season brings new fruits and spices to brighten your oats. To personalize your oats, think about fun toppings. You can add chia seeds for extra fiber. Dried fruits like raisins or cranberries add a nice chew. For crunch, sprinkle some granola on top. You can also try coconut flakes or dark chocolate chips. Each topping adds a new layer of flavor and texture. If you need gluten-free oats, use certified gluten-free rolled oats. Most oats are naturally gluten-free, but cross-contamination can happen. Always check the package. You can also swap almond milk for any other plant-based milk, like oat or rice milk. These swaps keep your oats tasty and safe for all diets. To keep your Vegan Caramel Apple Overnight Oats fresh, store them in the fridge. Place any leftovers in an airtight container. This helps keep them from drying out or absorbing other smells from your fridge. Your oats will stay good for about three to five days. I recommend using glass jars or plastic containers for storing your oats. Mason jars work great because they are easy to seal and look nice. Choose containers that are the right size for your portion. This way, you won’t waste any oats. If you like your oats warm, you can heat them up. Just transfer the oats to a microwave-safe bowl. Heat them in short bursts, about 30 seconds at a time. Stir between heating to make sure they warm evenly. If they feel too thick, add a splash of almond milk to smooth them out. Enjoy your cozy breakfast! Yes, you can use any plant-based milk. Almond, oat, or soy milk work well. Each type gives a unique flavor and texture. Almond milk adds a nutty taste, while oat milk is creamier. Just pick what you like best! Overnight oats stay fresh for up to five days in the fridge. Store them in airtight containers. This way, you can make a batch and grab it throughout the week. Just be sure to stir them before eating. Absolutely! Doubling the recipe is easy and smart for meal prep. Just mix everything in a larger bowl. Divide the mixture into jars or containers. This makes breakfast quick and delicious for the whole week! You learned about key ingredients for overnight oats and smart substitutes. I shared tips on choosing the best apples and preparing your oat mixture. You now know layering tricks and how to store leftovers safely. Experiment with flavors, toppings, and different containers. Overnight oats are easy, tasty, and versatile. Enjoy customizing your creation. Aim for balance in flavors and textures to make it just right for you.
                    Vegan Caramel Apple Overnight Oats Simple Recipe
                  • To make Cookie Dough Greek Yogurt Bark, you will need these key ingredients: - 2 cups plain Greek yogurt - ¼ cup honey or maple syrup - 1 teaspoon vanilla extract - ½ cup mini chocolate chips - ¼ cup almond flour (or finely ground oats) - ¼ cup chopped nuts (e.g., walnuts or pecans) - Pinch of sea salt These ingredients work together to create a creamy and tasty treat. The Greek yogurt gives the bark its smooth texture and protein punch. The honey or maple syrup adds just the right amount of sweetness. If you need alternatives, here are some ideas: - For Greek yogurt, use regular yogurt or a dairy-free option like coconut yogurt. - If you want a low-calorie sweetener, try stevia or agave syrup. These substitutes can help you fit your needs without losing flavor. To make your bark even more fun, consider these add-ins: - Dried fruit like cranberries or raisins for sweetness. - Shredded coconut for a tropical twist. - Different nuts like almonds or pecans for added crunch. These extras can make your bark unique and tasty. Feel free to mix and match based on what you love! To start, gather your ingredients. You need 2 cups of plain Greek yogurt, ¼ cup of honey or maple syrup, and 1 teaspoon of vanilla extract. In a mixing bowl, combine the Greek yogurt, honey, and vanilla. Stir until smooth. Next, add ¼ cup of almond flour and a pinch of sea salt. Mix until combined. This step adds texture and flavor. Finally, fold in ½ cup of mini chocolate chips and ¼ cup of chopped nuts. These add a nice crunch and extra flavor. Now it’s time to spread the mixture. Line a baking sheet with parchment paper. Pour the yogurt mixture onto the sheet. Use a spatula to spread it into an even layer, about ½ inch thick. For extra taste, sprinkle some more chocolate chips and nuts on top. Press them lightly into the mixture. Place the baking sheet in the freezer. Freeze for about 2-3 hours or until the bark is firm. This freezing makes it easy to break into pieces later. Once the bark is frozen, take it out of the freezer. Remove the parchment paper carefully. You can break the bark into pieces or cut it into squares. Use a sharp knife for clean cuts. Store the pieces in an airtight container. Keep them in the freezer until you are ready to enjoy this treat. This helps keep the bark fresh and tasty. To get that creamy texture, start with thick Greek yogurt. It needs to be plain and full-fat. This gives the bark a rich taste. Mixing in almond flour helps create a nice bite. Make sure to blend it well with the yogurt. The mixture should feel smooth and thick. If it is too runny, the bark may not hold together. Use a spatula to spread it evenly on the baking sheet. This helps it freeze uniformly. You can easily change the flavors to fit your taste. Try adding a bit of cinnamon for warmth. You can also mix in other extracts like almond or hazelnut. For a fruity twist, add chopped dried fruits like cranberries or apricots. You can swap out the mini chocolate chips for dark chocolate or even white chocolate. If you want a nutty flavor, try using different nuts like pecans or hazelnuts. Feel free to be creative! A big mistake is not measuring the ingredients. Always use the right amounts for the best taste. Another mistake is not allowing enough freezing time. If the bark is not frozen long enough, it will be too soft. Avoid overmixing the yogurt mixture too. This can make it watery and thin. Lastly, remember to line your baking sheet with parchment paper. This makes it easier to remove the bark once it is frozen. {{image_2}} You can make a tasty, dairy-free version of this treat. Use coconut yogurt instead of Greek yogurt. It has a creamy texture and a subtle flavor. For sweetener, try agave syrup or maple syrup. These swaps keep it delicious without dairy. Don't forget to check labels to ensure your yogurt is dairy-free. Get creative with flavors! You can swap the vanilla extract for almond or hazelnut extract. This change adds a nutty twist. Want a fruity kick? Mix in some mashed banana or pureed strawberries. You can also try adding spices, like cinnamon or nutmeg. Each change gives your bark a unique taste. You can adjust your bark for the seasons. In fall, add pumpkin spice and chopped apples. For winter, mix in peppermint extract and crushed candy canes. In summer, try fresh berries and a hint of lemon zest. Each season brings fresh ideas to your bark, making it fun to enjoy year-round. To keep your Cookie Dough Greek Yogurt Bark fresh, store it in an airtight container. Make sure the container is freezer-safe. This will help prevent freezer burn. If you have leftover pieces, you can layer them with parchment paper. This way, they won’t stick together. When you're ready to enjoy a piece, take it out of the freezer. Let it sit at room temperature for about 5 minutes. This helps to soften it just enough for easy munching. When stored properly, your bark can last up to two months in the freezer. This means you can make a big batch and enjoy it later. Just remember: the fresher the bark, the better it tastes. I recommend eating it within a month for the best flavor and texture. Cookie Dough Greek Yogurt Bark is great on its own. But you can also pair it with fresh fruit like strawberries or bananas. For a fun twist, serve it with a drizzle of chocolate sauce. It makes a great snack for kids and adults alike. You can even break it into smaller pieces and add it to a smoothie for a sweet treat. Remember, the possibilities are endless! You can use other types of yogurt, but Greek yogurt works best. It gives a thick texture and creamy taste. If you use regular yogurt, the bark may not hold its shape as well. You can try dairy-free options too, but check if they are thick enough. To make this bark vegan, use dairy-free yogurt. Coconut yogurt or almond yogurt are great choices. Substitute honey with maple syrup or agave nectar. This way, you keep the sweetness without using animal products. Yes, you can use alternative sweeteners. Stevia, agave syrup, or monk fruit sweetener work well. Just remember to adjust the amount based on sweetness level. This keeps the bark tasty without adding extra sugar. Absolutely! Adding protein powder is a great idea. It boosts nutrition and keeps you full longer. Mix in a scoop of your favorite flavor when combining the yogurt. Make sure to blend well for even flavor throughout the bark. This blog post covered how to make delicious cookie dough Greek yogurt bark. We discussed key ingredients, substitutes, and fun add-ins that boost flavor and crunch. I detailed preparation and freezing steps, plus tips for perfect texture and common mistakes to avoid. We explored dairy-free options, unique flavors, and how to store it well. Remember, you can customize this bark to fit your taste. Enjoy creating this treat and share it with friends and family!
                    Cookie Dough Greek Yogurt Bark Creamy and Simple Treat
                  • - 1 ½ cups all-purpose flour - 1 tablespoon cocoa powder - ½ teaspoon baking powder - ½ teaspoon baking soda - ¼ teaspoon salt - ½ cup unsalted butter, softened - 1 cup granulated sugar - 1 large egg - 1 teaspoon vanilla extract - 1 tablespoon red food coloring - ½ cup powdered sugar (for dusting) For all-purpose flour, you can use cake flour for a softer cookie. If you want a gluten-free option, try almond flour or a gluten-free blend. Instead of unsalted butter, you can use margarine. Just keep in mind that it may change the taste slightly. You might replace granulated sugar with coconut sugar for a different sweetness. Make sure to adjust amounts based on what you like. You can add white chocolate chips or chopped nuts for extra texture. Crushed peppermint candies are great for a holiday twist. If you love cream cheese, consider making a cream cheese frosting drizzle. Just mix cream cheese, butter, and powdered sugar until smooth, then drizzle it over the cookies. To start, preheat your oven to 350°F (175°C). Line two baking sheets with parchment paper. This helps cookies bake evenly. In a medium bowl, sift together the flour, cocoa powder, baking powder, baking soda, and salt. This mix is key for texture. Set this bowl aside. In a large bowl, cream the softened butter and granulated sugar. Use an electric mixer for 2-3 minutes. You want it light and fluffy. Next, beat in one large egg, one teaspoon of vanilla extract, and one tablespoon of red food coloring. Mix until everything is smooth and the color is bright. Gradually add your dry ingredients to the wet mix. Stir until just combined. Be careful not to overmix. Chill the dough in the refrigerator for at least 30 minutes. This makes it easier to handle when forming cookies. After chilling, take the dough out. Use a cookie scoop or tablespoon to scoop out the dough. Form each scoop into a ball. Then, roll each ball in powdered sugar. Make sure they are fully coated. This will create that crinkle look when baked. Place the cookie dough balls on the prepared baking sheets. Leave enough space between each ball for spreading. Now it’s time to bake! Put the baking sheets in the oven. Bake for 10-12 minutes. The edges should be set, but the centers will look slightly underbaked. This gives the cookies a soft texture. Once done, take them out and let the cookies cool on the sheets for 5 minutes. After that, transfer them to a wire rack to cool completely. Enjoy your beautiful, tasty Red Velvet Crinkle Cookies! To get the best texture for your red velvet crinkle cookies, follow these steps: - Use softened butter, not melted. Softened butter helps create a light and fluffy mix. - Chill your dough for at least 30 minutes. Cold dough makes it easier to shape. - Don’t overmix the dough. Mix until just combined for soft, tender cookies. Here are some common mistakes to avoid when baking: - Forgetting to preheat your oven can lead to uneven baking. Always preheat first. - Not measuring flour correctly can make cookies dry. Use a spoon to scoop, then level. - Baking cookies too long makes them hard. Watch the edges; they should be set, but centers can look soft. Having the right tools makes baking fun and easy: - Use a good electric mixer for creaming butter and sugar. - A cookie scoop helps shape uniform cookie balls. - Parchment paper prevents sticking and makes cleanup easy. - A wire rack cools cookies evenly, keeping them soft. {{image_2}} You can easily change the flavor of your Red Velvet Crinkle Cookies. Want a hint of chocolate? Add more cocoa powder. Craving something fruity? Toss in some dried cherries or raspberries. You can also add a teaspoon of almond extract for a nutty twist. These small changes make a big impact on taste. Red velvet is classic, but you can switch up the color for fun. Use blue or green food coloring for a unique look. This works well for themed parties or holidays. For Halloween, try orange or purple! These colors can match your event and make the cookies even more special. If you need a gluten-free option, swap the all-purpose flour with a gluten-free blend. Make sure the blend has xanthan gum for the best texture. For a vegan version, replace the butter with coconut oil and the egg with a flax egg (1 tablespoon of ground flaxseed mixed with 2.5 tablespoons of water). These adjustments keep the cookies tasty while fitting your dietary needs. To keep your Red Velvet Crinkle Cookies fresh, store them in an airtight container. Line the container with parchment paper. This helps to absorb moisture. Place a layer of cookies, then add more parchment paper between layers. This keeps them from sticking together. You can also use a zip-top bag if you don’t have a container. Just remove as much air as possible before sealing. Freezing your cookies is a great way to save them for later. First, let the cookies cool completely. Then, place them in a single layer on a baking sheet. Freeze for about an hour. Once frozen, transfer them to an airtight container or a zip-top bag. This helps to keep the cookies from getting freezer burn. They can last in the freezer for up to three months. When ready to eat, let them thaw at room temperature. Red Velvet Crinkle Cookies stay fresh for about five days at room temperature. If stored correctly in an airtight container, they can last even longer. You can also refrigerate them to extend their shelf life. In the fridge, they can stay good for about a week. Always check for any signs of spoilage before eating. Enjoy these tasty treats while they are fresh! You can use beet juice for a natural option. It gives a nice red hue. Pomegranate juice works too but may change the cookie's taste. If you want, you can skip the coloring. The cookies will still taste great! Look for edges that are set. The centers should look a bit soft. A slight shine means they are ready. They will firm up as they cool. Trust your eyes, but a timer helps too! Yes, you can! Chill the dough and store it in the fridge. It lasts for up to three days. You can also freeze it for up to three months. Just thaw before baking for best results. These cookies pair nicely with milk or coffee. Try them with vanilla ice cream for a treat! You can also serve them at parties with other sweets. They add a fun splash of color to any dessert table. To sum up, we explored the essential ingredients, detailed steps, and handy tips for perfect Red Velvet Crinkle Cookies. Remember to measure your ingredients carefully and consider great mix-ins. Avoid common mistakes for the best texture. You can also try fun variations or make them gluten-free. Store your cookies properly to enjoy longer. These easy steps will help you bake delicious cookies every time. Now, it's time to make your baking dreams a reality!
                    Red Velvet Crinkle Cookies Irresistible and Tasty Treat

                  Recent Drinks

                  • To make a delicious Turmeric Golden Milk Latte, gather these simple ingredients: - 2 cups almond milk (or your preferred milk) - 1 teaspoon ground turmeric - ½ teaspoon ground ginger - ¼ teaspoon cinnamon - 1 tablespoon honey or maple syrup (adjust to taste) - Pinch of black pepper - ½ teaspoon vanilla extract - Optional: a sprinkle of nutmeg for garnish - Almond Milk: This milk is low in calories and rich in vitamins. It helps with heart health. - Turmeric: This spice has curcumin, known for its anti-inflammatory properties. It may help improve brain function. - Ginger: Ginger can help with digestion and nausea. It adds a nice warmth to the drink. - Cinnamon: This spice is rich in antioxidants. It may help lower blood sugar and improve heart health. - Honey or Maple Syrup: Both sweeteners can boost energy. They also provide antioxidants. - Black Pepper: This spice enhances turmeric absorption. It makes the drink more effective. - Vanilla Extract: It adds flavor and can help reduce stress. - Nutmeg: This spice is optional, but it adds warmth and a nice aroma. - Milk Options: You can use oat milk, soy milk, or coconut milk for different flavors. - Sweeteners: If you prefer, try agave syrup or stevia as sugar-free options. - Spices: Experiment with cardamom or cloves for added flavor. - Nutmeg: You can skip it if you don't like nutmeg, or use a touch of cocoa powder instead. 1. Start by taking a small saucepan. 2. Add 2 cups of almond milk to the pan. 3. Measure and add 1 teaspoon of ground turmeric. 4. Next, add ½ teaspoon of ground ginger. 5. Sprinkle in ¼ teaspoon of cinnamon. 6. Sweeten your drink with 1 tablespoon of honey or maple syrup. 7. Don't forget a pinch of black pepper for better absorption of turmeric. 8. Lastly, add ½ teaspoon of vanilla extract. 9. Whisk all the ingredients well in the pan. 10. Place the saucepan on medium heat. 11. Gently warm the mixture while stirring often. 12. Keep an eye on it; do not let it boil. 13. After about 5-7 minutes, it should be hot enough. 14. Remove the pan from heat and let it cool slightly. 15. If you want a frothy drink, use a milk frother or whisk it quickly. 16. Pour the golden milk into your favorite mugs. 17. Optionally, sprinkle a bit of nutmeg on top for a nice touch. 18. Serve warm and enjoy this comforting drink! - Always use a whisk to blend the spices into the milk. - Whisking helps mix the turmeric and other spices evenly. - When heating, keep the heat low to avoid scalding the milk. - Stir often to prevent sticking at the bottom of the pan. - If you see steam but no bubbles, you are at the right temperature. - A milk frother works wonders for a smooth, frothy finish. - If you don’t have a frother, whisk vigorously by hand. - Frothing adds air, giving the latte a creamy feel. - The more you froth, the lighter and fluffier your drink will become. - For an extra touch, froth some almond milk separately and top your latte with it. You can mix spices to make your turmeric latte tastier. Try adding a pinch of nutmeg or a dash of cardamom. These spices add warmth to the drink. You can also use fresh ginger instead of ground ginger. This will give your latte a bright, zesty kick. Just remember, fresh ginger may need more time to steep. Many people rush the heating process. Always warm your milk slowly over medium heat. If you boil it, the spices can lose flavor. Another mistake is not blending the spices well. Make sure to whisk the mixture thoroughly. This helps avoid clumps of turmeric or ginger. Lastly, avoid skipping the black pepper. It helps your body absorb turmeric better. Sweetness is personal. Start with one tablespoon of honey or maple syrup. Taste your latte and add more if you like it sweeter. For creaminess, use full-fat coconut milk for a richer feel. Almond milk is lighter but still delicious. You can also mix almond and coconut milk for the best of both worlds. {{image_2}} You can easily make this latte vegan. Just use almond milk, coconut milk, or oat milk. These milks work great in this recipe. They keep the drink creamy and delicious. If you want a nut-free option, oat milk is the best choice. It blends well with turmeric and spices. To make an iced version, start with brewed turmeric milk. Follow the same steps but let it cool. Pour over ice instead of serving warm. This drink is refreshing on hot days. You can also add some ice cream for a treat! You can mix and match flavors for fun. Try adding matcha for a green twist. This adds a fresh taste and boosts energy. You can also use cocoa for a chocolatey version. The cocoa pairs well with turmeric and spices. For a special touch, add a dash of vanilla extract. This enhances the overall flavor and aroma. To store leftover turmeric golden milk, let it cool first. Then, pour it into an airtight container. Keep it in the fridge for up to three days. This way, you can enjoy the drink again without losing its flavor. When reheating your golden milk, do it gently. Pour it into a small saucepan. Heat it over low to medium heat. Stir it often to avoid burning. Never let it boil, as this can change the taste and texture. You can also use a microwave. Heat in short bursts, stirring in between. Turmeric golden milk lasts about three days in the fridge. Check for signs of spoilage. If it smells sour or has any mold, discard it. Always trust your senses. If it looks or smells off, it’s best to throw it away. Turmeric has many health benefits. It is known for its bright yellow color and active compound called curcumin. Curcumin may help reduce inflammation. It can also support joint health. Some studies suggest it may boost your mood. Turmeric might even help with digestion. Drinking turmeric may also support your immune system. Yes, you can use any milk you like. Almond milk is great, but coconut milk adds creaminess. Oat milk is a good choice for a thicker texture. If you prefer dairy, whole or skim milk works too. Just remember, different types of milk will change the flavor a bit. To make this recipe sugar-free, skip the honey or maple syrup. You can use a sugar substitute like stevia or monk fruit instead. These options will give you sweetness without the calories. Just adjust the amount to your taste. Yes, it is safe for most people to have turmeric daily. Using it in cooking or drinks is a great way to enjoy its benefits. However, if you have health issues or take certain medications, check with a doctor first. Moderation is key, as with any food. In this blog post, we explored the ingredients and health benefits of Turmeric Golden Milk. I shared step-by-step instructions for making it frothy and delicious. We also discovered tips, tricks, and variations to enhance your drink. Proper storage and reheating advice can help you enjoy leftovers. Remember, turmeric offers many health benefits, so enjoy this drink often. Use alternative ingredients if you prefer. With these ideas, you can create the perfect golden milk to suit your taste and health needs. Enjoy your journey to wellness!
                    Turmeric Golden Milk Latte Simple and Creamy Recipe
                  • - 1 ripe mango, peeled and diced - 1 cup fresh pineapple chunks - 1 banana, sliced - 1 cup coconut water (or regular water) - ½ cup plain Greek yogurt (or dairy-free alternative) - 1 tablespoon honey or agave syrup (optional) - A handful of fresh mint leaves (for garnish) - Ice cubes (optional) The key to a delicious mango pineapple smoothie lies in its fresh ingredients. You want ripe fruits for the best flavor. The mango should feel soft when you squeeze it gently. Pineapples should smell sweet and fruity. This smoothie combines sweet mango, tangy pineapple, and creamy banana. Coconut water adds hydration, while Greek yogurt gives it a nice creaminess. You can add honey for extra sweetness if you like. Mint leaves add a refreshing touch when you serve it. Each ingredient plays a role in making this smoothie flavorful and refreshing. Trust me, using fresh ingredients will make a big difference in taste! To make this smoothie, start by gathering your main ingredients. You need a ripe mango, fresh pineapple, and a banana. 1. In a blender, combine the diced mango, pineapple chunks, and banana slices. This mix brings a burst of tropical flavor. 2. Next, add one cup of coconut water to the blender. This not only hydrates but also adds a refreshing twist. 3. For creaminess, pour in half a cup of plain Greek yogurt. If you want it sweeter, drizzle in one tablespoon of honey or agave syrup. 4. Blend on high until the mixture is smooth and creamy. If you like your smoothie chilled, toss in a few ice cubes and blend again until they are fully mixed in. 5. After blending, taste your smoothie. If it needs to be sweeter or thicker, add more honey or coconut water as needed. Once your smoothie is ready, it’s time to serve it. I recommend using tall glasses to show off the vibrant color. For a fun touch, garnish each glass with a few fresh mint leaves on top. This not only looks nice but also adds a fresh aroma. Enjoy your delicious Mango Pineapple Smoothie! For the Full Recipe, please refer back to the ingredient list and instructions. To get your smoothie just right, focus on creaminess. Use ripe fruits like mango and banana. The Greek yogurt adds a nice, smooth texture. If you want a richer taste, try full-fat yogurt. For a lighter feel, use low-fat or dairy-free yogurt. Adjust the thickness by adding more liquid. Coconut water is great for this. If your smoothie is too thick, just pour in a bit more. Blend again until it’s just how you like it. If you want a thicker smoothie, add more banana or ice cubes. Boosting flavor can take your smoothie to the next level. Try adding spices like cinnamon or ginger. These spices not only add warmth but also great health benefits. A dash of cinnamon can make the smoothie taste cozy. A pinch of ginger gives it a nice kick. You can also use flavored yogurts for extra taste. Vanilla or coconut yogurt work well. If you want sweetness, think about honey or agave syrup. These can make your smoothie more enjoyable. For a fun twist, try adding a splash of vanilla extract. It will add a lovely aroma to your drink. For a full taste experience, explore the [Full Recipe]. {{image_2}} You can change the fruit in your smoothie to keep it fresh. Adding strawberries or blueberries gives a sweet twist. These berries add a nice color and taste. You can also try using other tropical fruits like papaya or kiwi. These fruits bring new flavors and nutrients to your drink. Each fruit will change the smoothie’s taste and make it unique. If you want a dairy-free smoothie, swap the Greek yogurt for a plant-based option. Almond, coconut, or soy yogurt works well. These alternatives keep your smoothie creamy without dairy. For sweeteners, you can use maple syrup or agave syrup for a vegan choice. These options add sweetness while keeping your drink plant-based. Enjoy the fruity goodness in many ways! Don't forget to check the Full Recipe for more ideas. You may have some smoothie left after making your Mango Pineapple Smoothie. To keep it fresh, use a glass jar or a BPA-free plastic container. Seal it tightly to prevent air from spoiling the flavor. Store it in the fridge for up to 24 hours. After that, it may lose some taste and texture. If you want to enjoy the smoothie later, freezing is a great option. Pour the smoothie into ice cube trays or freezer-safe bags. Leave some space in the bags for expansion. You can freeze it for up to three months. When you’re ready to drink it, take out what you need. Thaw it in the fridge overnight or blend it straight from the freezer for a slushy treat. Enjoy your refreshing Mango Pineapple Smoothie anytime! Yes, you can make this smoothie ahead of time. If you want to save it, store it in an airtight container. Keep it in the fridge for up to one day. The smoothie may separate, so stir it well before you drink it. If you don’t have coconut water, use regular water or fruit juice instead. Fruit juice can add a nice flavor. You can also try almond milk for a creamier touch. Just remember, the taste will change a bit based on what you use. To make the smoothie thicker, add more Greek yogurt or a banana. You can also use frozen fruit instead of fresh. Frozen fruit gives you a nice, thick texture. Just blend it well, and you’ll get a creamy drink. Yes, this smoothie is great for kids! It is packed with fruits and tastes sweet. You can adjust the sweetness by adding less honey. The bright colors and fresh flavors will appeal to children, making it a fun treat. You can find the Full Recipe for the Tropical Bliss Mango Pineapple Smoothie above in this article. This will guide you through every step to create your own refreshing drink. This blog post covers a simple and tasty smoothie recipe. You learned about the key ingredients and their nutritional benefits. I provided steps to prepare and serve the smoothie perfectly. Tips for texture and flavor help you make it your own. You can explore variations to suit your tastes or dietary needs. Don’t forget storage tips to keep leftovers fresh. Enjoy your smoothie making journey. It’s all about trying new things and having fun!
                    Mango Pineapple Smoothie Refreshing and Flavorful Blend
                  • - 2 packets of frozen açaí puree - 1 ripe banana - 1 cup of fresh pineapple chunks - 1 cup of coconut milk (or any non-dairy milk) - 1 tablespoon of honey or agave syrup (optional) For a vibrant tropical taste, the main ingredients are key. Açaí puree brings rich color and flavor. It is full of antioxidants. Bananas add creaminess and natural sweetness. Fresh pineapple gives a bright, juicy touch. Coconut milk offers a smooth base. You can use any non-dairy milk you prefer. Honey or agave syrup adds sweetness if needed. - Sliced kiwi - Coconut flakes - Granola - Chia seeds - Fresh berries (e.g., strawberries, blueberries) Toppings make your smoothie bowl pop! Sliced kiwi adds a zesty kick. Coconut flakes give it a tropical crunch. Granola provides texture and flavor. Chia seeds offer extra nutrients. Fresh berries, like strawberries and blueberries, add color and taste. You can mix and match these toppings for a fun look. For the full recipe, please refer to the section above. 1. Blend the ingredients Start by adding the frozen açaí puree, ripe banana, fresh pineapple chunks, and coconut milk into a blender. If you want it sweeter, you can add honey or agave syrup. Blend this mixture on high speed until it becomes creamy and smooth. 2. Adjust consistency with coconut milk If your smoothie is too thick, just add a bit more coconut milk. Blend again until you reach the texture you want. This step is key to making your smoothie bowl enjoyable. 3. Pour into a bowl Once blended, carefully pour the smoothie mixture into a bowl. Make sure to use a large enough bowl to hold all the goodness. 4. Add toppings creatively Now comes the fun part! Arrange your toppings, such as sliced kiwi, coconut flakes, granola, chia seeds, and fresh berries, over the smoothie. Try to create a colorful pattern. I love making a circular design to highlight all the vibrant colors. - Tips for presentation Use a shallow bowl to show off your beautiful toppings. You can also sprinkle some extra coconut flakes around the edge for a nice touch. A colorful presentation makes your smoothie bowl more fun to eat. - Recommended serving utensils Serve your smoothie bowl with a regular spoon. If you want to make it more special, use a wooden spoon or a cute, colorful one. Enjoy your tropical treat right away to keep it fresh and tasty. For the full recipe, refer to the earlier sections. To make a great smoothie bowl, start with ripe fruits. Ripe fruits taste better and add natural sweetness. Look for bananas that are yellow with some brown spots. When it comes to pineapples, choose ones that smell sweet. It ensures they are juicy and fresh. Blending is key to your smoothie bowl. You want a smooth and creamy texture. If your mix is too thick, add more coconut milk. Blend again until you reach the right consistency. A good blend makes your bowl enjoyable and easy to eat. A colorful topping arrangement makes your smoothie bowl pop. Use fresh berries, sliced kiwi, and coconut flakes. Lay them out in a pattern. A circular design looks appealing and fun. To elevate your smoothie bowl's look, use bowls with interesting shapes. Tall bowls or wide, shallow ones can change the game. Garnish with a sprinkle of chia seeds for a fancy touch. This not only looks great but adds a bit of crunch too. {{image_2}} You can change the non-dairy milk for this smoothie. Almond, soy, or oat milk work well. Each milk adds a different taste. Try using seasonal fruits too. Mango, papaya, or berries add a fresh twist. You can mix and match to find your favorite blend. Want more nutrients? Add spinach or kale to your smoothie. They blend well and boost health. You won’t even taste them! For extra energy, stir in nut butter or protein powder. Both will make your smoothie more filling. They add great flavor too! You can also experiment with different combinations to find the best taste for you. To store leftovers, place your smoothie bowl in the fridge. Use a tight container to keep it fresh. Glass or BPA-free plastic works well for storage. I prefer glass because it keeps flavors better. You can freeze smoothie bowls for later. Just pour the mixture into an airtight container. Leave some space at the top, as it will expand when frozen. To defrost, place it in the fridge overnight. If you’re in a rush, you can use the microwave. Just heat it in short bursts to avoid cooking. Enjoy your tropical treat later with ease! For the recipe, check out the Full Recipe. What is açaí and what are its benefits? Açaí is a small, dark purple berry from Brazil. It is full of antioxidants, which help fight free radicals in the body. Açaí is also rich in fiber, promoting good digestion. Plus, it has healthy fats that support heart health. You can enjoy its fruity taste in many dishes. Can I make this smoothie bowl ahead of time? Yes! You can prepare the smoothie mix and store it in the fridge for up to 24 hours. Just remember to keep the toppings separate. This way, your bowl stays fresh and tasty. How can I make this recipe vegan or gluten-free? To make it vegan, use agave syrup instead of honey. For gluten-free, ensure your granola and any other toppings are gluten-free. Most fruits and coconut milk are naturally gluten-free, so you’re all set! Can I substitute açaí with other fruits? Yes, you can! If you can’t find açaí, try using frozen berries like blueberries or strawberries. These fruits will add sweetness and a burst of color to your bowl. What to do if the smoothie is too thick? If your smoothie is too thick, just add a little more coconut milk. Blend again until you reach your desired creaminess. This will make it easier to pour and enjoy. How to fix a smoothie bowl that tastes too bland? If your smoothie bowl lacks flavor, try adding a splash of vanilla extract or a pinch of salt. You can also mix in a bit of honey or agave syrup for sweetness. Adjust the toppings to add more taste and texture. This article covers how to make a delicious açaí smoothie bowl. You learned about the key ingredients, easy steps for preparation, and creative topping ideas. I shared tips to improve taste and presentation, plus fun variations to try. Don’t forget storage techniques to keep your bowl fresh. With all this information, you can enjoy a tasty and nutritious treat anytime. Get creative with your favorites and make this recipe truly yours. Enjoy every bite!
                    Tropical Acai Smoothie Bowl Energizing Healthy Treat
                  • - 1 cup plain yogurt - ½ cup coconut milk - 1 cup fresh blueberries (plus extra for garnish) - 2 tablespoons honey or agave syrup (adjust to taste) - ½ teaspoon vanilla extract - A pinch of cardamom powder - Ice cubes (optional) Using fresh ingredients makes a big difference in taste. Fresh blueberries burst with flavor and nutrients. They give the lassi a bright color and a sweet taste. If you can’t find fresh blueberries, frozen ones work too. They are picked at their peak and frozen quickly. This helps keep their taste and nutrients. However, fresh blueberries always add a better texture. Each ingredient in this lassi has great health benefits. - Plain yogurt: Full of protein and good for your gut health. - Coconut milk: Contains healthy fats that can boost energy. - Blueberries: Packed with antioxidants, they help fight disease. - Honey or agave syrup: Adds sweetness and has some vitamins. - Vanilla extract: Adds flavor and may reduce stress. - Cardamom powder: Can aid digestion and add a warm spice note. This Blueberry Coconut Lassi is not just tasty; it’s also good for you! Start by gathering all your ingredients. This makes the process easier and faster. You will need: - 1 cup plain yogurt - ½ cup coconut milk - 1 cup fresh blueberries (plus extra for garnish) - 2 tablespoons honey or agave syrup (adjust to taste) - ½ teaspoon vanilla extract - A pinch of cardamom powder - Ice cubes (optional) Make sure your blueberries are fresh and ripe. They add great flavor and color. If you want a sweeter lassi, adjust the honey or agave syrup to your taste. Now it’s time to blend! In a blender, combine the yogurt, coconut milk, blueberries, honey, vanilla extract, and cardamom powder. Blend on high speed until the mix is smooth and creamy. If you like a thinner drink, add more coconut milk. After blending, taste the lassi. You can add more honey if you want it sweeter. For a chilled treat, add ice cubes and blend again until frothy. Pour your lassi into tall, clear glasses. This shows off the pretty purple color. For a special touch, garnish with a few whole blueberries on top. You can also sprinkle a little cardamom powder for added flair. If you want to impress, add a slice of lime on the glass rim. This not only looks good but adds a nice contrast to the drink. Enjoy your refreshing Blueberry Coconut Lassi! For the full recipe, check the earlier section. For a thick and creamy lassi, use full-fat yogurt. This gives your drink a rich texture. If you want it thinner, add a bit more coconut milk. Blend it well until it's smooth. You can also try adding ice cubes. This makes it frothy and cold. Both honey and agave syrup are great for sweetness. Honey gives a floral taste, while agave is mild. Start with two tablespoons and taste it. If you want it sweeter, add more. Remember, you can always add more, but you can't take it out! You can make your lassi even better! Try adding a pinch of cinnamon or nutmeg for warmth. Fresh mint leaves can add a nice touch too. You might even add a splash of lime juice for a zesty kick. All these extras can make your blueberry coconut lassi unique and delicious. For the full recipe, check out the complete instructions. {{image_2}} You can easily make a vegan version of blueberry coconut lassi. Just swap the yogurt with a plant-based option. Use coconut yogurt or almond yogurt for a creamy base. These alternatives keep that rich flavor. They also add a nice texture. You still get the fresh taste from blueberries and coconut milk. This change makes the drink creamy without any dairy. Spices can enhance the flavor of your lassi. Cardamom adds a warm note. You can also try cinnamon for a sweet twist. If you want more fruit, think about adding bananas or mangoes. These fruits blend well with blueberries. They also boost the health benefits. Each adds its own flavor and richness to the drink. If you prefer different dairy options, there are many choices. Greek yogurt gives a thicker texture. It also adds a tangy taste. You can use regular yogurt instead of plain yogurt. It is a great way to change the flavor. Try using buttermilk for a unique twist. Each choice will change the texture and taste of your lassi. Each option keeps the drink creamy and delicious. For the full recipe, check out the link above. To keep your blueberry coconut lassi fresh, store it in a clean glass jar. Make sure the jar is airtight. This helps keep out air and bacteria. If you have leftovers, don’t let them sit out for long. Refrigerate the lassi within two hours of making it. Always use a spoon to scoop the lassi. Avoid using your fingers, as this can introduce germs. When stored properly, blueberry coconut lassi lasts about 2 to 3 days in the fridge. After that, the taste and texture may change. You will notice it may separate a bit. If this happens, just give it a good shake or blend it again. Always check for any off smells or changes in color before consuming. You can freeze blueberry coconut lassi for later enjoyment. Pour the lassi into ice cube trays or freezer-safe containers. Leave some space at the top, as liquids expand when frozen. To use, thaw the lassi in the fridge overnight or blend the frozen cubes into smoothies. This method keeps the flavor and nutrients intact. For the best taste, use frozen lassi within three months. For the full recipe, check out the earlier section! Yes, you can use Greek yogurt. It makes the lassi thicker and creamier. If you prefer a lighter drink, stick with plain yogurt. Greek yogurt has more protein, which is great for keeping you full. Just remember to adjust the coconut milk to balance the thickness. Absolutely! Blueberry Coconut Lassi is a fun and tasty drink for kids. It has natural sweetness from honey and blueberries. The yogurt provides healthy probiotics, good for digestion. Kids love the vibrant color and fruity flavor. You can make it as sweet as they like! You can find Blueberry Coconut Lassi at many health food stores or cafes. Some grocery stores may also carry it in the yogurt section. If you want a fresh one, try making it at home. You can easily whip up this drink with the Full Recipe I provided. Blueberry coconut lassi is a nutritious and tasty drink. You learned about key ingredients, like fresh blueberries and coconut. The blending process ensures a smooth drink. Adjust sweetness with honey or agave for your taste. You can try different fruits and spices to mix it up. Storing tips help you keep leftovers fresh. Remember, lassi is fun to make and enjoy. Experiment with variations to find your favorite way to drink it. Enjoy your delicious and healthy blueberry coconut lassi!
                    Blueberry Coconut Lassi Creamy and Refreshing Drink

                  Footer

                  Indulge in the mouthwatering delight of Birria Nachos, where savory birria meets crispy tortilla chips for a sensational flavor explosion. This recipe showcases tender, seasoned meat layered with gooey cheese and fresh toppings that elevate any gathering. Perfect for game days or family dinners, our step-by-step guide makes it easy to impress your guests. Click to discover the full recipe and bring this delicious fusion dish to your table!
                  ↑ back to top

                  More information

                  • Home
                  • Drinks
                  • Appetizer
                  • Dinner
                  • Desserts
                  • About
                  • Contact
                  • Privacy Policy

                  Our Policies

                  • Privacy Policy
                  • GDPR Policy
                  • Terms Of Use
                  • Copyright Policy
                  • Cookie Policy
                  • Disclaimer

                  Copyright © 2025 cheftaling