Chef Taling

  • Recipes
    • Dinner
    • Desserts
    • Appetizer
    • Drinks
  • Privacy Policy
  • Contact
  • About
menu icon
go to homepage
  • Recipes
    • Dinner
    • Desserts
    • Appetizer
    • Drinks
  • Privacy Policy
  • Contact
  • About
Elevate your meals with this irresistible creamy balsamic vinaigrette recipe! Discover how to blend rich balsamic vinegar with creamy ingredients to create a dressing that enhances salads, roasted vegetables, and grilled meats. Made from fresh, wholesome ingredients, this homemade dressing is perfect for those who want a healthier alternative to store-bought options. Click to explore the full recipe and transform your dish with this easy, flavorful dressing!

search icon
Homepage link
  • Recipes
    • Dinner
    • Desserts
    • Appetizer
    • Drinks
  • Privacy Policy
  • Contact
  • About
Elevate your meals with this irresistible creamy balsamic vinaigrette recipe! Discover how to blend rich balsamic vinegar with creamy ingredients to create a dressing that enhances salads, roasted vegetables, and grilled meats. Made from fresh, wholesome ingredients, this homemade dressing is perfect for those who want a healthier alternative to store-bought options. Click to explore the full recipe and transform your dish with this easy, flavorful dressing!

×

Creamy Balsamic Vinaigrette Recipe

Published: Feb 9, 2025 · by Taling · Leave a Comment

WANT TO SAVE THIS RECIPE?

1 shares
Elevate your meals with this irresistible creamy balsamic vinaigrette recipe! Discover how to blend rich balsamic vinegar with creamy ingredients to create a dressing that enhances salads, roasted vegetables, and grilled meats. Made from fresh, wholesome ingredients, this homemade dressing is perfect for those who want a healthier alternative to store-bought options. Click to explore the full recipe and transform your dish with this easy, flavorful dressing!

Introduction

Vinaigrettes are a staple in the culinary world, celebrated for their versatility and ability to elevate a wide range of dishes. From crisp salads to roasted vegetables and even grilled meats, the right vinaigrette can transform an ordinary meal into something special. Among the myriad of options available, creamy balsamic vinaigrette stands out for its rich flavor and velvety texture. It marries the sweet, tangy notes of balsamic vinegar with a creamy base, creating a delightful dressing that enhances any dish it graces.

Vinaigrettes are a staple in the culinary world, celebrated for their versatility and ability to elevate a wide range of dishes. From crisp salads to roasted vegetables and even grilled meats, the right vinaigrette can transform an ordinary meal into something special. Among the myriad of options available, creamy balsamic vinaigrette stands out for its rich flavor and velvety texture. It marries the sweet, tangy notes of balsamic vinegar with a creamy base, creating a delightful dressing that enhances any dish it graces.

The appeal of creamy balsamic vinaigrette lies not just in its taste and texture but also in its ease of preparation. This dressing can be whipped up in mere minutes, requiring minimal effort while delivering maximum flavor. Unlike many store-bought dressings laden with preservatives and artificial ingredients, a homemade creamy balsamic vinaigrette offers a healthier alternative. By using fresh, quality ingredients, you can control the flavor and nutritional content, making it a guilt-free addition to your meals.

Understanding Balsamic Vinegar

At the heart of this creamy dressing is balsamic vinegar, a unique condiment with a rich history. Originating from Modena, Italy, traditional balsamic vinegar is made from freshly crushed grape must. This must is cooked down and then aged in wooden barrels for a period ranging from a few years to several decades. The aging process allows the vinegar to develop complex flavors, ranging from sweet and fruity to tangy and rich.

There are several types of balsamic vinegar available on the market today. The most authentic versions are labeled “Aceto Balsamico Tradizionale” and are produced in Modena or Reggio Emilia. These varieties can be quite expensive due to their lengthy aging process and the labor-intensive methods used in production. On the other hand, “Balsamic Vinegar of Modena” is a more accessible option, often blended with wine vinegar and aged for a shorter period, offering a more affordable choice without sacrificing too much on flavor.

The flavor profile of balsamic vinegar is multifaceted. Its sweetness, combined with acidity, creates a balance that can enhance the flavor of both savory and sweet dishes. When used in a creamy vinaigrette, balsamic vinegar adds depth and richness, making it a perfect partner for fresh greens and roasted vegetables alike.

Ingredients Overview

When crafting a creamy balsamic vinaigrette, the choice of ingredients is crucial for achieving the desired flavor and texture. Below is a comprehensive overview of each component that contributes to this delightful dressing:

  1. Balsamic Vinegar: This key ingredient imparts a distinctive tangy sweetness to the dressing. It is rich in polyphenols, which are antioxidants that offer various health benefits, including anti-inflammatory properties and improved heart health. When selecting balsamic vinegar, look for high-quality options that are labeled as “aged” for a more robust flavor.
  2. Mayonnaise vs. Greek Yogurt: The creaminess in this vinaigrette can come from either mayonnaise or Greek yogurt. Mayonnaise provides a rich, smooth texture and a slightly tangy flavor, while Greek yogurt offers a lighter, tangy alternative that is lower in calories and fat. Depending on your dietary preferences, you can choose either option without sacrificing taste.
  3. Honey vs. Maple Syrup: Sweeteners play an essential role in balancing the acidity of balsamic vinegar. Honey adds a floral sweetness that complements the tanginess well, while maple syrup brings a unique, earthy flavor to the dressing. Both options are natural sweeteners, but they impart different characteristics, so choose based on your flavor preference.
  4. Dijon Mustard: This ingredient serves as an emulsifier, helping to blend the oil and vinegar while adding a hint of spiciness. Dijon mustard not only balances flavors but also enhances the overall taste of the vinaigrette, making it a vital component.
  5. Garlic: Fresh garlic adds a bold flavor that elevates the dressing. It offers numerous health benefits, including antibacterial and antiviral properties. The key to incorporating garlic into your vinaigrette is to finely mince or grate it, ensuring even distribution throughout the dressing.
  6. Olive Oil: The type of olive oil you use can significantly affect the final flavor of the vinaigrette. Extra virgin olive oil is recommended for its high quality and rich taste, contributing a fruity, peppery note that complements the balsamic vinegar nicely. Additionally, olive oil is packed with healthy fats that promote heart health.
  7. Fresh Basil: While optional, fresh basil can add a delightful herbal note to your creamy balsamic vinaigrette. Its aromatic qualities enhance the dressing’s flavor profile, making it a great addition during the summer months when basil is in season.

Step-by-Step Instructions

Creating your own creamy balsamic vinaigrette is a straightforward process that can be accomplished in just a few steps. Here’s a detailed breakdown of how to bring this delicious dressing to life:

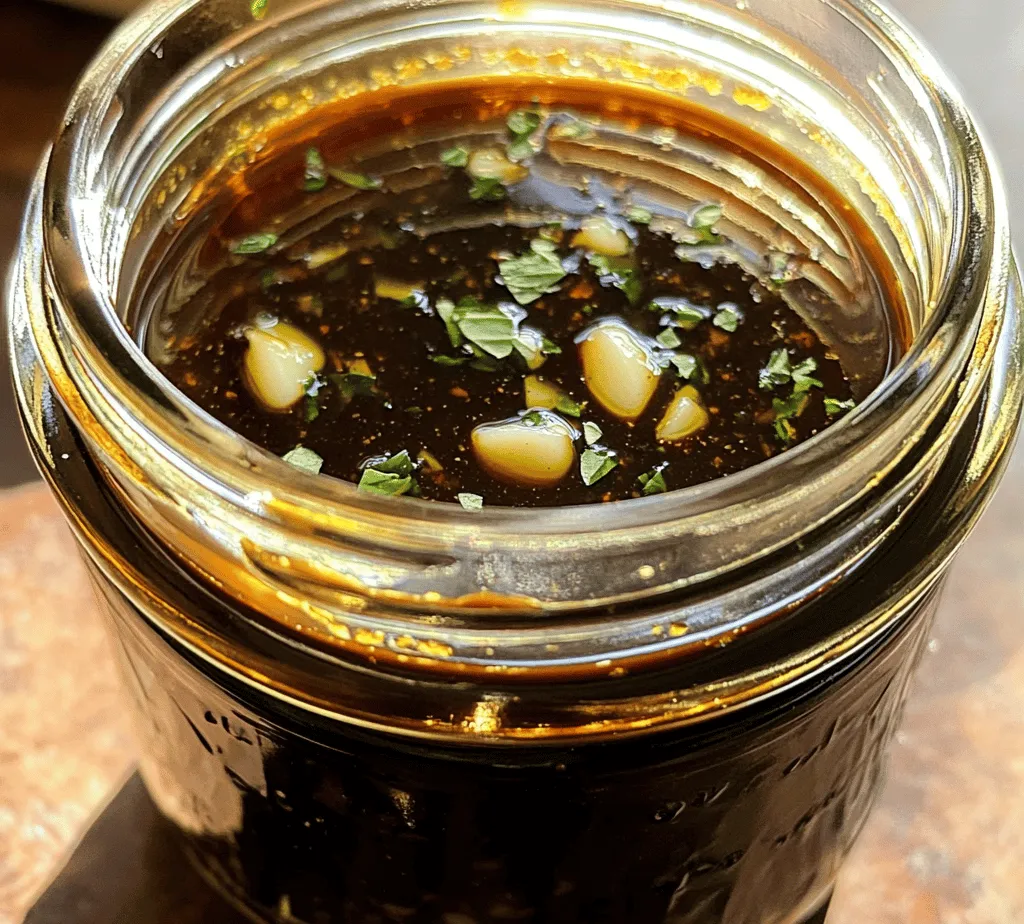
1. Combining Ingredients in a Bowl: Begin by gathering all the ingredients in a medium-sized mixing bowl. Measure out the balsamic vinegar, mayonnaise or Greek yogurt, honey or maple syrup, Dijon mustard, minced garlic, and a pinch of salt and pepper. The key to a well-balanced vinaigrette is to ensure all the ingredients are proportionate to one another.

2. Emulsifying the Dressing: To achieve that creamy consistency, you will need to whisk the ingredients together thoroughly. Start by whisking the balsamic vinegar, mayonnaise or Greek yogurt, and Dijon mustard until they are well combined. Slowly drizzle in the olive oil while continuing to whisk vigorously. This emulsification process is essential, as it helps to blend the oil and vinegar seamlessly, creating a smooth and luscious dressing.

3. Adjusting Seasoning to Taste: Once the vinaigrette is emulsified, taste it and adjust the seasoning to your preference. You may want to add more salt, pepper, or sweetness depending on your palate. If you prefer a more tangy dressing, consider adding an extra splash of balsamic vinegar.

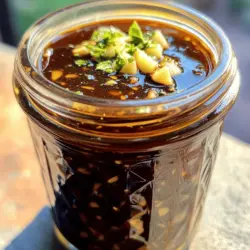
By following these steps, you’ll create a creamy balsamic vinaigrette that not only enhances salads but doubles as a delicious marinade for meats or a dipping sauce for fresh vegetables. This dressing is not only easy to make but is also a healthier alternative to many commercial dressings, allowing you to enjoy your meals guilt-free. Keep an eye out for the second part of this article, where we will delve deeper into serving suggestions and storage tips to maximize the use of your homemade vinaigrette.

Vinaigrettes are a staple in the culinary world, celebrated for their versatility and ability to elevate a wide range of dishes. From crisp salads to roasted vegetables and even grilled meats, the right vinaigrette can transform an ordinary meal into something special. Among the myriad of options available, creamy balsamic vinaigrette stands out for its rich flavor and velvety texture. It marries the sweet, tangy notes of balsamic vinegar with a creamy base, creating a delightful dressing that enhances any dish it graces.

Incorporating Fresh Herbs for Added Flavor

One of the simplest ways to elevate your creamy balsamic vinaigrette is by incorporating fresh herbs. Fresh herbs not only add vibrant flavors but also enhance the overall nutritional profile of your dressing. Here are some popular options:

  1. Basil: Adds a sweet, slightly peppery flavor that pairs exceptionally well with balsamic vinegar. Simply chop fresh basil leaves and mix them into your vinaigrette.
  2. Parsley: This herb brings a fresh, bright taste to your dressing. Finely chop Italian flat-leaf parsley and fold it into the mixture for a subtle green flavor.
  3. Thyme: Its earthy and slightly minty flavor can add depth to your vinaigrette. Use fresh thyme sprigs, stripping the leaves off the stem before adding them to the dressing.
  4. Dill: If you enjoy a tangy twist, fresh dill can be a delightful addition. Its unique taste complements many salad ingredients, making it an excellent choice for your vinaigrette.

Experiment with these herbs to find the combination that best suits your palate. Don’t shy away from blending different herbs together for a complex flavor profile that will elevate your salads and dishes.

Tips for Perfecting Your Vinaigrette

Creating the perfect creamy balsamic vinaigrette is an art that can be easily mastered. However, a few common mistakes can lead to underwhelming results. Here’s how to avoid them:

  1. Incorrect Ratios: The classic vinaigrette ratio is three parts oil to one part vinegar. For creamy vinaigrettes, start with this base and adjust as needed. Too much vinegar can make your dressing overly acidic, while too little may not provide enough tang.
  2. Inadequate Emulsification: To achieve that creamy texture, ensure you whisk the ingredients together vigorously. An immersion blender or a small food processor can also be effective in creating a stable emulsion.
  3. Neglecting Seasoning: Don’t forget to season your vinaigrette! Salt and pepper are essential to enhancing the flavors. Taste and adjust as necessary, and consider adding a pinch of sugar or honey to balance the acidity if desired.

Variations on the Recipe

To keep things interesting, consider these variations on your creamy balsamic vinaigrette:

  1. Different Vinegars: While balsamic vinegar is a classic choice, you can experiment with other varieties. Apple cider vinegar brings a fruity tang, while red wine vinegar offers robust flavor notes. Each will impart a unique taste to your dressing.
  2. Adding Spices or Fresh Herbs: Don’t hesitate to incorporate spices like garlic powder, onion powder, or a dash of cayenne for heat. Fresh herbs can also be added for an aromatic twist, as mentioned above.
  3. Adjusting Sweetness Levels: Depending on your taste preference, you can increase or decrease the sweetness of your vinaigrette. Maple syrup, agave nectar, or even a splash of orange juice can add a delightful sweetness that complements the acidity of the vinegar.

By personalizing your vinaigrette, you can create a dressing that perfectly matches your meal and mood.

Serving Suggestions

A creamy balsamic vinaigrette is incredibly versatile and can enhance a wide range of dishes. Here are some delightful ways to incorporate it into your meals:

  1. Salads: Use this vinaigrette on various greens such as arugula, spinach, or mixed salad greens. Add toppings like sliced strawberries, crumbled goat cheese, or toasted nuts for a complete and satisfying dish.
  2. Roasted Vegetables: Drizzle the vinaigrette over roasted vegetables such as Brussels sprouts, carrots, or sweet potatoes. The creamy dressing creates a rich flavor that beautifully complements their natural sweetness.
  3. Grilled Meats and Fish: For an added layer of flavor, brush your grilled chicken, steak, or fish with the vinaigrette before grilling. It will create a delightful glaze that infuses your proteins with a zesty taste.
  4. Grain Bowls and Pasta Salads: Toss your favorite grains—like quinoa or farro—with the creamy vinaigrette for a filling grain bowl. It also works wonderfully in pasta salads, providing a creamy texture that binds the flavors together.

With its adaptability, creamy balsamic vinaigrette can be a staple in your kitchen, ready to enhance any meal.

Health Benefits of Homemade Dressings

Homemade dressings offer several health advantages when compared to store-bought varieties, making them an excellent choice for health-conscious eaters. Here’s why:

  1. Nutritional Content: Many commercial dressings contain preservatives, artificial flavors, and added sugars. When you make your vinaigrette at home, you can control the ingredients, ensuring a healthier option that is free from unwanted additives.
  2. Avoiding Preservatives: Homemade dressings are fresher and free from the preservatives that extend the shelf life of store-bought products. This means more natural flavors and nutrients in every bite.
  3. Using Fresh Ingredients: Utilizing fresh, natural ingredients in your salads and dressings maximizes flavor and nutrition. Fresh herbs, quality olive oil, and organic vinegars contribute to a healthier meal overall.

By opting for homemade dressings, you are not only enhancing the flavor of your meals but also prioritizing your health.

Storing Your Vinaigrette

To maintain the freshness and quality of your creamy balsamic vinaigrette, proper storage is essential. Here are some guidelines:

  1. Storage Container: Use a clean, airtight container to store your vinaigrette. Glass jars or bottles work well, as they do not retain odors or stains.
  2. Refrigeration: Store your vinaigrette in the refrigerator, where it can last for up to one week. The cold temperature helps preserve the flavors and prevents spoilage.
  3. Shelf Life: Always check for signs of spoilage, such as an off smell or unusual texture. If you notice separation, simply shake or stir the dressing before use—this is normal and does not indicate spoilage.

By following these storage tips, you can enjoy your creamy balsamic vinaigrette for days to come.

Conclusion

Creating a creamy balsamic vinaigrette at home is not only straightforward but also immensely satisfying. The joy of combining fresh ingredients, customizing flavors, and enhancing your meals with a homemade dressing is truly rewarding. This vinaigrette not only elevates salads but also pairs beautifully with various dishes, making it a versatile addition to your culinary repertoire.

We encourage you to experiment with this recipe and make it your own. Adjust the balance of ingredients to suit your taste preferences, and don’t hesitate to explore new herb and spice combinations. Remember, homemade dressings can transform ordinary meals into extraordinary ones, contributing to a healthier diet filled with fresh flavors. Enjoy the process of making it, and relish the delightful difference it brings to your dining experience!
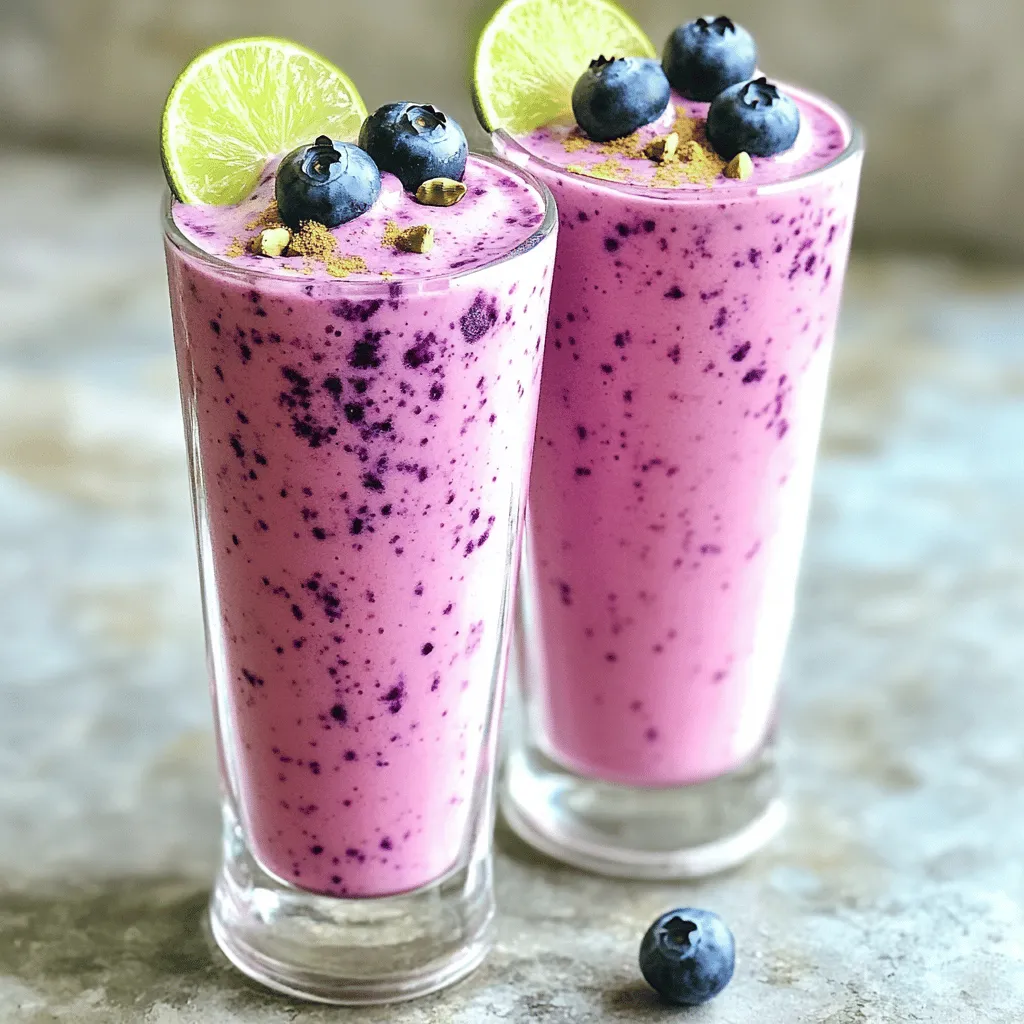
Vinaigrettes are a staple in the culinary world, celebrated for their versatility and ability to elevate a wide range of dishes. From crisp salads to roasted vegetables and even grilled meats, the right vinaigrette can transform an ordinary meal into something special. Among the myriad of options available, creamy balsamic vinaigrette stands out for its rich flavor and velvety texture. It marries the sweet, tangy notes of balsamic vinegar with a creamy base, creating a delightful dressing that enhances any dish it graces.

Creamy Balsamic Vinaigrette

Elevate your meals with this irresistible creamy balsamic vinaigrette recipe! Discover how to blend rich balsamic vinegar with creamy ingredients to create a dressing that enhances salads, roasted vegetables, and grilled meats. Made from fresh, wholesome ingredients, this homemade dressing is perfect for those who want a healthier alternative to store-bought options.
Print Recipe Pin Recipe

Ingredients
  

½ cup balsamic vinegar

¼ cup mayonnaise (or Greek yogurt for a lighter version)

2 tablespoons honey or maple syrup

1 teaspoon Dijon mustard

1 garlic clove, minced

¼ cup olive oil

Salt and pepper to taste

1 teaspoon fresh basil, finely chopped (optional for a herbal twist)

Instructions
 

In a medium bowl, combine balsamic vinegar, mayonnaise (or Greek yogurt), honey (or maple syrup), Dijon mustard, and minced garlic.

    Whisk together until smooth and well mixed.

      Gradually add olive oil while whisking vigorously to emulsify the dressing.

        Season with salt and pepper to taste. If using, stir in the finely chopped fresh basil for added flavor.

          Transfer the vinaigrette to a jar with a tight-fitting lid, and shake well before using.

            Prep Time: 5 minutes | Total Time: 5 minutes | Servings: About ¾ cup

              Related Recipes

              • To make a delicious Turmeric Golden Milk Latte, gather these simple ingredients: - 2 cups almond milk (or your preferred milk) - 1 teaspoon ground turmeric - 1/2 teaspoon ground ginger - 1/4 teaspoon cinnamon - 1 tablespoon honey or maple syrup (adjust to taste) - Pinch of black pepper - 1/2 teaspoon vanilla extract - Optional: a sprinkle of nutmeg for garnish - Almond Milk: This milk is low in calories and rich in vitamins. It helps with heart health. - Turmeric: This spice has curcumin, known for its anti-inflammatory properties. It may help improve brain function. - Ginger: Ginger can help with digestion and nausea. It adds a nice warmth to the drink. - Cinnamon: This spice is rich in antioxidants. It may help lower blood sugar and improve heart health. - Honey or Maple Syrup: Both sweeteners can boost energy. They also provide antioxidants. - Black Pepper: This spice enhances turmeric absorption. It makes the drink more effective. - Vanilla Extract: It adds flavor and can help reduce stress. - Nutmeg: This spice is optional, but it adds warmth and a nice aroma. - Milk Options: You can use oat milk, soy milk, or coconut milk for different flavors. - Sweeteners: If you prefer, try agave syrup or stevia as sugar-free options. - Spices: Experiment with cardamom or cloves for added flavor. - Nutmeg: You can skip it if you don't like nutmeg, or use a touch of cocoa powder instead. 1. Start by taking a small saucepan. 2. Add 2 cups of almond milk to the pan. 3. Measure and add 1 teaspoon of ground turmeric. 4. Next, add 1/2 teaspoon of ground ginger. 5. Sprinkle in 1/4 teaspoon of cinnamon. 6. Sweeten your drink with 1 tablespoon of honey or maple syrup. 7. Don't forget a pinch of black pepper for better absorption of turmeric. 8. Lastly, add 1/2 teaspoon of vanilla extract. 9. Whisk all the ingredients well in the pan. 10. Place the saucepan on medium heat. 11. Gently warm the mixture while stirring often. 12. Keep an eye on it; do not let it boil. 13. After about 5-7 minutes, it should be hot enough. 14. Remove the pan from heat and let it cool slightly. 15. If you want a frothy drink, use a milk frother or whisk it quickly. 16. Pour the golden milk into your favorite mugs. 17. Optionally, sprinkle a bit of nutmeg on top for a nice touch. 18. Serve warm and enjoy this comforting drink! - Always use a whisk to blend the spices into the milk. - Whisking helps mix the turmeric and other spices evenly. - When heating, keep the heat low to avoid scalding the milk. - Stir often to prevent sticking at the bottom of the pan. - If you see steam but no bubbles, you are at the right temperature. - A milk frother works wonders for a smooth, frothy finish. - If you don’t have a frother, whisk vigorously by hand. - Frothing adds air, giving the latte a creamy feel. - The more you froth, the lighter and fluffier your drink will become. - For an extra touch, froth some almond milk separately and top your latte with it. You can mix spices to make your turmeric latte tastier. Try adding a pinch of nutmeg or a dash of cardamom. These spices add warmth to the drink. You can also use fresh ginger instead of ground ginger. This will give your latte a bright, zesty kick. Just remember, fresh ginger may need more time to steep. Many people rush the heating process. Always warm your milk slowly over medium heat. If you boil it, the spices can lose flavor. Another mistake is not blending the spices well. Make sure to whisk the mixture thoroughly. This helps avoid clumps of turmeric or ginger. Lastly, avoid skipping the black pepper. It helps your body absorb turmeric better. Sweetness is personal. Start with one tablespoon of honey or maple syrup. Taste your latte and add more if you like it sweeter. For creaminess, use full-fat coconut milk for a richer feel. Almond milk is lighter but still delicious. You can also mix almond and coconut milk for the best of both worlds. {{image_2}} You can easily make this latte vegan. Just use almond milk, coconut milk, or oat milk. These milks work great in this recipe. They keep the drink creamy and delicious. If you want a nut-free option, oat milk is the best choice. It blends well with turmeric and spices. To make an iced version, start with brewed turmeric milk. Follow the same steps but let it cool. Pour over ice instead of serving warm. This drink is refreshing on hot days. You can also add some ice cream for a treat! You can mix and match flavors for fun. Try adding matcha for a green twist. This adds a fresh taste and boosts energy. You can also use cocoa for a chocolatey version. The cocoa pairs well with turmeric and spices. For a special touch, add a dash of vanilla extract. This enhances the overall flavor and aroma. To store leftover turmeric golden milk, let it cool first. Then, pour it into an airtight container. Keep it in the fridge for up to three days. This way, you can enjoy the drink again without losing its flavor. When reheating your golden milk, do it gently. Pour it into a small saucepan. Heat it over low to medium heat. Stir it often to avoid burning. Never let it boil, as this can change the taste and texture. You can also use a microwave. Heat in short bursts, stirring in between. Turmeric golden milk lasts about three days in the fridge. Check for signs of spoilage. If it smells sour or has any mold, discard it. Always trust your senses. If it looks or smells off, it’s best to throw it away. Turmeric has many health benefits. It is known for its bright yellow color and active compound called curcumin. Curcumin may help reduce inflammation. It can also support joint health. Some studies suggest it may boost your mood. Turmeric might even help with digestion. Drinking turmeric may also support your immune system. Yes, you can use any milk you like. Almond milk is great, but coconut milk adds creaminess. Oat milk is a good choice for a thicker texture. If you prefer dairy, whole or skim milk works too. Just remember, different types of milk will change the flavor a bit. To make this recipe sugar-free, skip the honey or maple syrup. You can use a sugar substitute like stevia or monk fruit instead. These options will give you sweetness without the calories. Just adjust the amount to your taste. Yes, it is safe for most people to have turmeric daily. Using it in cooking or drinks is a great way to enjoy its benefits. However, if you have health issues or take certain medications, check with a doctor first. Moderation is key, as with any food. In this blog post, we explored the ingredients and health benefits of Turmeric Golden Milk. I shared step-by-step instructions for making it frothy and delicious. We also discovered tips, tricks, and variations to enhance your drink. Proper storage and reheating advice can help you enjoy leftovers. Remember, turmeric offers many health benefits, so enjoy this drink often. Use alternative ingredients if you prefer. With these ideas, you can create the perfect golden milk to suit your taste and health needs. Enjoy your journey to wellness!
                Turmeric Golden Milk Latte Simple and Creamy Recipe
              • - 1 ripe mango, peeled and diced - 1 cup fresh pineapple chunks - 1 banana, sliced - 1 cup coconut water (or regular water) - 1/2 cup plain Greek yogurt (or dairy-free alternative) - 1 tablespoon honey or agave syrup (optional) - A handful of fresh mint leaves (for garnish) - Ice cubes (optional) The key to a delicious mango pineapple smoothie lies in its fresh ingredients. You want ripe fruits for the best flavor. The mango should feel soft when you squeeze it gently. Pineapples should smell sweet and fruity. This smoothie combines sweet mango, tangy pineapple, and creamy banana. Coconut water adds hydration, while Greek yogurt gives it a nice creaminess. You can add honey for extra sweetness if you like. Mint leaves add a refreshing touch when you serve it. Each ingredient plays a role in making this smoothie flavorful and refreshing. Trust me, using fresh ingredients will make a big difference in taste! To make this smoothie, start by gathering your main ingredients. You need a ripe mango, fresh pineapple, and a banana. 1. In a blender, combine the diced mango, pineapple chunks, and banana slices. This mix brings a burst of tropical flavor. 2. Next, add one cup of coconut water to the blender. This not only hydrates but also adds a refreshing twist. 3. For creaminess, pour in half a cup of plain Greek yogurt. If you want it sweeter, drizzle in one tablespoon of honey or agave syrup. 4. Blend on high until the mixture is smooth and creamy. If you like your smoothie chilled, toss in a few ice cubes and blend again until they are fully mixed in. 5. After blending, taste your smoothie. If it needs to be sweeter or thicker, add more honey or coconut water as needed. Once your smoothie is ready, it’s time to serve it. I recommend using tall glasses to show off the vibrant color. For a fun touch, garnish each glass with a few fresh mint leaves on top. This not only looks nice but also adds a fresh aroma. Enjoy your delicious Mango Pineapple Smoothie! For the Full Recipe, please refer back to the ingredient list and instructions. To get your smoothie just right, focus on creaminess. Use ripe fruits like mango and banana. The Greek yogurt adds a nice, smooth texture. If you want a richer taste, try full-fat yogurt. For a lighter feel, use low-fat or dairy-free yogurt. Adjust the thickness by adding more liquid. Coconut water is great for this. If your smoothie is too thick, just pour in a bit more. Blend again until it’s just how you like it. If you want a thicker smoothie, add more banana or ice cubes. Boosting flavor can take your smoothie to the next level. Try adding spices like cinnamon or ginger. These spices not only add warmth but also great health benefits. A dash of cinnamon can make the smoothie taste cozy. A pinch of ginger gives it a nice kick. You can also use flavored yogurts for extra taste. Vanilla or coconut yogurt work well. If you want sweetness, think about honey or agave syrup. These can make your smoothie more enjoyable. For a fun twist, try adding a splash of vanilla extract. It will add a lovely aroma to your drink. For a full taste experience, explore the [Full Recipe]. {{image_2}} You can change the fruit in your smoothie to keep it fresh. Adding strawberries or blueberries gives a sweet twist. These berries add a nice color and taste. You can also try using other tropical fruits like papaya or kiwi. These fruits bring new flavors and nutrients to your drink. Each fruit will change the smoothie’s taste and make it unique. If you want a dairy-free smoothie, swap the Greek yogurt for a plant-based option. Almond, coconut, or soy yogurt works well. These alternatives keep your smoothie creamy without dairy. For sweeteners, you can use maple syrup or agave syrup for a vegan choice. These options add sweetness while keeping your drink plant-based. Enjoy the fruity goodness in many ways! Don't forget to check the Full Recipe for more ideas. You may have some smoothie left after making your Mango Pineapple Smoothie. To keep it fresh, use a glass jar or a BPA-free plastic container. Seal it tightly to prevent air from spoiling the flavor. Store it in the fridge for up to 24 hours. After that, it may lose some taste and texture. If you want to enjoy the smoothie later, freezing is a great option. Pour the smoothie into ice cube trays or freezer-safe bags. Leave some space in the bags for expansion. You can freeze it for up to three months. When you’re ready to drink it, take out what you need. Thaw it in the fridge overnight or blend it straight from the freezer for a slushy treat. Enjoy your refreshing Mango Pineapple Smoothie anytime! Yes, you can make this smoothie ahead of time. If you want to save it, store it in an airtight container. Keep it in the fridge for up to one day. The smoothie may separate, so stir it well before you drink it. If you don’t have coconut water, use regular water or fruit juice instead. Fruit juice can add a nice flavor. You can also try almond milk for a creamier touch. Just remember, the taste will change a bit based on what you use. To make the smoothie thicker, add more Greek yogurt or a banana. You can also use frozen fruit instead of fresh. Frozen fruit gives you a nice, thick texture. Just blend it well, and you’ll get a creamy drink. Yes, this smoothie is great for kids! It is packed with fruits and tastes sweet. You can adjust the sweetness by adding less honey. The bright colors and fresh flavors will appeal to children, making it a fun treat. You can find the Full Recipe for the Tropical Bliss Mango Pineapple Smoothie above in this article. This will guide you through every step to create your own refreshing drink. This blog post covers a simple and tasty smoothie recipe. You learned about the key ingredients and their nutritional benefits. I provided steps to prepare and serve the smoothie perfectly. Tips for texture and flavor help you make it your own. You can explore variations to suit your tastes or dietary needs. Don’t forget storage tips to keep leftovers fresh. Enjoy your smoothie making journey. It’s all about trying new things and having fun!
                Mango Pineapple Smoothie Refreshing and Flavorful Blend
              • - 2 packets of frozen açaí puree - 1 ripe banana - 1 cup of fresh pineapple chunks - 1 cup of coconut milk (or any non-dairy milk) - 1 tablespoon of honey or agave syrup (optional) For a vibrant tropical taste, the main ingredients are key. Açaí puree brings rich color and flavor. It is full of antioxidants. Bananas add creaminess and natural sweetness. Fresh pineapple gives a bright, juicy touch. Coconut milk offers a smooth base. You can use any non-dairy milk you prefer. Honey or agave syrup adds sweetness if needed. - Sliced kiwi - Coconut flakes - Granola - Chia seeds - Fresh berries (e.g., strawberries, blueberries) Toppings make your smoothie bowl pop! Sliced kiwi adds a zesty kick. Coconut flakes give it a tropical crunch. Granola provides texture and flavor. Chia seeds offer extra nutrients. Fresh berries, like strawberries and blueberries, add color and taste. You can mix and match these toppings for a fun look. For the full recipe, please refer to the section above. 1. Blend the ingredients Start by adding the frozen açaí puree, ripe banana, fresh pineapple chunks, and coconut milk into a blender. If you want it sweeter, you can add honey or agave syrup. Blend this mixture on high speed until it becomes creamy and smooth. 2. Adjust consistency with coconut milk If your smoothie is too thick, just add a bit more coconut milk. Blend again until you reach the texture you want. This step is key to making your smoothie bowl enjoyable. 3. Pour into a bowl Once blended, carefully pour the smoothie mixture into a bowl. Make sure to use a large enough bowl to hold all the goodness. 4. Add toppings creatively Now comes the fun part! Arrange your toppings, such as sliced kiwi, coconut flakes, granola, chia seeds, and fresh berries, over the smoothie. Try to create a colorful pattern. I love making a circular design to highlight all the vibrant colors. - Tips for presentation Use a shallow bowl to show off your beautiful toppings. You can also sprinkle some extra coconut flakes around the edge for a nice touch. A colorful presentation makes your smoothie bowl more fun to eat. - Recommended serving utensils Serve your smoothie bowl with a regular spoon. If you want to make it more special, use a wooden spoon or a cute, colorful one. Enjoy your tropical treat right away to keep it fresh and tasty. For the full recipe, refer to the earlier sections. To make a great smoothie bowl, start with ripe fruits. Ripe fruits taste better and add natural sweetness. Look for bananas that are yellow with some brown spots. When it comes to pineapples, choose ones that smell sweet. It ensures they are juicy and fresh. Blending is key to your smoothie bowl. You want a smooth and creamy texture. If your mix is too thick, add more coconut milk. Blend again until you reach the right consistency. A good blend makes your bowl enjoyable and easy to eat. A colorful topping arrangement makes your smoothie bowl pop. Use fresh berries, sliced kiwi, and coconut flakes. Lay them out in a pattern. A circular design looks appealing and fun. To elevate your smoothie bowl's look, use bowls with interesting shapes. Tall bowls or wide, shallow ones can change the game. Garnish with a sprinkle of chia seeds for a fancy touch. This not only looks great but adds a bit of crunch too. {{image_2}} You can change the non-dairy milk for this smoothie. Almond, soy, or oat milk work well. Each milk adds a different taste. Try using seasonal fruits too. Mango, papaya, or berries add a fresh twist. You can mix and match to find your favorite blend. Want more nutrients? Add spinach or kale to your smoothie. They blend well and boost health. You won’t even taste them! For extra energy, stir in nut butter or protein powder. Both will make your smoothie more filling. They add great flavor too! You can also experiment with different combinations to find the best taste for you. To store leftovers, place your smoothie bowl in the fridge. Use a tight container to keep it fresh. Glass or BPA-free plastic works well for storage. I prefer glass because it keeps flavors better. You can freeze smoothie bowls for later. Just pour the mixture into an airtight container. Leave some space at the top, as it will expand when frozen. To defrost, place it in the fridge overnight. If you’re in a rush, you can use the microwave. Just heat it in short bursts to avoid cooking. Enjoy your tropical treat later with ease! For the recipe, check out the Full Recipe. What is açaí and what are its benefits? Açaí is a small, dark purple berry from Brazil. It is full of antioxidants, which help fight free radicals in the body. Açaí is also rich in fiber, promoting good digestion. Plus, it has healthy fats that support heart health. You can enjoy its fruity taste in many dishes. Can I make this smoothie bowl ahead of time? Yes! You can prepare the smoothie mix and store it in the fridge for up to 24 hours. Just remember to keep the toppings separate. This way, your bowl stays fresh and tasty. How can I make this recipe vegan or gluten-free? To make it vegan, use agave syrup instead of honey. For gluten-free, ensure your granola and any other toppings are gluten-free. Most fruits and coconut milk are naturally gluten-free, so you’re all set! Can I substitute açaí with other fruits? Yes, you can! If you can’t find açaí, try using frozen berries like blueberries or strawberries. These fruits will add sweetness and a burst of color to your bowl. What to do if the smoothie is too thick? If your smoothie is too thick, just add a little more coconut milk. Blend again until you reach your desired creaminess. This will make it easier to pour and enjoy. How to fix a smoothie bowl that tastes too bland? If your smoothie bowl lacks flavor, try adding a splash of vanilla extract or a pinch of salt. You can also mix in a bit of honey or agave syrup for sweetness. Adjust the toppings to add more taste and texture. This article covers how to make a delicious açaí smoothie bowl. You learned about the key ingredients, easy steps for preparation, and creative topping ideas. I shared tips to improve taste and presentation, plus fun variations to try. Don’t forget storage techniques to keep your bowl fresh. With all this information, you can enjoy a tasty and nutritious treat anytime. Get creative with your favorites and make this recipe truly yours. Enjoy every bite!
                Tropical Acai Smoothie Bowl Energizing Healthy Treat
              • - 1 cup plain yogurt - 1/2 cup coconut milk - 1 cup fresh blueberries (plus extra for garnish) - 2 tablespoons honey or agave syrup (adjust to taste) - 1/2 teaspoon vanilla extract - A pinch of cardamom powder - Ice cubes (optional) Using fresh ingredients makes a big difference in taste. Fresh blueberries burst with flavor and nutrients. They give the lassi a bright color and a sweet taste. If you can’t find fresh blueberries, frozen ones work too. They are picked at their peak and frozen quickly. This helps keep their taste and nutrients. However, fresh blueberries always add a better texture. Each ingredient in this lassi has great health benefits. - Plain yogurt: Full of protein and good for your gut health. - Coconut milk: Contains healthy fats that can boost energy. - Blueberries: Packed with antioxidants, they help fight disease. - Honey or agave syrup: Adds sweetness and has some vitamins. - Vanilla extract: Adds flavor and may reduce stress. - Cardamom powder: Can aid digestion and add a warm spice note. This Blueberry Coconut Lassi is not just tasty; it’s also good for you! Start by gathering all your ingredients. This makes the process easier and faster. You will need: - 1 cup plain yogurt - 1/2 cup coconut milk - 1 cup fresh blueberries (plus extra for garnish) - 2 tablespoons honey or agave syrup (adjust to taste) - 1/2 teaspoon vanilla extract - A pinch of cardamom powder - Ice cubes (optional) Make sure your blueberries are fresh and ripe. They add great flavor and color. If you want a sweeter lassi, adjust the honey or agave syrup to your taste. Now it’s time to blend! In a blender, combine the yogurt, coconut milk, blueberries, honey, vanilla extract, and cardamom powder. Blend on high speed until the mix is smooth and creamy. If you like a thinner drink, add more coconut milk. After blending, taste the lassi. You can add more honey if you want it sweeter. For a chilled treat, add ice cubes and blend again until frothy. Pour your lassi into tall, clear glasses. This shows off the pretty purple color. For a special touch, garnish with a few whole blueberries on top. You can also sprinkle a little cardamom powder for added flair. If you want to impress, add a slice of lime on the glass rim. This not only looks good but adds a nice contrast to the drink. Enjoy your refreshing Blueberry Coconut Lassi! For the full recipe, check the earlier section. For a thick and creamy lassi, use full-fat yogurt. This gives your drink a rich texture. If you want it thinner, add a bit more coconut milk. Blend it well until it's smooth. You can also try adding ice cubes. This makes it frothy and cold. Both honey and agave syrup are great for sweetness. Honey gives a floral taste, while agave is mild. Start with two tablespoons and taste it. If you want it sweeter, add more. Remember, you can always add more, but you can't take it out! You can make your lassi even better! Try adding a pinch of cinnamon or nutmeg for warmth. Fresh mint leaves can add a nice touch too. You might even add a splash of lime juice for a zesty kick. All these extras can make your blueberry coconut lassi unique and delicious. For the full recipe, check out the complete instructions. {{image_2}} You can easily make a vegan version of blueberry coconut lassi. Just swap the yogurt with a plant-based option. Use coconut yogurt or almond yogurt for a creamy base. These alternatives keep that rich flavor. They also add a nice texture. You still get the fresh taste from blueberries and coconut milk. This change makes the drink creamy without any dairy. Spices can enhance the flavor of your lassi. Cardamom adds a warm note. You can also try cinnamon for a sweet twist. If you want more fruit, think about adding bananas or mangoes. These fruits blend well with blueberries. They also boost the health benefits. Each adds its own flavor and richness to the drink. If you prefer different dairy options, there are many choices. Greek yogurt gives a thicker texture. It also adds a tangy taste. You can use regular yogurt instead of plain yogurt. It is a great way to change the flavor. Try using buttermilk for a unique twist. Each choice will change the texture and taste of your lassi. Each option keeps the drink creamy and delicious. For the full recipe, check out the link above. To keep your blueberry coconut lassi fresh, store it in a clean glass jar. Make sure the jar is airtight. This helps keep out air and bacteria. If you have leftovers, don’t let them sit out for long. Refrigerate the lassi within two hours of making it. Always use a spoon to scoop the lassi. Avoid using your fingers, as this can introduce germs. When stored properly, blueberry coconut lassi lasts about 2 to 3 days in the fridge. After that, the taste and texture may change. You will notice it may separate a bit. If this happens, just give it a good shake or blend it again. Always check for any off smells or changes in color before consuming. You can freeze blueberry coconut lassi for later enjoyment. Pour the lassi into ice cube trays or freezer-safe containers. Leave some space at the top, as liquids expand when frozen. To use, thaw the lassi in the fridge overnight or blend the frozen cubes into smoothies. This method keeps the flavor and nutrients intact. For the best taste, use frozen lassi within three months. For the full recipe, check out the earlier section! Yes, you can use Greek yogurt. It makes the lassi thicker and creamier. If you prefer a lighter drink, stick with plain yogurt. Greek yogurt has more protein, which is great for keeping you full. Just remember to adjust the coconut milk to balance the thickness. Absolutely! Blueberry Coconut Lassi is a fun and tasty drink for kids. It has natural sweetness from honey and blueberries. The yogurt provides healthy probiotics, good for digestion. Kids love the vibrant color and fruity flavor. You can make it as sweet as they like! You can find Blueberry Coconut Lassi at many health food stores or cafes. Some grocery stores may also carry it in the yogurt section. If you want a fresh one, try making it at home. You can easily whip up this drink with the Full Recipe I provided. Blueberry coconut lassi is a nutritious and tasty drink. You learned about key ingredients, like fresh blueberries and coconut. The blending process ensures a smooth drink. Adjust sweetness with honey or agave for your taste. You can try different fruits and spices to mix it up. Storing tips help you keep leftovers fresh. Remember, lassi is fun to make and enjoy. Experiment with variations to find your favorite way to drink it. Enjoy your delicious and healthy blueberry coconut lassi!
                Blueberry Coconut Lassi Creamy and Refreshing Drink

              WANT TO SAVE THIS RECIPE?

              1 shares

              Leave a Reply Cancel reply

              Your email address will not be published. Required fields are marked *

              Recipe Rating


              Elevate your meals with this irresistible creamy balsamic vinaigrette recipe! Discover how to blend rich balsamic vinegar with creamy ingredients to create a dressing that enhances salads, roasted vegetables, and grilled meats. Made from fresh, wholesome ingredients, this homemade dressing is perfect for those who want a healthier alternative to store-bought options. Click to explore the full recipe and transform your dish with this easy, flavorful dressing!

              Hi I’m Taling

              I love sharing perfected dishes from my kitchen. I’m sure they’ll earn a spot in your heart. Let’s savor this journey together!.

              More about me

              Recent Desserts

              • - 2 cups fresh blueberries - 1 cup Greek yogurt (vanilla or plain) - ¼ cup honey or maple syrup - ½ cup coconut milk - Juice of 1 lemon - Zest of 1 lemon - A pinch of salt To make Blueberry Lemon Yogurt Popsicles, gather these fresh ingredients. You need ripe blueberries for the best flavor. Greek yogurt adds creaminess and protein. Honey or maple syrup sweetens the pops. Coconut milk gives a smooth texture and a hint of tropical taste. The juice and zest of one lemon bring a bright, zesty kick. Finally, a pinch of salt enhances all the flavors. Using fresh blueberries is key. They burst with juice and add natural sweetness. If you can’t find fresh berries, frozen ones work too, but they may change the texture slightly. Greek yogurt is a great choice, as it thickens the mix and gives a nice tang. If you prefer a dairy-free option, try a plant-based yogurt. When sweetening, adjust to your taste. Honey has a floral note, while maple syrup offers a richer flavor. The coconut milk adds creaminess and helps with freezing. Lemon juice brightens the pops, while lemon zest adds a fragrant touch. The pinch of salt balances the sweetness and highlights the flavors. Make sure to measure carefully for the best results. Once you have these ingredients, you’re ready to blend and create a delightful summer treat! 1. Combine the fresh blueberries, Greek yogurt, honey (or maple syrup), coconut milk, lemon juice, lemon zest, and a pinch of salt in a blender. 2. Blend the mixture until it is smooth and creamy. You want a nice, consistent texture. 3. Taste the mixture and adjust the sweetness if needed. Add more honey or maple syrup if you like it sweeter. 1. Pour the blueberry yogurt mixture into popsicle molds. Fill them about ¾ full to allow for expansion as they freeze. 2. Insert sticks into the molds. Gently tap the molds on the counter to remove any air bubbles. 3. Freeze the popsicles for at least 4-6 hours, or until they are completely solid. 1. To release the popsicles, run warm water over the outside of the molds for a few seconds. This will help loosen them. 2. Serve the popsicles on a colorful platter. For a fun look, garnish with whole blueberries and a sprinkle of lemon zest. - Best practices for blending ingredients: Start with the blueberries at the bottom. This helps them blend better. Add yogurt and coconut milk next. Blend on a low speed first, then increase to high. This method makes the mixture smooth and creamy. - How to achieve creamier popsicles: Use full-fat Greek yogurt for the best texture. It adds richness and creaminess. Coconut milk also helps. If you want extra creaminess, add more coconut milk or yogurt. - Filling molds too full: Always fill molds about ¾ full. The mixture expands when frozen. If you fill them too full, they overflow and create a mess. - Over-blending or under-blending: Blend just until smooth. Over-blending can make the popsicles icy. Under-blending leaves chunks of fruit. Aim for a nice, even consistency. - Sweetening alternatives: Honey and maple syrup are great options. You can also use agave syrup or stevia. Taste the mix before pouring into molds. Adjust sweetness to your liking. - Balancing flavors with citrus: Lemon juice brightens the flavor. The zest adds a nice touch. If the mixture tastes too sweet, add a bit more lemon juice. This balances the flavors nicely. {{image_2}} You can make these popsicles even more fun! Add other fruits like strawberries or raspberries. These fruits mix well with blueberries. They bring a new taste and color. You can also infuse herbs like mint or basil. Just add a few leaves when blending. This adds a fresh twist to your treats. Need dairy-free options? Use almond milk or oat milk instead of coconut milk. Swap the Greek yogurt for dairy-free yogurt. For a low-sugar version, use less honey or maple syrup. You can also try stevia or monk fruit sweetener. These options keep your popsicles tasty and light. Get creative with your popsicles! Make holiday-themed treats by adding festive colors. For example, use red fruits for Christmas or orange for Halloween. You can also create colorful swirls. Blend purees of different fruits and layer them in your molds. This not only looks great but tastes amazing too! Freezing popsicles requires some care to keep them tasty. First, make sure your popsicle molds are clean and dry before filling. This helps avoid any odd flavors. Fill the molds about three-quarters full. This allows space for the mixture to expand when frozen. Once filled, insert the sticks carefully. If you tap them on the counter, it helps release air bubbles. To maintain flavor and texture, wrap the molds tightly in plastic wrap after freezing. This prevents ice crystals from forming. Ice crystals can ruin the smooth texture you want in your popsicles. Blueberry lemon yogurt popsicles can last up to three months in the freezer if stored well. After that, they may lose flavor or texture. Check for signs of freezer burn, like white patches or dryness. If you see these, it’s best to toss them out. Cleaning your popsicle molds is simple. Rinse them with warm, soapy water and let them dry completely. Avoid using harsh scrubbers that might scratch them. Store molds in a cool, dry place to keep them in good shape. If you don’t have popsicle molds, use small cups or ice cube trays. Just insert wooden sticks or spoons in the center. These alternatives work well and are easy to find at home. I recommend using Greek yogurt for these popsicles. It has a thick texture and gives a creamy taste. Regular yogurt works too, but it may be thinner. Greek yogurt also adds protein, making the popsicles more filling. If you want a twist, try vanilla Greek yogurt for added flavor. Yes, you can use frozen blueberries. They are convenient and still tasty. Frozen berries may make your popsicles a bit looser when blended. Fresh blueberries offer a bright flavor and nice texture. If you use frozen berries, let them thaw for a few minutes before blending. The popsicles need at least 4-6 hours to freeze completely. If you want them to be extra firm, leave them in the freezer overnight. This way, they are ready for hot summer days. Be patient, as the waiting makes the treat even better! You can definitely make these popsicles without added sugar. Use ripe fruit for natural sweetness. You can also try mashed bananas or pureed dates. If you want a little sweetness, use honey or maple syrup. Just remember, different sweeteners can change the taste. You can make tasty and healthy popsicles using fresh ingredients. Blend blueberries, Greek yogurt, honey, and lemon for a creamy treat. Fill molds, freeze, and enjoy! Remember to balance flavors and avoid overfilling molds. Get creative with variations to keep things fun. These popsicles are easy to store and last long in the freezer. You now have the skills to make refreshing popsicles anytime! Enjoy experimenting with flavors and impress your friends and family.
                Blueberry Lemon Yogurt Popsicles Refreshing Summer Treat
              • To make Vegan Caramel Apple Overnight Oats, gather these simple items: - 1 cup rolled oats - 1 ½ cups almond milk (or any plant-based milk) - 1 medium apple, diced (preferably a sweeter variety like Fuji or Honeycrisp) - 2 tablespoons maple syrup - 1 tablespoon almond butter - 1 teaspoon cinnamon - ½ teaspoon vanilla extract - 2 tablespoons coconut sugar (for the caramel flavor) - ¼ cup chopped nuts (walnuts or pecans) - A pinch of sea salt You can easily swap out some ingredients if needed. Use oat milk or soy milk instead of almond milk. Peanut butter works well if you don’t have almond butter. For a sweeter taste, try agave syrup in place of maple syrup. You can also replace coconut sugar with brown sugar if that’s what you have on hand. The key is to keep it plant-based while matching your taste. When selecting apples, look for varieties that are sweet and crisp. Fuji and Honeycrisp are my top picks. They add a nice sweetness to the oats. Choose apples that are firm and free from blemishes. If you like a tart flavor, try Granny Smith apples. They balance the sweetness from the other ingredients well. Always wash your apples before using them, as this keeps your dish fresh and clean. Start by grabbing a mixing bowl. Add 1 cup of rolled oats and 1 ½ cups of almond milk. Pour in 2 tablespoons of maple syrup and 1 tablespoon of almond butter. Next, sprinkle in 1 teaspoon of cinnamon and ½ teaspoon of vanilla extract. Mix well until everything blends together. Now, fold in 1 diced apple and ¼ cup of chopped nuts. Save some apple and nuts for later. This mixture is the base for your oats. Take your oat mixture and spoon it into jars or bowls. To make it fun, create layers. Add some of the oat mix, then a layer of chopped apple, and a sprinkle of coconut sugar. Repeat this until the jars are full. This method makes your oats look pretty and tasty. You can see the different layers when you serve them. Cover the jars with lids or plastic wrap and place them in the fridge. Let them chill overnight or for at least 4 hours. This is key for thickening the oats and blending the flavors. In the morning, stir the oats. If they seem too thick, splash in more almond milk. This helps you get the right texture. Enjoy them topped with the reserved apple pieces, nuts, and a drizzle of maple syrup for extra sweetness. To make your oats creamy, use rolled oats instead of instant oats. Rolled oats soak up liquid well and create a smooth texture. Use almond milk, or any plant-based milk you like. A good ratio is 1 cup of oats to 1.5 cups of milk. This helps the oats soften overnight. Stir well to mix everything together. If your oats are too thick in the morning, just add a splash of milk. Sweetness is key in your vegan caramel apple overnight oats. Start with 2 tablespoons of maple syrup. You can add more if you want it sweeter. The coconut sugar adds a nice caramel flavor, so don’t skip it! You can also add more cinnamon for extra warmth. Taste your mixture before refrigerating. Adjust the flavors to match your preferences. Presentation makes a dish more fun. Serve your oats in clear jars to show off the layers. Top with extra diced apples and a sprinkle of cinnamon. Chopped nuts add crunch and a nice look. A drizzle of maple syrup on top makes it even better. You can also add a few chocolate chips for a sweet touch. Enjoy the beautiful colors and textures! {{image_2}} You can change the flavor of your vegan caramel apple overnight oats with the seasons. In autumn, use spiced apples with nutmeg or cloves. In winter, add warm vanilla and a touch of maple. In spring, try fresh berries to add brightness. For summer, mix in diced peaches or plums for a juicy twist. Each season brings new fruits and spices to brighten your oats. To personalize your oats, think about fun toppings. You can add chia seeds for extra fiber. Dried fruits like raisins or cranberries add a nice chew. For crunch, sprinkle some granola on top. You can also try coconut flakes or dark chocolate chips. Each topping adds a new layer of flavor and texture. If you need gluten-free oats, use certified gluten-free rolled oats. Most oats are naturally gluten-free, but cross-contamination can happen. Always check the package. You can also swap almond milk for any other plant-based milk, like oat or rice milk. These swaps keep your oats tasty and safe for all diets. To keep your Vegan Caramel Apple Overnight Oats fresh, store them in the fridge. Place any leftovers in an airtight container. This helps keep them from drying out or absorbing other smells from your fridge. Your oats will stay good for about three to five days. I recommend using glass jars or plastic containers for storing your oats. Mason jars work great because they are easy to seal and look nice. Choose containers that are the right size for your portion. This way, you won’t waste any oats. If you like your oats warm, you can heat them up. Just transfer the oats to a microwave-safe bowl. Heat them in short bursts, about 30 seconds at a time. Stir between heating to make sure they warm evenly. If they feel too thick, add a splash of almond milk to smooth them out. Enjoy your cozy breakfast! Yes, you can use any plant-based milk. Almond, oat, or soy milk work well. Each type gives a unique flavor and texture. Almond milk adds a nutty taste, while oat milk is creamier. Just pick what you like best! Overnight oats stay fresh for up to five days in the fridge. Store them in airtight containers. This way, you can make a batch and grab it throughout the week. Just be sure to stir them before eating. Absolutely! Doubling the recipe is easy and smart for meal prep. Just mix everything in a larger bowl. Divide the mixture into jars or containers. This makes breakfast quick and delicious for the whole week! You learned about key ingredients for overnight oats and smart substitutes. I shared tips on choosing the best apples and preparing your oat mixture. You now know layering tricks and how to store leftovers safely. Experiment with flavors, toppings, and different containers. Overnight oats are easy, tasty, and versatile. Enjoy customizing your creation. Aim for balance in flavors and textures to make it just right for you.
                Vegan Caramel Apple Overnight Oats Simple Recipe
              • To make Cookie Dough Greek Yogurt Bark, you will need these key ingredients: - 2 cups plain Greek yogurt - ¼ cup honey or maple syrup - 1 teaspoon vanilla extract - ½ cup mini chocolate chips - ¼ cup almond flour (or finely ground oats) - ¼ cup chopped nuts (e.g., walnuts or pecans) - Pinch of sea salt These ingredients work together to create a creamy and tasty treat. The Greek yogurt gives the bark its smooth texture and protein punch. The honey or maple syrup adds just the right amount of sweetness. If you need alternatives, here are some ideas: - For Greek yogurt, use regular yogurt or a dairy-free option like coconut yogurt. - If you want a low-calorie sweetener, try stevia or agave syrup. These substitutes can help you fit your needs without losing flavor. To make your bark even more fun, consider these add-ins: - Dried fruit like cranberries or raisins for sweetness. - Shredded coconut for a tropical twist. - Different nuts like almonds or pecans for added crunch. These extras can make your bark unique and tasty. Feel free to mix and match based on what you love! To start, gather your ingredients. You need 2 cups of plain Greek yogurt, ¼ cup of honey or maple syrup, and 1 teaspoon of vanilla extract. In a mixing bowl, combine the Greek yogurt, honey, and vanilla. Stir until smooth. Next, add ¼ cup of almond flour and a pinch of sea salt. Mix until combined. This step adds texture and flavor. Finally, fold in ½ cup of mini chocolate chips and ¼ cup of chopped nuts. These add a nice crunch and extra flavor. Now it’s time to spread the mixture. Line a baking sheet with parchment paper. Pour the yogurt mixture onto the sheet. Use a spatula to spread it into an even layer, about ½ inch thick. For extra taste, sprinkle some more chocolate chips and nuts on top. Press them lightly into the mixture. Place the baking sheet in the freezer. Freeze for about 2-3 hours or until the bark is firm. This freezing makes it easy to break into pieces later. Once the bark is frozen, take it out of the freezer. Remove the parchment paper carefully. You can break the bark into pieces or cut it into squares. Use a sharp knife for clean cuts. Store the pieces in an airtight container. Keep them in the freezer until you are ready to enjoy this treat. This helps keep the bark fresh and tasty. To get that creamy texture, start with thick Greek yogurt. It needs to be plain and full-fat. This gives the bark a rich taste. Mixing in almond flour helps create a nice bite. Make sure to blend it well with the yogurt. The mixture should feel smooth and thick. If it is too runny, the bark may not hold together. Use a spatula to spread it evenly on the baking sheet. This helps it freeze uniformly. You can easily change the flavors to fit your taste. Try adding a bit of cinnamon for warmth. You can also mix in other extracts like almond or hazelnut. For a fruity twist, add chopped dried fruits like cranberries or apricots. You can swap out the mini chocolate chips for dark chocolate or even white chocolate. If you want a nutty flavor, try using different nuts like pecans or hazelnuts. Feel free to be creative! A big mistake is not measuring the ingredients. Always use the right amounts for the best taste. Another mistake is not allowing enough freezing time. If the bark is not frozen long enough, it will be too soft. Avoid overmixing the yogurt mixture too. This can make it watery and thin. Lastly, remember to line your baking sheet with parchment paper. This makes it easier to remove the bark once it is frozen. {{image_2}} You can make a tasty, dairy-free version of this treat. Use coconut yogurt instead of Greek yogurt. It has a creamy texture and a subtle flavor. For sweetener, try agave syrup or maple syrup. These swaps keep it delicious without dairy. Don't forget to check labels to ensure your yogurt is dairy-free. Get creative with flavors! You can swap the vanilla extract for almond or hazelnut extract. This change adds a nutty twist. Want a fruity kick? Mix in some mashed banana or pureed strawberries. You can also try adding spices, like cinnamon or nutmeg. Each change gives your bark a unique taste. You can adjust your bark for the seasons. In fall, add pumpkin spice and chopped apples. For winter, mix in peppermint extract and crushed candy canes. In summer, try fresh berries and a hint of lemon zest. Each season brings fresh ideas to your bark, making it fun to enjoy year-round. To keep your Cookie Dough Greek Yogurt Bark fresh, store it in an airtight container. Make sure the container is freezer-safe. This will help prevent freezer burn. If you have leftover pieces, you can layer them with parchment paper. This way, they won’t stick together. When you're ready to enjoy a piece, take it out of the freezer. Let it sit at room temperature for about 5 minutes. This helps to soften it just enough for easy munching. When stored properly, your bark can last up to two months in the freezer. This means you can make a big batch and enjoy it later. Just remember: the fresher the bark, the better it tastes. I recommend eating it within a month for the best flavor and texture. Cookie Dough Greek Yogurt Bark is great on its own. But you can also pair it with fresh fruit like strawberries or bananas. For a fun twist, serve it with a drizzle of chocolate sauce. It makes a great snack for kids and adults alike. You can even break it into smaller pieces and add it to a smoothie for a sweet treat. Remember, the possibilities are endless! You can use other types of yogurt, but Greek yogurt works best. It gives a thick texture and creamy taste. If you use regular yogurt, the bark may not hold its shape as well. You can try dairy-free options too, but check if they are thick enough. To make this bark vegan, use dairy-free yogurt. Coconut yogurt or almond yogurt are great choices. Substitute honey with maple syrup or agave nectar. This way, you keep the sweetness without using animal products. Yes, you can use alternative sweeteners. Stevia, agave syrup, or monk fruit sweetener work well. Just remember to adjust the amount based on sweetness level. This keeps the bark tasty without adding extra sugar. Absolutely! Adding protein powder is a great idea. It boosts nutrition and keeps you full longer. Mix in a scoop of your favorite flavor when combining the yogurt. Make sure to blend well for even flavor throughout the bark. This blog post covered how to make delicious cookie dough Greek yogurt bark. We discussed key ingredients, substitutes, and fun add-ins that boost flavor and crunch. I detailed preparation and freezing steps, plus tips for perfect texture and common mistakes to avoid. We explored dairy-free options, unique flavors, and how to store it well. Remember, you can customize this bark to fit your taste. Enjoy creating this treat and share it with friends and family!
                Cookie Dough Greek Yogurt Bark Creamy and Simple Treat
              • - 1 ½ cups all-purpose flour - 1 tablespoon cocoa powder - ½ teaspoon baking powder - ½ teaspoon baking soda - ¼ teaspoon salt - ½ cup unsalted butter, softened - 1 cup granulated sugar - 1 large egg - 1 teaspoon vanilla extract - 1 tablespoon red food coloring - ½ cup powdered sugar (for dusting) For all-purpose flour, you can use cake flour for a softer cookie. If you want a gluten-free option, try almond flour or a gluten-free blend. Instead of unsalted butter, you can use margarine. Just keep in mind that it may change the taste slightly. You might replace granulated sugar with coconut sugar for a different sweetness. Make sure to adjust amounts based on what you like. You can add white chocolate chips or chopped nuts for extra texture. Crushed peppermint candies are great for a holiday twist. If you love cream cheese, consider making a cream cheese frosting drizzle. Just mix cream cheese, butter, and powdered sugar until smooth, then drizzle it over the cookies. To start, preheat your oven to 350°F (175°C). Line two baking sheets with parchment paper. This helps cookies bake evenly. In a medium bowl, sift together the flour, cocoa powder, baking powder, baking soda, and salt. This mix is key for texture. Set this bowl aside. In a large bowl, cream the softened butter and granulated sugar. Use an electric mixer for 2-3 minutes. You want it light and fluffy. Next, beat in one large egg, one teaspoon of vanilla extract, and one tablespoon of red food coloring. Mix until everything is smooth and the color is bright. Gradually add your dry ingredients to the wet mix. Stir until just combined. Be careful not to overmix. Chill the dough in the refrigerator for at least 30 minutes. This makes it easier to handle when forming cookies. After chilling, take the dough out. Use a cookie scoop or tablespoon to scoop out the dough. Form each scoop into a ball. Then, roll each ball in powdered sugar. Make sure they are fully coated. This will create that crinkle look when baked. Place the cookie dough balls on the prepared baking sheets. Leave enough space between each ball for spreading. Now it’s time to bake! Put the baking sheets in the oven. Bake for 10-12 minutes. The edges should be set, but the centers will look slightly underbaked. This gives the cookies a soft texture. Once done, take them out and let the cookies cool on the sheets for 5 minutes. After that, transfer them to a wire rack to cool completely. Enjoy your beautiful, tasty Red Velvet Crinkle Cookies! To get the best texture for your red velvet crinkle cookies, follow these steps: - Use softened butter, not melted. Softened butter helps create a light and fluffy mix. - Chill your dough for at least 30 minutes. Cold dough makes it easier to shape. - Don’t overmix the dough. Mix until just combined for soft, tender cookies. Here are some common mistakes to avoid when baking: - Forgetting to preheat your oven can lead to uneven baking. Always preheat first. - Not measuring flour correctly can make cookies dry. Use a spoon to scoop, then level. - Baking cookies too long makes them hard. Watch the edges; they should be set, but centers can look soft. Having the right tools makes baking fun and easy: - Use a good electric mixer for creaming butter and sugar. - A cookie scoop helps shape uniform cookie balls. - Parchment paper prevents sticking and makes cleanup easy. - A wire rack cools cookies evenly, keeping them soft. {{image_2}} You can easily change the flavor of your Red Velvet Crinkle Cookies. Want a hint of chocolate? Add more cocoa powder. Craving something fruity? Toss in some dried cherries or raspberries. You can also add a teaspoon of almond extract for a nutty twist. These small changes make a big impact on taste. Red velvet is classic, but you can switch up the color for fun. Use blue or green food coloring for a unique look. This works well for themed parties or holidays. For Halloween, try orange or purple! These colors can match your event and make the cookies even more special. If you need a gluten-free option, swap the all-purpose flour with a gluten-free blend. Make sure the blend has xanthan gum for the best texture. For a vegan version, replace the butter with coconut oil and the egg with a flax egg (1 tablespoon of ground flaxseed mixed with 2.5 tablespoons of water). These adjustments keep the cookies tasty while fitting your dietary needs. To keep your Red Velvet Crinkle Cookies fresh, store them in an airtight container. Line the container with parchment paper. This helps to absorb moisture. Place a layer of cookies, then add more parchment paper between layers. This keeps them from sticking together. You can also use a zip-top bag if you don’t have a container. Just remove as much air as possible before sealing. Freezing your cookies is a great way to save them for later. First, let the cookies cool completely. Then, place them in a single layer on a baking sheet. Freeze for about an hour. Once frozen, transfer them to an airtight container or a zip-top bag. This helps to keep the cookies from getting freezer burn. They can last in the freezer for up to three months. When ready to eat, let them thaw at room temperature. Red Velvet Crinkle Cookies stay fresh for about five days at room temperature. If stored correctly in an airtight container, they can last even longer. You can also refrigerate them to extend their shelf life. In the fridge, they can stay good for about a week. Always check for any signs of spoilage before eating. Enjoy these tasty treats while they are fresh! You can use beet juice for a natural option. It gives a nice red hue. Pomegranate juice works too but may change the cookie's taste. If you want, you can skip the coloring. The cookies will still taste great! Look for edges that are set. The centers should look a bit soft. A slight shine means they are ready. They will firm up as they cool. Trust your eyes, but a timer helps too! Yes, you can! Chill the dough and store it in the fridge. It lasts for up to three days. You can also freeze it for up to three months. Just thaw before baking for best results. These cookies pair nicely with milk or coffee. Try them with vanilla ice cream for a treat! You can also serve them at parties with other sweets. They add a fun splash of color to any dessert table. To sum up, we explored the essential ingredients, detailed steps, and handy tips for perfect Red Velvet Crinkle Cookies. Remember to measure your ingredients carefully and consider great mix-ins. Avoid common mistakes for the best texture. You can also try fun variations or make them gluten-free. Store your cookies properly to enjoy longer. These easy steps will help you bake delicious cookies every time. Now, it's time to make your baking dreams a reality!
                Red Velvet Crinkle Cookies Irresistible and Tasty Treat

              Recent Drinks

              • For this recipe, you need ripe peaches and mangoes. Ripe peaches should feel soft when you gently press them. They should smell sweet and juicy. Ripe mangoes should have a slight give when pressed. Their skin should show a bit of color, often yellow or red. Using fresh fruit is best. Fresh fruit tastes better and has more nutrients. Frozen fruit can work, but it may change the drink's texture. Fresh peaches and mangoes bring bright flavor. They also add a beautiful color to your drink. You can use different types of tea in this recipe. Black tea gives a strong flavor, while green tea adds a lighter taste. Choose what you like best. For milk, you have many options. You can use dairy milk or non-dairy milk like almond or oat milk. Each choice adds a unique twist to the drink. Non-dairy milk can be creamier, while dairy milk gives a classic taste. When sweetening your drink, you can choose honey or agave syrup. Honey has a rich flavor and can be a bit thicker. Agave syrup is sweeter and lighter. Both work well, so pick what you prefer. You might also want to add spices like cinnamon. Cinnamon gives a warm flavor that pairs well with peach and mango. It also has health benefits, like helping with digestion. A little can go a long way in enhancing your drink's taste. For the full recipe, refer to the section above. To make the fruit puree, start with fresh peaches and mangoes. Wash the fruit well. For the peach, slice it in half and remove the pit. Make thin slices from one half and then dice the other half into small pieces. For the mango, peel it. Cut the sides off the pit and dice the flesh. You want small, even pieces. This helps the puree blend smoothly. Now, grab your blender. Add the sliced peach and diced mango. Blend them until they are smooth. This is your fruit puree. Next, in a large pitcher, pour in the cooled brewed black tea. Add the milk and sweeteners. You can use honey or agave syrup, depending on your taste. Mix these well. If you want, add in the vanilla extract and ground cinnamon for more flavor. Stir until everything is combined. Choose your favorite glasses. Fill each glass with ice cubes. Pour the tea mixture into the glasses, filling them about three-quarters full. Now, scoop a generous spoonful of the peach-mango puree on top. Let it swirl into the milk tea for a lovely look. Finally, add fresh mint leaves on top for a nice touch. Enjoy your Peach Mango Milk Tea! You can find the full recipe [here](Full Recipe). To make a smooth puree, start with ripe fruit. Use one peach and one mango. Slice the peach and dice the mango. Place them in a blender. Blend until there are no lumps. If your puree seems thick, add a tiny splash of water. This will help it blend better. A smooth puree makes your drink look great and taste even better. Sweetness can change the whole drink. Start with two tablespoons of honey or agave syrup. Taste it after mixing. If you like it sweeter, add more. Some might want less sweetness, so adjust to your taste. Remember, the fruit adds natural sugar too. Always taste as you go to find the right balance. You can make your drink even more special with extra flavors. Try adding a teaspoon of vanilla extract for a nice touch. Ground cinnamon gives warmth and depth. If you want something fresh, add mint leaves for garnish. They look pretty and add a nice flavor. You can also explore other fruits like strawberries for a twist. {{image_2}} You can change the fruits in your peach mango milk tea. Try using strawberries for a sweet twist. You can also add passion fruit for a tangy kick. Mix and match based on what you love. The goal is to keep it fruity and fun. Each fruit brings its own flavor. This keeps your drink fresh and exciting. Using different teas can change the taste of your milk tea. Black tea gives a rich flavor, while green tea offers a lighter taste. Herbal teas, like chamomile, can add a calming touch. Experiment with what you have at home. Each tea base will give your drink a new vibe. So don’t be afraid to switch it up! If you want a vegan version, use plant-based milk. Almond milk or oat milk works well. You can also use maple syrup instead of honey for sweetness. For a keto option, use unsweetened almond milk and a low-carb sweetener. This way, you can enjoy peach mango milk tea without the carbs. These changes make it fit your diet while keeping it delicious. To keep your peaches and mangoes fresh, follow these tips: - Peaches: Store ripe peaches in the fridge. They stay fresh for about three to five days. If they are not ripe, keep them at room temperature until they soften. - Mangoes: Like peaches, keep ripe mangoes in the fridge. They can last about five days. If they are firm, leave them out to ripen first. Fresh fruit is best for your peach mango milk tea. Avoid frozen fruit if you want a bright, fresh flavor. After making your peach mango milk tea, you may want to store it. Here is how to do it right: - Refrigeration: Pour the milk tea into an airtight container. This helps keep it fresh and tasty. - Serving Later: When you serve it later, stir it well. The fruit puree may settle at the bottom, so mix it again. Your peach mango milk tea can last in the fridge for about two to three days. However, for the best flavor, enjoy it fresh. If you notice any change in taste or smell, it’s best to toss it out. Peach mango milk tea is a fruity drink made from fresh peaches and mangoes. You blend the fruits into a smooth puree. Then, you mix it with brewed black tea and milk for a creamy texture. This drink is sweet, refreshing, and perfect for hot days. You can find peach mango milk tea at many cafes and tea shops. Popular brands include Chatime and Gong Cha. They offer different versions of this drink. Local bubble tea cafes may also serve it. Check menus for special flavors and toppings. Peach mango milk tea has many health benefits. Peaches are high in vitamins A and C. They can help your skin and immune system. Mangoes are rich in antioxidants and fiber, which support digestion. Using milk adds calcium for strong bones. If you use honey or agave, you get a natural sweetener with fewer chemicals. Enjoy this drink as a tasty treat that is also good for you. In this article, we explored how to make delicious peach mango milk tea. We covered fresh ingredients, sweeteners, and the importance of using the right tea and milk. I shared tips for creating the perfect puree and adjusting sweetness to your taste. You can also experiment with different fruits and teas. Remember, storing your tea properly helps maintain its freshness. By following these steps, you can enjoy a tasty, healthy drink anytime. Enjoy your peach mango milk tea adventure!
                Peach Mango Milk Tea Refreshing and Simple Recipe
              • To make a delicious pistachio cardamom iced coffee, gather these key ingredients: - 2 cups strong brewed coffee, cooled - 1 cup milk (or non-dairy alternative) - 1 tablespoon pistachio paste - ½ teaspoon ground cardamom - 2 tablespoons maple syrup (or to taste) - Crushed ice - Chopped pistachios and cardamom pods for garnish These ingredients work together to create a rich and refreshing drink. The strong brewed coffee gives you a great base, while the pistachio paste adds a creamy texture. The cardamom provides a warm spice, and maple syrup sweetens the mix. If you want a non-dairy option, try these milk alternatives: - Almond milk - Oat milk - Coconut milk - Cashew milk Each of these options brings its own flavor to the drink. Almond milk adds a nutty taste. Oat milk provides creaminess. Coconut milk gives a tropical twist. Cashew milk is rich and smooth. Choose the milk that fits your taste best! Garnishes make your drink look and taste even better. Here are some great options: - Chopped pistachios - Whole cardamom pods - A sprinkle of cinnamon - A drizzle of honey Chopped pistachios add crunch and a pop of color. Whole cardamom pods enhance the spice aroma. A sprinkle of cinnamon can add warmth. A drizzle of honey gives extra sweetness. These garnishes not only beautify your iced coffee but also boost the flavor! For the full recipe, check the detailed instructions to create this delightful drink. Start by brewing two cups of strong coffee. Let it cool down completely. You want it chilled for this drink. Using cooled coffee helps keep your iced drink refreshing. This step is key for the perfect iced coffee. In a large bowl or pitcher, mix the cooled coffee with one cup of milk. You can use any milk you like, even non-dairy options. Add one tablespoon of pistachio paste to the mix. This gives the drink its nutty flavor. Next, sprinkle in half a teaspoon of ground cardamom. This spice adds warmth and depth. Then, pour in two tablespoons of maple syrup. Taste the mix and adjust it to your liking. Some may want it sweeter. Whisk everything together until the pistachio paste blends well. This step is important to get a smooth drink. Take a glass and fill it halfway with crushed ice. Pour your coffee mixture over the ice, leaving some room at the top. For a nice finish, sprinkle chopped pistachios and a few cardamom pods on top. This makes the drink look beautiful and adds extra flavor. Before sipping, stir gently. This helps mix the flavors again. Enjoy your pistachio cardamom iced coffee! You can find the full recipe at the beginning of this article. To get the best taste, you should focus on the coffee and spices. Use strong brewed coffee; it makes a big difference. I like to brew it a little stronger than usual. The pistachio paste gives a creamy texture. Make sure it is mixed well. Cardamom has a strong flavor. Just half a teaspoon adds warmth without overpowering. Taste it as you mix. If you want it sweeter, add more maple syrup. Adjust it to what you love! If you have extra iced coffee, store it right! Use a sealed container to keep it fresh. It can last in the fridge for up to three days. But remember, the flavors may change over time. If you want to enjoy it again, shake it before serving. If it tastes a bit off, try adding more milk or syrup. This helps revive the flavors. When making your iced coffee, avoid these common mistakes. First, don’t skip cooling the coffee. Hot coffee will melt the ice too fast. Next, be careful with the spices. Too much cardamom can make it taste bitter. Always start with less; you can add more later. Lastly, don’t forget the garnish! Chopped pistachios and cardamom pods make your drink look pretty and add flavor. For the full recipe, check the section above! {{image_2}} You can easily make this drink dairy-free or vegan. Instead of regular milk, use almond, oat, or coconut milk. These options add their own unique tastes. I love using almond milk for a nutty twist. Just ensure the milk is unsweetened to keep the flavor balanced. Feel free to get creative with flavors! You can mix in vanilla extract for warmth. A dash of cinnamon gives a nice spice kick. If you want something unique, try adding a splash of rose water. This will give it a floral note that pairs well with cardamom. Maple syrup is a great choice for sweetening this drink. However, you can try honey or agave syrup as well. For a low-calorie option, consider stevia or monk fruit sweetener. Each sweetener brings its own taste, so taste as you go. Adjust until it's just how you like it. For the full recipe, check out the detailed instructions above. Enjoy experimenting with your own variations! If you have leftover pistachio cardamom iced coffee, store it in an airtight container. This keeps the flavors fresh. You can use a glass jar or a plastic pitcher. Make sure to put it in the fridge right away. Do not let it sit out at room temperature. Store your ingredients properly for the best taste. Keep pistachio paste in the fridge after opening. It lasts longer that way. Ground cardamom should stay in a cool, dark place. Use it within six months for the best flavor. If you use milk, check the expiration date often. Homemade pistachio cardamom iced coffee stays fresh for about 3 days in the fridge. After that, the taste may change. If it starts to smell funny or looks off, toss it out. Always give it a good stir before drinking. For the full recipe, check the top of this article. Pistachio Cardamom Iced Coffee is a unique drink that mixes rich coffee with nutty flavors. You blend brewed coffee, milk, pistachio paste, and cardamom for a refreshing treat. The pistachios add creaminess, while cardamom gives a warm spice. This drink is perfect for hot days or any time you crave something special. Yes, you can prepare the coffee mixture ahead of time. Just mix the coffee, milk, pistachio paste, and cardamom. Store it in your fridge for up to two days. When you are ready to enjoy, pour it over ice and add your garnishes. This makes it easy to serve to guests or enjoy a quick treat. Pistachios are packed with protein, fiber, and healthy fats. They help keep you full and support heart health. Cardamom has antioxidant properties and can aid digestion. Together, these ingredients make your iced coffee not just tasty but also good for you. Enjoying this drink can be a delightful way to add nutrients to your day. Pistachio cardamom iced coffee combines unique flavors for a refreshing drink. You learned about essential ingredients, milk options, and flavor enhancers to make it great. Following the step-by-step guide helps ensure your coffee tastes its best. I shared helpful tips to avoid mistakes and achieve balance. Plus, I offered ideas for variations and proper storage. Enjoy experimenting with this drink for a delightful taste experience. Make it your own, and don’t hesitate to share it with friends!
                Pistachio Cardamom Iced Coffee Rich and Refreshing Drink
              • - 1 cup strawberries, hulled and sliced - 1 medium dragon fruit, peeled and diced - 4 cups water - 2 tablespoons agave syrup - 1 tablespoon lime juice These main ingredients make the base for your Strawberry Dragon Fruit Agua Fresca. Fresh strawberries give a sweet and tangy taste. Dragon fruit adds a unique texture and a bright color. - Ice cubes - Fresh mint leaves for garnish Adding ice cubes keeps your drink cool and refreshing. A sprig of mint on top adds a nice touch. It also enhances the aroma, making each sip more delightful. - Alternative sweeteners - Additional fruits for blending You can use other sweeteners if you prefer. Honey or maple syrup works well. Want to experiment? Try adding other fruits like mango or pineapple for a twist. They will blend beautifully with the dragon fruit and strawberries. For the full recipe, check the section above. - Step 1: Blend strawberries and dragon fruit Start by adding 1 cup of sliced strawberries and 1 medium diced dragon fruit into a blender. Pour in 2 cups of water. Blend this mix on high until it's smooth and creamy. The colors should be bright and inviting. - Step 2: Strain the mixture Next, set up a fine mesh sieve over a large pitcher. Pour the blended mix into the sieve. Use a spatula to push the liquid through while leaving the pulp behind. This step makes your agua fresca silky and refreshing. - Step 3: Combine with remaining ingredients Once strained, add 2 more cups of water to the pitcher. Then mix in 2 tablespoons of agave syrup and 1 tablespoon of lime juice. Stir everything together until well combined. - Serve over ice Fill tall glasses with ice cubes. Pour the chilled agua fresca over the ice. This drink is best enjoyed cold on a warm day. - Garnish with mint leaves To add a touch of beauty, garnish each glass with fresh mint leaves. This not only looks great but also adds a fresh aroma. - Taste testing and modifications Before serving, give your agua fresca a taste. If you want it sweeter, add more agave syrup. Stir well and taste again. Adjust until it’s just right for you. Enjoy making it your own! Use fresh strawberries and dragon fruit for the best taste. Look for bright red strawberries. They should be firm and free from soft spots. For dragon fruit, select one with vibrant skin. It should feel slightly soft when you press it gently. To get a smooth drink, blend the fruit well. Start by adding strawberries and dragon fruit to the blender. Use two cups of water for easy blending. Blend on high until it looks creamy. If your mixture is too thick, add more water before blending again. Taste your agua fresca after mixing in the lime juice and agave syrup. If it needs more lime, add a little more juice. If it’s not sweet enough, stir in more agave syrup. Adjust these flavors to fit your taste. Enjoy experimenting until it’s just right! {{image_2}} You can change up the fruits in this recipe for new flavors. Try using mango, pineapple, or kiwi. Each fruit brings its own taste and color. For a berry twist, add blueberries or raspberries. These fruits all blend well with strawberries and dragon fruit. Feel free to mix and match. You might find a combo you love even more! If you want to make this drink vegan, switch the sweeteners. Instead of agave syrup, use maple syrup or coconut sugar. Both choices work well and keep the drink plant-based. Just remember to adjust the amount based on how sweet you like it. Taste as you go, and find your perfect balance! If you enjoy a bit of heat, consider adding jalapeño or ginger. A few slices of jalapeño can bring a fun, spicy kick. If you prefer ginger, grate a small piece and mix it in. Both options add a unique twist to the refreshing taste. This can make your agua fresca exciting and different. Give it a try if you’re feeling adventurous! To keep your strawberry dragon fruit agua fresca fresh, store it in the fridge. Use a clean glass pitcher or jar with a tight lid. This helps keep out air and light, which can affect taste. If you have leftovers, it’s best to drink them within a couple of days. In the fridge, your agua fresca stays fresh for up to three days. After that, the flavors may fade. If you notice any change in smell or color, it’s best to throw it away. Always give it a taste before serving to ensure it's still good. You can freeze agua fresca if you want to save it for later. Pour the mixture into ice cube trays or freezer-safe bags. This way, you can enjoy it for up to three months. When you’re ready to drink, just thaw it in the fridge. You can also blend the frozen cubes into smoothies for a quick treat. Agua fresca is a light, refreshing drink from Mexico. It combines fruit, water, and sometimes sugar. People enjoy it on hot days. The name means "fresh water" in Spanish. Each region has its own version, using local fruits. You can find flavors like hibiscus, tamarind, and cucumber. This drink is perfect for gatherings. It’s easy to make and very tasty! Yes, you can make this drink ahead of time. Prepare it in the morning for later. Store it in the fridge for up to three days. Keep it in a sealed container. The flavors will blend well over time. Just remember to stir it before serving. If it separates, that's normal. Strawberry Dragon Fruit Agua Fresca is healthy and refreshing. Strawberries are high in vitamin C and fiber. Dragon fruit is low in calories and packed with antioxidants. This drink is hydrating, especially in hot weather. Using agave syrup keeps it natural. You can adjust sweetness to fit your taste. Overall, this drink is a nutritious choice for everyone! You’ve learned how to make a refreshing Strawberry Dragon Fruit Agua Fresca. We covered the simplest ingredients and steps. This drink is tasty and easy to customize. Don’t forget to try different fruits or adjust the sweetness to your liking. Store any leftovers properly to enjoy later. Experiment with flavors to find your favorite twist. This drink can be a fun addition to your menu. Enjoy making this drink for yourself and friends.
                Strawberry Dragon Fruit Agua Fresca Refreshing Drink
              • To make Sweet Peach Iced Tea, you need simple, fresh ingredients. Here’s what you'll need: - 4 black tea bags - 4 cups water - 2 ripe peaches, sliced - ½ cup sugar (or to taste) - 1 tablespoon fresh lemon juice - Fresh mint leaves for garnish - Ice cubes These ingredients come together to create a refreshing drink perfect for summer. You can twist this recipe to fit your tastes. Here are some fun ideas: - Tea Base: Use green tea or herbal tea instead of black tea for a lighter taste. - Fruits: Swap peaches for nectarines or apricots. You can mix different fruits too. - Sweeteners: Try honey or agave syrup instead of sugar for a different sweetness. - Herbs: Add basil instead of mint for a unique flavor. Feel free to play with these options to find what you love! Peaches and tea are more than just tasty. They also offer health perks: - Peaches: These fruits are full of vitamins A and C. They help keep your skin healthy and boost your immune system. - Tea: Black tea contains antioxidants. These can help fight free radicals in your body. - Hydration: This iced tea is hydrating, making it a great choice on hot days. Enjoying Sweet Peach Iced Tea means treating yourself to a drink that tastes good and is good for you! For the full recipe, check out the details above. First, we need to make the tea. Grab a medium saucepan. Pour in 4 cups of water and bring it to a boil. When the water is bubbling, take it off the heat. Add 4 black tea bags to the hot water. Let them steep for 5-7 minutes. This makes the tea strong and flavorful. If you like it lighter, steep for less time. After steeping, remove the tea bags. Next, let’s prepare the peach syrup. Take a small saucepan and place it on medium heat. Add 2 sliced peaches and ½ cup of sugar. Stir the mix. You want the peaches to release their juices. This will take about 5-10 minutes. Once it looks syrupy, remove it from the heat. Use a strainer to separate the syrup from the peach slices. Now, you have a sweet syrup ready to use! Now it's time to combine everything. In a large pitcher, pour in the brewed tea. Add the peach syrup and 1 tablespoon of fresh lemon juice. Stir well to mix all the flavors. Taste it to see if you want more sugar. If it’s good, let it cool at room temperature for about 20 minutes. Then, place it in the fridge for at least 1 hour. This chilling step makes it super refreshing. Once chilled, it’s time to serve! Fill glasses with ice cubes. Pour the Sweet Peach Iced Tea over the ice. You can garnish with fresh mint leaves and a slice of peach if you wish. Enjoy your drink! For the best flavor, use fresh, high-quality black tea bags. Heat your water to a boil, then steep the tea bags for 5-7 minutes. Be careful not to steep too long. Over-steeping makes the tea bitter. If you prefer a stronger flavor, try using more tea bags. Taste your tea after mixing in the peach syrup. If it is not sweet enough, add more sugar. You can also use honey or agave syrup for a different flavor. Mix well until the sweetener dissolves. Remember, you can always add more, but you can't take it out. Serve Sweet Peach Iced Tea over ice for a refreshing drink. Add fresh mint leaves for a pop of color and flavor. You can also slice extra peaches to float on top. This makes the drink look fancy and fun. For a twist, try a splash of sparkling water. It adds fizz and makes the drink even more special. Enjoy! {{image_2}} You can mix other fruits with peach for fun. Try adding raspberries or strawberries. Their tartness pairs well with the sweet peach. You can also add a splash of pineapple juice for a tropical twist. Lime juice can add a zesty kick, making your drink more exciting. You can enjoy sweet peach tea hot or cold. For hot tea, steep the black tea bags in boiling water. Add the peach syrup right after steeping. This method creates a cozy drink perfect for chilly days. However, iced peach tea is a summer favorite. Chill it in the fridge and serve over ice. This keeps it refreshing and cool. Sugar is a common choice, but you can try other sweeteners too. Honey adds a floral note that enhances the peach flavor. If you want a low-calorie option, try stevia or agave syrup. Each sweetener gives a unique taste, so feel free to experiment. Adjust the amount based on your preference for sweetness. For the full recipe, check the Sweet Peach Iced Tea section. To store leftover Sweet Peach Iced Tea, pour it into a clean pitcher. Make sure to cover the pitcher with a lid or plastic wrap. This keeps the tea fresh and prevents it from absorbing other smells in the fridge. Keep your iced tea in the coldest part of the fridge. The back of the shelf is usually the best spot. Avoid placing it in the door. The door often gets warmer when you open it. Your Sweet Peach Iced Tea stays fresh for about 3 to 5 days. After that, the flavor fades. If you see any signs of mold or changes in smell, throw it away. Enjoy your refreshing drink while it’s at its best! You can skip the sugar by using natural sweeteners. Try honey or agave syrup. You can also use ripe peaches, as they add sweetness. Just blend them into a puree and mix with the tea. This keeps the drink refreshing and tasty without added sugar. Yes, frozen peaches work well in this recipe. They can add a nice chill to your drink. Just thaw the peaches before use. You can mash them for more flavor in the syrup. This is a great option when fresh peaches are out of season. You can find Sweet Peach Iced Tea at many grocery stores. Look in the beverage aisle or tea section. Some cafes and restaurants also serve this flavor. For the best taste, consider making it at home with the full recipe. We covered how to make Sweet Peach Iced Tea from scratch. You learned about key ingredients, how to prepare the peach syrup, and the best ways to chill your drink. We explored helpful tips for brewing and adjusting sweetness. I also shared fun variations to try and how to store any leftovers. Enjoy making this refreshing drink that not only tastes great but also offers health benefits. Experiment with flavors, and find what delights your taste buds. Your perfect summer drink awaits!
                Sweet Peach Iced Tea Refreshing Summer Delight

              Footer

              Elevate your meals with this irresistible creamy balsamic vinaigrette recipe! Discover how to blend rich balsamic vinegar with creamy ingredients to create a dressing that enhances salads, roasted vegetables, and grilled meats. Made from fresh, wholesome ingredients, this homemade dressing is perfect for those who want a healthier alternative to store-bought options. Click to explore the full recipe and transform your dish with this easy, flavorful dressing!
              ↑ back to top

              More information

              • Home
              • Drinks
              • Appetizer
              • Dinner
              • Desserts
              • About
              • Contact
              • Privacy Policy

              Our Policies

              • Privacy Policy
              • GDPR Policy
              • Terms Of Use
              • Copyright Policy
              • Cookie Policy
              • Disclaimer

              Copyright © 2025 cheftaling