
Introduction
In the realm of quick and easy meals, few dishes rival the beloved pizza. This Quick and Cheesy Bisquick Pizza Dough recipe stands out for its simplicity and deliciousness, making it a favorite for weeknight dinners or casual gatherings. With just a handful of ingredients and minimal preparation time, you can whip up a delightful homemade pizza that caters to your unique taste preferences. This article will explore the ins and outs of preparing this pizza dough, including ingredient insights, variations, and serving suggestions, ensuring a satisfying culinary experience for you and your loved ones.
Pizza is more than just a meal; it’s a social experience—a canvas for creativity, a comfort food, and a go-to dish for families everywhere. Whether you’re hosting a movie night, celebrating a birthday, or simply craving a slice after a long day, the traditional pizza-making process can often feel overwhelming. Enter Bisquick—a versatile baking mix that simplifies the process while delivering delicious results. With the Quick and Cheesy Bisquick Pizza Dough, you can say goodbye to the complexity of yeast-based doughs and hello to a straightforward approach that yields a delightful crust in no time.
Understanding Bisquick and Its Versatility
Exploring the Origin of Bisquick
Bisquick was first introduced in 1931 by General Mills, initially marketed as a pancake mix. Over the decades, it has evolved into a staple in many American kitchens, primarily due to its versatility and ease of use. The original formula was designed to create fluffy pancakes, but clever home cooks quickly discovered that it could be used for much more. From biscuits and waffles to dumplings and pizza crusts, Bisquick has cemented its place as a go-to ingredient for quick and delicious meals.
The appeal of Bisquick lies not only in its convenience but also in its ability to produce consistent results. The mix contains a blend of flour, baking powder, and fat, which means that you don’t have to measure out each component separately. This makes it an ideal choice for busy families or novice cooks looking for a reliable way to create homemade dishes without extensive preparation.
How Bisquick Simplifies Cooking
In the fast-paced world we live in, time is often of the essence in meal preparation. Bisquick simplifies cooking by reducing the number of steps and ingredients needed to create a delicious dish. For those who may feel intimidated by the idea of making pizza dough from scratch, Bisquick offers a hassle-free alternative.
Using Bisquick allows you to skip the lengthy process of activating yeast, kneading dough, and allowing it to rise. Instead, you can focus on the fun parts of pizza-making—choosing your toppings, experimenting with flavors, and enjoying the process with family or friends. The Quick and Cheesy Bisquick Pizza Dough recipe is perfect for those spontaneous cravings or last-minute gatherings, providing a delicious homemade option that can be ready in a fraction of the time.
The Role of Bisquick in Pizza Making
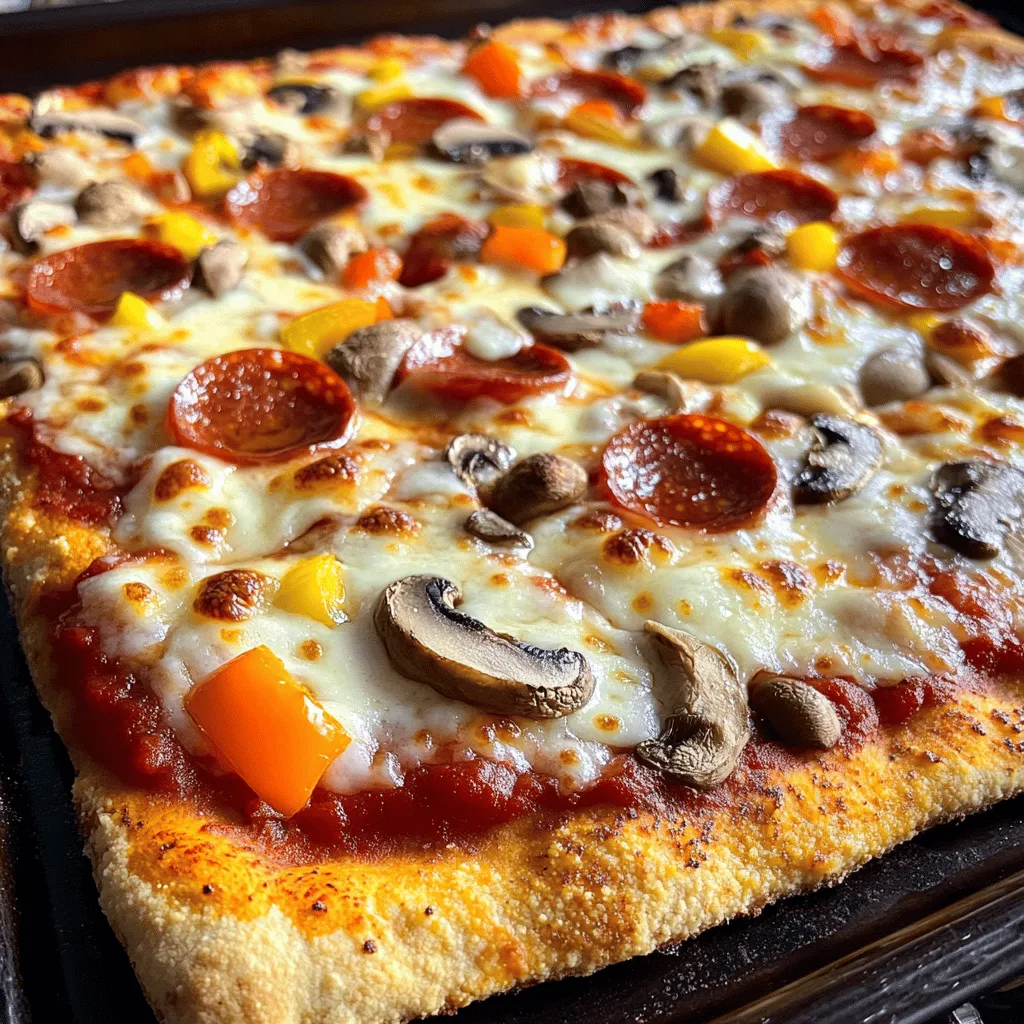
When it comes to pizza, the crust is just as important as the toppings. A great crust can elevate a pizza from ordinary to extraordinary, and this is where Bisquick shines. The mix provides a light and fluffy texture, creating a satisfying bite that pairs perfectly with a variety of toppings.
Unlike traditional pizza dough, which can be chewy and dense if not prepared correctly, the Bisquick dough offers a tender crust that holds up well under the weight of cheesy toppings and savory sauces. Additionally, the inclusion of cheese in the dough itself adds an extra layer of flavor, making each bite a delightful experience.
With just a few additional ingredients, you can transform the basic Bisquick mix into a delicious pizza crust that rivals your favorite pizzeria. Let’s delve into the specific ingredients that make this Quick and Cheesy Bisquick Pizza Dough so special.
Ingredients Breakdown
Key Ingredients for the Dough
Creating the Quick and Cheesy Bisquick Pizza Dough is a straightforward process that requires just a few essential ingredients. Here’s a closer look at what you’ll need:
Bisquick Mix: The Base of the Pizza
The star ingredient in this recipe is, of course, the Bisquick mix. This pre-mixed blend of flour, baking powder, and fat serves as the foundation for your pizza dough. It provides structure and a light texture, making it the perfect base for your cheesy creation.
When choosing your Bisquick mix, you can opt for the classic version or explore gluten-free alternatives if you have dietary restrictions. Regardless of the type, the essential baking properties remain the same, allowing you to achieve a delightful crust every time.
Dairy Choices: Milk and Cheese
The addition of dairy helps enhance the flavor and texture of the pizza dough. Typically, whole milk is used for its rich taste and creamy texture, but you can substitute it with any milk of your choice, such as almond milk or oat milk, depending on your dietary needs.
Cheese is another key component in this recipe. Shredded cheese—whether mozzarella, cheddar, or a blend—adds a savory flavor that complements the dough. Not only does it contribute to the overall taste, but it also helps bind the dough together, ensuring a cohesive and delicious crust.
Flavor Enhancers: Garlic Powder and Oregano
To elevate the flavor profile of your pizza dough, incorporating herbs and spices can make a significant difference. Garlic powder adds a subtle garlic flavor that enhances the overall taste, while dried oregano brings a classic Italian touch to the mix. These flavor enhancers will ensure that your crust is anything but bland, creating a delicious base for all your favorite toppings.
Salt: The Essential Enhancer
Salt is a crucial ingredient in any dough recipe, and this one is no exception. It enhances the natural flavors of the other ingredients and balances the overall taste of the pizza. A pinch of salt goes a long way in ensuring that your crust is flavorful and satisfying.
Choosing the Right Toppings
One of the best parts of making pizza at home is the freedom to choose your toppings. With the Quick and Cheesy Bisquick Pizza Dough, the possibilities are endless. Here are some topping ideas to inspire your next pizza night:
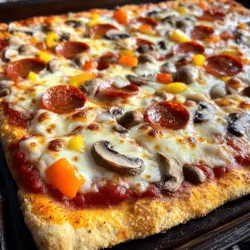
Classic Toppings: Pepperoni and Mushrooms
For a traditional pizza experience, you can’t go wrong with classic toppings like pepperoni and mushrooms. The spicy, savory flavor of pepperoni pairs beautifully with the earthy taste of sautéed mushrooms, making for a satisfying combination.
Fresh Vegetables: Bell Peppers, Onions, and More
If you prefer a lighter option, consider loading your pizza with fresh vegetables. Bell peppers, onions, and spinach are all excellent choices that add color, texture, and nutrients to your meal. You can also experiment with other vegetables like zucchini, artichokes, or olives to create a unique flavor profile.
Unique Options: Pineapple, Bacon, and Specialty Cheeses
For those adventurous eaters, don’t shy away from unique toppings. Pineapple adds a sweet and tangy flavor that contrasts beautifully with savory ingredients. Bacon brings a crispy, smoky element, while specialty cheeses like goat cheese or blue cheese can elevate your pizza to gourmet levels. The beauty of homemade pizza lies in the ability to craft combinations that suit your taste buds perfectly.
Step-by-Step Instructions
Preparation Overview
Now that you have a solid understanding of the ingredients, it’s time to dive into the preparation process. Making your Quick and Cheesy Bisquick Pizza Dough is a straightforward task that anyone can master with just a few simple steps.
Preheating and Greasing the Baking Surface
Begin by preheating your oven to 425°F (220°C). This ensures that your pizza cooks evenly and achieves that golden-brown crust. While the oven is heating, prepare your baking surface. You can use a pizza stone, a baking sheet, or a cast-iron skillet—whatever you have on hand. Lightly grease the surface with cooking spray or a thin layer of olive oil to prevent sticking.
Mixing Dry Ingredients: Creating a Flavorful Base
In a large mixing bowl, combine the Bisquick mix with the garlic powder, dried oregano, and a pinch of salt. Use a whisk or spoon to mix the dry ingredients thoroughly, ensuring that the flavors are evenly distributed throughout the flour mixture. This step is essential for achieving a well-flavored crust.
Adding Wet Ingredients: Forming the Dough
Next, add the milk and shredded cheese to the dry mixture. Stir the ingredients together until a dough begins to form. The dough should be slightly sticky but manageable. If it seems too dry, add a splash more milk until you reach the desired consistency. Avoid overmixing, as this can lead to a tough crust.
Incorporating Cheese: Enhancing Flavor and Texture
For an extra cheesy flavor, you can fold in more shredded cheese at this stage. Mozzarella is a popular choice for its meltability, but feel free to experiment with your favorite cheese varieties. The more cheese you add, the richer your crust will be.
Shaping the Dough
Once your dough is ready, it’s time to shape it into the perfect pizza crust.
Techniques for Even Distribution
Transfer the dough onto your prepared baking surface. Using your hands or a rolling pin, spread the dough evenly across the surface, ensuring that it reaches the edges. If you prefer a thicker crust, leave it slightly thicker around the edges to create a crust wall that holds in your toppings.
Achieving the Perfect Thickness
Aim for a thickness of about 1/4 to 1/2 inch, depending on your preference. Thinner crusts will yield a crispier pizza, while thicker crusts will be more doughy and chewy. Once you’ve achieved your desired thickness, use a fork to prick the dough lightly. This step helps prevent bubbling during baking and allows for even cooking.
Assembling Your Pizza
With your dough shaped and ready, it’s time to assemble your pizza masterpiece.
Spreading the Sauce: Tips for Even Coverage
Start by spreading your choice of pizza sauce evenly over the crust. Whether you opt for a classic marinara, a white sauce, or a pesto, ensure that you cover the surface evenly, leaving a small border around the edges for the crust. This will help avoid soggy dough and ensure a delightful crunch.
Layering Toppings: Maximizing Flavor Combinations
Now comes the fun part—layering your toppings! Begin with a generous handful of shredded cheese, which acts as the foundation for your toppings. Then, add your chosen toppings, whether they’re classic pepperoni, fresh vegetables, or unique ingredients. Be creative and don’t be afraid to experiment with flavors.
Once you’ve assembled your pizza, it’s ready to be placed in the preheated oven. Bake for 15-20 minutes or until the crust is golden brown and the cheese is bubbling and melted to perfection.
This Quick and Cheesy Bisquick Pizza Dough not only simplifies the pizza-making process but also allows for endless customization, making it a fantastic option for any occasion. Stay tuned for the next part of this article, where we will dive deeper into tips for best results and answer some common questions about this delicious recipe!
Optional Cheese Layer: For Extra Gooeyness
One of the simplest ways to elevate your Quick and Cheesy Bisquick Pizza is by adding an optional cheese layer. This additional layer not only enhances the pizza’s flavor but also contributes to a gooey, indulgent texture that cheese lovers will adore.
To create this cheese layer, simply sprinkle a generous amount of shredded cheese—such as mozzarella or cheddar—over the sauce before adding your favorite toppings. For an extra cheesy experience, consider incorporating a blend of cheeses. A mix of provolone, parmesan, and gouda can provide a complex flavor profile while increasing the gooeyness factor.
Baking Your Pizza to Perfection
Understanding Oven Temperature
The key to achieving a perfectly baked pizza lies in understanding your oven’s temperature settings. For our Quick and Cheesy Bisquick Pizza, you will want to preheat your oven to 425°F (220°C). This temperature allows the dough to rise adequately while creating a crispy crust that isn’t too thick or doughy.
The Importance of Preheating
Preheating your oven is a crucial step that should never be skipped. It ensures that the pizza cooks evenly and helps to achieve that desirable golden-brown finish. While your oven is preheating, you can prepare your pizza on a baking sheet or pizza stone, allowing for a seamless transition into the oven once it’s ready.
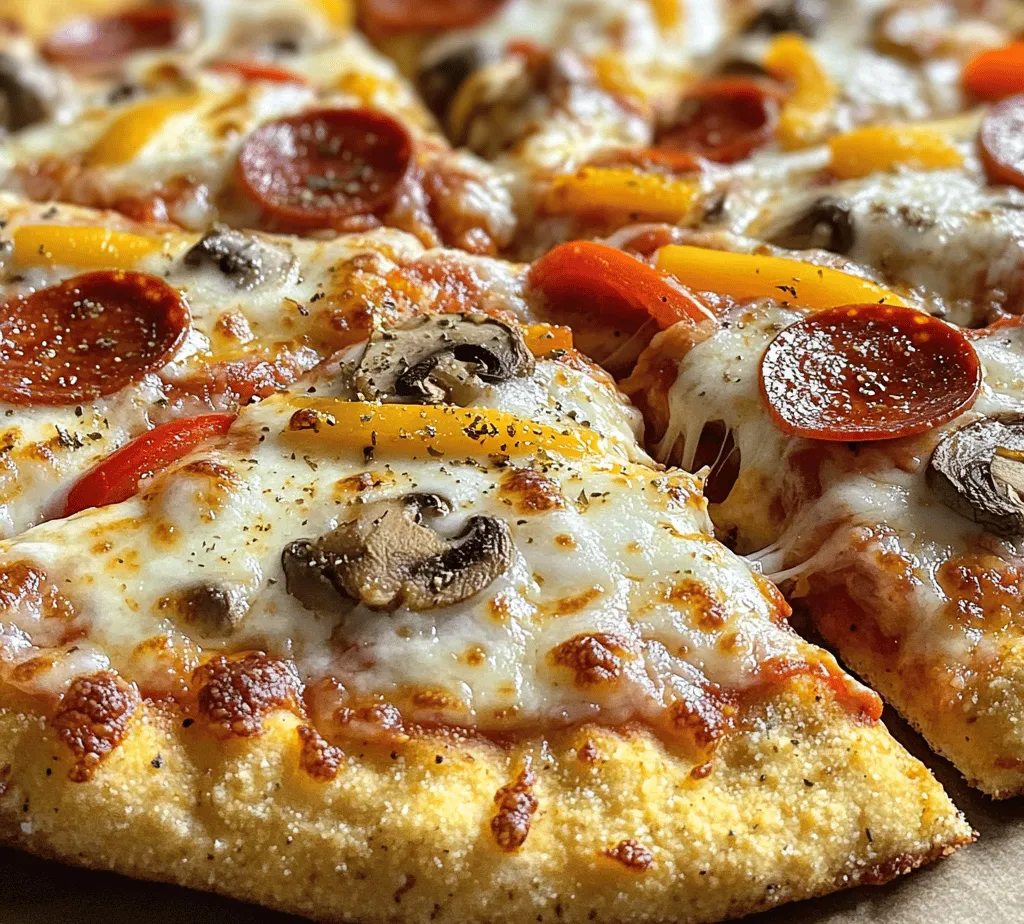
Baking Time and Indicators of Doneness
Once the oven is preheated, place your assembled pizza in the center of the oven. Bake for approximately 15-20 minutes, but keep an eye on it as baking times can vary based on individual oven characteristics. You’ll know your pizza is done when the cheese is bubbly and golden brown, and the crust has a delightful crispness.
To ensure even cooking, you may want to rotate the pizza halfway through the baking time. This helps to prevent any hot spots in your oven from leaving one side undercooked.
Cooling and Slicing the Pizza
Allowing the Pizza to Rest
After baking, it’s tempting to cut into your pizza right away, but allowing it to rest for about 5-10 minutes is essential. This resting time lets the cheese set and cool slightly, making it easier to slice without losing toppings or letting the cheese slide off.
Slicing Techniques for Perfect Portions
When it comes time to slice your pizza, a sharp pizza cutter or a large chef’s knife works best for achieving clean cuts. Start by cutting the pizza into quarters, then slice each quarter into smaller pieces, depending on your desired portion size. This method not only creates uniform slices but also ensures that each piece has a good balance of crust, sauce, and toppings.
Serving Suggestions
Pairing Your Pizza with Sides
To create a well-rounded meal, consider pairing your Quick and Cheesy Bisquick Pizza with various sides that complement its flavors.
Fresh Salads: Complementing Flavors
A light, fresh salad can be the perfect accompaniment to your pizza. Consider a simple arugula salad with a lemon vinaigrette, which can provide a refreshing contrast to the richness of the cheese. Alternatively, a classic Caesar salad with crunchy croutons and creamy dressing can add a deliciously satisfying element to your meal.
Dipping Sauces: Adding More Depth
Enhance your pizza experience with a variety of dipping sauces. Classic options like marinara or garlic butter can add extra flavor to each bite. For something different, try a spicy ranch or a balsamic glaze for a sweet and tangy twist.
Beverage Pairings: Wine, Beer, or Soft Drinks
Choosing the right beverage can further enhance your meal. A crisp white wine, such as Pinot Grigio, pairs beautifully with a cheesy pizza. If you prefer beer, a light lager or amber ale will complement the flavors without overpowering them. For non-alcoholic options, consider sparkling water with a splash of lemon or a classic soda.
Storage and Reheating Suggestions
Storing Leftovers Properly
If you find yourself with leftover pizza, proper storage is key to maintaining its flavor and texture.
Refrigeration Techniques for Freshness
Allow your pizza to cool completely before storing it in the refrigerator. Wrap individual slices in plastic wrap or aluminum foil to prevent them from drying out. You can also place them in an airtight container with parchment paper between layers to keep the crust from becoming soggy.
Freezing Options for Long-Term Storage
For longer-term storage, consider freezing your pizza. Wrap each slice tightly in plastic wrap, then place them in a freezer-safe bag or container. This method can keep your pizza fresh for up to three months, allowing you to enjoy a quick meal whenever you desire.
Reheating Your Pizza
Reheating pizza can be a challenge if you want to maintain that freshly baked taste.
Oven vs. Microwave: Best Practices
While the microwave is convenient, it can leave your crust chewy and less enjoyable. Instead, opt for the oven when reheating. Preheat your oven to 375°F (190°C) and place the leftover slices on a baking sheet. Cover with aluminum foil to keep moisture in, and heat for about 10-15 minutes or until the cheese is bubbly and the crust is warm.
If you’re in a hurry, you can use the microwave, but place a cup of water in the microwave alongside the pizza. This creates steam, which helps keep the crust from becoming too tough.
Achieving That Freshly Baked Taste Again
For a freshly baked taste, consider using a skillet. Heat a non-stick skillet over medium heat and add a slice of pizza. Cover with a lid to help melt the cheese and create a crispy bottom. This method takes just a few minutes and can result in a deliciously restored slice.
Exploring Variations of the Recipe
Gluten-Free Alternatives
Substituting with Gluten-Free Bisquick
If you’re looking for gluten-free options, simply substitute regular Bisquick with gluten-free Bisquick. The recipe remains fundamentally the same, allowing you to enjoy a delicious pizza without worrying about gluten sensitivity.
Adjusting Ingredients for Gluten Sensitivity
Along with the gluten-free mix, ensure that any additional toppings or sauces you use are also gluten-free. Check labels for hidden gluten in processed ingredients to create a safe and tasty meal.
Vegan Options
Dairy-Free Cheese Alternatives
For those following a vegan diet, there are plenty of dairy-free cheese alternatives available. Brands like Daiya or Follow Your Heart offer shredded cheese that melts well and provides a similar taste to traditional cheese.
Plant-Based Toppings for Vegan Enjoyment
Don’t hesitate to get creative with toppings. Load your pizza with a variety of vegetables, such as bell peppers, mushrooms, red onions, and spinach. You can also add protein-rich toppings like chickpeas or vegan sausage to make your vegan pizza satisfying and delicious.
Conclusion
The Quick and Cheesy Bisquick Pizza Dough is more than just a meal; it’s an opportunity to customize and create a dish that reflects your tastes and preferences. With its straightforward preparation and versatile nature, this recipe can easily become a go-to option for any occasion. Whether you stick with classic toppings or explore innovative variations, this pizza dough serves as the perfect canvas for your culinary creativity, delighting friends and family alike with every slice. Enjoy the journey of making your pizza from scratch, and savor the delicious results!