Introduction
There’s something inherently enchanting about the process of making homemade syrups. Not only do they elevate your culinary creations, but they also allow you to incorporate fresh, vibrant flavors that store-bought options often lack. One syrup that stands out for its unique and refreshing taste is green apple syrup. With its crisp, tangy notes, green apple syrup can transform a simple pancake breakfast into a gourmet affair or add a delightful twist to cocktails and desserts.
The allure of green apple syrup lies in its bright flavor profile, which perfectly balances sweetness and tartness. This syrup captures the essence of freshly harvested green apples, making it a must-have for any kitchen enthusiast. Whether you’re drizzling it over waffles, mixing it into a salad dressing, or using it as a glaze for meats, this syrup can enhance a variety of dishes, bringing a touch of creativity to your culinary endeavors.
Understanding the Ingredients
To make a delicious batch of crunchy green apple syrup, it’s essential to understand the key ingredients involved. The primary components are, of course, fresh green apples, sugar, water, and optional seasonings. Each ingredient plays a crucial role in achieving that perfect balance of flavor and texture.
Green Apples
The star of this recipe is undoubtedly the green apple. Known for their tartness and crisp texture, green apples, particularly varieties like Granny Smith, are ideal for syrup-making. They not only impart a bright, tangy flavor but also offer a satisfying crunch that adds to the texture of the syrup. Nutritionally, green apples are rich in vitamins A and C, as well as dietary fiber, making this syrup a slightly healthier indulgence compared to traditional sugary options.
When selecting green apples for your syrup, it’s important to choose fresh, firm apples with a vibrant green color. They should be free from bruising or blemishes, as fresh ingredients significantly impact the syrup’s overall taste and quality. Using apples that are in season will ensure you get the best flavor profile.
Optional Ingredients
While the basic recipe focuses on green apples, you might also consider enhancing the flavor with optional ingredients like ground cinnamon. Cinnamon adds a warm, aromatic depth to the syrup, complementing the tartness of the apples beautifully. A small amount can transform the syrup, making it even more versatile for different applications.
Using fresh ingredients and experimenting with flavors can turn your green apple syrup into a personalized creation that reflects your culinary style.
Preparation Steps Explained
Creating crunchy green apple syrup is a simple yet rewarding process. Let’s break down the preparation steps to ensure you achieve the best results.
Step 1: Preparing the Apples
Begin by washing your green apples thoroughly to remove any dirt or pesticides. Once cleaned, the next step is to peel and dice the apples. Peeling is essential because it removes the waxy coating that can be found on some apples, ensuring a smoother syrup. Dicing the apples into uniform pieces is equally important, as this promotes even cooking and helps release the apples’ juices more effectively during the boiling process.
Step 2: Boiling the Apples
After preparing the apples, place them in a large pot and add water. The amount of water should just cover the apples to facilitate boiling without diluting the flavor. Bring the mixture to a gentle boil over medium heat. This initial boiling process helps to soften the apples and extract their juices.
Step 3: Simmering for Flavor
Once the mixture reaches a boil, reduce the heat to low and let it simmer. Simmering allows the apples to break down, releasing their natural sugars and flavors into the water. This process typically takes around 20-30 minutes. It’s essential to stir occasionally to prevent sticking and ensure even cooking.
Step 4: Mashing the Apples
As the apples soften, you’ll want to mash them to create a chunky puree. Using a potato masher or a fork, gently mash the apples in the pot. The goal is to break down the apples while retaining some of the texture. This step is crucial because it helps to incorporate the apple flavor throughout the syrup while providing that delightful crunch.
Step 5: Straining the Mixture
After mashing, it’s time to extract the juice. Set up a fine-mesh strainer or cheesecloth over a large bowl or another pot to catch the pulp. Pour the apple mixture into the strainer and let it sit for a few minutes, allowing the juice to drip through. Gently press down on the pulp with a spoon to extract as much juice as possible. This extraction is vital as it concentrates the apple flavor and eliminates any unwanted solids.
Cooking the Syrup
Once you have your fresh apple juice, the next step is to turn it into syrup. In a clean pot, combine the strained apple juice with sugar and any optional ingredients, such as ground cinnamon. The typical ratio is about one cup of sugar for every cup of juice, but you can adjust this according to your taste preferences.
Heat the mixture over medium heat, stirring gently until the sugar dissolves completely. Once dissolved, bring the mixture to a boil, then reduce the heat to low and let it simmer for another 10-15 minutes. This simmering process allows the syrup to thicken and develop its rich flavor.
As the syrup cooks, keep an eye on its consistency. You’re looking for a syrup that coats the back of a spoon, indicating it’s ready to be removed from the heat. If you prefer a thicker syrup, you can continue to simmer until it reaches your desired consistency.
In the next part of the article, we’ll cover the final steps of bottling and storing your homemade crunchy green apple syrup, along with tips for enjoying it in various recipes. Stay tuned for more delightful insights on this versatile syrup!

The Science Behind Boiling and Simmering: How It Affects Syrup Consistency
When making green apple syrup, understanding the science behind boiling and simmering is essential for achieving the perfect consistency. Boiling initiates the thickening process, as high temperatures cause the water content in the syrup to evaporate, concentrating the flavors and sugars. However, boiling too vigorously can lead to a syrup that’s too thick and potentially burnt, while too gentle of a simmer may not allow enough evaporation to create the desired texture.
As you heat the apple mixture, the sugar begins to dissolve, and the pectin in the apples helps to thicken the syrup as it cooks. Pectin, a natural thickening agent found in fruits, works best when combined with acids and sugars, which is why the balance of green apples and sugar is crucial. The optimal boiling point for syrup typically lies between 220°F to 225°F. Using a candy thermometer can help you monitor the temperature and achieve the desired consistency.
Tips for Determining the Perfect Thickness of the Syrup
To ensure your green apple syrup reaches the perfect thickness, consider the following tips:
1. Cold Plate Test: One of the simplest methods to test syrup thickness is the cold plate test. Place a small plate in the freezer for a few minutes. Once chilled, drop a spoonful of syrup onto the plate. Allow it to sit for a few seconds before running your finger through it. If the line stays clear and the syrup does not run back together, it’s ready.
2. Visual Cues: Watch for visual changes in the syrup as it cooks. A good syrup should have a glossy appearance and a slightly viscous texture. It should flow off the spoon in a continuous stream without breaking apart.
3. Let It Cool: Remember that syrup thickens slightly as it cools. Don’t rush to bottle your syrup when it’s boiling hot; give it a moment to cool down and assess its final thickness.
Storage and Shelf Life
Proper storage is crucial to prolonging the freshness of your homemade green apple syrup. Here are some best practices:
Best Practices for Storing Homemade Syrup
1. Use Clean Containers: Always store your syrup in clean, sterilized bottles or jars. This minimizes the risk of contamination and helps maintain the syrup’s quality.
2. Cool Completely Before Sealing: Allow your syrup to cool completely before transferring it to storage containers. Sealing hot syrup can create condensation, leading to potential spoilage.
3. Choose the Right Material: Glass jars are preferable for storage as they are non-reactive and help preserve the flavor. Avoid plastic containers, as they can absorb the syrup’s flavors over time.
Explanation of Sterilizing Bottles or Jars to Prolong Freshness
To ensure the longevity of your syrup, sterilizing your bottles or jars is a critical step. Here’s how to do it:
1. Boil Method: Submerge glass jars and lids in a large pot of boiling water for about 10 minutes. Remove them with tongs and place them on a clean towel to air dry.
2. Oven Method: Preheat your oven to 225°F. Place clean jars upside down on a baking sheet and heat them for about 15 minutes. Allow them to cool before filling.
Both methods effectively kill off any bacteria or yeast that could compromise your syrup’s freshness.
Discussing the Typical Shelf Life of Green Apple Syrup in the Refrigerator
When properly stored in the refrigerator, homemade green apple syrup can last for about 3 to 6 months. To maximize its shelf life, always check for signs of spoilage before use, such as an off smell, discoloration, or mold. If you notice any of these signs, it’s best to discard the syrup.
Creative Ways to Use Green Apple Syrup
Now that you have your delicious green apple syrup ready, let’s explore some creative ways to enjoy it:
Suggestions for Breakfast Pairings: Pancakes, Waffles, and More
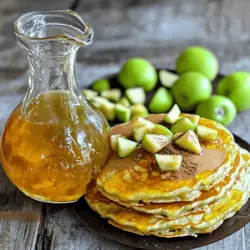
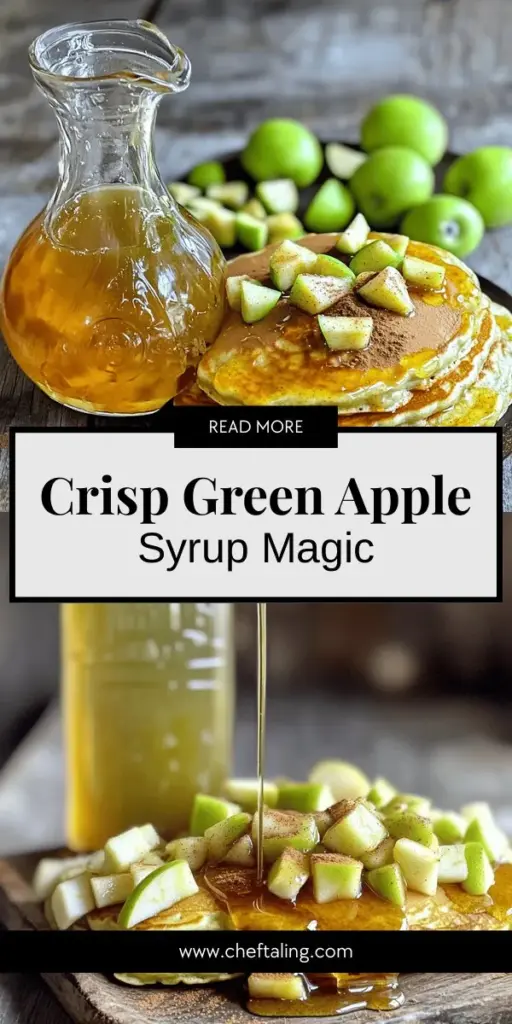
Green apple syrup is a fantastic addition to your breakfast table. Drizzle it over fluffy pancakes or crispy waffles for a burst of tart sweetness. You can also stir a spoonful into oatmeal or yogurt for added flavor and texture. For a gourmet touch, combine the syrup with a dollop of whipped cream or Greek yogurt and top with sliced apples and granola.
Ideas for Using the Syrup in Desserts: Ice Cream and Yogurt Drizzling
For dessert lovers, the uses for green apple syrup are endless. It makes a delightful topping for vanilla ice cream or sorbet, adding a sweet and tangy twist. Try drizzling it over baked goods like tarts or muffins or incorporating it into desserts like panna cotta or cheesecake for a refreshing flavor contrast.
Beverage Applications: Incorporating Syrup into Cocktails or Sparkling Water
Not just for food, green apple syrup can elevate your beverage game too! Use it to sweeten cocktails, such as an apple mojito or a sparkling apple spritz. Simply mix the syrup with club soda or sparkling water for a refreshing non-alcoholic drink. Add a few slices of fresh apple and a sprig of mint for a beautiful presentation.
Highlighting the Syrup as a Unique Gift Idea for Special Occasions
Homemade green apple syrup makes for an excellent gift, especially for foodies or anyone who appreciates unique culinary treats. Package it in a beautiful glass bottle, label it with the date and contents, and consider adding a recipe card with suggestions on how to use it. This personal touch is sure to delight friends and family during holidays, birthdays, or housewarming events.
Nutritional Information
Understanding the nutritional benefits of your ingredients can enhance your appreciation of the syrup.
Overview of the Nutritional Benefits of Green Apples
Green apples, particularly varieties like Granny Smith, are rich in vitamins A and C, dietary fiber, and antioxidants. They are low in calories and high in water content, making them an excellent choice for those looking to maintain a healthy diet. The tartness of green apples also means they contain less sugar compared to sweeter varieties, providing flavor without excessive calories.
Discussion on the Balance of Sugar and Natural Flavors in the Syrup
While making syrup does involve adding sugar, the primary flavor comes from the apples. The natural tartness of green apples balances the sweetness, offering a unique flavor profile that can be enjoyed in moderation. For those concerned about sugar intake, consider reducing the amount of sugar in your syrup or experimenting with alternative sweeteners like honey or agave syrup.
Considerations for Health-Conscious Individuals
For health-conscious individuals, it’s essential to enjoy green apple syrup in moderation. While it can add flavor and excitement to meals, being mindful of portion sizes can help maintain a balanced diet. Pair your syrup with whole grains, proteins, and healthy fats to create a satisfying meal that won’t spike your blood sugar levels.
Conclusion
Making and enjoying homemade green apple syrup is a delightful experience that combines the natural tartness of apples with the sweetness of sugar. The versatility of this syrup allows it to enhance various dishes, from breakfast favorites to elegant desserts and refreshing beverages. Experimenting with the recipe can yield a syrup that perfectly suits your taste preferences, encouraging creativity in the kitchen.
So, gather your ingredients, follow the steps, and let the vibrant flavors of green apple syrup inspire your culinary adventures. Whether you serve it at your breakfast table or gift it to loved ones, this syrup is sure to leave a lasting impression. Enjoy the journey of making this delightful syrup, and don’t hesitate to adapt it to make it uniquely yours!