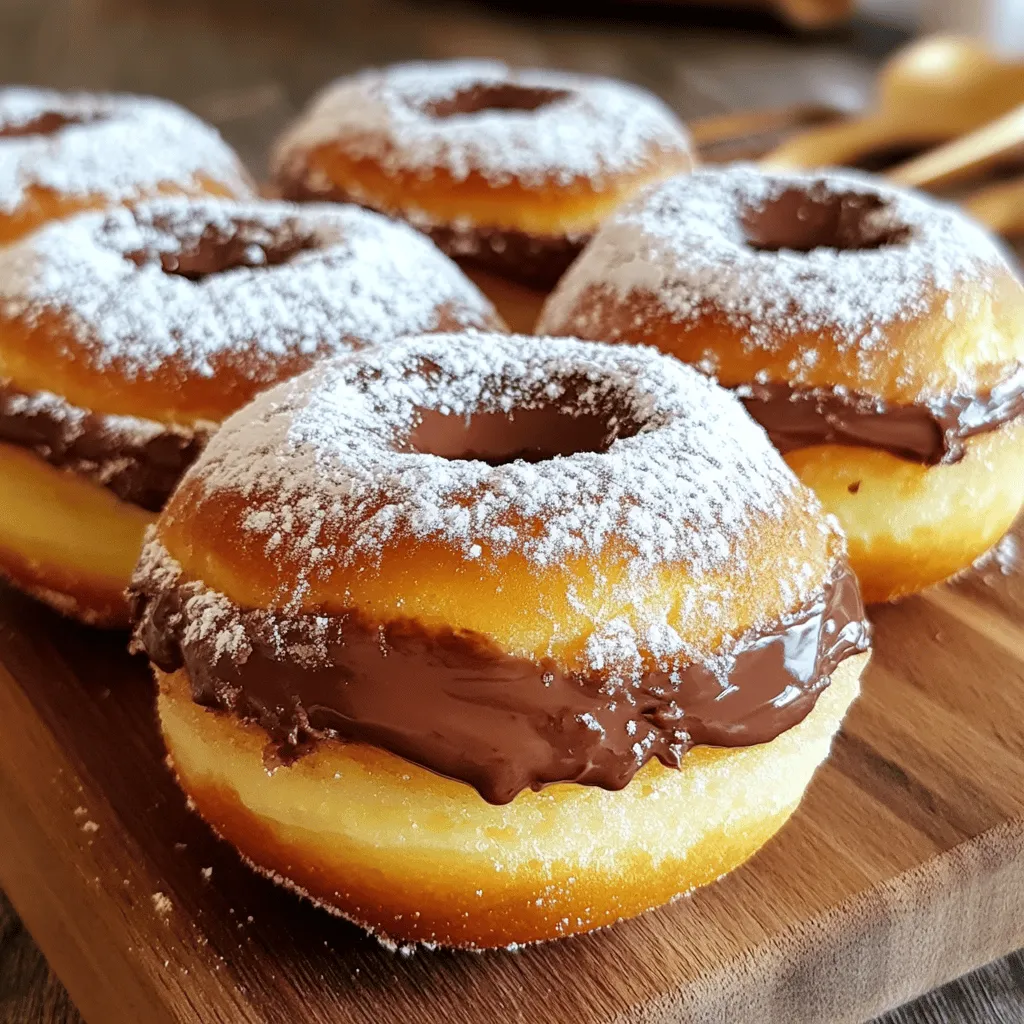

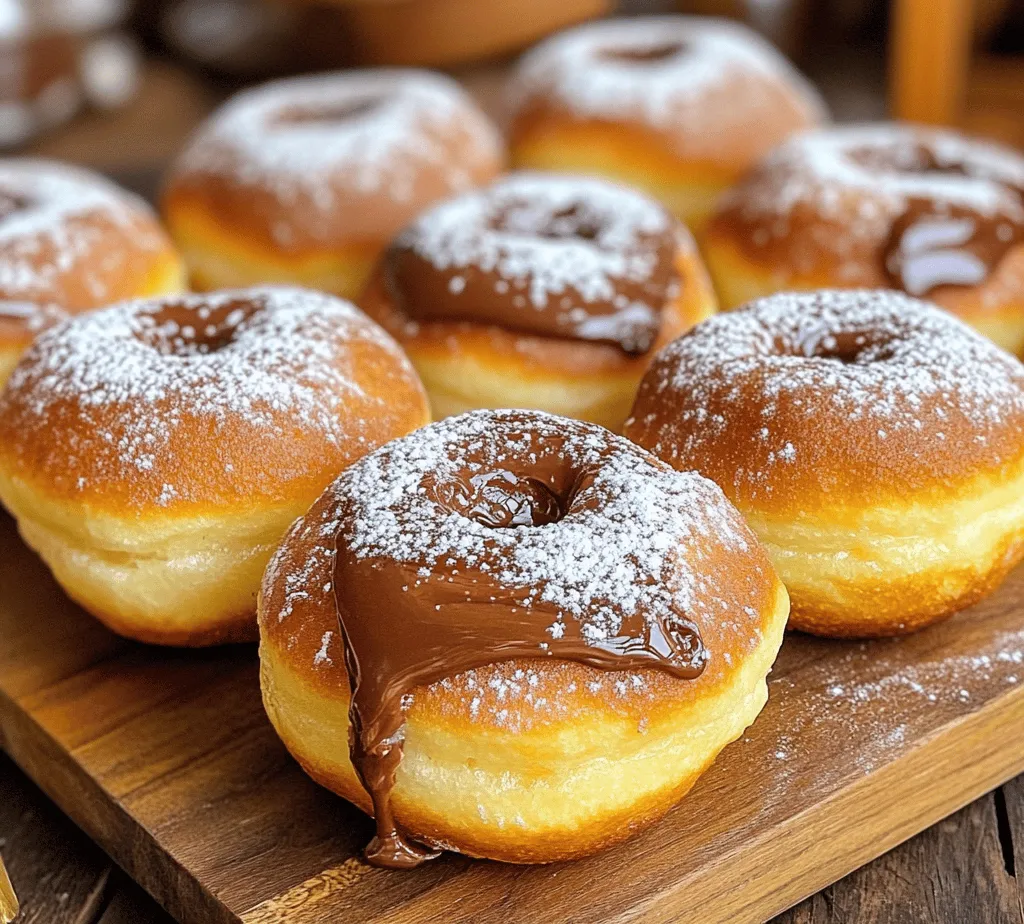
When it comes to irresistible desserts, donuts undoubtedly hold a special place in our hearts. Their soft, fluffy texture combined with a myriad of flavors and fillings makes them a favorite indulgence for many. But what happens when you take the classic donut and transform it into a decadent treat by stuffing it with Nutella? The answer is simply delightful. Nutella, the beloved hazelnut spread, adds a rich, creamy, and chocolatey dimension that perfectly complements the warm sweetness of a freshly made donut. In this article, we promise to guide you through the process of making Nutella-stuffed donuts at home, ensuring that every bite is as heavenly as the last.
The Allure of Homemade Donuts
While store-bought donuts can be convenient, homemade donuts reign supreme for several compelling reasons. For one, there’s an undeniable charm in preparing your own donuts from scratch. The process of mixing, kneading, and frying not only fills your kitchen with enticing aromas but also evokes a sense of nostalgia. Many of us have fond memories of baking with family members or experimenting with flavors during weekend brunches, and making these Nutella-stuffed donuts is sure to create new memories.
Homemade donuts also provide the joy of customization. Unlike their commercially produced counterparts, you have complete control over the ingredients and flavors. Want to infuse your donuts with a hint of cinnamon or vanilla? Or perhaps you prefer a fruity glaze to complement the rich Nutella filling? The possibilities are endless when you make donuts at home. Plus, you can adjust the sweetness to your liking, ensuring that your treats are tailored to your preferences.
By opting for homemade donuts, you’re not just baking; you’re crafting an experience. The satisfaction of biting into a donut you’ve made with your own hands, filled with warm Nutella, is unmatched. So roll up your sleeves and get ready to embark on this delicious adventure!
Ingredients Breakdown
Creating the perfect Nutella-stuffed donuts requires a selection of essential ingredients, each playing a vital role in the overall flavor and texture of the final product. Here’s a breakdown of what you’ll need:
- All-Purpose Flour: This is the backbone of your donut dough, providing structure and chewiness. Using high-quality flour is crucial for achieving the perfect texture.
- Granulated Sugar: A sweetener that enhances the flavor of the donuts while also feeding the yeast during the fermentation process.
- Instant Yeast: This leavening agent is responsible for making your donuts rise. Instant yeast is favored because it can be mixed directly into the dry ingredients without needing to be activated separately.
- Milk: Adds moisture to the dough and helps create a tender crumb. Whole milk is ideal for a richer flavor, but you can substitute with non-dairy alternatives if needed.
- Eggs: Essential for richness and binding the ingredients together. They also contribute to the donuts’ golden color and fluffy texture.
- Butter: Melted butter adds a luxurious flavor and richness to the dough. Using unsalted butter allows you to control the salt level in your recipe.
- Nutella: The star of the show, this creamy hazelnut spread will be used as the delicious filling in your donuts.
- Salt: A small amount enhances the overall flavor and balances the sweetness.
- Vegetable Oil: Used for frying, it provides the necessary heat to cook the donuts until they are golden brown and perfectly crispy on the outside.
When preparing your Nutella-stuffed donuts, quality is key. Using fresh, high-quality ingredients will significantly impact the flavor of your final product. If you have dietary restrictions, don’t worry; there are plenty of alternatives available. For instance, you can use gluten-free flour blends, dairy-free milk, or egg substitutes to cater to various dietary needs.
Step-by-Step Instructions for Making Nutella-Stuffed Donuts
Now that you have a good understanding of the allure of homemade donuts and the ingredients involved, let’s dive into the step-by-step process for making these delectable Nutella-stuffed donuts.
Mixing the Dough
The first step in creating your Nutella-stuffed donuts is to mix the dough. Start by combining your dry ingredients in a large mixing bowl. This includes the all-purpose flour, granulated sugar, instant yeast, and salt. Whisk them together until they are evenly distributed, ensuring that the yeast is well incorporated.
Next, in a separate bowl, combine your wet ingredients: warm milk, melted butter, and eggs. The milk should be warmed to about 110°F (43°C) — warm enough to activate the yeast but not so hot that it kills it. If you don’t have a thermometer, a good rule of thumb is to heat the milk until it feels warm to the touch but not scalding.
Once your wet ingredients are ready, pour them into the bowl with the dry ingredients. Stir until a shaggy dough forms. It’s important not to overmix at this stage; just ensure that all the flour is incorporated.
Yeast Activation Process
Yeast is a remarkable ingredient in baking, and understanding how it works will greatly enhance your baking skills. When you dissolve yeast in warm liquid, it begins to activate, feeding on the sugars present in the mixture. This process creates carbon dioxide gas, which causes the dough to rise.
For our donut recipe, using instant yeast simplifies the process since it doesn’t require proofing in warm water like active dry yeast does. However, if you prefer to use active dry yeast, you’ll want to mix it with warm water and a pinch of sugar and let it sit for about 5-10 minutes until it becomes frothy before mixing it with the other ingredients.
Importance of Temperature in Yeast-Based Recipes
Temperature plays a crucial role in yeast-based recipes. Yeast thrives in a warm environment, so make sure your kitchen is at a comfortable temperature during the rising process. If it’s too cold, the dough may take longer to rise or may not rise at all. Conversely, if it’s too hot, the yeast may become dormant or die.
Kneading and Rising
Once your dough has come together, it’s time to knead it. Kneading develops the gluten in the dough, giving your donuts their structure and chewiness. Turn the dough out onto a lightly floured surface and knead it for about 8-10 minutes. You’ll know it’s ready when it’s smooth and elastic.
After kneading, place the dough in a lightly greased bowl, cover it with a clean kitchen towel or plastic wrap, and let it rise until it has doubled in size. This usually takes about 1-2 hours, depending on the temperature of your kitchen. To ensure a successful rise, consider placing the bowl in a warm, draft-free area.
Techniques for Kneading Dough Effectively
To knead dough effectively, use the heel of your hand to push the dough away from you, then fold it back over itself. Turn the dough a quarter turn and repeat the process. This method helps develop the gluten and creates a smooth texture. If the dough becomes too sticky, sprinkle a little flour on the surface, but be cautious not to add too much, as this can result in dry donuts.
The Significance of Allowing Dough to Rise for Texture and Flavor Development
Allowing the dough to rise is a vital step in the process. As the dough rises, yeast produces carbon dioxide, creating air pockets that result in light, fluffy donuts. The longer the dough ferments, the more flavor it develops, which is why many bakers prefer a longer first rise. Patience is key here; once the dough has doubled in size, it will be ready for shaping.
Shaping the Donuts
After the dough has risen, it’s time to shape the donuts. Turn the dough out onto a floured surface and gently punch it down to release any air bubbles. Roll the dough out to about ½ inch thick. Using a donut cutter or two round cookie cutters (one larger and one smaller), cut out your donut shapes.
Once you have your donuts cut out, you can also shape the holes. Gather any scraps of dough, reroll them, and cut out additional donuts. Place the shaped donuts on a parchment-lined baking sheet and cover them with a kitchen towel. Allow them to rise again for about 30-45 minutes until they puff up.
With your donuts shaped and ready for frying, you’re one step closer to enjoying the delightful experience of biting into a warm, Nutella-filled treat. In the next part of this article, we will delve into the frying process and how to achieve that perfect golden-brown exterior, along with tips for the best results. Stay tuned for the delicious continuation of this Nutella-stuffed adventure!
Tips on Rolling Out Dough and Cutting Out Shapes
Rolling out donut dough is a crucial step that can affect the final texture and appearance of your Nutella-stuffed donuts. Start with well-chilled dough, as this makes it easier to handle and less sticky. Lightly flour your work surface and the rolling pin to prevent the dough from sticking. Aim for an even thickness of about ½ inch to ensure the donuts fry properly.
When it comes to cutting out shapes, a round cookie cutter is the classic choice for traditional donut shapes. For a bit of creativity, consider using cookie cutters in fun shapes like stars, hearts, or even seasonal designs. To achieve a perfect cut, press down firmly without twisting the cutter, as twisting can seal the edges and prevent the donuts from rising properly while frying.
If you want to create filled donuts without a traditional hole, simply cut squares or rectangles instead of circles. This will give you a new twist on the classic shape while maximizing the delicious Nutella filling.
Frying the Donuts
Best Practices for Frying Donuts Safely
Frying donuts at home can be a rewarding experience, but safety should always come first. Always use a deep, heavy-bottomed pot or a deep fryer to regulate the oil temperature effectively. Fill the pot with enough oil to allow the donuts to float while frying—about 2-3 inches deep is optimal.
Keep a close eye on the temperature of the oil. Use a cooking thermometer to monitor it closely. If the oil is too hot, the donuts will brown too quickly on the outside while remaining raw on the inside. Conversely, if the oil is not hot enough, your donuts will absorb excess oil and become greasy.
Ideal Oil Temperature and How to Maintain It
The ideal temperature for frying donuts is between 350°F and 375°F (175°C and 190°C). Once the oil reaches this temperature, gently lower the prepared donuts into the oil one or two at a time, ensuring you don’t overcrowd the pot, which can lower the oil temperature and lead to uneven cooking.
To maintain oil temperature, you may need to adjust the heat as you fry. If you notice that the donuts are browning too quickly, reduce the heat. Conversely, if the oil temperature drops too low, slightly increase the heat. Always return the temperature to the ideal range before adding more donuts.
Signs to Look for Indicating When Donuts Are Ready to Be Flipped
As the donuts fry, they will begin to rise to the surface. Keep an eye out for visual cues: when the donuts are golden brown on the bottom, it’s time to flip them. Use a slotted spoon or a pair of tongs to gently turn them over and fry the other side until it reaches a similar golden hue. This process usually takes about 1-2 minutes per side, depending on the size of your donuts.
Once fully cooked, use the slotted spoon to remove the donuts and place them on a cooling rack lined with paper towels to drain any excess oil. This will help maintain their fluffy texture.
Filling the Donuts with Nutella
Techniques for Using a Piping Bag to Fill Donuts
Filling your donuts with Nutella is perhaps the most satisfying part of the process. To do this, you’ll need a piping bag fitted with a long, narrow tip. If you don’t have a piping bag, you can use a resealable plastic bag with a corner snipped off.
Once the donuts have cooled, insert the piping tip into the side of each donut and gently squeeze the bag to fill. Be sure to fill each donut just until you feel a slight resistance, indicating that it’s full but not overstuffed. This technique ensures a perfect distribution of Nutella throughout each donut, providing that delightful burst of flavor with every bite.
Tips on Achieving the Perfect Filling Ratio for Maximum Enjoyment
Finding the perfect filling ratio is essential for enjoying your Nutella-stuffed donuts. A good rule of thumb is to aim for about 1 tablespoon of Nutella per donut. However, this can vary based on personal preference; feel free to adjust according to how indulgent you want your treats to be. Remember, there’s no such thing as too much Nutella!
If you’d like to create a variety of flavors, consider experimenting with other fillings such as fruit preserves, cream cheese frosting, or chocolate ganache. You can even create a Nutella and banana filling for a delicious twist.
Finishing Touches: Dusting and Serving
The Art of Dusting Donuts with Powdered Sugar
After filling your donuts, it’s time for the finishing touch. Dusting with powdered sugar not only adds a beautiful aesthetic but also a hint of sweetness. To achieve an even dusting, place powdered sugar in a fine mesh sieve and gently shake it over the donuts. This ensures a light coating that doesn’t overwhelm the flavor of the Nutella.
Presentation Tips for Serving Nutella-Stuffed Donuts
When it comes to serving your donuts, presentation matters. Arrange them on a decorative platter, and consider garnishing with fresh fruits such as strawberries or raspberries for a pop of color. You can also serve them alongside a small bowl of Nutella for dipping or drizzling, enhancing the indulgence of the experience.
Pairing Suggestions
To elevate your donut experience, think about beverage pairings. A hot cup of coffee, rich hot chocolate, or even a cold glass of milk works beautifully with Nutella-stuffed donuts. You might also consider serving them with a scoop of vanilla ice cream for an extravagant dessert option.
Nutritional Information
Overview of the Nutritional Aspects of the Donuts
While Nutella-stuffed donuts are undeniably a treat, it’s good to be aware of their nutritional aspects. Each donut contains a mix of carbohydrates, sugars, fats, and proteins. The ingredients used can significantly affect these values, so consider using whole wheat flour or a healthier oil option for frying to make them slightly healthier.
Discussion of Portion Control and Indulgence in Moderation
As with any indulgent treat, enjoying Nutella-stuffed donuts in moderation is key. A single donut can satisfy your sweet tooth without derailing your health goals. Sharing with friends or family can also make the experience more enjoyable while promoting portion control.
Conclusion
Making Nutella-stuffed donuts is a delightful culinary adventure that brings joy to both the creator and the eater. Their warm, fluffy centers filled with rich Nutella create a harmonious balance of textures and flavors that is hard to resist. Whether you enjoy them on a sweet Sunday morning or as an after-dinner treat, there’s something special about indulging in homemade donuts.
We encourage you to share this experience with family and friends, allowing everyone to partake in the joy. Homemade treats have a unique charm that fosters connection and happiness. As you embark on your donut-making journey, remember that the satisfaction of creating something delicious from scratch is one of the greatest rewards of cooking. Enjoy your Nutella-stuffed donuts, and don’t forget to savor every bite!
