
Introduction
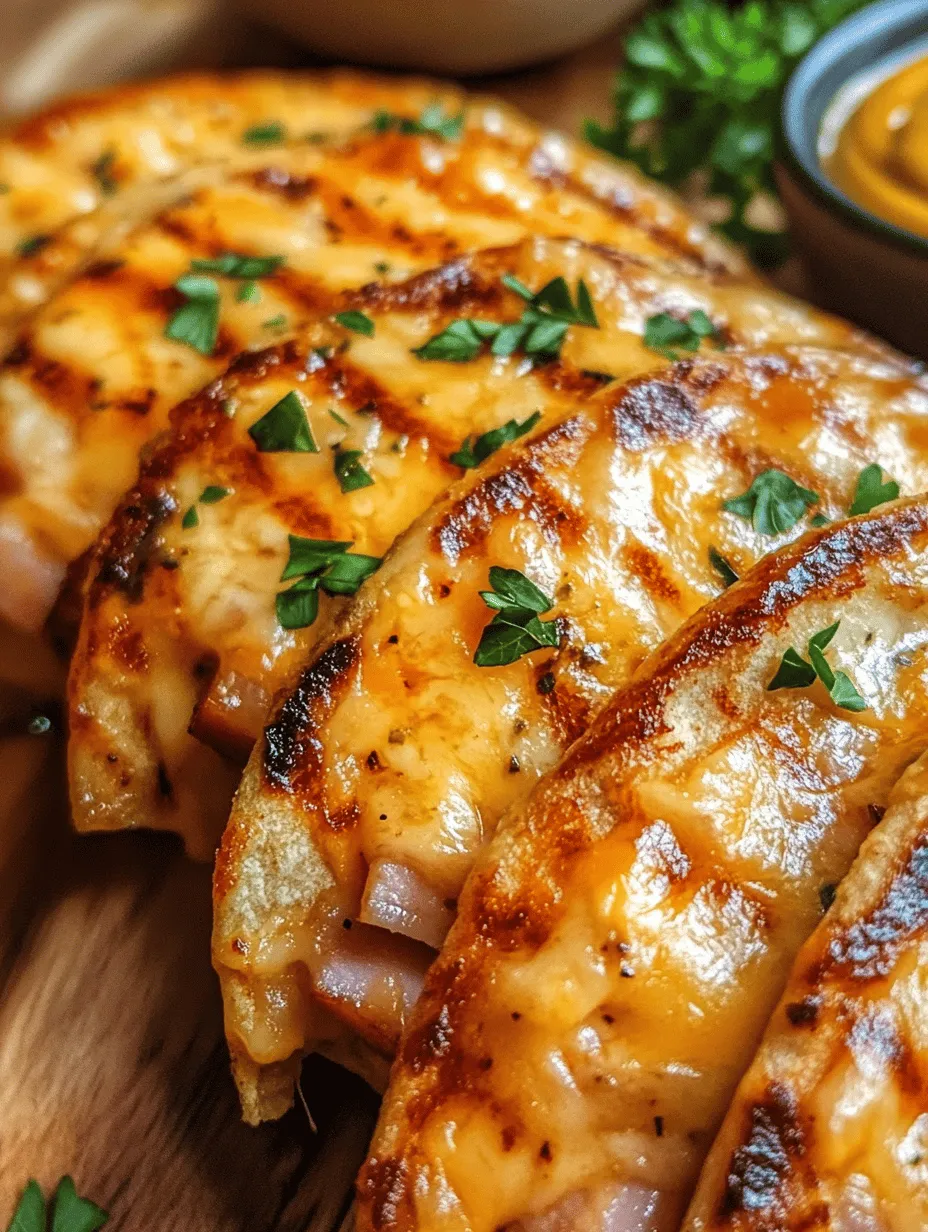
If you’re looking for a quick, satisfying meal that ticks all the boxes for flavor and convenience, the toasted ham and cheese tortilla pockets are the perfect solution. This delightful recipe has gained popularity for its simplicity, requiring minimal preparation while delivering maximum taste. Whether you’re whipping up a snack for your kids, preparing a light lunch, or looking for a fun appetizer for your next gathering, these tortilla pockets are sure to impress.
What sets this recipe apart is its incredible versatility. While the classic combination of ham and cheese is a favorite, the options for customization are virtually endless. You can easily swap out the deli ham for turkey or chicken, or even add a variety of fresh vegetables to suit your palate. This adaptability makes the toasted ham and cheese tortilla pockets a fantastic go-to recipe for any occasion.
Understanding the Ingredients
To create the perfect toasted ham and cheese tortilla pockets, it’s essential to understand the key ingredients that will bring this dish to life.
Flour Tortillas
The foundation of this recipe is, of course, the flour tortilla. Flour tortillas are preferred for their soft, pliable texture, which allows for easy folding and a satisfying chew. They act as the perfect vessel for your filling, providing a delightful contrast to the crispy, toasted exterior. When selecting tortillas, choose fresh ones that are soft and flexible, ensuring they will hold up well during the cooking process. You can find them in various sizes, but medium-sized tortillas are ideal for creating the perfect pocket.
Deli Ham: Options and Flavors
Next up is the deli ham, which is the star of the filling. The choice of ham can greatly influence the flavor profile of your tortilla pockets. Classic options include honey ham for a touch of sweetness, smoked ham for a robust flavor, or even black forest ham for a more intense taste. If you prefer a leaner option, turkey or chicken slices can also work well. Feel free to mix and match different types of ham or layer them for a more complex flavor. The beauty of this recipe lies in the ability to tailor it to your preferences.
Cheese Selection: Cheddar, Mozzarella, or Alternatives
No ham and cheese dish would be complete without the cheese! The choice of cheese can elevate your tortilla pockets to new heights. Cheddar cheese is a popular choice, offering a sharpness that complements the ham beautifully. Mozzarella, on the other hand, provides a creamy, stretchy texture that adds a delightful contrast. For those looking to experiment, consider using pepper jack for a spicy kick or a blend of cheeses for a richer flavor. The key is to choose a cheese that melts well, ensuring a gooey, satisfying filling.
Role of Dijon Mustard in Flavor Enhancement
To take your toasted tortilla pockets to the next level, consider incorporating Dijon mustard into your filling. This tangy condiment adds a layer of complexity that enhances the overall flavor profile. The slight acidity of Dijon mustard balances the richness of the cheese and ham, creating a harmonious blend of flavors. A thin spread on the inside of the tortilla before adding the fillings can make a significant difference in taste.
Discussion on Seasoning: Salt, Pepper, and Optional Garnishes
Lastly, don’t forget about seasoning! A pinch of salt and freshly cracked black pepper can elevate the flavors of your filling. Depending on your taste preferences, you can also add other seasonings such as garlic powder, onion powder, or even a dash of hot sauce for some heat. Additionally, consider garnishing your tortilla pockets with fresh herbs, such as parsley or chives, for a burst of freshness that enhances both the visual appeal and taste of the dish.
Preparation Steps Explained
Now that we have a clear understanding of the ingredients, let’s dive into the preparation steps for crafting these delicious toasted ham and cheese tortilla pockets.
Preparing the Filling
Start by preparing the filling, which is the heart of your tortilla pockets. Begin by gathering your chosen deli ham and cheese. If you’re using multiple types of cheese, grate or shred them into a bowl for easy mixing. The goal is to create a harmonious blend that will melt beautifully when toasted.
If you’d like to add Dijon mustard, spread a thin layer onto the inside of the tortilla to add flavor without overwhelming the other ingredients. Remember, balance is key, so use just enough to enhance, but not overpower the main flavors.
Mixing Cheeses and Optional Ingredients
Combine your cheese mixture in a bowl and consider adding any optional ingredients at this stage. Chopped vegetables like bell peppers, spinach, or even jalapeños can introduce additional flavors and textures. If you opt for vegetables, make sure to chop them finely to ensure they fit neatly within the tortilla pocket and cook thoroughly.
For an added burst of flavor, consider mixing in some spices or herbs. A sprinkle of Italian seasoning or fresh basil can bring a delightful freshness to your filling. Take a moment to taste the mixture and adjust the seasoning to your liking.
Tips for Achieving the Right Texture and Flavor
To achieve the right texture and flavor in your filling, ensure that all ingredients are evenly distributed. This will prevent any single ingredient from overpowering the others and will create a balanced bite in every mouthful. Additionally, using a combination of cheeses with different melting points can lead to a more interesting texture. For instance, pairing a sharp cheddar with a creamy mozzarella will create a delightful contrast.
Layering the Ingredients
Once your filling is prepared, it’s time to layer the ingredients onto the tortilla. Place the tortilla on a flat surface and begin by adding a generous amount of the cheese and ham mixture in the center. Be careful not to overfill; a well-balanced pocket will be easier to fold and toast.
Ensure that the filling is evenly distributed across the tortilla, leaving about an inch of space around the edges. This space is crucial for folding and sealing the tortilla, preventing any filling from spilling out during cooking.
Importance of Even Distribution
Even distribution is key to ensuring that each pocket cooks uniformly. If one side is heavily filled while the other is sparse, you may end up with a pocket that is either too soggy or too dry. Aim for a consistent layer of filling, and remember that less can be more when it comes to achieving the perfect toasted pocket.
Suggestions for Additional Fillings (Vegetables, Spices)
While the classic ham and cheese combination is delicious on its own, feel free to get creative with additional fillings. Sautéed mushrooms, caramelized onions, or roasted red peppers can add depth and flavor. If you want to add a spicy twist, consider including sliced jalapeños or a sprinkle of red pepper flakes. The addition of fresh herbs or even a dollop of pesto can also elevate the flavor profile, making your tortilla pockets uniquely yours.
Folding the Tortilla
The folding technique is crucial for ensuring that your tortilla pockets remain intact during cooking. After layering the filling, carefully fold the tortilla in half, creating a semi-circle. For added security, you can fold the edges inward slightly before pressing down to seal the pocket.
Another method is to roll the tortilla tightly like a burrito, tucking in the sides as you go. This technique helps to create a secure seal that prevents any filling from escaping during the toasting process. If you find that your tortillas are tearing, try warming them slightly in the microwave or on a skillet to make them more pliable.
Techniques for a Secure Fold
To ensure a secure fold, consider using a little cheese or even a bit of the Dijon mustard as a “glue” to help seal the edges together. Once folded, gently press down on the pocket to flatten it slightly, which will help it hold its shape during cooking.
If you’re preparing multiple pockets, you can place them on a plate or cutting board while you finish folding the rest. Once all are ready, you can move on to the cooking stage.
With these preparation steps, you’re well on your way to enjoying delicious toasted ham and cheese tortilla pockets that are sure to satisfy. The combination of flavors, textures, and the convenience of preparation make this recipe a must-try for anyone seeking a quick yet delicious meal option. Stay tuned for the next part of the recipe, where we’ll delve into the toasting process and tips for serving your tortilla pockets to perfection.

Importance of Pressing Down
When making toasted ham and cheese tortilla pockets, one crucial technique is pressing down on the pockets as they cook. This step not only ensures that the fillings meld together but also promotes a delightful, crispy texture on the outside. Pressing down helps to eliminate excess air pockets, allowing the tortilla to toast evenly and thoroughly. It also enhances the overall presentation, giving each pocket a neatly sealed edge that prevents any cheese or ham from oozing out during cooking.
Cooking Techniques for Perfect Tortilla Pockets
Heating the Pan
Before you start cooking, it’s essential to preheat your skillet properly. A hot pan is vital for achieving that coveted crispy exterior on your tortilla pockets. Choose a non-stick skillet or a well-seasoned cast-iron pan for the best results. Preheat your skillet over medium heat for about 3-5 minutes. You can test if the pan is ready by sprinkling a few drops of water; if they sizzle and evaporate immediately, your skillet is good to go.
Importance of Skillet Temperature
Maintaining the right skillet temperature is crucial throughout the cooking process. If the skillet is too hot, your tortillas may burn before the cheese has a chance to melt, leading to an unsatisfactory texture. Conversely, if the heat is too low, the tortillas may not toast properly and could become soggy. Aim for a medium heat setting, adjusting as necessary during cooking to ensure even browning without burning.
Benefits of Using Butter for Crispness
While you can opt for oil or cooking spray, using butter adds a rich flavor and promotes a beautifully golden, crispy crust. Butter contains milk solids that caramelize when heated, contributing to both texture and taste. For each batch of tortilla pockets, add about a tablespoon of butter to the skillet. Allow it to melt and coat the surface evenly before placing your pockets in the pan. This technique ensures each pocket gets that irresistible buttery flavor while achieving the perfect crisp.
Toasting the Pockets
Once your skillet is heated and buttered, it’s time to toast the pockets. Carefully place filled tortillas in the skillet, ensuring they don’t overcrowd the pan. Overcrowding can lead to uneven cooking and steaming rather than toasting. Allow the pockets to cook for about 3-4 minutes on one side, or until they are golden brown and crispy.
Timing for Optimal Golden Brown Texture
Timing is key to achieving that perfect golden brown texture. Keep a close eye on the pockets as they cook, and don’t hesitate to adjust the heat if necessary. After the initial 3-4 minutes, gently lift one pocket with a spatula to check its color. If it’s not quite there yet, give it another minute or so before flipping. Remember that patience pays off; rushing the process can lead to burnt pockets or undercooked cheese.
Tips for Flipping Without Losing Filling
Flipping the tortilla pockets can be tricky, especially if they are overstuffed. To avoid losing any filling, use a wide spatula to support the entire pocket as you flip. Slide the spatula underneath and lift gently, ensuring that the pocket is stable before turning it over. If you’re concerned about spillage, consider using a pair of tongs to hold the sides as you flip. This method provides more control and prevents any delicious fillings from escaping.
Repeating the Process
As you cook your tortilla pockets, you may need to work in batches, depending on the size of your skillet. After each batch, be sure to wipe out any leftover butter or crumbs before adding more butter and heating the skillet again. This practice keeps your cooking surface clean and ensures that each batch achieves a consistent texture and flavor. If you’re making a large quantity, consider keeping the cooked pockets warm in a low oven (around 200°F) while you finish the remaining batches.
Serving Suggestions
Presentation Ideas for Serving
When it comes to serving your toasted ham and cheese tortilla pockets, presentation matters! Arrange the pockets on a large platter, stacking them slightly for an inviting look. You can garnish the platter with fresh herbs like parsley or cilantro for a pop of color. Slicing each pocket in half diagonally not only enhances the visual appeal but also makes it easier for guests to grab a portion.
Recommended Dipping Sauces
Dipping sauces can elevate the flavor of your tortilla pockets. Here are a few delicious options to consider:
- Spicy Mustard: A tangy and spicy mustard pairs well with the richness of the ham and cheese.
- Salsa: Fresh tomato salsa adds a refreshing contrast and a burst of flavor.
- Ranch Dressing: Creamy ranch dressing is a favorite for dipping and adds a cool creaminess.
- Guacamole: For an extra layer of flavor, serve with a side of guacamole.
Feel free to get creative and offer a variety of dips to please different palates.
Pairing Ideas with Side Dishes or Beverages
To complete your meal, consider pairing these toasted pockets with some complementary side dishes. A light side salad featuring mixed greens, cherry tomatoes, and a lemon vinaigrette can balance the richness of the pockets. Alternatively, a bowl of tomato soup can provide a comforting and classic pairing.
For beverages, opt for something refreshing. Sparkling water with a slice of lemon or iced tea can cleanse the palate. If you’re in the mood for something a little stronger, a light beer or a chilled white wine can also pair well.
Nutritional Information
Overview of Nutritional Benefits of the Recipe
Toasted ham and cheese tortilla pockets are not only delicious but can also be nutritious, depending on the ingredients you choose. Ham provides a good source of protein, while cheese offers calcium and other essential nutrients. Whole wheat tortillas can add fiber to your meal, which is beneficial for digestive health.
Caloric Breakdown Per Serving
The caloric content of your tortilla pockets will vary based on the specific ingredients and portion sizes. On average, one pocket may contain approximately 250-300 calories. This breakdown typically accounts for:
- 120 calories from the tortilla
- 70-100 calories from the ham
- 60-80 calories from the cheese
- 10-20 calories from the butter used for cooking
These values can fluctuate based on the type and amount of cheese, ham, and tortilla used.
Discussion on Potential Modifications for Dietary Preferences
This recipe is highly customizable to suit various dietary preferences. For a healthier option, consider using low-fat cheese or turkey ham. If you’re looking for a vegetarian alternative, swap out the ham for grilled vegetables or beans. For those following a gluten-free diet, use gluten-free tortillas made from rice or corn. The versatility of this recipe allows you to tailor it to your needs while still enjoying a delicious snack.
Conclusion
Toasted ham and cheese tortilla pockets are a fantastic and versatile recipe that combines simplicity with flavor. The ease of preparation makes it a go-to choice for quick snacks or casual meals. With a few cooking techniques, you can achieve that perfect crispy texture and gooey filling that will delight your taste buds.
Encouraging readers to experiment with different fillings and dipping sauces can turn this dish into a family favorite. The possibilities are endless—add spinach for a nutritional boost, use different types of cheese, or play with spices to create a unique flavor profile. Whether enjoyed as a snack for one or a party platter for many, these tortilla pockets are sure to make an impression.
So gather your ingredients, fire up the skillet, and enjoy this quick and delicious treat with family and friends. Don’t forget to share your creations and variations; you might inspire someone else to try their hand at this mouthwatering recipe.