Chef Taling

  • Home
  • Recipe Index
    • Desserts
    • Dinner
    • Appetizer
    • Drinks
  • About
  • Contact
  • Privacy Policy
menu icon
go to homepage
  • Home
  • Recipe Index
    • Desserts
    • Dinner
    • Appetizer
    • Drinks
  • About
  • Contact
  • Privacy Policy

search icon
Homepage link
  • Home
  • Recipe Index
    • Desserts
    • Dinner
    • Appetizer
    • Drinks
  • About
  • Contact
  • Privacy Policy

×

Irresistible Air Fryer Honey Garlic Wings Recipe

Published: Sep 13, 2025 · by Taling · Leave a Comment

WANT TO SAVE THIS RECIPE?

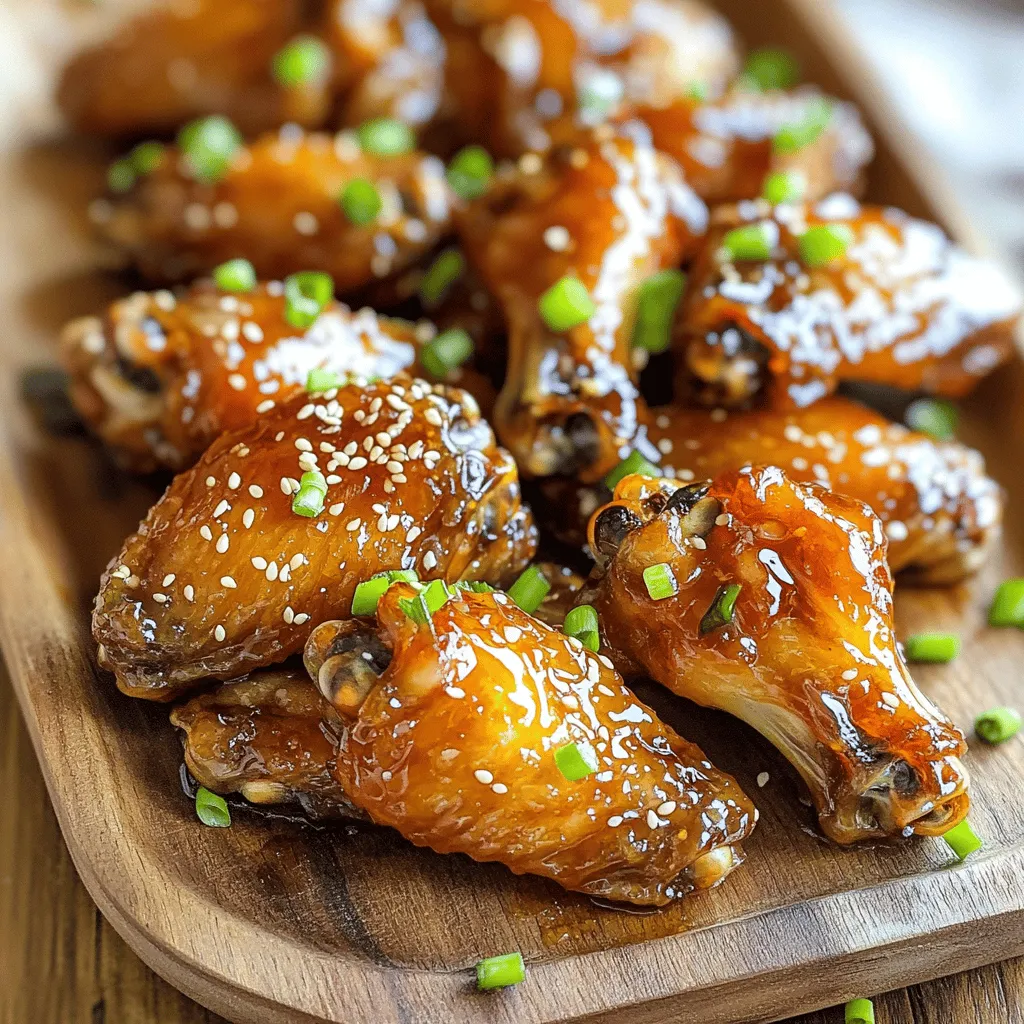
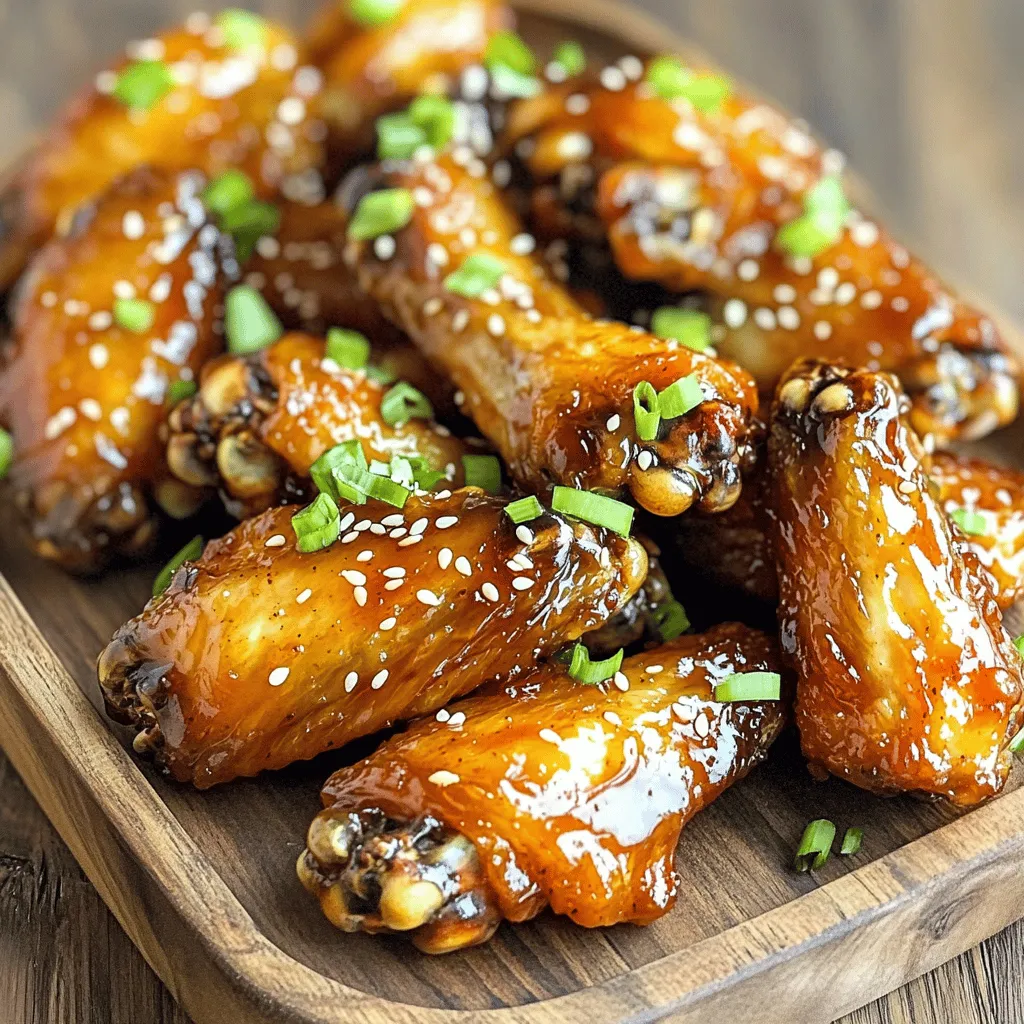
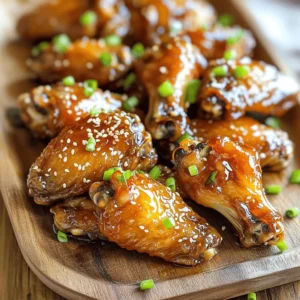
Get ready to impress your friends and family with my Irresistible Air Fryer Honey Garlic Wings! These tasty wings are juicy, sticky, and bursting with flavor. They are quick to make and perfect for any gathering. In this post, I’ll guide you step-by-step through easy instructions, handy tips, and delicious variations. Let’s dive in and make the best wings you've ever tasted!

For this recipe, you need: - 2 lbs chicken wings These wings are the star of the dish. They are juicy and perfect when cooked right. Make sure to choose fresh wings for the best taste. The marinade gives the wings their sweet and savory flavor. You’ll need: - ¼ cup honey - ¼ cup soy sauce (or coconut aminos for a gluten-free option) - 4 cloves garlic, minced - 1 tablespoon fresh ginger, grated - 1 tablespoon apple cider vinegar - 1 teaspoon sesame oil - ½ teaspoon black pepper - ¼ teaspoon red chili flakes (optional for heat) Mix these ingredients well. The honey and soy sauce balance each other. Garlic and ginger add depth and warmth. Apple cider vinegar brings a nice tang, while sesame oil adds a hint of nuttiness. The red chili flakes can spice it up if you like. To make the wings look great and add flavor, consider these garnishes: - Sesame seeds - Chopped green onions These garnishes add a nice crunch and fresh taste. They make your wings pop on the plate. Enjoy your delicious Air Fryer Honey Garlic Wings! To start, gather all the ingredients. In a large bowl, mix together: - ¼ cup honey - ¼ cup soy sauce (or coconut aminos for gluten-free) - 4 cloves garlic, minced - 1 tablespoon fresh ginger, grated - 1 tablespoon apple cider vinegar - 1 teaspoon sesame oil - ½ teaspoon black pepper - ¼ teaspoon red chili flakes (if you want heat) Stir these together well. This mix will be your marinade. The honey gives a nice sweet touch, while the garlic and ginger add bold flavors. Next, add the 2 lbs of chicken wings to the bowl. Make sure each wing is covered in the marinade. This step is key for flavor. Once coated, cover the bowl with plastic wrap. Place it in the fridge for at least 30 minutes. If you have time, marinate for up to 2 hours. More time means more flavor! When you’re ready to cook, preheat your air fryer. Set it to 380°F (190°C) for about 5 minutes. Lightly spray the air fryer basket with cooking spray or oil. This helps the wings not stick. Take the wings out of the marinade, shaking off any extra liquid. Place them in the basket in a single layer. Cook for 25-30 minutes. Flip them halfway through for even cooking. The wings should be crispy and golden brown when done. While the wings cook, heat the leftover marinade in a small pan. Cook it over medium heat for about 5-7 minutes until it thickens slightly. Once the wings are cooked, toss them in this sauce or drizzle it on top. For a nice finish, sprinkle sesame seeds and chopped green onions before serving. Enjoy the sweet and savory flavors of your honey garlic wings! To make your wings extra crispy, here are some tips: - Pat the chicken wings dry with paper towels. This helps remove moisture. - Use a little baking powder in your marinade. It boosts crispiness. - Air fry the wings in a single layer. This allows for better airflow. - Flip the wings halfway through cooking. This helps both sides crisp up. - If you want them super crispy, air fry them for an extra 5 minutes at the end. Marinating your wings is key for flavor. Aim for at least 30 minutes. For more taste, let them sit for 2 hours. The longer you marinate, the better the flavor. You can also marinate them overnight for a fun twist. Just remember to keep them in the fridge! To get the best results with your air fryer, follow these tips: - Preheat your air fryer before adding the wings. This helps them cook evenly. - Lightly grease the basket with cooking spray. This prevents sticking. - Don't overcrowd the basket. Cook in batches if needed. This ensures even cooking. - Always check the wings for doneness. Look for a crispy, golden brown color. - Let the wings rest for a few minutes after cooking. This keeps them juicy. {{image_2}} To make these wings gluten-free, swap soy sauce with coconut aminos. This option tastes great. It keeps the sweet and savory notes of the dish. You can also use gluten-free soy sauce if you prefer. Always check labels to ensure they are gluten-free. Want to spice things up? Add a pinch of cayenne pepper or smoked paprika to the marinade. These spices add a nice kick and depth. You can also mix in some garlic powder or onion powder for a flavor boost. Feel free to experiment with your favorite spices for a unique twist. While chicken wings are classic, you can use chicken thighs or drumsticks. Both options stay juicy and tender. Adjust the cooking time slightly, as they may take a bit longer. Just make sure the internal temperature reaches 165°F. This way, you ensure safe and tasty chicken. To store leftover wings, place them in an airtight container. Make sure they cool down first. You can keep them in the fridge for up to three days. If you want to keep them longer, freeze them. Just remember to wrap them well. Reheating is easy! You can use the air fryer or oven. For the air fryer, set it to 350°F (175°C) and heat for about 8-10 minutes. If using the oven, preheat to 350°F (175°C) and bake for 15-20 minutes. This makes them crispy again. Freezing wings is a great option. Place the cooked wings on a baking sheet in a single layer. Freeze them until solid, then transfer to a freezer bag. They can last up to three months. When you want to eat them, thaw in the fridge overnight. Then, reheat as mentioned above. Yes, you can make the wings ahead. Marinate them and store in the fridge. You can prepare the wings up to 2 hours in advance for great flavor. Just remember to cook them fresh when you are ready to serve. This way, they stay crispy and delicious. You can try many sauces with these wings. Buffalo sauce adds spice. Teriyaki sauce gives a sweet twist. Barbecue sauce is another favorite. You can mix and match to find your best flavor. Feel free to get creative and use what you love. Yes, you can use frozen chicken wings. Just make sure to thaw them first. Thaw in the fridge overnight or use the microwave. Once thawed, you can follow the same steps in the recipe. This makes it easy to enjoy wings anytime. Check the wings for a crispy outside and golden brown color. They should reach an internal temperature of 165°F (74°C). You can use a meat thermometer for accuracy. If you want extra crispiness, cook them for an additional 5 minutes in the air fryer. You learned how to make tasty air fryer chicken wings. We covered the ingredients, marination steps, and cooking tips to get them crispy. You saw how to store leftovers and answered common questions. Remember, customizing flavors can make your wings unique. With a few tricks, you can impress anyone. Enjoy your cooking!

Ingredients

Chicken Wings

For this recipe, you need:

  1. 2 lbs chicken wings

These wings are the star of the dish. They are juicy and perfect when cooked right. Make sure to choose fresh wings for the best taste.

Marinade Components

The marinade gives the wings their sweet and savory flavor. You’ll need:

  1. ¼ cup honey
  2. ¼ cup soy sauce (or coconut aminos for a gluten-free option)
  3. 4 cloves garlic, minced
  4. 1 tablespoon fresh ginger, grated
  5. 1 tablespoon apple cider vinegar
  6. 1 teaspoon sesame oil
  7. ½ teaspoon black pepper
  8. ¼ teaspoon red chili flakes (optional for heat)

Mix these ingredients well. The honey and soy sauce balance each other. Garlic and ginger add depth and warmth. Apple cider vinegar brings a nice tang, while sesame oil adds a hint of nuttiness. The red chili flakes can spice it up if you like.

Optional Garnishes

To make the wings look great and add flavor, consider these garnishes:

  1. Sesame seeds
  2. Chopped green onions

These garnishes add a nice crunch and fresh taste. They make your wings pop on the plate. Enjoy your delicious Air Fryer Honey Garlic Wings!

Step-by-Step Instructions

Preparing the Marinade

To start, gather all the ingredients. In a large bowl, mix together:

  1. ¼ cup honey
  2. ¼ cup soy sauce (or coconut aminos for gluten-free)
  3. 4 cloves garlic, minced
  4. 1 tablespoon fresh ginger, grated
  5. 1 tablespoon apple cider vinegar
  6. 1 teaspoon sesame oil
  7. ½ teaspoon black pepper
  8. ¼ teaspoon red chili flakes (if you want heat)

Stir these together well. This mix will be your marinade. The honey gives a nice sweet touch, while the garlic and ginger add bold flavors.

Marinating the Wings

Next, add the 2 lbs of chicken wings to the bowl. Make sure each wing is covered in the marinade. This step is key for flavor. Once coated, cover the bowl with plastic wrap. Place it in the fridge for at least 30 minutes. If you have time, marinate for up to 2 hours. More time means more flavor!

Cooking in the Air Fryer

When you’re ready to cook, preheat your air fryer. Set it to 380°F (190°C) for about 5 minutes. Lightly spray the air fryer basket with cooking spray or oil. This helps the wings not stick. Take the wings out of the marinade, shaking off any extra liquid. Place them in the basket in a single layer. Cook for 25-30 minutes. Flip them halfway through for even cooking. The wings should be crispy and golden brown when done.

Final Touches

While the wings cook, heat the leftover marinade in a small pan. Cook it over medium heat for about 5-7 minutes until it thickens slightly. Once the wings are cooked, toss them in this sauce or drizzle it on top. For a nice finish, sprinkle sesame seeds and chopped green onions before serving. Enjoy the sweet and savory flavors of your honey garlic wings!

Tips & Tricks

How to Achieve Extra Crispy Wings

To make your wings extra crispy, here are some tips:

  1. Pat the chicken wings dry with paper towels. This helps remove moisture.
  2. Use a little baking powder in your marinade. It boosts crispiness.
  3. Air fry the wings in a single layer. This allows for better airflow.
  4. Flip the wings halfway through cooking. This helps both sides crisp up.
  5. If you want them super crispy, air fry them for an extra 5 minutes at the end.

Marination Time Recommendations

Marinating your wings is key for flavor. Aim for at least 30 minutes. For more taste, let them sit for 2 hours. The longer you marinate, the better the flavor. You can also marinate them overnight for a fun twist. Just remember to keep them in the fridge!

Air Fryer Best Practices

To get the best results with your air fryer, follow these tips:

  1. Preheat your air fryer before adding the wings. This helps them cook evenly.
  2. Lightly grease the basket with cooking spray. This prevents sticking.
  3. Don't overcrowd the basket. Cook in batches if needed. This ensures even cooking.
  4. Always check the wings for doneness. Look for a crispy, golden brown color.
  5. Let the wings rest for a few minutes after cooking. This keeps them juicy.

Variations

Gluten-Free Substitutions

To make these wings gluten-free, swap soy sauce with coconut aminos. This option tastes great. It keeps the sweet and savory notes of the dish. You can also use gluten-free soy sauce if you prefer. Always check labels to ensure they are gluten-free.

Adding Spices for Extra Flavor

Want to spice things up? Add a pinch of cayenne pepper or smoked paprika to the marinade. These spices add a nice kick and depth. You can also mix in some garlic powder or onion powder for a flavor boost. Feel free to experiment with your favorite spices for a unique twist.

Different Types of Chicken

While chicken wings are classic, you can use chicken thighs or drumsticks. Both options stay juicy and tender. Adjust the cooking time slightly, as they may take a bit longer. Just make sure the internal temperature reaches 165°F. This way, you ensure safe and tasty chicken.

Storage Info

How to Store Leftover Wings

To store leftover wings, place them in an airtight container. Make sure they cool down first. You can keep them in the fridge for up to three days. If you want to keep them longer, freeze them. Just remember to wrap them well.

Reheating Instructions

Reheating is easy! You can use the air fryer or oven. For the air fryer, set it to 350°F (175°C) and heat for about 8-10 minutes. If using the oven, preheat to 350°F (175°C) and bake for 15-20 minutes. This makes them crispy again.

Freezing for Later Use

Freezing wings is a great option. Place the cooked wings on a baking sheet in a single layer. Freeze them until solid, then transfer to a freezer bag. They can last up to three months. When you want to eat them, thaw in the fridge overnight. Then, reheat as mentioned above.

FAQs

Can I make Air Fryer Honey Garlic Wings ahead of time?

Yes, you can make the wings ahead. Marinate them and store in the fridge. You can prepare the wings up to 2 hours in advance for great flavor. Just remember to cook them fresh when you are ready to serve. This way, they stay crispy and delicious.

What other sauces can I use?

You can try many sauces with these wings. Buffalo sauce adds spice. Teriyaki sauce gives a sweet twist. Barbecue sauce is another favorite. You can mix and match to find your best flavor. Feel free to get creative and use what you love.

Can I use frozen chicken wings?

Yes, you can use frozen chicken wings. Just make sure to thaw them first. Thaw in the fridge overnight or use the microwave. Once thawed, you can follow the same steps in the recipe. This makes it easy to enjoy wings anytime.

How do I know when the wings are fully cooked?

Check the wings for a crispy outside and golden brown color. They should reach an internal temperature of 165°F (74°C). You can use a meat thermometer for accuracy. If you want extra crispiness, cook them for an additional 5 minutes in the air fryer.

You learned how to make tasty air fryer chicken wings. We covered the ingredients, marination steps, and cooking tips to get them crispy. You saw how to store leftovers and answered common questions.

Remember, customizing flavors can make your wings unique. With a few tricks, you can impress anyone. Enjoy your cooking!

For this recipe, you need: - 2 lbs chicken wings These wings are the star of the dish. They are juicy and perfect when cooked right. Make sure to choose fresh wings for the best taste. The marinade gives the wings their sweet and savory flavor. You’ll need: - ¼ cup honey - ¼ cup soy sauce (or coconut aminos for a gluten-free option) - 4 cloves garlic, minced - 1 tablespoon fresh ginger, grated - 1 tablespoon apple cider vinegar - 1 teaspoon sesame oil - ½ teaspoon black pepper - ¼ teaspoon red chili flakes (optional for heat) Mix these ingredients well. The honey and soy sauce balance each other. Garlic and ginger add depth and warmth. Apple cider vinegar brings a nice tang, while sesame oil adds a hint of nuttiness. The red chili flakes can spice it up if you like. To make the wings look great and add flavor, consider these garnishes: - Sesame seeds - Chopped green onions These garnishes add a nice crunch and fresh taste. They make your wings pop on the plate. Enjoy your delicious Air Fryer Honey Garlic Wings! To start, gather all the ingredients. In a large bowl, mix together: - ¼ cup honey - ¼ cup soy sauce (or coconut aminos for gluten-free) - 4 cloves garlic, minced - 1 tablespoon fresh ginger, grated - 1 tablespoon apple cider vinegar - 1 teaspoon sesame oil - ½ teaspoon black pepper - ¼ teaspoon red chili flakes (if you want heat) Stir these together well. This mix will be your marinade. The honey gives a nice sweet touch, while the garlic and ginger add bold flavors. Next, add the 2 lbs of chicken wings to the bowl. Make sure each wing is covered in the marinade. This step is key for flavor. Once coated, cover the bowl with plastic wrap. Place it in the fridge for at least 30 minutes. If you have time, marinate for up to 2 hours. More time means more flavor! When you’re ready to cook, preheat your air fryer. Set it to 380°F (190°C) for about 5 minutes. Lightly spray the air fryer basket with cooking spray or oil. This helps the wings not stick. Take the wings out of the marinade, shaking off any extra liquid. Place them in the basket in a single layer. Cook for 25-30 minutes. Flip them halfway through for even cooking. The wings should be crispy and golden brown when done. While the wings cook, heat the leftover marinade in a small pan. Cook it over medium heat for about 5-7 minutes until it thickens slightly. Once the wings are cooked, toss them in this sauce or drizzle it on top. For a nice finish, sprinkle sesame seeds and chopped green onions before serving. Enjoy the sweet and savory flavors of your honey garlic wings! To make your wings extra crispy, here are some tips: - Pat the chicken wings dry with paper towels. This helps remove moisture. - Use a little baking powder in your marinade. It boosts crispiness. - Air fry the wings in a single layer. This allows for better airflow. - Flip the wings halfway through cooking. This helps both sides crisp up. - If you want them super crispy, air fry them for an extra 5 minutes at the end. Marinating your wings is key for flavor. Aim for at least 30 minutes. For more taste, let them sit for 2 hours. The longer you marinate, the better the flavor. You can also marinate them overnight for a fun twist. Just remember to keep them in the fridge! To get the best results with your air fryer, follow these tips: - Preheat your air fryer before adding the wings. This helps them cook evenly. - Lightly grease the basket with cooking spray. This prevents sticking. - Don't overcrowd the basket. Cook in batches if needed. This ensures even cooking. - Always check the wings for doneness. Look for a crispy, golden brown color. - Let the wings rest for a few minutes after cooking. This keeps them juicy. {{image_2}} To make these wings gluten-free, swap soy sauce with coconut aminos. This option tastes great. It keeps the sweet and savory notes of the dish. You can also use gluten-free soy sauce if you prefer. Always check labels to ensure they are gluten-free. Want to spice things up? Add a pinch of cayenne pepper or smoked paprika to the marinade. These spices add a nice kick and depth. You can also mix in some garlic powder or onion powder for a flavor boost. Feel free to experiment with your favorite spices for a unique twist. While chicken wings are classic, you can use chicken thighs or drumsticks. Both options stay juicy and tender. Adjust the cooking time slightly, as they may take a bit longer. Just make sure the internal temperature reaches 165°F. This way, you ensure safe and tasty chicken. To store leftover wings, place them in an airtight container. Make sure they cool down first. You can keep them in the fridge for up to three days. If you want to keep them longer, freeze them. Just remember to wrap them well. Reheating is easy! You can use the air fryer or oven. For the air fryer, set it to 350°F (175°C) and heat for about 8-10 minutes. If using the oven, preheat to 350°F (175°C) and bake for 15-20 minutes. This makes them crispy again. Freezing wings is a great option. Place the cooked wings on a baking sheet in a single layer. Freeze them until solid, then transfer to a freezer bag. They can last up to three months. When you want to eat them, thaw in the fridge overnight. Then, reheat as mentioned above. Yes, you can make the wings ahead. Marinate them and store in the fridge. You can prepare the wings up to 2 hours in advance for great flavor. Just remember to cook them fresh when you are ready to serve. This way, they stay crispy and delicious. You can try many sauces with these wings. Buffalo sauce adds spice. Teriyaki sauce gives a sweet twist. Barbecue sauce is another favorite. You can mix and match to find your best flavor. Feel free to get creative and use what you love. Yes, you can use frozen chicken wings. Just make sure to thaw them first. Thaw in the fridge overnight or use the microwave. Once thawed, you can follow the same steps in the recipe. This makes it easy to enjoy wings anytime. Check the wings for a crispy outside and golden brown color. They should reach an internal temperature of 165°F (74°C). You can use a meat thermometer for accuracy. If you want extra crispiness, cook them for an additional 5 minutes in the air fryer. You learned how to make tasty air fryer chicken wings. We covered the ingredients, marination steps, and cooking tips to get them crispy. You saw how to store leftovers and answered common questions. Remember, customizing flavors can make your wings unique. With a few tricks, you can impress anyone. Enjoy your cooking!

Air Fryer Honey Garlic Wings

Indulge in the crispy goodness of Air Fryer Honey Garlic Wings with this delicious recipe! Perfectly marinated and air-fried to golden perfection, these wings are packed with flavor from honey, garlic, and a hint of ginger. Easy to prepare and ready in just 40 minutes, they make a fantastic appetizer for any occasion. Click through to explore this mouthwatering recipe and elevate your next gathering with these tasty wings!
Print Recipe Pin Recipe

Ingredients
  

2 lbs chicken wings

¼ cup honey

¼ cup soy sauce (or coconut aminos for a gluten-free option)

4 cloves garlic, minced

1 tablespoon fresh ginger, grated

1 tablespoon apple cider vinegar

1 teaspoon sesame oil

½ teaspoon black pepper

¼ teaspoon red chili flakes (optional for heat)

Sesame seeds and chopped green onions for garnish

Instructions
 

In a large mixing bowl, combine honey, soy sauce, minced garlic, grated ginger, apple cider vinegar, sesame oil, black pepper, and red chili flakes (if using). Mix well to form a marinade.

    Add the chicken wings to the marinade, ensuring they are well coated. Cover and marinate in the refrigerator for at least 30 minutes, or up to 2 hours for more flavor.

      Preheat your air fryer to 380°F (190°C) for about 5 minutes.

        Lightly grease the air fryer basket with cooking spray or a bit of oil.

          Remove the wings from the marinade, shaking off excess liquid, and place them in the air fryer basket in a single layer.

            Cook the wings in the air fryer for 25-30 minutes, flipping them halfway through to ensure even cooking and browning.

              Once done, check for doneness; the wings should be crispy and golden brown. If desired, return them to the air fryer for an additional 5 minutes for extra crispiness.

                While the wings are cooking, you can heat the remaining marinade in a small saucepan over medium heat until it slightly thickens, about 5-7 minutes.

                  Once cooked, toss the wings in the thickened sauce or drizzle it on top before serving.

                    Garnish with sesame seeds and chopped green onions before serving.

                      Prep Time: 10 min | Total Time: 40 min | Servings: 4

                        Related Recipes

                        • To make Air Fryer Honey Garlic Brussels Sprouts, gather these key items: - 1 lb Brussels sprouts, trimmed and halved - 3 tablespoons honey - 2 tablespoons soy sauce - 2 cloves garlic, minced - 1 tablespoon olive oil - Salt and pepper to taste - 1 teaspoon sesame seeds (for garnish) If you want to amp up the taste, consider these options: - Red pepper flakes for a spicy kick You can swap some ingredients without losing flavor: - Use maple syrup instead of honey for a vegan option. - Tamari can replace soy sauce for a gluten-free version. - Coconut oil works well in place of olive oil. To make the honey garlic sauce, grab a large bowl. Add 3 tablespoons of honey. Next, pour in 2 tablespoons of soy sauce. Then, add 2 minced cloves of garlic. Follow this with 1 tablespoon of olive oil. Season with salt and pepper to taste. Mix everything well until it blends nicely. This sauce is sweet, salty, and packed with flavor. Now, it’s time to coat the Brussels sprouts. Take 1 pound of trimmed and halved Brussels sprouts. Add them to the bowl with the honey garlic sauce. Toss the sprouts gently until each one is fully coated. Make sure no sprout is left dry. This step is key for flavor and caramelization. Preheat your air fryer to 375°F (190°C). This step helps the sprouts cook evenly. Place the coated Brussels sprouts in the air fryer basket in a single layer. Don’t crowd the basket; it may take two batches. Air fry for 15-18 minutes. Shake the basket halfway through to ensure even cooking. The sprouts should turn crispy and caramelized when done. After cooking, transfer them to a serving dish. Drizzle any leftover sauce over the top. Sprinkle sesame seeds for a nice touch. If you like heat, add red pepper flakes for a spicy kick. Enjoy your crunchy delight! To get the best crunch, you must start with fresh sprouts. Look for bright green, firm Brussels sprouts. Trim and halve them evenly to ensure they cook well. The honey garlic sauce adds flavor, but too much moisture can make them soggy. Keep the sauce light. If you notice extra liquid, drain it before cooking. Preheat your air fryer to 375°F (190°C). This step helps the Brussels sprouts cook evenly. Place them in a single layer to let hot air circulate. If your air fryer is small, cook in batches. Shake the basket halfway through to help with even browning. Check for doneness after 15 minutes. They should be crispy and have a nice caramel color. These honey garlic Brussels sprouts shine on their own or as a side dish. They pair well with grilled chicken or fish. For a twist, add red pepper flakes for heat. You can also sprinkle some extra sesame seeds for a nice finish. Serve them warm in a decorative bowl with a drizzle of honey on top. This not only looks great but also adds more sweetness. {{image_2}} If you want some heat, try adding red pepper flakes. Just sprinkle them into the sauce. This spice brings a nice kick to your sweet dish. You can adjust the amount based on your taste. For a bolder flavor, consider adding some sriracha sauce to the mix too. It blends well with honey and garlic. You can swap honey for other sweeteners. Maple syrup is a great choice. It adds a rich flavor that pairs nicely with Brussels sprouts. Agave nectar is another option if you want a vegan twist. Each sweetener gives a different taste, so feel free to experiment. Brussels sprouts are not the only veggies you can use. Try adding broccoli or cauliflower for more color. Slice carrots or bell peppers for a sweet addition. Just remember to cut them to a similar size. This ensures even cooking in the air fryer. Mixing vegetables can create a fun and tasty medley. To store leftover Brussels sprouts, first let them cool. Place them in a container with a lid. You can keep them in the fridge for up to three days. Make sure they are sealed tightly to keep them fresh. When you are ready to eat the leftovers, you can reheat them in the air fryer. Set the air fryer to 350°F (175°C). Heat for about 5 to 7 minutes. This will help them regain some crunch. You can also use a microwave, but this may make them soggy. If you want to freeze Brussels sprouts, place them in a freezer-safe bag. Remove as much air as you can before sealing. They will stay good for about three months. When you're ready to cook them, thaw them in the fridge overnight before reheating in the air fryer. This will help keep their texture. Yes, you can use frozen Brussels sprouts. Just keep in mind that they may not get as crispy. I suggest thawing them first. Pat them dry with a towel. This helps remove excess moisture. Then, toss them in your honey garlic sauce and air fry as usual. You can tell the Brussels sprouts are done when they are crispy and golden brown. They should be tender inside. Check them at around 15 minutes. If they need more time, give them a few extra minutes. Shake the basket halfway through cooking for even crispiness. These Brussels sprouts pair well with many dishes. Try them with grilled chicken or salmon. They also go great with rice or quinoa. You can serve them as a side dish at dinner or even as an appetizer. The sweet and savory flavors make them a hit with everyone! This guide covered all you need to know about making honey garlic Brussels sprouts. You learned about essential ingredients, easy steps, and useful tips for cooking. We explored tasty variations and how to store leftovers, ensuring you can enjoy these sprouts later. Remember, air frying gives a crisp outside and tender inside. Use these ideas to make your dish unique. Experiment confidently, and enjoy your meals with great flavors and textures.
                          Air Fryer Honey Garlic Brussels Sprouts Crunchy Delight
                        • - 2 ripe avocados - 1 cup cherry tomatoes, halved - 1 cup fresh mozzarella balls, drained - 1/4 cup fresh basil leaves, chopped - 2 tablespoons balsamic glaze - 1 tablespoon olive oil - Salt and pepper to taste Using high-quality ingredients makes a big difference. Fresh avocados give a creamy texture. Ripe cherry tomatoes add sweetness. Choose mozzarella balls that are fresh and soft. Fresh basil leaves bring bright flavor. Balsamic glaze should be thick and rich. When you pick top ingredients, your dish shines. Caprese stuffed avocados are not just tasty; they are healthy too. Avocados are full of good fats. They help your heart and keep you full. Cherry tomatoes add vitamins C and K. Mozzarella brings protein and calcium. This dish is light but satisfying. Plus, it's a good source of fiber. Enjoying this treat is a smart choice for your meal. Start by cutting the avocados in half lengthwise. Use a sharp knife for this. Carefully remove the pit with a spoon or knife. Make sure to be gentle. Next, scoop out a bit of the avocado flesh. This creates space for your filling. Chop the scooped-out flesh into small pieces. Set these aside for later use. In a mixing bowl, combine one cup of halved cherry tomatoes. Add one cup of fresh mozzarella balls that you drained. Toss in the chopped basil leaves and the small pieces of avocado you set aside. Drizzle two tablespoons of olive oil over the mix. Sprinkle salt and pepper to taste. Gently mix everything together. This step is key to blending the flavors. Grab your avocado halves. Spoon the Caprese salad mixture into each half. Fill them generously, but don’t overstuff. Drizzle balsamic glaze over the top for added flavor. This will make the dish shine. You can serve right away, or chill for up to 15 minutes. Chilling helps the flavors meld together nicely. Place the stuffed avocados on a platter for a beautiful presentation. Garnish with extra basil leaves and a drizzle of balsamic glaze. Enjoy your tasty treat! To find the perfect avocado, look for a few key signs. First, check the skin. It should be dark and slightly bumpy. Gently squeeze the avocado; it should yield just a bit but not feel mushy. If it feels hard, it is not ripe yet. You can also check the stem. If it pops off easily and is green underneath, the avocado is ripe. Avoid any with large dark spots or dents, as these may indicate overripeness or spoilage. Caprese stuffed avocados are a great treat for many occasions. You can serve them as a light lunch, a savory snack, or a colorful appetizer. Pair them with crusty bread or tortilla chips for added crunch. These stuffed avocados also shine at parties. Just prepare the filling ahead of time and stuff them just before serving. This keeps them fresh and tasty. Presentation is key to making your dish stand out. Place the stuffed avocados on a bright platter to catch the eye. Garnish them with extra basil leaves for a pop of color. A light drizzle of balsamic glaze adds shine and elegance. For added flair, sprinkle some sea salt on top. This enhances the flavors while making your dish look gourmet. {{image_2}} You can switch the cheese for a unique taste. Try feta for a tangy kick. Goat cheese adds creaminess and flavor. If you want a stronger taste, use aged cheddar. Each cheese brings a different twist to your Caprese stuffed avocados. Want a filling dish? Add protein like grilled chicken or shrimp. Diced turkey or ham also work well. You can even mix in chickpeas for a plant-based option. This makes the meal more balanced and satisfying. Make the most of seasonal produce. In summer, use fresh peaches or mangoes for sweetness. In the fall, add roasted butternut squash for warmth. Winter calls for citrus like orange or grapefruit to brighten the dish. Each seasonal swap keeps the flavors fresh and exciting. To keep your Caprese stuffed avocados fresh, store them in an airtight container. This helps prevent browning. If possible, keep the avocado halves separate from the salad mix. You can also sprinkle lemon juice on the avocado flesh to slow down browning. Aim to eat leftovers within a day for the best taste. Stuffed avocados are best enjoyed fresh. However, they can last in the fridge for about 1 day. If you store them properly, you may get an extra 24 hours. After that, the taste and texture may decline. Always check for freshness before eating. Reheating stuffed avocados is not recommended. They taste best cold or at room temperature. If you need to eat them warm, try to just warm the filling gently. Avoid using a microwave, as it can make the avocado mushy. Instead, use a low oven for a short time. Caprese stuffed avocados are a great dish for your health. They offer healthy fats from avocados. The fresh mozzarella adds protein and calcium. Cherry tomatoes provide vitamins A and C. Basil gives you antioxidants. This dish is low in carbs and high in flavor. Eating this meal can help you feel full longer. Yes, you can prepare parts of this recipe ahead of time. You can mix the Caprese salad mixture a few hours in advance. Just keep it in the fridge until you're ready to serve. However, I recommend waiting to stuff the avocados until right before you eat. This keeps the avocados fresh and green. You can get creative with your stuffing! Adding grilled chicken can make it heartier. You could also use different cheeses, like feta or goat cheese. For a spicy kick, consider adding jalapeños. You might even include nuts for a crunchy texture. The options are endless, so feel free to experiment! In this blog post, we explored the ingredients for Caprese stuffed avocados and their quality. We also covered step-by-step instructions on how to prepare and assemble this dish. You learned tips for choosing ripe avocados and how to present your plates beautifully. Variations offered ways to customize the recipe, making it your own. In my final thoughts, this dish is not just tasty; it’s also flexible and fun. Enjoy creating it for yourself and your loved ones!
                          Caprese Stuffed Avocados Flavorful and Healthy Treat
                        • - 1 lb chicken tenders - 1 cup buttermilk or alternative - 1 cup all-purpose flour - 2 large eggs To start, you need fresh chicken tenders. They cook fast and stay juicy. Buttermilk or a lemon-milk mix adds flavor and moisture. All-purpose flour helps the coating stick. Beaten eggs create a binding layer. - 1 cup panko breadcrumbs - 3 tablespoons everything bagel seasoning - Salt and pepper to taste Panko breadcrumbs give a great crunch. Everything bagel seasoning adds a tasty twist. Use salt and pepper to enhance flavors. Together, these make the chicken tasty and fun. - Cooking spray - Air fryer - Bowls for breading station You need an air fryer for this recipe. It cooks the chicken evenly and quickly. Use cooking spray for crispiness. Set up three bowls for the breading: one for flour, one for eggs, and one for panko. This makes the process smooth and easy. Start by putting the chicken tenders in a bowl. Pour in the buttermilk. This mix helps make the chicken tender. Let it soak for at least 30 minutes. This time is key for adding flavor. Next, you need to preheat your air fryer. Set it to 400°F (200°C). This takes about 5 minutes. Preheating ensures even cooking. Now, let’s set up the breading station. You need three bowls: - First bowl: 1 cup of flour with salt and pepper. - Second bowl: 2 large beaten eggs. - Third bowl: 1 cup of panko mixed with 3 tablespoons of everything bagel seasoning. To bread the chicken, take a tender from the buttermilk. Let the extra drip off. First, dredge it in the flour. Then dip it in the beaten eggs. Finally, coat it with the panko mix, pressing gently to stick. Place the breaded chicken tenders in the air fryer basket. Lay them flat in a single layer. Lightly spray them with cooking spray to make them crispy. Cook at 400°F (200°C) for 10 to 12 minutes. Flip halfway through for even cooking. To check if the chicken is done, use an instant-read thermometer. The inside should reach 165°F (74°C). This ensures the chicken is safe to eat. To boost the taste of your chicken tenders, consider adding garlic powder or paprika. These spices add depth and a hint of warmth. You can also mix in some fresh herbs like thyme or parsley for a fresh touch. Marinating your chicken in buttermilk is key. Let it sit for at least 30 minutes. This makes the chicken tender and juicy. For great breading, use three separate bowls: flour, eggs, and panko. Make sure to coat each tender well. This helps the breadcrumbs stick better. Don't skip the cooking spray! A light spray adds extra crispiness and keeps the chicken from drying out. Serve your chicken tenders with dips like honey mustard or ranch for extra flavor. Pair them with crispy fries or a fresh salad for a complete meal. For a nice touch, arrange the tenders on a wooden board. Add a small bowl of sauce and some parsley on top for color. This makes your dish look appealing and tasty! {{image_2}} You can swap out all-purpose flour for whole grain flour. Whole grain flour adds fiber and nutrients. For a gluten-free option, use gluten-free flour. This keeps your meal tasty and safe for those with gluten issues. Instead of panko, you can use crushed pork rinds. Pork rinds add crunch and flavor without carbs. They work well in many recipes, giving a nice twist. You can change the seasoning to fit your taste. For a spicy kick, add cayenne pepper or chili powder. You can also use lemon zest for a fresh zing. Mix it up with garlic powder or onion powder for added depth. Dipping sauces can also be fun. Try honey mustard, ranch, or even a spicy sriracha mayo. Each dip can change the meal's whole vibe. If you want to bake instead of air fry, preheat your oven to 400°F (200°C). Place the chicken on a baking sheet lined with parchment paper. Bake for 15-20 minutes, flipping halfway through, until golden. You can also use a traditional fryer. Heat oil to 350°F (175°C) and fry the chicken for about 5-7 minutes. This gives a crispy texture but adds more oil to the dish. Choose the method that suits your style! To keep your chicken tenders fresh, store them in an airtight container. Place a layer of paper towels at the bottom to absorb moisture. You can keep the chicken tenders in the fridge for up to three days. After that, they may lose their flavor and texture. To reheat chicken tenders, use your air fryer. Set it to 350°F (175°C) for about 5 to 7 minutes. This method helps keep them crispy. You can also use an oven at the same temperature. Avoid using a microwave, as it makes chicken soggy. If you want to freeze the chicken tenders, do it before cooking. Place the breaded tenders in a single layer on a baking sheet. Once frozen solid, transfer them to a freezer bag. They can stay in the freezer for up to three months. When you're ready to eat, cook them straight from frozen. Cook for about 15 to 18 minutes at 400°F (200°C), flipping halfway through. Yes, you can use chicken breasts. Just cut them into strips. The cooking time may change. Cook the strips for about 12-15 minutes. Always check that the chicken reaches 165°F (74°C). This ensures safety and flavor. If you lack buttermilk, don’t worry! You can make a quick substitute. Mix 1 cup of milk with a squeeze of lemon juice or vinegar. Let it sit for a few minutes. This will mimic the tangy flavor of buttermilk. It depends on your air fryer size. Typically, you can fit 4-6 tenders in a single layer. Avoid overcrowding them. This helps them cook evenly and stay crispy. You can cook in batches if needed. Absolutely! Feel free to explore other seasonings. You can try garlic powder, paprika, or even taco seasoning. Mix and match for fun flavors. Just make sure to adjust the amount to your taste preference. You now have a complete guide for making delicious air fryer chicken tenders. From the main ingredients to storage tips, each step is laid out for you. Remember to marinate your chicken well for the best flavor. Experiment with coatings and seasonings to find what you love. Don’t forget, these tenders can be stored and reheated easily, so you can enjoy them anytime. Use what you learned to cook up the perfect meal. Get ready to impress with your tasty homemade chicken tenders!
                          Air Fryer Everything Bagel Chicken Tenders Delight
                        • - 3 cups all-purpose flour - 1 packet (2 1/4 teaspoons) active dry yeast - 1 cup warm milk - 1/4 cup granulated sugar - 1/4 cup unsalted butter, melted - 1 teaspoon salt - 1 teaspoon garlic powder - 1/2 cup unsalted butter, softened - 4 cloves garlic, minced - 1/4 cup fresh parsley, chopped - 1/2 teaspoon Italian seasoning - 1/4 cup grated Parmesan cheese (optional) To make Buttery Garlic Pull Apart Bread, gather all your ingredients first. Freshness matters! Use warm milk, around 110°F or 43°C, to wake up the yeast. The sugar helps the yeast grow, creating a nice fluffy bread. You'll need three cups of all-purpose flour. It gives the bread a great texture. Salt and garlic powder enhance the taste. Butter adds richness, while parsley and Italian seasoning give it that fresh, herby kick. For a cheesy twist, sprinkle grated Parmesan on top. It’s optional, but I highly recommend it. With these simple ingredients, you’re on your way to making a bread that everyone will love! To start, you need to activate the yeast. In a small bowl, mix warm milk and sugar. Add the yeast and let it sit for 5-10 minutes. It should get frothy. This shows the yeast is alive, ready to help your bread rise. Next, take a large mixing bowl. Combine all-purpose flour, salt, and garlic powder. Then, pour in the melted butter and the frothy yeast mixture. Mix until a dough starts to form. Now, knead the dough on a floured surface for about 5-7 minutes. This makes the dough smooth and elastic. Once kneaded, place the dough in a greased bowl. Cover it with a kitchen towel. Let the dough rise in a warm spot for about 1 hour. It should double in size, which means the yeast is working hard. While the dough rises, prepare the garlic butter mixture. In a separate bowl, mix softened butter, minced garlic, chopped parsley, and Italian seasoning. This mix adds great flavor to your bread. After the dough has risen, punch it down gently. Tear off small pieces, each about the size of a golf ball. Roll each piece into a ball and dip it into the garlic butter mixture, coating it well. This step makes sure every bite is packed with flavor. Now it’s time to arrange the dough balls. Place them in a greased bundt pan or a round cake pan. Layer them slightly as you go. If you want, sprinkle grated Parmesan cheese over the top for an extra treat. Cover the pan again and let the dough rise for another 30 minutes. This gives it a chance to puff up even more. Preheat your oven to 350°F (175°C). When the dough has risen, bake it for 25-30 minutes. It should be golden brown, and a toothpick inserted in the center should come out clean. Let it cool for a bit before serving. Enjoy your warm, buttery garlic pull apart bread! To know when your dough is kneaded enough, look for a smooth texture. It should spring back when poked. Knead the dough for about 5 to 7 minutes. If it feels sticky, add a little flour. For the best rise, keep your dough warm. The ideal temperature is around 80°F to 90°F. Let it rise for about an hour or until it doubles in size. Cover it with a towel to keep it cozy. You can add herbs like rosemary or thyme for extra taste. A pinch of red pepper flakes gives a nice kick. Mix in your favorite spices to the garlic butter too. For the garlic butter, use fresh garlic for the best flavor. Soften the butter well before mixing. This helps the garlic blend in perfectly. Let the mixture sit for a few minutes to develop a richer taste. Serve your bread warm with marinara sauce for dipping. The rich sauce pairs well with the garlic flavor. You can also sprinkle extra parsley on top for color. Grating some Parmesan cheese over the bread adds a nice touch. It melts slightly and creates a tasty crust. Enjoy this delightful bread as a snack or side dish. {{image_2}} You can switch up the cheese in this bread. Mozzarella gives a nice stretch. Cheddar adds a sharp flavor. Feta brings a salty and tangy taste. Each choice makes the bread unique and tasty. Herbs add great flavor. Rosemary gives a woodsy note. Thyme has a mild flavor that pairs well. Oregano adds a touch of sweetness. Try different herb blends to find what you love best. You can add veggies for extra flavor and nutrition. Spinach adds a pop of green and softness. Sun-dried tomatoes bring a sweet and tangy kick. Bell peppers add crunch and color. Mix and match to create your perfect pull-apart bread! To keep your Buttery Garlic Pull Apart Bread fresh, use these steps: - Refrigerate: Wrap the bread in plastic wrap or foil. Place it in an airtight container. This way, it stays soft for up to 3 days. - Freeze: Slice the bread first. Wrap each slice in plastic wrap, then place them in a freezer bag. It can last up to 3 months in the freezer. When you want to enjoy leftovers, reheat them gently. - Reheating: Preheat your oven to 350°F (175°C). Place the bread on a baking sheet. Warm it for about 10-15 minutes. This method keeps the bread soft and tasty. The shelf life of your bread depends on storage. - Refrigerated: Buttery Garlic Pull Apart Bread stays fresh for about 3 days. - Frozen: If you freeze it, the bread stays good for up to 3 months. Just remember to wrap it well. To make this bread vegan, you can swap out a few key ingredients. Use plant-based milk in place of regular milk. Coconut, almond, or soy milk work well. Replace the unsalted butter with vegan butter or olive oil. Also, ensure the yeast is vegan-friendly, which most are. These changes will keep the rich flavor while making it plant-based. Yes, you can use whole wheat flour. It adds a nutty flavor and more fiber. However, whole wheat flour absorbs more liquid. You may need to add a bit more warm milk to get the right dough texture. Start with an extra tablespoon or two if needed. To reheat leftover bread, wrap it in foil. Place it in a preheated oven at 350°F (175°C) for about 10-15 minutes. This method keeps the bread warm and soft. You can also microwave it for 15-20 seconds, but it may become a bit chewy. Yes, you can prepare the dough ahead of time. After kneading, let the dough rise as usual. Once it has risen, punch it down and shape it into balls. Place the balls in the pan and cover them tightly. You can store it in the fridge overnight. Just let it come to room temperature before baking. To keep your bread moist, avoid overbaking. Check for doneness a few minutes early. Also, brush melted butter on top after baking. This adds flavor and moisture. Storing the bread in an airtight container helps retain its softness for longer. We covered many steps to make Buttery Garlic Pull Apart Bread. You learned the needed ingredients, which equipment to use, and how to prepare the dough. I shared tips for flavor and ways to store leftovers. Remember, you can play with different cheeses and herbs. Be creative! Whether for a party or a family meal, this bread is sure to impress. Now, it’s your turn to bake and enjoy!
                          Buttery Garlic Pull Apart Bread Irresistible Delight

                        WANT TO SAVE THIS RECIPE?

                        Leave a Reply Cancel reply

                        Your email address will not be published. Required fields are marked *

                        Recipe Rating


                        Hi I’m Taling

                        I love sharing perfected dishes from my kitchen. I’m sure they’ll earn a spot in your heart. Let’s savor this journey together!.

                        More about me

                        Recent Desserts

                        • - 1 ½ cups all-purpose flour - 1 teaspoon baking powder - ½ teaspoon baking soda - ½ teaspoon salt - 1 teaspoon ground cinnamon - ½ teaspoon ground nutmeg - ½ teaspoon ground ginger - 2 large eggs - 1 cup canned pumpkin puree - ½ cup brown sugar, packed - ½ cup granulated sugar - ½ cup vegetable oil - 1 teaspoon vanilla extract - 1 cup semi-sweet chocolate chips - ½ cup chopped walnuts (optional) For this recipe, it's key to measure carefully. Use a dry measuring cup for the flour. Spoon the flour into the cup and level it off. This helps avoid too much flour. If you don't have ground ginger, try using allspice or leave it out. You can swap the granulated sugar for coconut sugar for a richer flavor. If you need a nut-free version, skip the walnuts. Choose high-quality canned pumpkin puree. Look for brands that list pumpkin as the only ingredient. Fresh spices give a stronger flavor than old ones. For chocolate chips, semi-sweet is best, but dark chocolate also works well. If you can, use organic eggs and sugar for a cleaner taste. Quality ingredients make a big difference in flavor and texture. Start by heating your oven to 350°F (175°C). While it warms up, grab a 9x5 inch loaf pan. Grease it well with cooking spray or butter. This helps the loaf come out easily after baking. In a medium bowl, combine the all-purpose flour, baking powder, baking soda, salt, cinnamon, nutmeg, and ginger. Whisk these together until they blend well. This mix gives the loaf its great flavor and texture. In a large mixing bowl, crack the two eggs. Beat them lightly. Then, add the pumpkin puree, brown sugar, granulated sugar, vegetable oil, and vanilla extract. Mix these ingredients until they are smooth and well combined. This step is key for a moist loaf. Now, it's time to add the dry mix to your wet ingredients. Do this slowly and stir gently. You want to combine them without overmixing. Next, fold in the semi-sweet chocolate chips and, if you like, the chopped walnuts. Stir until they are evenly spread throughout the batter. Pour the batter into your prepared loaf pan. Use a spatula to smooth the top. Bake it in the oven for 55-65 minutes. To check if it's ready, insert a toothpick into the center. If it comes out clean, your loaf is done. Remove it from the oven and let it cool in the pan for about 10 minutes. Then, transfer it to a wire rack to cool completely. Enjoy your delicious creation! To make your pumpkin chocolate chip loaf perfect, avoid common baking mistakes. First, measure your flour correctly. Too much flour can make the cake dry. Use the spoon and level method for best results. Next, do not overmix your batter. Stir until just combined for a soft loaf. Finally, check your oven's temperature. An oven that is too hot can burn the edges. For a moist loaf, use canned pumpkin puree, not fresh pumpkin. Canned pumpkin gives a smooth texture. Adding eggs helps bind the ingredients and adds moisture. Use room temperature eggs for better mixing. The right balance of sugars also helps. Brown sugar adds moisture, while granulated sugar gives a nice rise. To elevate flavor, add spices like allspice or cloves. They give warmth to the loaf. You can also mix in nuts for crunch. Use walnuts for a rich texture. If you want a twist, try using dark chocolate chips instead of semi-sweet. For a fun touch, add a swirl of cream cheese in the batter before baking. This adds creaminess and a tangy kick. {{image_2}} To make a gluten-free version, swap regular flour with gluten-free all-purpose flour. This flour is easy to find and works well in most recipes. Use a blend that contains xanthan gum for the best results. Your loaf will still be moist and delicious. For a dairy-free loaf, replace the eggs with flax eggs. Mix one tablespoon of flaxseed meal with three tablespoons of water for each egg. Let it sit for five minutes to thicken. Also, use a dairy-free milk like almond or coconut milk instead of any dairy milk. You can get creative with add-ins. Try adding dried cranberries, chopped pecans, or even a swirl of cream cheese for a tangy twist. For toppings, sprinkle some cinnamon sugar before baking for a crunchy crust. A drizzle of caramel sauce on top makes it even more special! To keep your pumpkin chocolate chip loaf fresh, wrap it tightly. Use plastic wrap or aluminum foil. You can also place it in an airtight container. Store it at room temperature for up to three days. If you want it to last longer, refrigerate it. Just remember, cold air can dry it out. Freezing is a great way to save your loaf. Slice it first for easy serving later. Wrap each slice in plastic wrap, then place them in a freezer bag. Squeeze out the air to prevent freezer burn. You can freeze the loaf for up to three months. Label the bag with the date for easy tracking. To enjoy your loaf again, thaw it overnight in the fridge. For a warm treat, preheat your oven to 350°F (175°C). Place the loaf or slices on a baking sheet. Heat for about 10-15 minutes until warm. You can also use a microwave. Heat for 20-30 seconds per slice, but check often. Enjoy your delicious, warm pumpkin chocolate chip loaf! Yes, you can use fresh pumpkin. First, cook and puree your pumpkin. Make sure it is smooth and not too watery. Canned pumpkin is thicker, so adjust your other liquids if needed. You can make this recipe healthier by using whole wheat flour instead of all-purpose flour. You can also reduce the sugar by using applesauce or honey. For added fiber, mix in some ground flaxseed. The best way to check if the loaf is done is with a toothpick. Insert it into the center of the loaf. If it comes out clean or with a few crumbs, your loaf is ready. Yes, you can make mini loaves! Just divide the batter into smaller pans. Bake for about 20-30 minutes. Keep an eye on them to avoid overbaking. The cake will last about 2-3 days at room temperature. Make sure to store it in an airtight container. This helps keep it moist and fresh. In this post, we explored everything about making a pumpkin chocolate chip loaf cake. We covered the right ingredients, step-by-step instructions, and helpful tips for baking. You learned about variations and the best ways to store your cake. Baking can be fun and tasty with the right know-how. Now, you can enjoy this delicious treat on any occasion! Happy baking!
                          Pumpkin Chocolate Chip Loaf Cake Irresistible Recipe
                        • To make Apple Cider Donut Trifle Cups, you'll need: - 4 apple cider donuts, crumbled - 2 cups vanilla pudding - 1 cup whipped cream - 1 cup diced apples (preferably sweet varieties) - 1 teaspoon cinnamon - 2 tablespoons brown sugar These ingredients blend to create a sweet, layered dessert that brings joy to any gathering. Enhance your trifle cups with these garnishes: - Caramel sauce for drizzling - Thin apple slices for decoration - Crushed nuts for added crunch These little touches make your trifle cups look and taste even better! You can switch some ingredients if needed: - Use chocolate pudding instead of vanilla for a richer flavor. - Swap apple cider donuts for cinnamon donuts or sponge cake. - Try different apples, like tart Granny Smith or sweet Fuji. These substitutions allow you to customize the trifle to your taste and what you have on hand. Start by dicing your apples into small pieces. I prefer sweet apples for their taste. In a small bowl, mix the diced apples with one teaspoon of cinnamon and two tablespoons of brown sugar. This blend adds a warm, sweet flavor. Let the apples sit for about 10 minutes. This allows the sugar to draw out the juice from the apples. You will see a nice syrup form at the bottom of the bowl. Grab your clear cups or dessert glasses. Begin with a layer of crumbled apple cider donuts. Use about half of the donuts for the bottom layer. Next, spoon a layer of vanilla pudding over the donuts. Smooth it out with the back of your spoon for a nice look. After that, add a layer of whipped cream. You can use a piping bag for a fancy touch, or just spoon it on. Now, take your cinnamon-sugar apple mixture and spoon it over the whipped cream. Repeat the layering process. Start again with donut crumbles, then pudding, followed by whipped cream, and finally the apple mixture. Finish with a big dollop of whipped cream on top. If you want to make it special, drizzle some caramel sauce over the top. A sprinkle of cinnamon adds a nice touch, too. Enjoy this treat chilled for the best flavor! Make your trifle cups look great. Use clear cups to show off the layers. This makes it fun to see the bright apples, cream, and donuts. For a fancy touch, add a thin apple slice on the rim. A sprinkle of crushed nuts adds crunch and color. Serve the cups chilled for the best taste. To boost flavor, try adding nutmeg or ginger to the apple mix. These spices add warmth that pairs well with the sweet donuts. Drizzle some caramel sauce on top for extra sweetness. You can also swap the vanilla pudding for a butterscotch or pumpkin flavor. These changes can make the trifle even more special. One mistake is not letting the apples sit long enough. They need to sit so they can soak up the cinnamon and sugar. This step brings out their natural sweetness. Avoid overfilling the cups. Each layer should be even and not too packed. This helps keep each bite balanced and tasty. Lastly, don't skip the chilling step. Chilling helps the flavors blend and makes each bite creamy and smooth. {{image_2}} You can change your trifle cups with the seasons. In fall, use spiced donuts. In winter, try peppermint donuts for a festive twist. In spring, swap for lemon donuts to brighten the dish. Summer? Fresh berry toppings can add a burst of color and flavor. Each season brings new tastes to enjoy. To make this treat gluten-free, use gluten-free apple cider donuts. Check the label to be sure. For a vegan option, swap the pudding for a plant-based version and use coconut cream instead of whipped cream. You can still enjoy all the layers without missing any flavors. Mixing flavors can elevate your trifle. Add nutmeg for warmth or ginger for a kick. Try using different fruits like pears or berries. You can even mix in some nuts for crunch. These small changes can create a new favorite dessert every time. Store your Apple Cider Donut Trifle Cups in the fridge. Use an airtight container. They will stay fresh for about 2 to 3 days. Keep the whipped cream from getting too soft. If you notice it losing its shape, enjoy them quickly. Freezing is not the best option for these trifle cups. The texture of the whipped cream and pudding can change. If you must freeze them, separate the layers first. You can freeze the crumbled donuts and apple mixture. Just thaw them before layering again. These trifle cups taste best when served cold. Enjoy them the same day you make them. The flavors blend nicely after a few hours in the fridge. They are perfect for parties or gatherings, especially in autumn. Yes, you can use store-bought apple cider donuts. They save time and still taste great. Just crumble them up as you would with homemade ones. The flavor will still shine through in your trifle cups. You can store the trifle cups in the fridge for up to two days. Keep them covered to avoid drying out. After two days, the donuts may get soggy. You can use chocolate pudding or butterscotch pudding instead of vanilla. Both will add a fun twist to your trifle. If you want a lighter option, try Greek yogurt mixed with honey. Yes, you can use gluten-free apple cider donuts for this recipe. Check the store for gluten-free brands. Ensure the pudding and any other ingredients are gluten-free too. Yes, you can make this trifle ahead of time. Assemble it a day in advance and store it in the fridge. Just add the whipped cream and caramel sauce right before serving for the best taste. This blog covered key ingredients and how to prepare them for your trifle. I shared tips for better presentation and ways to adapt the recipe for different diets. Remember to store your trifle properly for the best taste. Enjoy experimenting with flavors and substitutes to make it your own. With these steps in mind, you can create a great dessert that impresses everyone!
                          Apple Cider Donut Trifle Cups Easy Seasonal Delight
                        • To make a delicious Cinnamon Streusel Coffee Cake, you will need: - 2 cups all-purpose flour - 1 cup granulated sugar - ½ cup unsalted butter, softened - 2 large eggs - 1 cup sour cream - 1 teaspoon vanilla extract - 1 teaspoon baking powder - ½ teaspoon baking soda - ½ teaspoon salt - 1 tablespoon ground cinnamon - ½ cup brown sugar, packed - ½ cup chopped walnuts or pecans (optional) - ¼ cup powdered sugar (for dusting) These ingredients come together to create a rich and moist cake with a crunchy topping. You can add extra flavor to your cake. Here are some ideas: - Chopped fruit: Try adding apples or pears for a fruity twist. - Chocolate chips: These add sweetness and richness. - More nuts: If you love nuts, add more walnuts or pecans. - Citrus zest: A bit of lemon or orange zest brightens up the flavor. Feel free to mix and match based on your taste! Choosing the best ingredients makes your cake taste great. Here are some tips: - Flour: Use fresh all-purpose flour. Check the date on the bag. - Butter: Choose high-quality unsalted butter for rich flavor. - Eggs: Fresh eggs make for a fluffier cake. Look for organic if possible. - Sour cream: A creamy, full-fat sour cream adds moisture. - Spices: Use fresh cinnamon for a strong and warm flavor. Good ingredients lead to a great outcome. Enjoy your baking! Start by preheating your oven to 350°F (175°C). This step ensures your cake bakes evenly. While the oven heats, grease and flour a 9x13-inch baking pan. This helps the cake come out easily after baking. It also prevents sticking. In a large mixing bowl, cream ½ cup of softened butter with 1 cup of granulated sugar. Mix until the mixture looks light and fluffy. This step adds air and helps your cake rise. Next, beat in 2 large eggs, one at a time. Make sure to mix well after each egg. Then, stir in 1 cup of sour cream and 1 teaspoon of vanilla extract. Mix until everything is combined. In a separate bowl, whisk together 2 cups of all-purpose flour, 1 teaspoon of baking powder, ½ teaspoon of baking soda, and ½ teaspoon of salt. Gradually add this dry mix to the wet mix. Stir gently until just combined. Be careful not to over-mix. This keeps the cake light. In a small bowl, mix together ½ cup of brown sugar and 1 tablespoon of ground cinnamon. If you like, add ½ cup of chopped walnuts or pecans for a nice crunch. Combine these ingredients well. Pour half of the batter into the prepared baking pan. Spread it evenly. Then, sprinkle half of the streusel mixture on top. Pour the remaining batter over this layer. Finally, finish with the last of the streusel mixture on top. Place the pan in the oven and bake for 30-35 minutes. Check if it’s done by inserting a toothpick into the center. If it comes out clean, your cake is ready. After baking, let the cake cool in the pan for about 10-15 minutes. Once cooled, dust the top with ¼ cup of powdered sugar. This adds a lovely touch and makes it look fancy. Now, you can cut it into squares. Enjoy your warm coffee cake! When making cinnamon streusel coffee cake, watch out for a few common errors. First, do not over-mix your batter. Mixing too much makes the cake dense. Second, make sure your oven is at the right temperature. An oven that is too hot can burn the cake, while one that is too cool will leave it soggy. Lastly, ensure you let the cake cool before dusting with powdered sugar. If you do this too soon, the sugar will melt and disappear. To get the perfect texture, use room-temperature ingredients. Cold butter or eggs can lead to uneven mixing. Also, make sure to measure your flour correctly. Too much flour can create a dry cake. Use the spoon and level method: spoon flour into your measuring cup and level it off with a knife. This will help you get the right amount. Lastly, bake until a toothpick comes out clean. This ensures your cake is moist and fluffy. Serve your coffee cake warm for the best taste. Pair it with a cup of coffee or tea for a lovely treat. You can also add fresh fruit, like berries or sliced bananas, on the side. If you want an extra touch, try adding a scoop of vanilla ice cream or whipped cream on top. This makes for a delightful dessert option! {{image_2}} You can easily skip the nuts in the cinnamon streusel. Just leave out the walnuts or pecans. This change makes the cake safe for those with nut allergies. It still tastes great! The streusel will be just as sweet and crunchy without them. You can switch things up for the seasons. Try adding pumpkin puree for a fall treat. Use one cup of pumpkin instead of sour cream. You can add pumpkin spice for extra flavor. For summer, add fresh apples. Chop them into small pieces and fold them into the batter. This adds a lovely fruity taste. If you want to change the topping, consider a cream cheese glaze. Mix cream cheese, powdered sugar, and a little milk. Drizzle it on top after the cake cools. For a lighter option, dust with extra powdered sugar or even cinnamon. Each choice gives your coffee cake a new twist! To keep your Cinnamon Streusel Coffee Cake fresh, store it in an airtight container. This will help it stay moist. You can also wrap it tightly in plastic wrap. Place it at room temperature for up to three days. If you want it to last longer, the fridge is a good option. Just know that it may dry out a bit. If you want to save some for later, freezing is a great choice. First, let the cake cool completely. Then, cut it into squares for easy serving. Wrap each square in plastic wrap. After that, place them in a freezer-safe bag. You can freeze the cake for up to three months. When you’re ready to eat, just pull out a piece. To enjoy your cake warm, reheating is simple. Preheat your oven to 350°F (175°C). Place the cake on a baking sheet. Cover it with foil to prevent it from drying out. Heat for about 10 to 15 minutes. You can also use the microwave. Heat for 15 to 20 seconds, but be careful not to make it tough. Enjoy your cake with a fresh cup of coffee! You can use plain yogurt as a sour cream substitute. It has a similar taste and texture. You can also use buttermilk or a mix of milk and vinegar. Each option keeps the cake moist and tasty. Yes, you can make this coffee cake vegan. Use plant-based butter and substitute eggs with flax eggs. Mix one tablespoon of ground flaxseed with three tablespoons of water to replace one egg. For sour cream, use unsweetened coconut yogurt or another dairy-free yogurt. Check the cake after 30 minutes. Insert a toothpick into the center. If it comes out clean or with a few crumbs, the cake is done. If wet batter sticks to the toothpick, bake for a few more minutes. Always let it cool before cutting. This blog post shared key steps to bake a great coffee cake. You learned about essential ingredients and fun add-ins to enhance flavor. We covered precise instructions, tips for perfect texture, and creative variations. Storing leftovers and reheating keep your cake fresh and tasty. Enjoying coffee cake brings family and friends together. With these tips, you can bake one that everyone will love. Happy baking!
                          Cinnamon Streusel Coffee Cake Simple and Delicious Treat
                        • - 1 cup almond butter - ½ cup coconut oil, melted - ¼ cup cocoa powder - ¼ cup maple syrup or honey - 1 teaspoon pure vanilla extract - ¼ teaspoon sea salt - ½ cup dark chocolate chips - ¼ cup chopped almonds (optional topping) Gather these simple ingredients. Each one plays a key role in flavor and texture. Almond butter gives a creamy base. Coconut oil helps things bind together while adding richness. Cocoa powder provides that deep chocolate taste. Maple syrup or honey adds just the right sweetness. Vanilla extract boosts all the flavors. Sea salt balances the sweetness and enhances taste. Dark chocolate chips are the final layer of joy. If you like, sprinkle chopped almonds on top for crunch. This mix will help you create a treat that feels indulgent yet simple. - In a mixing bowl, combine: - 1 cup almond butter - ½ cup melted coconut oil - ¼ cup cocoa powder - ¼ cup maple syrup or honey - 1 teaspoon pure vanilla extract - ¼ teaspoon sea salt - Stir the mixture until it is smooth and well combined. This step is key for a rich flavor. - Line a muffin tin with paper liners to keep the cups from sticking. - Spoon about 2 tablespoons of the almond butter mixture into each liner. Fill them halfway. Use the back of a spoon to press down gently for even layers. - Place the muffin tin in the freezer for 15 to 20 minutes. This helps the almond butter layer set. - While that freezes, melt ½ cup dark chocolate chips in a microwave-safe bowl. Heat in 30-second bursts, stirring until smooth. - Remove the muffin tin from the freezer. Pour the melted chocolate over the almond butter layer in each cup. - If you want, sprinkle with ¼ cup chopped almonds for a nice crunch. - Return the muffin tin to the freezer for another 30 minutes to let the chocolate set. - After they are set, remove the cups from the freezer and peel away the paper liners. Enjoy! - Use natural almond butter for a healthier option. This choice enhances flavor and nutrition. - Allow the chocolate to cool slightly before pouring over the almond butter. This helps keep the layers distinct. - Replace maple syrup with agave nectar for a vegan option. This change keeps the sweetness while meeting dietary needs. - Use other nut butters like peanut butter for a different flavor. Each nut butter brings its own unique taste and texture. {{image_2}} You can easily mix up the flavors. Adding a pinch of sea salt on top gives a nice touch. Salt balances the sweetness and enhances the chocolate. Another fun idea is to add shredded coconut into the almond butter mix. This adds a chewy texture and a tropical twist to your cups. You can adjust the taste and feel by changing the cocoa powder amount. Adding more cocoa powder gives a richer, deeper chocolate flavor. To add crunch, try topping your cups with different nuts or seeds. Chopped walnuts or sunflower seeds work well. Mixing these in can make the treat even more delicious! You can keep these no-bake chocolate almond butter cups in the freezer. Use an airtight container for best results. They will stay fresh for up to 2 months. When you want to enjoy them, simply thaw before serving. If you’re in a hurry, you can eat them straight from the freezer. They taste great cold! These cups are best enjoyed at room temperature. Let them sit out for a few minutes before serving. Avoid putting them in the microwave. Reheating can change their texture, and we want them to stay smooth and creamy. Enjoy your tasty treat! Yes, you can use peanut butter or cashew butter. Both options work well. Each nut butter adds a unique flavor. This gives you room to create your favorite taste. These cups can be stored in the freezer for up to 2 months. Just keep them in an airtight container. They will stay fresh and tasty. You can enjoy them whenever you like. Yes, they are quite healthy. They contain good fats from the nut butter and coconut oil. The maple syrup or honey adds natural sweetness. This makes them a guilt-free treat that tastes great! These no-bake chocolate almond butter cups are easy and fun to make. You only need a few ingredients and simple steps to get delicious results. Remember, you can swap ingredients to match your taste. Store them in your freezer for a sweet treat anytime. Enjoy this guilt-free snack without worry. You’ll love how satisfying they are and how quick they come together. Happy cooking!
                          No-Bake Chocolate Almond Butter Cups Delightfully Simple

                        Recent Drinks

                        • - 1 ripe banana - 2 tablespoons natural peanut butter - 1 cup unsweetened almond milk (or any milk of choice) - 1 scoop vanilla protein powder (plant-based or whey) - 1 tablespoon chia seeds - 1 teaspoon honey (optional for sweetness) - A pinch of cinnamon - Ice cubes (optional, for a thicker texture) Gather these simple items before you start. A ripe banana gives natural sweetness and creaminess. Use two tablespoons of natural peanut butter for a rich flavor. Almond milk is my go-to, but any milk you love works great. The protein powder adds a boost of nutrition. Choose vanilla to match the banana. Chia seeds are tiny but mighty. They add fiber and help keep you full. If you like it sweeter, add honey, but it’s not a must. A pinch of cinnamon brings warmth and depth to this drink. For a thicker texture, toss in some ice cubes. This smoothie is flexible, so feel free to mix and match based on your taste. Now, let's blend it all together! 1. Start by peeling the ripe banana. Break it into small chunks. 2. In a blender, combine the banana chunks, natural peanut butter, almond milk, protein powder, chia seeds, and a pinch of cinnamon. 3. If you like a colder and thicker smoothie, add some ice cubes. 1. Blend all the ingredients on high speed. Keep blending until you have a smooth and creamy mix. 2. Stop the blender and taste your smoothie. If you want it sweeter, add honey. Blend again for a few seconds to mix. 1. Pour the smoothie into a tall glass. Enjoy it right away for the best taste and creaminess. 2. For a fun twist, you can top it with extra chia seeds or banana slices. This makes it look pretty too! To get the perfect texture, use a ripe banana. A ripe banana makes the smoothie creamy. Add ice cubes if you want it thicker. If you prefer a smoother drink, blend longer. Scrape the sides of the blender to mix all the ingredients well. This ensures a silky-smooth result. If your smoothie tastes too bland, add honey or more banana. Start with a teaspoon of honey. Blend and taste again. You can always add more honey if needed. This way, you control the sweetness to match your taste. Remember, ripe bananas also add natural sweetness. Use a high-speed blender for the best results. A strong blender breaks down the ingredients quickly. If you have a less powerful blender, blend in stages. Start with the liquids first, then add the solids. This helps everything mix better. Make sure your blender is clean for the best flavor. {{image_2}} You can switch the peanut butter for other nut butters. Almond butter offers a nutty taste. Cashew butter is creamy and sweet. Sunflower seed butter is a great choice for allergies. Each nut butter brings its own flavor and health benefits. Experiment to find your favorite. You can add many fruits to the smoothie. Frozen berries add sweetness and color. Spinach or kale boosts nutrition without changing the taste. Try mango for a tropical twist. Each fruit adds vitamins and makes the smoothie fun. Mix and match to discover new flavors. Choosing the right protein powder is key. Plant-based powders are great for vegan diets. Whey protein is popular for muscle recovery. Look for flavors that match your taste, like chocolate or vanilla. The right powder can enhance the smoothie’s flavor and nutrition. Test different types to see what you prefer. Store any leftover smoothie in an airtight container. You want to keep it fresh. Place it in the fridge right after making it. It will stay good for about one day. When you are ready to drink it again, shake or stir well. This helps mix any settled ingredients. You can freeze your smoothie for later. Pour it into ice cube trays or freezer-safe bags. This way, you can grab a portion whenever you want. To use, thaw the smoothie overnight in the fridge. You can also blend it again for a fresh taste. In the fridge, your smoothie lasts about 24 hours. In the freezer, it can last up to three months. Just remember, the sooner you drink it, the better the taste and texture will be! Yes, this smoothie is gluten-free. All the ingredients listed are naturally free from gluten. The peanut butter, banana, almond milk, protein powder, chia seeds, and honey do not contain gluten. Always check labels if you use store-bought items to confirm they are gluten-free. Absolutely! To make this smoothie vegan, simply use plant-based protein powder. Ensure your peanut butter is also free from animal products. Replace honey with maple syrup or agave nectar for sweetness. All other ingredients are already vegan-friendly. This smoothie offers many health benefits. It provides protein from the peanut butter and protein powder, which helps build muscle. Bananas add potassium, good for heart health. Chia seeds are packed with fiber, aiding digestion. Almond milk is low in calories and rich in vitamins. Yes, you can use various milk types. Cow’s milk will add creaminess and protein. Soy milk is a great option for extra protein. Coconut milk gives a tropical flavor. Each milk option changes the taste and texture slightly, so choose what you enjoy best. This smoothie recipe combines simple ingredients for great taste and nutrition. You learned step-by-step how to prepare it and tips for perfect texture. Variations let you customize your drink to fit your taste. Remember to store leftovers properly for later enjoyment. Smoothies can be healthy and fun. Try new mixtures to find what you love best. Keep experimenting and enjoy your delicious creations!
                          Peanut Butter Banana Protein Smoothie Easy Recipe
                        • To make a delicious Turmeric Golden Milk Latte, gather these simple ingredients: - 2 cups almond milk (or your preferred milk) - 1 teaspoon ground turmeric - ½ teaspoon ground ginger - ¼ teaspoon cinnamon - 1 tablespoon honey or maple syrup (adjust to taste) - Pinch of black pepper - ½ teaspoon vanilla extract - Optional: a sprinkle of nutmeg for garnish - Almond Milk: This milk is low in calories and rich in vitamins. It helps with heart health. - Turmeric: This spice has curcumin, known for its anti-inflammatory properties. It may help improve brain function. - Ginger: Ginger can help with digestion and nausea. It adds a nice warmth to the drink. - Cinnamon: This spice is rich in antioxidants. It may help lower blood sugar and improve heart health. - Honey or Maple Syrup: Both sweeteners can boost energy. They also provide antioxidants. - Black Pepper: This spice enhances turmeric absorption. It makes the drink more effective. - Vanilla Extract: It adds flavor and can help reduce stress. - Nutmeg: This spice is optional, but it adds warmth and a nice aroma. - Milk Options: You can use oat milk, soy milk, or coconut milk for different flavors. - Sweeteners: If you prefer, try agave syrup or stevia as sugar-free options. - Spices: Experiment with cardamom or cloves for added flavor. - Nutmeg: You can skip it if you don't like nutmeg, or use a touch of cocoa powder instead. 1. Start by taking a small saucepan. 2. Add 2 cups of almond milk to the pan. 3. Measure and add 1 teaspoon of ground turmeric. 4. Next, add ½ teaspoon of ground ginger. 5. Sprinkle in ¼ teaspoon of cinnamon. 6. Sweeten your drink with 1 tablespoon of honey or maple syrup. 7. Don't forget a pinch of black pepper for better absorption of turmeric. 8. Lastly, add ½ teaspoon of vanilla extract. 9. Whisk all the ingredients well in the pan. 10. Place the saucepan on medium heat. 11. Gently warm the mixture while stirring often. 12. Keep an eye on it; do not let it boil. 13. After about 5-7 minutes, it should be hot enough. 14. Remove the pan from heat and let it cool slightly. 15. If you want a frothy drink, use a milk frother or whisk it quickly. 16. Pour the golden milk into your favorite mugs. 17. Optionally, sprinkle a bit of nutmeg on top for a nice touch. 18. Serve warm and enjoy this comforting drink! - Always use a whisk to blend the spices into the milk. - Whisking helps mix the turmeric and other spices evenly. - When heating, keep the heat low to avoid scalding the milk. - Stir often to prevent sticking at the bottom of the pan. - If you see steam but no bubbles, you are at the right temperature. - A milk frother works wonders for a smooth, frothy finish. - If you don’t have a frother, whisk vigorously by hand. - Frothing adds air, giving the latte a creamy feel. - The more you froth, the lighter and fluffier your drink will become. - For an extra touch, froth some almond milk separately and top your latte with it. You can mix spices to make your turmeric latte tastier. Try adding a pinch of nutmeg or a dash of cardamom. These spices add warmth to the drink. You can also use fresh ginger instead of ground ginger. This will give your latte a bright, zesty kick. Just remember, fresh ginger may need more time to steep. Many people rush the heating process. Always warm your milk slowly over medium heat. If you boil it, the spices can lose flavor. Another mistake is not blending the spices well. Make sure to whisk the mixture thoroughly. This helps avoid clumps of turmeric or ginger. Lastly, avoid skipping the black pepper. It helps your body absorb turmeric better. Sweetness is personal. Start with one tablespoon of honey or maple syrup. Taste your latte and add more if you like it sweeter. For creaminess, use full-fat coconut milk for a richer feel. Almond milk is lighter but still delicious. You can also mix almond and coconut milk for the best of both worlds. {{image_2}} You can easily make this latte vegan. Just use almond milk, coconut milk, or oat milk. These milks work great in this recipe. They keep the drink creamy and delicious. If you want a nut-free option, oat milk is the best choice. It blends well with turmeric and spices. To make an iced version, start with brewed turmeric milk. Follow the same steps but let it cool. Pour over ice instead of serving warm. This drink is refreshing on hot days. You can also add some ice cream for a treat! You can mix and match flavors for fun. Try adding matcha for a green twist. This adds a fresh taste and boosts energy. You can also use cocoa for a chocolatey version. The cocoa pairs well with turmeric and spices. For a special touch, add a dash of vanilla extract. This enhances the overall flavor and aroma. To store leftover turmeric golden milk, let it cool first. Then, pour it into an airtight container. Keep it in the fridge for up to three days. This way, you can enjoy the drink again without losing its flavor. When reheating your golden milk, do it gently. Pour it into a small saucepan. Heat it over low to medium heat. Stir it often to avoid burning. Never let it boil, as this can change the taste and texture. You can also use a microwave. Heat in short bursts, stirring in between. Turmeric golden milk lasts about three days in the fridge. Check for signs of spoilage. If it smells sour or has any mold, discard it. Always trust your senses. If it looks or smells off, it’s best to throw it away. Turmeric has many health benefits. It is known for its bright yellow color and active compound called curcumin. Curcumin may help reduce inflammation. It can also support joint health. Some studies suggest it may boost your mood. Turmeric might even help with digestion. Drinking turmeric may also support your immune system. Yes, you can use any milk you like. Almond milk is great, but coconut milk adds creaminess. Oat milk is a good choice for a thicker texture. If you prefer dairy, whole or skim milk works too. Just remember, different types of milk will change the flavor a bit. To make this recipe sugar-free, skip the honey or maple syrup. You can use a sugar substitute like stevia or monk fruit instead. These options will give you sweetness without the calories. Just adjust the amount to your taste. Yes, it is safe for most people to have turmeric daily. Using it in cooking or drinks is a great way to enjoy its benefits. However, if you have health issues or take certain medications, check with a doctor first. Moderation is key, as with any food. In this blog post, we explored the ingredients and health benefits of Turmeric Golden Milk. I shared step-by-step instructions for making it frothy and delicious. We also discovered tips, tricks, and variations to enhance your drink. Proper storage and reheating advice can help you enjoy leftovers. Remember, turmeric offers many health benefits, so enjoy this drink often. Use alternative ingredients if you prefer. With these ideas, you can create the perfect golden milk to suit your taste and health needs. Enjoy your journey to wellness!
                          Turmeric Golden Milk Latte Simple and Creamy Recipe
                        • - 1 ripe mango, peeled and diced - 1 cup fresh pineapple chunks - 1 banana, sliced - 1 cup coconut water (or regular water) - ½ cup plain Greek yogurt (or dairy-free alternative) - 1 tablespoon honey or agave syrup (optional) - A handful of fresh mint leaves (for garnish) - Ice cubes (optional) The key to a delicious mango pineapple smoothie lies in its fresh ingredients. You want ripe fruits for the best flavor. The mango should feel soft when you squeeze it gently. Pineapples should smell sweet and fruity. This smoothie combines sweet mango, tangy pineapple, and creamy banana. Coconut water adds hydration, while Greek yogurt gives it a nice creaminess. You can add honey for extra sweetness if you like. Mint leaves add a refreshing touch when you serve it. Each ingredient plays a role in making this smoothie flavorful and refreshing. Trust me, using fresh ingredients will make a big difference in taste! To make this smoothie, start by gathering your main ingredients. You need a ripe mango, fresh pineapple, and a banana. 1. In a blender, combine the diced mango, pineapple chunks, and banana slices. This mix brings a burst of tropical flavor. 2. Next, add one cup of coconut water to the blender. This not only hydrates but also adds a refreshing twist. 3. For creaminess, pour in half a cup of plain Greek yogurt. If you want it sweeter, drizzle in one tablespoon of honey or agave syrup. 4. Blend on high until the mixture is smooth and creamy. If you like your smoothie chilled, toss in a few ice cubes and blend again until they are fully mixed in. 5. After blending, taste your smoothie. If it needs to be sweeter or thicker, add more honey or coconut water as needed. Once your smoothie is ready, it’s time to serve it. I recommend using tall glasses to show off the vibrant color. For a fun touch, garnish each glass with a few fresh mint leaves on top. This not only looks nice but also adds a fresh aroma. Enjoy your delicious Mango Pineapple Smoothie! For the Full Recipe, please refer back to the ingredient list and instructions. To get your smoothie just right, focus on creaminess. Use ripe fruits like mango and banana. The Greek yogurt adds a nice, smooth texture. If you want a richer taste, try full-fat yogurt. For a lighter feel, use low-fat or dairy-free yogurt. Adjust the thickness by adding more liquid. Coconut water is great for this. If your smoothie is too thick, just pour in a bit more. Blend again until it’s just how you like it. If you want a thicker smoothie, add more banana or ice cubes. Boosting flavor can take your smoothie to the next level. Try adding spices like cinnamon or ginger. These spices not only add warmth but also great health benefits. A dash of cinnamon can make the smoothie taste cozy. A pinch of ginger gives it a nice kick. You can also use flavored yogurts for extra taste. Vanilla or coconut yogurt work well. If you want sweetness, think about honey or agave syrup. These can make your smoothie more enjoyable. For a fun twist, try adding a splash of vanilla extract. It will add a lovely aroma to your drink. For a full taste experience, explore the [Full Recipe]. {{image_2}} You can change the fruit in your smoothie to keep it fresh. Adding strawberries or blueberries gives a sweet twist. These berries add a nice color and taste. You can also try using other tropical fruits like papaya or kiwi. These fruits bring new flavors and nutrients to your drink. Each fruit will change the smoothie’s taste and make it unique. If you want a dairy-free smoothie, swap the Greek yogurt for a plant-based option. Almond, coconut, or soy yogurt works well. These alternatives keep your smoothie creamy without dairy. For sweeteners, you can use maple syrup or agave syrup for a vegan choice. These options add sweetness while keeping your drink plant-based. Enjoy the fruity goodness in many ways! Don't forget to check the Full Recipe for more ideas. You may have some smoothie left after making your Mango Pineapple Smoothie. To keep it fresh, use a glass jar or a BPA-free plastic container. Seal it tightly to prevent air from spoiling the flavor. Store it in the fridge for up to 24 hours. After that, it may lose some taste and texture. If you want to enjoy the smoothie later, freezing is a great option. Pour the smoothie into ice cube trays or freezer-safe bags. Leave some space in the bags for expansion. You can freeze it for up to three months. When you’re ready to drink it, take out what you need. Thaw it in the fridge overnight or blend it straight from the freezer for a slushy treat. Enjoy your refreshing Mango Pineapple Smoothie anytime! Yes, you can make this smoothie ahead of time. If you want to save it, store it in an airtight container. Keep it in the fridge for up to one day. The smoothie may separate, so stir it well before you drink it. If you don’t have coconut water, use regular water or fruit juice instead. Fruit juice can add a nice flavor. You can also try almond milk for a creamier touch. Just remember, the taste will change a bit based on what you use. To make the smoothie thicker, add more Greek yogurt or a banana. You can also use frozen fruit instead of fresh. Frozen fruit gives you a nice, thick texture. Just blend it well, and you’ll get a creamy drink. Yes, this smoothie is great for kids! It is packed with fruits and tastes sweet. You can adjust the sweetness by adding less honey. The bright colors and fresh flavors will appeal to children, making it a fun treat. You can find the Full Recipe for the Tropical Bliss Mango Pineapple Smoothie above in this article. This will guide you through every step to create your own refreshing drink. This blog post covers a simple and tasty smoothie recipe. You learned about the key ingredients and their nutritional benefits. I provided steps to prepare and serve the smoothie perfectly. Tips for texture and flavor help you make it your own. You can explore variations to suit your tastes or dietary needs. Don’t forget storage tips to keep leftovers fresh. Enjoy your smoothie making journey. It’s all about trying new things and having fun!
                          Mango Pineapple Smoothie Refreshing and Flavorful Blend
                        • - 2 packets of frozen açaí puree - 1 ripe banana - 1 cup of fresh pineapple chunks - 1 cup of coconut milk (or any non-dairy milk) - 1 tablespoon of honey or agave syrup (optional) For a vibrant tropical taste, the main ingredients are key. Açaí puree brings rich color and flavor. It is full of antioxidants. Bananas add creaminess and natural sweetness. Fresh pineapple gives a bright, juicy touch. Coconut milk offers a smooth base. You can use any non-dairy milk you prefer. Honey or agave syrup adds sweetness if needed. - Sliced kiwi - Coconut flakes - Granola - Chia seeds - Fresh berries (e.g., strawberries, blueberries) Toppings make your smoothie bowl pop! Sliced kiwi adds a zesty kick. Coconut flakes give it a tropical crunch. Granola provides texture and flavor. Chia seeds offer extra nutrients. Fresh berries, like strawberries and blueberries, add color and taste. You can mix and match these toppings for a fun look. For the full recipe, please refer to the section above. 1. Blend the ingredients Start by adding the frozen açaí puree, ripe banana, fresh pineapple chunks, and coconut milk into a blender. If you want it sweeter, you can add honey or agave syrup. Blend this mixture on high speed until it becomes creamy and smooth. 2. Adjust consistency with coconut milk If your smoothie is too thick, just add a bit more coconut milk. Blend again until you reach the texture you want. This step is key to making your smoothie bowl enjoyable. 3. Pour into a bowl Once blended, carefully pour the smoothie mixture into a bowl. Make sure to use a large enough bowl to hold all the goodness. 4. Add toppings creatively Now comes the fun part! Arrange your toppings, such as sliced kiwi, coconut flakes, granola, chia seeds, and fresh berries, over the smoothie. Try to create a colorful pattern. I love making a circular design to highlight all the vibrant colors. - Tips for presentation Use a shallow bowl to show off your beautiful toppings. You can also sprinkle some extra coconut flakes around the edge for a nice touch. A colorful presentation makes your smoothie bowl more fun to eat. - Recommended serving utensils Serve your smoothie bowl with a regular spoon. If you want to make it more special, use a wooden spoon or a cute, colorful one. Enjoy your tropical treat right away to keep it fresh and tasty. For the full recipe, refer to the earlier sections. To make a great smoothie bowl, start with ripe fruits. Ripe fruits taste better and add natural sweetness. Look for bananas that are yellow with some brown spots. When it comes to pineapples, choose ones that smell sweet. It ensures they are juicy and fresh. Blending is key to your smoothie bowl. You want a smooth and creamy texture. If your mix is too thick, add more coconut milk. Blend again until you reach the right consistency. A good blend makes your bowl enjoyable and easy to eat. A colorful topping arrangement makes your smoothie bowl pop. Use fresh berries, sliced kiwi, and coconut flakes. Lay them out in a pattern. A circular design looks appealing and fun. To elevate your smoothie bowl's look, use bowls with interesting shapes. Tall bowls or wide, shallow ones can change the game. Garnish with a sprinkle of chia seeds for a fancy touch. This not only looks great but adds a bit of crunch too. {{image_2}} You can change the non-dairy milk for this smoothie. Almond, soy, or oat milk work well. Each milk adds a different taste. Try using seasonal fruits too. Mango, papaya, or berries add a fresh twist. You can mix and match to find your favorite blend. Want more nutrients? Add spinach or kale to your smoothie. They blend well and boost health. You won’t even taste them! For extra energy, stir in nut butter or protein powder. Both will make your smoothie more filling. They add great flavor too! You can also experiment with different combinations to find the best taste for you. To store leftovers, place your smoothie bowl in the fridge. Use a tight container to keep it fresh. Glass or BPA-free plastic works well for storage. I prefer glass because it keeps flavors better. You can freeze smoothie bowls for later. Just pour the mixture into an airtight container. Leave some space at the top, as it will expand when frozen. To defrost, place it in the fridge overnight. If you’re in a rush, you can use the microwave. Just heat it in short bursts to avoid cooking. Enjoy your tropical treat later with ease! For the recipe, check out the Full Recipe. What is açaí and what are its benefits? Açaí is a small, dark purple berry from Brazil. It is full of antioxidants, which help fight free radicals in the body. Açaí is also rich in fiber, promoting good digestion. Plus, it has healthy fats that support heart health. You can enjoy its fruity taste in many dishes. Can I make this smoothie bowl ahead of time? Yes! You can prepare the smoothie mix and store it in the fridge for up to 24 hours. Just remember to keep the toppings separate. This way, your bowl stays fresh and tasty. How can I make this recipe vegan or gluten-free? To make it vegan, use agave syrup instead of honey. For gluten-free, ensure your granola and any other toppings are gluten-free. Most fruits and coconut milk are naturally gluten-free, so you’re all set! Can I substitute açaí with other fruits? Yes, you can! If you can’t find açaí, try using frozen berries like blueberries or strawberries. These fruits will add sweetness and a burst of color to your bowl. What to do if the smoothie is too thick? If your smoothie is too thick, just add a little more coconut milk. Blend again until you reach your desired creaminess. This will make it easier to pour and enjoy. How to fix a smoothie bowl that tastes too bland? If your smoothie bowl lacks flavor, try adding a splash of vanilla extract or a pinch of salt. You can also mix in a bit of honey or agave syrup for sweetness. Adjust the toppings to add more taste and texture. This article covers how to make a delicious açaí smoothie bowl. You learned about the key ingredients, easy steps for preparation, and creative topping ideas. I shared tips to improve taste and presentation, plus fun variations to try. Don’t forget storage techniques to keep your bowl fresh. With all this information, you can enjoy a tasty and nutritious treat anytime. Get creative with your favorites and make this recipe truly yours. Enjoy every bite!
                          Tropical Acai Smoothie Bowl Energizing Healthy Treat

                        Footer

                        ↑ back to top

                        More information

                        • Drinks
                        • Appetizer
                        • Dinner
                        • Desserts
                        • About
                        • Contact
                        • Privacy Policy

                        Our Policies

                        • Privacy Policy
                        • GDPR Policy
                        • Terms Of Use
                        • Copyright Policy
                        • Cookie Policy
                        • Disclaimer

                        Copyright © 2025 cheftaling