
Introduction
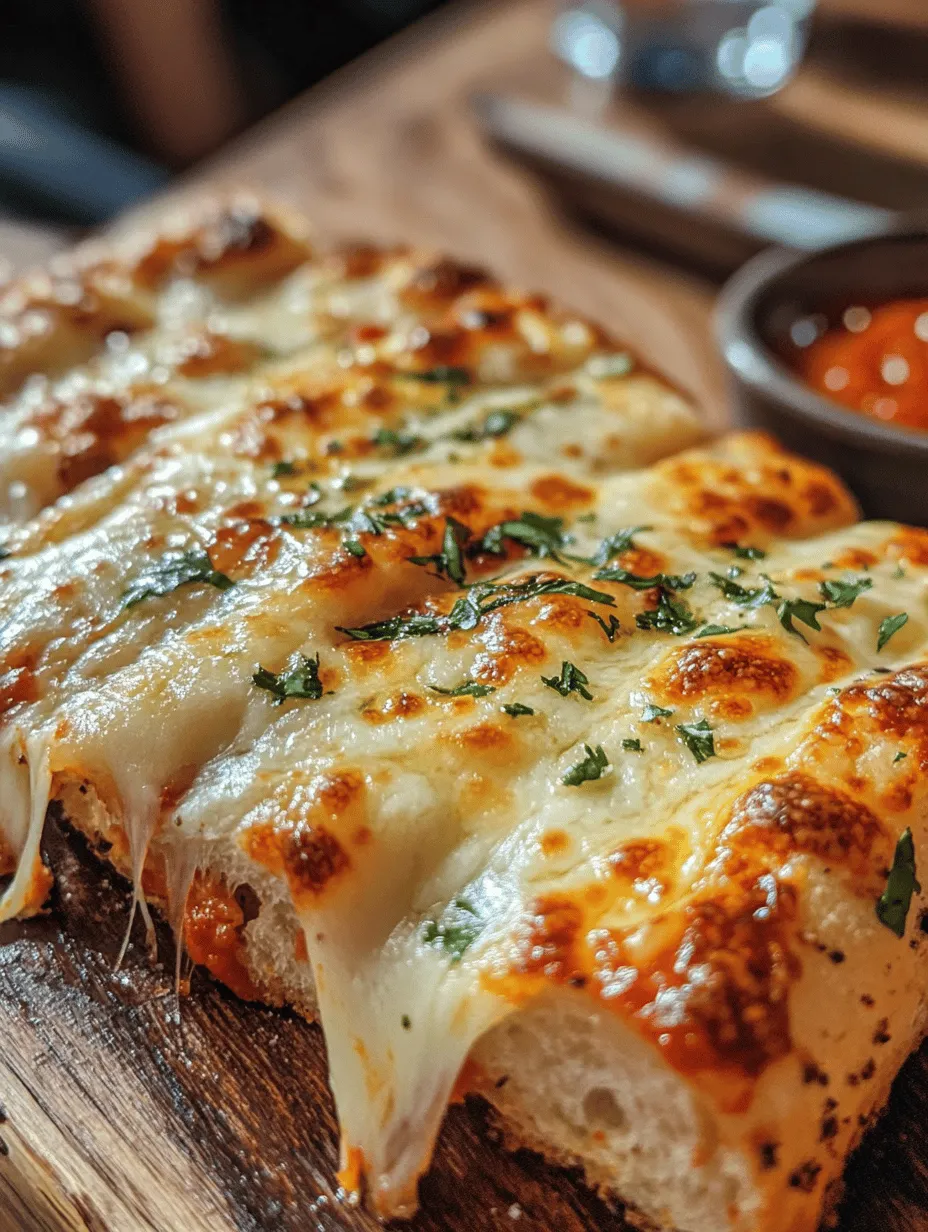
Italian breadsticks, known for their delightful crunch and irresistible flavors, have earned a beloved place in the culinary world. These delicious treats, often served as appetizers or snacks, embody the essence of Italian cuisine which emphasizes quality ingredients and simplicity. The combination of flavors and textures in Italian breadsticks is what makes them so appealing; the soft, chewy interior contrasts beautifully with a golden, crispy exterior. When you add gooey, melted cheese to the mix, you elevate these breadsticks to a whole new level of deliciousness.
This recipe for Cheesy Italian Breadsticks is an easy-to-follow guide that will help you recreate this popular snack at home. Perfect for gatherings, family dinners, or even a quiet night in, these breadsticks are sure to be a hit. They pair wonderfully with marinara sauce for dipping, making them an ideal accompaniment to pasta dishes or a stand-alone snack. With every bite, you’ll experience the delightful combination of stretchy cheese and warm, freshly baked bread that is simply irresistible.
Understanding the Ingredients
To make the perfect Cheesy Italian Breadsticks, it’s vital to understand the key ingredients that contribute to their flavor and texture. Each component plays a significant role in creating that perfect balance that will keep you coming back for more.
All-Purpose Flour
All-purpose flour is the backbone of any bread recipe, and it is no different for our breadsticks. The right type of flour will ensure that the dough achieves the perfect texture—soft, yet sturdy enough to hold its shape. All-purpose flour contains a moderate protein content, which is essential for gluten development. Gluten is what gives bread its structure and chewiness, so selecting quality all-purpose flour is crucial for achieving the desired outcome.
Instant Yeast
Instant yeast is a game-changer in bread-making. Unlike traditional yeast, which requires activation in warm water before use, instant yeast can be mixed directly with dry ingredients. This saves time and simplifies the process. Instant yeast is more potent than active dry yeast, which means it can help your dough rise faster. This efficiency allows for quicker preparation, making your cooking experience more enjoyable. The yeast will create air pockets in the dough as it ferments, leading to that light and airy texture we all adore in breadsticks.
Olive Oil
Olive oil is not just a flavorful addition to our dough; it also plays a significant role in enhancing the overall texture of the breadsticks. The fat in olive oil helps to create a tender crumb by coating the flour’s proteins, which inhibits gluten formation. This results in a softer breadstick. In addition to its textural benefits, olive oil adds a rich, fruity flavor that complements the other ingredients beautifully. Opt for a high-quality extra virgin olive oil to achieve the best flavor.
Cheese Varieties
When it comes to cheesy breadsticks, the choice of cheese is crucial. Mozzarella cheese is the star of this recipe, contributing its signature stretchiness that we all associate with gooey cheese dishes. It melts beautifully, creating that luscious layer of cheese on top of the breadsticks. Parmesan cheese, on the other hand, adds a sharp, nutty flavor that enhances the overall taste profile. The combination of these two cheeses creates a delightful balance of flavors that is sure to tantalize your taste buds.
Seasonings
To elevate the flavor of your Cheesy Italian Breadsticks, don’t overlook the importance of seasonings. Garlic powder is a staple in many Italian recipes and adds a wonderful aromatic quality to the breadsticks. It infuses the dough with a savory flavor that complements the cheese perfectly. Italian seasoning, a blend of herbs such as oregano, basil, and thyme, further enhances the flavor profile, providing that authentic Italian taste that everyone loves. These seasonings are essential for creating breadsticks that are bursting with flavor.
Preparation Steps in Detail
Now that we understand the ingredients, it’s time to dive into the preparation process. Making Cheesy Italian Breadsticks is straightforward, and with a little patience, you’ll be rewarded with delicious, homemade breadsticks that are sure to impress.
Activating the Yeast
The first step in our preparation involves activating the yeast. If you’re using instant yeast, you can skip the activation step; however, if you’re using active dry yeast, it’s important to ensure it’s properly activated for the best results. Start by warming a cup of water to around 110°F (43°C)—it should feel warm to the touch but not hot. Sprinkle the yeast over the warm water and allow it to sit for about 5-10 minutes. You’ll know it’s activated when the mixture becomes foamy and bubbly. This indicates that the yeast is alive and ready to work its magic in the dough.
Mixing Dry Ingredients
In a large mixing bowl, combine your all-purpose flour, garlic powder, Italian seasoning, and salt. Whisk these dry ingredients together until they are evenly distributed. This step is crucial as it ensures that every bite of your breadsticks is packed with flavor. The salt not only enhances the taste but also regulates yeast activity, so be sure to measure it accurately.
Combining Wet and Dry Ingredients
Once the yeast is activated (if using active dry yeast), it’s time to mix the wet and dry ingredients. In a separate bowl, combine the activated yeast mixture with olive oil. Gradually pour this mixture into the bowl with the dry ingredients, stirring with a wooden spoon until a shaggy dough begins to form. It’s essential to mix until there are no dry bits of flour left, but don’t worry about achieving a perfectly smooth dough at this stage.
Kneading Techniques
Kneading is a vital step in bread-making that helps to develop gluten, leading to a chewy texture. Transfer the dough onto a lightly floured surface and begin to knead it by pushing it with the heel of your hand, folding it over, and repeating the process. Knead for about 8-10 minutes, or until the dough is smooth and elastic. If the dough is sticking to your hands or the work surface, sprinkle a little extra flour as needed. Proper kneading will make a noticeable difference in the final product.
First Rise
Once the dough has been kneaded to perfection, it’s time for the first rise. Form the dough into a ball and place it in a lightly greased bowl, turning it to coat the surface with oil. Cover the bowl with a clean kitchen towel or plastic wrap and set it in a warm, draft-free area. Allow the dough to rise for about 1 to 1.5 hours, or until it has doubled in size. You’ll know it’s ready when you gently press your finger into the dough, and the indentation remains.
Preheating the Oven
While the dough is rising, preheat your oven to 425°F (220°C). The right temperature is crucial for achieving that perfect golden crust on your breadsticks. A hot oven will ensure that the breadsticks bake evenly and develop a crispy exterior while remaining soft and chewy on the inside.
Shaping the Breadsticks
Once your dough has risen, it’s time to shape the breadsticks. This step is where you can get creative!
1. Lightly flour your work surface and punch down the risen dough to release any air bubbles.
2. Divide the dough into equal portions, depending on how thick or thin you want your breadsticks to be. A good rule of thumb is to aim for about 12-16 pieces.
3. Roll each piece of dough into a rope shape, approximately 8-10 inches long. You can make them thinner for a crispier texture or thicker for a chewier bite.
4. Place the shaped breadsticks on a baking sheet lined with parchment paper, leaving space between each stick to allow for expansion during baking.
5. For an extra touch, brush the tops with olive oil and sprinkle additional garlic powder and Italian seasoning if desired. This will enhance the flavor and give the breadsticks a beautiful finish.
By following these steps, you’ll have perfectly shaped breadsticks ready for the oven. The combination of gooey cheese, soft bread, and aromatic seasonings will create a mouthwatering treat that is hard to resist. Stay tuned for the baking instructions and tips for serving these delightful Cheesy Italian Breadsticks.
Techniques for Achieving Uniform Thickness for Even Baking
To ensure that your Cheesy Italian Breadsticks bake evenly, it is crucial to achieve a uniform thickness throughout the dough. Here are some techniques to help you do just that:
1. Rolling Method: Use a rolling pin to gently roll out the dough to your desired thickness. Start in the center and work your way outwards, applying even pressure. Rotate the dough a quarter turn every few rolls to maintain a circular shape.
2. Use of Guides: If you want to be precise, consider using wooden dowels or rolling pin rings. Place them on either side of the dough as you roll to create a consistent thickness. This method is especially helpful if you’re aiming for a specific width, such as ½ inch.
3. Dough Dividers: If you’ve divided your dough into sections, using a bench scraper can help ensure that each piece is roughly the same size. This not only aids in even baking but also provides a consistent appearance.
Creative Shaping Options: Twisting and Forming for Visual Appeal
While traditional breadsticks are straight, adding a twist or other shapes can enhance their visual appeal. Here are some creative shaping options:
1. Twisted Breadsticks: After rolling out the dough, cut it into strips. Take a strip and gently twist it several times before placing it on the baking sheet. This not only looks appealing but also allows for more surface area to be coated in cheese and flavors.
2. Braided Breadsticks: Similar to twisting, you can create a braid with three strips of dough. This method adds an elegant touch and can be a conversation starter at gatherings.
3. Curled or Knotted Shapes: Forming the dough into knots or curls can add a fun texture. Simply take a strip, loop it around itself, and tuck the ends underneath.
Cheese Application: How to Evenly Distribute Mozzarella and Parmesan
Cheese is the star of the show in these breadsticks, and even distribution is key for maximum flavor. Here’s how to apply your cheese evenly:
1. Pre-Shredded vs. Fresh Cheese: While pre-shredded cheese is convenient, fresh mozzarella and Parmesan will melt better and provide superior flavor. If using fresh cheese, shred it just before using to maintain its texture.
2. Layering Technique: After rolling out your dough, sprinkle a thin layer of mozzarella, followed by a light dusting of Parmesan. Use your hands to gently press the cheese into the dough to help it adhere.
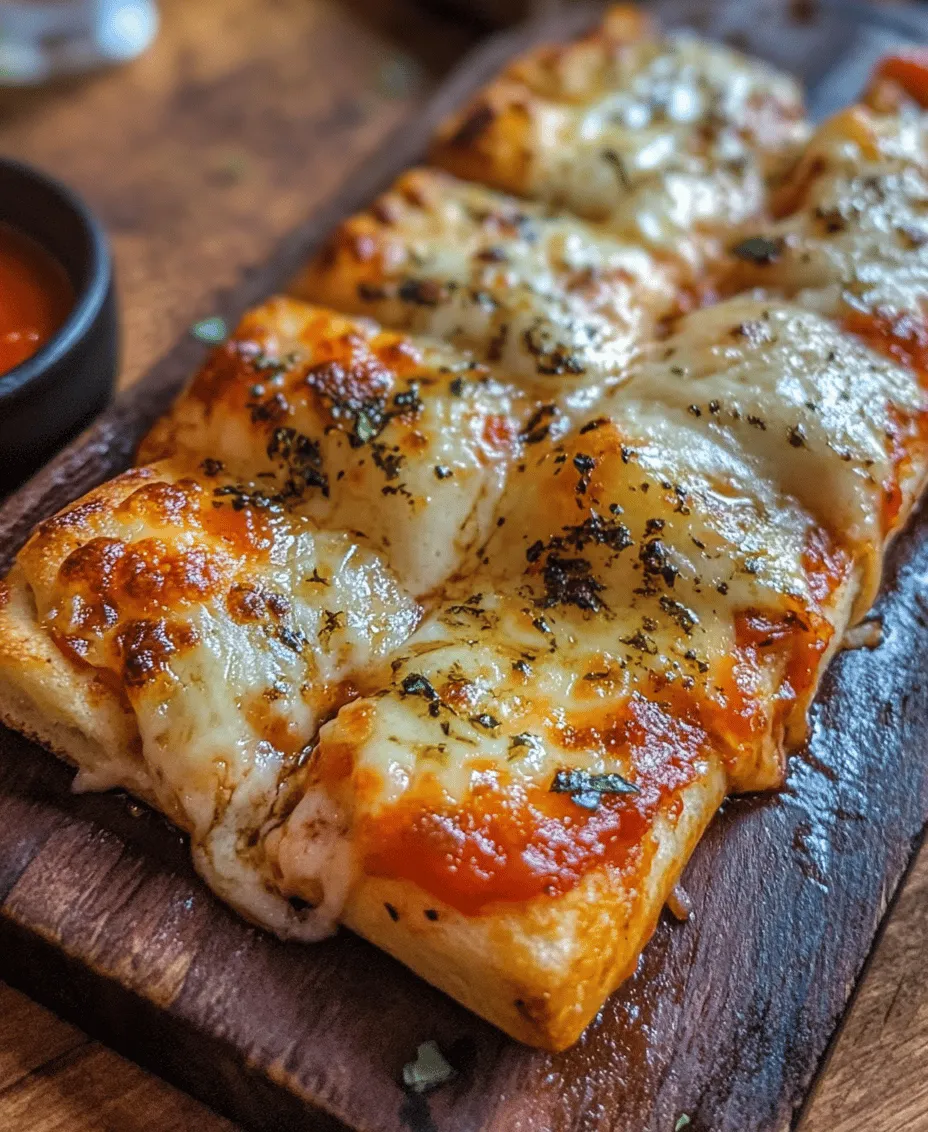
3. Final Topping: After shaping your breadsticks, give them a final sprinkle of cheese before baking. This ensures a gooey, cheesy exterior that will delight your taste buds.
The Baking Process
Importance of the Second Rise: How It Impacts Texture and Final Appearance
The second rise is a crucial step in the breadstick-making process. After shaping, allow the breadsticks to rise again for about 30 minutes. This step is essential for several reasons:
- Texture: The second rise allows the dough to relax, resulting in a lighter, airier texture. Skipping this step can lead to dense breadsticks.
- Volume: A proper rise will help the dough to expand, leading to fluffy breadsticks that are perfect for dipping.
- Flavor Development: The yeast continues to work during the second rise, enhancing the flavor profile of your breadsticks.
Olive Oil Brushing: Benefits for Flavor and Crust Development
Brushing your breadsticks with olive oil before baking serves multiple purposes:
1. Flavor: Olive oil adds a rich flavor that complements the cheesy goodness of the breadsticks. It can also be infused with herbs for an extra kick.
2. Crust Development: The oil helps achieve a golden-brown crust, creating a delightful texture contrast with the soft interior.
3. Preventing Sticking: A light brush of olive oil will help prevent the breadsticks from sticking to the baking sheet, ensuring they come off easily after baking.
Baking Time and Temperature: Key Indicators for Doneness and Techniques for Checking
The optimal baking temperature for Cheesy Italian Breadsticks is typically 375°F (190°C). Here are key indicators to check for doneness:
1. Color: Look for a golden-brown color on top. The cheese should be bubbling and slightly browned.
2. Texture: Gently tap the bottom of a breadstick; it should sound hollow when fully baked. If it feels too soft or doughy, give them a few more minutes.
3. Internal Temperature: If you have a kitchen thermometer, the internal temperature should reach around 190°F (88°C) for optimal texture.
Serving Suggestions
Best Ways to Serve Cheesy Italian Breadsticks
Cheesy Italian Breadsticks are incredibly versatile and can be served in various ways:
1. Appetizer: Present them warm on a platter at the start of a meal. Their cheesy aroma will entice guests immediately.
2. Side Dish: Pair them with Italian dishes like pasta or salad for a hearty side.
3. Snacks: They make for a great snack at any time of the day, perfect for sharing with family or friends.
Pairing Options: Marinara Sauce and Other Dipping Sauces
Serving your breadsticks with a dipping sauce elevates the experience. Here are some popular options:
1. Marinara Sauce: A classic pairing, marinara sauce adds a tangy flavor that complements the cheesy richness.
2. Garlic Butter: Melted garlic butter drizzled over the breadsticks provides a deliciously indulgent option.
3. Ranch Dressing: For a twist, serve with ranch dressing for a creamy, savory dip.
Presentation Tips: Plating Ideas for Parties or Gatherings
Presentation matters, especially for gatherings. Here are some tips to make your Cheesy Italian Breadsticks stand out:
1. Wooden Board: Serve on a rustic wooden cutting board for a charming, casual touch.
2. Garnish: Sprinkle fresh herbs like parsley or basil on top for a pop of color and flavor.
3. Dipping Station: Create a small dipping station with various sauces in small bowls, inviting guests to mix and match.
Nutritional Analysis
Overview of the Nutritional Benefits of Homemade Breadsticks
Homemade Cheesy Italian Breadsticks offer several nutritional benefits:
- Quality Ingredients: You control the ingredients, ensuring freshness and avoiding preservatives often found in store-bought options.
- Whole Grains: Consider using whole wheat flour for added fiber and nutrients.
- Reduced Sodium: Making them at home allows you to manage the salt content, making it a healthier option.
Discussing Healthier Choices with Homemade vs. Store-Bought Options
Choosing homemade over store-bought provides numerous advantages:
1. Freshness: Homemade breadsticks are fresher, leading to superior taste and texture.
2. Customization: You can adjust the recipe according to dietary needs, such as using gluten-free flour or reducing cheese.
3. Cost-Effective: Making a larger batch at home can be more economical than purchasing smaller quantities from a store.
Balancing Indulgence with Nutrition: Portion Sizes and Sharing Ideas
While these breadsticks are a treat, indulging in moderation is key. Here are some tips for balancing enjoyment with nutrition:
1. Portion Control: Offer smaller breadsticks or cut them into bite-sized pieces for sharing.
2. Balance with Sides: Pair them with a light salad or vegetable dish to create a balanced meal.
3. Sharing is Caring: Encourage sharing among friends and family to keep portion sizes in check while enjoying the delicious flavors.
Storing and Reheating
Best Practices for Storing Leftover Breadsticks
To ensure your leftover Cheesy Italian Breadsticks maintain their flavor and texture:
1. Cooling: Allow the breadsticks to cool completely before storing to prevent moisture buildup.
2. Airtight Container: Store in an airtight container at room temperature for up to 2 days. For longer storage, consider freezing.
Tips for Reheating to Maintain Texture and Flavor
When reheating your breadsticks, you want to ensure they retain their deliciousness:
1. Oven Method: Preheat your oven to 350°F (175°C) and place the breadsticks on a baking sheet. Heat for about 5-10 minutes, or until warmed through.
2. Microwave Method: For a quicker option, microwave on a plate for 20-30 seconds, but this may result in a softer texture.
Conclusion
Making Cheesy Italian Breadsticks is not just about satisfying a craving; it’s about enjoying the entire process of cooking and sharing. Their cheesy goodness, combined with various serving and pairing options, makes them perfect for family gatherings, parties, or a cozy night in. Embrace the joy of homemade snacks and the satisfaction that comes from creating something delicious from scratch. Whether you choose to serve them alongside your favorite dipping sauce or enjoy them alone, these breadsticks are bound to become a staple in your home. So gather your ingredients, roll up your sleeves, and dive into the delightful world of Cheesy Italian Breadsticks!