
Get ready for a sweet treat that requires no baking! These No-Bake Peanut Butter Bars are quick, easy, and packed with flavor. You only need a few simple ingredients like creamy peanut butter, oats, and a hint of chocolate. Perfect for busy days, kids’ snacks, or a healthy dessert, these bars are sure to please everyone. Let’s dive into the simple steps to create this delicious snack today!
Ingredients
To make these tasty no-bake peanut butter bars, you need simple ingredients. Here’s what you’ll need:
- 1 cup creamy peanut butter
- ½ cup honey or maple syrup
- 1 cup rolled oats
- ½ cup almond flour
- ¼ cup dark chocolate chips
- 1 teaspoon vanilla extract
- Pinch of salt
- Optional: ¼ cup chopped nuts
Each ingredient plays an important role. The peanut butter gives a rich flavor and creamy texture. Honey or maple syrup adds sweetness and binds the mix. Rolled oats provide a hearty base. Almond flour adds a touch of nuttiness, while dark chocolate chips bring a delightful bite. A little vanilla extract enhances the overall taste, and salt balances the sweetness.
Feel free to customize this recipe. You can use different sweeteners or add nuts for crunch. Each twist can make your bars unique.These bars are not just easy to make, they are also a healthy treat!
Step-by-Step Instructions
Preparation Overview
1. Mix peanut butter and sweetener: In a large bowl, combine 1 cup of creamy peanut butter and ½ cup of honey or maple syrup. Stir it well until it becomes smooth. This mix gives the bars their rich flavor.
2. Combine dry ingredients: Next, add 1 cup of rolled oats, ½ cup of almond flour, 1 teaspoon of vanilla extract, and a pinch of salt to the bowl. Mix until you form a thick dough. This step ensures all flavors blend well.
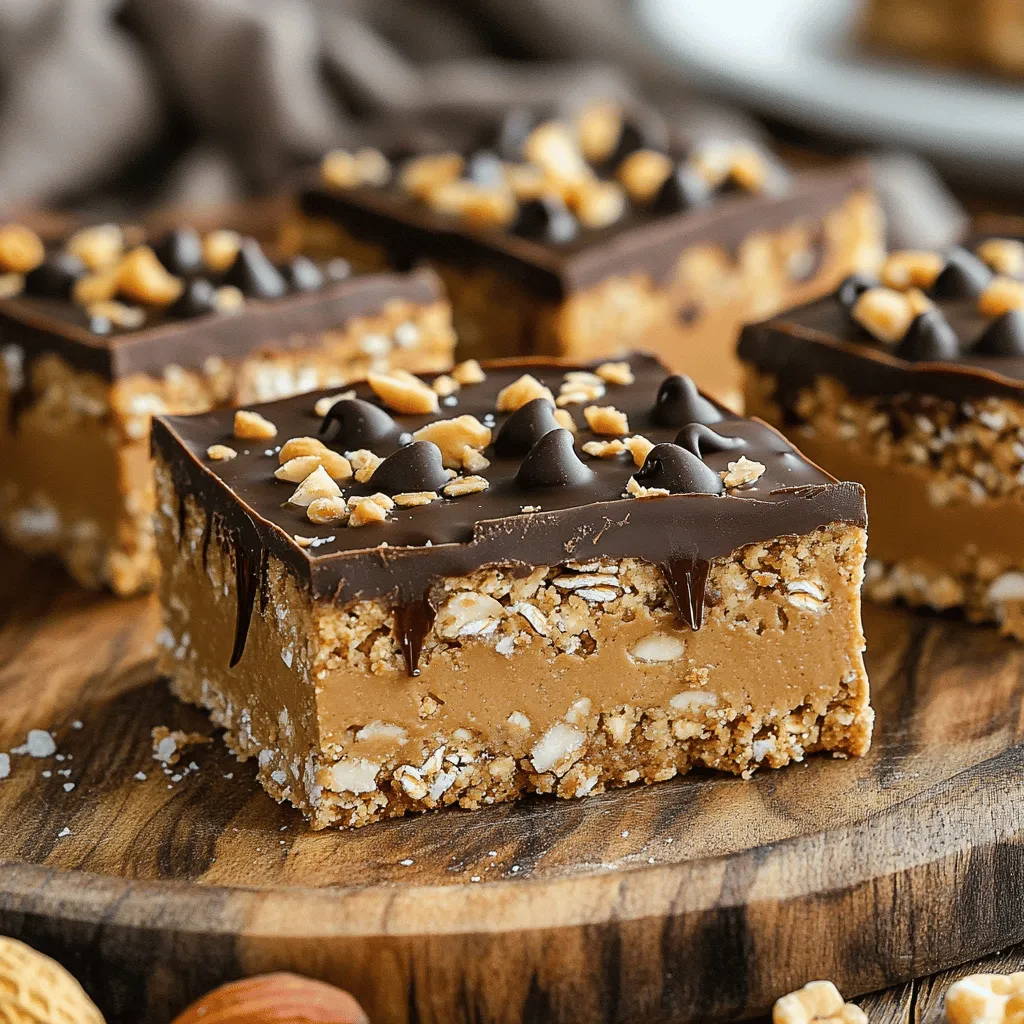
3. Fold in chocolate chips and nuts: Now, gently fold in ¼ cup of dark chocolate chips and any optional chopped nuts you like. This adds extra texture and a nice crunch to your bars.
Line the Pan
- Using parchment paper: Grab an 8×8 inch square baking pan. Line it with parchment paper. Leave some overhang on the sides. This helps when you take the bars out later.
- Ensuring easy removal: The parchment paper keeps the bars from sticking. It makes it simple to lift them out once they’re set.
Refrigeration Process
- How long to chill: Place the pan in the fridge. Chill the bars for at least 1 to 2 hours. This allows them to firm up.
- Importance of firm texture: Chilling is key for a good bite. It gives the bars their shape and makes them easier to cut into squares. Enjoy these tasty treats straight from the fridge!
Tips & Tricks
Ensuring Perfect Texture
To get the right thickness, make sure you press the mixture firmly into the pan. This helps the bars hold together well. If you want a creamier texture, try using smooth peanut butter. You can also mix in a little coconut oil or yogurt for added creaminess.
Presentation Ideas
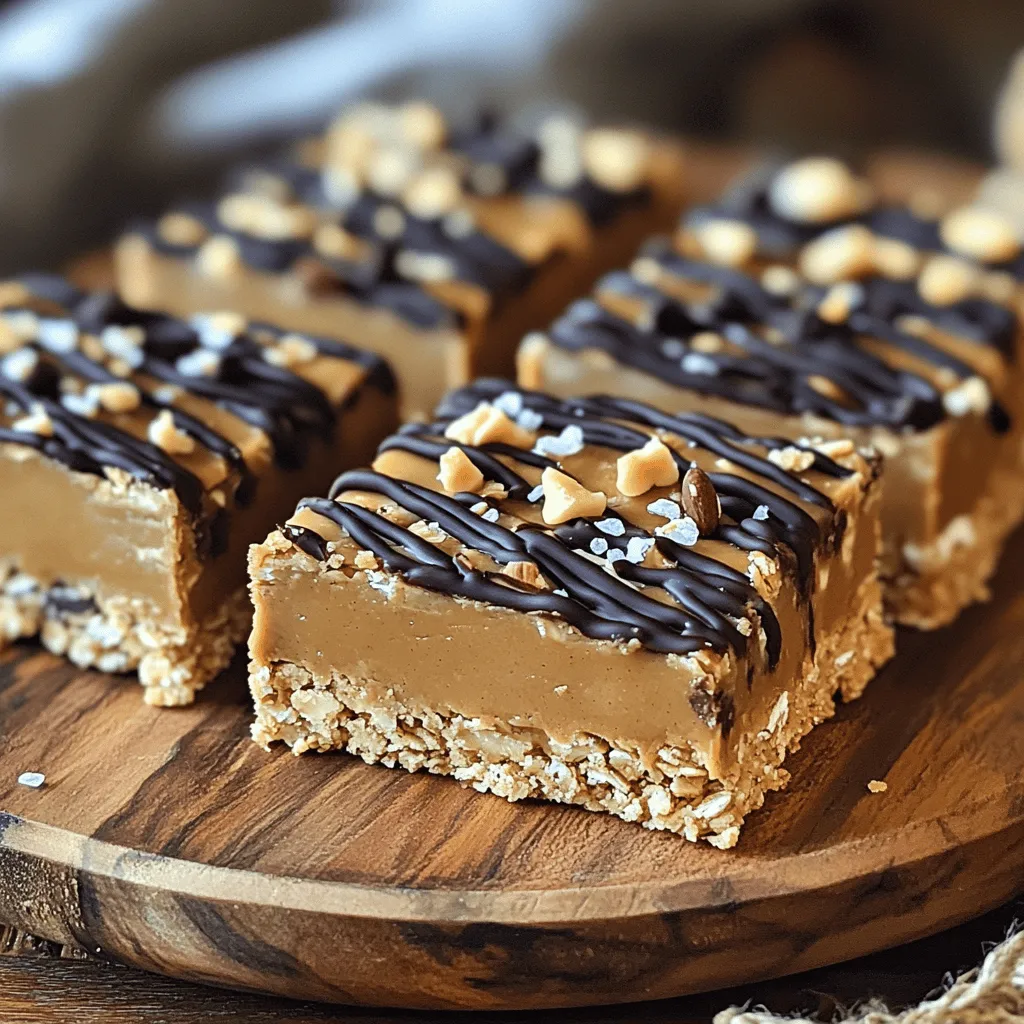
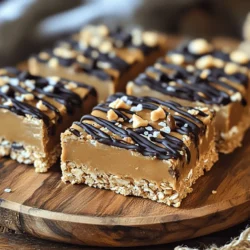
For serving, place the bars on a wooden platter. This gives them a rustic look. Drizzle melted chocolate on top for a fancy touch. You can also sprinkle sea salt for a nice contrast to the sweet flavors.
Bonus Customizations
Feel free to add in new flavors! You can mix in cinnamon or even a scoop of protein powder. If you want to make them gluten-free, use gluten-free oats. For a nut-free option, swap peanut butter for sun butter or soy nut butter. These swaps keep the bars tasty while fitting different diets.
Variations
Nut-Free Options
If you have nut allergies, don’t worry! You can still enjoy these treats. Sunflower seed butter is a great swap for peanut butter. It has a similar creamy texture and a nice taste. You can also use soy nut butter. Both options keep the bars rich and tasty.
Flavor Variations
Craving something extra? You can make chocolate-peanut butter bars! Just add cocoa powder to the peanut butter mix. This gives a rich, chocolatey flavor. You can also fold in fruits like raisins or diced apples. These add sweetness and a fun chewiness to the bars. Other mix-ins could include seeds or coconut flakes. Get creative and find your favorite combo!
Dietary Adaptations
Want a vegan version? Swap honey for maple syrup. Both work well and keep the bars sweet. For a sugar-free option, use a sugar substitute like stevia or erythritol. Just adjust the amount to match your taste. These changes make the bars fit different diets. Enjoy a treat that meets your needs!
Storage Info
Best Storage Practices
To keep your no-bake peanut butter bars fresh, use an airtight container. A glass or plastic container works well. Make sure the lid seals tight. This helps keep moisture out and flavor in. Place a piece of parchment paper between layers if you stack them. This prevents sticking.
Freezing Instructions
You can freeze these bars for longer storage. Wrap each bar in plastic wrap tightly. Then, place them in a freezer bag or container. This protects them from freezer burn. To thaw, move them to the fridge for a few hours. You can also leave them at room temperature for about 30 minutes. They taste best if eaten within three months.
Shelf Life
You can store these bars in the fridge for up to one week. They stay fresh and tasty when stored properly. Look for signs of spoilage. If you see any mold or off smells, it’s time to toss them. Always trust your senses to decide if they are still good.
FAQs
What can I substitute for almond flour?
You can use several options in place of almond flour. Oat flour is a great choice. It has a mild flavor and works well in these bars. You can also try sunflower seed flour. This is nut-free and adds a nice texture. If you want a gluten-free option, use coconut flour. Just remember to adjust the amount. Coconut flour absorbs more moisture, so use less than almond flour.
Can I use crunchy peanut butter?
Yes, you can! Using crunchy peanut butter gives the bars a fun texture. It adds little bits of peanuts that you can taste. This change will make your bars feel more rustic. The flavor stays the same, sweet and nutty. Just be sure to mix it well. This way, the crunch blends evenly with the other ingredients.
How long do no-bake peanut butter bars last?
These bars last about one week in the fridge. Store them in an airtight container to keep them fresh. If you want to enjoy them longer, you can freeze them. They stay tasty for up to three months in the freezer. Just remember to wrap them well. This helps avoid freezer burn.
Is it possible to add protein powder?
Yes, you can add protein powder! This boosts the nutrition of your bars. Mix in a scoop when you combine the dry ingredients. Be aware that it may change the texture. You might need to add a little more peanut butter or honey. This keeps the bars moist and delicious.
Can I make the bars nut-free?
Absolutely! To make these bars nut-free, use sunflower seed butter instead of peanut butter. This swap keeps the flavor rich and creamy. You can also use soy nut butter or pumpkin seed butter. These options work well for nut allergies. Just make sure to check for any added sugars or oils.
These no-bake peanut butter bars are simple to make and delicious to eat. We covered all the steps, from mixing ingredients to chilling them for the perfect texture. You can also customize them to fit your taste. Remember to store them well for freshness. Don’t hesitate to get creative with flavors and textures. Enjoy your bar-making adventure!
Leave a Reply