Craving a sweet treat that’s easy to whip up? This Easy No-Bake Tiramisu is your answer! With quick steps and simple ingredients, you can enjoy a delightful dessert without any baking. Whether you’re a busy parent or a first-time cook, I’ll guide you through making this classic Italian dessert in no time. Let’s dive into the rich layers of flavors and creamy textures together!
Ingredients
List of Required Ingredients
- 2 cups mascarpone cheese
- 1 cup heavy cream
- 1/2 cup powdered sugar
- 1 teaspoon vanilla extract
- 1 cup strong brewed coffee, cooled
- 12-16 ladyfinger cookies
- 2 tablespoons cocoa powder (for dusting)
- Dark chocolate shavings (for garnish)
Substitutions and Alterations
You can swap mascarpone cheese with cream cheese for a tangy taste. Heavy cream can also be replaced with coconut cream for a dairy-free option. If you want less sugar, try using honey or agave nectar instead of powdered sugar. For a caffeine-free version, use herbal tea instead of coffee.
Kitchen Tools Needed
To make this easy dessert, gather these tools:
- Mixing bowls for combining ingredients
- A hand mixer or whisk for mixing
- A rectangular dish to layer your tiramisu
- Measuring cups and spoons for accuracy
These ingredients and tools will help you create a delightful no-bake tiramisu that everyone will love. Check out the Full Recipe for the complete guide!
Step-by-Step Instructions
Preparing the Mascarpone Mixture
Start by mixing 2 cups of mascarpone cheese with 1/2 cup of powdered sugar and 1 teaspoon of vanilla extract. Use a hand mixer or whisk to blend until smooth and creamy. This step is key for a rich flavor. You want a thick but spreadable mixture. If it feels too thick, add a splash of cream to loosen it slightly.
Whipping the Cream
Next, whip 1 cup of heavy cream in a separate bowl. Use a hand mixer to achieve stiff peaks. This means the cream stands tall when you lift the whisk. Be careful not to over-whip, as it can become grainy. Once the cream is ready, gently fold it into the mascarpone mixture. Use a spatula and move in a circular motion. This keeps the mixture light and fluffy.
Assembling the Tiramisu
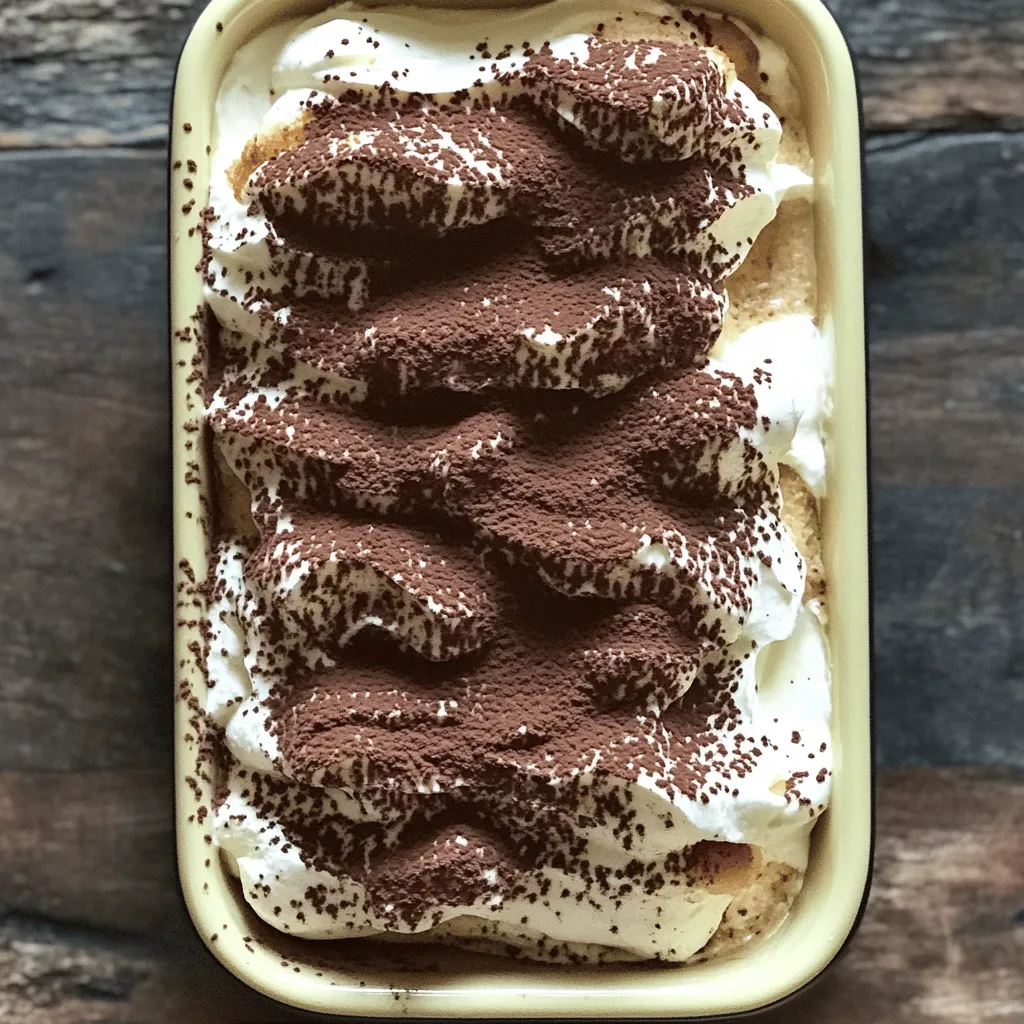
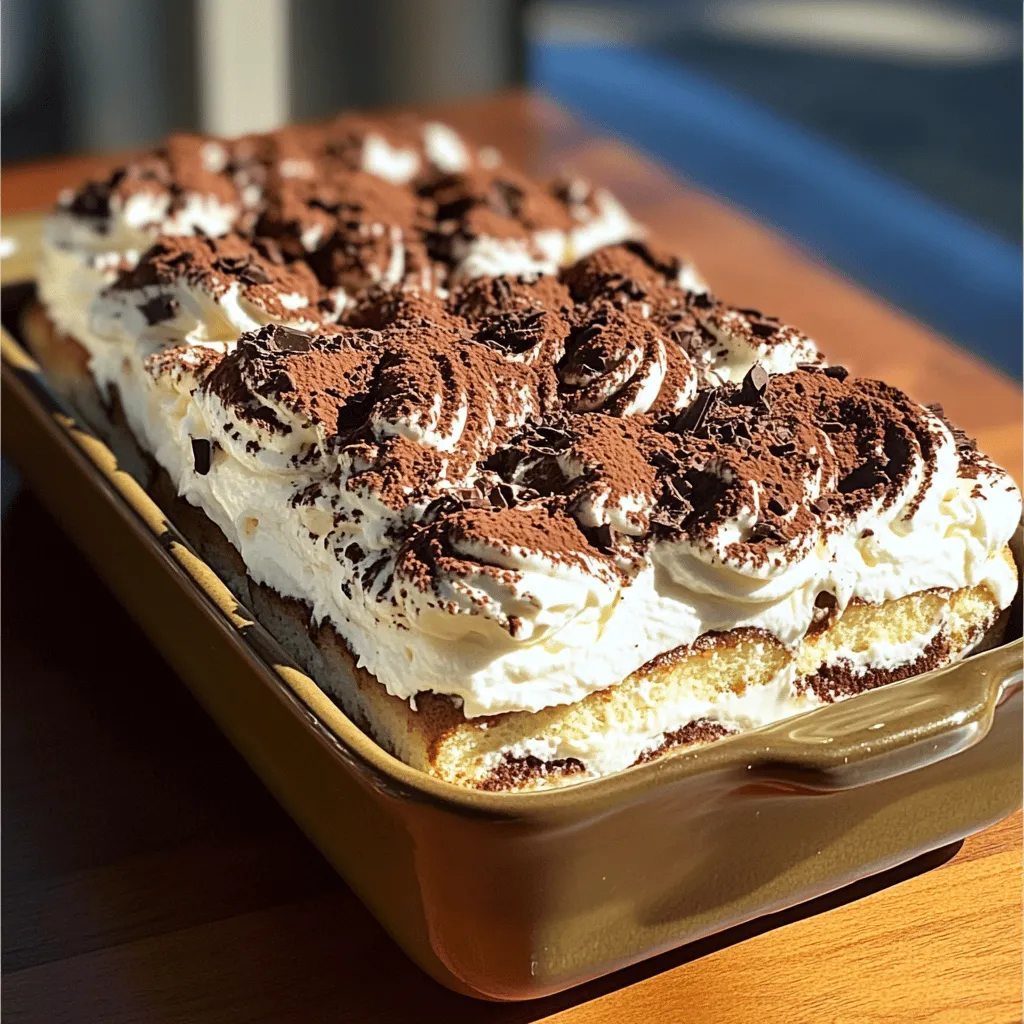
Now it’s time to assemble the tiramisu. Quickly dip 12-16 ladyfinger cookies into 1 cup of cooled, strong brewed coffee. Make sure they soak just enough, so they don’t fall apart. Arrange them in a single layer in a rectangular dish. Spread half of the mascarpone mixture over the ladyfingers. Smooth it out evenly. Repeat with another layer of dipped ladyfingers and then top with the rest of the mascarpone mixture. Cover the dish with plastic wrap and refrigerate for at least 4 hours. For best flavor, chill overnight.
Tips & Tricks
Making the Perfect Tiramisu
To make the best tiramisu, manage your time well. Start by preparing your mascarpone mixture. This step takes about 10 minutes. While it sets, you can brew your coffee. Make sure it cools before soaking the ladyfingers. Taste the mascarpone mix and adjust the sweetness to your liking. You want it creamy but not too sweet.
Common Mistakes to Avoid
One big mistake is over-soaking the ladyfingers. Just a quick dip in coffee is enough. If you soak too long, they will turn soggy. Another issue is not chilling the tiramisu long enough. It needs at least 4 hours to set. For the best results, let it chill overnight. This helps the flavors blend perfectly.
Presentation Ideas
For a stunning finish, dust the top with cocoa powder. You can also add dark chocolate shavings for a touch of elegance. Serve each piece on a plate with a sprig of mint or a few berries. This adds color and looks great! You can find more ideas in the Full Recipe for extra tips on making your dessert shine.
Variations
Flavored Tiramisu Options
You can easily change up your tiramisu by adding fun flavors. Here are a couple of ideas:
- Liqueurs: Try adding a splash of Kahlúa or Amaretto. This adds a rich taste. Just mix it in with your coffee before dipping the ladyfingers.
- Fruit flavors: You can also mix in fruit. Raspberry or chocolate can give your dessert a fresh twist. Just blend the fruit into the mascarpone for a fruity cream.
Dietary Adjustments
If you have special dietary needs, you can still enjoy tiramisu:
- Gluten-free options: Use gluten-free ladyfingers. They work just as well. Check the label to ensure they fit your needs.
- Vegan alternatives: Substitute mascarpone with vegan cream cheese and use coconut cream. This keeps the creamy texture while being plant-based.
Regional Twists
Many cultures have their own takes on tiramisu. Here are some interesting ones:
- Traditional Italian variations: In Italy, people sometimes use different types of coffee or add a layer of chocolate. This brings new flavors and textures.
- Unique international takes: In some places, they mix in local ingredients like matcha in Japan or chai spices in India. These twists create exciting new versions of this classic dessert.
For the complete recipe, check out the [Full Recipe].
Storage Info
How to Store Tiramisu
Store your tiramisu in the fridge. Use an airtight container to keep it fresh. Make sure to cover it well with plastic wrap. This helps keep the moisture in and prevents it from absorbing other smells. Tiramisu can last for 3 to 4 days in the fridge. If you want to keep it longer, you can freeze it. To freeze, cut it into portions and wrap each piece in plastic wrap. Place the wrapped pieces in a freezer-safe bag. Tiramisu can stay frozen for up to 3 months.
Shelf Life
Tiramisu can last in the fridge for about 3 to 4 days. Always check for signs of spoilage. If it smells sour or looks off, it may not be safe to eat. A change in texture can also indicate spoilage. If you see liquid pooling or the dessert looks overly wet, throw it away.
Re-serving Recommendations
When serving leftovers, use a clean spoon to avoid cross-contamination. This keeps your tiramisu safe and fresh. If you want to enjoy it cold, serve it straight from the fridge. If you feel like warming it up, do so gently in the microwave for just a few seconds. Be careful not to overheat it, as the cream can separate. For the best taste, dust cocoa powder on top right before serving. For a twist, add some extra chocolate shavings too.
For a full recipe, check out [Full Recipe].
FAQs
How long does No-Bake Tiramisu need to set?
No-Bake Tiramisu needs at least 4 hours to chill. I recommend letting it set overnight. This helps the flavors mix well. The longer it sits, the better it tastes.
Can I make Tiramisu a day in advance?
Absolutely! Making Tiramisu a day ahead is smart. It gives the dessert time to develop rich flavors. Plus, it saves you time on the day you serve it. You can focus on other dishes or enjoy your guests.
Why is my Tiramisu runny?
A runny Tiramisu can happen for a few reasons. You might have used too much coffee or not whipped the cream enough. Make sure to fold the cream gently into the mascarpone. If it still turns out runny, try using less coffee next time.
Can I replace mascarpone cheese in Tiramisu?
Yes, you can replace mascarpone cheese! Cream cheese works well, but it changes the taste. You can also use a mix of cream cheese and sour cream for a similar texture. Just keep in mind that it might taste different.
Is it safe to eat Tiramisu with raw eggs?
Traditional recipes use raw eggs, which can be risky. However, my no-bake version skips them for safety. If you want to use raw eggs, make sure they are fresh and pasteurized. But I always recommend the no-egg method for peace of mind. For the full recipe, check out the No-Bake Coffee Dream Tiramisu.
Making tiramisu is simple and fun. We covered the main ingredients, kitchen tools, and step-by-step instructions. Don’t forget to try the tips to avoid common mistakes. You can even customize your dessert with fun flavors and dietary changes. Remember to store your tiramisu properly to keep it fresh. Whether you serve it today or tomorrow, you’ll have a delightful treat ready. Enjoy your homemade tiramisu, and share it with friends and family. It’s a recipe worth repeating!
