Chef Taling

  • Dinner
  • Desserts
  • Appetizer
  • Drinks
  • Privacy Policy
  • Contact
  • About
menu icon
go to homepage
  • Dinner
  • Desserts
  • Appetizer
  • Drinks
  • Privacy Policy
  • Contact
  • About
Experience the bliss of Chocolate Covered Strawberry Cookies, where soft, chocolatey cookies meet juicy strawberries and rich chocolate. In this delightful treat, learn essential ingredients, step-by-step baking instructions, and fun variations to impress everyone at home. Get creative with toppings and decorating ideas that make these cookies a showstopper. Click through to explore the complete recipe and start your baking adventure today!

search icon
Homepage link
  • Dinner
  • Desserts
  • Appetizer
  • Drinks
  • Privacy Policy
  • Contact
  • About
Experience the bliss of Chocolate Covered Strawberry Cookies, where soft, chocolatey cookies meet juicy strawberries and rich chocolate. In this delightful treat, learn essential ingredients, step-by-step baking instructions, and fun variations to impress everyone at home. Get creative with toppings and decorating ideas that make these cookies a showstopper. Click through to explore the complete recipe and start your baking adventure today!

×

Chocolate Covered Strawberry Cookies Delightful Treat

Published: Feb 22, 2025 · by Taling · Leave a Comment

WANT TO SAVE THIS RECIPE?

4 shares
Experience the bliss of Chocolate Covered Strawberry Cookies, where soft, chocolatey cookies meet juicy strawberries and rich chocolate. In this delightful treat, learn essential ingredients, step-by-step baking instructions, and fun variations to impress everyone at home. Get creative with toppings and decorating ideas that make these cookies a showstopper. Click through to explore the complete recipe and start your baking adventure today!

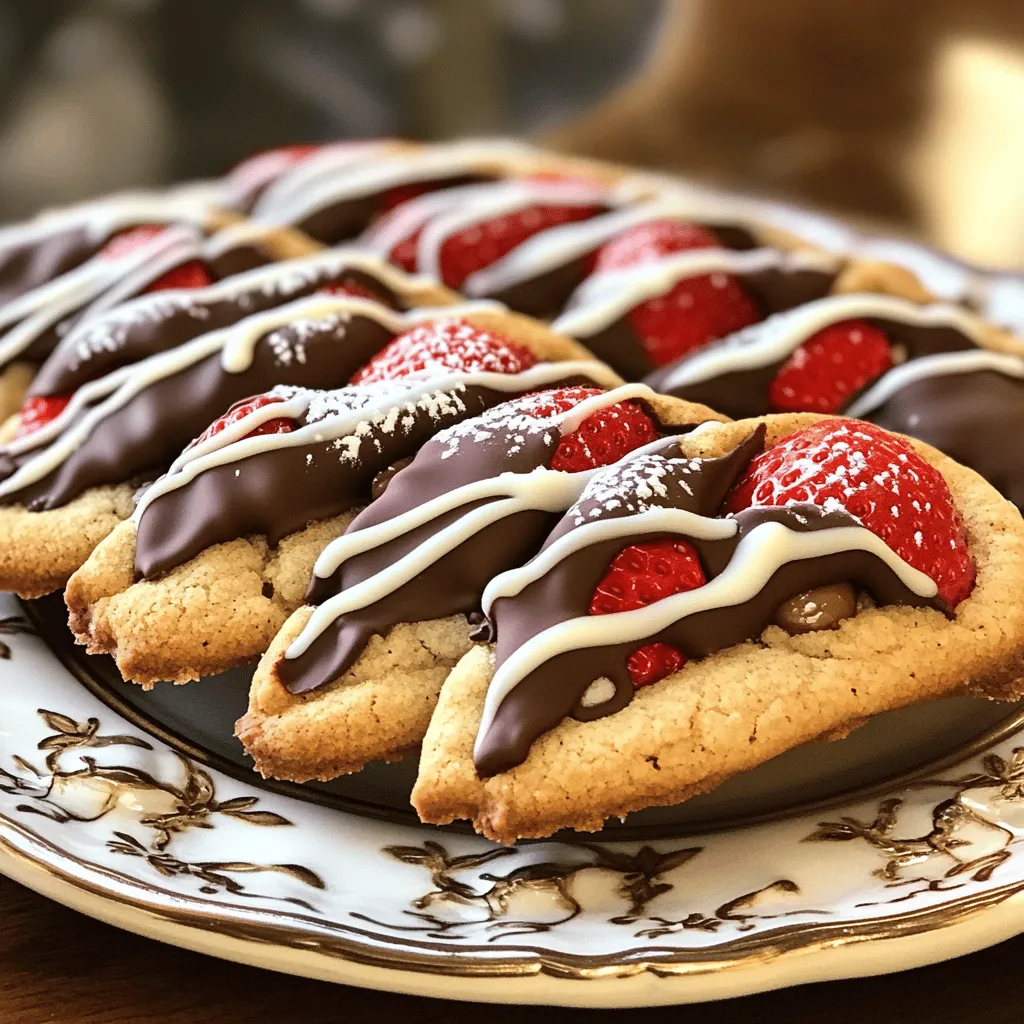
Indulging in Chocolate Covered Strawberry Cookies is like a sweet dream come true. Imagine soft, chocolatey cookies topped with juicy strawberries and rich chocolate. This delightful treat combines the best of both worlds: fruit and dessert! In this article, I’ll guide you through the key ingredients, baking steps, fun variations, and clever decorating ideas. Get ready to impress friends and family with this sweet sensation!

For a great chocolate covered strawberry cookies recipe, you need key ingredients. First, fresh strawberries for baking are vital. They add sweetness and moisture. I always use ripe, juicy strawberries. Their flavor shines through in every bite.

Table of Contents

Toggle

  • What are the Key Ingredients for Chocolate Covered Strawberry Cookies?
  • How Do You Make Chocolate Covered Strawberry Cookies?
  • What Variations Can You Try with This Chocolate Strawberry Cookie Recipe?
  • How Can You Decorate Chocolate Covered Strawberry Cookies?
  • Where Can You Find Ready-Made Chocolate Covered Strawberry Cookies?
  • What Tips Do Experts Recommend for Baking Chocolate Covered Strawberry Cookies?

What are the Key Ingredients for Chocolate Covered Strawberry Cookies?

For a great chocolate covered strawberry cookies recipe, you need key ingredients. First, fresh strawberries for baking are vital. They add sweetness and moisture. I always use ripe, juicy strawberries. Their flavor shines through in every bite.

Next, we have chocolate cookie dough. The dough should be soft yet sturdy. This helps hold the strawberries and chocolate chips well. My favorite choice is semi-sweet chocolate chips. They balance the cookie’s sweetness perfectly.

Now, let’s talk about flour. Different flour types can change the texture. All-purpose flour works best for this recipe. It gives a nice chewy bite. Other flours may make your cookies too dry or dense. Stick with all-purpose for the best outcome.

So, to sum it up, fresh strawberries, chocolate chips, and all-purpose flour are key. Each ingredient plays a crucial role in making these cookies delightful.

How Do You Make Chocolate Covered Strawberry Cookies?

Making chocolate covered strawberry cookies is a fun and rewarding process. First, gather your ingredients. You need unsalted butter, sugar, brown sugar, eggs, vanilla extract, flour, baking soda, salt, fresh strawberries, semi-sweet chocolate chips, and white chocolate chips for drizzling.

What Are the Step-by-Step Instructions for Baking?

1. Preheat your oven to 350°F (175°C). Line two baking sheets with parchment paper.

2. In a large bowl, cream together the softened butter, sugar, and brown sugar until smooth.

3. Add the eggs one at a time, mixing well after each addition, then add the vanilla.

4. In another bowl, whisk together the flour, baking soda, and salt.

5. Gradually mix the dry ingredients into the wet mixture until just combined.

6. Gently fold in the diced strawberries and semi-sweet chocolate chips.

7. Drop rounded tablespoons of dough onto the prepared sheets, spacing them about 2 inches apart.

8. Bake for 10-12 minutes. The edges should be golden, and the centers set.

9. Cool the cookies on the sheets for 5 minutes, then transfer them to wire racks.

10. Melt the white chocolate chips in a microwave-safe bowl, stirring until smooth.

11. Drizzle the melted white chocolate over the cooled cookies.

12. Allow the chocolate to set before serving.

Are There Tips for Mixing the Dough Properly?

Mix the dough gently. Over-mixing can make cookies tough. When adding the flour, mix only until combined. This keeps the cookies soft. It is also key to fold in the strawberries and chocolate chips carefully. This helps keep the fruit intact and ensures even mixing.

How Can You Ensure the Perfect Bake Time?

Keep an eye on your cookies while baking. The edges should turn golden. If you bake them too long, they can become hard. Start checking at 10 minutes. If the centers look soft but set, it is time to take them out. Remember, they will continue to cook a bit after you remove them from the oven. Enjoy this easy chocolate strawberry cookies recipe for a delightful treat!

For a great chocolate covered strawberry cookies recipe, you need key ingredients. First, fresh strawberries for baking are vital. They add sweetness and moisture. I always use ripe, juicy strawberries. Their flavor shines through in every bite.

What Variations Can You Try with This Chocolate Strawberry Cookie Recipe?

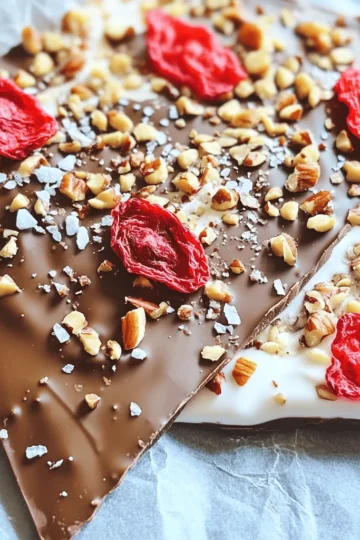
You can have fun with chocolate cookie variations. Try adding nuts to your dough for crunch. Chopped walnuts or almonds pair well with chocolate and strawberry. You can also add dried fruits for a chewy texture. Raisins, cranberries, or even cherries will work great.

Another idea is to customize the chocolate coating. Use dark chocolate or milk chocolate for different flavors. You can also mix in flavors like mint or orange for a twist. Just melt the chocolate and dip your cookies. For added flair, sprinkle some sea salt on top.

If you want gluten-free or vegan options, you have choices. Use gluten-free flour blends to make the cookies. For vegan cookies, replace butter with coconut oil. Use flaxseed meal mixed with water as an egg substitute. This keeps the cookie moist and tasty.

These ideas help create unique and festive cookie recipes. You can make each batch special and suited to your taste. Try different combinations and enjoy the process!

How Can You Decorate Chocolate Covered Strawberry Cookies?

Decorating chocolate covered strawberry cookies can be a fun task. Start with the chocolate drizzle. You can use semi-sweet or white chocolate. To drizzle, melt the chocolate until smooth. Use a fork or piping bag for control. Hold it high for a thin line, or lower for thicker strands. This technique adds flair to your cookies.

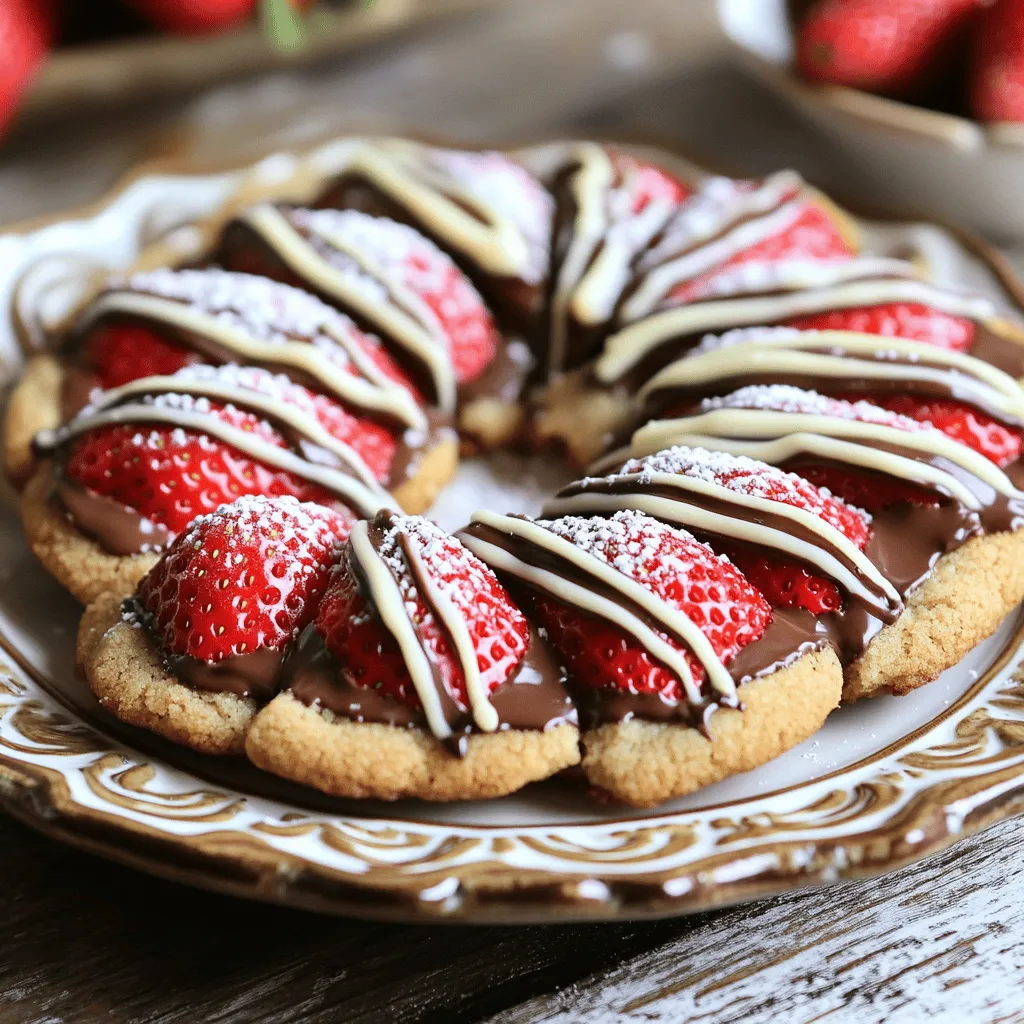
Next, think about toppings. You can add sprinkles, crushed nuts, or coconut flakes. These toppings create a fun look and add texture. Fresh strawberries can also shine as a topping. Place them on top of the cookies for a fresh touch.

When serving these cookies, presentation matters. Arrange them on a colorful plate. You can stack them or lay them out in a fan shape. A dusting of powdered sugar gives them a sweet finish. Adding fresh strawberries around the cookies makes the plate pop. These little details make your cookies a delight at any gathering.

For a great chocolate covered strawberry cookies recipe, you need key ingredients. First, fresh strawberries for baking are vital. They add sweetness and moisture. I always use ripe, juicy strawberries. Their flavor shines through in every bite.

Where Can You Find Ready-Made Chocolate Covered Strawberry Cookies?

You can find chocolate covered strawberry cookies at local bakeries. Many bakeries create special treats using fresh strawberries. Look for shops that focus on quality and taste. Ask them if they use ripe strawberries in their recipes. This can make a big difference in flavor.

Some well-known brands offer pre-made chocolate covered strawberry cookies. Check grocery stores in your area. Brands like Pepperidge Farm and Entenmann’s often have fun cookie options. They may have seasonal flavors too, especially in summer.

When you buy desserts, you want to check for quality. Look at the ingredients. Fresh, high-quality ingredients lead to better taste. Check if the cookies have real chocolate or artificial flavors. You can also read reviews online. This helps you find the best chocolate covered treats available.

If you prefer, you can make your own cookies at home.Making them fresh allows you to control the taste and quality. Plus, it’s fun to bake and share with friends!

What Tips Do Experts Recommend for Baking Chocolate Covered Strawberry Cookies?

Baking chocolate covered strawberry cookies can be fun and rewarding. Here are some expert tips to help you create perfect cookies each time.

What Common Mistakes Should You Avoid?

One big mistake is using cold butter. Cold butter makes it hard to mix. Always use softened butter for a smooth dough. Another mistake is overmixing the dough. Mix just until the flour disappears. Overmixing can make your cookies tough.

How Can You Ensure Consistency in Texture and Flavor?

To keep your cookies soft and chewy, measure your flour correctly. Use the spoon-and-level method. This means spooning flour into your cup and leveling it off with a knife. Also, use fresh strawberries. They add moisture and flavor. If the strawberries are too ripe, they can make your dough too wet.

What Baking Tools Do You Need for Best Results?

You need a few key tools. A stand mixer or a hand mixer helps to cream butter and sugar well. Use a spatula to fold in strawberries and chocolate chips. Parchment paper is a must for easy cookie release. Lastly, a cookie scoop helps you get even-sized cookies, ensuring a perfect bake.

Follow these tips, and you’ll bake delicious chocolate covered strawberry cookies.Enjoy your baking!

Making chocolate covered strawberry cookies is both fun and rewarding. Fresh strawberries enhance flavor, while good chocolate coats them perfectly. As you mix the dough, remember to choose the right flour. You learned steps for baking, plus tips for the best bake time. Get creative with toppings and variations to stand out. If you want ready-made options, local bakeries and brands offer great choices. Overall, these tips will help you bake delicious cookies every time. Enjoy your baking adventure!

For a great chocolate covered strawberry cookies recipe, you need key ingredients. First, fresh strawberries for baking are vital. They add sweetness and moisture. I always use ripe, juicy strawberries. Their flavor shines through in every bite.

Chocolate Covered Strawberry Cookies

Experience the bliss of Chocolate Covered Strawberry Cookies, where soft, chocolatey cookies meet juicy strawberries and rich chocolate. In this delightful treat, learn essential ingredients, step-by-step baking instructions, and fun variations to impress everyone at home. Get creative with toppings and decorating ideas that make these cookies a showstopper. Click through to explore the complete recipe and start your baking adventure today!
Print Recipe Pin Recipe

Ingredients
  

1 cup unsalted butter, softened

1 cup sugar

1 cup brown sugar, packed

2 large eggs

1 teaspoon vanilla extract

3 cups all-purpose flour

1 teaspoon baking soda

½ teaspoon salt

1 cup fresh strawberries, diced

1 cup semi-sweet chocolate chips

½ cup white chocolate chips (for drizzling)

Instructions
 

Preheat your oven to 350°F (175°C) and line two baking sheets with parchment paper.

    In a large mixing bowl, cream together the softened butter, sugar, and brown sugar until smooth and fluffy.

      Add the eggs one at a time, mixing well after each addition, followed by the vanilla extract.

        In a separate bowl, whisk together the flour, baking soda, and salt. Gradually add the dry ingredients to the wet mixture, mixing until just combined.

          Gently fold in the diced strawberries and semi-sweet chocolate chips with a spatula, ensuring they are evenly distributed throughout the dough.

            Drop rounded tablespoons of dough onto the prepared baking sheets, spacing them about 2 inches apart.

              Bake in the preheated oven for 10-12 minutes or until the edges are lightly golden and the centers appear set.

                Remove from the oven and allow the cookies to cool on the baking sheets for 5 minutes before transferring them to wire racks to cool completely.

                  While the cookies are cooling, melt the white chocolate chips in a microwave-safe bowl in 30-second intervals, stirring in between, until smooth.

                    Once the cookies have cooled completely, drizzle the melted white chocolate over the cookies using a fork or a piping bag for precision.

                      Allow the white chocolate to set before serving.

                        Prep Time: 15 minutes | Total Time: 35 minutes | Servings: 24 cookies

                          - Presentation Tips: Serve the cookies on a decorative plate, arranging them in a fan shape. Garnish with fresh strawberries for an extra touch, and dust with powdered sugar for a delightful finish.

                            Related Recipes

                            • To make Chocolate Greek Yogurt Bark, you need the following ingredients: - 2 cups plain Greek yogurt - 1/4 cup honey or maple syrup - 1/2 cup dark chocolate chips - 1/4 cup freeze-dried strawberries (or other fruits like raspberries or blueberries) - 2 tablespoons chopped nuts (e.g., almonds or pistachios) - Pinch of sea salt Each ingredient plays a key role in creating this tasty treat. The Greek yogurt serves as the base, giving it a creamy texture. Honey or maple syrup adds sweetness, while dark chocolate chips bring rich flavor. Freeze-dried strawberries add a fun crunch and fruity taste. Finally, nuts add a nice bite, and sea salt enhances all the flavors. You can swap ingredients based on what you have. Here are some ideas: - Use plain yogurt instead of Greek yogurt for a lighter option. - Maple syrup can replace honey if you prefer a vegan alternative. - Try white chocolate chips if you love a sweeter taste. - Any dried fruit works well. Try banana chips or dried apricots. - Choose different nuts, like walnuts or pecans, for variety. These swaps let you personalize your bark while keeping it delicious. This recipe is not just tasty; it also offers health benefits: - Greek yogurt is high in protein and good for digestion. - Honey provides natural sweetness and has antioxidants. - Dark chocolate is rich in antioxidants and may boost heart health. - Freeze-dried strawberries are low in calories and high in vitamins. - Nuts add healthy fats and protein, helping you feel full. Making this snack can fuel your body while satisfying your sweet tooth. First, grab a mixing bowl and add 2 cups of plain Greek yogurt. Next, pour in 1/4 cup of honey or maple syrup. Stir well until the mixture is smooth and creamy. This step adds sweetness and balances the tartness of the yogurt. Now, line a baking sheet with parchment paper. Pour the yogurt mixture onto the paper. Use a spatula to spread it evenly, making a rectangle about 1/4-inch thick. This thickness helps it freeze well, so be sure to cover the whole area. Take a microwave-safe bowl and add 1/2 cup of dark chocolate chips. Heat it in the microwave for 30 seconds, then stir. Repeat this until the chocolate is fully melted and smooth. Drizzle the melted chocolate over the yogurt using a spoon. Swirl it gently with the back of the spoon for a pretty marbled effect. To get that creamy, smooth texture in your bark, mix the Greek yogurt and honey well. You want no lumps. Use a spatula to spread the yogurt mixture evenly. Aim for a 1/4-inch thick layer. This thickness helps it freeze well and makes it easy to break into pieces later. For melting chocolate, use a microwave-safe bowl. Heat the chocolate chips in short bursts of 30 seconds. Stir after each interval to avoid burning. Look for a smooth, glossy finish. If it gets too thick, add a tiny bit of coconut oil to help it flow better. This keeps your drizzle looking nice and neat. Toppings make your bark fun and tasty. Freeze-dried strawberries add a sweet, fruity crunch. You can also use raspberries or blueberries for variety. Chopped nuts like almonds or pistachios add a nice bite and a bit of healthy fat. Finally, a pinch of sea salt boosts all the flavors. Don't skip this step; it makes a big difference! {{image_2}} You can change the fruit in this recipe easily. I love using freeze-dried strawberries, but you can try other fruits. Raspberries and blueberries work well too. These fruits add a nice tartness. You can also use bananas or peaches if you want fresh fruit. Just slice them thin. Remember, fresh fruit has more water, which can change the texture. Honey offers a rich sweetness, but maple syrup is a great choice too. If you want to cut sugar, try using stevia or monk fruit. These sweeteners can make the bark low-calorie. However, they might change the flavor slightly. Always taste as you mix to find what you like best. Nuts add crunch and flavor to your bark. Almonds and pistachios are my favorites. You can also use walnuts or pecans for a different taste. If you want some extra nutrition, try adding seeds. Chia seeds or sunflower seeds work well. They bring a nice texture and health benefits too. Just sprinkle them on top before freezing. To keep your chocolate Greek yogurt bark fresh, place it in an airtight container. Make sure to layer parchment paper between the pieces. This helps prevent sticking and keeps it easy to grab. Always seal the container tightly to avoid freezer burn. The best way to store this bark is in the freezer. Wrap the container in plastic wrap for extra protection. You can also cut the bark into pieces before freezing. This way, you can take out just what you want. It’s a great snack for any time! When stored correctly, chocolate Greek yogurt bark lasts about two months in the freezer. After that, the taste and texture may change. Always check for ice crystals or changes in smell before eating. If it looks or smells odd, it’s best to toss it. Enjoy your bark while it’s fresh for the best flavor! Greek yogurt bark is a fun and tasty snack. You mix Greek yogurt with sweeteners, then freeze it. It becomes a solid treat that you can break into pieces. I love adding chocolate and fruits for flavor. The result is a creamy, crunchy, and sweet snack. Yes, you can use flavored Greek yogurt! It adds extra taste to your bark. Just remember that flavored yogurts can change the sweetness level. You may need less honey or syrup. Experiment with different flavors like vanilla or berry to find your favorite. It takes about 2 to 3 hours to freeze Greek yogurt bark. Make sure it is firm before you break it into pieces. If you want to make it ahead of time, it can stay in the freezer longer. Just keep it in an airtight container to prevent freezer burn. You learned about making delicious Chocolate Greek Yogurt Bark. We discussed the key ingredients, step-by-step prep, and helpful tips to achieve the best texture. Protect your creation with proper storage practices. Enjoy exploring variations with fruits, nuts, and sweeteners. Remember, you can easily customize this treat. So, get creative and make it your own!
                              Chocolate Greek Yogurt Bark Indulgent Snack Treat
                            • - Dry ingredients: - 1 cup all-purpose flour - 1 teaspoon baking powder - 1/2 teaspoon baking soda - 1 teaspoon ground cinnamon - 1/2 teaspoon ground nutmeg - 1/4 teaspoon salt - Wet ingredients: - 1 cup pumpkin puree - 1/2 cup granulated sugar - 1/2 cup brown sugar, packed - 1/2 cup unsalted butter, softened - 2 large eggs - 1 teaspoon vanilla extract - 1 cup brewed coffee, cooled - Optional ingredients: - 1/2 cup chopped walnuts or pecans - For the Crumb Topping: - 1/2 cup all-purpose flour - 1/4 cup brown sugar, packed - 1/4 cup rolled oats - 1/4 cup cold unsalted butter, cubed - 1 teaspoon ground cinnamon This recipe blends warm spices and rich pumpkin. Each ingredient plays a key role. The all-purpose flour gives the cake its structure. Baking powder and soda help it rise. Cinnamon and nutmeg add warmth and depth. Salt balances the sweetness. The pumpkin puree is the star. It makes the cake moist and flavorful. Granulated and brown sugars sweeten the cake, while butter adds richness. Eggs bind the mixture, giving it a tender crumb. Vanilla extract enhances the overall flavor. Brewed coffee adds a unique twist. It deepens the cake's taste and offers a hint of bitterness. If you want a nutty crunch, add walnuts or pecans. The crumb topping features more flour, brown sugar, oats, and butter. This creates a lovely texture and a sweet finish. Gather all these ingredients before you start. They work together to create a delightful fall treat. Enjoy the process, and let the scents fill your kitchen! 1. Preheat your oven to 350°F (175°C). This helps the cake bake evenly. 2. Grease a 9-inch square baking dish. This will keep your cake from sticking. 3. In a large bowl, cream together the softened butter, granulated sugar, and brown sugar. Mix until it is light and fluffy. 4. Add the eggs one at a time, mixing well after each egg. Then stir in the pumpkin puree and vanilla extract until everything is well combined. 1. In another bowl, whisk together the flour, baking powder, baking soda, cinnamon, nutmeg, and salt. This helps to mix the dry ingredients evenly. 2. Gradually add this dry mix to the pumpkin mixture. Alternate with adding the cooled brewed coffee. Start and end with the flour mixture. Stir gently until just combined. If you want, fold in the chopped walnuts or pecans at this point. 1. Pour the batter into your prepared baking dish. Use a spatula to smooth the top. 2. For the crumb topping, in a separate bowl, combine flour, brown sugar, oats, and cinnamon. Add the cold cubed butter and mix until it looks like coarse crumbs. 3. Sprinkle the crumb topping evenly over the cake batter. This will give your cake a crunchy layer. 4. Bake in the oven for 30-35 minutes. Check for doneness by inserting a toothpick into the center. It should come out clean. 5. Let the cake cool in the pan for at least 10 minutes before slicing and serving. Enjoy your treat with coffee! To get the right texture, use fresh pumpkin puree. It keeps the cake moist and soft. Ensure your butter is softened before mixing. Cold butter does not blend well and can lead to lumps. Eggs should be at room temperature. This helps them mix better and creates a light cake. Serve your cake warm with a dusting of powdered sugar. A slice of fall fruit adds color and flavor. Try pairing it with a hot cup of coffee. The rich coffee flavor in the cake goes well with a latte or a spiced chai. Avoid over-mixing your batter. This can make the cake dense. Be careful with the crumb topping; it should be crumbly, not paste-like. If your topping is too wet, it won’t crisp up. Always check the cake with a toothpick. It should come out clean when done. {{image_2}} You can change the flavors in your Pumpkin Coffee Crumb Cake. Try adding spices like ginger or cloves. These spices give a warm kick that fits fall well. You can also add chocolate chips for a sweet twist. Dried fruit like raisins or cranberries can add a chewy texture too. Each option makes the cake special and fun. If you need a gluten-free cake, use alternatives like almond flour or a gluten-free blend. These flours can change the cake's texture, so add a bit more liquid. For moisture, consider using a little extra pumpkin puree or brewed coffee. This keeps your cake from drying out and makes it delicious. Want to make your cake healthier? You can reduce sugar by half, or swap it for honey or maple syrup. These natural sweeteners add great flavor. You can also replace butter with applesauce or yogurt. This cuts fat while keeping the cake moist. These small changes can make your treat a bit better for you while still being tasty! To keep your Pumpkin Coffee Crumb Cake fresh, store it in an airtight container. This method preserves moisture and flavor. If you don’t have one, covering the cake with foil works too. Just make sure the foil is tight. This will help keep air away from the cake. You can freeze the cake for later enjoyment. First, let it cool completely. Then, wrap it tightly in plastic wrap. Place it in a freezer-safe bag or container. When you want to eat it, take it out and let it thaw in the fridge overnight. For the best texture, reheat it in the oven for a few minutes before serving. At room temperature, the cake lasts about three days. If you store it in the fridge, it can last up to a week. Just remember to keep it covered to maintain its yumminess! Yes, you can use fresh pumpkin. Just cook and mash it first. Make sure it is smooth. Fresh pumpkin adds a nice flavor. It may take a bit more time to prepare. To make it dairy-free, use plant-based butter. Replace regular milk with almond or oat milk. This keeps the cake moist and tasty without dairy. Always check labels to ensure they are dairy-free. You can use brewed tea or hot chocolate for a different taste. If you want a caffeine boost, use espresso. Unsweetened cocoa can add a rich flavor as well. Each option brings its own twist to the cake. Yes, you can make the crumb topping ahead of time. Just store it in the fridge. You can keep it for up to two days before baking. It will save you time on baking day! This blog post covered everything you need to know about baking a delicious pumpkin cake. We discussed the key ingredients, from the dry and wet components to optional mix-ins. You learned the step-by-step instructions, essential baking tips, and ways to serve the cake. Plus, we explored variations and storage best practices. Keep these tips in mind for a tasty treat. Enjoy your baking and share your results!
                              Pumpkin Coffee Crumb Cake Delightful Fall Treat
                            • - 1 cup unsalted butter, melted - 1 cup brown sugar, packed - 1/2 cup granulated sugar - 1/2 cup apple cider - 2 large eggs - 1 teaspoon vanilla extract - 2 cups all-purpose flour - 1 teaspoon baking powder - 1/2 teaspoon baking soda - 1/2 teaspoon salt - 1 teaspoon ground cinnamon - 1/2 cup chopped walnuts or pecans (optional) - 1 cup caramel sauce (store-bought or homemade) I love using fresh apple cider in these blondies. It adds a rich flavor that fits fall perfectly. The butter gives a nice moistness, while the brown sugar brings a deep, caramel-like taste. Granulated sugar gives sweetness without being too heavy. You can add eggs for structure and texture. Vanilla extract enhances the overall taste. Flour gives the blondies their body. Baking powder and baking soda help them rise, making them soft. Salt balances the sweetness. Ground cinnamon adds warmth and spice. If you like nuts, walnuts or pecans add a nice crunch. You can skip them if you prefer a smooth texture. Lastly, caramel sauce is key. It makes these blondies extra special. You can use store-bought or homemade. - For a dairy-free option, use coconut oil instead of butter. - Applesauce can replace eggs for a vegan choice. - For gluten-free blondies, try almond flour or a gluten-free blend. These swaps help you enjoy the flavor while meeting dietary needs. - Preheat your oven to 350°F (175°C). - Grease and line a 9x13 inch baking pan with parchment paper. Leave some paper hanging over the sides. This helps you lift out the blondies later. - In a large bowl, combine the melted butter, brown sugar, and granulated sugar. Whisk until smooth. - Next, stir in the apple cider, eggs, and vanilla extract. Mix until everything is well blended. - In another bowl, whisk together the all-purpose flour, baking powder, baking soda, salt, and ground cinnamon. This step is key to even mixing. - Gradually add the dry ingredients to the wet mixture. Mix gently until just combined. If you like, fold in chopped nuts at this point. - Pour the batter into the prepared baking pan. Use a spatula to spread it evenly. - Drizzle caramel sauce over the top. Reserve a bit of sauce for serving. Use a knife or toothpick to swirl the caramel into the batter. - Bake in your preheated oven for 25-30 minutes. Check for doneness by inserting a toothpick in the center. It should come out with a few moist crumbs, not wet batter. To get the best blondies, do not overmix the batter. Mix just until you see no dry flour. Overmixing makes them tough. Once baked, let them cool completely before slicing. This step helps them set well and makes cutting easier. You can make homemade caramel sauce easily. Just heat sugar and water until it melts and turns golden. Stir in butter and cream for a rich taste. If you prefer store-bought, look for a high-quality brand. Choose one that has a rich flavor and smooth texture. Serve the blondies warm or at room temperature. Drizzle extra caramel sauce on top for added sweetness. A sprinkle of sea salt enhances the flavors and adds a nice touch. You can also add whipped cream or ice cream for a special treat. {{image_2}} You can spice up your blondies easily. Adding spices like nutmeg or cloves gives them warmth. A pinch of nutmeg adds a cozy taste. Cloves bring a bold flavor that pairs well with apple cider. You can also add fruits to the mix. Diced apples will boost the apple flavor. They create a nice texture, too. Dried cranberries add a sweet-tart twist. Both options make your blondies even more delightful. Nuts also change the game for these blondies. You can use almonds or pecans for a crunchy bite. They add flavor and good fats. If you want them nut-free, just leave them out. The blondies will still taste great without nuts. If you choose to add nuts, chop them finely. This way, they blend in well with the batter. You’ll get a nice surprise in every bite. Chocolate lovers, rejoice! You can add chocolate chips or chunks to your blondies. They melt into gooey pockets of goodness. Swirling chocolate into the batter adds a fun twist, too. Just pour some melted chocolate over the top. Use a knife to create swirls. This method makes your blondies look fancy and taste amazing. Each bite will be a sweet adventure! To keep your Apple Cider Caramel Blondies fresh, store them in an airtight container. This helps retain their moisture and flavor. If you need to refrigerate them, place a piece of parchment paper between layers to avoid sticking. This method works wonders for maintaining the perfect texture. Freezing is another great option. Cut the blondies into squares before freezing. Wrap each square tightly in plastic wrap, then place them in a freezer-safe bag. This way, you can grab one whenever you crave a sweet treat. Just let them thaw at room temperature for about 30 minutes before enjoying. When stored at room temperature, these blondies last about 3 to 4 days. Keep them in a cool, dry place, away from direct sunlight. After a few days, you might notice changes in texture or taste. Watch for signs of spoilage. If the blondies become dry or hard, they may not be enjoyable anymore. If you see any mold or strange smells, it’s best to throw them out. Always trust your senses. If something seems off, it’s safer to discard the food. Yes, you can make these blondies a day ahead. Allow the blondies to cool completely. Then, wrap them tightly in plastic wrap. This keeps them fresh. You can store them in the fridge. Just take them out an hour before serving for the best taste. I love pairing these blondies with vanilla ice cream. The cold ice cream balances the warm blondies. You can also serve them with spiced apple cider. A dollop of whipped cream adds a nice touch too. For a drink, try a warm chai tea or cider. Look for a golden brown top. The edges should pull away from the pan slightly. When you insert a toothpick, it should come out with a few moist crumbs. This means the blondies are ready. Don't overbake them; they can turn dry quickly! In this post, I shared a detailed recipe for Apple Cider Caramel Blondies. We covered the ingredients, step-by-step instructions, and tips for the best results. I also suggested variations and storage advice to keep your blondies fresh. These sweet, chewy treats can be adapted for your tastes. Experiment with flavors and toppings. Enjoy sharing them with family and friends. Happy baking!
                              Apple Cider Caramel Blondies Irresistible Fall Treat
                            • - 2 cups all-purpose flour - 1/4 cup granulated sugar - 1/2 teaspoon salt - 1 tablespoon instant yeast - 1/2 teaspoon ground cinnamon - 1/4 teaspoon ground nutmeg - 1/4 teaspoon ground ginger - 3/4 cup pumpkin puree - 1/4 cup warm milk - 1 large egg - 1/4 cup unsalted butter, melted - 1/2 cup packed brown sugar - 2 teaspoons cinnamon (for filling) - 1/2 cup cream cheese, softened - 1/2 cup powdered sugar - 1 teaspoon vanilla extract - 2 tablespoons milk (for cream cheese frosting) For best results, use standard measuring cups and spoons. This ensures accurate amounts. Use a kitchen scale if you have one. It helps with precision, especially with flour. Keep the butter unsalted to control salt levels in your rolls. Make sure the pumpkin puree is pure without added ingredients. You can swap all-purpose flour with whole wheat flour for a healthier option. If you need a gluten-free version, try a gluten-free flour blend. Coconut sugar can replace granulated sugar for a unique flavor. Almond milk works well instead of regular milk. If you don’t have cream cheese, ricotta can be a nice substitute. Start by grabbing a large mixing bowl. Whisk together these dry ingredients: - 2 cups all-purpose flour - 1/4 cup granulated sugar - 1/2 teaspoon salt - 1 tablespoon instant yeast - 1/2 teaspoon ground cinnamon - 1/4 teaspoon ground nutmeg - 1/4 teaspoon ground ginger Mix these well until everything is combined. Next, take another bowl for the wet ingredients. Combine: - 3/4 cup pumpkin puree - 1/4 cup warm milk - 1 large egg - 1/4 cup melted unsalted butter Stir these until smooth. Gradually add the wet mix to the dry mix. Stir until a dough forms. Now, turn the dough onto a floured surface. Knead it for about 5-7 minutes. You want it smooth and elastic. Place the dough in a greased bowl. Cover it with a kitchen towel. Let it rise in a warm place for about 1 hour, or until it doubles in size. After the dough has risen, punch it down gently. Roll it out into a rectangle, about 1/4 inch thick. Spread brown sugar evenly over the dough. Sprinkle 2 teaspoons of cinnamon on top. Now, roll the dough tightly into a log, starting from one end. Pinch the seams to seal it well. Cut the log into 12 equal pieces. Place them in a greased baking dish. Cover these rolls with a towel. Let them rise again for 30 minutes. Preheat your oven to 350°F (175°C). Bake the rolls for 20-25 minutes. They should be golden brown when done. While the rolls bake, prepare the cream cheese frosting. In a bowl, mix: - 1/2 cup softened cream cheese - 1/2 cup powdered sugar - 1 teaspoon vanilla extract - 2 tablespoons milk Stir until the mixture is smooth and creamy. Once the rolls are baked, let them cool slightly. Then, drizzle the cream cheese frosting on top. Enjoy these soft, sweet treats! To make great pumpkin cinnamon rolls, focus on the dough. Use all-purpose flour for the best result. Make sure to knead the dough for 5-7 minutes. This helps it become smooth and elastic. If the dough feels too sticky, add a little more flour. Aim for a soft, pliable dough that holds its shape. If you want to speed up the rising, try a warm spot in your kitchen. You can turn on the oven to its lowest setting for a few minutes. Then, turn it off and place the dough inside. Cover it with a towel. This can cut the rising time in half. Another trick is to place a bowl of hot water next to the dough. The steam helps the dough rise faster. Serve your pumpkin cinnamon rolls warm for the best taste. Drizzle the cream cheese frosting right before serving. You can add a sprinkle of cinnamon on top for extra flair. These rolls pair well with coffee or tea. For a fun twist, serve them with apple cider or a scoop of vanilla ice cream. Enjoy! {{image_2}} You can make your pumpkin cinnamon rolls even better by adding nuts or chocolate chips. Chopped pecans or walnuts add a nice crunch. Use about 1/2 cup of nuts. If you prefer chocolate, use semi-sweet chocolate chips. They will melt slightly and add richness. Mix them into the filling before rolling up the dough. This gives you a sweet surprise in every bite. If you need gluten-free rolls, you can swap the all-purpose flour. Use a gluten-free flour blend instead. Make sure it has xanthan gum for the right texture. Follow the same steps in the recipe. Keep an eye on the baking time. Gluten-free dough may need a few extra minutes to cook through. Enjoy the same great flavor without gluten! You can change up the cream cheese frosting to match your taste. For a hint of spice, add a pinch of ground cinnamon or nutmeg. For a citrus twist, mix in some lemon or orange zest. This brightens the flavor and pairs well with pumpkin. To make it richer, add a tablespoon of maple syrup. It gives a wonderful depth to the frosting. Try out these variations for a fun twist! To keep your pumpkin cinnamon rolls fresh, place them in an airtight container. This will help them stay soft and tasty. You can also wrap them tightly in plastic wrap. Store the rolls at room temperature for up to three days. If you want to keep them longer, consider freezing them. Freezing your pumpkin cinnamon rolls is easy! First, let the rolls cool completely. Then, place them on a baking sheet. Freeze them for about an hour until solid. Once frozen, transfer the rolls to a freezer-safe bag or container. They can last in the freezer for up to three months. When you are ready to enjoy them, you can thaw them overnight in the fridge. To reheat your pumpkin cinnamon rolls, preheat your oven to 350°F (175°C). Place the rolls on a baking sheet and cover them with foil. Heat for about 10-15 minutes. This helps the rolls stay moist. You can also microwave them for 15-20 seconds for a quick warm-up. Don’t forget to add some cream cheese frosting on top for extra flavor! Yes, you can make pumpkin cinnamon rolls ahead of time. Prepare the dough up to the first rise. After the dough rises, roll it out and cut the rolls. Place them in a greased dish, cover with plastic wrap, and keep in the fridge overnight. The next day, let them rise for 30 minutes before baking. This saves time and gives you fresh rolls in the morning. You can tell pumpkin cinnamon rolls are done by looking for a golden brown color. The edges should also be firm. If you tap the top, it should sound hollow. For an exact check, use a toothpick. Insert it into the center; if it comes out clean, the rolls are ready. Pumpkin cinnamon rolls pair well with many items. Here are some tasty options: - Hot coffee or chai tea - A side of fresh fruit, like apples or pears - A dollop of whipped cream for extra sweetness - A sprinkle of chopped nuts for crunch You learned how to make delicious pumpkin cinnamon rolls. We covered the ingredients, including substitutes, and the step-by-step process. You now know tips for perfect dough and creative variations. Storing leftovers is easy with the right methods. Enjoy these treats warm or with a twist. Remember, baking is about having fun and experimenting! Your kitchen adventure awaits. Happy baking!
                              Pumpkin Cinnamon Rolls With Cream Cheese Delight

                            WANT TO SAVE THIS RECIPE?

                            4 shares

                            Leave a Reply Cancel reply

                            Your email address will not be published. Required fields are marked *

                            Recipe Rating


                            Experience the bliss of Chocolate Covered Strawberry Cookies, where soft, chocolatey cookies meet juicy strawberries and rich chocolate. In this delightful treat, learn essential ingredients, step-by-step baking instructions, and fun variations to impress everyone at home. Get creative with toppings and decorating ideas that make these cookies a showstopper. Click through to explore the complete recipe and start your baking adventure today!

                            Hi I’m Taling

                            I love sharing perfected dishes from my kitchen. I’m sure they’ll earn a spot in your heart. Let’s savor this journey together!.

                            More about me

                            Recent Desserts

                            • To make Brown Butter Pumpkin Spice Blondies, gather these key ingredients: - 1 cup unsalted butter - 1 cup brown sugar - ½ cup granulated sugar - 2 large eggs - 1 teaspoon vanilla extract - 1 cup pumpkin puree - 2 cups all-purpose flour - 1 teaspoon baking powder - 1 teaspoon baking soda - 1 teaspoon pumpkin pie spice - ½ teaspoon salt - ½ cup chocolate chips (optional) These ingredients work together to create a rich, moist blondie with a warm pumpkin flavor. The brown butter adds a nutty taste that pairs perfectly with the spices. Using both brown and granulated sugar gives the blondies a nice balance of sweetness. Make sure to use pure pumpkin puree, not pie filling. This keeps your blondies from being too sweet. The chocolate chips are optional, but they add a nice touch if you want a little extra sweetness. Gathering fresh ingredients will ensure your blondies taste their best. Make sure your butter is unsalted for better control of the overall flavor. Each ingredient plays a vital role, so don't skip any! - Preheat the oven to 350°F (175°C). - Grease a 9x13 inch baking pan and line it with parchment paper. - Melt the butter in a medium saucepan over medium heat. - Stir frequently until it turns golden brown and smells nutty. This should take about 5-7 minutes. Watch it closely to avoid burning. - In a large bowl, combine brown and granulated sugar. - Add the eggs one at a time, mixing well after each. - Stir in the vanilla extract and pumpkin puree until smooth. - In a separate bowl, whisk together flour, baking powder, baking soda, pumpkin pie spice, and salt. - Gradually add the dry mix into the wet mixture, stirring until just combined. - Pour the batter into the prepared pan and spread it evenly. - Bake for 25-30 minutes or until a toothpick comes out clean. - Cool in the pan for 10 minutes, then transfer to a wire rack. - Let it cool completely before cutting into squares and serving. To get the best texture, you must brown the butter right. Start with a medium heat. Stir it often until it turns golden brown and smells nutty. This usually takes about 5-7 minutes. Keep an eye on it. If it burns, the flavor will change. When mixing, be gentle. Overmixing makes blondies tough. Mix until the wet and dry ingredients just come together. You want some lumps to keep them soft. If you want to switch things up, you can use other fats instead of butter. Coconut oil works well for a dairy-free option. You can also try using applesauce or yogurt for a lighter treat. For sugars, you can swap brown sugar with coconut sugar. It gives a unique taste. You can also mix in different spices. Try cinnamon or nutmeg for a fun twist. If you love crunch, add nuts like walnuts or pecans. Dust the top of your blondies with powdered sugar. It adds a lovely finish and looks great. For serving, a dollop of whipped cream is a perfect touch. You can also add a scoop of vanilla ice cream for extra creaminess. These small details make your blondies feel special and festive. {{image_2}} You can make these blondies even better! Try adding nuts like walnuts or pecans for crunch. Dried fruits like cranberries or raisins add a nice chew. You can also mix in seeds like pumpkin or sunflower for extra texture. If you want to change the flavor, add a pinch of nutmeg or ginger. These spices add warmth and depth to the taste. Adding chocolate chips makes these blondies rich and sweet. They melt slightly and create gooey pockets. You can also use butterscotch chips or caramel bits for a different treat. Both options bring a new twist to the classic recipe. If you prefer no chocolate, simply leave it out. The blondies will still taste amazing with just pumpkin spice. If you follow a gluten-free diet, you can still enjoy these blondies. Use almond flour or coconut flour instead of all-purpose flour. You can also try a gluten-free baking blend. Just be sure it has xanthum gum for the right texture. This way, you can enjoy these yummy treats without worry. To keep your blondies fresh, let them cool completely. If you store them warm, moisture will build up and make them soggy. Use an airtight container for the best results. This keeps the blondies soft and moist. A covered dish also works but may not keep them as fresh. Remember, air is not your friend here! Want to save some for later? You can freeze the blondies! First, cut them into squares. Wrap each square tightly in plastic wrap. Then, place them in a freezer-safe bag or container. They will stay good for up to three months. When you want to enjoy them, take a square out and let it thaw in the fridge overnight. If you’re in a hurry, just leave it at room temperature for a couple of hours. Enjoy your treat again! You can check if the blondies are done by using a toothpick. Insert it into the center of the blondies. If it comes out clean or with a few moist crumbs, they are ready. If the toothpick has wet batter, bake them a little longer. The blondies should also look golden on top and feel set around the edges. You can use pumpkin pie filling, but it has added spices and sugar. This will change the flavor and sweetness of your blondies. If you do use it, reduce or skip the pumpkin pie spice and sugar in the recipe to balance the flavors. When stored in an airtight container, the blondies last about 3 to 4 days at room temperature. Make sure they are completely cool before sealing them. This helps keep them soft and fresh. Yes, you can double the recipe. Just use a larger baking pan, like a 12x18 inch, and adjust the baking time. Check for doneness with a toothpick, as larger batches may take longer to bake. These blondies pair great with whipped cream or vanilla ice cream. You can also dust them with powdered sugar for a pretty touch. For a fun twist, try serving them with caramel sauce or a drizzle of chocolate. This blog post covered everything you need to make delicious Brown Butter Pumpkin Spice Blondies. We've discussed the key ingredients, the step-by-step instructions, and tips for great texture. You can even explore variations and storage options. These blondies are perfect for fall and can be tailored to your taste. Experiment with flavors, textures, and pairings to make them your own. Enjoy baking and sharing these treats with friends and family!
                              Brown Butter Pumpkin Spice Blondies Soft Autumn Treat
                            • To make these Peanut Butter Chocolate Oat Bars, you need simple and healthy ingredients. Here’s what you will need: - 2 cups rolled oats - 1 cup natural peanut butter (smooth or crunchy) - ½ cup honey or maple syrup - ½ cup dark chocolate chips - ¼ cup unsweetened cocoa powder - ¼ teaspoon salt - ½ teaspoon vanilla extract - Optional: ¼ cup chopped nuts or seeds for added crunch Each ingredient plays a key role in the final taste and texture. Rolled oats provide a hearty base. Natural peanut butter adds creaminess and richness. Honey or maple syrup gives sweetness and binds everything together. Dark chocolate chips bring a delightful burst of flavor. Unsweetened cocoa powder intensifies the chocolate taste. A little salt balances the flavors, and vanilla extract enhances the aroma. You can also add chopped nuts or seeds for extra texture and nutrition. These ingredients work together to create a tasty snack that is easy to make and satisfying to eat. How to Preheat Your Oven First, set your oven to 350°F (175°C). This step warms the oven for even baking. Lining the Baking Pan with Parchment Paper Grab an 8x8 inch baking pan. Place parchment paper inside, letting it hang over the edges. This makes it easy to lift out the bars later. Combining Oats, Cocoa Powder, and Salt In a large bowl, mix 2 cups of rolled oats, ¼ cup of cocoa powder, and ¼ teaspoon of salt. Stir well until combined. This mix adds flavor and texture to your bars. Steps for Melting Peanut Butter with Honey/Maple Syrup Take a microwave-safe bowl. Combine 1 cup of natural peanut butter, ½ cup of honey (or maple syrup), and ½ teaspoon of vanilla extract. Heat for 30-45 seconds until warm. Stir until smooth. This mixture binds the bars together. Pouring and Mixing the Ingredients Together Pour the peanut butter mixture over the dry oats. Use a spatula to mix them well. Make sure everything is sticky and uniform. Incorporating Chocolate Chips and Optional Add-ins Next, fold in ½ cup of dark chocolate chips. You can also add ¼ cup of chopped nuts or seeds if you like extra crunch. Mix until evenly distributed. How to Properly Bake the Mixture Transfer the mixture into the prepared baking pan. Press down firmly to create an even layer. Bake for 15-20 minutes until the edges are slightly golden. Cooling Process and Cutting Instructions After baking, let the bars cool completely in the pan. Once cool, use the parchment paper to lift them out. Cut into squares or rectangles. Enjoy your tasty snack! To get a smooth texture, start with dry ingredients. Mix the oats, cocoa powder, and salt in a big bowl. Stir them well so they blend evenly. For your wet ingredients, heat the peanut butter, honey, and vanilla in the microwave. This makes it easier to mix. When you combine the two mixtures, use a spatula to fold them. This way, you ensure every oat gets coated well. To know when your bars are done, look at the edges. They should be golden brown. The center may still look soft, but that’s okay. It will firm as it cools. Set a timer for 15 minutes and check. If the edges are not golden, bake for another few minutes. Don’t overbake, or the bars will be dry. You can make these bars even better! Add-ins can boost the taste and texture. Try mixing in chopped nuts or seeds for a crunchy bite. You can also add spices like cinnamon for warmth. If you love coconut, shredded coconut works great too. Experiment and find your favorite mix! {{image_2}} You can change the sweet taste of these bars. Using agave nectar can give a nice twist. It’s sweeter than honey and has a lower glycemic index. This option is great for those who want a lighter sweetness. If you prefer sugar-free, try stevia or monk fruit sweetener. These add sweetness without extra calories. You might need to adjust the amount since they are much sweeter than honey. Feel free to swap peanut butter with other nut butters. Almond butter works well and adds a rich, nutty flavor. It’s a tasty choice for those who want to try something new. Cashew butter is another choice. It’s creamier and has a milder taste. Both nut butters give the bars a different texture and flavor. Adding spices can boost the taste of your bars. Try cinnamon for a warm, sweet touch. Just a pinch can make a big difference! Nutmeg is also a great option. It gives a cozy, fall flavor. You can experiment with both spices to find your favorite combo. These small changes can make your bars even more enjoyable! Choosing the right container is key. Use an airtight container to keep your bars fresh. Glass or plastic works well. Make sure the bars cool completely before storing them. This helps prevent moisture build-up and keeps them from getting soggy. How long do these bars last in the fridge? They can stay fresh for up to one week. After that, the taste and texture may change. To enjoy them at their best, eat them within this time. You can freeze these bars for later. To freeze, cut them into squares or rectangles. Wrap each piece in plastic wrap, then place them in a freezer-safe bag. This keeps them fresh for up to three months. To thaw, just take them out and let them sit at room temperature for about 30 minutes. Enjoy your tasty snack anytime! Yes, you can use quick oats. They will make the bars softer. Rolled oats create a chewier texture, which many prefer. If you choose quick oats, reduce the baking time slightly. To make these bars vegan, swap honey for maple syrup or agave. Use a plant-based peanut butter. All other ingredients are already vegan-friendly. You can use agave nectar or brown rice syrup. Both options work well. They maintain moisture and sweetness. Look for golden edges and a firm center. The bars should not jiggle. They will firm up as they cool. Yes, you can add protein powder. Start with ¼ cup and mix it in with the dry ingredients. Adjust other liquids if needed for texture. You learned how to make tasty Peanut Butter Chocolate Oat Bars. We covered the right ingredients and simple steps to mix, bake, and store them. I shared tips for flavor options and even answered common questions. These bars are easy to customize and great for snacks or desserts. Try different add-ins and enjoy them fresh or stored. Now, it's time to make your own bars and share them with friends! Enjoy your baking adventure!
                              Peanut Butter Chocolate Oat Bars Simple and Tasty Snack
                            • - 2 cups all-purpose flour - 1 cup granulated sugar - 1 tablespoon baking powder - ½ teaspoon salt - 1 teaspoon ground cinnamon - ½ teaspoon nutmeg - ½ cup unsalted butter, melted - 1 cup milk - 2 large eggs - 1 teaspoon vanilla extract - 2 cups diced apples (peeled, such as Granny Smith or Honeycrisp) - ¼ cup maple syrup (for glaze) - ½ cup powdered sugar (for glaze) These ingredients create a muffin that is soft and flavorful. The apples add a nice texture, while the spices give warmth. Use fresh apples for the best taste. The melted butter keeps the muffins moist. - Chopped walnuts or pecans - Extra maple syrup for drizzling If you want a little crunch, add some nuts on top. They add flavor and texture. You can also drizzle more syrup if you love that sweet taste. Each muffin has about 200 calories. They have 4 grams of protein and 8 grams of fat. The apples add vitamins and fiber. This treat is not just tasty, but also offers some nutrients. Enjoy these muffins as a fun snack or breakfast! Start by preheating your oven to 375°F (190°C). This helps the muffins rise well. Next, grab a large mixing bowl. Add 2 cups of all-purpose flour, 1 cup of granulated sugar, 1 tablespoon of baking powder, and ½ teaspoon of salt. Now, add in 1 teaspoon of ground cinnamon and ½ teaspoon of nutmeg. Whisk these dry ingredients well. Make sure there are no lumps. This mix creates a great base for your muffins. In another bowl, melt ½ cup of unsalted butter. Then, mix in 1 cup of milk, 2 large eggs, and 1 teaspoon of vanilla extract. Stir these wet ingredients until they blend smoothly. This step is key for a rich flavor. The melted butter adds moisture, making your muffins soft and tasty. Pour the wet mix into the bowl of dry ingredients. Stir carefully until just combined. It’s okay if some flour shows. Overmixing can make muffins tough. Now, gently fold in 2 cups of diced apples. Use apples like Granny Smith or Honeycrisp for sweetness. Once mixed, divide the batter evenly into muffin cups. Fill each cup about ⅔ full. This allows space for rising. Place the muffin tin in your preheated oven. Bake for 18 to 22 minutes. Check with a toothpick. If it comes out clean, they’re done. Let the muffins cool in the pan for five minutes. Then, move them to a wire rack. While they cool, prepare the glaze. In a small bowl, whisk together ¼ cup of maple syrup and ½ cup of powdered sugar. Adjust if needed. Drizzle the glaze over cooled muffins. Top with nuts if you like. Enjoy your fresh and flavorful muffins! To keep muffins light, mix carefully. After you add wet ingredients to dry, stir just until you see no dry flour. Lumps are okay! Overmixing makes muffins tough. It’s better to be gentle. This helps the muffins rise and stay soft. Choose apples that add flavor and moisture. I love using Granny Smith or Honeycrisp apples. They balance sweetness and tartness. Other good options include Fuji or Gala. They also hold their shape well during baking. For a great glaze, mix maple syrup and powdered sugar. Start with ¼ cup of syrup and ½ cup of sugar. Whisk until smooth. If it’s too thick, add more syrup. If it’s too runny, add more sugar. You want it thick but pourable. This glaze adds a sweet touch to your muffins. {{image_2}} You can make your muffins special by adding fruits or nuts. For a fruity twist, try mixing in 1 cup of blueberries, cranberries, or even diced pears. These fruits add color and enhance the flavor. If you enjoy nuts, consider adding ½ cup of chopped walnuts or pecans. They bring a nice crunch and a rich taste. Just fold these extras gently into the batter before baking. If you need gluten-free muffins, swap out regular flour for gluten-free flour. Look for a blend made for baking. Make sure it has a good mix of flours and starches. You might need to add a bit more liquid. Start with an extra tablespoon of milk. This small change helps keep the muffins moist and fluffy. For a vegan version, replace the eggs with flax eggs. Mix one tablespoon of ground flaxseed with three tablespoons of water. Let it sit for a few minutes until it thickens. Use almond milk or oat milk instead of regular milk. Instead of butter, use coconut oil or a plant-based butter. These swaps keep your muffins delicious while making them vegan-friendly. To keep your maple glazed apple muffins fresh, store them in an airtight container. Place the muffins in a single layer, if possible. You can also use plastic wrap for extra protection. Keep them at room temperature for up to three days. If you want them to last longer, refrigerate them. This will keep them fresh for up to a week. Freezing is a great option for these muffins. To freeze, let the muffins cool completely. Wrap each muffin in plastic wrap or foil. Then, place them in a freezer-safe bag or container. Label the bag with the date. You can freeze them for up to three months. When you’re ready to enjoy one, just thaw it at room temperature. Reheating is easy! If you want a warm muffin, preheat your oven to 350°F (175°C). Place the muffin on a baking sheet and heat for about 5-10 minutes. You can also use a microwave. Heat the muffin for about 10-15 seconds. This helps bring back that fresh taste and soft texture. Enjoy your muffins warm! Yes, you can swap some ingredients. For flour, try whole wheat flour for a healthier option. You can use brown sugar instead of granulated sugar for extra flavor. If you don’t have apples, pears work well too. You can also replace eggs with applesauce or mashed bananas for a vegan option. Just remember, each swap may change the taste slightly. These muffins stay fresh for about three days at room temperature. Place them in an airtight container to keep them moist. If you want to store them longer, put them in the fridge, where they can last up to a week. For the best taste, warm them slightly before serving. Serve the muffins warm or at room temperature. Drizzle the maple glaze on top right before serving. You can add sliced apples or extra nuts for a nice touch. Pair them with a cup of coffee or tea for a delicious treat. These muffins also make a great breakfast or snack for any time of day. You learned how to make maple glazed apple muffins, from key ingredients to baking. I shared tips to avoid overmixing and to pick the best apples. You can also explore fun variations like gluten-free or vegan options. Proper storage helps keep your muffins fresh for longer. These muffins are tasty and flexible for many diets. Enjoy sharing them and let your creativity shine in the kitchen!
                              Maple Glazed Apple Muffins Fresh and Flavorful Treat
                            • - 2 cups pecan halves - 1 cup brown sugar - ¼ cup unsalted butter, melted - 2 teaspoons vanilla extract - 1 teaspoon ground cinnamon - ¼ teaspoon cayenne pepper (adjust to taste) - ¼ teaspoon salt - 1 egg white, lightly beaten To make slow cooker candied pecans, start with the main ingredients. You need fresh pecan halves, brown sugar, melted unsalted butter, and vanilla extract. Each of these adds sweetness and depth to the dish. Next, add flavoring ingredients. Ground cinnamon gives warmth, while cayenne pepper adds a kick. Salt balances the sweetness. Finally, the egg white helps the sugar mix stick to the pecans. This blend creates a sweet and spicy treat that is hard to resist. Make sure to have all your ingredients ready. This way, you can easily move from mixing to cooking without any delays. First, let's mix our sugar and butter blend. In a mixing bowl, add: - 1 cup brown sugar - ¼ cup unsalted butter, melted - 2 teaspoons vanilla extract - 1 teaspoon ground cinnamon - ¼ teaspoon cayenne pepper - ¼ teaspoon salt Stir these ingredients until smooth. You want a nice, thick mixture that coats well. Next, whisk the egg white in a separate bowl. Make it light and frothy. This step helps the pecans stick to the sweet mix. Now, let’s get our pecans ready. Take 2 cups of pecan halves and toss them in the bowl with the beaten egg white. Make sure they are well coated. Pour the sugar mix over the pecans. Stir gently to coat each pecan evenly. Transfer the coated pecans to your slow cooker. Spread them out evenly. Set your slow cooker to low heat. Cook for about 2 hours. Stir every 30 minutes to keep them from sticking. Once cooking is done, turn off the slow cooker. Spread the pecans onto a lined baking sheet. Let them cool completely. As they cool, they will become crisp. If you find any clumps, break them apart once cooled. For a nice touch, serve them in a decorative bowl. You can sprinkle a pinch of sea salt on top for extra flavor. Store any leftovers in an airtight container. To make the best candy coating, focus on the sugar mixture. Mix the brown sugar, melted butter, vanilla, cinnamon, cayenne, and salt until smooth. This helps the coating stick well. Use a bowl that allows you to stir easily. A whisk can help blend the ingredients thoroughly. Stirring during cooking is key. Set the slow cooker to low heat and cook for two hours. Stir every 30 minutes to keep the pecans from sticking. This ensures every pecan gets coated evenly. If you skip stirring, some pecans may burn. Want to boost the flavor? Add spices like nutmeg or ginger. A pinch of nutmeg can add warmth. You can also try adding a dash of allspice for a unique taste. Customizing the sweetness is simple. If you like it sweeter, add more brown sugar. You can also mix in some honey or maple syrup. Adjust to your taste. Remember, you can always add but not take away! {{image_2}} You can easily swap pecans for other nuts. Almonds, walnuts, and cashews all work well. Each nut adds a unique crunch and taste. If you want a mix, combine different nuts for a fun treat. This nut blend brings a variety of textures and flavors to your snack. Do you like sweet or spicy? You can adjust the flavor to suit your taste. Add more cayenne pepper for heat. If you prefer a sweeter snack, increase the brown sugar. You can also enhance your pecans with chocolate or caramel. Drizzle melted chocolate over cooled pecans or mix caramel bits in before cooking. Both options give a rich and delightful twist to this snack. To keep your slow cooker candied pecans fresh, use an airtight container. This helps keep out air and moisture. Store them in a cool, dry place away from sunlight. If stored correctly, these tasty pecans can last for up to two weeks. If you want to re-crisp your pecans, preheat your oven to 350°F. Spread the pecans on a baking sheet and heat them for about 5-10 minutes. Keep an eye on them to avoid burning. This method helps restore their crunch. To maintain freshness, seal the container tightly after each use. This way, your candied pecans stay delicious and ready for snacking! Can I use different nuts for this recipe? Yes, you can use other nuts. Almonds, walnuts, or cashews work well. Each nut brings a unique taste. Just follow the same steps. What is the ideal cooking time for the best texture? The best cooking time is about 2 hours on low heat. Stir every 30 minutes. This helps the nuts cook evenly. They should be crunchy when done. How can I adjust the recipe for dietary restrictions? To make it dairy-free, swap the butter for coconut oil. You can use maple syrup instead of brown sugar for a vegan option. Always check for nut allergies before serving. This blog covers how to make slow cooker candied pecans. We explored the key ingredients, easy steps, and tips for a perfect candy coating. You can customize flavors and even substitute nuts. Proper storage keeps them fresh for longer. In conclusion, making these pecans is simple and fun. You can enjoy them as snacks or gifts. Happy cooking!
                              Slow Cooker Candied Pecans Tasty Snack Recipe

                            Recent Drinks

                            • - 1 ripe banana - 2 tablespoons natural peanut butter - 1 cup unsweetened almond milk (or any milk of choice) - 1 scoop vanilla protein powder (plant-based or whey) - 1 tablespoon chia seeds - 1 teaspoon honey (optional for sweetness) - A pinch of cinnamon - Ice cubes (optional, for a thicker texture) Gather these simple items before you start. A ripe banana gives natural sweetness and creaminess. Use two tablespoons of natural peanut butter for a rich flavor. Almond milk is my go-to, but any milk you love works great. The protein powder adds a boost of nutrition. Choose vanilla to match the banana. Chia seeds are tiny but mighty. They add fiber and help keep you full. If you like it sweeter, add honey, but it’s not a must. A pinch of cinnamon brings warmth and depth to this drink. For a thicker texture, toss in some ice cubes. This smoothie is flexible, so feel free to mix and match based on your taste. Now, let's blend it all together! 1. Start by peeling the ripe banana. Break it into small chunks. 2. In a blender, combine the banana chunks, natural peanut butter, almond milk, protein powder, chia seeds, and a pinch of cinnamon. 3. If you like a colder and thicker smoothie, add some ice cubes. 1. Blend all the ingredients on high speed. Keep blending until you have a smooth and creamy mix. 2. Stop the blender and taste your smoothie. If you want it sweeter, add honey. Blend again for a few seconds to mix. 1. Pour the smoothie into a tall glass. Enjoy it right away for the best taste and creaminess. 2. For a fun twist, you can top it with extra chia seeds or banana slices. This makes it look pretty too! To get the perfect texture, use a ripe banana. A ripe banana makes the smoothie creamy. Add ice cubes if you want it thicker. If you prefer a smoother drink, blend longer. Scrape the sides of the blender to mix all the ingredients well. This ensures a silky-smooth result. If your smoothie tastes too bland, add honey or more banana. Start with a teaspoon of honey. Blend and taste again. You can always add more honey if needed. This way, you control the sweetness to match your taste. Remember, ripe bananas also add natural sweetness. Use a high-speed blender for the best results. A strong blender breaks down the ingredients quickly. If you have a less powerful blender, blend in stages. Start with the liquids first, then add the solids. This helps everything mix better. Make sure your blender is clean for the best flavor. {{image_2}} You can switch the peanut butter for other nut butters. Almond butter offers a nutty taste. Cashew butter is creamy and sweet. Sunflower seed butter is a great choice for allergies. Each nut butter brings its own flavor and health benefits. Experiment to find your favorite. You can add many fruits to the smoothie. Frozen berries add sweetness and color. Spinach or kale boosts nutrition without changing the taste. Try mango for a tropical twist. Each fruit adds vitamins and makes the smoothie fun. Mix and match to discover new flavors. Choosing the right protein powder is key. Plant-based powders are great for vegan diets. Whey protein is popular for muscle recovery. Look for flavors that match your taste, like chocolate or vanilla. The right powder can enhance the smoothie’s flavor and nutrition. Test different types to see what you prefer. Store any leftover smoothie in an airtight container. You want to keep it fresh. Place it in the fridge right after making it. It will stay good for about one day. When you are ready to drink it again, shake or stir well. This helps mix any settled ingredients. You can freeze your smoothie for later. Pour it into ice cube trays or freezer-safe bags. This way, you can grab a portion whenever you want. To use, thaw the smoothie overnight in the fridge. You can also blend it again for a fresh taste. In the fridge, your smoothie lasts about 24 hours. In the freezer, it can last up to three months. Just remember, the sooner you drink it, the better the taste and texture will be! Yes, this smoothie is gluten-free. All the ingredients listed are naturally free from gluten. The peanut butter, banana, almond milk, protein powder, chia seeds, and honey do not contain gluten. Always check labels if you use store-bought items to confirm they are gluten-free. Absolutely! To make this smoothie vegan, simply use plant-based protein powder. Ensure your peanut butter is also free from animal products. Replace honey with maple syrup or agave nectar for sweetness. All other ingredients are already vegan-friendly. This smoothie offers many health benefits. It provides protein from the peanut butter and protein powder, which helps build muscle. Bananas add potassium, good for heart health. Chia seeds are packed with fiber, aiding digestion. Almond milk is low in calories and rich in vitamins. Yes, you can use various milk types. Cow’s milk will add creaminess and protein. Soy milk is a great option for extra protein. Coconut milk gives a tropical flavor. Each milk option changes the taste and texture slightly, so choose what you enjoy best. This smoothie recipe combines simple ingredients for great taste and nutrition. You learned step-by-step how to prepare it and tips for perfect texture. Variations let you customize your drink to fit your taste. Remember to store leftovers properly for later enjoyment. Smoothies can be healthy and fun. Try new mixtures to find what you love best. Keep experimenting and enjoy your delicious creations!
                              Peanut Butter Banana Protein Smoothie Easy Recipe
                            • To make a delicious Turmeric Golden Milk Latte, gather these simple ingredients: - 2 cups almond milk (or your preferred milk) - 1 teaspoon ground turmeric - ½ teaspoon ground ginger - ¼ teaspoon cinnamon - 1 tablespoon honey or maple syrup (adjust to taste) - Pinch of black pepper - ½ teaspoon vanilla extract - Optional: a sprinkle of nutmeg for garnish - Almond Milk: This milk is low in calories and rich in vitamins. It helps with heart health. - Turmeric: This spice has curcumin, known for its anti-inflammatory properties. It may help improve brain function. - Ginger: Ginger can help with digestion and nausea. It adds a nice warmth to the drink. - Cinnamon: This spice is rich in antioxidants. It may help lower blood sugar and improve heart health. - Honey or Maple Syrup: Both sweeteners can boost energy. They also provide antioxidants. - Black Pepper: This spice enhances turmeric absorption. It makes the drink more effective. - Vanilla Extract: It adds flavor and can help reduce stress. - Nutmeg: This spice is optional, but it adds warmth and a nice aroma. - Milk Options: You can use oat milk, soy milk, or coconut milk for different flavors. - Sweeteners: If you prefer, try agave syrup or stevia as sugar-free options. - Spices: Experiment with cardamom or cloves for added flavor. - Nutmeg: You can skip it if you don't like nutmeg, or use a touch of cocoa powder instead. 1. Start by taking a small saucepan. 2. Add 2 cups of almond milk to the pan. 3. Measure and add 1 teaspoon of ground turmeric. 4. Next, add ½ teaspoon of ground ginger. 5. Sprinkle in ¼ teaspoon of cinnamon. 6. Sweeten your drink with 1 tablespoon of honey or maple syrup. 7. Don't forget a pinch of black pepper for better absorption of turmeric. 8. Lastly, add ½ teaspoon of vanilla extract. 9. Whisk all the ingredients well in the pan. 10. Place the saucepan on medium heat. 11. Gently warm the mixture while stirring often. 12. Keep an eye on it; do not let it boil. 13. After about 5-7 minutes, it should be hot enough. 14. Remove the pan from heat and let it cool slightly. 15. If you want a frothy drink, use a milk frother or whisk it quickly. 16. Pour the golden milk into your favorite mugs. 17. Optionally, sprinkle a bit of nutmeg on top for a nice touch. 18. Serve warm and enjoy this comforting drink! - Always use a whisk to blend the spices into the milk. - Whisking helps mix the turmeric and other spices evenly. - When heating, keep the heat low to avoid scalding the milk. - Stir often to prevent sticking at the bottom of the pan. - If you see steam but no bubbles, you are at the right temperature. - A milk frother works wonders for a smooth, frothy finish. - If you don’t have a frother, whisk vigorously by hand. - Frothing adds air, giving the latte a creamy feel. - The more you froth, the lighter and fluffier your drink will become. - For an extra touch, froth some almond milk separately and top your latte with it. You can mix spices to make your turmeric latte tastier. Try adding a pinch of nutmeg or a dash of cardamom. These spices add warmth to the drink. You can also use fresh ginger instead of ground ginger. This will give your latte a bright, zesty kick. Just remember, fresh ginger may need more time to steep. Many people rush the heating process. Always warm your milk slowly over medium heat. If you boil it, the spices can lose flavor. Another mistake is not blending the spices well. Make sure to whisk the mixture thoroughly. This helps avoid clumps of turmeric or ginger. Lastly, avoid skipping the black pepper. It helps your body absorb turmeric better. Sweetness is personal. Start with one tablespoon of honey or maple syrup. Taste your latte and add more if you like it sweeter. For creaminess, use full-fat coconut milk for a richer feel. Almond milk is lighter but still delicious. You can also mix almond and coconut milk for the best of both worlds. {{image_2}} You can easily make this latte vegan. Just use almond milk, coconut milk, or oat milk. These milks work great in this recipe. They keep the drink creamy and delicious. If you want a nut-free option, oat milk is the best choice. It blends well with turmeric and spices. To make an iced version, start with brewed turmeric milk. Follow the same steps but let it cool. Pour over ice instead of serving warm. This drink is refreshing on hot days. You can also add some ice cream for a treat! You can mix and match flavors for fun. Try adding matcha for a green twist. This adds a fresh taste and boosts energy. You can also use cocoa for a chocolatey version. The cocoa pairs well with turmeric and spices. For a special touch, add a dash of vanilla extract. This enhances the overall flavor and aroma. To store leftover turmeric golden milk, let it cool first. Then, pour it into an airtight container. Keep it in the fridge for up to three days. This way, you can enjoy the drink again without losing its flavor. When reheating your golden milk, do it gently. Pour it into a small saucepan. Heat it over low to medium heat. Stir it often to avoid burning. Never let it boil, as this can change the taste and texture. You can also use a microwave. Heat in short bursts, stirring in between. Turmeric golden milk lasts about three days in the fridge. Check for signs of spoilage. If it smells sour or has any mold, discard it. Always trust your senses. If it looks or smells off, it’s best to throw it away. Turmeric has many health benefits. It is known for its bright yellow color and active compound called curcumin. Curcumin may help reduce inflammation. It can also support joint health. Some studies suggest it may boost your mood. Turmeric might even help with digestion. Drinking turmeric may also support your immune system. Yes, you can use any milk you like. Almond milk is great, but coconut milk adds creaminess. Oat milk is a good choice for a thicker texture. If you prefer dairy, whole or skim milk works too. Just remember, different types of milk will change the flavor a bit. To make this recipe sugar-free, skip the honey or maple syrup. You can use a sugar substitute like stevia or monk fruit instead. These options will give you sweetness without the calories. Just adjust the amount to your taste. Yes, it is safe for most people to have turmeric daily. Using it in cooking or drinks is a great way to enjoy its benefits. However, if you have health issues or take certain medications, check with a doctor first. Moderation is key, as with any food. In this blog post, we explored the ingredients and health benefits of Turmeric Golden Milk. I shared step-by-step instructions for making it frothy and delicious. We also discovered tips, tricks, and variations to enhance your drink. Proper storage and reheating advice can help you enjoy leftovers. Remember, turmeric offers many health benefits, so enjoy this drink often. Use alternative ingredients if you prefer. With these ideas, you can create the perfect golden milk to suit your taste and health needs. Enjoy your journey to wellness!
                              Turmeric Golden Milk Latte Simple and Creamy Recipe
                            • - 1 ripe mango, peeled and diced - 1 cup fresh pineapple chunks - 1 banana, sliced - 1 cup coconut water (or regular water) - ½ cup plain Greek yogurt (or dairy-free alternative) - 1 tablespoon honey or agave syrup (optional) - A handful of fresh mint leaves (for garnish) - Ice cubes (optional) The key to a delicious mango pineapple smoothie lies in its fresh ingredients. You want ripe fruits for the best flavor. The mango should feel soft when you squeeze it gently. Pineapples should smell sweet and fruity. This smoothie combines sweet mango, tangy pineapple, and creamy banana. Coconut water adds hydration, while Greek yogurt gives it a nice creaminess. You can add honey for extra sweetness if you like. Mint leaves add a refreshing touch when you serve it. Each ingredient plays a role in making this smoothie flavorful and refreshing. Trust me, using fresh ingredients will make a big difference in taste! To make this smoothie, start by gathering your main ingredients. You need a ripe mango, fresh pineapple, and a banana. 1. In a blender, combine the diced mango, pineapple chunks, and banana slices. This mix brings a burst of tropical flavor. 2. Next, add one cup of coconut water to the blender. This not only hydrates but also adds a refreshing twist. 3. For creaminess, pour in half a cup of plain Greek yogurt. If you want it sweeter, drizzle in one tablespoon of honey or agave syrup. 4. Blend on high until the mixture is smooth and creamy. If you like your smoothie chilled, toss in a few ice cubes and blend again until they are fully mixed in. 5. After blending, taste your smoothie. If it needs to be sweeter or thicker, add more honey or coconut water as needed. Once your smoothie is ready, it’s time to serve it. I recommend using tall glasses to show off the vibrant color. For a fun touch, garnish each glass with a few fresh mint leaves on top. This not only looks nice but also adds a fresh aroma. Enjoy your delicious Mango Pineapple Smoothie! For the Full Recipe, please refer back to the ingredient list and instructions. To get your smoothie just right, focus on creaminess. Use ripe fruits like mango and banana. The Greek yogurt adds a nice, smooth texture. If you want a richer taste, try full-fat yogurt. For a lighter feel, use low-fat or dairy-free yogurt. Adjust the thickness by adding more liquid. Coconut water is great for this. If your smoothie is too thick, just pour in a bit more. Blend again until it’s just how you like it. If you want a thicker smoothie, add more banana or ice cubes. Boosting flavor can take your smoothie to the next level. Try adding spices like cinnamon or ginger. These spices not only add warmth but also great health benefits. A dash of cinnamon can make the smoothie taste cozy. A pinch of ginger gives it a nice kick. You can also use flavored yogurts for extra taste. Vanilla or coconut yogurt work well. If you want sweetness, think about honey or agave syrup. These can make your smoothie more enjoyable. For a fun twist, try adding a splash of vanilla extract. It will add a lovely aroma to your drink. For a full taste experience, explore the [Full Recipe]. {{image_2}} You can change the fruit in your smoothie to keep it fresh. Adding strawberries or blueberries gives a sweet twist. These berries add a nice color and taste. You can also try using other tropical fruits like papaya or kiwi. These fruits bring new flavors and nutrients to your drink. Each fruit will change the smoothie’s taste and make it unique. If you want a dairy-free smoothie, swap the Greek yogurt for a plant-based option. Almond, coconut, or soy yogurt works well. These alternatives keep your smoothie creamy without dairy. For sweeteners, you can use maple syrup or agave syrup for a vegan choice. These options add sweetness while keeping your drink plant-based. Enjoy the fruity goodness in many ways! Don't forget to check the Full Recipe for more ideas. You may have some smoothie left after making your Mango Pineapple Smoothie. To keep it fresh, use a glass jar or a BPA-free plastic container. Seal it tightly to prevent air from spoiling the flavor. Store it in the fridge for up to 24 hours. After that, it may lose some taste and texture. If you want to enjoy the smoothie later, freezing is a great option. Pour the smoothie into ice cube trays or freezer-safe bags. Leave some space in the bags for expansion. You can freeze it for up to three months. When you’re ready to drink it, take out what you need. Thaw it in the fridge overnight or blend it straight from the freezer for a slushy treat. Enjoy your refreshing Mango Pineapple Smoothie anytime! Yes, you can make this smoothie ahead of time. If you want to save it, store it in an airtight container. Keep it in the fridge for up to one day. The smoothie may separate, so stir it well before you drink it. If you don’t have coconut water, use regular water or fruit juice instead. Fruit juice can add a nice flavor. You can also try almond milk for a creamier touch. Just remember, the taste will change a bit based on what you use. To make the smoothie thicker, add more Greek yogurt or a banana. You can also use frozen fruit instead of fresh. Frozen fruit gives you a nice, thick texture. Just blend it well, and you’ll get a creamy drink. Yes, this smoothie is great for kids! It is packed with fruits and tastes sweet. You can adjust the sweetness by adding less honey. The bright colors and fresh flavors will appeal to children, making it a fun treat. You can find the Full Recipe for the Tropical Bliss Mango Pineapple Smoothie above in this article. This will guide you through every step to create your own refreshing drink. This blog post covers a simple and tasty smoothie recipe. You learned about the key ingredients and their nutritional benefits. I provided steps to prepare and serve the smoothie perfectly. Tips for texture and flavor help you make it your own. You can explore variations to suit your tastes or dietary needs. Don’t forget storage tips to keep leftovers fresh. Enjoy your smoothie making journey. It’s all about trying new things and having fun!
                              Mango Pineapple Smoothie Refreshing and Flavorful Blend
                            • - 2 packets of frozen açaí puree - 1 ripe banana - 1 cup of fresh pineapple chunks - 1 cup of coconut milk (or any non-dairy milk) - 1 tablespoon of honey or agave syrup (optional) For a vibrant tropical taste, the main ingredients are key. Açaí puree brings rich color and flavor. It is full of antioxidants. Bananas add creaminess and natural sweetness. Fresh pineapple gives a bright, juicy touch. Coconut milk offers a smooth base. You can use any non-dairy milk you prefer. Honey or agave syrup adds sweetness if needed. - Sliced kiwi - Coconut flakes - Granola - Chia seeds - Fresh berries (e.g., strawberries, blueberries) Toppings make your smoothie bowl pop! Sliced kiwi adds a zesty kick. Coconut flakes give it a tropical crunch. Granola provides texture and flavor. Chia seeds offer extra nutrients. Fresh berries, like strawberries and blueberries, add color and taste. You can mix and match these toppings for a fun look. For the full recipe, please refer to the section above. 1. Blend the ingredients Start by adding the frozen açaí puree, ripe banana, fresh pineapple chunks, and coconut milk into a blender. If you want it sweeter, you can add honey or agave syrup. Blend this mixture on high speed until it becomes creamy and smooth. 2. Adjust consistency with coconut milk If your smoothie is too thick, just add a bit more coconut milk. Blend again until you reach the texture you want. This step is key to making your smoothie bowl enjoyable. 3. Pour into a bowl Once blended, carefully pour the smoothie mixture into a bowl. Make sure to use a large enough bowl to hold all the goodness. 4. Add toppings creatively Now comes the fun part! Arrange your toppings, such as sliced kiwi, coconut flakes, granola, chia seeds, and fresh berries, over the smoothie. Try to create a colorful pattern. I love making a circular design to highlight all the vibrant colors. - Tips for presentation Use a shallow bowl to show off your beautiful toppings. You can also sprinkle some extra coconut flakes around the edge for a nice touch. A colorful presentation makes your smoothie bowl more fun to eat. - Recommended serving utensils Serve your smoothie bowl with a regular spoon. If you want to make it more special, use a wooden spoon or a cute, colorful one. Enjoy your tropical treat right away to keep it fresh and tasty. For the full recipe, refer to the earlier sections. To make a great smoothie bowl, start with ripe fruits. Ripe fruits taste better and add natural sweetness. Look for bananas that are yellow with some brown spots. When it comes to pineapples, choose ones that smell sweet. It ensures they are juicy and fresh. Blending is key to your smoothie bowl. You want a smooth and creamy texture. If your mix is too thick, add more coconut milk. Blend again until you reach the right consistency. A good blend makes your bowl enjoyable and easy to eat. A colorful topping arrangement makes your smoothie bowl pop. Use fresh berries, sliced kiwi, and coconut flakes. Lay them out in a pattern. A circular design looks appealing and fun. To elevate your smoothie bowl's look, use bowls with interesting shapes. Tall bowls or wide, shallow ones can change the game. Garnish with a sprinkle of chia seeds for a fancy touch. This not only looks great but adds a bit of crunch too. {{image_2}} You can change the non-dairy milk for this smoothie. Almond, soy, or oat milk work well. Each milk adds a different taste. Try using seasonal fruits too. Mango, papaya, or berries add a fresh twist. You can mix and match to find your favorite blend. Want more nutrients? Add spinach or kale to your smoothie. They blend well and boost health. You won’t even taste them! For extra energy, stir in nut butter or protein powder. Both will make your smoothie more filling. They add great flavor too! You can also experiment with different combinations to find the best taste for you. To store leftovers, place your smoothie bowl in the fridge. Use a tight container to keep it fresh. Glass or BPA-free plastic works well for storage. I prefer glass because it keeps flavors better. You can freeze smoothie bowls for later. Just pour the mixture into an airtight container. Leave some space at the top, as it will expand when frozen. To defrost, place it in the fridge overnight. If you’re in a rush, you can use the microwave. Just heat it in short bursts to avoid cooking. Enjoy your tropical treat later with ease! For the recipe, check out the Full Recipe. What is açaí and what are its benefits? Açaí is a small, dark purple berry from Brazil. It is full of antioxidants, which help fight free radicals in the body. Açaí is also rich in fiber, promoting good digestion. Plus, it has healthy fats that support heart health. You can enjoy its fruity taste in many dishes. Can I make this smoothie bowl ahead of time? Yes! You can prepare the smoothie mix and store it in the fridge for up to 24 hours. Just remember to keep the toppings separate. This way, your bowl stays fresh and tasty. How can I make this recipe vegan or gluten-free? To make it vegan, use agave syrup instead of honey. For gluten-free, ensure your granola and any other toppings are gluten-free. Most fruits and coconut milk are naturally gluten-free, so you’re all set! Can I substitute açaí with other fruits? Yes, you can! If you can’t find açaí, try using frozen berries like blueberries or strawberries. These fruits will add sweetness and a burst of color to your bowl. What to do if the smoothie is too thick? If your smoothie is too thick, just add a little more coconut milk. Blend again until you reach your desired creaminess. This will make it easier to pour and enjoy. How to fix a smoothie bowl that tastes too bland? If your smoothie bowl lacks flavor, try adding a splash of vanilla extract or a pinch of salt. You can also mix in a bit of honey or agave syrup for sweetness. Adjust the toppings to add more taste and texture. This article covers how to make a delicious açaí smoothie bowl. You learned about the key ingredients, easy steps for preparation, and creative topping ideas. I shared tips to improve taste and presentation, plus fun variations to try. Don’t forget storage techniques to keep your bowl fresh. With all this information, you can enjoy a tasty and nutritious treat anytime. Get creative with your favorites and make this recipe truly yours. Enjoy every bite!
                              Tropical Acai Smoothie Bowl Energizing Healthy Treat

                            Footer

                            Experience the bliss of Chocolate Covered Strawberry Cookies, where soft, chocolatey cookies meet juicy strawberries and rich chocolate. In this delightful treat, learn essential ingredients, step-by-step baking instructions, and fun variations to impress everyone at home. Get creative with toppings and decorating ideas that make these cookies a showstopper. Click through to explore the complete recipe and start your baking adventure today!
                            ↑ back to top

                            More information

                            • Home
                            • Drinks
                            • Appetizer
                            • Dinner
                            • Desserts
                            • About
                            • Contact
                            • Privacy Policy

                            Our Policies

                            • Privacy Policy
                            • GDPR Policy
                            • Terms Of Use
                            • Copyright Policy
                            • Cookie Policy
                            • Disclaimer

                            Copyright © 2025 cheftaling