Chef Taling

  • Disclaimer
  • Terms Of Use
  • GDPR Policy
  • Cookie Policy
menu icon
go to homepage
  • Disclaimer
  • Terms Of Use
  • GDPR Policy
  • Cookie Policy
search icon
Homepage link
  • Disclaimer
  • Terms Of Use
  • GDPR Policy
  • Cookie Policy
×

Sun-Dried Tomato Pesto Pasta Delightful and Easy Meal

Published: Jun 27, 2025 · Modified: Aug 1, 2025 by Taling · This post may contain affiliate links · Leave a Comment

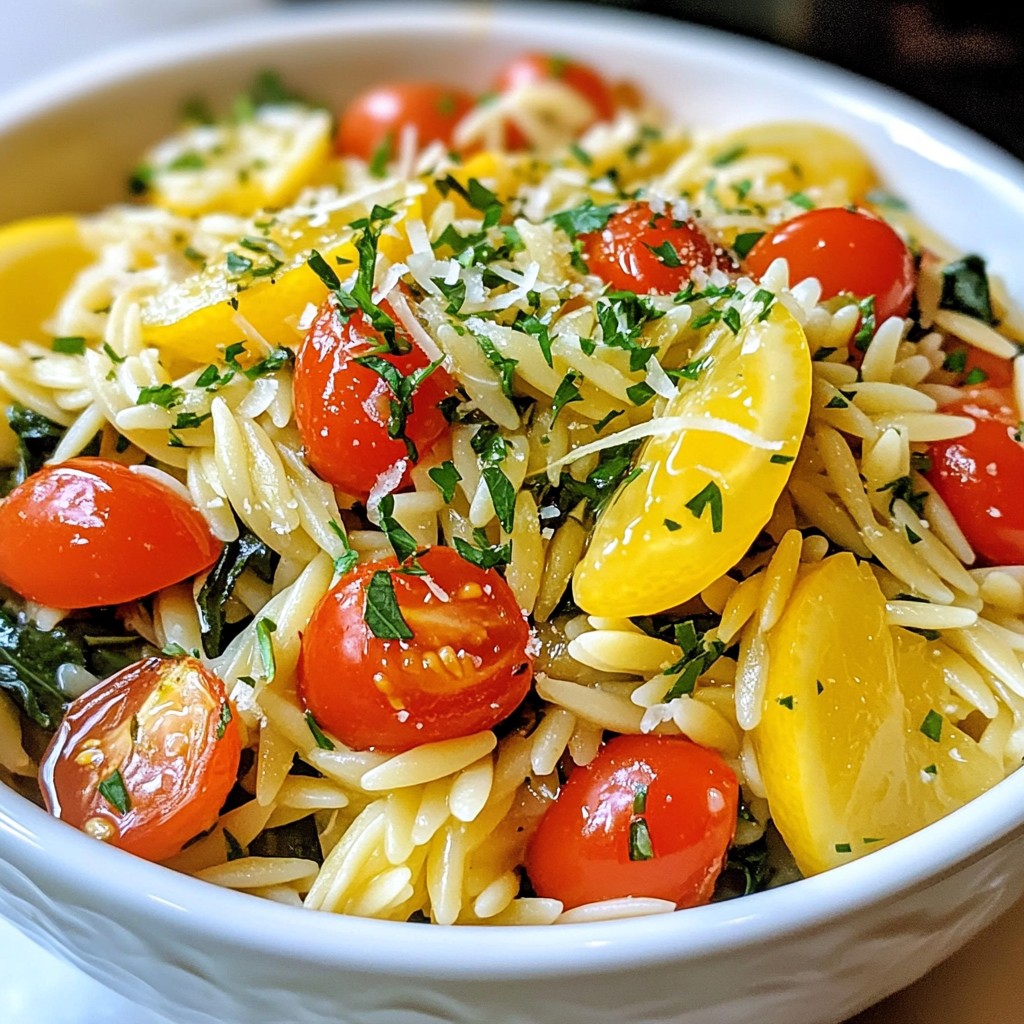
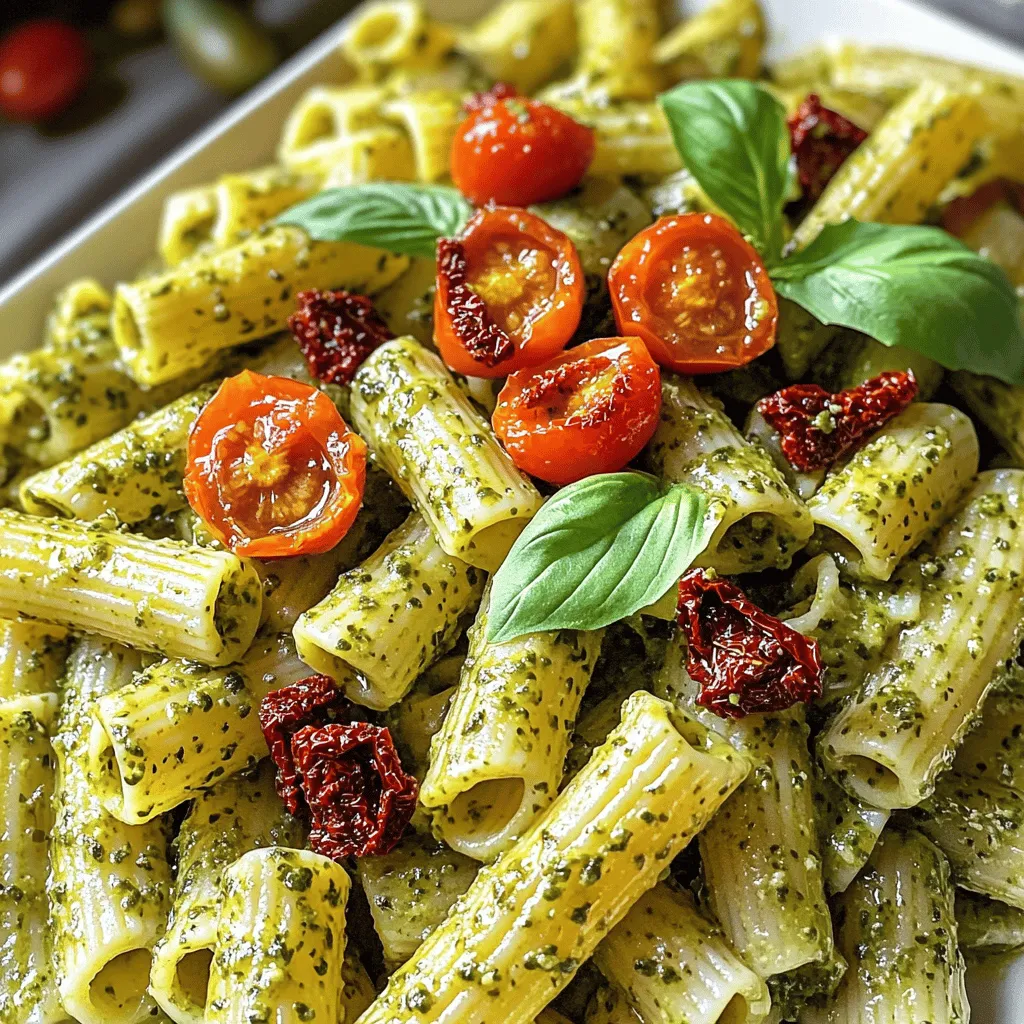
Looking for a quick and tasty meal? Sun-Dried Tomato Pesto Pasta is your answer! This dish is full of flavor and easy to make. With just a few simple ingredients, you can whip up a delightful dinner in no time. I’ll guide you through each step to create a meal that’s sure to impress. Get ready to enjoy a bowl of happiness that is both satisfying and delicious!

- 250g pasta (penne or spaghetti) - 150g sun-dried tomatoes in oil, drained - 50g fresh basil leaves - 30g grated Parmesan cheese (or nutritional yeast) - 1 clove garlic You need good ingredients for great Sun-Dried Tomato Pesto Pasta. Start with the pasta. I like penne or spaghetti, but you can choose your favorite. Sun-dried tomatoes add a rich flavor. Use those packed in oil for extra taste. Fresh basil brings a nice green touch. It also gives a fresh aroma. Grated Parmesan cheese gives a salty kick. If you want a vegan option, use nutritional yeast instead. Finally, add one clove of garlic. It gives a lovely scent and depth to the dish. - 50g pine nuts (or walnuts) - Salt and pepper to taste - Cherry tomatoes for garnish - Extra basil leaves for garnish You can enhance your pasta with a few extra items. Pine nuts or walnuts add crunch and flavor. Season with salt and pepper for balance. Cherry tomatoes make a pretty garnish. They add pop and freshness. A few extra basil leaves on top also look nice. For the full recipe, check out the detailed instructions to create this delightful dish! Start by bringing a large pot of salted water to a boil. The salt adds flavor to the pasta as it cooks. Once the water is boiling, add 250g of your chosen pasta, like penne or spaghetti. Cook the pasta according to the package instructions. You want it to be al dente, which means it should be firm when bitten. This usually takes about 8 to 12 minutes. Remember to reserve 1 cup of the pasta water before draining the pasta. While the pasta cooks, it’s time to make the tasty pesto. Grab a food processor and add these ingredients: - 150g sun-dried tomatoes in oil, drained - 50g fresh basil leaves - 30g grated Parmesan cheese (or nutritional yeast) - 1 clove garlic - 50g pine nuts (or walnuts) Blend these together until they are finely chopped. As you process the mixture, slowly drizzle in 100ml of olive oil. This will help create a smooth paste. If your pesto is too thick, add a bit of the reserved pasta water until you reach the desired consistency. Now for the fun part! In a large bowl, mix the cooked pasta with your fresh sun-dried tomato pesto. Toss everything well so that the pasta gets coated evenly. It’s important to taste and season with salt and pepper as needed. If you prefer a creamier texture, stir in more reserved pasta water one tablespoon at a time. To serve, plate the pasta in bowls or on a large dish. Garnish with halved cherry tomatoes and extra basil leaves to make it look great. For an extra touch, drizzle some olive oil over the top. Enjoy your delightful and easy sun-dried tomato pesto pasta! For the full recipe, check the details above. To get the best flavor, start with quality sun-dried tomatoes. Look for ones packed in oil. They add depth and richness. Fresh basil is just as important. It gives a bright flavor that shines through. Always use fresh basil instead of dried for the best taste. Adjusting the pesto's consistency is key. If it feels too thick, add the reserved pasta water. This water has starch that helps bind the sauce. For creaminess, drizzle in more olive oil slowly. This will make your pesto silky and smooth. Garnish your dish to make it pop. Use halved cherry tomatoes for a splash of color. Extra basil leaves also add freshness. For special occasions, serve in a large bowl. Drizzle with olive oil and sprinkle more cheese on top for a gourmet touch. For the complete recipe, check out the Full Recipe. {{image_2}} You can easily make this dish vegan. Just swap the cheese for nutritional yeast. Nutritional yeast adds a cheesy flavor without dairy. Use about 30g for a nice taste. It also brings extra nutrients! This way, anyone can enjoy this meal. Want to make it heartier? You can add grilled chicken or chickpeas. Grilled chicken gives a great texture and flavor. Slice it up and mix it into the pasta. Chickpeas are a good choice for a plant-based option. They add protein and a nice bite. This makes the dish more filling and satisfying. Pine nuts are tasty, but you can try other nuts too! Walnuts or almonds work well in the pesto. They bring unique flavors and textures. Just chop them lightly before mixing. This small change can make your dish stand out. To keep your Sun-Dried Tomato Pesto Pasta fresh, store leftovers in an airtight container. Place the container in the fridge. The pasta stays good for about three days. Before you eat it again, check for any strange smells or colors. If you want to save some for later, freezing is easy. First, let the pasta cool down completely. Then, portion it into freezer-safe bags or containers. Squeeze out as much air as possible. Label and date the bags. You can freeze it for up to three months. Just remember: the texture may change after freezing. When you’re ready to enjoy your pasta again, reheating is key. The best way is to use the stovetop. Add the pasta to a pan with a splash of water or olive oil. Heat over low to medium heat, stirring often. This helps keep the flavors and moisture intact. You can also use the microwave. Use a microwave-safe bowl and cover it with a damp paper towel. Heat in short bursts, stirring in between, until hot. Enjoy your meal just like the first time! Sun-Dried Tomato Pesto stays fresh for about one week in the fridge. To keep it fresh, store it in an airtight container. Make sure to cover the pesto with a thin layer of olive oil. This helps prevent it from drying out. If you want to keep it longer, you can freeze it. In the freezer, it can last up to three months. You can use fresh tomatoes, but it changes the taste. Sun-dried tomatoes have a rich, concentrated flavor that fresh ones lack. If you use fresh tomatoes, roast them first. This enhances their flavor and adds a nice sweetness. However, the texture of your pesto will be different. It may not be as creamy or thick with fresh tomatoes. Several side dishes complement Sun-Dried Tomato Pesto Pasta well. Here are some great options: - A simple green salad with vinaigrette - Garlic bread for a crunchy side - Roasted vegetables for added flavor - Grilled shrimp for a protein boost - A light soup like minestrone or tomato basil These sides enhance your meal and balance the flavors of the pasta. Enjoy experimenting with these options! This blog post covered a simple yet tasty Sun-Dried Tomato Pesto Pasta recipe. We discussed essential ingredients, cooking steps, and tips for flavor and texture. Remember, using fresh basil and quality tomatoes makes a big difference. You can also customize the dish with vegan options or extra protein. Storage tips help keep your meal fresh longer. Enjoy making this dish, and don't hesitate to experiment with variations. Your journey in the kitchen can be fun and delicious!

Ingredients

Essential Components

  1. 250g pasta (penne or spaghetti)
  2. 150g sun-dried tomatoes in oil, drained
  3. 50g fresh basil leaves
  4. 30g grated Parmesan cheese (or nutritional yeast)
  5. 1 clove garlic

You need good ingredients for great Sun-Dried Tomato Pesto Pasta. Start with the pasta. I like penne or spaghetti, but you can choose your favorite. Sun-dried tomatoes add a rich flavor. Use those packed in oil for extra taste. Fresh basil brings a nice green touch. It also gives a fresh aroma.

Grated Parmesan cheese gives a salty kick. If you want a vegan option, use nutritional yeast instead. Finally, add one clove of garlic. It gives a lovely scent and depth to the dish.

Optional Add-Ons

  1. 50g pine nuts (or walnuts)
  2. Salt and pepper to taste
  3. Cherry tomatoes for garnish
  4. Extra basil leaves for garnish

You can enhance your pasta with a few extra items. Pine nuts or walnuts add crunch and flavor. Season with salt and pepper for balance. Cherry tomatoes make a pretty garnish. They add pop and freshness. A few extra basil leaves on top also look nice.

Step-by-Step Instructions

Cooking the Pasta

Start by bringing a large pot of salted water to a boil. The salt adds flavor to the pasta as it cooks. Once the water is boiling, add 250g of your chosen pasta, like penne or spaghetti. Cook the pasta according to the package instructions. You want it to be al dente, which means it should be firm when bitten. This usually takes about 8 to 12 minutes. Remember to reserve 1 cup of the pasta water before draining the pasta.

Preparing the Pesto

While the pasta cooks, it’s time to make the tasty pesto. Grab a food processor and add these ingredients:

  1. 150g sun-dried tomatoes in oil, drained
  2. 50g fresh basil leaves
  3. 30g grated Parmesan cheese (or nutritional yeast)
  4. 1 clove garlic
  5. 50g pine nuts (or walnuts)

Blend these together until they are finely chopped. As you process the mixture, slowly drizzle in 100ml of olive oil. This will help create a smooth paste. If your pesto is too thick, add a bit of the reserved pasta water until you reach the desired consistency.

Finalizing and Serving

Now for the fun part! In a large bowl, mix the cooked pasta with your fresh sun-dried tomato pesto. Toss everything well so that the pasta gets coated evenly. It’s important to taste and season with salt and pepper as needed. If you prefer a creamier texture, stir in more reserved pasta water one tablespoon at a time.

To serve, plate the pasta in bowls or on a large dish. Garnish with halved cherry tomatoes and extra basil leaves to make it look great. For an extra touch, drizzle some olive oil over the top. Enjoy your delightful and easy sun-dried tomato pesto pasta!

Tips & Tricks

Achieving the Best Flavor

To get the best flavor, start with quality sun-dried tomatoes. Look for ones packed in oil. They add depth and richness. Fresh basil is just as important. It gives a bright flavor that shines through. Always use fresh basil instead of dried for the best taste.

Enhancing the Texture

Adjusting the pesto’s consistency is key. If it feels too thick, add the reserved pasta water. This water has starch that helps bind the sauce. For creaminess, drizzle in more olive oil slowly. This will make your pesto silky and smooth.

Presentation Suggestions

Garnish your dish to make it pop. Use halved cherry tomatoes for a splash of color. Extra basil leaves also add freshness. For special occasions, serve in a large bowl. Drizzle with olive oil and sprinkle more cheese on top for a gourmet touch.

Variations

Vegan Alternatives

You can easily make this dish vegan. Just swap the cheese for nutritional yeast. Nutritional yeast adds a cheesy flavor without dairy. Use about 30g for a nice taste. It also brings extra nutrients! This way, anyone can enjoy this meal.

Protein Additions

Want to make it heartier? You can add grilled chicken or chickpeas. Grilled chicken gives a great texture and flavor. Slice it up and mix it into the pasta. Chickpeas are a good choice for a plant-based option. They add protein and a nice bite. This makes the dish more filling and satisfying.

Different Nut Options

Pine nuts are tasty, but you can try other nuts too! Walnuts or almonds work well in the pesto. They bring unique flavors and textures. Just chop them lightly before mixing. This small change can make your dish stand out.

Storage Information

Short-Term Storage

To keep your Sun-Dried Tomato Pesto Pasta fresh, store leftovers in an airtight container. Place the container in the fridge. The pasta stays good for about three days. Before you eat it again, check for any strange smells or colors.

Freezing Instructions

If you want to save some for later, freezing is easy. First, let the pasta cool down completely. Then, portion it into freezer-safe bags or containers. Squeeze out as much air as possible. Label and date the bags. You can freeze it for up to three months. Just remember: the texture may change after freezing.

Reheating Tips

When you’re ready to enjoy your pasta again, reheating is key. The best way is to use the stovetop. Add the pasta to a pan with a splash of water or olive oil. Heat over low to medium heat, stirring often. This helps keep the flavors and moisture intact. You can also use the microwave. Use a microwave-safe bowl and cover it with a damp paper towel. Heat in short bursts, stirring in between, until hot. Enjoy your meal just like the first time!

FAQs

How long does Sun-Dried Tomato Pesto stay fresh?

Sun-Dried Tomato Pesto stays fresh for about one week in the fridge. To keep it fresh, store it in an airtight container. Make sure to cover the pesto with a thin layer of olive oil. This helps prevent it from drying out. If you want to keep it longer, you can freeze it. In the freezer, it can last up to three months.

Can I use fresh tomatoes instead of sun-dried?

You can use fresh tomatoes, but it changes the taste. Sun-dried tomatoes have a rich, concentrated flavor that fresh ones lack. If you use fresh tomatoes, roast them first. This enhances their flavor and adds a nice sweetness. However, the texture of your pesto will be different. It may not be as creamy or thick with fresh tomatoes.

What are some side dishes that pair well with this pasta?

Several side dishes complement Sun-Dried Tomato Pesto Pasta well. Here are some great options:

  1. A simple green salad with vinaigrette
  2. Garlic bread for a crunchy side
  3. Roasted vegetables for added flavor
  4. Grilled shrimp for a protein boost
  5. A light soup like minestrone or tomato basil

These sides enhance your meal and balance the flavors of the pasta. Enjoy experimenting with these options!

This blog post covered a simple yet tasty Sun-Dried Tomato Pesto Pasta recipe. We discussed essential ingredients, cooking steps, and tips for flavor and texture. Remember, using fresh basil and quality tomatoes makes a big difference. You can also customize the dish with vegan options or extra protein. Storage tips help keep your meal fresh longer. Enjoy making this dish, and don’t hesitate to experiment with variations. Your journey in the kitchen can be fun and delicious!

- 250g pasta (penne or spaghetti) - 150g sun-dried tomatoes in oil, drained - 50g fresh basil leaves - 30g grated Parmesan cheese (or nutritional yeast) - 1 clove garlic You need good ingredients for great Sun-Dried Tomato Pesto Pasta. Start with the pasta. I like penne or spaghetti, but you can choose your favorite. Sun-dried tomatoes add a rich flavor. Use those packed in oil for extra taste. Fresh basil brings a nice green touch. It also gives a fresh aroma. Grated Parmesan cheese gives a salty kick. If you want a vegan option, use nutritional yeast instead. Finally, add one clove of garlic. It gives a lovely scent and depth to the dish. - 50g pine nuts (or walnuts) - Salt and pepper to taste - Cherry tomatoes for garnish - Extra basil leaves for garnish You can enhance your pasta with a few extra items. Pine nuts or walnuts add crunch and flavor. Season with salt and pepper for balance. Cherry tomatoes make a pretty garnish. They add pop and freshness. A few extra basil leaves on top also look nice. For the full recipe, check out the detailed instructions to create this delightful dish! Start by bringing a large pot of salted water to a boil. The salt adds flavor to the pasta as it cooks. Once the water is boiling, add 250g of your chosen pasta, like penne or spaghetti. Cook the pasta according to the package instructions. You want it to be al dente, which means it should be firm when bitten. This usually takes about 8 to 12 minutes. Remember to reserve 1 cup of the pasta water before draining the pasta. While the pasta cooks, it’s time to make the tasty pesto. Grab a food processor and add these ingredients: - 150g sun-dried tomatoes in oil, drained - 50g fresh basil leaves - 30g grated Parmesan cheese (or nutritional yeast) - 1 clove garlic - 50g pine nuts (or walnuts) Blend these together until they are finely chopped. As you process the mixture, slowly drizzle in 100ml of olive oil. This will help create a smooth paste. If your pesto is too thick, add a bit of the reserved pasta water until you reach the desired consistency. Now for the fun part! In a large bowl, mix the cooked pasta with your fresh sun-dried tomato pesto. Toss everything well so that the pasta gets coated evenly. It’s important to taste and season with salt and pepper as needed. If you prefer a creamier texture, stir in more reserved pasta water one tablespoon at a time. To serve, plate the pasta in bowls or on a large dish. Garnish with halved cherry tomatoes and extra basil leaves to make it look great. For an extra touch, drizzle some olive oil over the top. Enjoy your delightful and easy sun-dried tomato pesto pasta! For the full recipe, check the details above. To get the best flavor, start with quality sun-dried tomatoes. Look for ones packed in oil. They add depth and richness. Fresh basil is just as important. It gives a bright flavor that shines through. Always use fresh basil instead of dried for the best taste. Adjusting the pesto's consistency is key. If it feels too thick, add the reserved pasta water. This water has starch that helps bind the sauce. For creaminess, drizzle in more olive oil slowly. This will make your pesto silky and smooth. Garnish your dish to make it pop. Use halved cherry tomatoes for a splash of color. Extra basil leaves also add freshness. For special occasions, serve in a large bowl. Drizzle with olive oil and sprinkle more cheese on top for a gourmet touch. For the complete recipe, check out the Full Recipe. {{image_2}} You can easily make this dish vegan. Just swap the cheese for nutritional yeast. Nutritional yeast adds a cheesy flavor without dairy. Use about 30g for a nice taste. It also brings extra nutrients! This way, anyone can enjoy this meal. Want to make it heartier? You can add grilled chicken or chickpeas. Grilled chicken gives a great texture and flavor. Slice it up and mix it into the pasta. Chickpeas are a good choice for a plant-based option. They add protein and a nice bite. This makes the dish more filling and satisfying. Pine nuts are tasty, but you can try other nuts too! Walnuts or almonds work well in the pesto. They bring unique flavors and textures. Just chop them lightly before mixing. This small change can make your dish stand out. To keep your Sun-Dried Tomato Pesto Pasta fresh, store leftovers in an airtight container. Place the container in the fridge. The pasta stays good for about three days. Before you eat it again, check for any strange smells or colors. If you want to save some for later, freezing is easy. First, let the pasta cool down completely. Then, portion it into freezer-safe bags or containers. Squeeze out as much air as possible. Label and date the bags. You can freeze it for up to three months. Just remember: the texture may change after freezing. When you’re ready to enjoy your pasta again, reheating is key. The best way is to use the stovetop. Add the pasta to a pan with a splash of water or olive oil. Heat over low to medium heat, stirring often. This helps keep the flavors and moisture intact. You can also use the microwave. Use a microwave-safe bowl and cover it with a damp paper towel. Heat in short bursts, stirring in between, until hot. Enjoy your meal just like the first time! Sun-Dried Tomato Pesto stays fresh for about one week in the fridge. To keep it fresh, store it in an airtight container. Make sure to cover the pesto with a thin layer of olive oil. This helps prevent it from drying out. If you want to keep it longer, you can freeze it. In the freezer, it can last up to three months. You can use fresh tomatoes, but it changes the taste. Sun-dried tomatoes have a rich, concentrated flavor that fresh ones lack. If you use fresh tomatoes, roast them first. This enhances their flavor and adds a nice sweetness. However, the texture of your pesto will be different. It may not be as creamy or thick with fresh tomatoes. Several side dishes complement Sun-Dried Tomato Pesto Pasta well. Here are some great options: - A simple green salad with vinaigrette - Garlic bread for a crunchy side - Roasted vegetables for added flavor - Grilled shrimp for a protein boost - A light soup like minestrone or tomato basil These sides enhance your meal and balance the flavors of the pasta. Enjoy experimenting with these options! This blog post covered a simple yet tasty Sun-Dried Tomato Pesto Pasta recipe. We discussed essential ingredients, cooking steps, and tips for flavor and texture. Remember, using fresh basil and quality tomatoes makes a big difference. You can also customize the dish with vegan options or extra protein. Storage tips help keep your meal fresh longer. Enjoy making this dish, and don't hesitate to experiment with variations. Your journey in the kitchen can be fun and delicious!

Sun-Dried Tomato Pesto Pasta

Delight your taste buds with this easy and delicious sun-dried tomato pesto pasta recipe! Made with fresh ingredients like sun-dried tomatoes, basil, and Parmesan cheese, this dish is simple to prepare and packed with flavor. Perfect for a quick weeknight dinner, it takes only 30 minutes from start to finish. Ready to impress your family and friends?
Print Recipe Pin Recipe

Ingredients
  

250g pasta (penne or spaghetti)

150g sun-dried tomatoes in oil, drained

50g fresh basil leaves

30g grated Parmesan cheese (or nutritional yeast for a vegan option)

1 clove garlic

50g pine nuts (or walnuts)

100ml olive oil

Salt and pepper to taste

Cherry tomatoes, halved (for garnish)

Extra basil leaves (for garnish)

Instructions
 

Cook the Pasta: In a large pot, bring salted water to a boil. Add the pasta and cook according to package instructions until al dente. Reserve 1 cup of pasta water, then drain and set the pasta aside.

    Make the Pesto: In a food processor, combine the sun-dried tomatoes, fresh basil, Parmesan cheese, garlic, and pine nuts. Blend until finely chopped.

      Add Olive Oil: While the processor is running, slowly drizzle in the olive oil until the mixture becomes a smooth paste. If it's too thick, add in a bit of the reserved pasta water until you reach your desired consistency.

        Combine: In a large bowl, combine the cooked pasta with the sun-dried tomato pesto. Toss well to ensure the pasta is evenly coated.

          Season: Taste the mixture and season with salt and pepper as needed. If you want a creamier texture, add more reserved pasta water one tablespoon at a time.

            Serve: Plate the pasta in bowls or on a large serving dish. Garnish with halved cherry tomatoes and extra basil leaves for a pop of color.

              - Prep Time: 10 minutes | Total Time: 30 minutes | Servings: 4

                Presentation Tips: Drizzle some extra olive oil over the top before serving and sprinkle with additional grated Parmesan or nutritional yeast for garnishing.

                  More Dinner

                  • To make flavorful cilantro lime shrimp tacos, you'll need the following fresh ingredients: - 1 lb (450g) medium shrimp, peeled and deveined - 2 tablespoons olive oil - 3 cloves garlic, minced - Zest and juice of 2 limes - 1 teaspoon ground cumin - 1 teaspoon chili powder - 1/2 teaspoon salt - 1/4 teaspoon black pepper - 1/4 cup fresh cilantro, chopped - 8 small corn or flour tortillas - 1 cup shredded cabbage - 1 avocado, sliced These ingredients come together for a fresh and vibrant dish. For added flavor and texture, consider these optional toppings: - Cotija cheese (for a salty kick) - Lime wedges (for extra zing) These toppings enhance the dish. They add layers of flavor and provide a nice contrast. These tacos pair well with side dishes like: - Mexican rice (for heartiness) - Black beans (for protein) - Grilled corn on the cob (for sweetness) These sides complement the tacos. They create a colorful and balanced meal. Enjoy experimenting with these flavors and textures! First, grab a medium bowl. Add the shrimp, olive oil, minced garlic, lime juice, and lime zest. Sprinkle in the ground cumin, chili powder, salt, and black pepper. Mix well to coat the shrimp. This step is key for flavor. Let the shrimp marinate in the fridge for about 15-20 minutes. This helps the shrimp absorb all the zesty goodness. Next, heat a large skillet over medium-high heat. Once hot, carefully add the shrimp in a single layer. Cook the shrimp for about 2-3 minutes on each side. You’ll know they’re done when they turn pink and opaque. Avoid overcooking to keep them tender and juicy. After cooking, toss the shrimp with chopped cilantro for a fresh touch. Warm the tortillas in a separate pan for about 30 seconds on each side. This makes them soft and easy to fold. On each tortilla, place a good amount of shredded cabbage. Then, add the cilantro lime shrimp on top. If you like, add avocado slices for creaminess. For extra flavor, sprinkle Cotija cheese on top. Serve with lime wedges on the side for an extra burst of zest. Enjoy your fresh and tasty tacos! When you choose shrimp, look for ones that smell clean. Fresh shrimp should have a slight ocean scent. Check for firm bodies and shiny shells. Avoid shrimp with black spots or a strong fishy smell. If you can, buy shrimp that are still in their shells. They taste better and stay fresh longer. Cook shrimp quickly for the best taste. Heat your skillet to medium-high before adding shrimp. This helps them sear well. Cook them for just 2-3 minutes on each side. When they turn pink and opaque, they are ready. Overcooking makes shrimp tough. If you see them curling tightly, they may be overdone. Add more zest with lime juice and lime zest. These add freshness to your shrimp. Try mixing in other herbs like parsley or dill. For spice, add a pinch of cayenne or jalapeños. You can also use mango or pineapple salsa for a sweet twist. Experiment with flavors to find your perfect taco! {{image_2}} You can swap shrimp for chicken or fish. Chicken thighs work well for a juicy taco. Just marinate them the same way as the shrimp. If you prefer fish, try salmon or tilapia. Both will absorb the lime and spices nicely. For a vegetarian taco, use grilled bell peppers or zucchini. These give a nice texture and flavor. If you want a vegan option, use chickpeas or black beans. They add protein and taste great with cilantro and lime. To change the flavor, try different spices. Use smoked paprika for a deeper taste. Add jalapeños for heat or mango for sweetness. You can also mix in garlic with the marinade for extra punch. Experiment with fresh herbs like mint for a unique twist. To store leftover tacos, place them in an airtight container. Keep the shrimp and toppings separate from the tortillas to prevent sogginess. Shrimp can last up to three days in the fridge. Tacos taste best when fresh, but you can save them for later. To reheat the shrimp, warm them gently in a skillet over medium heat. Avoid cooking them too long. This step ensures the shrimp stay juicy. For tortillas, heat them in a dry pan for about 15 seconds on each side. This will make them soft and warm again. You can freeze the shrimp before cooking. Place them in a freezer-safe bag with some marinade. They can last up to three months in the freezer. When you're ready to cook, thaw them overnight in the fridge. This way, you can enjoy fresh shrimp tacos anytime! Yes, you can use frozen shrimp. Just make sure to thaw it first. Place the shrimp in the fridge overnight or run it under cold water. This keeps the shrimp fresh and tasty. You can use feta cheese or queso fresco. Both have a similar texture and taste. They add creaminess to the tacos. If you want a dairy-free option, try avocado or a sprinkle of nutritional yeast. These tacos have mild spice. The chili powder adds flavor without too much heat. If you want extra spice, add sliced jalapeños or a dash of hot sauce. Adjust to your taste for a perfect meal! Cilantro lime shrimp tacos are easy and fun to make. We explored the main ingredients, optional toppings, and side dishes that pair well. I shared tips for selecting fresh shrimp and cooking them just right. You learned about tasty variations and how to store leftovers safely. These tacos can fit many diets and tastes. Enjoy your cooking journey and make these tacos your own! They are sure to be a hit at any meal.
                    Cilantro Lime Shrimp Tacos Flavorful and Fresh Meal
                  • - 2 large flatbreads or naan - 1 cup cooked chicken, shredded - 1/2 cup basil pesto - 1 cup fresh mozzarella, sliced - 1 cup cherry tomatoes, halved - 1/4 cup balsamic glaze - Olive oil for brushing - Fresh basil leaves for garnish - Salt and pepper to taste Gathering the right ingredients is key to making a great Pesto Chicken Caprese Flatbread. First, choose between flatbreads or naan. Both work well and give a nice base. Next, shred your cooked chicken. This adds protein and flavor. Basil pesto is essential for that fresh taste. I suggest using homemade if you can. Fresh mozzarella provides creaminess and melts perfectly. Lastly, halved cherry tomatoes add a sweet burst. For extra flavor, consider balsamic glaze. It adds a sweet tang. A drizzle of olive oil will help crisp up the flatbread. Don’t forget salt and pepper for seasoning. You can also add fresh basil leaves for garnish. They look great and taste good too. With these ingredients, you’ll create a tasty meal that’s easy to make. 1. Preheat Oven and Prepare Baking Sheet First, set your oven to 400°F (200°C). This temperature helps the flatbread get crispy and the cheese melt nicely. Next, take a baking sheet and line it with parchment paper. This makes cleanup easy later. 2. Brush Flatbreads with Olive Oil Take your large flatbreads or naan and place them on the baking sheet. Use a brush to spread a light layer of olive oil on each flatbread. This not only adds flavor but also helps create a golden, crispy edge. 1. Spread Basil Pesto Now, grab your basil pesto. Spread about 1/4 cup of it evenly across each flatbread. The pesto adds a fresh, herby taste that complements the chicken and cheese. 2. Layer Chicken, Mozzarella, and Tomatoes Next, scatter the shredded chicken on top of the pesto. Once the chicken is on, add the sliced fresh mozzarella. Finally, sprinkle the halved cherry tomatoes across the flatbreads. This adds juicy bursts of flavor in every bite. 1. Season with Salt and Pepper To finish the prep, sprinkle salt and pepper over the toppings. This simple step brings out all the flavors and makes the dish more enjoyable. 2. Baking Time and Temperature Slide the baking sheet into your preheated oven. Bake for 12 to 15 minutes. You'll know it’s ready when the cheese is melted and bubbly, and the edges of the flatbread are golden brown. Enjoy your Pesto Chicken Caprese Flatbread right out of the oven! To get a crisp flatbread, start by brushing olive oil on the surface. This small step adds flavor and helps it crisp up nicely. Use a light hand; too much oil can make it soggy. Preheat your oven to 400°F (200°C) for the best results. Baking at this high temperature ensures the edges get golden brown and crunchy. If you want extra crunch, consider using a pizza stone. It holds heat well and crisps the flatbread evenly. For perfectly melted cheese, use fresh mozzarella. It melts beautifully and adds a creamy texture. Slice it thinly to help it melt faster. Layer the cheese on top of your other ingredients. This way, it traps heat and gets gooey. Keep an eye on your flatbread while it bakes. You want it bubbly and just starting to brown. If it doesn’t melt enough, you can pop it back in for a minute or two. When serving your flatbread, cut it into wedges. This makes it easy for everyone to grab a piece. You can place it on a wooden board for a rustic look. Add a side salad for color and a balanced meal. A simple mixed green salad pairs well. It adds freshness that complements the rich flavors of the flatbread. Garnishing is key to making your dish pop. Use fresh basil leaves on top for a splash of green. Drizzle balsamic glaze over the flatbread just before serving. This adds a sweet touch and makes it look fancy. Keep it simple but appealing. A well-presented dish makes meals more enjoyable. {{image_2}} You can change the proteins to fit your taste. Instead of chicken, try turkey. Turkey gives a lean option that is still full of flavor. If you prefer plant-based meals, use tofu. Tofu absorbs flavors well and adds a nice texture. Cheese can also change the taste of your flatbread. Fresh mozzarella is classic, but goat cheese adds a creamy tang. Ricotta is another great choice. It makes the flatbread rich and smooth. Adding more vegetables makes your flatbread even better. Spinach adds a fresh taste and packs in nutrients. Bell peppers bring a sweet crunch, making every bite exciting. You can switch up sauces for a unique twist. Try arugula pesto for a peppery kick. If you want something classic, use tomato sauce instead. Each sauce offers a different flavor that complements the other ingredients. To keep your Pesto Chicken Caprese Flatbread fresh, store it in the fridge. Place any leftover flatbread in an airtight container. This helps to prevent it from drying out. If you have multiple pieces, you can layer them with parchment paper. This keeps them from sticking together. Make sure to eat the leftovers within three days for the best taste. When reheating, I recommend using the oven. Preheat your oven to 350°F (175°C). Place the flatbread on a baking sheet. Heat it for about 10-12 minutes. This method keeps the flatbread crispy. You can also use a skillet for a quick reheat. Just warm it over medium heat for a few minutes. This way, the bottom stays nice and crunchy. Enjoy your flatbread warm for the best flavor! Yes, you can use store-bought pesto. It saves time and still tastes great. Look for fresh or high-quality brands. They often have vibrant flavors and good texture. This option makes your meal quick and easy. If you want to make your own, blend fresh basil, garlic, nuts, cheese, and oil. Homemade pesto offers a personal touch. To make this recipe gluten-free, choose gluten-free flatbreads or naan. Many stores sell these options now. You can also make your own using gluten-free flour. Just check the labels to ensure they meet your needs. This way, everyone can enjoy the tasty flatbread without worry. Great sides for this flatbread include: - A simple green salad with lemon dressing - Roasted vegetables like zucchini and bell peppers - A light soup, such as minestrone or tomato - Garlic bread for extra flavor - Fresh fruit salad for a sweet touch These sides balance the meal and add variety. To keep your flatbread crispy, follow these tips: - Preheat your oven to the right temperature. - Brush the flatbread with olive oil before baking. - Bake until the cheese bubbles and the edges turn golden. - Use parchment paper to prevent sticking. These steps help you achieve that perfect crispy texture. Enjoy! This recipe for Pesto Chicken Caprese Flatbread is easy and fun to make. You just need simple ingredients and clear steps. Start with flatbreads, cooked chicken, basil pesto, and fresh mozzarella. Add cherry tomatoes for extra flavor. Try the tips for perfecting your flatbread. You can change up the toppings and use different cheeses too. Remember, storing leftovers properly keeps them fresh. With these tips, you’ll enjoy tasty meals all week. Happy cooking!
                    Pesto Chicken Caprese Flatbread Tasty and Easy Meal
                  • - 1 lb ground beef - 1 lb ground pork (or turkey) - 1 cup fresh mozzarella balls - 1 teaspoon garlic powder - 1 teaspoon onion powder - ½ cup fresh basil pesto - 1 cup breadcrumbs - 1 large egg - 1 cup marinara sauce Gathering the right ingredients is key for great meatballs. I love using a mix of ground beef and ground pork. This combo gives the meatballs a rich flavor. If you prefer a lighter dish, ground turkey works well. Make sure to choose fresh mozzarella balls for that gooey, cheesy center. Next, flavor is important. Garlic powder and onion powder are my go-tos. They add depth without overpowering the dish. Fresh basil pesto brings a bright taste. It complements the meat and cheese beautifully. Lastly, we need to bind and coat the meatballs. Breadcrumbs help keep the meatballs tender. The egg acts like glue, holding everything together. Marinara sauce is perfect for coating the meatballs as they bake. It adds moisture and flavor. With these ingredients, you’re set to create a savory dinner delight. - Preheat oven to 375°F (190°C) - Gather and measure all ingredients Start by preheating your oven. This helps the meatballs cook evenly. Gather everything you need, so you have it all at hand. It makes cooking easier and more fun! - Combine ground meats, breadcrumbs, and spices - Incorporate egg for binding In a large bowl, mix the ground beef and ground pork. You can use ground turkey for a lighter choice. Add breadcrumbs, garlic powder, onion powder, salt, and black pepper. These spices give your meatballs great flavor! Then, crack in one egg. This helps bind the mix. Use your hands to mix it well until everything is combined. - Flatten meat mixture, add mozzarella and pesto - Roll into balls ensuring stuffing is sealed Take about two tablespoons of the meat mixture. Flatten it in your palm. Place a half of mozzarella and a bit of pesto in the center. Wrap the meat around the filling carefully. Make sure you seal it well. This keeps the cheesy goodness inside. Roll it into a ball. Repeat until you use all the mixture. - Brown meatballs in skillet - Transfer to baking dish and coat with marinara sauce - Bake until cooked through Heat a skillet with a little olive oil over medium heat. Add the meatballs in batches. Brown each side for about 3-4 minutes. This gives them a nice crust and flavor. Once browned, move the meatballs to a baking dish. Pour marinara sauce over them, covering them well. Bake in the preheated oven for 20-25 minutes. The meatballs are done when their internal temperature hits 160°F (70°C). Mixing the meatball base is key to great texture. Combine the meats, breadcrumbs, egg, and spices well. This helps create a uniform mix. If you don’t mix enough, the meatballs may fall apart. To prevent toughness, don’t overwork the meat. Mix until just combined. Use your hands for the best results. This ensures the meat stays tender and juicy. You can add herbs and spices for extra flavor. Consider using fresh parsley or oregano. A pinch of red pepper flakes adds a nice kick too. Don’t forget to adjust the salt based on your taste. For cheese, try using provolone or gouda instead of mozzarella. Each type of cheese brings a unique taste and texture. Experimenting is part of the fun! For sides, I love serving these meatballs with pasta or a fresh salad. Garlic bread pairs well too. You can also serve them over polenta for a twist. For plating, use a large platter. Drizzle with extra marinara sauce and sprinkle fresh basil on top. This adds color and aroma. You can even serve them in individual bowls for a cozy dinner feel. {{image_2}} You can swap ground pork with ground turkey. Turkey gives a lighter taste. It works great in meatballs. The texture stays nice and juicy. Next, consider dairy-free mozzarella. Brands like Daiya offer tasty options. They melt well and taste good too. This makes the dish friendly for everyone. You can try different sauces with these meatballs. Alfredo sauce can add a creamy touch. It pairs well with the pesto flavor. Pesto itself works as a sauce option, too. Just pour it over your meatballs before serving. If you want a twist, use barbecue sauce. It adds a sweet and smoky flavor. This can change the whole taste of the dish. For gluten-free meatballs, use gluten-free breadcrumbs. They bind the meatballs just like regular breadcrumbs. You can also try ground oats for a similar effect. Another option is to use mashed potatoes. They keep the meatballs moist and help them stick together. To keep your pesto mozzarella stuffed meatballs fresh, store leftovers in an airtight container. This helps maintain flavor and moisture. Place the meatballs in the fridge within two hours of cooking. They will stay fresh for up to three days. If you want a quick meal later, this is a great option. Just heat them up when you're ready to eat. Freezing your meatballs is easy and great for meal prep. First, let them cool completely. Then, place them in a single layer on a baking sheet. Freeze for about an hour, until firm. Next, transfer the meatballs to a freezer-safe bag or container. They can last up to three months in the freezer. When you want to eat them, thaw overnight in the fridge. Reheat in the oven at 350°F for 15-20 minutes, or until hot. For meal planning, make a big batch of these meatballs. You can prep them ahead of time. Use a mix of ground meats for taste. Store them in meal prep containers. I recommend glass containers for easy reheating. Label each container with the date to keep track. This way, you have ready-to-eat meals on hand, perfect for busy days. To check if the meatballs are done, use a meat thermometer. The internal temperature should reach 160°F (70°C). This ensures the meat is safe to eat. If you don't have a thermometer, cut one meatball in half. The center should no longer be pink and the juices should run clear. Cooking them to this temperature keeps the meat juicy and safe. Yes, you can make these meatballs ahead of time. Prepare them and place them in the fridge for up to 24 hours. This helps the flavors blend well. You can also freeze them before baking. Place uncooked meatballs on a baking sheet and freeze for about two hours. After that, transfer them to a freezer bag. When you're ready to cook, bake them straight from frozen. Just add a few extra minutes to the cooking time. If you don't have fresh mozzarella, you can use shredded mozzarella or provolone cheese. These options melt well and add a nice flavor. You can also try goat cheese for a tangy twist. For a dairy-free choice, look for plant-based cheese substitutes that melt. Each cheese brings its own unique taste, so choose one that you enjoy! In this article, we explored how to make delicious meatballs. We discussed key ingredients like ground beef, pork, and mozzarella. You learned about mixing and shaping the meatballs, browning them, and baking until they are perfect. I shared tips to enhance flavor and texture, as well as variations to suit your tastes. Don't forget about storing leftovers or meal prepping for later. With these steps and ideas, you can enjoy meatballs that impress every time. Happy cooking!
                    Pesto Mozzarella Stuffed Meatballs Savory Dinner Delight
                  • - 2 cod fillets (about 6 oz each) - 2 tablespoons unsalted butter - 2 tablespoons olive oil - 4 cloves garlic, minced - Zest of 1 lemon - Juice of 1 lemon - 1 teaspoon dried thyme - Salt and pepper to taste - Fresh parsley, chopped (for garnish) - Lemon slices (for garnish) For the best flavor, use fresh cod fillets. Look for firm, bright fish with a clean scent. Fresh garlic adds a punch, so choose whole heads rather than pre-minced. Unsalted butter is ideal, as it lets you control the salt. Opt for high-quality olive oil for rich taste. Fresh herbs brighten the dish, so buy parsley right before cooking. If you can't find cod, halibut or tilapia works well. Use ghee or coconut oil instead of butter for a dairy-free option. For a twist, try lime instead of lemon, or add fresh herbs like dill or basil. If you want a kick, mix in a pinch of red pepper flakes. First, grab your cod fillets. Pat them dry with paper towels. This step helps the fish to brown well. Next, sprinkle salt and pepper on both sides. Use enough to season them well. Set the fillets aside while you make the sauce. Now, let’s make the lemon garlic butter. In a small saucepan, melt two tablespoons of unsalted butter and two tablespoons of olive oil over medium heat. Once melted, add four minced cloves of garlic. Stir constantly for about one minute. You want the garlic fragrant but not brown. Remove the pan from heat. Now, stir in the zest and juice of one lemon and one teaspoon of dried thyme. This mixture is your star sauce! Heat a large skillet with one tablespoon of olive oil over medium-high heat. Once it's hot, carefully add the cod fillets. Cook them for about three to four minutes on one side. You want them golden brown. After that, gently flip the fillets. Pour the lemon garlic butter sauce over them. Cook for another three to four minutes. Spoon the sauce over the fish while it cooks. This helps keep the cod moist. You’ll know it’s done when the fish is opaque and flakes easily with a fork. To cook cod just right, start by drying the fillets. Use paper towels to remove extra moisture. Season them well with salt and pepper. Heat your skillet until it's hot. This helps to get a nice golden color. Cook the first side for 3-4 minutes. Flip the fillets carefully with a spatula. Pour the lemon garlic butter over them. Baste often to keep the fish moist. Cook until the cod looks opaque and flakes easily with a fork. You can easily tweak the flavors to fit your taste. Want a bit of heat? Add a pinch of red pepper flakes to the butter sauce. Prefer fresh herbs? Swap dried thyme for fresh thyme or dill. Want a touch of sweetness? Mix in a teaspoon of honey with the lemon juice. Each change makes the dish unique. Play around and find what you love! Make your cod look stunning on the plate. Serve it on sautéed spinach or a light salad. This adds color and nutrition. Add a sprinkle of lemon zest for a bright touch. Fresh parsley not only adds flavor but also looks beautiful. Lemon slices on the side give a fresh look and taste. Remember, we eat with our eyes first! {{image_2}} You can add herbs to change the flavor. Try fresh dill or basil for a fresh twist. You can also use a pinch of red pepper flakes to add heat. This gives a nice kick to the dish. You can even mix in some chopped fresh chives for a mild onion flavor. Each herb brings a unique taste that enhances the lemon and garlic. Lemon garlic butter cod pairs well with many sides. A simple green salad adds crunch. You can also serve it over sautéed spinach for a healthy option. For a filling meal, try it with quinoa or rice. Roasted potatoes or steamed asparagus can add nice texture. Lemon slices on the side brighten the plate and the flavor. You can cook cod in different ways. Baking is a great option. Preheat your oven to 400°F, then place the cod in a baking dish. Pour the lemon garlic butter over the top and bake for about 12-15 minutes. Grilling is another fun method. Just brush the cod with olive oil and grill it for 3-4 minutes on each side. Each method brings a new taste to this dish. To store leftover lemon garlic butter cod, let it cool first. Place the cod in an airtight container. Make sure to cover it well. Store it in the fridge for up to two days. To reheat, preheat your oven to 350°F (175°C). Put the cod on a baking tray. Cover it with foil to keep it moist. Heat for about 10-12 minutes until warm. You can also use a microwave. Just heat it for about one minute. If you want to freeze it, wrap the cod tightly in plastic wrap. Then, place it in a freezer bag. You can freeze it for up to three months. When you're ready to eat, thaw it overnight in the fridge before reheating. Yes, you can use frozen cod. Just make sure to thaw it first. Thaw the cod in the fridge overnight. If you’re in a hurry, you can use cold water. Place the cod in a sealed bag and submerge it in cold water for about an hour. Once thawed, pat it dry and season as the recipe directs. Many sides go well with lemon garlic butter cod. Here are a few tasty options: - Sautéed spinach - Steamed broccoli - Roasted potatoes - Quinoa salad - Light pasta with olive oil These sides add color and nutrition to your meal. They also balance the rich flavors of the cod. To check if the cod is fully cooked, look for a few signs. The fish should turn opaque. It should also flake easily with a fork. If it still looks translucent or raw, cook it a bit longer. Usually, 6-8 minutes total cook time is enough for the fillets. Use a meat thermometer if you have one; the internal temperature should be 145°F (63°C). In this post, we explored making delicious lemon garlic butter cod. We covered essential ingredients, preparation steps, and cooking tips. Remember to use fresh ingredients for the best flavor. You can adjust the seasoning to suit your taste. Presentation matters too, so add a garnish for style. This dish is easy to store and reheat. Try frozen cod if fresh isn’t available. With these tips, you will create a tasty meal your friends and family will love. Enjoy your cooking adventure!
                    Lemon Garlic Butter Cod Tasty and Simple Recipe

                  Leave a Reply Cancel reply

                  Your email address will not be published. Required fields are marked *

                  Recipe Rating