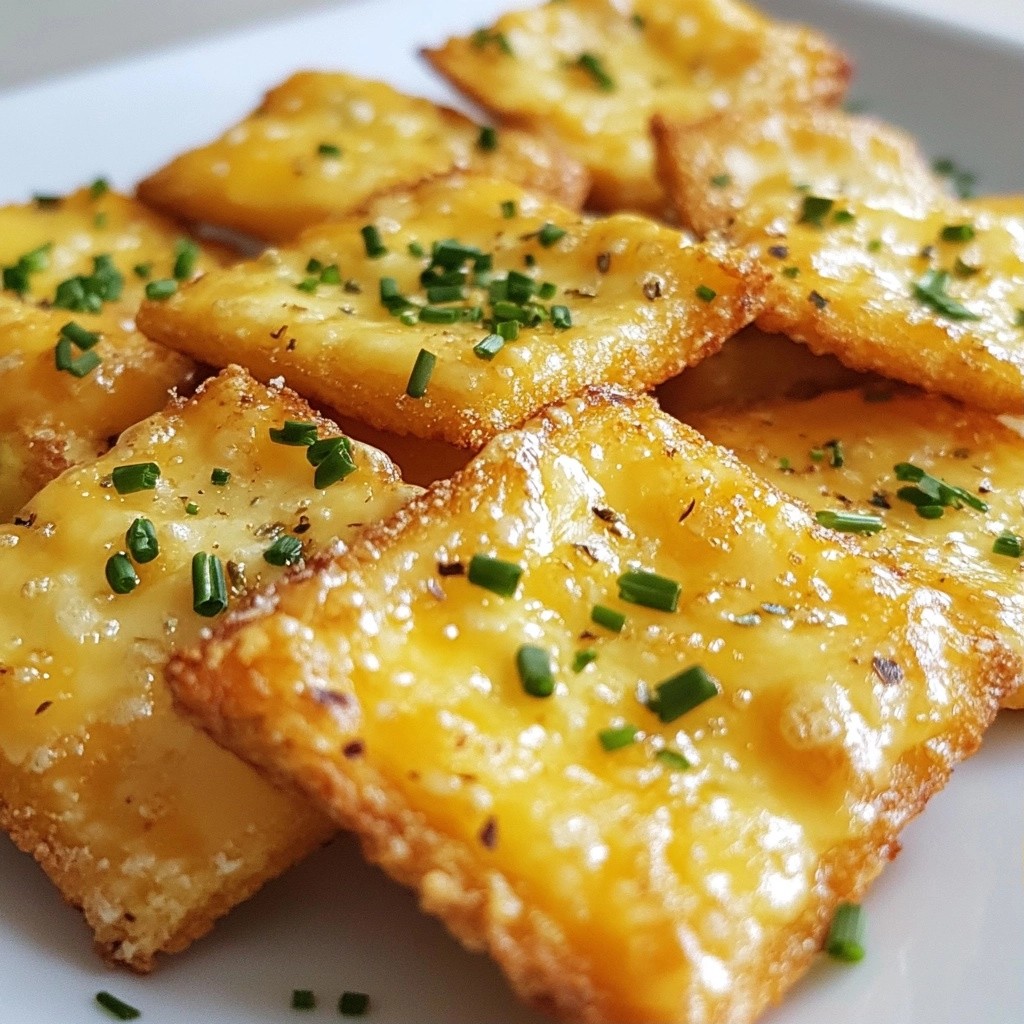
Are you ready to indulge in a tasty snack that fits your keto lifestyle? In this blog post, I'll share how to make Savory Keto Cheddar and Herb Crisps that are easy to whip up. With simple ingredients you probably have at home, these crisps are crunchy, cheesy, and packed with flavor. Let’s dive into this delightful recipe that will satisfy your cravings without wrecking your diet!
Why I Love This Recipe
- Delicious Flavor Combination: The blend of sharp cheddar and aromatic herbs creates a savory snack that tantalizes the taste buds.
- Keto-Friendly: With low carbs and high fat, these crisps align perfectly with ketogenic dietary needs.
- Easy to Make: With just a few ingredients and simple steps, these crisps can be whipped up in no time.
- Versatile Snack: Perfect for pairing with dips or enjoying on their own, these crisps are a great addition to any snack table.
Ingredients
List of Ingredients
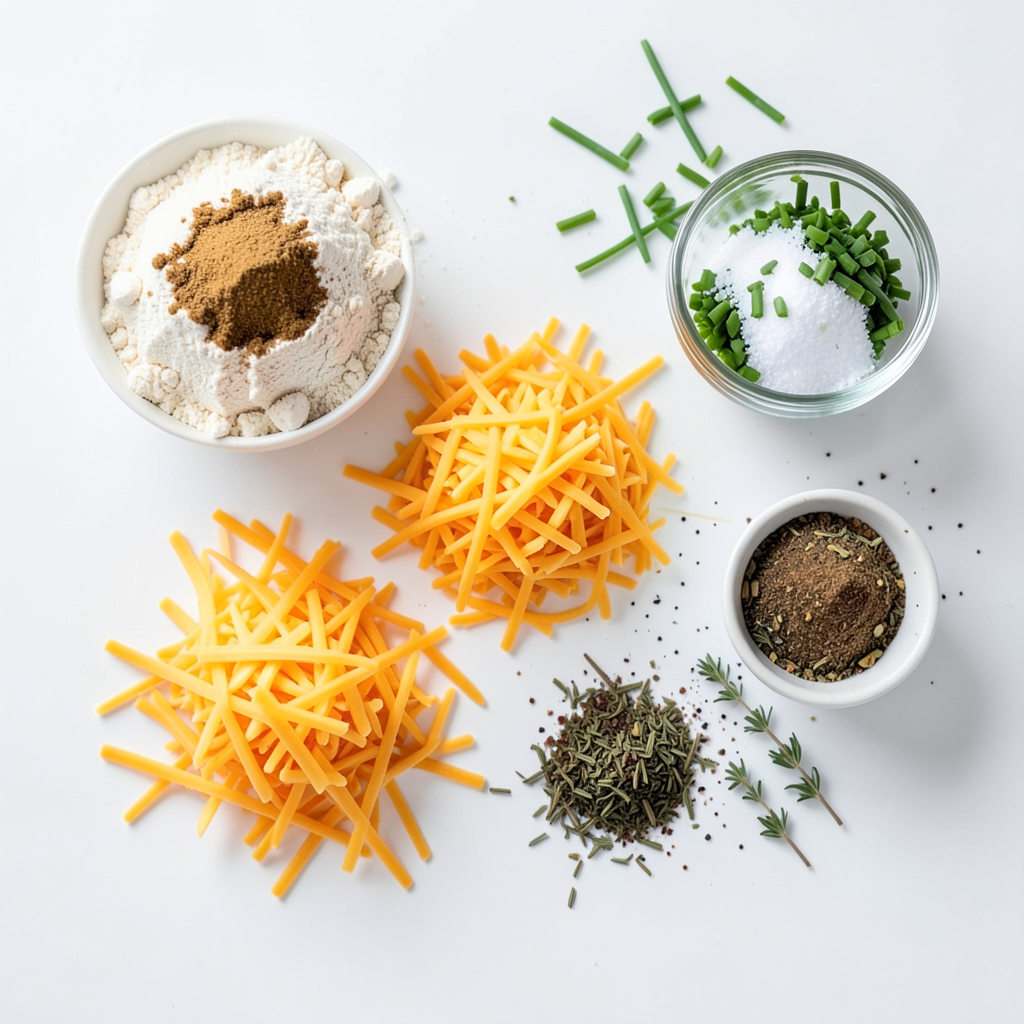
To make savory keto cheddar and herb crisps, gather these ingredients:
- 1 cup shredded sharp cheddar cheese
- 2 tablespoons almond flour
- 1 teaspoon garlic powder
- 1 teaspoon onion powder
- 1 teaspoon dried oregano
- 1 teaspoon dried thyme
- Salt and pepper to taste
- Fresh herbs (like chives or parsley) for garnish (optional)
Nutritional Information
These crisps are not just tasty; they fit well into a keto diet. Each crisp has about:
- Calories: 70
- Protein: 5g
- Fat: 6g
- Carbohydrates: 1g
- Fiber: 0.5g
This means they are low in carbs and high in fat, making them great for keto lovers.
Dietary Considerations
These crisps are gluten-free due to the almond flour. They are also perfect for low-carb diets. If you want a dairy-free option, use dairy-free cheese. You can adjust the herbs based on your taste. Always check the labels of the products you use to ensure they meet your dietary needs.
Step-by-Step Instructions
Prepping the Oven and Baking Sheet
First, preheat your oven to 350°F (175°C). This step is key to getting the crisps just right. Next, grab a baking sheet and line it with parchment paper. This helps to prevent sticking and makes cleanup easy.
Mixing the Ingredients
In a medium mixing bowl, add the shredded sharp cheddar cheese. Then, add two tablespoons of almond flour. Sprinkle in a teaspoon each of garlic powder, onion powder, dried oregano, and dried thyme. These herbs add a lovely flavor. Now, mix everything together well. Keep stirring until you have a thick, sticky dough. Don't forget to add salt and pepper to taste. This will bring out all the flavors.
Forming and Baking the Crisps
Using a tablespoon, scoop small portions of the dough. Place them on your prepared baking sheet. Make sure to space them about 2 inches apart. This helps them bake evenly. Next, use a fork to flatten each mound slightly. This creates the crisp shape. Now, pop the baking sheet into your preheated oven. Bake for 12-15 minutes. Keep an eye on them until the edges turn golden and bubbly.
Cooling and Serving Tips
Once they are ready, remove the crisps from the oven. Let them cool on the baking sheet for 5 minutes. This helps them firm up. After that, transfer them to a wire rack to cool completely. For an extra touch, you can garnish with fresh herbs like chives or parsley. Serve the crisps on a rustic wooden board with guacamole or salsa for dipping. Enjoy your delicious snack!
Tips & Tricks
How to Achieve Perfect Crispiness
To make your crisps crispy, use a fine shred of cheese. The finer the cheese, the better the melt. Mix the cheese with almond flour well. This adds texture and helps bind. Spread the mixture thin on the baking sheet. If they are too thick, they won’t crisp up. Bake until golden around the edges. Keep watch to avoid burning.
Substitutions for Ingredients
You can swap the almond flour for coconut flour. This makes it nut-free, but use less. Start with 1 tablespoon and adjust as needed. For herbs, feel free to mix and match. Basil or rosemary adds a unique twist. You can also use different cheese types. Try mozzarella for a milder taste or pepper jack for heat.
Storage and Reheating Tips
Store leftover crisps in an airtight container. They stay fresh for up to three days. To reheat, place them in the oven at 350°F. Bake for 5 minutes to regain crunch. Avoid microwaving, as this makes them chewy. Enjoy your crisps with dips or alone for a tasty snack!
Pro Tips
- Use Fresh Cheese: Freshly shredded cheese melts better and creates crispier textures compared to pre-packaged shredded cheese.
- Experiment with Seasonings: Feel free to add your favorite spices or herbs to the cheese mixture for a unique flavor twist.
- Keep an Eye on Baking: Ovens can vary, so check the crisps a couple of minutes early to prevent burning.
- Storing Leftovers: Store any leftover crisps in an airtight container at room temperature to maintain their crunchiness.
Variations
Flavor Infusions
You can change the flavors in these crisps easily. Try adding spices like smoked paprika or cayenne pepper for some heat. A pinch of cumin can add a nice earthy taste. You can also use different herbs. Basil or dill can give fresh flavors. Experimenting with flavors makes each batch unique.
Additional Toppings
Toppings can make your crisps even better. After baking, sprinkle some extra cheese on top. You could also add seeds like sesame or poppy for crunch. Chopped olives or sun-dried tomatoes can add a rich taste. Use fresh herbs like chives or parsley for a pop of color. These toppings can make your snack look fancy.
Low-Carb Dips to Pair
Dips can take your crisps to the next level. Guacamole works great and adds creamy texture. You can also try a simple sour cream dip with herbs. Salsa adds a nice kick and pairs well with cheese. Creamy ranch or blue cheese dressing also match nicely. These dips keep it low-carb and tasty!
Storage Info
Best Practices for Storing Leftovers
To keep your savory keto cheddar and herb crisps fresh, store them in an airtight container. This helps avoid moisture, which can make them soggy. Place parchment paper between layers of crisps. This keeps them from sticking together. You should store them at room temperature, away from sunlight. Enjoy them within a few days for the best taste and crunch.
Freezing Instructions
If you want to save some for later, freezing is a great option. First, let the crisps cool completely. Then, place them in a single layer on a baking sheet. Freeze them for about an hour until firm. Once frozen, transfer the crisps to a freezer-safe bag. Remove as much air as you can to prevent freezer burn. They can stay in the freezer for up to three months. When ready to eat, thaw them in the fridge or at room temperature.
Shelf Life of Crisps
When stored properly, your crisps can last up to a week at room temperature. If you freeze them, they can remain good for three months. However, for the best quality, try to eat them sooner. The longer they sit, the less crispy they become. Always check for any signs of spoilage before eating. Enjoy your delicious snacks without worry!
FAQs
How can I make these crisps dairy-free?
To make these crisps dairy-free, use a dairy-free cheese. Look for a brand that melts well. Make sure it has a similar texture to cheddar. You can also try nutritional yeast for cheesy flavor. This gives a nice twist without dairy.
Can I use different types of cheese?
Yes, you can use different cheeses. Some great options include mozzarella or gouda. Both melt well and offer a unique taste. Mixing cheeses can create fun flavor profiles. Just be mindful of moisture content; too much can affect crispiness.
What is the best way to reheat the crisps?
To reheat the crisps, use your oven or air fryer. Set the oven to 350°F. Place the crisps on a baking sheet for about 5 minutes. This keeps them crispy and warm. Avoid the microwave; it can make them chewy. Enjoy them fresh!
You learned the key ingredients and step-by-step process for making delicious crisps. We explored tips to get the perfect crunch and tasty variations to try. Don't forget proper storage to keep them fresh for longer. With these ideas, you can impress your friends and family. Enjoy making your crisps and have fun experimenting with flavors! Your crispy creations are sure to be a hit.