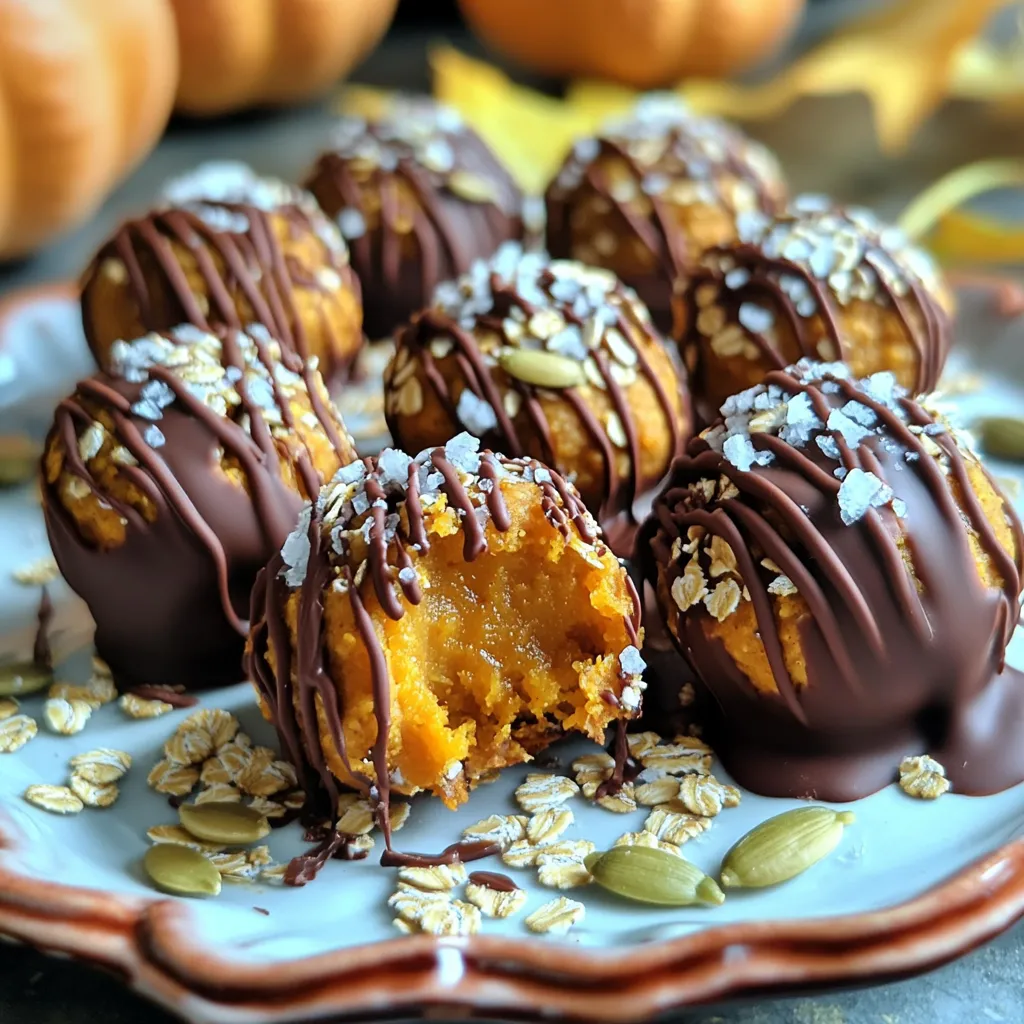
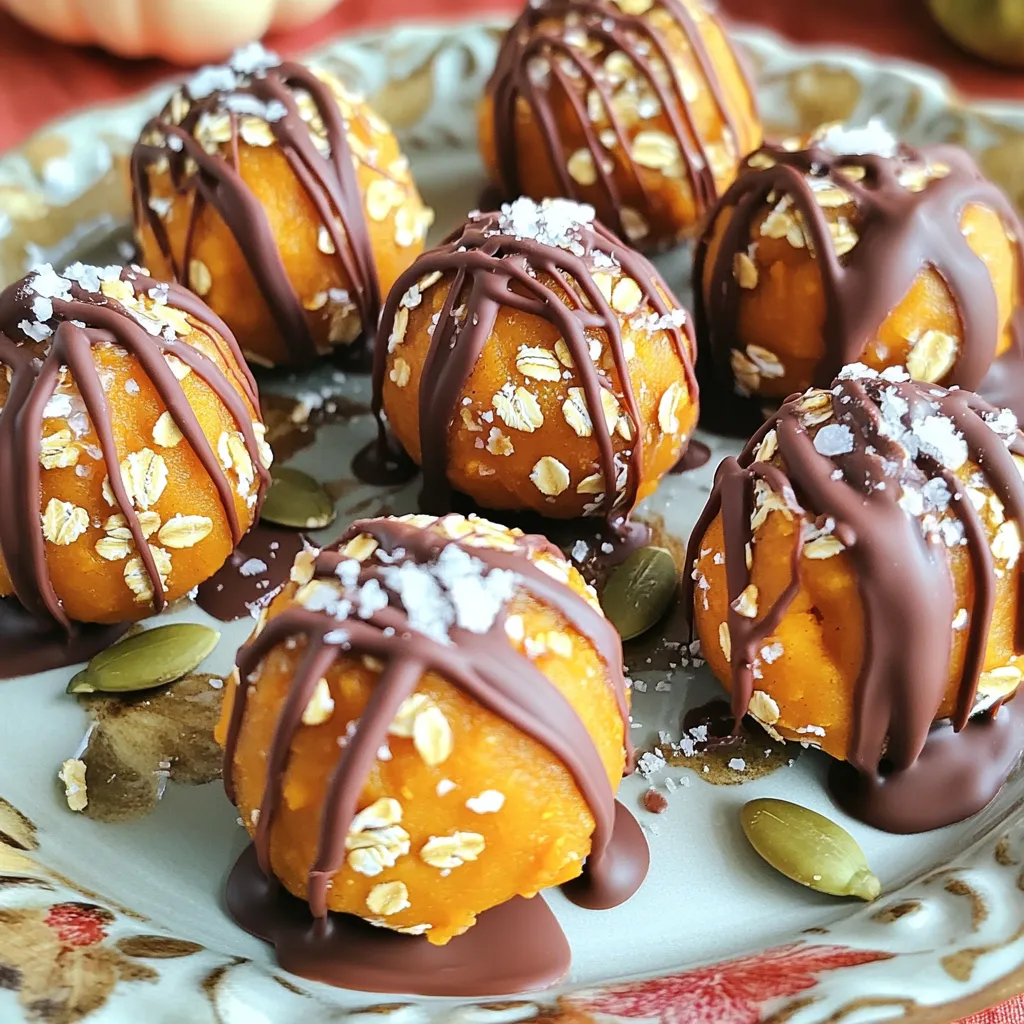
Fall is here, and what better way to celebrate than with my Salted Caramel Pumpkin Bites? These no-bake treats are easy to make and taste like autumn in every bite! You’ll love their rich flavor and creamy texture. I’ll guide you through simple steps, perfect tips, and fun variations to make these bites your own. Ready to impress friends and family? Let’s dive into this delightful recipe!
Ingredients
Complete List of Ingredients
To make your Salted Caramel Pumpkin Bites, gather these ingredients:
- 1 cup pumpkin puree
- ½ cup almond butter (or any nut butter of your choice)
- ⅓ cup maple syrup
- 1 teaspoon vanilla extract
- 1 teaspoon pumpkin pie spice
- 1 cup rolled oats
- ¼ cup coconut flour
- ¼ teaspoon sea salt
- ½ cup chocolate chips (for drizzling)
- Additional sea salt for sprinkling
These ingredients blend together to create a sweet and creamy treat. The pumpkin gives it a lovely flavor, while the almond butter adds a nice creaminess.
Ingredient Substitutions
You might not have all the ingredients at home. Here are some easy swaps:
- Nut Butter: You can use peanut butter or sunflower seed butter if you prefer.
- Maple Syrup: Honey or agave syrup works well too.
- Coconut Flour: Try using almond flour if you have it.
These substitutions will still keep your bites delicious!
Healthier Alternatives
Want to make these bites even healthier? Here are some tips:
- Use natural nut butter with no added sugar or oil.
- Swap maple syrup for a sugar-free sweetener like monk fruit or stevia.
- Add chia seeds or flax seeds for extra fiber and nutrients.
These changes can boost the nutrition of your tasty bites while keeping them enjoyable!
Step-by-Step Instructions
Preparation of the Base Mixture
Start with a large bowl. Add 1 cup of pumpkin puree. Next, include ½ cup of almond butter. Pour in ⅓ cup of maple syrup. Add 1 teaspoon of vanilla extract and 1 teaspoon of pumpkin pie spice. Mix these ingredients until smooth and creamy. This base will be the heart of your bites.
Now, it’s time for the dry ingredients. Add 1 cup of rolled oats and ¼ cup of coconut flour. Mix everything well. You want a thick dough that holds its shape. If it feels too sticky, add a bit more coconut flour. It should be easy to handle.
Shaping the Pumpkin Bites
Once your mixture is ready, use your hands to form small balls. Aim for about 1 inch in diameter. This size is perfect for popping in your mouth. Place each ball on a lined baking sheet. Make sure they are spaced out. This allows for easy handling later.
After shaping all the bites, pop the baking sheet into the fridge. Chill them for about 30 minutes. This step helps them firm up. A good chill makes them easier to drizzle with chocolate later on.
Drizzling and Final Touches
While the bites chill, it’s time to melt the chocolate. Use ½ cup of chocolate chips. Place them in a microwave-safe bowl. Heat them in 20-second bursts. Stir after each round until melted. Be careful not to overheat the chocolate.
Once the pumpkin bites are firm, take them out of the fridge. Use a fork or spoon to drizzle the melted chocolate over each bite. Get creative with your drizzling pattern. It adds a nice touch!
Before the chocolate sets, sprinkle a small pinch of sea salt on top. This salt enhances the flavor and gives a salted caramel vibe. After drizzling and salting, place the bites back in the fridge. Let them chill for another 15-20 minutes. This step ensures the chocolate hardens nicely.
Now you have delightful no-bake salted caramel pumpkin bites ready to enjoy!
Tips & Tricks
Tips for Perfect Pumpkin Bites
To make your pumpkin bites shine, use fresh pumpkin puree. It adds great flavor. Make sure your almond butter is creamy. This helps bind the mixture. If it feels too dry, add a touch more maple syrup. Chill the bites well after shaping. This step helps them hold their shape when drizzling chocolate.
Chocolate Melting Techniques
When melting chocolate, patience is key. Use a microwave-safe bowl. Heat the chocolate in 20-second bursts. Stir well between each burst. This helps avoid burning. If the chocolate is thick, add a teaspoon of coconut oil. This will make it smoother and easier to drizzle.
Serving Suggestions
Serve your pumpkin bites on a colorful plate. Drizzle more melted chocolate around the edges. For a fun touch, sprinkle pumpkin seeds on top. You can also add a dash of cinnamon for extra flavor. These bites are perfect for parties or a cozy night in. Enjoy them with a warm drink for a tasty treat!
Variations
Additional Flavor Enhancements
You can change the taste of your pumpkin bites easily. Try adding a bit of cinnamon for warmth. A splash of coconut extract can bring a tropical flair. You can also mix in mini chocolate chips for extra sweetness. If you like nuts, chopped pecans or walnuts add a nice crunch.
Different Nut Butters
While almond butter is great, you have options. Cashew butter gives a creamier texture. Peanut butter adds a rich flavor and pairs well with chocolate. For a fun twist, try sunflower seed butter for a nut-free alternative. Each nut butter brings its own unique taste to the bites.
Nut-Free Options
If you need to avoid nuts, don’t worry! Use sunflower seed butter instead of nut butters. You can also swap in coconut yogurt for creaminess. This keeps the texture smooth while keeping it nut-free. Just make sure to check for allergens in your other ingredients. Enjoy these bites with peace of mind!
Storage Info
Proper Storage Techniques
To keep your salted caramel pumpkin bites fresh, place them in an airtight container. Use parchment paper between layers to prevent sticking. Store them in the fridge for the best taste. This helps maintain their chewy texture and rich flavor.
Freezing Instructions
You can freeze these bites for later enjoyment. Place them in a single layer on a baking sheet. Once frozen, transfer them to an airtight freezer bag. They can stay fresh in the freezer for up to three months. Thaw them in the fridge before serving.
Shelf Life of Pumpkin Bites
When stored properly, these pumpkin bites last about one week in the fridge. If you freeze them, they can last up to three months. Enjoy them fresh for the best flavor, but they are still tasty after a week!
FAQs
Can I make these bites ahead of time?
Yes, you can make these bites ahead of time. I often prepare them a day in advance. Just store them in an airtight container in the fridge. They stay fresh and tasty for about a week. This makes them perfect for parties or snacks. You can pop them out whenever you want a sweet treat.
What can I substitute for pumpkin puree?
If you can’t find pumpkin puree, try using sweet potato puree. It gives a similar flavor and texture. You could also use butternut squash puree as a great option. Both substitutes work well in this recipe. Just make sure they are smooth and creamy for the best results.
How do I get the chocolate drizzle to harden properly?
To get the chocolate drizzle to harden, melt the chocolate slowly. Use a microwave in short bursts, stirring in between. After drizzling it over the bites, refrigerate them for 15-20 minutes. This helps the chocolate set nicely. If it still feels soft, let it chill a bit longer.
In this article, we explored various aspects of making delicious pumpkin bites. We looked at ingredients, step-by-step instructions, and helpful tips. You learned about substitutions and even storage options.
Remember, creating these bites can be fun and easy. Don’t hesitate to try new flavors or nut butters. With the right techniques, you’ll impress everyone with your tasty treats! Enjoy experimenting with your pumpkin bites recipe!
