If you love sweet and salty treats, you’re in for a real delight! In this post, I’ll share my easy recipe for Salted Caramel Apple Krispy Treats. This fun dessert combines gooey marshmallows, crispy rice cereal, and fresh apples drizzled with rich salted caramel. Whether you’re a baking pro or a kitchen newbie, I’ve got all the steps you need. Let’s create a mouthwatering treat that everyone will love!
Ingredients
List of Ingredients
– 4 cups rice cereal (Krispy Rice)
– 1 cup mini marshmallows
– ½ cup unsalted butter
– ½ cup salted caramel sauce (store-bought or homemade)
– 1 teaspoon vanilla extract
– 1 medium apple, diced (tart varieties like Granny Smith work best)
– ½ teaspoon sea salt
– Optional: ¼ cup chopped nuts (such as pecans or walnuts)
Tips for Selecting Fresh Apples
Choosing the right apple is key. For these treats, I suggest tart apples. They balance the sweet caramel. Granny Smith apples are my favorite. They stay crisp and add a nice bite. When you pick apples, look for these signs:
– Firm skin
– Bright color
– No bruises or soft spots
Fresh apples make your treats taste better. Always wash your apples before dicing. This keeps them clean and crunchy.
Finding the Best Salted Caramel Sauce
You can use store-bought or homemade salted caramel. If you buy it, check the label. Look for quality ingredients, like real sugar and cream. This ensures a rich taste. For homemade, use simple ingredients: sugar, butter, and cream.
– Cook sugar until golden.
– Add butter and stir until melted.
– Slowly mix in cream for a smooth sauce.
This will give you a fresh, creamy caramel. It enhances every bite of the treats.
Step-by-Step Instructions
Preparing the Baking Dish
First, grab a 9×13 inch baking dish. Line it with parchment paper. Leave some paper hanging over the edges. This will help you lift the treats out later. Lightly grease the parchment with cooking spray or a bit of butter. This step keeps the treats from sticking.
Melting the Butter and Marshmallows
Next, take a large saucepan and set it over medium heat. Add the unsalted butter and let it melt. Once it is melted, toss in the mini marshmallows. Stir them continuously until they are fully melted and smooth. This mix is the base for your treats.
Combining and Mixing Ingredients
Once the marshmallows melt, remove the pan from heat. Now, mix in the salted caramel sauce. Add the vanilla extract and stir until everything is creamy and well blended. Then, it’s time to combine this with the rice cereal.
– Add 4 cups of rice cereal into the pan. Stir gently until every piece is coated. If you want some crunch, add ¼ cup of chopped nuts at this point. Fold them into the mix.
Additional Steps for Incorporating Apples
Now, it’s time for the star of the show: the apples. Take 1 medium apple and dice it into small pieces. Gently fold the apple pieces into the mixture. Be careful not to mash them. You want to keep those apple bits whole for a nice bite.
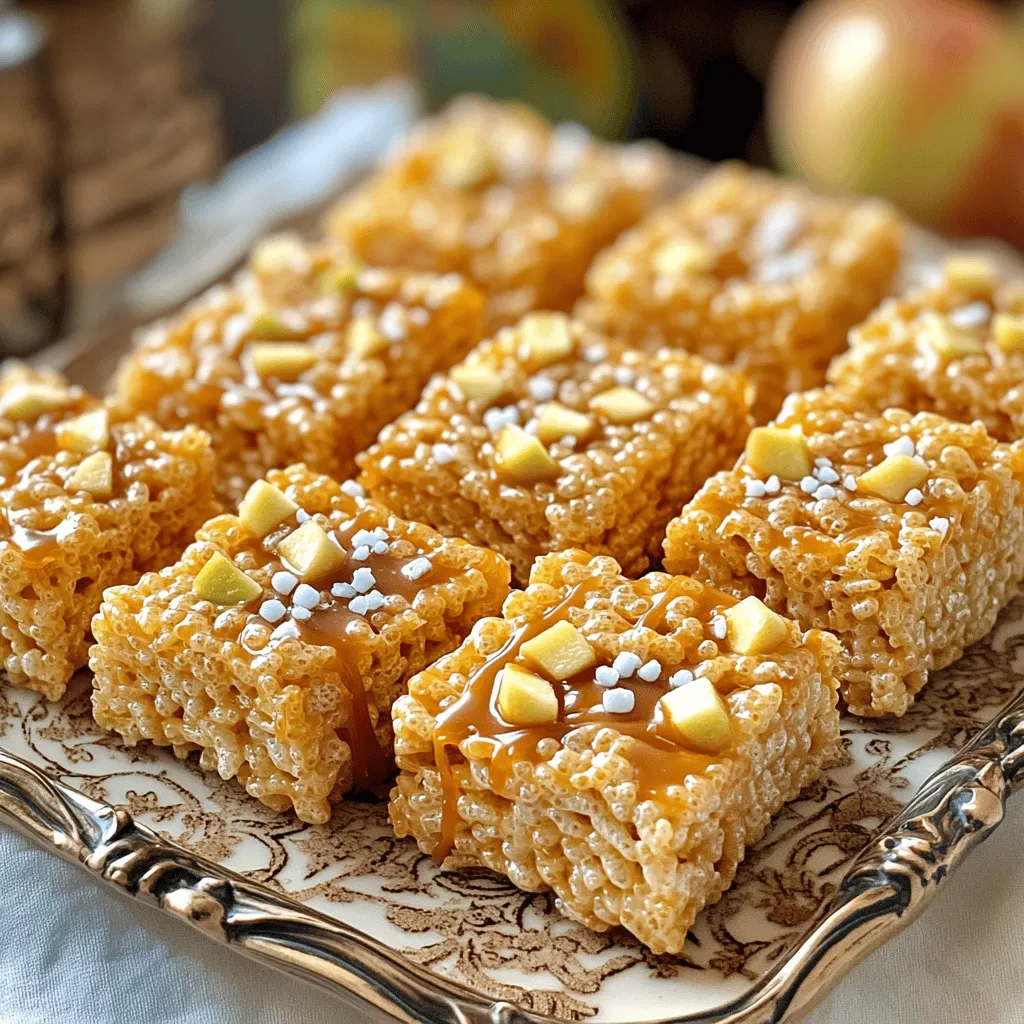
Now, pour this mixture into the prepared baking dish. Use a spatula or your hands to press it down firmly. Make sure it is even and flat. Finally, lightly sprinkle ½ teaspoon of sea salt on top. This will enhance the caramel flavor and balance the sweetness.
Let the treats cool at room temperature for 30 to 60 minutes. This will help them set nicely. Once cooled, use the parchment to lift them out. Cut into squares or rectangles and enjoy!
Tips & Tricks
Common Mistakes to Avoid
When making Salted Caramel Apple Krispy Treats, some simple errors can ruin your fun. Here are key mistakes to watch out for:
– Not Greasing the Dish: If you skip greasing, your treats may stick. Always grease your dish or use parchment paper.
– Overcooking the Butter: Melt the butter gently. If it burns, it changes the flavor and texture.
– Adding Apples Too Early: If you add apples while mixing, they can break down. Wait until the mixture cools slightly before folding them in.
Ensuring the Perfect Consistency
To get the right texture, follow these steps:
– Melt Marshmallows Fully: Ensure marshmallows are completely melted. Lumps can lead to uneven treats.
– Press Firmly: When you pack the mixture into the dish, press firmly. This helps the treats hold together.
– Cool Properly: Let the treats cool at room temperature. Avoid the fridge, as it can make them hard.
How to Make Homemade Salted Caramel Sauce
Making your own salted caramel sauce is simple and adds a special touch. Here’s how:
1. Ingredients Needed:
– 1 cup granulated sugar
– 6 tablespoons unsalted butter
– ½ cup heavy cream
– 1 teaspoon sea salt
2. Make the Caramel:
– In a saucepan, heat the sugar over medium heat, stirring until melted and golden.
– Add butter carefully. The mixture will bubble.
– Once combined, slowly pour in heavy cream. Stir until smooth.
3. Add Salt: After removing from heat, mix in sea salt. Let it cool before using in your treats.
This homemade sauce brings depth and flavor to your Salted Caramel Apple Krispy Treats.

Variations
Chocolate Drizzle Option
You can make these treats even more fun with chocolate. After they cool, melt some chocolate chips. Use a microwave or a double boiler for this. Drizzle the melted chocolate over the top of the treats. This adds a rich taste that pairs well with the caramel. It also makes them look fancy and special. Your guests will love the extra touch!
Adding Different Nuts or Dried Fruits
You can change the flavor by adding nuts or dried fruits. Try using chopped pecans, walnuts, or even almonds. They add a nice crunch and nutty flavor. You can also add dried fruits like cranberries or raisins. These give a hint of sweetness and chewiness. Mix in any of these options when you add the rice cereal. This makes each bite a little different and exciting!
Gluten-Free Alternatives
If you need gluten-free treats, there are easy swaps. Use gluten-free rice cereal instead of regular ones. Check the labels to be sure. You can also make sure your caramel sauce is gluten-free. Most brands are, but it’s always good to check. These changes make the treats safe for everyone. You won’t lose any flavor, just the gluten!
Storage Info
Best Ways to Store Leftovers
To keep your Salted Caramel Apple Krispy Treats fresh, store them in an airtight container. This helps maintain their chewy texture and rich flavor. Place parchment paper between layers if stacking. This prevents sticking and keeps them easy to grab.
How Long Do They Last?
When stored properly, these treats can last for about 3 to 5 days at room temperature. If you notice them getting too hard, they may be drying out. Keep an eye on them, and enjoy them while they are still soft and tasty!
Freeze Options for Long-Term Storage
If you want to save some for later, freezing is a great option. Wrap individual squares in plastic wrap, then place them in a freezer bag. They will stay good for up to 2 months in the freezer. To enjoy, just let them thaw at room temperature before indulging.
FAQs
Can I use regular caramel sauce instead of salted?
Yes, you can use regular caramel sauce. However, it will lack the salty contrast. Salted caramel adds a nice balance to the sweet treats. If you want to mimic that flavor, sprinkle a little sea salt on top. This will enhance the taste and make it more exciting.
What kind of apples are best for this recipe?
I recommend using tart apples like Granny Smith. Their tartness pairs well with the sweet caramel. Other good choices include Honeycrisp and Fuji. They hold their shape well and add crunchiness. Avoid soft apples like Red Delicious, as they may turn mushy.
How can I make these treats vegan?
To make these treats vegan, swap the butter for a plant-based butter. Use vegan mini marshmallows instead of regular ones. For the caramel, look for a vegan version or make your own using coconut milk. These changes keep the treats just as tasty and fun!
In this blog post, we explored the key ingredients and steps to create delicious treats. We covered how to choose fresh apples and the best salted caramel sauce. We also provided tips for avoiding common mistakes and achieving perfect consistency. You can try fun variations like chocolate drizzle or gluten-free options.
Remember, storing leftovers properly can keep them fresh for a longer time. These treats are fun to make and enjoy. I hope you try this recipe and share the joy with others!