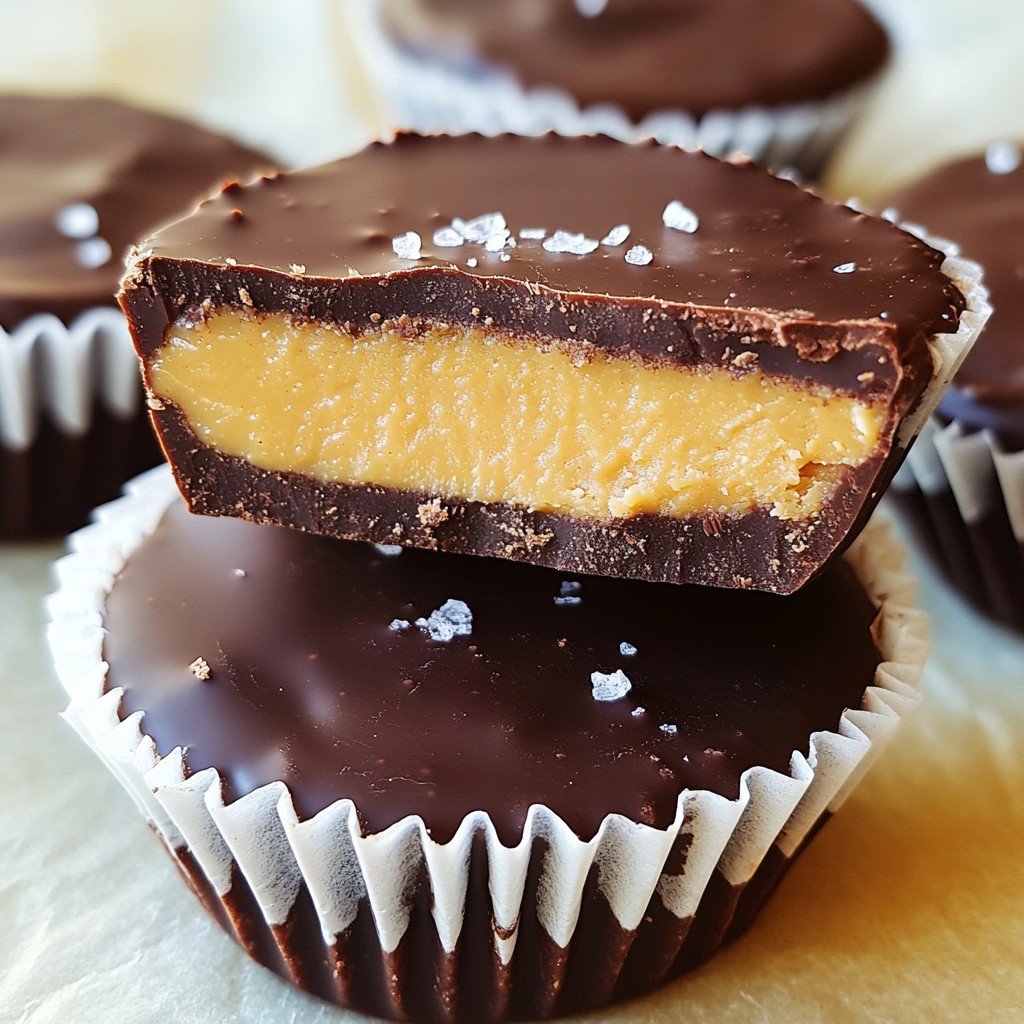
Craving a sweet treat that won’t derail your diet? Let’s dive into the world of Rich Sugar-Free Chocolate Peanut Butter Cups! These delicious cups satisfy your chocolate cravings without any added sugar. I’ll guide you through easy steps to make creamy, rich treats that taste amazing but keep your health in check. So grab your ingredients, and let’s create something delightful together!
Why I Love This Recipe
- Deliciously Indulgent: These chocolate peanut butter cups satisfy your sweet tooth without the added sugar, making them a guilt-free treat.
- Easy to Make: With simple ingredients and minimal prep time, you can whip these up quickly for a last-minute dessert.
- Customizable: You can easily adapt the recipe by using different nut butters or sweeteners to suit your taste preferences.
- Perfect for Sharing: These cups are great for parties or gatherings, allowing everyone to enjoy a delightful, healthier treat.
Ingredients
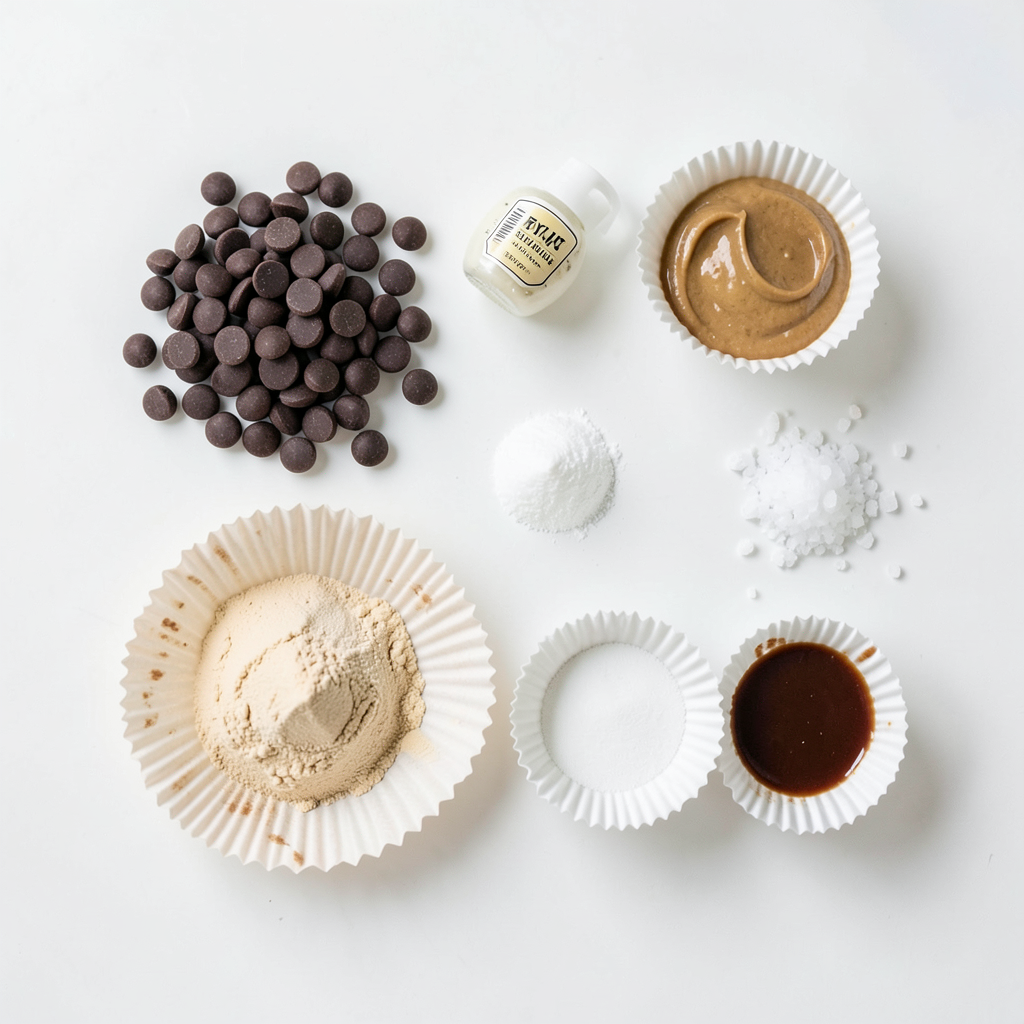
To make rich sugar-free chocolate peanut butter cups, you need a few key ingredients. Here’s the list:
- Sugar-free dark chocolate chips
- Natural peanut butter (smooth or crunchy)
- Powdered erythritol (or preferred sugar substitute)
- Vanilla extract
- Sea salt
- Cupcake liners
These ingredients work together to create a tasty treat. The sugar-free dark chocolate gives a rich flavor without the added sugar. Natural peanut butter adds creaminess and a nutty taste. The powdered erythritol sweetens the mix without calories. Vanilla extract enhances the overall flavor. A pinch of sea salt balances the sweetness. Lastly, cupcake liners are essential for easy removal and serving.
Using quality ingredients makes all the difference. Look for high-quality sugar-free chocolate chips that melt well. Choose a peanut butter you love, whether smooth or crunchy. The powdered erythritol should blend easily, so avoid grainy brands. This ensures each bite is smooth and delightful.
Feel free to get creative! You can swap in different nut butters or sweeteners. Just remember to keep the base flavors in mind. Enjoy experimenting with your own combinations!
Step-by-Step Instructions
Melting the Chocolate
To start, we’ll melt the sugar-free dark chocolate chips. Use a microwave-safe bowl for this.
1. Microwave Method: Place the chocolate chips in the bowl. Microwave them in 30-second bursts.
2. Stirring Technique: After each burst, stir the chocolate. Keep doing this until it’s fully melted and smooth. This method helps avoid burning the chocolate.
Preparing the Muffin Tin
Next, we prepare our muffin tin. This step is key for easy removal later.
- Importance of Cupcake Liners: Line each muffin cup with a cupcake liner. This will help keep the peanut butter cups intact and make cleanup a breeze.
Adding Layers
Now, let’s build our delicious layers.
1. Coating the Molds: Take a spoon and pour a thin layer of melted chocolate into each cupcake liner. It should just cover the base.
2. Mixing the Peanut Butter Filling: In a separate bowl, combine the natural peanut butter, powdered erythritol, vanilla extract, and sea salt. Mix until it’s smooth and creamy.
3. Topping with Chocolate: Once the chocolate base has set, spoon the peanut butter mixture on top. Press down gently to flatten it. After that, pour the remaining melted chocolate over the peanut butter layer. Make sure it’s fully covered. Tap the muffin tin on the counter to level the chocolate and remove any air bubbles.
These steps create a rich and satisfying treat. Enjoy each layer!
Tips & Tricks
Best Practices for Melting Chocolate
- Avoiding overheating: Heat your chocolate slowly. Use the microwave in short bursts of 30 seconds. Stir after each burst. This helps keep the chocolate smooth and prevents burning. If it looks shiny, you’re in good shape!
- Consistency check: After melting, check the texture. It should be smooth and glossy. If you see lumps, keep stirring. If lumps remain, you may need to gently reheat for a few seconds.
Customizing Your Peanut Butter Filling
- Adjusting sweetness: Taste your peanut butter mix before adding it. If you want it sweeter, add more powdered erythritol. Mix well after each addition.
- Alternative nut butters: If you want a twist, try almond or cashew butter. They give a nice change to the flavor while keeping it sugar-free.
Ensuring Perfect Texture
- Cooling times: After adding peanut butter, freeze the cups again for 15 to 20 minutes. This helps the layers set well and keeps them from mixing.
- Storing methods before serving: Keep your cups in an airtight container. Store them in the fridge to keep them fresh. If you want them to last longer, freeze them. Just let them thaw for a few minutes before enjoying!
Pro Tips
- Choose High-Quality Chocolate: Opt for a high-quality sugar-free dark chocolate that melts smoothly for the best flavor and texture.
- Experiment with Flavors: Add a pinch of cinnamon or a drop of peppermint extract to the peanut butter mixture for an exciting twist.
- Let Them Set Completely: Ensure the chocolate is fully hardened before removing the cups from the liners to prevent sticking.
- Store Properly: Keep your peanut butter cups in an airtight container in the refrigerator for up to two weeks for the best freshness.
Variations
Sugar-Free Alternatives
You can explore other sweeteners for this recipe. Options include stevia, monk fruit, or allulose. Each sweetener has its own taste. You may need to adjust the amount based on sweetness level. Dark chocolate gives a rich flavor. Milk chocolate offers a sweeter, creamier taste. Choose based on your preference.
Flavor Additions
Add sea salt flakes on top for a nice contrast. The salt enhances the sweet chocolate and peanut butter. You can also add spices like cinnamon or nutmeg. A drop of peppermint or almond extract adds a fun twist. Experiment with what you like!
Dietary Modifications
If you need dairy-free options, use dairy-free chocolate chips. This keeps the recipe vegan-friendly. For nut-free adaptations, try sun butter or soy nut butter. These swaps can make the cups safe for those with allergies. Adjust the recipe based on your dietary needs to enjoy these treats.
Storage Info
Best Storage Practices
Store your rich sugar-free chocolate peanut butter cups in an airtight container. You can keep them in the fridge or the freezer. Refrigeration is great for a quick treat. It keeps the cups firm and fresh for about a week. Freezing extends their life for up to three months. Just make sure to wrap them well to prevent freezer burn.
Shelf Life
These cups stay fresh for one week in the fridge. In the freezer, they last up to three months. Look for signs of spoilage, like an off smell or a change in texture. If they feel sticky or have a dull surface, it’s best to toss them.
Serving Suggestions
These chocolate peanut butter cups are perfect for snacks or desserts. Try pairing them with fresh fruit or a scoop of sugar-free ice cream. They also shine at parties or special events. Share them with friends, and watch everyone smile.
FAQs
How to make sugar-free chocolate peanut butter cups?
To make these treats, follow these steps:
1. Melt Chocolate: Place sugar-free dark chocolate chips in a bowl. Heat in the microwave for 30 seconds. Stir. Repeat until smooth.
2. Prepare Muffin Tin: Line a muffin tin with cupcake liners for easy removal.
3. Coat Molds: Pour a thin layer of melted chocolate into each liner. Freeze for 10 minutes to set.
4. Mix Peanut Butter Filling: In a bowl, combine peanut butter, powdered erythritol, vanilla extract, and sea salt. Mix until smooth.
5. Add Peanut Butter Layer: Take the muffin tin from the freezer. Spoon the peanut butter mix onto the chocolate base. Press down lightly.
6. Top with Chocolate: Pour the rest of the melted chocolate over the peanut butter. Tap the tin to remove air bubbles.
7. Freeze Again: Place the tin back in the freezer for 15-20 minutes until hard.
8. Serve: Remove the cups from the tin. Peel away liners and enjoy your sweet treat!
What are the benefits of using erythritol?
Erythritol is a great sugar substitute. It has few calories and does not spike blood sugar. It tastes sweet, like sugar, but with less impact. Using erythritol helps keep these cups sugar-free. This makes them better for your health. They have a lower glycemic index, meaning they are safer for diabetics. It also does not cause tooth decay, unlike regular sugar.
Can I make these chocolate cups in bulk?
Yes, you can make these cups in larger batches. Here are some tips:
- Freezing: After making, freeze the cups in an airtight container. This keeps them fresh for longer.
- Serving Size: You can make as many as you like. Just double or triple the recipe.
- Thawing: When ready to eat, let them sit at room temperature for a few minutes. This makes them easier to enjoy!
You can make delicious sugar-free chocolate peanut butter cups with ease. We covered the essential ingredients, melting techniques, and layer preparation. Remember to choose cupcake liners for easy removal. Also, don’t hesitate to customize your filling or adjust sweetness. Store them right to keep them fresh longer. These treats are perfect for any occasion. Enjoy making them and sharing with friends!