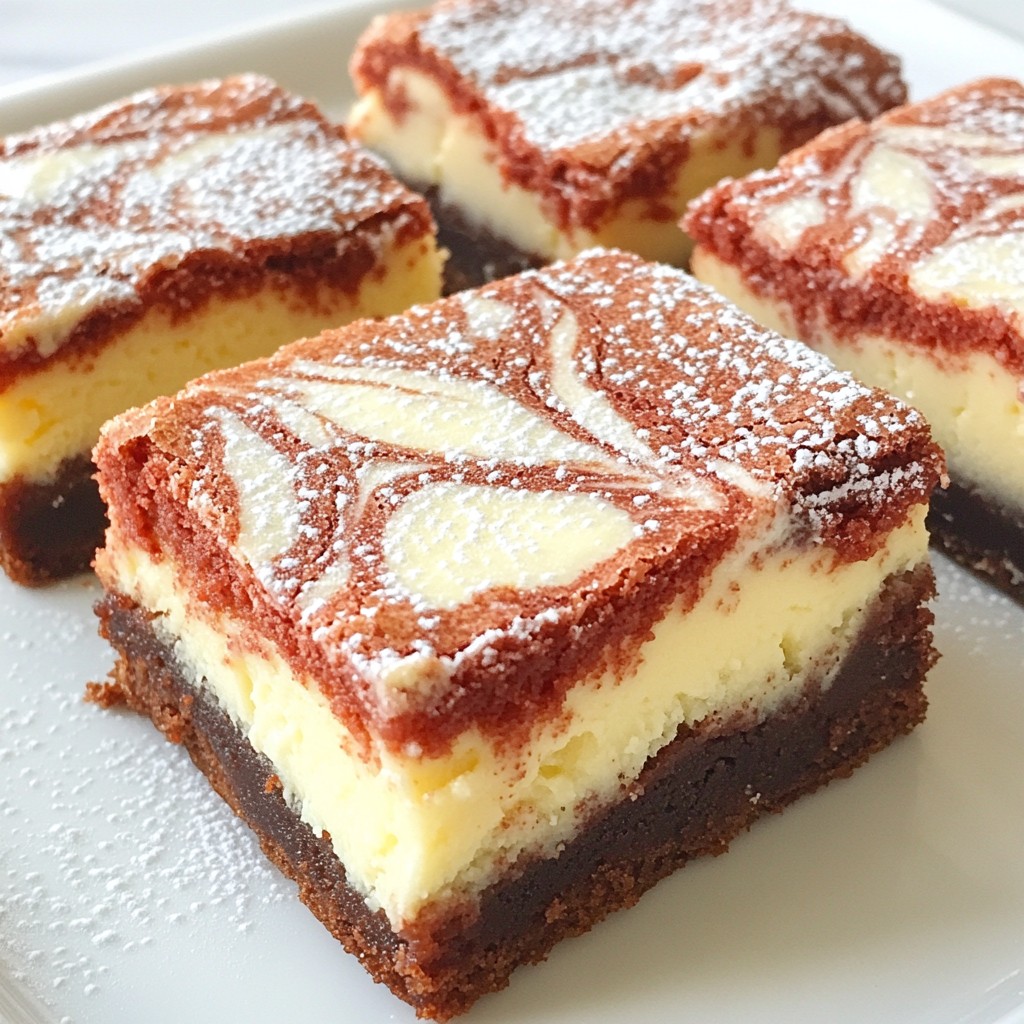
Get ready to dive into a sweet treat! Red Velvet Cheesecake Brownies are the perfect mix of rich chocolate and creamy cheesecake. In this easy guide, I'll share the ingredients you need, step-by-step instructions, and tips to avoid common mistakes. Plus, I’ll show you variations for gluten-free and vegan options. Let’s make these brownies an irresistible delight you’ll want to share with everyone!
Why I Love This Recipe
- Decadent Flavor: This recipe combines rich chocolate and creamy cheesecake for a dessert that’s simply irresistible.
- Stunning Presentation: The vibrant red color makes these brownies an eye-catching treat for any occasion.
- Easy to Make: With straightforward steps, these brownies are perfect for both novice and experienced bakers.
- Perfect for Sharing: Cut into squares, these brownies are great for gatherings, ensuring everyone gets a taste of deliciousness.
Ingredients
Essential Ingredients List
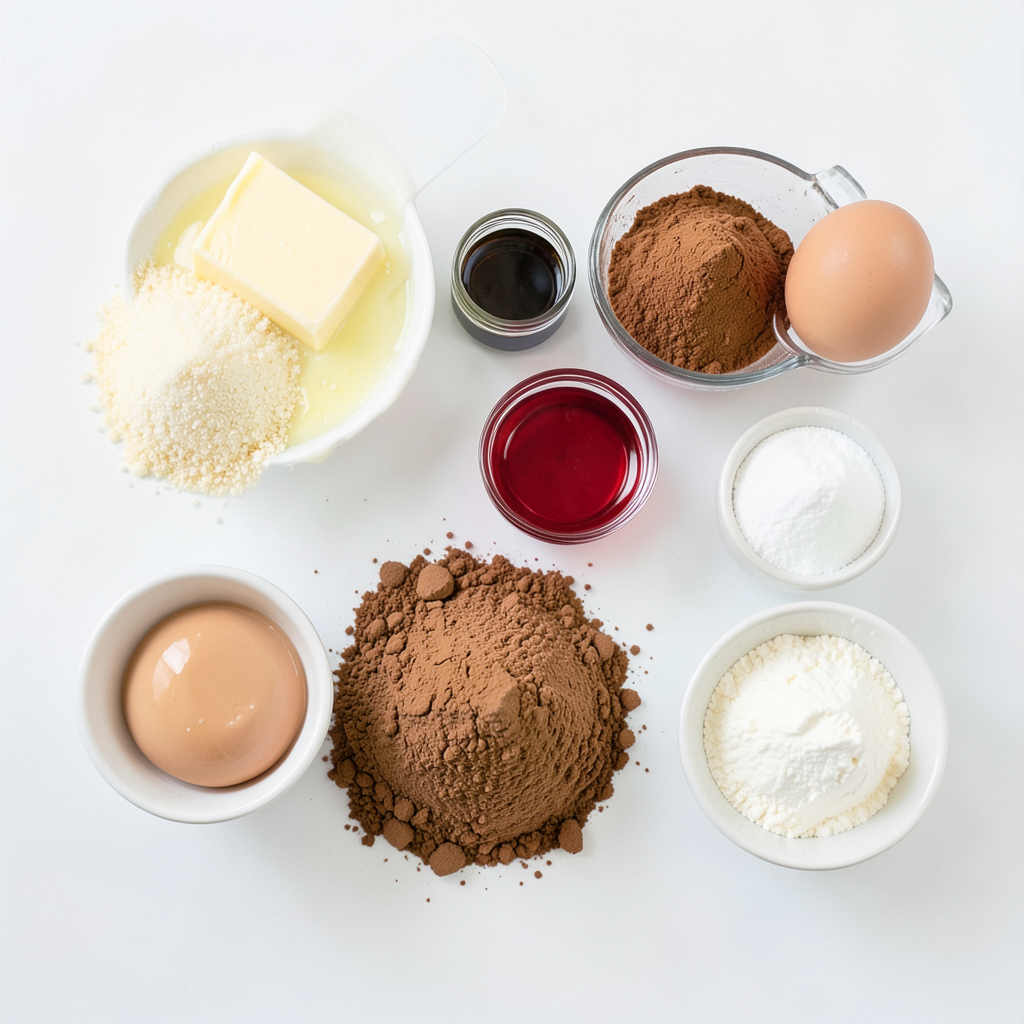
To make these red velvet cheesecake brownies, gather these key ingredients:
- 1 cup unsalted butter, melted
- 1 cup granulated sugar
- 1 cup packed brown sugar
- 4 large eggs
- 2 teaspoons vanilla extract
- 1 teaspoon red gel food coloring
- 1 ½ cups all-purpose flour
- ¼ cup unsweetened cocoa powder
- 1 teaspoon baking powder
- ½ teaspoon salt
- 8 oz cream cheese, softened
- ½ cup powdered sugar
- 1 large egg
- 1 teaspoon vanilla extract
These ingredients make a rich and tasty treat. The cream cheese adds a smooth layer that pairs well with the brownie base.
Optional Ingredients for Variations
You can play with the recipe using these optional ingredients:
- Chopped nuts like walnuts or pecans for crunch
- White chocolate chips for extra sweetness
- A splash of almond extract for a nutty flavor
These additions can change the taste and texture, making each batch unique.
Tips for Choosing Quality Ingredients
Choosing the best ingredients can boost your brownies:
- Use high-quality butter for a richer flavor.
- Opt for fresh eggs to ensure the best texture.
- When picking food coloring, gel offers vibrant color and less liquid.
- Look for full-fat cream cheese for a creamier filling.
Selecting quality items helps make your brownies truly special. Always check the labels and choose fresh options for the best results.
Step-by-Step Instructions
Prepping Your Ingredients
Gather all your ingredients before you start. This step makes baking easy and fun. You will need:
- 1 cup unsalted butter, melted
- 1 cup granulated sugar
- 1 cup packed brown sugar
- 4 large eggs
- 2 teaspoons vanilla extract
- 1 teaspoon red gel food coloring
- 1 ½ cups all-purpose flour
- ¼ cup unsweetened cocoa powder
- 1 teaspoon baking powder
- ½ teaspoon salt
- 8 oz cream cheese, softened
- ½ cup powdered sugar
- 1 large egg (for cream cheese layer)
- 1 teaspoon vanilla extract (for cream cheese layer)
Make sure your cream cheese is soft. This helps it mix well. You can set it out for a while or microwave it for a few seconds.
Mixing the Brownie Batter
Start by preheating your oven to 350°F (175°C). Grease a 9x13-inch pan or line it with parchment paper. In a large bowl, whisk together the melted butter, granulated sugar, and brown sugar until well combined. Then add the eggs one at a time. Mix well after each egg.
Now stir in the vanilla extract and red gel food coloring. Mix until the batter looks smooth and evenly red. In a separate bowl, sift together the flour, cocoa powder, baking powder, and salt. Gradually fold this dry mix into the wet mix. Be careful not to overmix.
Creating the Cream Cheese Layer
In another bowl, beat together the softened cream cheese, powdered sugar, one egg, and one teaspoon of vanilla extract. Keep mixing until the cream cheese is smooth and creamy. This layer adds a nice contrast to the brownie.
Baking and Cooling Instructions
Pour half of your red velvet brownie batter into the prepared pan. Spread it evenly. Next, spoon dollops of the cream cheese mixture over the brownie batter. Use a knife or toothpick to gently swirl the cream cheese into the batter for a marbled look.
Then, pour the remaining brownie batter on top, spreading it out to cover the cream cheese. Bake in the oven for 30-35 minutes. Check if they are done by inserting a toothpick into the center. It should come out with a few moist crumbs, not wet batter.
Once baked, let the brownies cool in the pan. After they cool, cut them into squares and serve. Enjoy this delicious treat!
Tips & Tricks
Common Mistakes to Avoid
When making red velvet cheesecake brownies, avoid overmixing the batter. This can make your brownies tough. Also, be careful not to skip cooling time. Cutting warm brownies can lead to a messy slice. Lastly, check your oven temperature. An oven that is too hot can dry out your brownies.
How to Achieve the Perfect Marble Effect
To get a great marble effect, use a toothpick or knife. After adding the cream cheese layer, swirl it gently into the brownie batter. Don’t overdo it! You want to see the contrast between red and white. A few swirls will do. The goal is a pretty design, not a mixed color.
Storing Leftover Brownies for Freshness
To keep brownies fresh, store them in an airtight container. You can keep them at room temperature for up to three days. If you want them to last longer, refrigerate them. For even longer storage, freeze them! Wrap each brownie in plastic wrap before placing them in a freezer bag. They can last up to three months in the freezer.
Pro Tips
- Use Gel Food Coloring: Gel food coloring provides a more vibrant color compared to liquid dyes. It won't alter the consistency of your batter.
- Perfect Cream Cheese Swirl: To achieve a beautiful marbled effect, use a toothpick or knife to swirl the cream cheese mixture gently without overmixing.
- Check for Doneness: To ensure the brownies are baked properly, insert a toothpick into the center; it should come out with a few moist crumbs, not wet batter.
- Cool Before Cutting: Allow the brownies to cool completely in the pan before cutting to ensure clean, even squares.
Variations
Gluten-Free Red Velvet Cheesecake Brownies
You can make these brownies gluten-free. Simply swap regular flour with a gluten-free blend. Look for a mix that has xanthan gum. This helps bind the ingredients together. Follow the same steps in the recipe, and you’ll get a tasty treat that everyone can enjoy.
Vegan Options for Red Velvet Cheesecake Brownies
Want to make these brownies vegan? It’s easy! Replace the eggs with flax eggs. Mix 1 tablespoon of flaxseed meal with 2.5 tablespoons of water per egg. Let it sit for five minutes until it thickens. Use dairy-free cream cheese for the cheesecake layer. This will keep the dessert creamy and delicious.
Flavor Additions and Mix-ins
Feel free to get creative with flavors! Here are some fun ideas:
- Add chocolate chips for extra sweetness.
- Mix in chopped nuts for some crunch.
- Try a hint of almond extract for a unique twist.
- Swirl in raspberry or cherry jam for fruity notes.
Each of these options can take your brownies to the next level. Enjoy experimenting to find your favorite combination.
Storage Info
Best Practices for Storing Brownies
To keep your red velvet cheesecake brownies fresh, start with proper storage. Once they cool, cut them into squares. Use an airtight container to store them. Layer parchment paper between the squares. This keeps them from sticking together. Store at room temperature for up to three days. If you want to keep them longer, consider the fridge. They stay fresh for about a week in there.
Freezing Instructions for Long-Term Storage
Freezing is a great way to save brownies. Wrap each square in plastic wrap tightly. Then, place them in a freezer-safe bag. Be sure to remove as much air as possible. Label the bag with the date. Your brownies can last up to three months in the freezer. When you are ready to enjoy them, simply thaw in the fridge overnight.
Reheating Tips for Enjoying Leftovers
Reheating your brownies brings back their soft texture. You can use a microwave or an oven. For the microwave, heat one square for about 10-15 seconds. Check to avoid overheating. If using the oven, preheat it to 350°F (175°C). Place the brownies on a baking sheet and warm for 5-10 minutes. Enjoy your delicious treat again!
FAQs
Can I use regular food coloring instead of gel?
Yes, you can use regular food coloring. However, gel food coloring works better. It gives a richer color without adding too much liquid. This helps keep the brownies moist and tasty.
How do I know when the brownies are fully baked?
You can check the brownies with a toothpick. Insert it into the center of the pan. If it comes out with a few moist crumbs, the brownies are done. If it comes out wet, they need more time.
What can I substitute for cream cheese?
You can use mascarpone or Greek yogurt as a substitute for cream cheese. Both options work well. They bring creaminess and a slight tangy taste. This keeps your red velvet cheesecake brownies soft and delicious.
How do I get my brownies to be more fudgy?
To make your brownies more fudgy, add an extra egg yolk. You can also reduce the flour by a couple of tablespoons. Another tip is to slightly underbake them. This will keep them moist and rich.
You now have all the tools to bake delicious Red Velvet Cheesecake Brownies. We covered essential ingredients, step-by-step instructions, and helpful tips. You can explore variations, such as gluten-free and vegan options, for your baking needs. Don't forget about storing and reheating your brownies to keep them fresh.
These brownies are sure to impress everyone. Dive in and enjoy your time baking something special!