Are you ready to whip up a stunning treat? Red Velvet Cake is not just a feast for the eyes; it’s a delicious delight that is fun and easy to make! In this post, I will guide you through the key ingredients, simple steps, and handy tips. You’ll be amazed at how quickly you can become a baking pro. Let’s dive in and get your cake journey started!
Ingredients
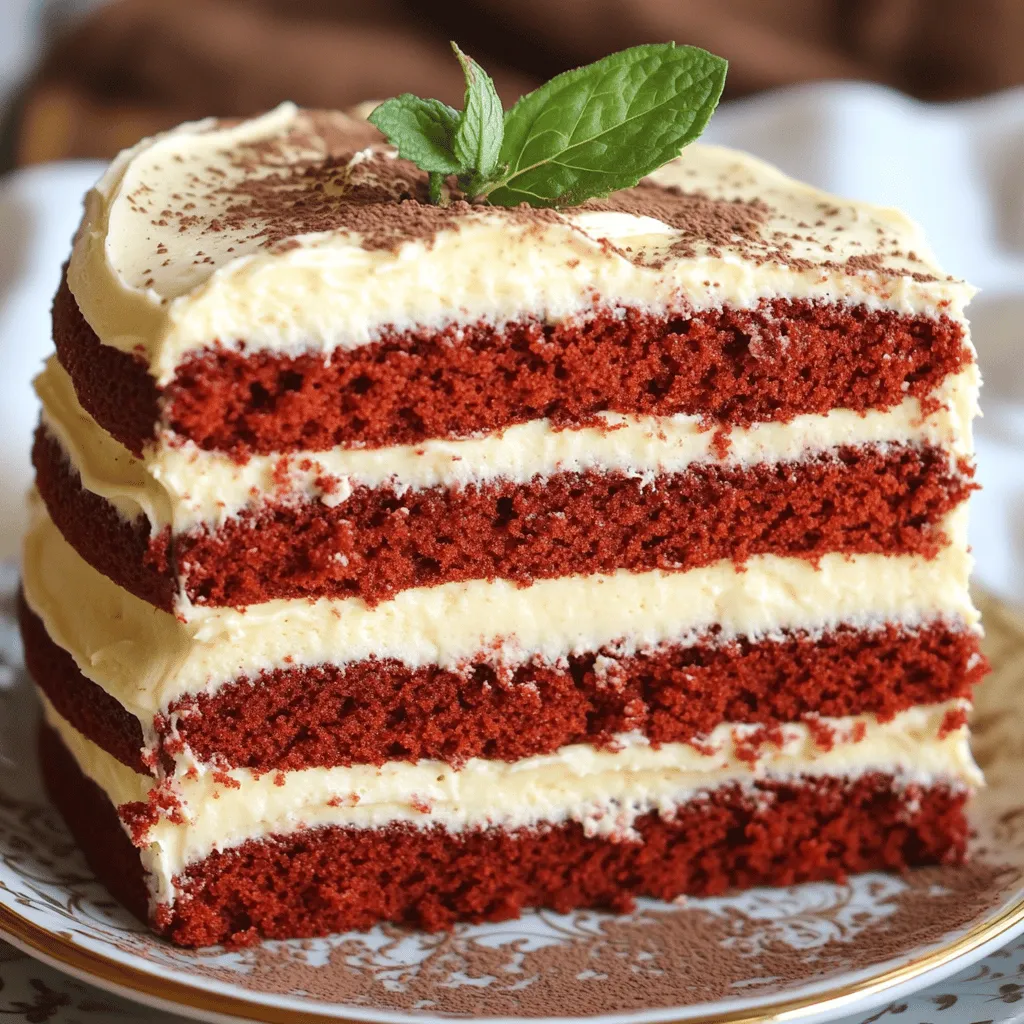
Key Ingredients for Red Velvet Cake
To make a great red velvet cake, you need a few key ingredients. Here’s what you’ll need:
– 2 ½ cups all-purpose flour
– 1 ½ cups granulated sugar
– 1 cup vegetable oil
– 1 cup buttermilk, at room temperature
– 2 large eggs, at room temperature
– 2 tablespoons red food coloring
– 1 teaspoon vanilla extract
– 1 teaspoon baking soda
– 1 teaspoon white vinegar
– 1 teaspoon cocoa powder
– ½ teaspoon salt
These ingredients work together to create the unique taste and texture of red velvet cake. The cocoa powder adds a hint of chocolate, while the buttermilk gives it a moist crumb.
Common Substitute Options
You might need to make some swaps for these ingredients. Here are some common substitutes:
– All-purpose flour: Use cake flour for a lighter texture.
– Granulated sugar: Brown sugar can add a richer flavor.
– Vegetable oil: You can use melted coconut oil or unsalted butter.
– Buttermilk: Mix one cup of milk with one tablespoon of vinegar for a quick buttermilk substitute.
– Red food coloring: Beet juice can give a natural color, but it may change the flavor slightly.
These options can help you create a delicious cake even if you lack some key items.
Importance of Fresh Ingredients
Using fresh ingredients is crucial for a tasty red velvet cake. Fresh eggs and buttermilk help with rising and flavor. Stale flour can lead to a dense cake that lacks fluffiness. I always recommend checking the expiry date on your ingredients before you start. Fresh ingredients make the difference between a good cake and a great one. You will taste the love and care in your baking!
Step-by-Step Instructions
Prepping the Oven and Pans
First, set your oven to 350°F (175°C). This helps the cake bake evenly. Grab two 9-inch round cake pans. Grease them well and sprinkle with flour. This step stops the cake from sticking.
Mixing Wet and Dry Ingredients
In a big bowl, sift together the flour, cocoa powder, baking soda, and salt. This makes the dry mix light and fluffy. In another bowl, mix the granulated sugar and vegetable oil. Stir until they blend well. Add the eggs one at a time, mixing after each. Pour in the buttermilk, red food coloring, and vanilla extract. Mix until smooth. Now, slowly add the dry mix to the wet mix. Be careful! You don’t want to overmix. In a small bowl, mix the baking soda and vinegar. This will fizz. Fold this into your batter for a nice lift.
Baking and Cooling Instructions
Divide the batter evenly between your prepared pans. Bake them for 25-30 minutes. Check if they’re done by inserting a toothpick in the center. If it comes out clean, they are ready. Let the cakes cool in the pans for 10 minutes. Then, move them to a wire rack to cool completely. While the cakes cool, you can start making the cream cheese frosting.
Tips & Tricks
Achieving the Perfect Red Color
To get that stunning red color, use gel food coloring. Liquid colors may not give the same effect. I suggest using about 2 tablespoons of gel food coloring. Mix it well into your wet ingredients until fully combined. This will ensure the color pops in your cake. You can also add a bit of cocoa powder to enhance the red hue without changing the taste.
Preventing a Dry Cake
No one likes a dry cake. To keep your red velvet cake moist, make sure your ingredients are at room temperature. This is key for a smooth batter. Also, be careful not to overmix your batter. Mix until just combined. Additionally, check your cake a few minutes before the suggested baking time. A toothpick should come out clean, but don’t wait too long to avoid dryness.
Frosting Application for Best Presentation
For a beautiful finish, apply the cream cheese frosting when your cake is completely cool. Start with the top layer first. Spread a generous amount of frosting on top and let it spill a little down the sides. Then, frost the sides with a smooth and even layer. For a nice touch, you can use a spatula to create swirls in the frosting. This simple step makes your cake look professional.

Variations
Red Velvet Cupcakes Recipe
Red velvet cupcakes are a fun twist on the classic cake. They keep all the rich flavor but are easier to serve.Instead of two cake pans, use a cupcake pan lined with paper liners. Fill each liner about two-thirds full. Bake them at 350°F (175°C) for 18-20 minutes. Check with a toothpick to see if they are done. Once cool, top with cream cheese frosting for a lovely treat.
Red Velvet Cheesecake Ideas
Red velvet cheesecake is a rich and creamy delight. To make this treat, start with a red velvet cake base.Pour half of the batter into a springform pan. Next, mix cream cheese, sugar, and eggs for the cheesecake layer. Pour this cream cheese mixture on top of the red velvet layer. Finally, pour the rest of the red velvet batter over the cheesecake layer. Bake it at 325°F (163°C) for about 50-60 minutes. Chill before serving for the best flavor.
Flavor Variations (Chocolate, Coconut)
You can easily change the flavor of red velvet cake. For a chocolate twist, add an extra tablespoon of cocoa powder to the batter. This will deepen the taste without losing that classic red hue. If you love coconut, try adding shredded coconut to the batter. You can also swap some of the buttermilk with coconut milk for added flavor. Both variations add a unique touch that will wow your guests.
Storage Info
How to Properly Store Red Velvet Cake
To keep your red velvet cake fresh, store it in an airtight container. This helps to lock in moisture and flavor. If you have leftover slices, wrap them in plastic wrap. You can also store the cake at room temperature for up to three days. If your kitchen is warm, refrigerate it to maintain freshness.
Freezing Instructions
You can freeze red velvet cake to enjoy later. First, let the cake cool completely. Then, slice it into portions. Wrap each slice tightly in plastic wrap, followed by aluminum foil. Label each wrap with the date. Frozen cake can last for up to three months. When you’re ready to eat, thaw it in the fridge overnight.
Best Ways to Reheat
To reheat a slice of red velvet cake, use the microwave. Place the slice on a microwave-safe plate. Heat it for about 10-15 seconds. Check if it’s warm enough; if not, heat for another few seconds. You can also reheat in the oven. Preheat it to 350°F (175°C). Place the slice on a baking sheet and heat for 5-10 minutes. Enjoy your slice warm, paired with a bit of cream cheese frosting for an extra treat!
FAQs
What causes the red color in Red Velvet Cake?
The bright red color in Red Velvet Cake comes from red food coloring. Traditionally, cocoa powder used in the recipe reacts with acidic ingredients, like buttermilk and vinegar. This reaction can create a reddish tint. However, this effect is mild, so many bakers add red food coloring to achieve that vibrant hue. I love using the coloring because it makes the cake look so festive!
Can I use regular milk instead of buttermilk?
Yes, you can use regular milk if you don’t have buttermilk. To make a quick substitute, add one tablespoon of vinegar or lemon juice to a cup of milk. Let it sit for about five minutes. This will mimic buttermilk’s tangy flavor, helping your cake stay moist and tender. I often do this when I run out of buttermilk!
How can I make a gluten-free Red Velvet Cake?
To make a gluten-free Red Velvet Cake, substitute all-purpose flour with a gluten-free blend. Make sure the blend includes xanthan gum, which helps improve the cake’s texture. Also, check that your baking soda and other ingredients are gluten-free. I recommend experimenting with different blends to find one that you enjoy the most. It’s fun to see how taste and texture change!
You’ve learned how to make a great red velvet cake from scratch. We covered the key ingredients, substitutions, and why fresh ingredients matter. I shared easy steps and tips to get the color and texture just right. You can also try fun variations like cupcakes or cheesecakes. Finally, I provided storage tips to keep your cake fresh. Red velvet cake is a treat that anyone can master. Enjoy baking and impressing your friends and family!


