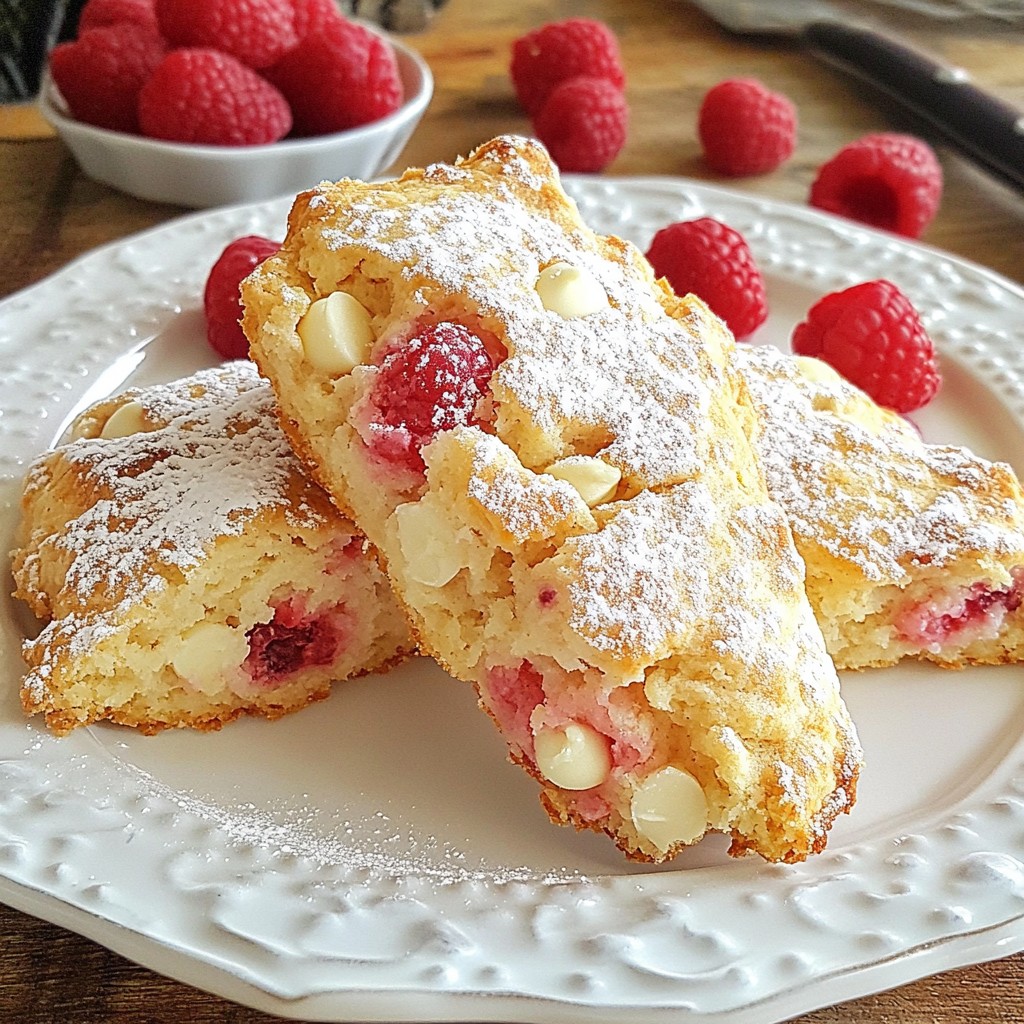
Do you love the sweet and tart blend of raspberries and white chocolate? Then this Raspberry White Chocolate Scone recipe is perfect for you! I’ll show you how to create these delightful treats that are soft, buttery, and bursting with flavor. Whether it’s breakfast or a cozy afternoon snack, these scones will impress. Let’s dive into the tasty details and whip up a batch that will have everyone asking for seconds!
Why I Love This Recipe
- Delicious Flavor Combination: The sweet and tangy raspberries paired with creamy white chocolate create a perfect balance that is simply irresistible.
- Easy to Make: This scone recipe is simple and quick, making it perfect for both novice bakers and experienced cooks looking for a delightful treat.
- Perfect for Any Occasion: Whether it’s brunch, tea time, or a snack, these scones fit wonderfully into any setting, impressing guests and family alike.
- Freezable for Convenience: You can prepare the dough ahead of time and freeze it, allowing you to bake fresh scones whenever you crave them!
Ingredients
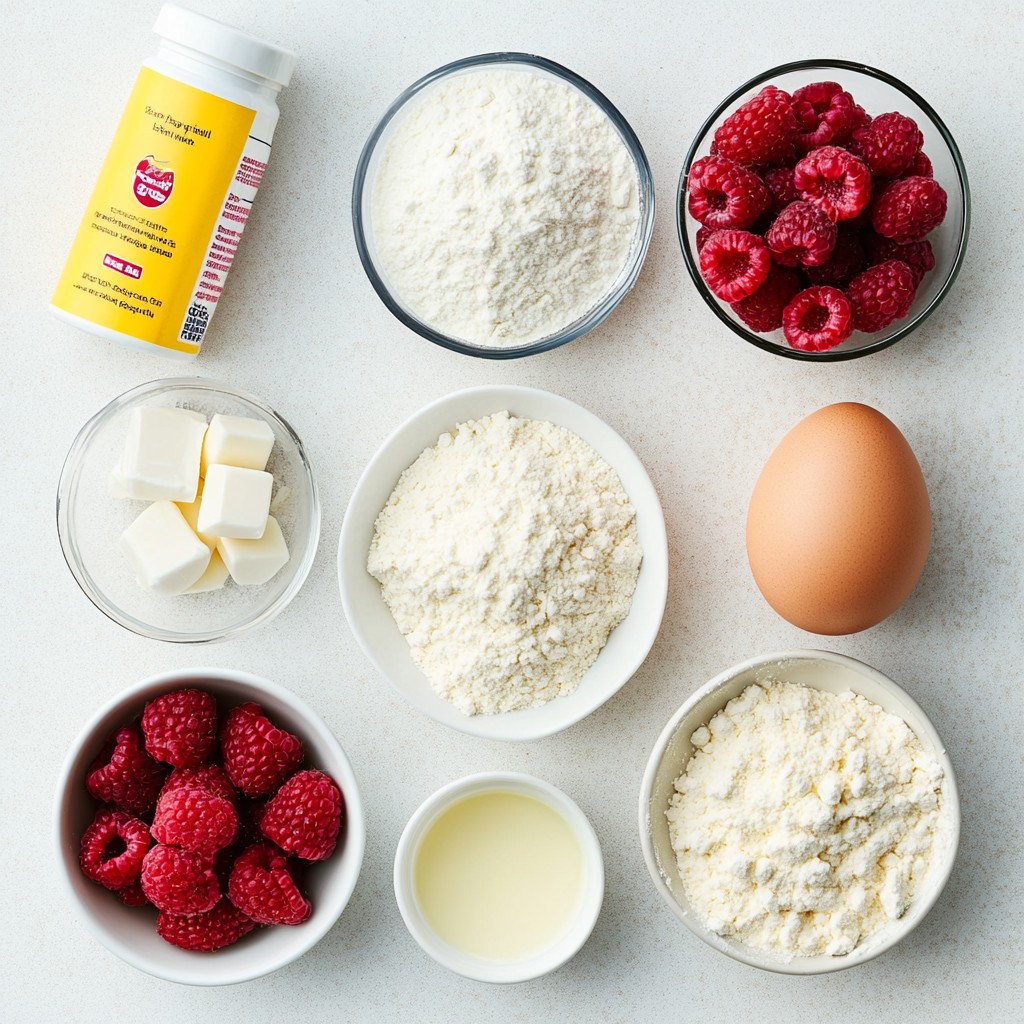
Main Ingredients List
- 2 cups all-purpose flour
- 1/2 cup granulated sugar
- 1 tablespoon baking powder
- 1/4 teaspoon salt
- 1/2 cup unsalted butter, cold and cubed
- 3/4 cup heavy cream
- 1 large egg
- 1 teaspoon vanilla extract
- 1 cup fresh raspberries
- 1/2 cup white chocolate chips
When I make Raspberry White Chocolate Scones, I always start with fresh ingredients. The flour gives structure, while sugar adds sweetness. Baking powder helps the scones rise, and salt brings out all the flavors. Cold butter is key for a flaky texture. Heavy cream makes the dough rich and tender. I use a large egg for binding, and vanilla adds a warm touch. Fresh raspberries burst with flavor, and white chocolate chips add a delightful sweetness.
Ingredient Substitutions
If you need gluten-free scones, consider using a gluten-free flour blend. Make sure it has xanthan gum for the best texture. For a dairy-free option, coconut cream can replace heavy cream. You can also use vegan butter instead of unsalted butter. If you want to skip white chocolate, try dark chocolate chips or chopped nuts. Each swap can give you a new twist on this classic treat.
Step-by-Step Instructions
Preparation Steps
1. First, preheat your oven to 400°F (200°C). Line a baking sheet with parchment paper. This keeps the scones from sticking.
2. In a large bowl, mix together 2 cups of flour, 1/2 cup of sugar, 1 tablespoon of baking powder, and 1/4 teaspoon of salt. Stir until they blend well.
3. Now, add 1/2 cup of cold, cubed unsalted butter to the dry mix.
4. Use a pastry cutter or your fingers to mix the butter in until it looks like coarse crumbs.
Combining Wet Ingredients
1. In another bowl, whisk together 3/4 cup of heavy cream, 1 large egg, and 1 teaspoon of vanilla extract. Make sure it's well mixed.
2. Pour this wet mix into the dry ingredients. Stir gently until just combined. Be careful not to overmix.
Shaping and Baking the Scones
1. Fold in 1 cup of fresh raspberries and 1/2 cup of white chocolate chips. Ensure they are evenly spread throughout.
2. Turn the dough out onto a floured surface. Knead it gently a few times until it forms a smooth dough.
3. Pat the dough into a circle about 1 inch thick. Using a sharp knife or pizza cutter, cut it into 8 wedges.
4. Move the wedges to the prepared baking sheet. Bake for 15-20 minutes until they are lightly golden on top.
5. After baking, let the scones cool on the sheet for a few minutes. Then, transfer them to a wire rack to cool completely.
Tips & Tricks
Achieving the Perfect Scone Texture
To get the best scone texture, avoid overmixing the dough. When you mix, do it just until the flour blends with the wet ingredients. Overmixing makes the scones tough. You want them light and fluffy.
Using cold butter is also key. Cold butter helps create flaky layers. Cut the butter into small cubes before mixing it into the flour. This keeps the butter cold until baking.
Flavor Enhancements
You can enhance the flavor of your scones in simple ways. Adding lemon zest or almond extract gives them a fresh twist. Just a teaspoon of lemon zest can brighten the taste. Almond extract adds a warm, nutty flavor.
Adjusting the sweetness is also easy. If you prefer less sweet scones, cut back on the sugar. You can also use a mix of brown and granulated sugar for richer flavor.
Serving Suggestions
Pair your warm scones with jams or clotted cream for a treat. Strawberry jam or raspberry preserves works well with the raspberry scones. Clotted cream adds a rich touch, perfect for special occasions.
Beverages that go well with scones include tea or coffee. A nice cup of Earl Grey or a rich coffee enhances the scone experience. Enjoying them fresh from the oven is truly the best way!
Pro Tips
- Use Cold Butter: Make sure your butter is very cold to achieve a flaky texture in your scones.
- Don't Overmix: Gently combine the ingredients to avoid tough scones; a few lumps are okay.
- Chill the Dough: If time allows, refrigerate the dough for 15-20 minutes before baking for a better rise.
- Experiment with Flavors: Try adding lemon zest or almond extract for a different flavor profile.
Variations
Fruit Variations
You can change the fruit in your scones for fun new flavors. Try using strawberries or blueberries instead of raspberries. These fruits give a sweet twist and add color. You can also use dried fruits like cranberries or apricots. Dried fruits bring a chewy texture and a different taste.
Chocolate Variations
If you want to mix up the chocolate, use dark chocolate chips instead of white ones. Dark chocolate adds a rich, deep flavor. You can also swap chocolate for nuts like pecans or walnuts. Nuts add crunch and a nutty taste that pairs well with the fruit.
Seasonal Variations
Seasonal changes can inspire your scones. For the holidays, add cranberries for a festive touch. You could even mix in pumpkin for a fall flavor. In summer, try a berry blend with strawberries, blueberries, and raspberries. This mix offers a fresh, fruity experience perfect for warm days.
Storage Info
How to Store Scones
To keep your scones fresh, store them in an airtight container. This method helps lock in moisture. Place a piece of parchment paper between layers if stacking. This prevents them from sticking together. Keep the container in a cool, dry spot, not in the fridge. Scones taste best within two days of baking. If you want to enjoy them later, freezing is a great option.
Freezing Instructions
You can freeze both unbaked and baked scones. To freeze unbaked scones, cut the dough into wedges first. Then, place them on a baking sheet lined with parchment. Freeze them for about an hour until firm. Once frozen, transfer the wedges to a freezer bag. Remove excess air and seal tightly.
For baked scones, let them cool completely. Then, wrap each scone in plastic wrap. Place wrapped scones into a freezer bag. This keeps them fresh for up to three months.
When you're ready to enjoy your scones, thaw them overnight in the fridge. For baked scones, reheat them in the oven at 350°F (175°C) for about 10 minutes. This makes them warm and delicious again!
FAQs
How do I make scones without heavy cream?
You can use milk, yogurt, or buttermilk. These options still add moisture. Each alternative brings a slightly different taste and texture. For a richer flavor, use full-fat milk. If you use yogurt, choose plain and thin it slightly with water.
Can scones be made ahead of time?
Yes, you can make scones in advance. Prepare the dough but do not bake them. Wrap the dough tightly in plastic wrap and store it in the fridge. You can also freeze the cut scones for later baking. Just remember to add a couple of extra minutes to the bake time if you bake from frozen.
Why are my scones dry?
Dry scones often result from overmixing the dough. Mixing too much can lead to tough scones. Also, check your measurements. Too much flour or not enough liquid can dry them out. Using cold butter helps keep them tender. If your scones turn out dry, try adding a bit more liquid next time.
You learned how to make scones, from ingredients to storage tips. We covered each step, including mixing, shaping, and baking. Don't forget to experiment with flavors and variations to find your favorite. If you follow these instructions, you'll enjoy tasty scones every time. Baking is a fun journey, so keep trying new ideas. With practice, you'll master the art of scone making and impress everyone with your skills.