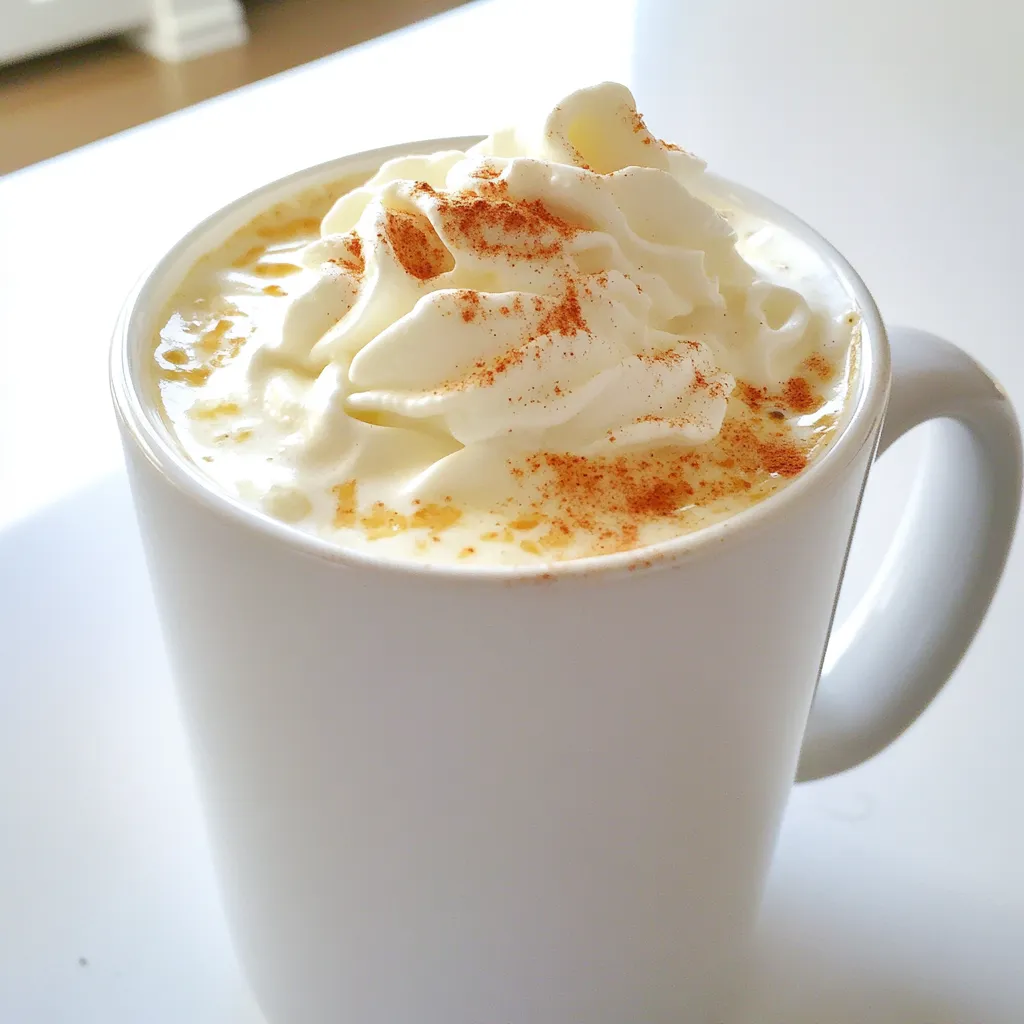
Get ready to indulge in the warm flavors of fall with my Pumpkin Spice White Hot Chocolate. This creamy delight combines rich white chocolate, pumpkin puree, and spices to create a drink you won't forget. It's perfect for cozy evenings or festive gatherings. Plus, I’ll share tips to make it just right, whether you want it extra creamy or with a unique twist. Let’s dive into this tasty recipe!
Ingredients
To make Pumpkin Spice White Hot Chocolate, you need simple and tasty ingredients. Each one adds a special touch to this cozy drink. Here’s what you’ll need:
- 2 cups whole milk
- 1 cup heavy cream
- 1 cup white chocolate chips
- ½ cup pumpkin puree
- 1 teaspoon vanilla extract
- 1 teaspoon pumpkin spice mix
- A pinch of salt
- Whipped cream, for topping
- Ground cinnamon or extra pumpkin spice, for garnish
Whole milk and heavy cream make the drink rich and creamy. White chocolate chips melt into a sweet base. Pumpkin puree gives it a warm flavor. Vanilla extract adds a lovely aroma. Pumpkin spice mix brings in classic fall flavors. Just a pinch of salt enhances all the tastes. Lastly, whipped cream and a sprinkle of cinnamon or pumpkin spice make it pretty.
Once you gather these ingredients, you’re ready to create a delicious drink that warms your heart. You can enjoy it alone or share it with friends and family. Each sip will remind you of cozy fall days.
Step-by-Step Instructions
Preparation Overview
Making Pumpkin Spice White Hot Chocolate is easy and fun. Gather all your ingredients first. You will need whole milk, heavy cream, white chocolate chips, pumpkin puree, vanilla extract, pumpkin spice mix, a pinch of salt, whipped cream, and ground cinnamon or extra pumpkin spice for garnish. This recipe takes about 10 minutes to prep and 15 minutes in total. You can serve four people, so share it with friends or family!
Heating the Milk and Cream
Start by pouring 2 cups of whole milk and 1 cup of heavy cream into a medium saucepan. Set your stove to medium heat. Stir the mixture gently. Heat it until it feels warm but do not let it boil. This step is important because boiling can change the texture.
Melting the White Chocolate
Once your milk and cream are warm, add 1 cup of white chocolate chips. Use a whisk and stir continuously. This will help the chocolate melt evenly into the milk. Keep whisking until the mixture is smooth and creamy. Next, stir in ½ cup of pumpkin puree, 1 teaspoon of vanilla extract, 1 teaspoon of pumpkin spice mix, and a pinch of salt. Make sure everything blends well. Once it's creamy and heated, remove the saucepan from the heat.
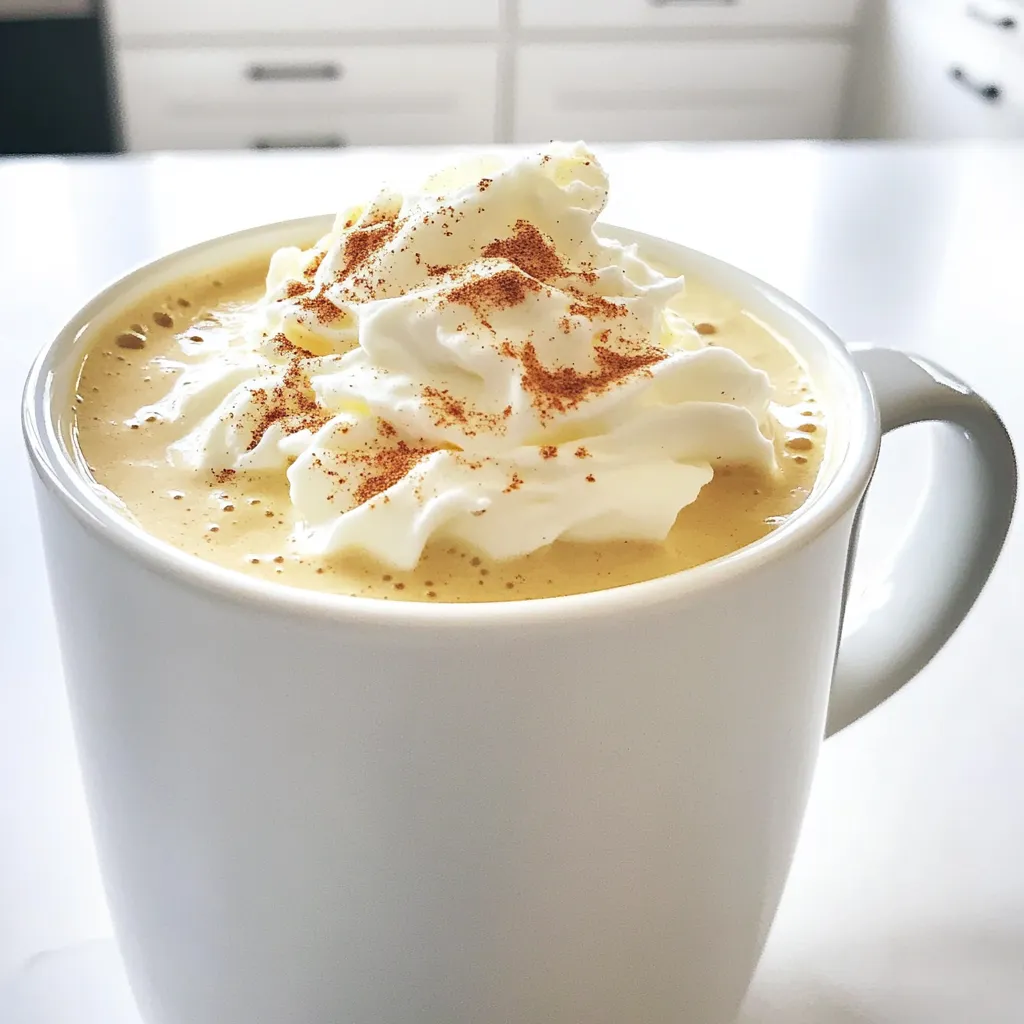
Now, pour your hot chocolate into mugs. Top each serving with whipped cream. Finish by sprinkling ground cinnamon or extra pumpkin spice on top. Enjoy your delicious drink!
Tips & Tricks
How to Achieve Optimal Creaminess
To make your Pumpkin Spice White Hot Chocolate super creamy, use whole milk and heavy cream. These two ingredients work great together. They add richness that makes each sip feel like a warm hug. Heat them gently in a saucepan, but don’t let them boil. Boiling can change the texture and make it less smooth. Stir often to keep the mixture even and creamy.
Customizing Sweetness Levels
Everyone has different tastes. If you like your drink sweeter, add more white chocolate chips. Start with an extra tablespoon, then taste it. If it needs more, keep adding a little at a time. For those who prefer less sweetness, cut back on the white chocolate. You can also use less pumpkin puree. This will keep the flavor strong but make it less sweet.
Best Practices for Whipped Cream Topping
Whipped cream makes this drink even better! To get the best whipped cream, use heavy cream. Beat it until it forms stiff peaks. This means it should hold its shape well. You can add a bit of sugar or vanilla for extra flavor. Once your hot chocolate is in the mug, top it with a big scoop of whipped cream. Don’t forget to sprinkle a bit of ground cinnamon or pumpkin spice on top. This adds a nice touch and enhances the fall flavors.
Variations
Dairy-Free Alternatives
If you want a dairy-free option, try using almond milk or oat milk. These milks create a creamy base without dairy. You can also swap out the heavy cream for coconut cream. It adds richness and a light coconut flavor. For the white chocolate, look for dairy-free chips. They melt well and keep the sweet taste.
Additional Flavor Enhancements
You can mix in some maple syrup for extra sweetness. It adds a nice fall flavor. Want a little heat? Add a pinch of cayenne pepper or a dash of chili powder. It gives a fun kick to your drink. You can also stir in some caramel sauce for a sweet twist. A splash of flavored extracts, like hazelnut or almond, can also elevate the taste.
Serving Suggestions for Seasonal Events
This drink is perfect for fall gatherings. Serve it at Halloween parties in cute mugs. You can even top it with marshmallows for a fun touch. For Thanksgiving, offer it as a warm drink option. Add a sprinkle of nutmeg on top for a festive look. You can create a hot chocolate bar with toppings like crushed cookies or chocolate shavings. This way, everyone can customize their own cup.
Storage Info
How to Store Leftover Hot Chocolate
You can store leftover Pumpkin Spice White Hot Chocolate in an airtight container. Let it cool first. Then, place it in the fridge. This keeps it fresh for later.
Reheating Tips
To reheat, pour the hot chocolate into a saucepan. Heat over low heat. Stir it gently to avoid burning. You can also use the microwave. Heat it in short bursts. Stir in between to ensure even warming.
Shelf Life Information
Stored correctly, this treat lasts about three days in the fridge. For best taste, consume it within this time. If you see any changes in texture or smell, toss it out. Always trust your senses!
FAQs
Can I make this recipe vegan?
Yes, you can make this drink vegan. Use almond milk or oat milk instead of whole milk and heavy cream. Replace white chocolate chips with dairy-free options. Pumpkin puree fits well in vegan recipes.
What can I substitute for pumpkin puree?
If you can't find pumpkin puree, use butternut squash puree or sweet potato puree. Both options give a similar flavor and texture. You may also blend cooked pumpkin for a fresh taste.
How can I make this drink spicier?
To add more spice, increase the pumpkin spice mix to two teaspoons. You can also add a pinch of cayenne pepper or more cinnamon for an extra kick. Adjust to your taste!
Is it possible to use milk alternatives?
Absolutely! Almond milk, soy milk, or coconut milk all work well. Choose a creamy milk alternative to maintain a rich texture. Just ensure it is unsweetened for better flavor balance.
What garnishes pair well with Pumpkin Spice White Hot Chocolate?
For garnishes, whipped cream is a must. You can sprinkle ground cinnamon or extra pumpkin spice on top. Chocolate shavings or caramel drizzle can add a fun twist. Enjoy your tasty drink!
This blog post detailed how to make a delicious Pumpkin Spice White Hot Chocolate. We covered essential ingredients, simple steps, and helpful tips. You learned how to achieve creamy texture and customize sweetness. We shared dairy-free ideas and perfect serving suggestions for seasonal gatherings.
In closing, enjoy crafting this cozy drink at home. It’s perfect for chilly days and gatherings. Your taste buds will thank you!