Craving a fall-inspired treat? You’ve come to the right place! These Pumpkin Caramel Cheesecake Bars with a Gingersnap Base marry creamy pumpkin filling with a spicy gingersnap crust. Topped with luscious caramel, they’re easy to make and perfect for sharing. In this article, I’ll guide you through each simple step, ensuring you can whip up this tasty dessert with no stress. Let’s dive into the delicious details!
Ingredients
Gingersnap Crust Ingredients
- 2 cups gingersnap crumbs
- ½ cup unsalted butter, melted
- ¼ cup brown sugar
Cheesecake Filling Ingredients
- 16 oz cream cheese, softened
- 1 cup pumpkin puree
- 1 cup granulated sugar
- 3 large eggs
- 1 teaspoon vanilla extract
- Spices: 1 teaspoon ground cinnamon, ½ teaspoon ground nutmeg, ½ teaspoon ground ginger
- ¼ teaspoon salt
Caramel Sauce
- 1 cup caramel sauce (store-bought or homemade)
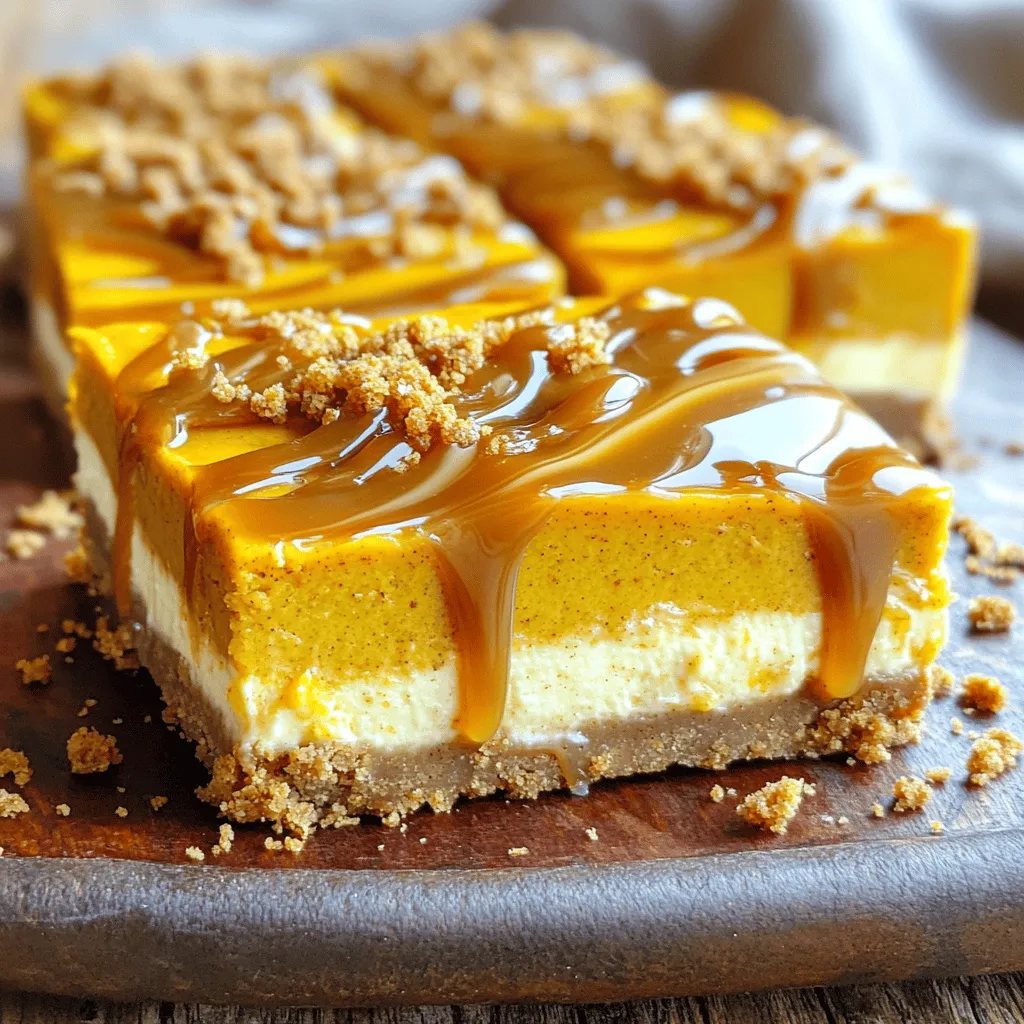
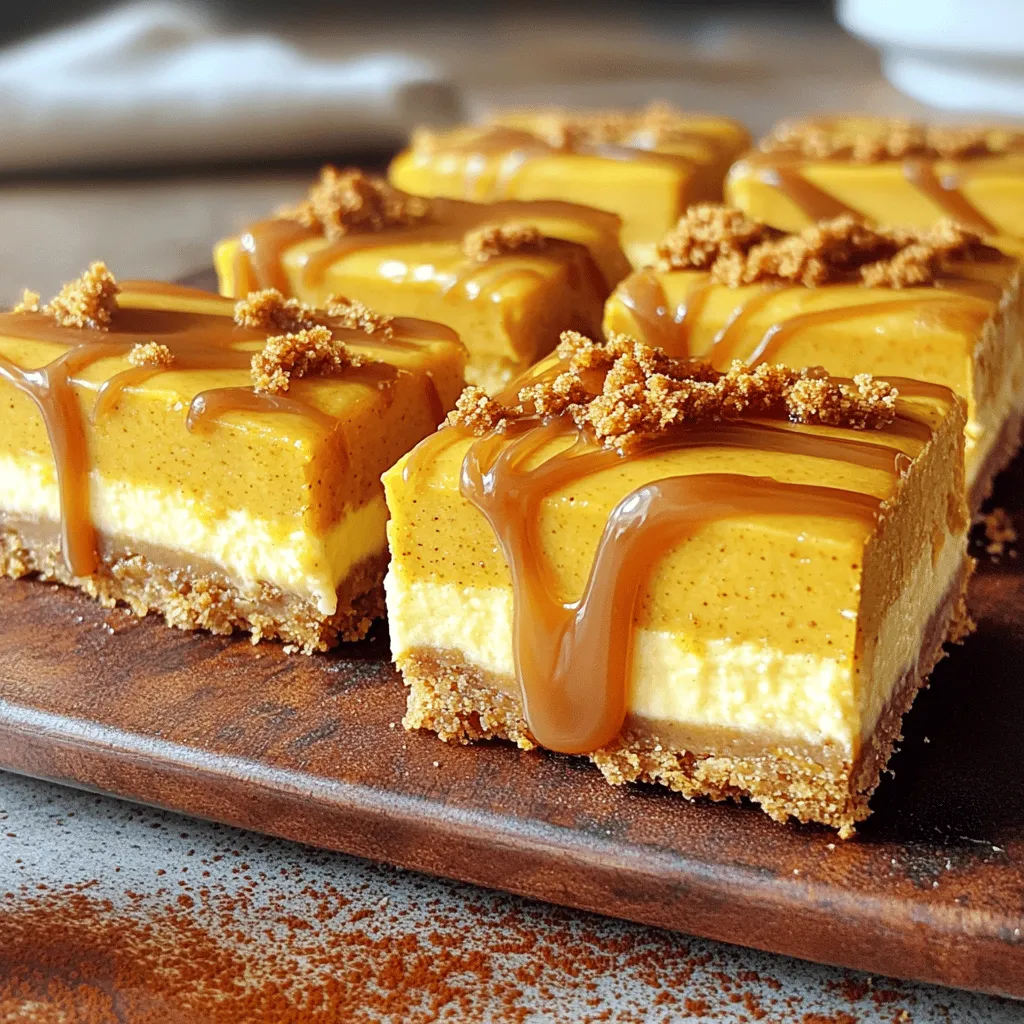
This recipe starts with a crunchy gingersnap crust. The crust is simple yet full of flavor. You mix gingersnap crumbs with melted butter and brown sugar. Press this mixture into the bottom of your baking dish.
Next, we create a smooth and creamy cheesecake filling. Start with softened cream cheese. This step is key. If the cream cheese is cold, it will be hard to mix. Add pumpkin puree and granulated sugar to the cream cheese. This combination gives the bars their delicious pumpkin flavor.
Then, mix in the eggs, one at a time. This helps to keep the filling light. After that, add vanilla extract and spices. The warm spices will fill your kitchen with a lovely aroma.
Lastly, we need caramel sauce. You can use store-bought sauce for ease, or make your own if you prefer. Drizzle this over the cheesecake filling. Swirl it in with a knife for a beautiful marbled look. Each layer adds to the rich taste of these pumpkin caramel cheesecake bars.
Step-by-Step Instructions
Preparing the Gingersnap Crust
1. Preheat your oven to 350°F (175°C). This step is crucial for a perfect crust.
2. In a medium bowl, mix 2 cups of gingersnap crumbs, ½ cup of melted butter, and ¼ cup of brown sugar. Stir until the crumbs look like wet sand.
3. Press the mixture evenly into the bottom of your greased 9x13 inch baking dish. Bake for 10 minutes. Let it cool slightly.
Making the Cheesecake Filling
1. In a large bowl, beat 16 ounces of softened cream cheese until smooth. This makes for a creamy texture.
2. Mix in 1 cup of pumpkin puree and 1 cup of granulated sugar. Blend well until smooth.
3. Add 3 large eggs, one at a time. Beat well after each egg. This helps to create a light filling.
4. Stir in 1 teaspoon of vanilla extract, 1 teaspoon of ground cinnamon, ½ teaspoon of ground nutmeg, ½ teaspoon of ground ginger, and ¼ teaspoon of salt. Mix until all ingredients are combined.
Assembling and Baking
1. Pour the pumpkin cheesecake filling over the cooled gingersnap crust. Spread it evenly.
2. Drizzle 1 cup of caramel sauce on top. Use a knife or skewer to swirl the caramel into the cheesecake. This creates a beautiful marbled effect.
3. Bake for 35-40 minutes. The center should be set but slightly jiggly.
4. After baking, let it cool at room temperature for about an hour. Then refrigerate for at least 4 hours, or overnight, to set completely.
Tips & Tricks
Achieving the Perfect Texture
To get a smooth texture, always start with softened cream cheese. This helps it mix well and prevents lumps. If you forget to soften it, you can microwave it for a few seconds. Also, mix the eggs gently. Overmixing can cause cracks in your cheesecake. Add them one at a time, and just mix until blended. This keeps the bars looking nice.
Flavor Enhancements
A pinch of salt can make a big difference. It enhances the sweetness and adds depth to the flavor. Use a high-quality caramel sauce. The better the sauce, the more delicious your bars will be. You can make homemade caramel, or choose a good store brand. Either way, quality matters.
Presentation Ideas
For a beautiful finish, garnish your bars with whipped cream. Crushed gingersnap cookies on top add a nice crunch. Drizzle more caramel sauce over the bars right before serving. This extra touch makes them look special and inviting. Serve them chilled on a nice platter to impress your guests.
Variations
Alternative Crust Options
You can change the crust for a new taste.
- Use 2 cups of graham cracker crumbs instead of gingersnap crumbs.
- For a gluten-free crust, try a nut-based crust, like almonds or pecans.
Cheesecake Filling Substitutes
You do not have to stick to pumpkin.
- Swap pumpkin puree with sweet potato puree for a different flavor.
- You can play with spices too. Try using allspice or cloves instead of the usual cinnamon and nutmeg.
Toppings and Add-ins
Add fun touches to your bars for extra joy.
- Mix in chocolate chips or toffee bits for a sweet surprise in the filling.
- Top your bars with chopped pecans or walnuts for a crunchy finish.
Storage Info
Proper Storage Techniques
To keep your pumpkin caramel cheesecake bars fresh, store them in an airtight container in the refrigerator. This will protect them from drying out. Always use parchment paper when baking. This makes it easy to lift and cut the bars later.
Freezing Instructions
If you want to save some bars for later, freeze them in individual portions. This way, you can enjoy a slice whenever you want. To serve, thaw the bars in the refrigerator. This keeps the texture just right.
Shelf Life and Serving Suggestions
These tasty bars are best eaten within a week when stored in the fridge. They pair wonderfully with coffee or tea. Enjoying them as a dessert with your favorite drink makes for a delightful experience.
FAQs
Can I use fresh pumpkin instead of canned?
Yes, but ensure it is cooked and well-pureed. Fresh pumpkin can bring a bright flavor. To prepare, cut the pumpkin, roast it, and blend until smooth. This method gives you a rich taste. Make sure you drain any excess moisture. It will help your cheesecake bars set better.
How can I tell when the cheesecake bars are done?
The center should be set but still slightly jiggly. When you take them out, the edges will be firm. The middle will have a soft wobble. This indicates it still has some creaminess. Keep in mind, they will firm up as they cool.
Can I make this recipe ahead of time?
Yes, these bars can be made and refrigerated for up to 2 days in advance. This makes them great for parties or family dinners. Just cover them well with plastic wrap. This keeps them fresh and tasty. Allow them to chill for at least four hours before serving. This helps the flavors meld together beautifully.
This blog post covered how to create delicious pumpkin cheesecake bars with a gingersnap crust. We explored each ingredient and step, ensuring you have the tools to succeed. Remember to soften the cream cheese and avoid overmixing the eggs to get the perfect texture. With these tips, your cheesecake can shine. Don't forget to customize your bars with different toppings or crust options. Enjoy your baking, and savor each bite!


