Ready for a treat that’s both simple and delicious? Peanut Butter Bliss Balls are the perfect snack to satisfy your cravings. With just a few healthy ingredients like natural peanut butter, oats, and dark chocolate chips, these no-bake goodies are quick to whip up. Whether you need a post-gym boost or a sweet pick-me-up, this recipe has you covered. Let’s dive into these tasty bites that you’ll love making and sharing!
Ingredients
To make Peanut Butter Bliss Balls, you need simple and easy-to-find items. Here’s what you will need:
– 1 cup natural peanut butter
– ½ cup honey or maple syrup
– 1 cup rolled oats
– ½ cup ground flaxseed
– ½ cup dark chocolate chips (you can use dairy-free if you like)
– 1 teaspoon vanilla extract
– A pinch of salt
– Optional: ¼ cup shredded coconut (for coating)
These ingredients work together to create a tasty treat. Natural peanut butter gives a rich flavor. Honey or maple syrup adds sweetness. Rolled oats provide a chewy texture. Ground flaxseed boosts nutrition and helps bind the balls. Dark chocolate chips make each bite fun and delicious. A hint of vanilla adds warmth. Salt balances the sweetness perfectly. If you want a fun twist, roll your bliss balls in shredded coconut.You will love how easy it is to make these treats!
Step-by-Step Instructions
Detailed Preparation Steps
1. Mixing the peanut butter and sweetener
Start with a large bowl. Add 1 cup of natural peanut butter and ½ cup of honey or maple syrup. Mix them well until the mixture is smooth.
2. Incorporating dry ingredients
Next, add 1 cup of rolled oats, ½ cup of ground flaxseed, and ½ cup of dark chocolate chips. Don’t forget 1 teaspoon of vanilla extract and a pinch of salt. Mix until everything is sticky and combined.
3. Forming the bliss balls
Use your hands to scoop out about 1 tablespoon of the mixture. Roll it into a ball shape. Place each ball aside on a plate or baking sheet.
4. Optional coating with coconut
If you want a fun twist, take ¼ cup of shredded coconut. Place it on a plate. Roll each bliss ball in the coconut to coat it. This adds a nice texture and flavor.
5. Refrigeration process
Once all balls are shaped, put them on a baking sheet lined with parchment paper. Refrigerate them for at least 30 minutes. This will help them firm up nicely.
These simple steps make delicious Peanut Butter Bliss Balls.Enjoy your tasty treats!
Tips & Tricks
Perfecting the Recipe
To get the best bliss balls, you may need to adjust the consistency. If your mix is too sticky, add more rolled oats or ground flaxseed. Keep adding until it feels just right. This balance helps the balls hold their shape.
You can also add fun flavors to your bliss balls. Try tossing in dried fruits like cranberries or raisins. You can even swap the dark chocolate chips for white chocolate or butterscotch chips. Each choice gives a new twist.
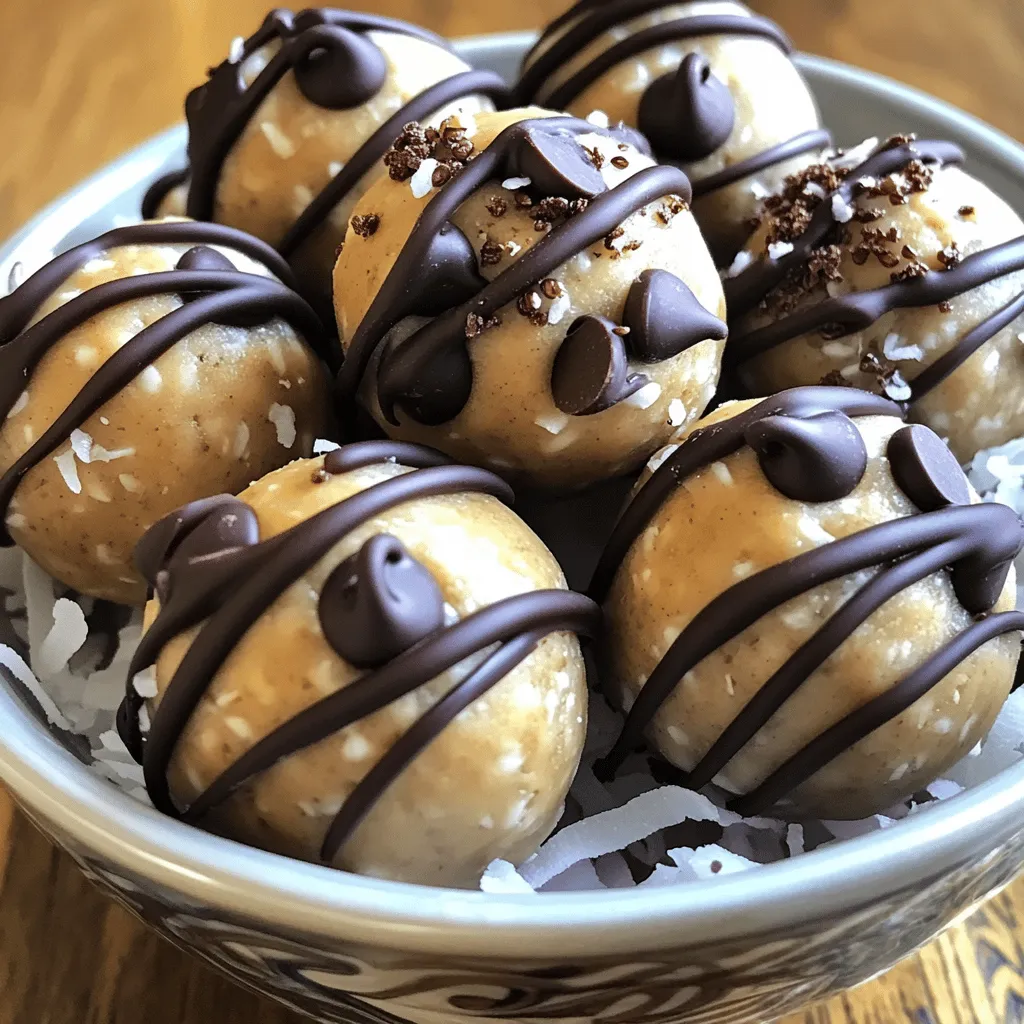
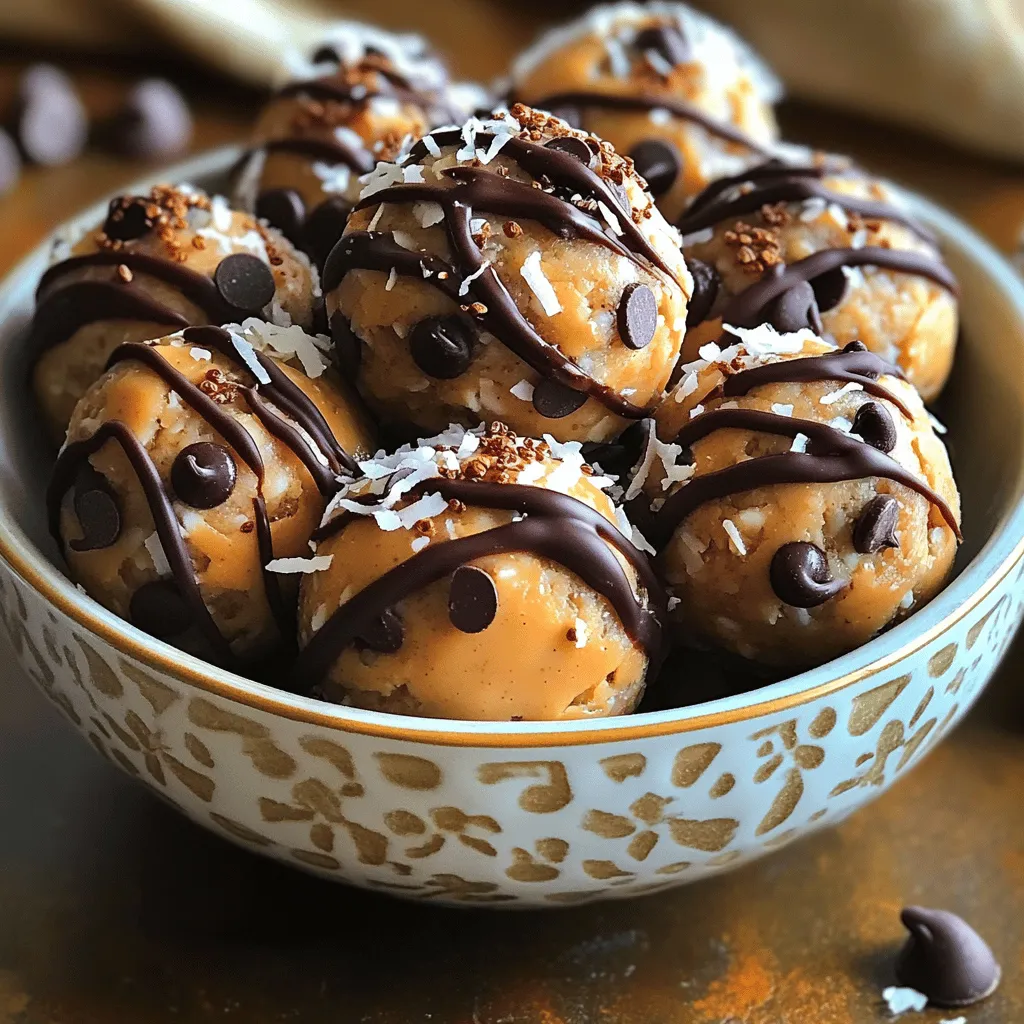
For serving, make your bliss balls look extra special. Place them in a pretty bowl. You can drizzle melted chocolate over them for a fancy touch. If you use shredded coconut, roll the balls in it first. This adds flavor and makes them look great.
Variations
Dietary Options
For a vegan version, swap honey with maple syrup. This keeps the bliss balls sweet and plant-based. You can also use agave syrup. It works well too.
To make these bliss balls gluten-free, use gluten-free rolled oats. Check the label to be sure. This small change keeps the treat safe for those with gluten issues.
Want to add a twist? Try using other nut butters like almond or cashew. You can mix in sunflower seed butter for a nut-free option. Add seeds or dried fruits for extra flavor and texture.
If you like, try mixing in spices like cinnamon or cocoa powder. These can enhance the taste and make your bliss balls unique.
For more fun, you can coat the bliss balls in different toppings. Try crushed nuts, seeds, or more chocolate chips. Each twist makes your snack special and fun to eat.
Feel free to experiment with flavors and find your favorite blend. Each bite of your creation will be a delicious surprise!
Storage Info
Storage Recommendations
To keep your Peanut Butter Bliss Balls fresh, use airtight containers. Glass jars or plastic containers work well. This prevents moisture and keeps them tasty.
Store the bliss balls in the fridge. They last up to one week. If you want to keep them longer, freezing is a great choice.
For freezing, place the bliss balls on a baking sheet. Freeze them for about one hour. Once firm, transfer them to a freezer-safe bag. Label the bag with the date. They can stay in the freezer for up to three months.
Enjoy these treats any time! You can grab them straight from the fridge or freezer. They make a quick snack or dessert.
FAQs
Common Questions
How to make Peanut Butter Bliss Balls vegan?
To make these bliss balls vegan, use maple syrup instead of honey. Choose dairy-free chocolate chips. These swaps keep the treat tasty and plant-based.
What can I substitute for honey or maple syrup?
You can use agave syrup or brown rice syrup. Both work well as sweeteners. They give a similar taste and texture to the bliss balls.
How long do these snacks last in the fridge?
These snacks stay fresh for about one week in the fridge. Store them in an airtight container for best results.
Can I make these without chocolate chips?
Yes, you can skip the chocolate chips. Try adding dried fruit, nuts, or seeds instead. This adds different flavors and textures to your bliss balls.
What is the nutritional value of Peanut Butter Bliss Balls?
Each bliss ball has protein from the peanut butter and healthy fats from flaxseed. They also provide fiber from oats.
You learned how to make Peanut Butter Bliss Balls today. We covered the needed ingredients, step-by-step instructions, and helpful tips. Variations like vegan options and gluten-free tips will suit different diets. Remember to store them right to keep them fresh. These snacks are easy to make and fun to enjoy. Now, it’s your turn to create these tasty treats in your kitchen! Happy snacking!


