Chef Taling

  • Home
  • Recipe Index
    • Desserts
    • Dinner
    • Appetizer
    • Drinks
  • About
  • Contact
  • Privacy Policy
menu icon
go to homepage
  • Home
  • Recipe Index
    • Desserts
    • Dinner
    • Appetizer
    • Drinks
  • About
  • Contact
  • Privacy Policy

search icon
Homepage link
  • Home
  • Recipe Index
    • Desserts
    • Dinner
    • Appetizer
    • Drinks
  • About
  • Contact
  • Privacy Policy

×

No-Churn Cookies And Cream Ice Cream Delight Recipe

Published: Sep 14, 2025 · by Natalie · Leave a Comment

WANT TO SAVE THIS RECIPE?

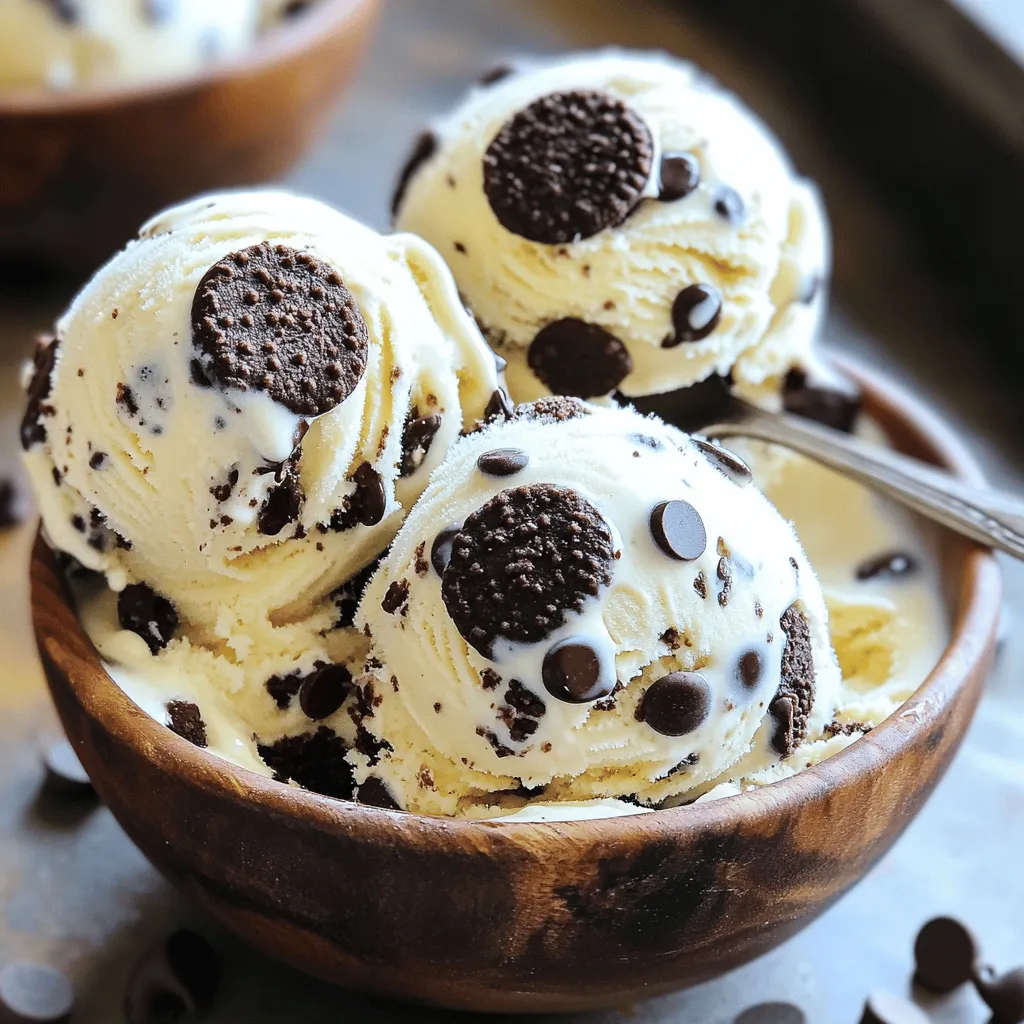
Get ready to treat yourself with my No-Churn Cookies and Cream Ice Cream Delight Recipe! This easy, no-churn method lets you whip up an ice cream that is creamy, crunchy, and oh-so-delicious without any special tools. In just a few simple steps, you’ll create a homemade treat that will impress your friends and family. So grab your ingredients, and let’s dive into this delightful dessert!

To make this tasty ice cream, you will need: - 2 cups heavy whipping cream - 1 cup sweetened condensed milk - 1 teaspoon vanilla extract - 1 cup crushed chocolate sandwich cookies (like Oreos) - ½ cup mini chocolate chips (optional) These ingredients come together to create a smooth and creamy treat. The heavy whipping cream gives the ice cream its fluffy texture. The sweetened condensed milk adds sweetness and creaminess, while the vanilla extract enhances the flavor. The chocolate sandwich cookies deliver that classic cookies and cream taste. You can play with flavors by adding: - ½ cup chopped nuts (like pecans or walnuts) - ½ cup crushed candy bars (like Snickers or Reese's) - A swirl of chocolate or caramel sauce These additions can make your ice cream even more fun and unique. You can mix and match to find your favorite combo! When choosing cookies, I suggest these brands: - Oreo - Hydrox - Famous Amos These brands provide a great crunch and rich taste. They are perfect for blending into your ice cream. Using quality cookies will make your ice cream delightfully delicious! To start, grab a large mixing bowl. Pour in 2 cups of heavy whipping cream. Use an electric mixer to whip the cream. Set the speed to medium-high. Whip for about 3 to 4 minutes. You want to see stiff peaks form. This step gives your ice cream its light texture. Now, take a separate bowl. Add 1 cup of sweetened condensed milk. Pour in 1 teaspoon of vanilla extract. Mix these well until they blend smoothly. This mixture brings a sweet, rich flavor to your ice cream. Next, gently fold the whipped cream into the condensed milk mixture. Do this slowly to keep the lightness. Once they mix well, it's time for the fun part! Add 1 cup of crushed chocolate sandwich cookies. If you like, toss in ½ cup of mini chocolate chips. Fold everything in until the cookies are spread evenly. Now, pour your mix into a loaf pan or an airtight container. Smooth the top with a spatula for evenness. Cover it with plastic wrap or a lid. Place it in the freezer for at least 4 to 6 hours. This waiting time helps it freeze and firm up. After that, scoop it into bowls or cones and enjoy! To get the best whipped cream, start with cold cream. Cold cream whips better and faster. Use a clean bowl and beaters for the best results. I whip the heavy cream on medium-high speed. It takes about 3-4 minutes to get stiff peaks. Stiff peaks mean the cream holds its shape well. This step is key for a light and airy ice cream. Ice crystals can ruin your ice cream's smoothness. To avoid them, freeze the mixture quickly. Use a shallow container for faster freezing. Cover the ice cream tightly to keep air out. This helps keep the texture creamy. Stir the ice cream after two hours of freezing. This breaks up any crystals forming. Repeat if you want a super smooth finish. When serving, scoop the ice cream into bowls or cones. You can add more crushed cookies on top. Drizzle chocolate syrup for extra sweetness. A sprinkle of mini chocolate chips makes it fun. Serve this ice cream with fresh berries for a nice touch. Enjoy it on a hot day or after dinner. It's a treat everyone loves! {{image_2}} You can switch up the cookie type for fun. Try chocolate chip cookies for a twist. Vanilla wafers can also add a new flavor. If you want a crunch, use peanut butter cookies. Each cookie brings its own taste and texture, making the ice cream unique. Just remember, crush the cookies before adding them in! Adding flavors can make your ice cream even better. You might stir in some caramel or fudge for a sweet swirl. Try adding crushed peppermint candies for a holiday treat. You can also mix in fruit purees like strawberry or raspberry for a fruity kick. The options are endless, and you can be as creative as you want! If you need a dairy-free version, use coconut cream instead of heavy whipping cream. This gives a rich flavor and creamy texture. For sweetened condensed milk, look for dairy-free brands made from coconut or almond. You can still enjoy cookies and cream ice cream without dairy. Just follow the same steps, and you’ll have a tasty treat! To keep your No-Churn Cookies and Cream Ice Cream fresh, use an airtight container. This helps prevent freezer burn and keeps flavors intact. Make sure to smooth the top of the ice cream before sealing it. Cover the surface with plastic wrap, then put the lid on. This extra step gives you a better seal. No-Churn Cookies and Cream Ice Cream lasts about two to three weeks in the freezer. After that, it may lose some taste and texture. For the best experience, enjoy it within the first week. If you have leftovers, note when you made it for easy tracking. If your ice cream melts, you can refreeze it. Make sure to stir it well before refreezing. This helps mix the texture and flavors evenly. However, repeated thawing and freezing can affect the creaminess. Try to keep it frozen once it sets for the best result. Yes, you can whip the cream by hand. Use a whisk and a large bowl. It will take more time and effort, about 8-10 minutes. Keep whisking until you see stiff peaks. This makes the ice cream light and fluffy. You can use coconut cream or a dairy-free whipping cream. They work well and still give you a nice texture. Make sure to chill the cream before whipping. This helps it whip better and hold its shape. Yes, it's easy to make a vegan version. Use coconut cream instead of heavy cream. Swap sweetened condensed milk for a dairy-free version. You can find these at most stores. This way, everyone can enjoy the treat! If your ice cream is too soft, freeze it longer. Try placing it in the freezer for an extra hour or two. If you need it firmer, let it sit in the freezer overnight. This will help it set better. Making No-Churn Cookies and Cream Ice Cream is simple and fun. You learned about key ingredients, like whipped cream and condensed milk, and how to mix them right. Tips help you get the best texture and flavor every time. You can even switch up cookies or add swirls to make it your own. Remember to store it well, so it stays fresh longer. Now, you’re ready to impress friends and family with your tasty homemade treat! Enjoy every creamy bite.

Ingredients

Key Ingredients for No-Churn Cookies and Cream Ice Cream

To make this tasty ice cream, you will need:

  1. 2 cups heavy whipping cream
  2. 1 cup sweetened condensed milk
  3. 1 teaspoon vanilla extract
  4. 1 cup crushed chocolate sandwich cookies (like Oreos)
  5. ½ cup mini chocolate chips (optional)

These ingredients come together to create a smooth and creamy treat. The heavy whipping cream gives the ice cream its fluffy texture. The sweetened condensed milk adds sweetness and creaminess, while the vanilla extract enhances the flavor. The chocolate sandwich cookies deliver that classic cookies and cream taste.

Optional Ingredients for Variation

You can play with flavors by adding:

  1. ½ cup chopped nuts (like pecans or walnuts)
  2. ½ cup crushed candy bars (like Snickers or Reese's)
  3. A swirl of chocolate or caramel sauce

These additions can make your ice cream even more fun and unique. You can mix and match to find your favorite combo!

Recommended Brands for Cookies and Cream

When choosing cookies, I suggest these brands:

  1. Oreo
  2. Hydrox
  3. Famous Amos

These brands provide a great crunch and rich taste. They are perfect for blending into your ice cream. Using quality cookies will make your ice cream delightfully delicious!

Step-by-Step Instructions

Preparation of the Whipped Cream

To start, grab a large mixing bowl. Pour in 2 cups of heavy whipping cream. Use an electric mixer to whip the cream. Set the speed to medium-high. Whip for about 3 to 4 minutes. You want to see stiff peaks form. This step gives your ice cream its light texture.

Mixing in the Condensed Milk and Vanilla

Now, take a separate bowl. Add 1 cup of sweetened condensed milk. Pour in 1 teaspoon of vanilla extract. Mix these well until they blend smoothly. This mixture brings a sweet, rich flavor to your ice cream.

Incorporating Cookies and Optional Chocolate Chips

Next, gently fold the whipped cream into the condensed milk mixture. Do this slowly to keep the lightness. Once they mix well, it's time for the fun part! Add 1 cup of crushed chocolate sandwich cookies. If you like, toss in ½ cup of mini chocolate chips. Fold everything in until the cookies are spread evenly.

Freezing Instructions

Now, pour your mix into a loaf pan or an airtight container. Smooth the top with a spatula for evenness. Cover it with plastic wrap or a lid. Place it in the freezer for at least 4 to 6 hours. This waiting time helps it freeze and firm up. After that, scoop it into bowls or cones and enjoy!

Tips & Tricks

Achieving the Perfect Whipped Cream

To get the best whipped cream, start with cold cream. Cold cream whips better and faster. Use a clean bowl and beaters for the best results. I whip the heavy cream on medium-high speed. It takes about 3-4 minutes to get stiff peaks. Stiff peaks mean the cream holds its shape well. This step is key for a light and airy ice cream.

Avoiding Ice Crystals in Your Ice Cream

Ice crystals can ruin your ice cream's smoothness. To avoid them, freeze the mixture quickly. Use a shallow container for faster freezing. Cover the ice cream tightly to keep air out. This helps keep the texture creamy. Stir the ice cream after two hours of freezing. This breaks up any crystals forming. Repeat if you want a super smooth finish.

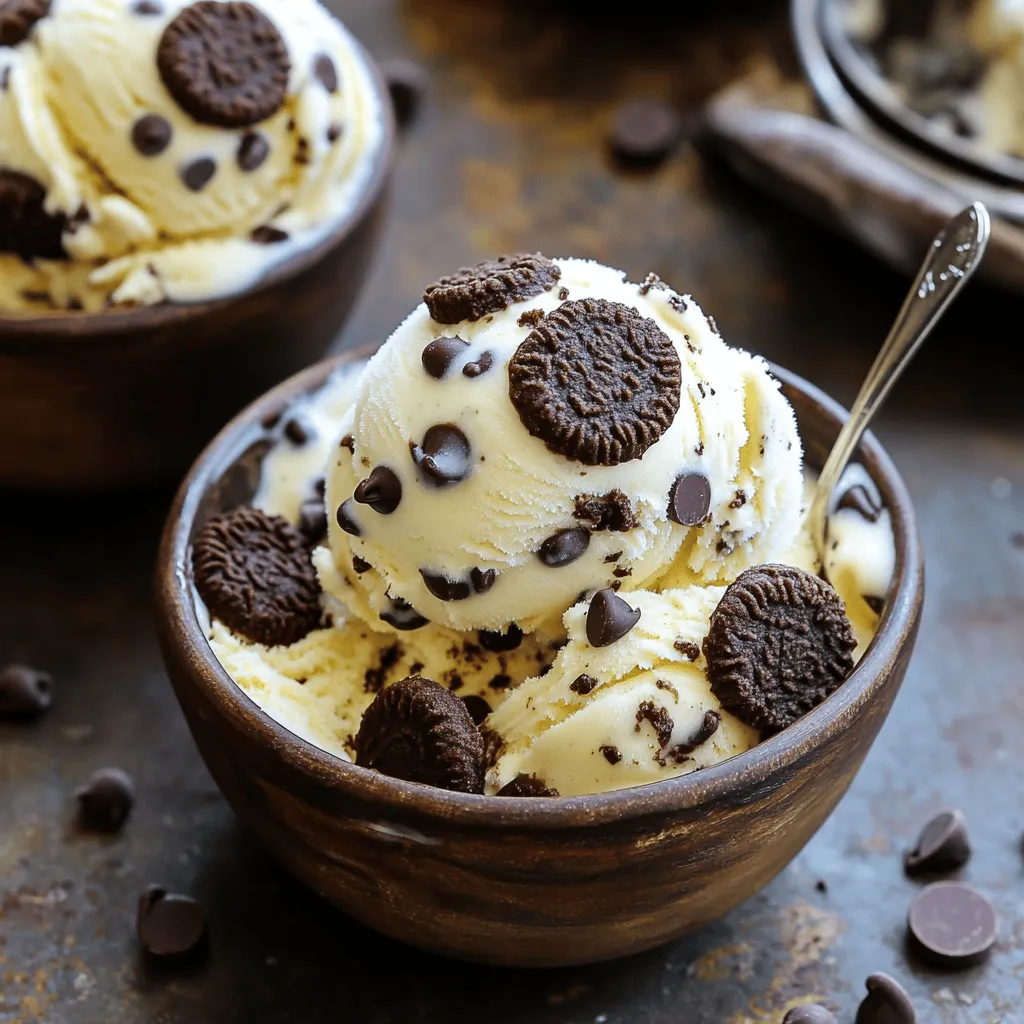
Serving Suggestions for Cookies and Cream Ice Cream

When serving, scoop the ice cream into bowls or cones. You can add more crushed cookies on top. Drizzle chocolate syrup for extra sweetness. A sprinkle of mini chocolate chips makes it fun. Serve this ice cream with fresh berries for a nice touch. Enjoy it on a hot day or after dinner. It's a treat everyone loves!

Variations

Different Cookie Options

You can switch up the cookie type for fun. Try chocolate chip cookies for a twist. Vanilla wafers can also add a new flavor. If you want a crunch, use peanut butter cookies. Each cookie brings its own taste and texture, making the ice cream unique. Just remember, crush the cookies before adding them in!

Flavor Add-ins and Swirls

Adding flavors can make your ice cream even better. You might stir in some caramel or fudge for a sweet swirl. Try adding crushed peppermint candies for a holiday treat. You can also mix in fruit purees like strawberry or raspberry for a fruity kick. The options are endless, and you can be as creative as you want!

Dairy-Free Alternatives

If you need a dairy-free version, use coconut cream instead of heavy whipping cream. This gives a rich flavor and creamy texture. For sweetened condensed milk, look for dairy-free brands made from coconut or almond. You can still enjoy cookies and cream ice cream without dairy. Just follow the same steps, and you’ll have a tasty treat!

Storage Info

Best Practices for Storing Homemade Ice Cream

To keep your No-Churn Cookies and Cream Ice Cream fresh, use an airtight container. This helps prevent freezer burn and keeps flavors intact. Make sure to smooth the top of the ice cream before sealing it. Cover the surface with plastic wrap, then put the lid on. This extra step gives you a better seal.

How Long Does No-Churn Ice Cream Last in the Freezer?

No-Churn Cookies and Cream Ice Cream lasts about two to three weeks in the freezer. After that, it may lose some taste and texture. For the best experience, enjoy it within the first week. If you have leftovers, note when you made it for easy tracking.

Re-freezing Guidelines

If your ice cream melts, you can refreeze it. Make sure to stir it well before refreezing. This helps mix the texture and flavors evenly. However, repeated thawing and freezing can affect the creaminess. Try to keep it frozen once it sets for the best result.

FAQs

Can I make this recipe without an electric mixer?

Yes, you can whip the cream by hand. Use a whisk and a large bowl. It will take more time and effort, about 8-10 minutes. Keep whisking until you see stiff peaks. This makes the ice cream light and fluffy.

What can I substitute for heavy whipping cream?

You can use coconut cream or a dairy-free whipping cream. They work well and still give you a nice texture. Make sure to chill the cream before whipping. This helps it whip better and hold its shape.

Is it possible to make this ice cream vegan?

Yes, it's easy to make a vegan version. Use coconut cream instead of heavy cream. Swap sweetened condensed milk for a dairy-free version. You can find these at most stores. This way, everyone can enjoy the treat!

How do I fix ice cream that is too soft?

If your ice cream is too soft, freeze it longer. Try placing it in the freezer for an extra hour or two. If you need it firmer, let it sit in the freezer overnight. This will help it set better.

Making No-Churn Cookies and Cream Ice Cream is simple and fun. You learned about key ingredients, like whipped cream and condensed milk, and how to mix them right. Tips help you get the best texture and flavor every time. You can even switch up cookies or add swirls to make it your own. Remember to store it well, so it stays fresh longer. Now, you’re ready to impress friends and family with your tasty homemade treat! Enjoy every creamy bite.

To make this tasty ice cream, you will need: - 2 cups heavy whipping cream - 1 cup sweetened condensed milk - 1 teaspoon vanilla extract - 1 cup crushed chocolate sandwich cookies (like Oreos) - ½ cup mini chocolate chips (optional) These ingredients come together to create a smooth and creamy treat. The heavy whipping cream gives the ice cream its fluffy texture. The sweetened condensed milk adds sweetness and creaminess, while the vanilla extract enhances the flavor. The chocolate sandwich cookies deliver that classic cookies and cream taste. You can play with flavors by adding: - ½ cup chopped nuts (like pecans or walnuts) - ½ cup crushed candy bars (like Snickers or Reese's) - A swirl of chocolate or caramel sauce These additions can make your ice cream even more fun and unique. You can mix and match to find your favorite combo! When choosing cookies, I suggest these brands: - Oreo - Hydrox - Famous Amos These brands provide a great crunch and rich taste. They are perfect for blending into your ice cream. Using quality cookies will make your ice cream delightfully delicious! To start, grab a large mixing bowl. Pour in 2 cups of heavy whipping cream. Use an electric mixer to whip the cream. Set the speed to medium-high. Whip for about 3 to 4 minutes. You want to see stiff peaks form. This step gives your ice cream its light texture. Now, take a separate bowl. Add 1 cup of sweetened condensed milk. Pour in 1 teaspoon of vanilla extract. Mix these well until they blend smoothly. This mixture brings a sweet, rich flavor to your ice cream. Next, gently fold the whipped cream into the condensed milk mixture. Do this slowly to keep the lightness. Once they mix well, it's time for the fun part! Add 1 cup of crushed chocolate sandwich cookies. If you like, toss in ½ cup of mini chocolate chips. Fold everything in until the cookies are spread evenly. Now, pour your mix into a loaf pan or an airtight container. Smooth the top with a spatula for evenness. Cover it with plastic wrap or a lid. Place it in the freezer for at least 4 to 6 hours. This waiting time helps it freeze and firm up. After that, scoop it into bowls or cones and enjoy! To get the best whipped cream, start with cold cream. Cold cream whips better and faster. Use a clean bowl and beaters for the best results. I whip the heavy cream on medium-high speed. It takes about 3-4 minutes to get stiff peaks. Stiff peaks mean the cream holds its shape well. This step is key for a light and airy ice cream. Ice crystals can ruin your ice cream's smoothness. To avoid them, freeze the mixture quickly. Use a shallow container for faster freezing. Cover the ice cream tightly to keep air out. This helps keep the texture creamy. Stir the ice cream after two hours of freezing. This breaks up any crystals forming. Repeat if you want a super smooth finish. When serving, scoop the ice cream into bowls or cones. You can add more crushed cookies on top. Drizzle chocolate syrup for extra sweetness. A sprinkle of mini chocolate chips makes it fun. Serve this ice cream with fresh berries for a nice touch. Enjoy it on a hot day or after dinner. It's a treat everyone loves! {{image_2}} You can switch up the cookie type for fun. Try chocolate chip cookies for a twist. Vanilla wafers can also add a new flavor. If you want a crunch, use peanut butter cookies. Each cookie brings its own taste and texture, making the ice cream unique. Just remember, crush the cookies before adding them in! Adding flavors can make your ice cream even better. You might stir in some caramel or fudge for a sweet swirl. Try adding crushed peppermint candies for a holiday treat. You can also mix in fruit purees like strawberry or raspberry for a fruity kick. The options are endless, and you can be as creative as you want! If you need a dairy-free version, use coconut cream instead of heavy whipping cream. This gives a rich flavor and creamy texture. For sweetened condensed milk, look for dairy-free brands made from coconut or almond. You can still enjoy cookies and cream ice cream without dairy. Just follow the same steps, and you’ll have a tasty treat! To keep your No-Churn Cookies and Cream Ice Cream fresh, use an airtight container. This helps prevent freezer burn and keeps flavors intact. Make sure to smooth the top of the ice cream before sealing it. Cover the surface with plastic wrap, then put the lid on. This extra step gives you a better seal. No-Churn Cookies and Cream Ice Cream lasts about two to three weeks in the freezer. After that, it may lose some taste and texture. For the best experience, enjoy it within the first week. If you have leftovers, note when you made it for easy tracking. If your ice cream melts, you can refreeze it. Make sure to stir it well before refreezing. This helps mix the texture and flavors evenly. However, repeated thawing and freezing can affect the creaminess. Try to keep it frozen once it sets for the best result. Yes, you can whip the cream by hand. Use a whisk and a large bowl. It will take more time and effort, about 8-10 minutes. Keep whisking until you see stiff peaks. This makes the ice cream light and fluffy. You can use coconut cream or a dairy-free whipping cream. They work well and still give you a nice texture. Make sure to chill the cream before whipping. This helps it whip better and hold its shape. Yes, it's easy to make a vegan version. Use coconut cream instead of heavy cream. Swap sweetened condensed milk for a dairy-free version. You can find these at most stores. This way, everyone can enjoy the treat! If your ice cream is too soft, freeze it longer. Try placing it in the freezer for an extra hour or two. If you need it firmer, let it sit in the freezer overnight. This will help it set better. Making No-Churn Cookies and Cream Ice Cream is simple and fun. You learned about key ingredients, like whipped cream and condensed milk, and how to mix them right. Tips help you get the best texture and flavor every time. You can even switch up cookies or add swirls to make it your own. Remember to store it well, so it stays fresh longer. Now, you’re ready to impress friends and family with your tasty homemade treat! Enjoy every creamy bite.

No-Churn Cookies And Cream Ice Cream

Indulge in the ultimate Cookies & Cream Dream ice cream with this easy no-churn recipe! Just mix heavy cream, sweetened condensed milk, and crushed chocolate sandwich cookies for a delicious treat. It’s perfect for parties or a cozy night in. Ready in just 15 minutes plus freezing time, you'll have a creamy dessert that everyone will love. Click to discover how to make this delightful ice cream and treat yourself today!
Print Recipe Pin Recipe

Ingredients
  

2 cups heavy whipping cream

1 cup sweetened condensed milk

1 teaspoon vanilla extract

1 cup crushed chocolate sandwich cookies (like Oreos)

½ cup mini chocolate chips (optional)

Instructions
 

In a large mixing bowl, pour in the heavy whipping cream. Using an electric mixer, whip the cream on medium-high speed until stiff peaks form (about 3-4 minutes).

    In a separate bowl, combine the sweetened condensed milk and vanilla extract. Mix well until combined.

      Gently fold the whipped cream into the condensed milk mixture. Be careful not to deflate the whipped cream; you want to maintain that light and fluffy texture.

        Add in the crushed chocolate sandwich cookies and mini chocolate chips (if using) to the mixture. Fold them in until evenly distributed.

          Pour the mixture into a loaf pan or an airtight container. Smooth the top with a spatula for an even surface.

            Cover with plastic wrap or a lid and freeze for at least 4-6 hours, or until the ice cream is firm.

              Once frozen, scoop the ice cream into bowls or cones and enjoy!

                Prep Time: 15 minutes | Total Time: 4-6 hours (mostly freezing time) | Servings: About 6-8 servings

                  Related Recipes

                  • - 1 ½ cups all-purpose flour - 1 teaspoon baking powder - ½ teaspoon baking soda - ½ teaspoon salt - 1 teaspoon ground cinnamon - ½ teaspoon ground nutmeg - ½ teaspoon ground ginger - 2 large eggs - 1 cup canned pumpkin puree - ½ cup brown sugar, packed - ½ cup granulated sugar - ½ cup vegetable oil - 1 teaspoon vanilla extract - 1 cup semi-sweet chocolate chips - ½ cup chopped walnuts (optional) For this recipe, it's key to measure carefully. Use a dry measuring cup for the flour. Spoon the flour into the cup and level it off. This helps avoid too much flour. If you don't have ground ginger, try using allspice or leave it out. You can swap the granulated sugar for coconut sugar for a richer flavor. If you need a nut-free version, skip the walnuts. Choose high-quality canned pumpkin puree. Look for brands that list pumpkin as the only ingredient. Fresh spices give a stronger flavor than old ones. For chocolate chips, semi-sweet is best, but dark chocolate also works well. If you can, use organic eggs and sugar for a cleaner taste. Quality ingredients make a big difference in flavor and texture. Start by heating your oven to 350°F (175°C). While it warms up, grab a 9x5 inch loaf pan. Grease it well with cooking spray or butter. This helps the loaf come out easily after baking. In a medium bowl, combine the all-purpose flour, baking powder, baking soda, salt, cinnamon, nutmeg, and ginger. Whisk these together until they blend well. This mix gives the loaf its great flavor and texture. In a large mixing bowl, crack the two eggs. Beat them lightly. Then, add the pumpkin puree, brown sugar, granulated sugar, vegetable oil, and vanilla extract. Mix these ingredients until they are smooth and well combined. This step is key for a moist loaf. Now, it's time to add the dry mix to your wet ingredients. Do this slowly and stir gently. You want to combine them without overmixing. Next, fold in the semi-sweet chocolate chips and, if you like, the chopped walnuts. Stir until they are evenly spread throughout the batter. Pour the batter into your prepared loaf pan. Use a spatula to smooth the top. Bake it in the oven for 55-65 minutes. To check if it's ready, insert a toothpick into the center. If it comes out clean, your loaf is done. Remove it from the oven and let it cool in the pan for about 10 minutes. Then, transfer it to a wire rack to cool completely. Enjoy your delicious creation! To make your pumpkin chocolate chip loaf perfect, avoid common baking mistakes. First, measure your flour correctly. Too much flour can make the cake dry. Use the spoon and level method for best results. Next, do not overmix your batter. Stir until just combined for a soft loaf. Finally, check your oven's temperature. An oven that is too hot can burn the edges. For a moist loaf, use canned pumpkin puree, not fresh pumpkin. Canned pumpkin gives a smooth texture. Adding eggs helps bind the ingredients and adds moisture. Use room temperature eggs for better mixing. The right balance of sugars also helps. Brown sugar adds moisture, while granulated sugar gives a nice rise. To elevate flavor, add spices like allspice or cloves. They give warmth to the loaf. You can also mix in nuts for crunch. Use walnuts for a rich texture. If you want a twist, try using dark chocolate chips instead of semi-sweet. For a fun touch, add a swirl of cream cheese in the batter before baking. This adds creaminess and a tangy kick. {{image_2}} To make a gluten-free version, swap regular flour with gluten-free all-purpose flour. This flour is easy to find and works well in most recipes. Use a blend that contains xanthan gum for the best results. Your loaf will still be moist and delicious. For a dairy-free loaf, replace the eggs with flax eggs. Mix one tablespoon of flaxseed meal with three tablespoons of water for each egg. Let it sit for five minutes to thicken. Also, use a dairy-free milk like almond or coconut milk instead of any dairy milk. You can get creative with add-ins. Try adding dried cranberries, chopped pecans, or even a swirl of cream cheese for a tangy twist. For toppings, sprinkle some cinnamon sugar before baking for a crunchy crust. A drizzle of caramel sauce on top makes it even more special! To keep your pumpkin chocolate chip loaf fresh, wrap it tightly. Use plastic wrap or aluminum foil. You can also place it in an airtight container. Store it at room temperature for up to three days. If you want it to last longer, refrigerate it. Just remember, cold air can dry it out. Freezing is a great way to save your loaf. Slice it first for easy serving later. Wrap each slice in plastic wrap, then place them in a freezer bag. Squeeze out the air to prevent freezer burn. You can freeze the loaf for up to three months. Label the bag with the date for easy tracking. To enjoy your loaf again, thaw it overnight in the fridge. For a warm treat, preheat your oven to 350°F (175°C). Place the loaf or slices on a baking sheet. Heat for about 10-15 minutes until warm. You can also use a microwave. Heat for 20-30 seconds per slice, but check often. Enjoy your delicious, warm pumpkin chocolate chip loaf! Yes, you can use fresh pumpkin. First, cook and puree your pumpkin. Make sure it is smooth and not too watery. Canned pumpkin is thicker, so adjust your other liquids if needed. You can make this recipe healthier by using whole wheat flour instead of all-purpose flour. You can also reduce the sugar by using applesauce or honey. For added fiber, mix in some ground flaxseed. The best way to check if the loaf is done is with a toothpick. Insert it into the center of the loaf. If it comes out clean or with a few crumbs, your loaf is ready. Yes, you can make mini loaves! Just divide the batter into smaller pans. Bake for about 20-30 minutes. Keep an eye on them to avoid overbaking. The cake will last about 2-3 days at room temperature. Make sure to store it in an airtight container. This helps keep it moist and fresh. In this post, we explored everything about making a pumpkin chocolate chip loaf cake. We covered the right ingredients, step-by-step instructions, and helpful tips for baking. You learned about variations and the best ways to store your cake. Baking can be fun and tasty with the right know-how. Now, you can enjoy this delicious treat on any occasion! Happy baking!
                    Pumpkin Chocolate Chip Loaf Cake Irresistible Recipe
                  • To make Apple Cider Donut Trifle Cups, you'll need: - 4 apple cider donuts, crumbled - 2 cups vanilla pudding - 1 cup whipped cream - 1 cup diced apples (preferably sweet varieties) - 1 teaspoon cinnamon - 2 tablespoons brown sugar These ingredients blend to create a sweet, layered dessert that brings joy to any gathering. Enhance your trifle cups with these garnishes: - Caramel sauce for drizzling - Thin apple slices for decoration - Crushed nuts for added crunch These little touches make your trifle cups look and taste even better! You can switch some ingredients if needed: - Use chocolate pudding instead of vanilla for a richer flavor. - Swap apple cider donuts for cinnamon donuts or sponge cake. - Try different apples, like tart Granny Smith or sweet Fuji. These substitutions allow you to customize the trifle to your taste and what you have on hand. Start by dicing your apples into small pieces. I prefer sweet apples for their taste. In a small bowl, mix the diced apples with one teaspoon of cinnamon and two tablespoons of brown sugar. This blend adds a warm, sweet flavor. Let the apples sit for about 10 minutes. This allows the sugar to draw out the juice from the apples. You will see a nice syrup form at the bottom of the bowl. Grab your clear cups or dessert glasses. Begin with a layer of crumbled apple cider donuts. Use about half of the donuts for the bottom layer. Next, spoon a layer of vanilla pudding over the donuts. Smooth it out with the back of your spoon for a nice look. After that, add a layer of whipped cream. You can use a piping bag for a fancy touch, or just spoon it on. Now, take your cinnamon-sugar apple mixture and spoon it over the whipped cream. Repeat the layering process. Start again with donut crumbles, then pudding, followed by whipped cream, and finally the apple mixture. Finish with a big dollop of whipped cream on top. If you want to make it special, drizzle some caramel sauce over the top. A sprinkle of cinnamon adds a nice touch, too. Enjoy this treat chilled for the best flavor! Make your trifle cups look great. Use clear cups to show off the layers. This makes it fun to see the bright apples, cream, and donuts. For a fancy touch, add a thin apple slice on the rim. A sprinkle of crushed nuts adds crunch and color. Serve the cups chilled for the best taste. To boost flavor, try adding nutmeg or ginger to the apple mix. These spices add warmth that pairs well with the sweet donuts. Drizzle some caramel sauce on top for extra sweetness. You can also swap the vanilla pudding for a butterscotch or pumpkin flavor. These changes can make the trifle even more special. One mistake is not letting the apples sit long enough. They need to sit so they can soak up the cinnamon and sugar. This step brings out their natural sweetness. Avoid overfilling the cups. Each layer should be even and not too packed. This helps keep each bite balanced and tasty. Lastly, don't skip the chilling step. Chilling helps the flavors blend and makes each bite creamy and smooth. {{image_2}} You can change your trifle cups with the seasons. In fall, use spiced donuts. In winter, try peppermint donuts for a festive twist. In spring, swap for lemon donuts to brighten the dish. Summer? Fresh berry toppings can add a burst of color and flavor. Each season brings new tastes to enjoy. To make this treat gluten-free, use gluten-free apple cider donuts. Check the label to be sure. For a vegan option, swap the pudding for a plant-based version and use coconut cream instead of whipped cream. You can still enjoy all the layers without missing any flavors. Mixing flavors can elevate your trifle. Add nutmeg for warmth or ginger for a kick. Try using different fruits like pears or berries. You can even mix in some nuts for crunch. These small changes can create a new favorite dessert every time. Store your Apple Cider Donut Trifle Cups in the fridge. Use an airtight container. They will stay fresh for about 2 to 3 days. Keep the whipped cream from getting too soft. If you notice it losing its shape, enjoy them quickly. Freezing is not the best option for these trifle cups. The texture of the whipped cream and pudding can change. If you must freeze them, separate the layers first. You can freeze the crumbled donuts and apple mixture. Just thaw them before layering again. These trifle cups taste best when served cold. Enjoy them the same day you make them. The flavors blend nicely after a few hours in the fridge. They are perfect for parties or gatherings, especially in autumn. Yes, you can use store-bought apple cider donuts. They save time and still taste great. Just crumble them up as you would with homemade ones. The flavor will still shine through in your trifle cups. You can store the trifle cups in the fridge for up to two days. Keep them covered to avoid drying out. After two days, the donuts may get soggy. You can use chocolate pudding or butterscotch pudding instead of vanilla. Both will add a fun twist to your trifle. If you want a lighter option, try Greek yogurt mixed with honey. Yes, you can use gluten-free apple cider donuts for this recipe. Check the store for gluten-free brands. Ensure the pudding and any other ingredients are gluten-free too. Yes, you can make this trifle ahead of time. Assemble it a day in advance and store it in the fridge. Just add the whipped cream and caramel sauce right before serving for the best taste. This blog covered key ingredients and how to prepare them for your trifle. I shared tips for better presentation and ways to adapt the recipe for different diets. Remember to store your trifle properly for the best taste. Enjoy experimenting with flavors and substitutes to make it your own. With these steps in mind, you can create a great dessert that impresses everyone!
                    Apple Cider Donut Trifle Cups Easy Seasonal Delight
                  • To make a delicious Cinnamon Streusel Coffee Cake, you will need: - 2 cups all-purpose flour - 1 cup granulated sugar - 1/2 cup unsalted butter, softened - 2 large eggs - 1 cup sour cream - 1 teaspoon vanilla extract - 1 teaspoon baking powder - 1/2 teaspoon baking soda - 1/2 teaspoon salt - 1 tablespoon ground cinnamon - 1/2 cup brown sugar, packed - 1/2 cup chopped walnuts or pecans (optional) - 1/4 cup powdered sugar (for dusting) These ingredients come together to create a rich and moist cake with a crunchy topping. You can add extra flavor to your cake. Here are some ideas: - Chopped fruit: Try adding apples or pears for a fruity twist. - Chocolate chips: These add sweetness and richness. - More nuts: If you love nuts, add more walnuts or pecans. - Citrus zest: A bit of lemon or orange zest brightens up the flavor. Feel free to mix and match based on your taste! Choosing the best ingredients makes your cake taste great. Here are some tips: - Flour: Use fresh all-purpose flour. Check the date on the bag. - Butter: Choose high-quality unsalted butter for rich flavor. - Eggs: Fresh eggs make for a fluffier cake. Look for organic if possible. - Sour cream: A creamy, full-fat sour cream adds moisture. - Spices: Use fresh cinnamon for a strong and warm flavor. Good ingredients lead to a great outcome. Enjoy your baking! Start by preheating your oven to 350°F (175°C). This step ensures your cake bakes evenly. While the oven heats, grease and flour a 9x13-inch baking pan. This helps the cake come out easily after baking. It also prevents sticking. In a large mixing bowl, cream 1/2 cup of softened butter with 1 cup of granulated sugar. Mix until the mixture looks light and fluffy. This step adds air and helps your cake rise. Next, beat in 2 large eggs, one at a time. Make sure to mix well after each egg. Then, stir in 1 cup of sour cream and 1 teaspoon of vanilla extract. Mix until everything is combined. In a separate bowl, whisk together 2 cups of all-purpose flour, 1 teaspoon of baking powder, 1/2 teaspoon of baking soda, and 1/2 teaspoon of salt. Gradually add this dry mix to the wet mix. Stir gently until just combined. Be careful not to over-mix. This keeps the cake light. In a small bowl, mix together 1/2 cup of brown sugar and 1 tablespoon of ground cinnamon. If you like, add 1/2 cup of chopped walnuts or pecans for a nice crunch. Combine these ingredients well. Pour half of the batter into the prepared baking pan. Spread it evenly. Then, sprinkle half of the streusel mixture on top. Pour the remaining batter over this layer. Finally, finish with the last of the streusel mixture on top. Place the pan in the oven and bake for 30-35 minutes. Check if it’s done by inserting a toothpick into the center. If it comes out clean, your cake is ready. After baking, let the cake cool in the pan for about 10-15 minutes. Once cooled, dust the top with 1/4 cup of powdered sugar. This adds a lovely touch and makes it look fancy. Now, you can cut it into squares. Enjoy your warm coffee cake! When making cinnamon streusel coffee cake, watch out for a few common errors. First, do not over-mix your batter. Mixing too much makes the cake dense. Second, make sure your oven is at the right temperature. An oven that is too hot can burn the cake, while one that is too cool will leave it soggy. Lastly, ensure you let the cake cool before dusting with powdered sugar. If you do this too soon, the sugar will melt and disappear. To get the perfect texture, use room-temperature ingredients. Cold butter or eggs can lead to uneven mixing. Also, make sure to measure your flour correctly. Too much flour can create a dry cake. Use the spoon and level method: spoon flour into your measuring cup and level it off with a knife. This will help you get the right amount. Lastly, bake until a toothpick comes out clean. This ensures your cake is moist and fluffy. Serve your coffee cake warm for the best taste. Pair it with a cup of coffee or tea for a lovely treat. You can also add fresh fruit, like berries or sliced bananas, on the side. If you want an extra touch, try adding a scoop of vanilla ice cream or whipped cream on top. This makes for a delightful dessert option! {{image_2}} You can easily skip the nuts in the cinnamon streusel. Just leave out the walnuts or pecans. This change makes the cake safe for those with nut allergies. It still tastes great! The streusel will be just as sweet and crunchy without them. You can switch things up for the seasons. Try adding pumpkin puree for a fall treat. Use one cup of pumpkin instead of sour cream. You can add pumpkin spice for extra flavor. For summer, add fresh apples. Chop them into small pieces and fold them into the batter. This adds a lovely fruity taste. If you want to change the topping, consider a cream cheese glaze. Mix cream cheese, powdered sugar, and a little milk. Drizzle it on top after the cake cools. For a lighter option, dust with extra powdered sugar or even cinnamon. Each choice gives your coffee cake a new twist! To keep your Cinnamon Streusel Coffee Cake fresh, store it in an airtight container. This will help it stay moist. You can also wrap it tightly in plastic wrap. Place it at room temperature for up to three days. If you want it to last longer, the fridge is a good option. Just know that it may dry out a bit. If you want to save some for later, freezing is a great choice. First, let the cake cool completely. Then, cut it into squares for easy serving. Wrap each square in plastic wrap. After that, place them in a freezer-safe bag. You can freeze the cake for up to three months. When you’re ready to eat, just pull out a piece. To enjoy your cake warm, reheating is simple. Preheat your oven to 350°F (175°C). Place the cake on a baking sheet. Cover it with foil to prevent it from drying out. Heat for about 10 to 15 minutes. You can also use the microwave. Heat for 15 to 20 seconds, but be careful not to make it tough. Enjoy your cake with a fresh cup of coffee! You can use plain yogurt as a sour cream substitute. It has a similar taste and texture. You can also use buttermilk or a mix of milk and vinegar. Each option keeps the cake moist and tasty. Yes, you can make this coffee cake vegan. Use plant-based butter and substitute eggs with flax eggs. Mix one tablespoon of ground flaxseed with three tablespoons of water to replace one egg. For sour cream, use unsweetened coconut yogurt or another dairy-free yogurt. Check the cake after 30 minutes. Insert a toothpick into the center. If it comes out clean or with a few crumbs, the cake is done. If wet batter sticks to the toothpick, bake for a few more minutes. Always let it cool before cutting. This blog post shared key steps to bake a great coffee cake. You learned about essential ingredients and fun add-ins to enhance flavor. We covered precise instructions, tips for perfect texture, and creative variations. Storing leftovers and reheating keep your cake fresh and tasty. Enjoying coffee cake brings family and friends together. With these tips, you can bake one that everyone will love. Happy baking!
                    Cinnamon Streusel Coffee Cake Simple and Delicious Treat
                  • - 1 cup almond butter - 1/2 cup coconut oil, melted - 1/4 cup cocoa powder - 1/4 cup maple syrup or honey - 1 teaspoon pure vanilla extract - 1/4 teaspoon sea salt - 1/2 cup dark chocolate chips - 1/4 cup chopped almonds (optional topping) Gather these simple ingredients. Each one plays a key role in flavor and texture. Almond butter gives a creamy base. Coconut oil helps things bind together while adding richness. Cocoa powder provides that deep chocolate taste. Maple syrup or honey adds just the right sweetness. Vanilla extract boosts all the flavors. Sea salt balances the sweetness and enhances taste. Dark chocolate chips are the final layer of joy. If you like, sprinkle chopped almonds on top for crunch. This mix will help you create a treat that feels indulgent yet simple. - In a mixing bowl, combine: - 1 cup almond butter - 1/2 cup melted coconut oil - 1/4 cup cocoa powder - 1/4 cup maple syrup or honey - 1 teaspoon pure vanilla extract - 1/4 teaspoon sea salt - Stir the mixture until it is smooth and well combined. This step is key for a rich flavor. - Line a muffin tin with paper liners to keep the cups from sticking. - Spoon about 2 tablespoons of the almond butter mixture into each liner. Fill them halfway. Use the back of a spoon to press down gently for even layers. - Place the muffin tin in the freezer for 15 to 20 minutes. This helps the almond butter layer set. - While that freezes, melt 1/2 cup dark chocolate chips in a microwave-safe bowl. Heat in 30-second bursts, stirring until smooth. - Remove the muffin tin from the freezer. Pour the melted chocolate over the almond butter layer in each cup. - If you want, sprinkle with 1/4 cup chopped almonds for a nice crunch. - Return the muffin tin to the freezer for another 30 minutes to let the chocolate set. - After they are set, remove the cups from the freezer and peel away the paper liners. Enjoy! - Use natural almond butter for a healthier option. This choice enhances flavor and nutrition. - Allow the chocolate to cool slightly before pouring over the almond butter. This helps keep the layers distinct. - Replace maple syrup with agave nectar for a vegan option. This change keeps the sweetness while meeting dietary needs. - Use other nut butters like peanut butter for a different flavor. Each nut butter brings its own unique taste and texture. {{image_2}} You can easily mix up the flavors. Adding a pinch of sea salt on top gives a nice touch. Salt balances the sweetness and enhances the chocolate. Another fun idea is to add shredded coconut into the almond butter mix. This adds a chewy texture and a tropical twist to your cups. You can adjust the taste and feel by changing the cocoa powder amount. Adding more cocoa powder gives a richer, deeper chocolate flavor. To add crunch, try topping your cups with different nuts or seeds. Chopped walnuts or sunflower seeds work well. Mixing these in can make the treat even more delicious! You can keep these no-bake chocolate almond butter cups in the freezer. Use an airtight container for best results. They will stay fresh for up to 2 months. When you want to enjoy them, simply thaw before serving. If you’re in a hurry, you can eat them straight from the freezer. They taste great cold! These cups are best enjoyed at room temperature. Let them sit out for a few minutes before serving. Avoid putting them in the microwave. Reheating can change their texture, and we want them to stay smooth and creamy. Enjoy your tasty treat! Yes, you can use peanut butter or cashew butter. Both options work well. Each nut butter adds a unique flavor. This gives you room to create your favorite taste. These cups can be stored in the freezer for up to 2 months. Just keep them in an airtight container. They will stay fresh and tasty. You can enjoy them whenever you like. Yes, they are quite healthy. They contain good fats from the nut butter and coconut oil. The maple syrup or honey adds natural sweetness. This makes them a guilt-free treat that tastes great! These no-bake chocolate almond butter cups are easy and fun to make. You only need a few ingredients and simple steps to get delicious results. Remember, you can swap ingredients to match your taste. Store them in your freezer for a sweet treat anytime. Enjoy this guilt-free snack without worry. You’ll love how satisfying they are and how quick they come together. Happy cooking!
                    No-Bake Chocolate Almond Butter Cups Delightfully Simple

                  WANT TO SAVE THIS RECIPE?

                  Leave a Reply Cancel reply

                  Your email address will not be published. Required fields are marked *

                  Recipe Rating


                  Hi I’m Taling

                  I love sharing perfected dishes from my kitchen. I’m sure they’ll earn a spot in your heart. Let’s savor this journey together!.

                  More about me

                  Recent Desserts

                  • For the Pumpkin Cream Cheese Whoopie Pies, you need the following items: - 1 ½ cups all-purpose flour - 1 teaspoon baking soda - ½ teaspoon baking powder - 1 teaspoon ground cinnamon - ½ teaspoon ground nutmeg - ¼ teaspoon ground ginger - ¼ teaspoon salt - ½ cup unsalted butter, softened - 1 cup packed brown sugar - ½ cup granulated sugar - 1 cup canned pumpkin puree - 1 large egg - 1 teaspoon vanilla extract - 8 oz cream cheese, softened - ½ cup powdered sugar - ¼ cup heavy cream - ½ teaspoon vanilla extract (for filling) These ingredients create a soft, spiced cake that pairs well with creamy filling. I love how the pumpkin gives a moist texture, while the spices add warmth. The cream cheese filling is rich and tangy, making every bite a delight. Using fresh spices can really boost flavor. Don't skip the cream cheese; it brings the whole treat together! - Preheat the oven to 350°F (175°C). - Line two baking sheets with parchment paper. - In a medium bowl, whisk together: - 1 ½ cups all-purpose flour - 1 teaspoon baking soda - ½ teaspoon baking powder - 1 teaspoon ground cinnamon - ½ teaspoon ground nutmeg - ¼ teaspoon ground ginger - ¼ teaspoon salt This mix gives your whoopie pies great flavor. Set the bowl aside for later. - In a large bowl, use an electric mixer to beat together: - ½ cup unsalted butter, softened - 1 cup packed brown sugar - ½ cup granulated sugar Mix until the mixture is light and fluffy. This takes about 3 to 5 minutes. - Next, add: - 1 cup canned pumpkin puree - 1 large egg - 1 teaspoon vanilla extract Beat everything together until it is well combined. - Gradually mix the dry ingredients into the wet ingredients. - Stir until just combined; do not overmix. This helps keep your whoopie pies soft. - Using a cookie scoop or tablespoon, drop heaping tablespoons of batter onto the prepared baking sheets. Space them about 2 inches apart. - Bake for about 12 to 15 minutes. Check with a toothpick; it should come out clean. - Let the cakes cool on the baking sheets for 5 minutes. Then, transfer them to wire racks to cool completely. - In a medium bowl, beat together: - 8 oz cream cheese, softened - ½ cup powdered sugar - ¼ cup heavy cream - ½ teaspoon vanilla extract Mix until the filling is smooth and creamy. - Once the pumpkin cakes have cooled, spread a generous dollop of cream cheese filling on the flat side of one cake. - Top with another cake to form a sandwich. Press gently to stick them together. Repeat this with all the cakes and filling. Enjoy your delicious whoopie pies! To make the best pumpkin whoopie pies, use room temperature ingredients. This helps them blend well. Cold butter or eggs can create lumps. Mix the batter gently. Overmixing can make the cakes tough, which you want to avoid. For the cream cheese filling, adjust the heavy cream. Add more for a thinner filling. Use less if you prefer a thicker texture. This way, you can get just the right spreadability for your whoopie pies. Make your whoopie pies look special. Dust them with powdered sugar before serving. This adds a nice touch and makes them look even more tempting. Plus, it enhances the sweet flavor. {{image_2}} You can change the cream cheese filling to fit your taste. Try using flavored cream cheeses like maple or vanilla. These will add a new twist to the whoopie pies. You can even use a mix of cream cheese and pumpkin spice for a fun surprise. Each variation brings a unique taste and keeps things fresh. Want to make your whoopie pies more exciting? Add chocolate chips or nuts to the batter. Chocolate chips give a sweet burst with each bite. Nuts add a nice crunch and depth of flavor. You can also sprinkle some chopped nuts on the filling for extra texture. This small change can make a big difference! If you need a gluten-free treat, you can easily adapt this recipe. Just swap the all-purpose flour for gluten-free flour. Make sure to choose a blend that works well for baking. Your whoopie pies will still be soft and tasty while fitting your dietary needs. Enjoy them without worry! You can store your whoopie pies in the refrigerator. They stay fresh for up to 3 days. Just place them in an airtight container. This keeps the pies soft and moist. If you want to save them longer, freeze your whoopie pies. They can last for up to 3 months in the freezer. Wrap each pie in plastic wrap and place them in a freezer bag. This way, you can enjoy them later. To avoid sticking, layer your whoopie pies with parchment paper. Place a piece of parchment between each pie. This simple trick helps keep them intact and ready to eat. Yes, you can use fresh pumpkin. To do this, roast a small pumpkin until soft. Let it cool, then scoop out the flesh. Blend the flesh until smooth to make a fresh pumpkin puree. This adds a lovely, bright flavor to your whoopie pies. To check if they are done, use the toothpick test. Insert a toothpick into the center of a pie. If it comes out clean, they are ready. If it has wet batter, bake them a bit longer. This ensures a moist yet firm texture. Yes, you can make these whoopie pies ahead of time. Bake and cool them completely first. Store them in an airtight container in the fridge for up to three days. You can also freeze them for up to three months. Just thaw before serving. These whoopie pies are best served chilled or at room temperature. For a pretty touch, dust them with powdered sugar. Arrange them on a nice plate for a fun presentation. Your guests will love the look and taste! You learned how to make delicious pumpkin whoopie pies. We covered all the important steps, from gathering ingredients to mixing and baking. The right texture and flavor matter, so remember to let your ingredients warm up. Experiment with fillings and toppings to make them unique. Store them well to keep them fresh. Enjoy these tasty treats with friends and family. You’ll impress everyone with your baking skills!
                    Pumpkin Cream Cheese Whoopie Pies Delightful Treats
                  • - 1 ½ cups graham cracker crumbs - ⅓ cup unsalted butter, melted - 2 tablespoons granulated sugar - 8 oz cream cheese, softened - ½ cup powdered sugar - 1 teaspoon vanilla extract - 1 cup heavy whipping cream - 2 cups fresh strawberries, hulled and sliced - 2 tablespoons lemon juice - 1 tablespoon granulated sugar (for strawberries) - Fresh mint leaves (for garnish) When measuring your ingredients, accuracy is key. Use a dry measuring cup for the graham cracker crumbs and sugar. For the butter, melt it and measure in a liquid measuring cup. Cream cheese should be softened, so let it sit out for 30 minutes. Use a kitchen scale for precise measurement if you have one. You can swap some ingredients if needed. Instead of graham crackers, use crushed cookies like Oreos for a different flavor. You can use coconut oil instead of unsalted butter for a dairy-free option. If you don't have powdered sugar, blend granulated sugar until fine. For a lighter version, try using low-fat cream cheese. Fresh strawberries are best, but frozen ones will work too; just thaw and drain excess liquid. To start, grab a medium mixing bowl. Add 1 ½ cups of graham cracker crumbs. Next, pour in ⅓ cup of melted unsalted butter and 2 tablespoons of granulated sugar. Mix it all together. You want the crumbs to feel like wet sand. This step is key; the crust holds everything in place. Now, press the crumb mixture firmly into the bottom of your jars or dessert cups. Make sure it’s even and compact. This will give your cheesecake a solid base. Set the jars aside. In a large mixing bowl, take 8 oz of softened cream cheese. Use an electric mixer to beat it until it’s smooth and creamy. This step ensures a rich filling. Add in ½ cup of powdered sugar and 1 teaspoon of vanilla extract. Mix until everything is smooth and well combined. In another bowl, whip 1 cup of heavy cream until soft peaks form. This whipped cream adds lightness to the filling. Gently fold the whipped cream into the cream cheese mixture. Be careful not to deflate the whipped cream. This keeps your filling fluffy. Now it’s time to assemble. Spoon the cream cheese mixture over the graham cracker crust in each jar. Fill them about ¾ full. This layer is where the magic happens. Next, take 2 cups of fresh strawberries that you’ve hulled and sliced. Mix them with 2 tablespoons of lemon juice and 1 tablespoon of sugar in a bowl. Let them sit for about 10 minutes. This allows the strawberries to become sweeter and juicier. Spoon the macerated strawberries on top of the cream cheese layer. Distribute them evenly across all jars. For a fancy touch, you can add a dollop of the remaining cream cheese mixture on top. Finish with a fresh mint leaf for color. Finally, refrigerate the jars for at least 2-4 hours. If possible, let them set overnight. This waiting time helps the cheesecake become firm and delicious. Enjoy your easy and tasty no-bake strawberry cheesecake jars! To achieve the best whipped cream, start with cold heavy cream. Cold cream whips up faster and better. Use a clean bowl and beaters. This helps the cream reach soft peaks quickly. Whip until it is fluffy but still holds its shape. Be careful not to over-whip, as it can turn buttery. Gently fold the whipped cream into the cream cheese mix. This keeps the texture light and airy. Fresh strawberries make this dessert shine. Choose ripe berries for the best taste. Remove the green tops and slice them thinly. Mix the slices with lemon juice and sugar. Let them sit for about ten minutes. This softens the berries and brings out their natural sweetness. The lemon juice adds brightness, enhancing the flavor of the strawberries. Presentation is key to making your jars appealing. Use clear jars to show off the lovely layers. Mason jars are a great choice, adding a rustic touch. You can also top the jars with a dollop of cream cheese mix. A fresh mint leaf adds a pop of color. Consider using striped paper straws for a fun look. Serve chilled for the best experience. {{image_2}} You can change the flavor of your cheesecake jars. Try adding chocolate for a rich twist. Melt some chocolate and mix it into the cream cheese. You can also use blueberry or raspberry instead of strawberries. Just swap the berries when you layer them on top. Each fruit brings its own taste and fun colors. Want a lighter version? Use low-fat cream cheese. It keeps the creaminess but cuts down on fat. You can also use Greek yogurt in place of some cream cheese. This adds protein and makes it healthier. For the crust, swap regular butter for coconut oil. It gives a nice flavor while keeping it light. If you need a gluten-free dessert, use gluten-free graham crackers. They work just like regular ones. You can also make a crust with ground nuts like almonds or pecans. Mix them with melted butter for a crunchy base. This adds flavor and texture while keeping your cheesecake jars safe for gluten-free diets. To store leftover cheesecake jars, cover them tightly with plastic wrap. You can also use a lid if your jars have one. This keeps the cheesecake fresh and prevents it from absorbing other smells in your fridge. Make sure to keep them in the main part of the fridge, not the door. The fridge door can be warmer and may not keep your dessert as fresh. Leftover cheesecake jars can stay fresh in the fridge for up to three days. After that, the crust may become soggy. If you can, enjoy your jars within this time for the best taste and texture. Always check for any signs of spoilage before eating. If something looks or smells off, it's best to toss it. You can freeze these cheesecake jars if you want to keep them longer. First, make sure the jars are airtight. If not, transfer the cheesecake to a freezer-safe container. These jars can last up to two months in the freezer. When you're ready to eat, thaw them in the fridge overnight. Avoid microwaving the jars, as this can change the texture. Yes, you can make these jars ahead of time. I often whip them up a day before I need them. This lets the flavors blend well. Just cover the jars and keep them in the fridge. They stay fresh and tasty for up to two days. This makes them great for parties or special meals. If you want a change, you can use cookies instead of graham crackers. Digestive biscuits work well. You can also use vanilla wafers or even crushed Oreos for a fun twist. Just make sure the texture is similar. This will keep your crust thick and tasty. These jars last about three to four days in the fridge. Keep them covered tightly to avoid drying out. If you notice the strawberries getting soft, it’s best to eat them sooner. Enjoy your cheesecake jars while they are fresh for the best taste! You now have all the tools to make delicious No Bake Strawberry Cheesecake Jars. We covered key ingredients, step-by-step instructions, and tips to enhance your recipe. Plus, we explored variations and storage methods to keep your jars fresh. Remember, making cheesecake jars is simple and fun. Enjoy experimenting with flavors and sharing your creations. Your friends will love this tasty treat! Dive in and make the jars your own. Happy baking!
                    No Bake Strawberry Cheesecake Jars Easy and Delicious
                  • To make caramel pecan pie bars, you will need: - 1 cup all-purpose flour - ½ cup unsalted butter, softened - ¼ cup granulated sugar - ¼ teaspoon salt - ½ cup brown sugar, packed - ⅓ cup light corn syrup - 1 large egg - 1 teaspoon vanilla extract - 1 cup pecans, roughly chopped - ¼ teaspoon ground cinnamon Each ingredient plays a key role in your bars. If you run out of all-purpose flour, you can use a gluten-free flour blend. Unsalted butter is best for control over salt. You can swap brown sugar for coconut sugar for a lighter taste. Light corn syrup can be replaced with maple syrup if desired. Just keep in mind that the flavor may slightly change. Using fresh ingredients always makes a big difference. Fresh pecans give more flavor and crunch. Check your baking supplies for freshness, especially the baking powder. If you have old ingredients, it can affect the taste and texture of your bars. Always go for the freshest options you can find for the best results. Start by preheating your oven to 350°F (175°C). Grease an 8x8-inch baking pan or line it with parchment paper. This helps with easy removal later. In a medium bowl, mix 1 cup of all-purpose flour, ½ cup of softened unsalted butter, and ¼ cup of granulated sugar with ¼ teaspoon of salt. Blend until the mixture looks crumbly. Press this dough into the bottom of your prepared pan. Bake it for about 15 minutes, or until it turns lightly golden. While the crust bakes, prepare the filling. In a bowl, whisk together ½ cup of packed brown sugar, ⅓ cup of light corn syrup, 1 large egg, and 1 teaspoon of vanilla extract. Mix until smooth. Then, stir in 1 cup of roughly chopped pecans and ¼ teaspoon of ground cinnamon. Make sure the pecans are well coated. Once your crust is golden, take it out of the oven. Pour the pecan filling over the hot crust, spreading it evenly. Bake the entire dish for 25-30 minutes, or until the filling is set and slightly bubbly. Let the bars cool completely in the pan on a wire rack. Once cool, cut them into squares or bars. Enjoy your sweet, nutty treat! To get a great crust, start with soft butter. It helps mix in better. Aim for a crumbly dough that sticks together. Press it firmly in the pan. This keeps the crust from falling apart. Bake it just until golden. This step gives it a nice crunch. For the filling, whisk the sugars and corn syrup well. This helps blend the sweet flavors. Add the egg and vanilla for richness. Stir in the pecans last. Make sure they are well coated. The cinnamon adds a warm note. Let the filling bubble just a bit while baking. This means it’s ready. Serve the bars on a pretty plate. Drizzle some extra caramel sauce on top. It looks fancy and tastes great. Add whole pecans on the sides for fun. This makes each bar pop with color. Always cut the bars after they cool. This keeps them neat and easy to serve. {{image_2}} If you want to make these bars without nuts, it's easy! You can replace the pecans with seeds. Sunflower seeds or pumpkin seeds work well. They add crunch and flavor without nuts. Just use the same amount of seeds as you would pecans. You can also add some chocolate chips for extra sweetness. You can add a twist to the flavor of your caramel pecan pie bars. Try mixing in some chocolate chips for a rich taste. Dark chocolate pairs nicely with the caramel. You can also add a touch of sea salt on top before baking. This will balance the sweetness and enhance the flavor. For a hint of spice, add a pinch of nutmeg or ginger to the filling. To make these bars gluten-free, swap the all-purpose flour for a gluten-free blend. Many blends work well in baking. Just check that the blend has a good balance of starches and flours. You can also use almond flour for a nutty flavor. Adjust the amount of butter if needed, as almond flour can be more moist. Store any leftover caramel pecan pie bars in an airtight container. Keep them in the fridge for up to one week. This keeps them fresh and tasty. If you want to enjoy them longer, freezing is a great option. To freeze the bars, first let them cool completely. Cut them into squares or bars. Wrap each one in plastic wrap or foil. Then, place them in a freezer-safe bag. These can stay frozen for up to three months. When you are ready to eat, thaw them in the fridge overnight. To reheat, take the bars out of the fridge. Place them in a microwave-safe dish. Heat them for about 10 to 15 seconds. This warms them up without making them soggy. You can also warm them in the oven. Set it to 350°F (175°C) and heat for about 5 minutes. Enjoy your delicious treat! Yes, you can use different nuts. Walnuts or almonds work great too. They add a nice crunch. Just chop them roughly like the pecans. Adjust the baking time if needed, but the bars will still be delicious. The bars are done when the filling is set and slightly bubbly. You can check by gently shaking the pan. If the center jiggles, bake a little longer. A golden top also shows they are ready. Absolutely! These bars taste great when made a day ahead. Just cool them completely and store them in an airtight container. They will stay fresh for up to four days. You can enjoy them anytime. To cut the bars, use a sharp knife. First, let them cool completely. If you lined the pan with parchment, lift the bars out. This makes cutting easier. Clean the knife between cuts for neat squares. You can use honey or maple syrup as a substitute. Both options add a nice flavor. However, they may change the texture a bit. Use the same amount as the corn syrup in the recipe. You now have all the details to make delicious caramel pecan pie bars. We covered the best ingredients, how to prepare them, and even tips for getting the most from your bake. Remember, using fresh ingredients makes a big difference. Don’t forget to explore variations to suit your taste. Store any leftovers properly to enjoy later. With these steps, you can impress everyone with your sweet treat. Enjoy baking and sharing your caramel pecan pie bars with family and friends!
                    Caramel Pecan Pie Bars Simple and Tasty Treat
                  • To make bakery-style cinnamon swirl bread, you'll need these key items: - 3 ½ cups all-purpose flour - ½ cup granulated sugar - 1 packet (2 ¼ tsp) instant yeast - 1 teaspoon salt - 1 cup warm milk (about 110°F/43°C) - ¼ cup unsalted butter, melted - 2 large eggs - 1 tablespoon vanilla extract - ⅓ cup brown sugar - 2 teaspoon ground cinnamon These ingredients create a soft and fluffy bread that swirls with sweet cinnamon goodness. The warm milk helps the yeast grow, and the butter adds richness. You will also need a few baking essentials: - A large mixing bowl - A floured surface for kneading - A rolling pin - A greased 9x5-inch loaf pan - A sharp knife for slicing These tools help you shape and prepare the dough without any hassle. Having everything ready makes baking more fun and easy. For a special touch, consider these optional toppings: - 1 egg wash (1 egg beaten with 1 tablespoon water) for a golden crust - Powdered sugar for dusting after baking The egg wash gives your bread a shiny finish, while powdered sugar adds sweetness. You can choose one or both to make your bread look and taste amazing! First, grab a large mixing bowl. Pour in 1 cup of warm milk and ¼ cup of melted unsalted butter. Then, add ½ cup of granulated sugar. Sprinkle 1 packet of instant yeast over the top. Let this sit for about 5 minutes. You want to see some bubbles forming. This shows the yeast is active and ready to work. Next, it's time to add the eggs and 1 tablespoon of vanilla extract. Stir this mixture well until it combines smoothly. Gradually mix in 3 ½ cups of all-purpose flour and 1 teaspoon of salt. Keep stirring until the dough begins to come together. Now, turn the dough out onto a floured surface. Knead it for 8 to 10 minutes. You want it to feel smooth and elastic. If the dough is too sticky, add a little more flour. Next, place the dough in a greased bowl. Cover it with a kitchen towel and set it in a warm spot to rise for about 1 hour. It should double in size. Enjoy this time; your bread is on its way to becoming amazing! To get the right dough, start with warm milk. It helps the yeast wake up. Mix in melted butter and sugar until smooth. When you add flour, do this slowly. The dough should feel soft but not sticky. If it feels too wet, add more flour, just a tablespoon at a time. Knead it on a floured surface for 8-10 minutes. You want it smooth and elastic. This is key for soft bread. To get a nice cinnamon swirl, roll the dough into a big rectangle. Aim for about 18x12 inches. Spread melted butter on top, then sprinkle your cinnamon-sugar mix evenly. When you roll it up, do it tightly. This helps keep the swirl intact. After cutting the roll, twist the two halves with the cut sides facing up. This will show off that lovely swirl when it bakes. Bake your bread at 350°F (175°C). This temperature gives a nice golden color. Keep an eye on it after 25 minutes. It should look brown and sound hollow when tapped. If it needs more time, check every 2-3 minutes. Let it cool in the pan for 10 minutes before moving it to a wire rack. This helps keep it moist. Enjoy the smell as it cools! {{image_2}} You can make your cinnamon swirl bread even better. Try adding nuts or fruits. Walnuts or pecans give a nice crunch. You can also add raisins or chopped apples for sweetness. When you sprinkle the cinnamon-sugar mix, fold in the nuts or fruits. It adds a fun twist and more flavor. A glaze can make your bread shine. You can use a simple glaze made from powdered sugar and milk. Mix one cup of powdered sugar with two tablespoons of milk. Drizzle it on the bread after it cools. For a richer taste, mix in some vanilla extract. You can also brush the top with melted butter and sprinkle more cinnamon sugar. It gives a sweet touch. Spices can change the whole taste of your bread. Try nutmeg or cardamom for a warm flavor. Mix these spices with your brown sugar and cinnamon. This gives your bread a unique twist. Experiment to find your favorite mix. You might just create a new family favorite! To keep your cinnamon swirl bread fresh, wrap it tightly in plastic wrap. You can also use aluminum foil. Place it in an airtight container at room temperature. This helps keep the bread moist. Enjoy it within three days for the best taste. If you want to save some for later, freezing works well. Slice the bread before freezing. Wrap each slice in plastic wrap, then place them in a freezer-safe bag. This way, you can take out just what you need. The bread can last up to three months in the freezer. To reheat, take out a slice and place it in the toaster. You can also warm it in the oven at 350°F (175°C) for about 10 minutes. This gives it a nice crust. If you prefer it warm and soft, use the microwave for about 15 seconds. Enjoy your bread warm! Yes, you can use whole wheat flour. Just replace half of the all-purpose flour with whole wheat. This change adds fiber and nutrients. The bread may be denser, but it still tastes great. You might need to add a bit more liquid to keep the dough soft. If your dough doesn't rise, check the yeast. It needs to be fresh and active. Make sure your milk is warm, about 110°F. If the dough is cold, it won’t rise well. Also, ensure you are in a warm spot for rising. You can place it in an oven with the light on to help. To make this recipe vegan-friendly, swap the eggs with flax eggs. Mix 1 tablespoon of flaxseed meal with 2.5 tablespoons of water for each egg. Replace the butter with coconut oil or vegan butter. Use plant-based milk instead of regular milk. This keeps all the flavor while making it vegan. You learned about the key ingredients for baking and how to prepare dough. I shared tips to perfect your swirl and get the baking time just right. You can even explore tasty variations like adding nuts or fruits. Storing and reheating your baked goods is simple. With these steps and tricks, you can create delicious treats at home. Keep experimenting and enjoy the fun of baking!
                    Bakery Style Cinnamon Swirl Bread Easy and Delicious

                  Recent Drinks

                  • - 1 ripe banana - 2 tablespoons natural peanut butter - 1 cup unsweetened almond milk (or any milk of choice) - 1 scoop vanilla protein powder (plant-based or whey) - 1 tablespoon chia seeds - 1 teaspoon honey (optional for sweetness) - A pinch of cinnamon - Ice cubes (optional, for a thicker texture) Gather these simple items before you start. A ripe banana gives natural sweetness and creaminess. Use two tablespoons of natural peanut butter for a rich flavor. Almond milk is my go-to, but any milk you love works great. The protein powder adds a boost of nutrition. Choose vanilla to match the banana. Chia seeds are tiny but mighty. They add fiber and help keep you full. If you like it sweeter, add honey, but it’s not a must. A pinch of cinnamon brings warmth and depth to this drink. For a thicker texture, toss in some ice cubes. This smoothie is flexible, so feel free to mix and match based on your taste. Now, let's blend it all together! 1. Start by peeling the ripe banana. Break it into small chunks. 2. In a blender, combine the banana chunks, natural peanut butter, almond milk, protein powder, chia seeds, and a pinch of cinnamon. 3. If you like a colder and thicker smoothie, add some ice cubes. 1. Blend all the ingredients on high speed. Keep blending until you have a smooth and creamy mix. 2. Stop the blender and taste your smoothie. If you want it sweeter, add honey. Blend again for a few seconds to mix. 1. Pour the smoothie into a tall glass. Enjoy it right away for the best taste and creaminess. 2. For a fun twist, you can top it with extra chia seeds or banana slices. This makes it look pretty too! To get the perfect texture, use a ripe banana. A ripe banana makes the smoothie creamy. Add ice cubes if you want it thicker. If you prefer a smoother drink, blend longer. Scrape the sides of the blender to mix all the ingredients well. This ensures a silky-smooth result. If your smoothie tastes too bland, add honey or more banana. Start with a teaspoon of honey. Blend and taste again. You can always add more honey if needed. This way, you control the sweetness to match your taste. Remember, ripe bananas also add natural sweetness. Use a high-speed blender for the best results. A strong blender breaks down the ingredients quickly. If you have a less powerful blender, blend in stages. Start with the liquids first, then add the solids. This helps everything mix better. Make sure your blender is clean for the best flavor. {{image_2}} You can switch the peanut butter for other nut butters. Almond butter offers a nutty taste. Cashew butter is creamy and sweet. Sunflower seed butter is a great choice for allergies. Each nut butter brings its own flavor and health benefits. Experiment to find your favorite. You can add many fruits to the smoothie. Frozen berries add sweetness and color. Spinach or kale boosts nutrition without changing the taste. Try mango for a tropical twist. Each fruit adds vitamins and makes the smoothie fun. Mix and match to discover new flavors. Choosing the right protein powder is key. Plant-based powders are great for vegan diets. Whey protein is popular for muscle recovery. Look for flavors that match your taste, like chocolate or vanilla. The right powder can enhance the smoothie’s flavor and nutrition. Test different types to see what you prefer. Store any leftover smoothie in an airtight container. You want to keep it fresh. Place it in the fridge right after making it. It will stay good for about one day. When you are ready to drink it again, shake or stir well. This helps mix any settled ingredients. You can freeze your smoothie for later. Pour it into ice cube trays or freezer-safe bags. This way, you can grab a portion whenever you want. To use, thaw the smoothie overnight in the fridge. You can also blend it again for a fresh taste. In the fridge, your smoothie lasts about 24 hours. In the freezer, it can last up to three months. Just remember, the sooner you drink it, the better the taste and texture will be! Yes, this smoothie is gluten-free. All the ingredients listed are naturally free from gluten. The peanut butter, banana, almond milk, protein powder, chia seeds, and honey do not contain gluten. Always check labels if you use store-bought items to confirm they are gluten-free. Absolutely! To make this smoothie vegan, simply use plant-based protein powder. Ensure your peanut butter is also free from animal products. Replace honey with maple syrup or agave nectar for sweetness. All other ingredients are already vegan-friendly. This smoothie offers many health benefits. It provides protein from the peanut butter and protein powder, which helps build muscle. Bananas add potassium, good for heart health. Chia seeds are packed with fiber, aiding digestion. Almond milk is low in calories and rich in vitamins. Yes, you can use various milk types. Cow’s milk will add creaminess and protein. Soy milk is a great option for extra protein. Coconut milk gives a tropical flavor. Each milk option changes the taste and texture slightly, so choose what you enjoy best. This smoothie recipe combines simple ingredients for great taste and nutrition. You learned step-by-step how to prepare it and tips for perfect texture. Variations let you customize your drink to fit your taste. Remember to store leftovers properly for later enjoyment. Smoothies can be healthy and fun. Try new mixtures to find what you love best. Keep experimenting and enjoy your delicious creations!
                    Peanut Butter Banana Protein Smoothie Easy Recipe
                  • To make a delicious Turmeric Golden Milk Latte, gather these simple ingredients: - 2 cups almond milk (or your preferred milk) - 1 teaspoon ground turmeric - ½ teaspoon ground ginger - ¼ teaspoon cinnamon - 1 tablespoon honey or maple syrup (adjust to taste) - Pinch of black pepper - ½ teaspoon vanilla extract - Optional: a sprinkle of nutmeg for garnish - Almond Milk: This milk is low in calories and rich in vitamins. It helps with heart health. - Turmeric: This spice has curcumin, known for its anti-inflammatory properties. It may help improve brain function. - Ginger: Ginger can help with digestion and nausea. It adds a nice warmth to the drink. - Cinnamon: This spice is rich in antioxidants. It may help lower blood sugar and improve heart health. - Honey or Maple Syrup: Both sweeteners can boost energy. They also provide antioxidants. - Black Pepper: This spice enhances turmeric absorption. It makes the drink more effective. - Vanilla Extract: It adds flavor and can help reduce stress. - Nutmeg: This spice is optional, but it adds warmth and a nice aroma. - Milk Options: You can use oat milk, soy milk, or coconut milk for different flavors. - Sweeteners: If you prefer, try agave syrup or stevia as sugar-free options. - Spices: Experiment with cardamom or cloves for added flavor. - Nutmeg: You can skip it if you don't like nutmeg, or use a touch of cocoa powder instead. 1. Start by taking a small saucepan. 2. Add 2 cups of almond milk to the pan. 3. Measure and add 1 teaspoon of ground turmeric. 4. Next, add ½ teaspoon of ground ginger. 5. Sprinkle in ¼ teaspoon of cinnamon. 6. Sweeten your drink with 1 tablespoon of honey or maple syrup. 7. Don't forget a pinch of black pepper for better absorption of turmeric. 8. Lastly, add ½ teaspoon of vanilla extract. 9. Whisk all the ingredients well in the pan. 10. Place the saucepan on medium heat. 11. Gently warm the mixture while stirring often. 12. Keep an eye on it; do not let it boil. 13. After about 5-7 minutes, it should be hot enough. 14. Remove the pan from heat and let it cool slightly. 15. If you want a frothy drink, use a milk frother or whisk it quickly. 16. Pour the golden milk into your favorite mugs. 17. Optionally, sprinkle a bit of nutmeg on top for a nice touch. 18. Serve warm and enjoy this comforting drink! - Always use a whisk to blend the spices into the milk. - Whisking helps mix the turmeric and other spices evenly. - When heating, keep the heat low to avoid scalding the milk. - Stir often to prevent sticking at the bottom of the pan. - If you see steam but no bubbles, you are at the right temperature. - A milk frother works wonders for a smooth, frothy finish. - If you don’t have a frother, whisk vigorously by hand. - Frothing adds air, giving the latte a creamy feel. - The more you froth, the lighter and fluffier your drink will become. - For an extra touch, froth some almond milk separately and top your latte with it. You can mix spices to make your turmeric latte tastier. Try adding a pinch of nutmeg or a dash of cardamom. These spices add warmth to the drink. You can also use fresh ginger instead of ground ginger. This will give your latte a bright, zesty kick. Just remember, fresh ginger may need more time to steep. Many people rush the heating process. Always warm your milk slowly over medium heat. If you boil it, the spices can lose flavor. Another mistake is not blending the spices well. Make sure to whisk the mixture thoroughly. This helps avoid clumps of turmeric or ginger. Lastly, avoid skipping the black pepper. It helps your body absorb turmeric better. Sweetness is personal. Start with one tablespoon of honey or maple syrup. Taste your latte and add more if you like it sweeter. For creaminess, use full-fat coconut milk for a richer feel. Almond milk is lighter but still delicious. You can also mix almond and coconut milk for the best of both worlds. {{image_2}} You can easily make this latte vegan. Just use almond milk, coconut milk, or oat milk. These milks work great in this recipe. They keep the drink creamy and delicious. If you want a nut-free option, oat milk is the best choice. It blends well with turmeric and spices. To make an iced version, start with brewed turmeric milk. Follow the same steps but let it cool. Pour over ice instead of serving warm. This drink is refreshing on hot days. You can also add some ice cream for a treat! You can mix and match flavors for fun. Try adding matcha for a green twist. This adds a fresh taste and boosts energy. You can also use cocoa for a chocolatey version. The cocoa pairs well with turmeric and spices. For a special touch, add a dash of vanilla extract. This enhances the overall flavor and aroma. To store leftover turmeric golden milk, let it cool first. Then, pour it into an airtight container. Keep it in the fridge for up to three days. This way, you can enjoy the drink again without losing its flavor. When reheating your golden milk, do it gently. Pour it into a small saucepan. Heat it over low to medium heat. Stir it often to avoid burning. Never let it boil, as this can change the taste and texture. You can also use a microwave. Heat in short bursts, stirring in between. Turmeric golden milk lasts about three days in the fridge. Check for signs of spoilage. If it smells sour or has any mold, discard it. Always trust your senses. If it looks or smells off, it’s best to throw it away. Turmeric has many health benefits. It is known for its bright yellow color and active compound called curcumin. Curcumin may help reduce inflammation. It can also support joint health. Some studies suggest it may boost your mood. Turmeric might even help with digestion. Drinking turmeric may also support your immune system. Yes, you can use any milk you like. Almond milk is great, but coconut milk adds creaminess. Oat milk is a good choice for a thicker texture. If you prefer dairy, whole or skim milk works too. Just remember, different types of milk will change the flavor a bit. To make this recipe sugar-free, skip the honey or maple syrup. You can use a sugar substitute like stevia or monk fruit instead. These options will give you sweetness without the calories. Just adjust the amount to your taste. Yes, it is safe for most people to have turmeric daily. Using it in cooking or drinks is a great way to enjoy its benefits. However, if you have health issues or take certain medications, check with a doctor first. Moderation is key, as with any food. In this blog post, we explored the ingredients and health benefits of Turmeric Golden Milk. I shared step-by-step instructions for making it frothy and delicious. We also discovered tips, tricks, and variations to enhance your drink. Proper storage and reheating advice can help you enjoy leftovers. Remember, turmeric offers many health benefits, so enjoy this drink often. Use alternative ingredients if you prefer. With these ideas, you can create the perfect golden milk to suit your taste and health needs. Enjoy your journey to wellness!
                    Turmeric Golden Milk Latte Simple and Creamy Recipe
                  • - 1 ripe mango, peeled and diced - 1 cup fresh pineapple chunks - 1 banana, sliced - 1 cup coconut water (or regular water) - ½ cup plain Greek yogurt (or dairy-free alternative) - 1 tablespoon honey or agave syrup (optional) - A handful of fresh mint leaves (for garnish) - Ice cubes (optional) The key to a delicious mango pineapple smoothie lies in its fresh ingredients. You want ripe fruits for the best flavor. The mango should feel soft when you squeeze it gently. Pineapples should smell sweet and fruity. This smoothie combines sweet mango, tangy pineapple, and creamy banana. Coconut water adds hydration, while Greek yogurt gives it a nice creaminess. You can add honey for extra sweetness if you like. Mint leaves add a refreshing touch when you serve it. Each ingredient plays a role in making this smoothie flavorful and refreshing. Trust me, using fresh ingredients will make a big difference in taste! To make this smoothie, start by gathering your main ingredients. You need a ripe mango, fresh pineapple, and a banana. 1. In a blender, combine the diced mango, pineapple chunks, and banana slices. This mix brings a burst of tropical flavor. 2. Next, add one cup of coconut water to the blender. This not only hydrates but also adds a refreshing twist. 3. For creaminess, pour in half a cup of plain Greek yogurt. If you want it sweeter, drizzle in one tablespoon of honey or agave syrup. 4. Blend on high until the mixture is smooth and creamy. If you like your smoothie chilled, toss in a few ice cubes and blend again until they are fully mixed in. 5. After blending, taste your smoothie. If it needs to be sweeter or thicker, add more honey or coconut water as needed. Once your smoothie is ready, it’s time to serve it. I recommend using tall glasses to show off the vibrant color. For a fun touch, garnish each glass with a few fresh mint leaves on top. This not only looks nice but also adds a fresh aroma. Enjoy your delicious Mango Pineapple Smoothie! For the Full Recipe, please refer back to the ingredient list and instructions. To get your smoothie just right, focus on creaminess. Use ripe fruits like mango and banana. The Greek yogurt adds a nice, smooth texture. If you want a richer taste, try full-fat yogurt. For a lighter feel, use low-fat or dairy-free yogurt. Adjust the thickness by adding more liquid. Coconut water is great for this. If your smoothie is too thick, just pour in a bit more. Blend again until it’s just how you like it. If you want a thicker smoothie, add more banana or ice cubes. Boosting flavor can take your smoothie to the next level. Try adding spices like cinnamon or ginger. These spices not only add warmth but also great health benefits. A dash of cinnamon can make the smoothie taste cozy. A pinch of ginger gives it a nice kick. You can also use flavored yogurts for extra taste. Vanilla or coconut yogurt work well. If you want sweetness, think about honey or agave syrup. These can make your smoothie more enjoyable. For a fun twist, try adding a splash of vanilla extract. It will add a lovely aroma to your drink. For a full taste experience, explore the [Full Recipe]. {{image_2}} You can change the fruit in your smoothie to keep it fresh. Adding strawberries or blueberries gives a sweet twist. These berries add a nice color and taste. You can also try using other tropical fruits like papaya or kiwi. These fruits bring new flavors and nutrients to your drink. Each fruit will change the smoothie’s taste and make it unique. If you want a dairy-free smoothie, swap the Greek yogurt for a plant-based option. Almond, coconut, or soy yogurt works well. These alternatives keep your smoothie creamy without dairy. For sweeteners, you can use maple syrup or agave syrup for a vegan choice. These options add sweetness while keeping your drink plant-based. Enjoy the fruity goodness in many ways! Don't forget to check the Full Recipe for more ideas. You may have some smoothie left after making your Mango Pineapple Smoothie. To keep it fresh, use a glass jar or a BPA-free plastic container. Seal it tightly to prevent air from spoiling the flavor. Store it in the fridge for up to 24 hours. After that, it may lose some taste and texture. If you want to enjoy the smoothie later, freezing is a great option. Pour the smoothie into ice cube trays or freezer-safe bags. Leave some space in the bags for expansion. You can freeze it for up to three months. When you’re ready to drink it, take out what you need. Thaw it in the fridge overnight or blend it straight from the freezer for a slushy treat. Enjoy your refreshing Mango Pineapple Smoothie anytime! Yes, you can make this smoothie ahead of time. If you want to save it, store it in an airtight container. Keep it in the fridge for up to one day. The smoothie may separate, so stir it well before you drink it. If you don’t have coconut water, use regular water or fruit juice instead. Fruit juice can add a nice flavor. You can also try almond milk for a creamier touch. Just remember, the taste will change a bit based on what you use. To make the smoothie thicker, add more Greek yogurt or a banana. You can also use frozen fruit instead of fresh. Frozen fruit gives you a nice, thick texture. Just blend it well, and you’ll get a creamy drink. Yes, this smoothie is great for kids! It is packed with fruits and tastes sweet. You can adjust the sweetness by adding less honey. The bright colors and fresh flavors will appeal to children, making it a fun treat. You can find the Full Recipe for the Tropical Bliss Mango Pineapple Smoothie above in this article. This will guide you through every step to create your own refreshing drink. This blog post covers a simple and tasty smoothie recipe. You learned about the key ingredients and their nutritional benefits. I provided steps to prepare and serve the smoothie perfectly. Tips for texture and flavor help you make it your own. You can explore variations to suit your tastes or dietary needs. Don’t forget storage tips to keep leftovers fresh. Enjoy your smoothie making journey. It’s all about trying new things and having fun!
                    Mango Pineapple Smoothie Refreshing and Flavorful Blend
                  • - 2 packets of frozen açaí puree - 1 ripe banana - 1 cup of fresh pineapple chunks - 1 cup of coconut milk (or any non-dairy milk) - 1 tablespoon of honey or agave syrup (optional) For a vibrant tropical taste, the main ingredients are key. Açaí puree brings rich color and flavor. It is full of antioxidants. Bananas add creaminess and natural sweetness. Fresh pineapple gives a bright, juicy touch. Coconut milk offers a smooth base. You can use any non-dairy milk you prefer. Honey or agave syrup adds sweetness if needed. - Sliced kiwi - Coconut flakes - Granola - Chia seeds - Fresh berries (e.g., strawberries, blueberries) Toppings make your smoothie bowl pop! Sliced kiwi adds a zesty kick. Coconut flakes give it a tropical crunch. Granola provides texture and flavor. Chia seeds offer extra nutrients. Fresh berries, like strawberries and blueberries, add color and taste. You can mix and match these toppings for a fun look. For the full recipe, please refer to the section above. 1. Blend the ingredients Start by adding the frozen açaí puree, ripe banana, fresh pineapple chunks, and coconut milk into a blender. If you want it sweeter, you can add honey or agave syrup. Blend this mixture on high speed until it becomes creamy and smooth. 2. Adjust consistency with coconut milk If your smoothie is too thick, just add a bit more coconut milk. Blend again until you reach the texture you want. This step is key to making your smoothie bowl enjoyable. 3. Pour into a bowl Once blended, carefully pour the smoothie mixture into a bowl. Make sure to use a large enough bowl to hold all the goodness. 4. Add toppings creatively Now comes the fun part! Arrange your toppings, such as sliced kiwi, coconut flakes, granola, chia seeds, and fresh berries, over the smoothie. Try to create a colorful pattern. I love making a circular design to highlight all the vibrant colors. - Tips for presentation Use a shallow bowl to show off your beautiful toppings. You can also sprinkle some extra coconut flakes around the edge for a nice touch. A colorful presentation makes your smoothie bowl more fun to eat. - Recommended serving utensils Serve your smoothie bowl with a regular spoon. If you want to make it more special, use a wooden spoon or a cute, colorful one. Enjoy your tropical treat right away to keep it fresh and tasty. For the full recipe, refer to the earlier sections. To make a great smoothie bowl, start with ripe fruits. Ripe fruits taste better and add natural sweetness. Look for bananas that are yellow with some brown spots. When it comes to pineapples, choose ones that smell sweet. It ensures they are juicy and fresh. Blending is key to your smoothie bowl. You want a smooth and creamy texture. If your mix is too thick, add more coconut milk. Blend again until you reach the right consistency. A good blend makes your bowl enjoyable and easy to eat. A colorful topping arrangement makes your smoothie bowl pop. Use fresh berries, sliced kiwi, and coconut flakes. Lay them out in a pattern. A circular design looks appealing and fun. To elevate your smoothie bowl's look, use bowls with interesting shapes. Tall bowls or wide, shallow ones can change the game. Garnish with a sprinkle of chia seeds for a fancy touch. This not only looks great but adds a bit of crunch too. {{image_2}} You can change the non-dairy milk for this smoothie. Almond, soy, or oat milk work well. Each milk adds a different taste. Try using seasonal fruits too. Mango, papaya, or berries add a fresh twist. You can mix and match to find your favorite blend. Want more nutrients? Add spinach or kale to your smoothie. They blend well and boost health. You won’t even taste them! For extra energy, stir in nut butter or protein powder. Both will make your smoothie more filling. They add great flavor too! You can also experiment with different combinations to find the best taste for you. To store leftovers, place your smoothie bowl in the fridge. Use a tight container to keep it fresh. Glass or BPA-free plastic works well for storage. I prefer glass because it keeps flavors better. You can freeze smoothie bowls for later. Just pour the mixture into an airtight container. Leave some space at the top, as it will expand when frozen. To defrost, place it in the fridge overnight. If you’re in a rush, you can use the microwave. Just heat it in short bursts to avoid cooking. Enjoy your tropical treat later with ease! For the recipe, check out the Full Recipe. What is açaí and what are its benefits? Açaí is a small, dark purple berry from Brazil. It is full of antioxidants, which help fight free radicals in the body. Açaí is also rich in fiber, promoting good digestion. Plus, it has healthy fats that support heart health. You can enjoy its fruity taste in many dishes. Can I make this smoothie bowl ahead of time? Yes! You can prepare the smoothie mix and store it in the fridge for up to 24 hours. Just remember to keep the toppings separate. This way, your bowl stays fresh and tasty. How can I make this recipe vegan or gluten-free? To make it vegan, use agave syrup instead of honey. For gluten-free, ensure your granola and any other toppings are gluten-free. Most fruits and coconut milk are naturally gluten-free, so you’re all set! Can I substitute açaí with other fruits? Yes, you can! If you can’t find açaí, try using frozen berries like blueberries or strawberries. These fruits will add sweetness and a burst of color to your bowl. What to do if the smoothie is too thick? If your smoothie is too thick, just add a little more coconut milk. Blend again until you reach your desired creaminess. This will make it easier to pour and enjoy. How to fix a smoothie bowl that tastes too bland? If your smoothie bowl lacks flavor, try adding a splash of vanilla extract or a pinch of salt. You can also mix in a bit of honey or agave syrup for sweetness. Adjust the toppings to add more taste and texture. This article covers how to make a delicious açaí smoothie bowl. You learned about the key ingredients, easy steps for preparation, and creative topping ideas. I shared tips to improve taste and presentation, plus fun variations to try. Don’t forget storage techniques to keep your bowl fresh. With all this information, you can enjoy a tasty and nutritious treat anytime. Get creative with your favorites and make this recipe truly yours. Enjoy every bite!
                    Tropical Acai Smoothie Bowl Energizing Healthy Treat

                  Footer

                  ↑ back to top

                  More information

                  • Drinks
                  • Appetizer
                  • Dinner
                  • Desserts
                  • About
                  • Contact
                  • Privacy Policy

                  Our Policies

                  • Privacy Policy
                  • GDPR Policy
                  • Terms Of Use
                  • Copyright Policy
                  • Cookie Policy
                  • Disclaimer

                  Copyright © 2025 cheftaling