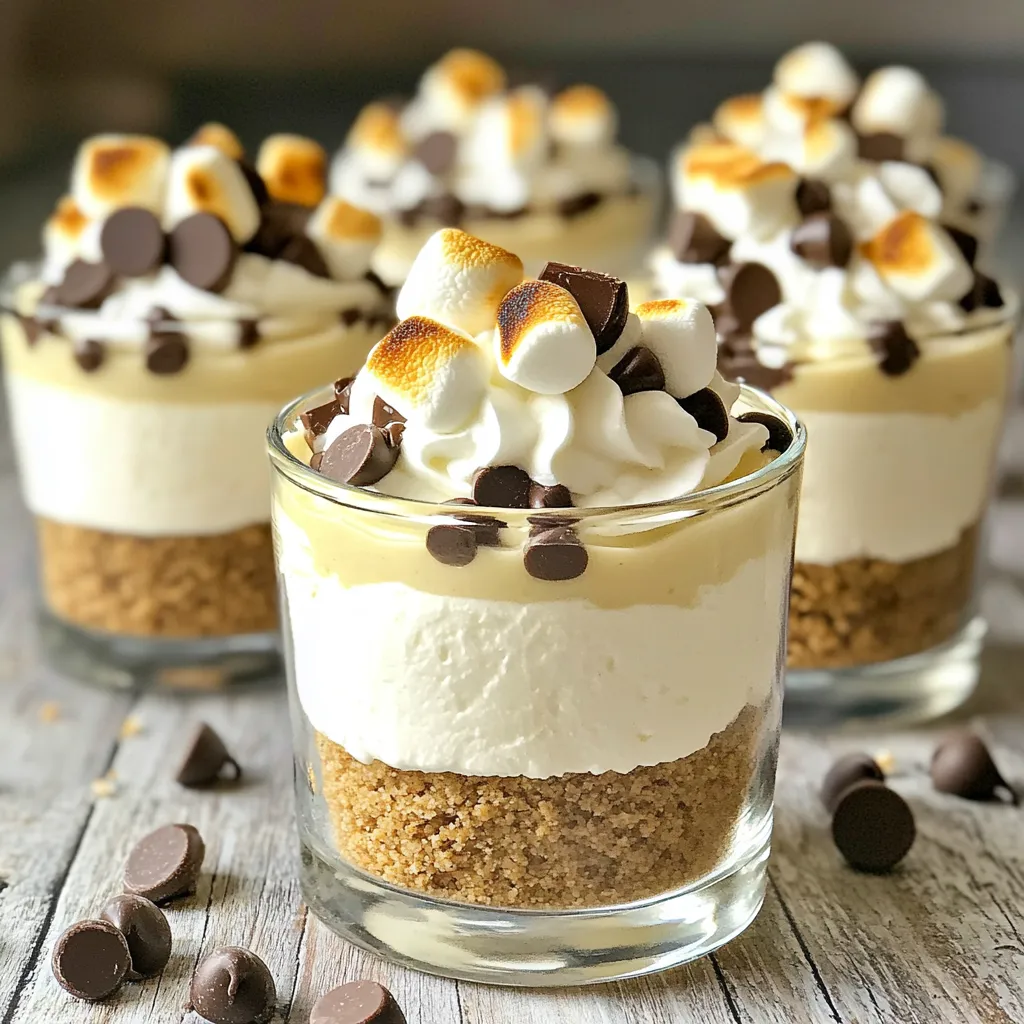
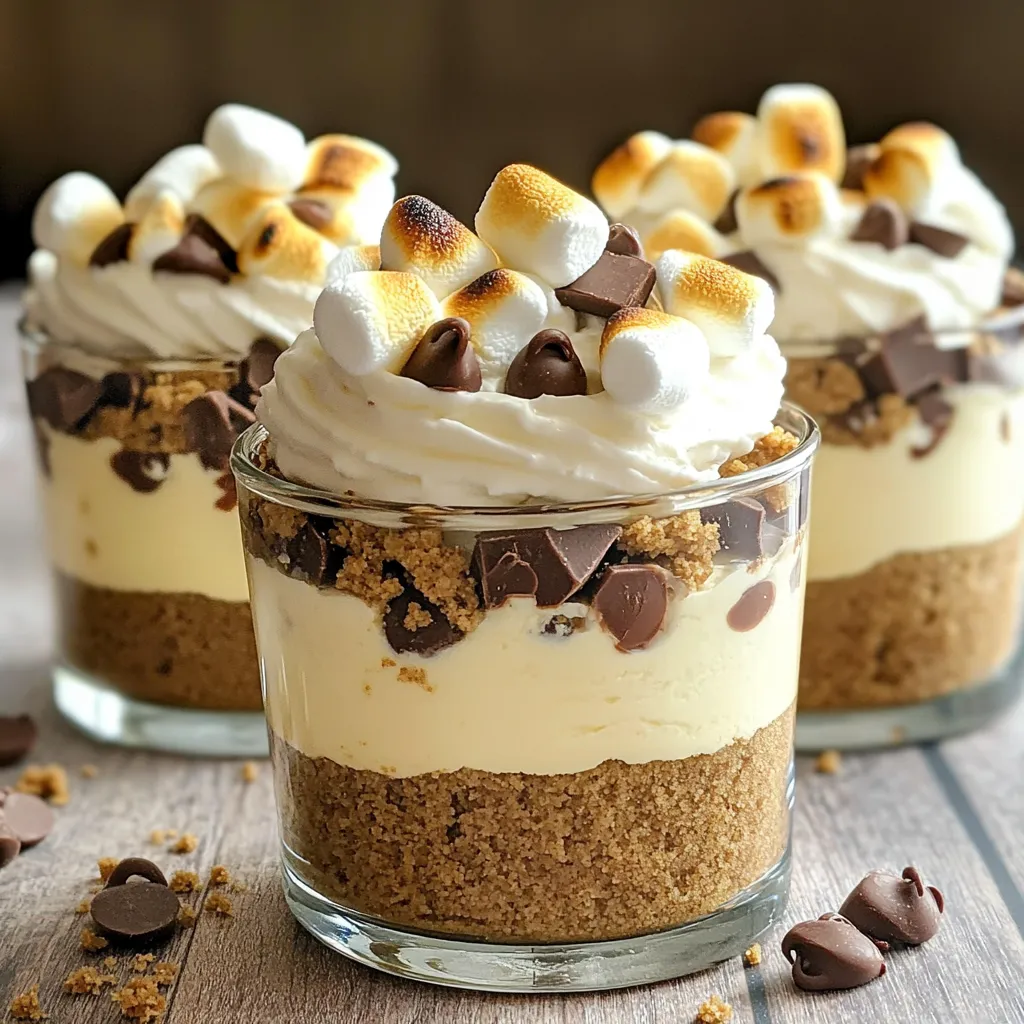
Indulging in a creamy, no-bake treat has never been easier or more fun! In this post, I’ll show you how to make delightful No-Bake S’mores Cheesecake Cups. These tasty cups combine creamy cheesecake, crunchy graham crackers, and sweet marshmallows. Perfect for parties or a cozy night in, they’ll bring nostalgia and joy to every bite. Let’s dive in and start creating this delicious dessert together!
Ingredients
Main Ingredients
- 1 cup graham cracker crumbs
- 4 tablespoons unsalted butter, melted
- 8 oz cream cheese, softened
- ½ cup powdered sugar
- 1 teaspoon vanilla extract
The base of our No-Bake S’mores Cheesecake Cups starts with graham cracker crumbs. These give a sweet and crunchy texture. Next, we add melted unsalted butter. This helps bind the crumbs and creates a rich flavor. Cream cheese is key for the cheesecake filling. It provides a creamy and smooth texture. Powdered sugar adds sweetness without grittiness. Don't forget the vanilla extract; it brightens the flavor and adds depth.
Toppings and Garnishes
- 1 cup whipped cream (or whipped topping)
- ½ cup mini marshmallows
- ½ cup chocolate chips (semi-sweet or milk chocolate)
- Extra mini marshmallows and chocolate for garnish
Toppings make this dessert fun and appealing. Whipped cream adds fluffiness and lightness. Mini marshmallows give that classic s'mores touch. Chocolate chips provide rich, melted chocolate goodness. For garnish, you can add extra mini marshmallows and chocolate pieces on top.
Equipment Needed
- Mixing bowls
- Serving cups or glasses
- Kitchen torch (optional)
You will need mixing bowls to combine your ingredients. Serving cups or glasses are perfect for layering your cheesecake. A kitchen torch is optional but fun for toasting the marshmallows on top. This adds a nice, smoky flavor that takes it to the next level.
Step-by-Step Instructions
Prepare the Crust
- Combine graham cracker crumbs and melted butter in a medium bowl.
- Mix until the crumbs are evenly coated. This forms a tasty base for your cups.
Layer the Crust
- Add the graham cracker mixture to your serving cups.
- Press down gently to form a solid crust. This step is key for holding the layers above.
Make the Cheesecake Filling
- In a mixing bowl, beat together softened cream cheese and powdered sugar until smooth.
- Mix in the vanilla extract for a fragrant touch. This adds great flavor to your cheesecake.
Fold in Whipped Cream
- Gently fold in the whipped cream to the cream cheese mixture.
- This makes the filling light and fluffy. Be careful not to deflate the mixture.
Assemble the Cups
- Spoon a layer of the cheesecake filling onto the graham cracker crust in each cup.
- Top with mini marshmallows and some chocolate chips for sweetness.
- Repeat layers until the cups are filled. This creates a delightful mix of flavors.
Chill and Serve
- Refrigerate the cups for at least 3 hours or until set.
- Before serving, you can torch the mini marshmallows for a toasted effect.
- Garnish with extra chocolate pieces for a final touch. This will impress your guests!
Tips & Tricks
How to Achieve the Best Texture
To make your cheesecake smooth, ensure the cream cheese is softened. It should feel like a cloud. If it is cold, your filling will be lumpy. This step is key for a creamy bite. Next, when you fold in the whipped cream, do it gently. This keeps the air in, making it light and fluffy. Over-mixing can make it dense, which we want to avoid.
Recommended Serving Tips
Using clear cups for your s'mores cheesecake cups adds a nice touch. Guests can see the layers, and it looks inviting. I also suggest serving with extra chocolate drizzle. A quick drizzle makes each bite feel special. You can use a squeeze bottle for precision.
Common Mistakes to Avoid
One common mistake is over-mixing the filling. This can lead to a heavy texture. Mix just until smooth. Another mistake is not chilling long enough. The cups need at least three hours to set. If you rush this step, the layers may run together. Trust the chill!
Variations
Different Flavor Profiles
You can switch things up with fun flavors. A pumpkin spice version is perfect for fall. Just add pumpkin puree and some cinnamon to the cheesecake mix. It gives a warm, cozy taste.
Another great choice is a peanut butter s'mores variation. Mix creamy peanut butter into the cheesecake filling. This adds a rich and nutty twist. You can even top it with chopped peanuts for extra crunch.
Dietary Modifications
If you need gluten-free options, use gluten-free graham crackers. They make a great base for the cheesecake. Just make sure to check the label for gluten-free labeling.
For those who prefer vegan options, substitute cream cheese with vegan cream cheese. Many brands taste just as good. You can also use coconut whipped cream for a light and fluffy texture.
Seasonal Additions
You can enhance your cups with seasonal flavors. In summer, add fresh fruit layers like strawberries or blueberries. They bring a refreshing touch and vibrant color.
During fall, consider adding dried fruits or nuts. Chopped pecans or cranberries make each bite even more delightful. The mix of flavors and textures will impress everyone.
Storage Info
Best Storage Practices
To keep your No-Bake S’mores Cheesecake Cups fresh, store them in the fridge. Use an airtight container to seal them tight. This helps to prevent any odors from your fridge affecting the taste.
Shelf Life
These cheesecake cups last for about 3 to 5 days in the fridge. Enjoy them within this time for the best taste and texture. After 5 days, they may not taste as fresh or creamy.
Freezing Instructions
You can freeze cheesecake cups, but it’s not the best choice. Freezing can change their creamy texture. If you still want to freeze, wrap each cup well in plastic wrap. Place them in a freezer-safe container. Thaw in the fridge before serving.
FAQs
How do I get the cheesecake to set properly?
To help your cheesecake set right, chill it well. I recommend at least 3 hours in the fridge. The longer it chills, the firmer it gets. Make sure to cover the cups with plastic wrap. This keeps moisture in and prevents the top from drying out.
Can I make this recipe ahead of time?
Yes, you can make these cups a day in advance. Just prepare and assemble them, then chill overnight. This gives the flavors time to meld. If you want, you can add the toppings just before serving. This keeps them fresh and tasty.
What can I use instead of graham crackers?
You can use cookies, like digestive biscuits or vanilla wafers, for the crust. Crushed pretzels add a salty crunch. For a gluten-free option, try gluten-free graham crackers. Just crush them the same way and mix with melted butter.
Can I torch the marshmallows in advance?
It's best to torch the marshmallows just before serving. This keeps them soft and fluffy. If you torch them too early, they may get hard and lose that nice toasted taste. You can just add extra marshmallows on top for a fun look.
What are the serving sizes for this recipe?
This recipe makes 6 to 8 cups, depending on cup size. For a good portion, fill each cup about three-quarters full. This way, everyone gets a nice treat without feeling too full. Perfect for sharing at a party!
These cheesecake cups are easy to make and full of flavor. You learned about the key ingredients like graham crackers and cream cheese. The step-by-step guide helped you layer delicious flavors, while tips ensured a perfect texture. You can even try different variations to match your taste. Remember, these cups store well and can last a few days. With a little creativity, you can impress anyone with this treat. Enjoy making these delightful desserts, and let your kitchen be filled with joy!