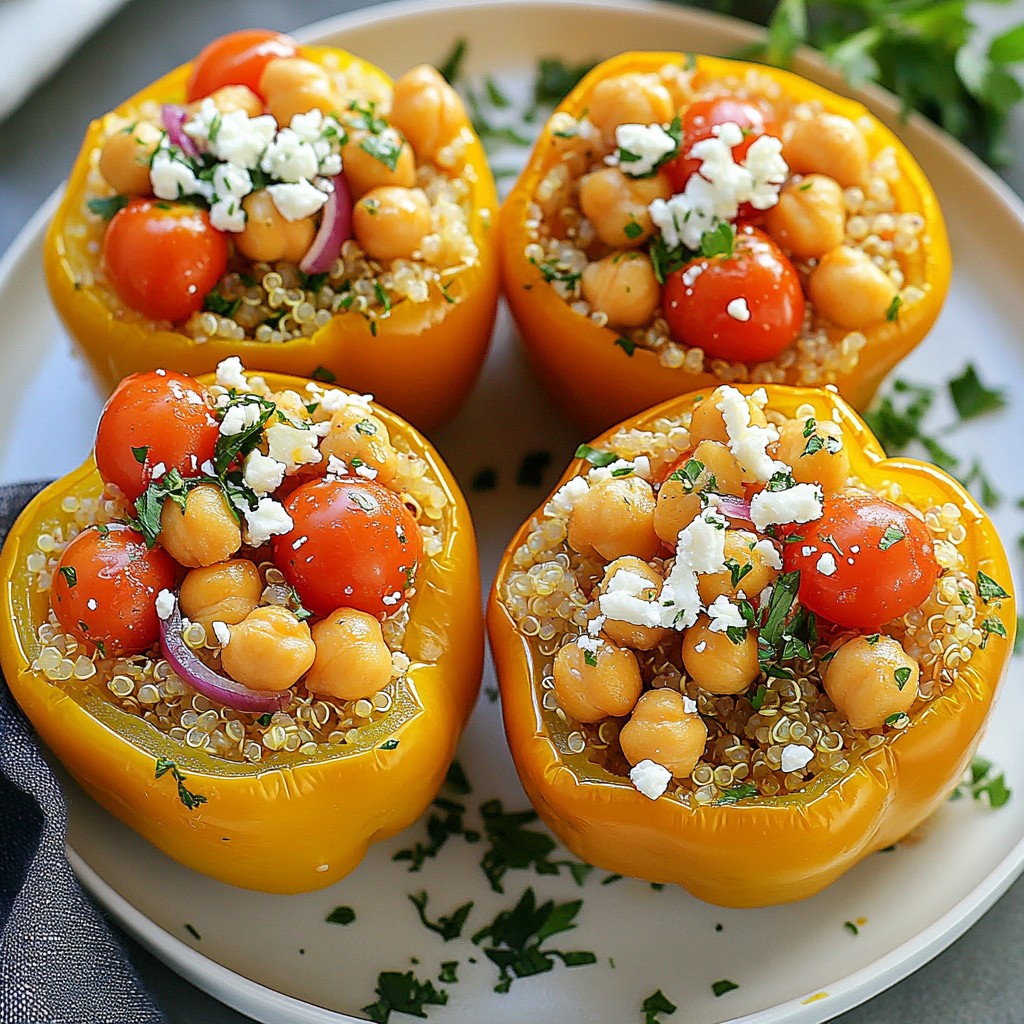
Are you tired of the same old dinner routine? Let’s shake things up with Mediterranean stuffed peppers! This vibrant dish is not only colorful but packed with flavor, combining wholesome ingredients like quinoa, chickpeas, and spices. I’ll guide you through the simple steps to create a meal that impresses. Whether you’re a busy parent or a cooking novice, you’ll love how easy and satisfying this dish is. Let's dive in!
Error: Connection error.
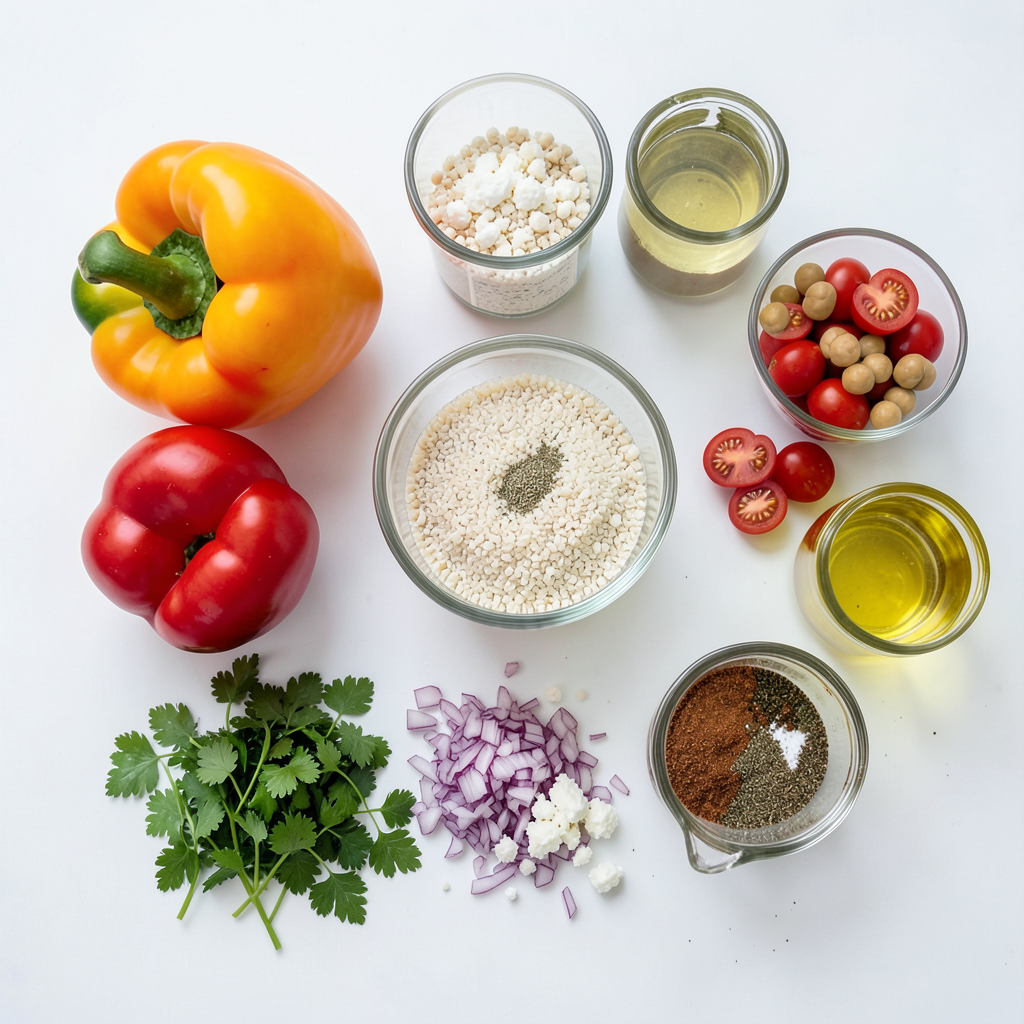
Ingredients
Main Ingredients
- 4 large bell peppers (any color)
- 1 cup quinoa, rinsed
- 1 can (15 oz) chickpeas, drained and rinsed
Additional Ingredients
- 1 cup cherry tomatoes, halved
- 1 small red onion, finely chopped
- 2 cloves garlic, minced
Seasoning and Garnishes
- 1 teaspoon dried oregano
- 1 teaspoon ground cumin
- 1/2 teaspoon smoked paprika
- 1/4 cup feta cheese, crumbled (optional for garnish)
- 1/4 cup fresh parsley, chopped
- 2 tablespoons olive oil
- Salt and pepper to taste
Gather all these ingredients before you start. Fresh bell peppers add color and taste. Quinoa is a great base. It is full of protein and fiber. Chickpeas add a nice texture. Cherry tomatoes give a burst of sweetness. Red onion and garlic bring depth to the dish.
For seasoning, dried oregano and ground cumin add warmth. Smoked paprika gives a hint of smokiness. Feta cheese adds a creamy touch on top. Fresh parsley adds a pop of color and flavor. Olive oil helps everything blend well. Salt and pepper adjust the taste to your liking. Keep these tips in mind as you prepare your Mediterranean stuffed peppers.
Step-by-Step Instructions
Preparation Steps
1. Preheating the oven
Start by preheating your oven to 375°F (190°C). This step is key for even cooking.
2. Preparing the bell peppers
Take four large bell peppers. Cut off their tops and remove seeds and membranes. Lightly brush the outside with olive oil. Set them aside.
Cooking the Quinoa
1. Combine quinoa and broth
In a medium saucepan, mix 1 cup of rinsed quinoa with 2 cups of vegetable broth.
2. Simmering instructions
Bring the mixture to a boil. Then, reduce the heat to low and cover. Let it simmer for about 15 minutes. When done, the quinoa should be fluffy and the liquid absorbed. Remove it from heat and let it cool a bit.
Mixing the Filling
1. Combining all filling ingredients
In a large bowl, combine the cooked quinoa, 1 can of chickpeas (drained and rinsed), 1 cup of halved cherry tomatoes, 1 finely chopped red onion, 2 minced garlic cloves, 1 teaspoon of oregano, 1 teaspoon of cumin, and 1/2 teaspoon of smoked paprika. Season with salt and pepper to taste. Mix everything well.
2. Filling the bell peppers
Carefully fill each bell pepper with the quinoa mixture. Press down gently to pack it in. Place the stuffed peppers upright in a baking dish.
Baking Instructions
1. Covering the dish
Drizzle any leftover olive oil over the tops of the stuffed peppers. Then, cover the dish with aluminum foil.
2. Baking time and instructions
Bake your peppers in the preheated oven for 25-30 minutes. After that, remove the foil and bake for another 10-15 minutes. You want the peppers to be tender and slightly charred. Once done, take them out and let them cool for a few minutes. Enjoy your beautiful Mediterranean stuffed peppers!
Tips & Tricks
Perfecting the Stuffed Peppers
Choosing the right peppers To start, pick large bell peppers. They should be firm and colorful. Each color adds a unique taste. Red, yellow, and green all work well. Cut the tops off and remove the seeds. This step helps the filling shine.
Cooking quinoa to perfection Rinse your quinoa before cooking. This removes a bitter taste. Use two cups of vegetable broth for one cup of quinoa. Bring it to a boil, then cover and lower the heat. Let it simmer for about 15 minutes. When done, the quinoa should be fluffy and tender.
Serving Suggestions
Vibrant presentation techniques When serving, place the stuffed peppers on a large platter. Drizzle extra olive oil on top. Sprinkle fresh parsley for a pop of color. This makes your meal look as good as it tastes.
Side dishes that pair well Consider serving a simple salad on the side. A mixed greens salad with lemon dressing works great. You could also add some crusty bread for a filling meal.
Common Mistakes to Avoid
Overstuffing peppers Do not cram too much filling into each pepper. Leave a little space at the top. This helps the peppers cook evenly and prevents spills.
Not baking long enough Bake the peppers for 25-30 minutes, then remove the foil. Make sure they bake for an extra 10-15 minutes to get tender. If they are still crunchy, give them more time.
Error: Connection error.
Variations
Ingredient Swaps
You can easily change your stuffed peppers by swapping some ingredients. Try different grains like rice or couscous instead of quinoa. Both options give a nice texture. If you want a protein boost, consider ground turkey or lentils. Both are tasty and healthy choices.
Flavor Enhancements
To add more flavor, use spices. A dash of chili powder or a hint of cinnamon can make a big difference. You can also try different cheeses for garnish. Feta adds saltiness, but mozzarella or goat cheese can create a unique taste.
Dietary Modifications
If you're looking for gluten-free options, make sure to choose gluten-free grains like quinoa. For vegan alternatives, replace the feta cheese with a nut-based cheese. You can also omit any animal protein for a fully plant-based meal. This way, everyone can enjoy your delicious stuffed peppers!
Storage Info
Refrigeration
To keep your Mediterranean stuffed peppers fresh, use proper cooling techniques. First, let them cool to room temperature. This step helps avoid moisture buildup in storage. Place the peppers in airtight containers. These containers will keep them safe and tasty for a few days. You can also wrap them in plastic wrap or aluminum foil. This method works well too. Store them in the fridge for the best results.
Freezing Guidelines
If you want to save stuffed peppers for later, freezing is a great option. To freeze them, let the stuffed peppers cool first. Then, wrap each pepper in plastic wrap. After that, place them in a freezer bag. Be sure to remove as much air as possible. This step helps prevent freezer burn. When you are ready to eat them, take the peppers out of the freezer. Thaw them in the fridge overnight. After thawing, reheat them in the oven at 350°F (175°C) for about 20 minutes, or until heated through.
Shelf Life
When stored in the fridge, your stuffed peppers will last about 3 to 5 days. Always check for signs of spoilage. If you notice any off smells, slimy textures, or discoloration, it’s best to toss them. Keeping an eye on these signs will help ensure you enjoy your delicious meal safely.
FAQs
Can I use different types of peppers?
Yes, you can use many types of peppers. I love to use bell peppers, but you can also try poblano or Anaheim peppers. These have a mild taste and work well with the stuffing. For a bit of heat, use jalapeños. Just remember to adjust your cooking time, as larger peppers may take longer to cook.
How long do I bake stuffed peppers?
Bake your stuffed peppers for 25 to 30 minutes. After that, remove the foil and bake for another 10 to 15 minutes. This helps them get tender and a little charred. If you prefer them softer, you can bake them a bit longer. Keep an eye on them to avoid overcooking.
Can I make stuffed peppers ahead of time?
Yes, you can prep stuffed peppers in advance. You can make the filling and stuff the peppers a day ahead. Just cover them and keep them in the fridge. When you're ready to bake, take them out and let them sit for a bit. Then, follow the same baking instructions. This makes it easy to enjoy a tasty meal later.
This blog post covered how to make delicious stuffed peppers using healthy ingredients. You learned about the main components like quinoa and chickpeas, plus seasoning with bold flavors. I shared step-by-step instructions for preparation and cooking, along with tips to perfect your dish. Remember to consider variations to suit your taste and dietary needs. Proper storage extends freshness, ensuring you enjoy your creation longer. Stick to these guidelines for tasty, fun meals that impress!