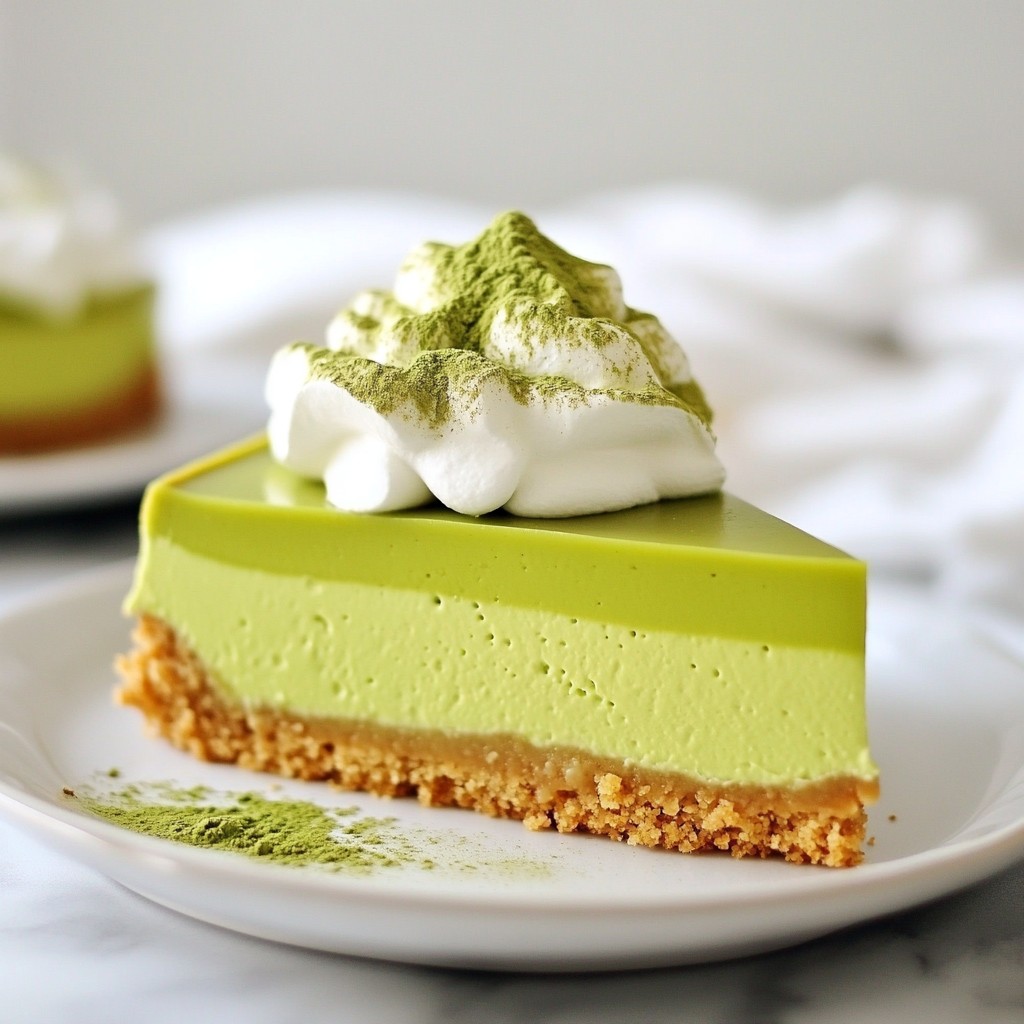
Craving a sweet treat that’s both unique and easy to make? Look no further than my Matcha Green Tea Cheesecake! This recipe blends the rich, creamy taste of cheesecake with the vibrant flavor of matcha. You’ll enjoy its beautiful color and delightful taste. Let’s dive into this tasty dessert that will impress your friends and family, while being simple enough for you to create at home!
Why I Love This Recipe
- Unique Flavor Combination: The earthy taste of matcha perfectly complements the creamy richness of the cheesecake, creating a delightful dessert that stands out.
- Health Benefits: Matcha is packed with antioxidants, making this cheesecake a slightly healthier indulgence compared to traditional desserts.
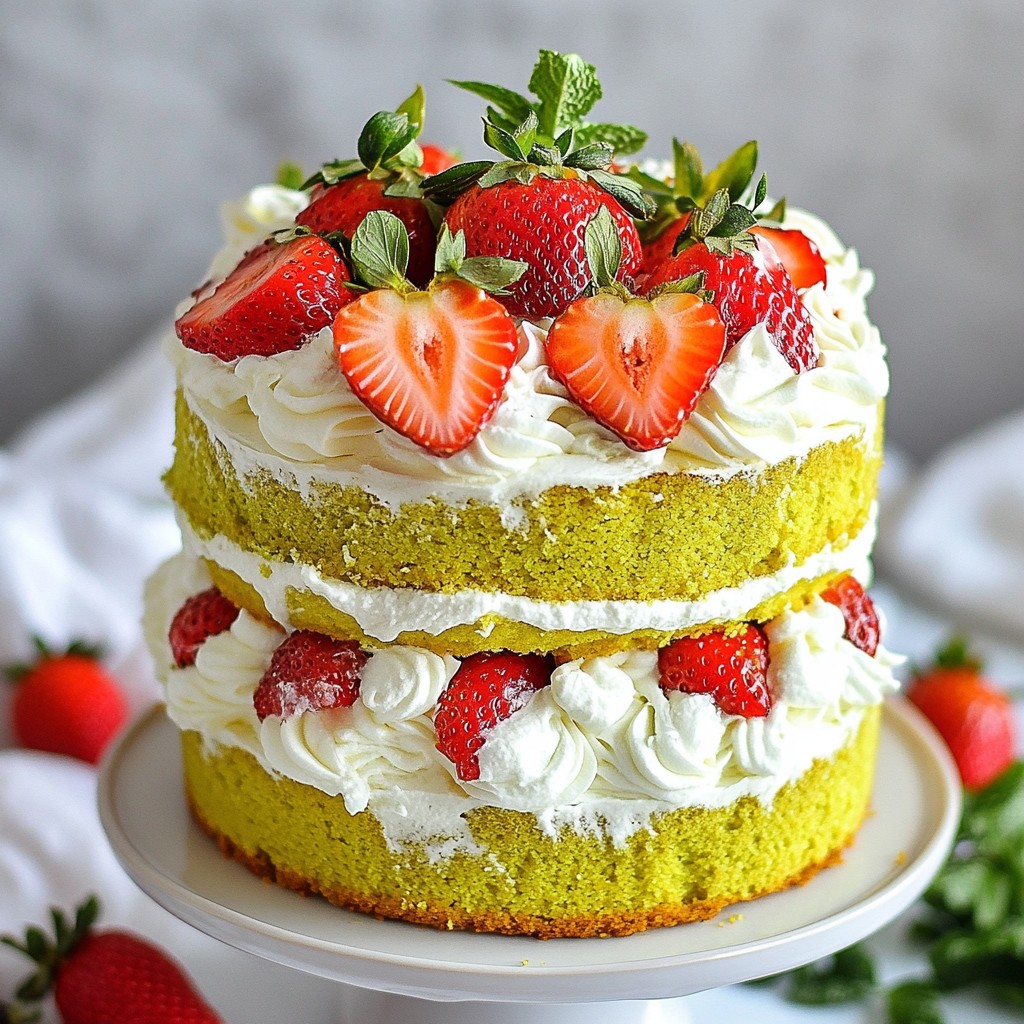
- Impressive Presentation: The vibrant green color of matcha gives this cheesecake a stunning visual appeal, perfect for special occasions.
- Customizable Toppings: Whether you add berries, whipped cream, or edible flowers, this cheesecake offers endless possibilities for garnishing and personalizing your dessert.
Ingredients
Main Ingredients
- 1 ½ cups graham cracker crumbs
- ½ cup unsalted butter, melted
- 2 cups cream cheese, softened
- 1 cup granulated sugar
- 3 large eggs
- ½ cup sour cream
- 2 tablespoons matcha green tea powder
- 1 teaspoon vanilla extract
- Pinch of salt
For this cheesecake, the main parts create a creamy and rich base. You need cream cheese, eggs, and sour cream. These ingredients give the cheesecake its smooth texture. They also add a delightful tang. Matcha green tea powder brings a lovely green color and a unique taste. It makes the cheesecake special and different from regular ones.
The crust is an important part too. You need graham cracker crumbs and melted butter. This mix gives the cheesecake a nice crunch. Press the crumbs firmly into the pan to form a sturdy base.
Optional Garnishes
- Whipped cream for topping
- Fresh berries or edible flowers for decoration
Garnishes can make your cheesecake look even better. A dollop of whipped cream on top adds a creamy touch. Fresh berries add color and sweetness. Edible flowers are a lovely way to make your dish stand out. They bring a fresh feeling to the dessert. You can enjoy this cheesecake plain, but a few garnishes make it pop!

Step-by-Step Instructions
Preparing the Crust
1. Preheat your oven to 325°F (163°C). Grease a 9-inch springform pan.
2. In a medium bowl, mix 1 ½ cups of graham cracker crumbs with ½ cup of melted unsalted butter. Stir until it looks like wet sand.
3. Press this mix firmly into the bottom of the pan to form the crust. Bake for 10 minutes and then set it aside to cool.
Making the Cheesecake Filling
1. In a large bowl, beat 2 cups of softened cream cheese with an electric mixer. Mix for about 2 minutes until it is smooth and creamy.
2. Gradually add 1 cup of granulated sugar, mixing until it is fully blended.
3. Add 3 large eggs one at a time, mixing well after each addition.
4. Blend in ½ cup of sour cream, 2 tablespoons of matcha green tea powder, 1 teaspoon of vanilla extract, and a pinch of salt. Mix until your batter is smooth and green.
Baking the Cheesecake
1. Pour the green cheesecake mixture over the cooled crust in your springform pan.
2. Bake in your preheated oven for 50-60 minutes. It should be set but still a little jiggly in the center.
3. Turn off the oven and crack the door. Let the cheesecake cool inside for about 1 hour. This step helps prevent cracks.
4. After an hour, refrigerate your cheesecake for at least 4 hours, or better yet, overnight.
5. When ready, carefully remove the springform sides and slice the cheesecake into wedges.
Tips & Tricks
Ensuring Perfect Texture
To get the best texture in your matcha green tea cheesecake, let it cool in the oven. After baking, turn off the oven and crack the door open. This helps the cheesecake cool slowly and reduces the chance of cracks. Let it sit for about an hour before moving it to the fridge.
Refrigerate the cheesecake for at least four hours, but it’s best to leave it overnight. This cooling time lets the flavors meld and gives the cheesecake a firmer texture.
Serving Suggestions
For a beautiful finish, top your cheesecake with a dollop of whipped cream. Sprinkle some matcha powder on top for a pop of color. Fresh berries or edible flowers can add some fun flair too.
When it comes to drinks, matcha cheesecake pairs well with green tea or a light herbal tea. A glass of milk or even a fruit smoothie can also make a nice match. Enjoy your creation!
Pro Tips
- Crust Perfection: Ensure that you press the graham cracker crust firmly into the pan for a solid base that holds its shape.
- Matcha Quality: Use high-quality matcha green tea powder for a vibrant color and rich flavor in your cheesecake.
- Cooling Method: Allow the cheesecake to cool in the oven with the door cracked to prevent cracks on the surface as it cools down.
- Chill Time: For the best texture and flavor, refrigerate the cheesecake overnight before serving; this allows the flavors to meld beautifully.
Variations
Different Flavors
You can change the matcha flavor in your cheesecake. Try using other tea powders, like chai or hibiscus. These will add unique tastes and colors. You can also create swirls in your cheesecake. Melt some chocolate or mash up fresh fruit. Fold these into the filling before baking. This will give your dessert a fun twist.
Dietary Adjustments
If you want a gluten-free crust, use almond flour or gluten-free cookies. Just replace the graham cracker crumbs. For a vegan option, swap cream cheese with cashew cream. Use flaxseed meal mixed with water instead of eggs. These changes keep the cheesecake creamy and tasty. You can enjoy it while sticking to your diet.
Storage Info
How to Store
To keep your matcha green tea cheesecake fresh, refrigerate it right after it cools. Wrap the cheesecake tightly in plastic wrap or cover it with a lid. This helps prevent it from drying out. Always store it in the fridge at a temperature below 40°F (4°C) to keep it safe.
If you want to save some for later, you can freeze it. First, slice the cheesecake into wedges. Wrap each slice in plastic wrap, then place them in a freezer bag. Be sure to label the bag with the date. This way, you can enjoy a piece anytime!
Shelf Life
Your cheesecake will stay fresh in the fridge for about 5-7 days. After that, it may start to lose its flavor and texture. Always check for signs of spoilage. If you see any mold or if it smells off, it's best to toss it.
When frozen, the cheesecake can last for about 2-3 months. However, the texture may change once it thaws. Always thaw it in the fridge for best results. Look for any ice crystals or changes in texture that might indicate spoilage. If it seems off, don’t eat it. Enjoy your matcha green tea cheesecake while it’s at its best!
FAQs
Common Questions
Can I use a different type of crust? Yes, you can use other crusts. Almond flour or Oreo crumbs work well. You can even try a nut crust for a gluten-free option. Just make sure it holds together well. A thicker crust may need a longer baking time.
How do I know when the cheesecake is done? The cheesecake is done when the center is just set but still jiggles slightly. It will firm up as it cools. You want to avoid overbaking, as this can cause cracks. A gentle shake of the pan helps you check for doneness.
Preparation Tips
Can I make this cheesecake in advance? Absolutely! You can make this cheesecake a day or two ahead. Just store it in the fridge. This allows the flavors to blend well. The longer it sits, the better it tastes!
What’s the best way to slice a cheesecake? To slice cheesecake perfectly, use a sharp knife. Dip the knife in hot water before each cut. Wipe it clean after each slice. This keeps the edges neat and clean. It makes your cheesecake look even more appealing.
This guide covers making a delicious matcha cheesecake step by step. We explored key ingredients, from the rich filling to the crunchy crust. You also learned tips for perfect textures and serving ideas. Variations offer new flavors, and proper storage ensures freshness. Whether for a party or a quiet night, this cheesecake is a treat. Enjoy creating your masterpiece and sharing it with others. Your kitchen adventure awaits!