Lemon-Dill Chickpea Wraps Fresh and Flavorful Recipe

WANT TO SAVE THIS RECIPE?

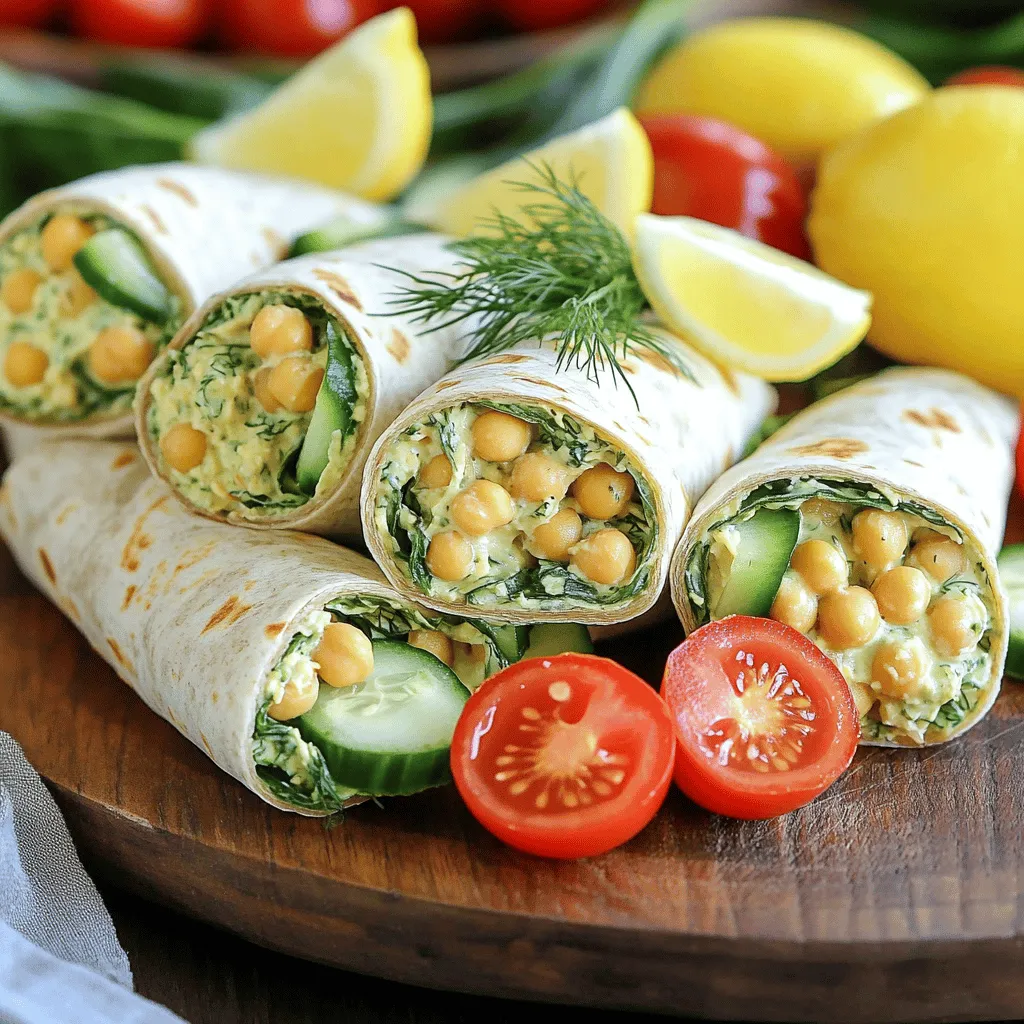
Looking for a fresh and tasty dish? Try these Lemon-Dill Chickpea Wraps! Packed with flavor and nutrition, they’re perfect for lunch or a light dinner. With just a few easy steps, you can whip these up in no time. I’ll guide you through the simple ingredients and preparation steps, ensuring your wraps turn out delicious every time. Let’s dive in and discover how to make this vibrant meal!

Ingredients

Detailed Ingredient List

– 1 can (15 oz) chickpeas, drained and rinsed

– 1/4 cup Greek yogurt

– 1 tablespoon tahini

– 1 tablespoon fresh lemon juice

– Zest of 1 lemon

– 1 tablespoon fresh dill, chopped

– 1 clove garlic, minced

– Salt and pepper to taste

– 4 large whole grain wraps

– 1 cup baby spinach

– 1 large cucumber, thinly sliced

– 1 bell pepper, thinly sliced

– Optional: Cherry tomatoes, halved

I love using chickpeas in this wrap. They provide a great source of plant protein. The Greek yogurt adds creaminess and tang, while tahini brings a lovely nutty flavor. Fresh lemon juice and zest brighten the dish. Dill gives it a fresh, herbaceous taste.

You can choose whole grain wraps for added fiber. Baby spinach adds a nice crunch. Sliced cucumber and bell pepper are perfect for texture and color. If you like, add cherry tomatoes for extra flavor.

Substitutions for Ingredients

If you are dairy-free, you can swap Greek yogurt for plant-based yogurt. For tahini, try almond butter or sunflower seed butter. You can also switch out the wraps. Try lettuce leaves or gluten-free wraps. Different greens like arugula or kale add unique tastes too.

Nutritional Information

Each serving of these wraps is low in calories yet high in protein and fiber. Chickpeas are amazing for heart health. They help keep you full and satisfied. Dill is not only tasty but also has health benefits. It may aid digestion and has antioxidants. Enjoy these wraps knowing you are eating well!

Step-by-Step Instructions

Preparation Steps

1. Mashing the chickpeas for texture

Start by taking a medium bowl. Add the drained chickpeas. Use a fork or a potato masher to mash them. Aim for a mix of smooth and chunky texture. This gives your wraps a nice bite.

2. Mixing the ingredients thoroughly

Once you mash the chickpeas, it’s time to add flavor. Add Greek yogurt, tahini, fresh lemon juice, lemon zest, chopped dill, and minced garlic. Sprinkle salt and pepper to taste. Mix well until it is creamy and combined.

Assembling the Wraps

1. How to layer the filling in the wrap

Grab a large whole grain wrap. Lay it flat on a clean surface. Scoop a generous amount of your chickpea mixture into the center. Spread it evenly but leave space at the edges for folding.

2. Folding techniques for optimal tightness

Next, add a handful of baby spinach on top. Then, add slices of cucumber and bell pepper. If you like, toss in some cherry tomatoes too. Fold in the sides of the wrap first, then roll it tightly from the bottom. Make sure all fillings stay inside.

Serving Suggestions

1. Cutting the wraps for presentation

To serve, cut each wrap in half diagonally. This makes them easy to hold and eat. Arrange them on a platter. A little fresh dill and lemon wedges on the side will look nice.

2. Suggested side dishes or dips

Serve your wraps with a side of your favorite dipping sauce. Hummus or tzatziki pairs well. You can also add a light salad for some crunch. Enjoy your fresh and flavorful Lemon-Dill Chickpea Wraps! For a full recipe, refer to the earlier section.

Tips & Tricks

Perfecting Your Chickpea Mixture

To make your chickpea mixture creamy, mash the chickpeas well. Use a fork or a potato masher. Leave some chunks for texture. Add Greek yogurt and tahini to enhance creaminess. The yogurt adds tang, while tahini gives richness. Adjust the salt and lemon juice for balance. Taste as you mix. You want a bright, fresh flavor.

Handling and Storing Leftovers

If you have wraps left, store them in an airtight container. Place parchment paper between layers to avoid sogginess. Keep the wraps in the fridge for up to three days. To maintain freshness, eat wraps within this time. If you notice any moisture, wrap them in a paper towel before storing.

Meal Prep Ideas

Make your wraps ahead for busy days. Prepare the chickpea mixture in advance and keep it in the fridge. You can assemble the wraps when you are ready to eat. For longer storage, freeze the chickpea mixture in portions. Just thaw it overnight in the fridge when needed. This way, you have a quick meal ready in no time. Check the full recipe for more details!

Variations

Customizing Fillings

You can change the fillings to fit your taste. Try adding different vegetables like carrots or radishes. Leafy greens like arugula or kale also work well. If you want more protein, add grilled chicken or roasted chickpeas. Spice it up with a sprinkle of cumin or smoked paprika. You can even add a dash of hot sauce for a kick. This flexibility makes these wraps fun and tasty.

Dietary Adjustments

If you want a vegan option, swap Greek yogurt for plant-based yogurt. This keeps the wraps creamy without using dairy. For those avoiding gluten, choose gluten-free wraps. Many brands offer great flavors and textures. Look for options made from rice or corn. This way, everyone can enjoy these wraps, no matter their diet.

Global Inspirations

You can give these wraps a twist from different cuisines. For a Mediterranean flair, add olives and feta cheese. This adds saltiness and depth. If you prefer an Asian vibe, mix in soy sauce and sesame seeds. These flavors create a unique, tasty experience. Feel free to experiment! Your Lemon-Dill Chickpea Wraps can become a world tour of flavors.

Storage Info

Best Practices for Refrigeration

You can store Lemon-Dill Chickpea Wraps in the fridge for up to three days. Keep them in an airtight container or wrap them tightly in plastic wrap. This will help maintain freshness. When reheating, use a skillet over medium heat. This method keeps the wrap crisp and warm. Avoid microwaving, as it can make the wrap soggy.

Freezing Instructions

To freeze assembled wraps, first wrap each one tightly in plastic wrap. Then place them in a freezer-safe bag. They can last up to three months in the freezer. When you’re ready to enjoy them, take the wraps out and thaw them in the fridge overnight. To reheat, use a skillet on medium heat until warmed through. This keeps the wraps nice and crispy.

Recognizing Shelf Life

Watch for signs of spoilage. If you notice any off smells, mold, or changes in color, it’s best to discard them. Always check the wraps before eating. For safe consumption, eat the wraps within three days if stored in the fridge or within three months if frozen. Enjoy your fresh and flavorful Lemon-Dill Chickpea Wraps! For the full recipe, refer to the earlier section.

FAQs

What are Lemon-Dill Chickpea Wraps?

Lemon-Dill Chickpea Wraps are fresh, tasty meals made with chickpeas, yogurt, and veggies. They burst with flavors of lemon and dill. The chickpeas provide a creamy base while the added veggies add crunch. Each bite is a mix of tangy, savory, and refreshing tastes. This dish is perfect for lunch or a light dinner. You can make them in just 15 minutes, making it an easy choice for busy days.

Can I make Lemon-Dill Chickpea Wraps ahead of time?

Yes, you can! To prep these wraps ahead, make the chickpea mixture and store it in the fridge. Keep the wraps separate until you are ready to eat. This keeps the wraps fresh and avoids sogginess. You can prepare the mixture a day in advance. Just assemble the wraps when you are ready to enjoy them.

Are Lemon-Dill Chickpea Wraps gluten-free?

Lemon-Dill Chickpea Wraps can be gluten-free. Simply choose gluten-free wraps or lettuce leaves instead. Many brands offer gluten-free options made from rice or corn. Always check the labels to be sure. The chickpea mixture is naturally gluten-free, so you can enjoy the flavors without worry.

How can I add protein to the wraps?

You can add protein to your wraps in several ways. Grilled chicken or tofu are great options. Both add flavor and extra nutrition. You can also mix in more legumes like black beans or lentils. These options keep the wraps filling and satisfying without losing the fresh taste.

Lemon-dill chickpea wraps are tasty, healthy, and easy to make. You learned how to prepare fresh ingredients, layer flavors, and customize your wraps. Don’t forget the tips for storing leftovers and meal prepping. Enjoy them now or save some for later. These wraps are perfect for quick meals or snacks. Explore variations and make them your own. Eating well can be simple and fun. Enjoy every bite!

- 1 can (15 oz) chickpeas, drained and rinsed - 1/4 cup Greek yogurt - 1 tablespoon tahini - 1 tablespoon fresh lemon juice - Zest of 1 lemon - 1 tablespoon fresh dill, chopped - 1 clove garlic, minced - Salt and pepper to taste - 4 large whole grain wraps - 1 cup baby spinach - 1 large cucumber, thinly sliced - 1 bell pepper, thinly sliced - Optional: Cherry tomatoes, halved I love using chickpeas in this wrap. They provide a great source of plant protein. The Greek yogurt adds creaminess and tang, while tahini brings a lovely nutty flavor. Fresh lemon juice and zest brighten the dish. Dill gives it a fresh, herbaceous taste. You can choose whole grain wraps for added fiber. Baby spinach adds a nice crunch. Sliced cucumber and bell pepper are perfect for texture and color. If you like, add cherry tomatoes for extra flavor. If you are dairy-free, you can swap Greek yogurt for plant-based yogurt. For tahini, try almond butter or sunflower seed butter. You can also switch out the wraps. Try lettuce leaves or gluten-free wraps. Different greens like arugula or kale add unique tastes too. Each serving of these wraps is low in calories yet high in protein and fiber. Chickpeas are amazing for heart health. They help keep you full and satisfied. Dill is not only tasty but also has health benefits. It may aid digestion and has antioxidants. Enjoy these wraps knowing you are eating well! 1. Mashing the chickpeas for texture Start by taking a medium bowl. Add the drained chickpeas. Use a fork or a potato masher to mash them. Aim for a mix of smooth and chunky texture. This gives your wraps a nice bite. 2. Mixing the ingredients thoroughly Once you mash the chickpeas, it's time to add flavor. Add Greek yogurt, tahini, fresh lemon juice, lemon zest, chopped dill, and minced garlic. Sprinkle salt and pepper to taste. Mix well until it is creamy and combined. 1. How to layer the filling in the wrap Grab a large whole grain wrap. Lay it flat on a clean surface. Scoop a generous amount of your chickpea mixture into the center. Spread it evenly but leave space at the edges for folding. 2. Folding techniques for optimal tightness Next, add a handful of baby spinach on top. Then, add slices of cucumber and bell pepper. If you like, toss in some cherry tomatoes too. Fold in the sides of the wrap first, then roll it tightly from the bottom. Make sure all fillings stay inside. 1. Cutting the wraps for presentation To serve, cut each wrap in half diagonally. This makes them easy to hold and eat. Arrange them on a platter. A little fresh dill and lemon wedges on the side will look nice. 2. Suggested side dishes or dips Serve your wraps with a side of your favorite dipping sauce. Hummus or tzatziki pairs well. You can also add a light salad for some crunch. Enjoy your fresh and flavorful Lemon-Dill Chickpea Wraps! For a full recipe, refer to the earlier section. To make your chickpea mixture creamy, mash the chickpeas well. Use a fork or a potato masher. Leave some chunks for texture. Add Greek yogurt and tahini to enhance creaminess. The yogurt adds tang, while tahini gives richness. Adjust the salt and lemon juice for balance. Taste as you mix. You want a bright, fresh flavor. If you have wraps left, store them in an airtight container. Place parchment paper between layers to avoid sogginess. Keep the wraps in the fridge for up to three days. To maintain freshness, eat wraps within this time. If you notice any moisture, wrap them in a paper towel before storing. Make your wraps ahead for busy days. Prepare the chickpea mixture in advance and keep it in the fridge. You can assemble the wraps when you are ready to eat. For longer storage, freeze the chickpea mixture in portions. Just thaw it overnight in the fridge when needed. This way, you have a quick meal ready in no time. Check the full recipe for more details! {{image_2}} You can change the fillings to fit your taste. Try adding different vegetables like carrots or radishes. Leafy greens like arugula or kale also work well. If you want more protein, add grilled chicken or roasted chickpeas. Spice it up with a sprinkle of cumin or smoked paprika. You can even add a dash of hot sauce for a kick. This flexibility makes these wraps fun and tasty. If you want a vegan option, swap Greek yogurt for plant-based yogurt. This keeps the wraps creamy without using dairy. For those avoiding gluten, choose gluten-free wraps. Many brands offer great flavors and textures. Look for options made from rice or corn. This way, everyone can enjoy these wraps, no matter their diet. You can give these wraps a twist from different cuisines. For a Mediterranean flair, add olives and feta cheese. This adds saltiness and depth. If you prefer an Asian vibe, mix in soy sauce and sesame seeds. These flavors create a unique, tasty experience. Feel free to experiment! Your Lemon-Dill Chickpea Wraps can become a world tour of flavors. You can store Lemon-Dill Chickpea Wraps in the fridge for up to three days. Keep them in an airtight container or wrap them tightly in plastic wrap. This will help maintain freshness. When reheating, use a skillet over medium heat. This method keeps the wrap crisp and warm. Avoid microwaving, as it can make the wrap soggy. To freeze assembled wraps, first wrap each one tightly in plastic wrap. Then place them in a freezer-safe bag. They can last up to three months in the freezer. When you're ready to enjoy them, take the wraps out and thaw them in the fridge overnight. To reheat, use a skillet on medium heat until warmed through. This keeps the wraps nice and crispy. Watch for signs of spoilage. If you notice any off smells, mold, or changes in color, it’s best to discard them. Always check the wraps before eating. For safe consumption, eat the wraps within three days if stored in the fridge or within three months if frozen. Enjoy your fresh and flavorful Lemon-Dill Chickpea Wraps! For the full recipe, refer to the earlier section. Lemon-Dill Chickpea Wraps are fresh, tasty meals made with chickpeas, yogurt, and veggies. They burst with flavors of lemon and dill. The chickpeas provide a creamy base while the added veggies add crunch. Each bite is a mix of tangy, savory, and refreshing tastes. This dish is perfect for lunch or a light dinner. You can make them in just 15 minutes, making it an easy choice for busy days. Yes, you can! To prep these wraps ahead, make the chickpea mixture and store it in the fridge. Keep the wraps separate until you are ready to eat. This keeps the wraps fresh and avoids sogginess. You can prepare the mixture a day in advance. Just assemble the wraps when you are ready to enjoy them. Lemon-Dill Chickpea Wraps can be gluten-free. Simply choose gluten-free wraps or lettuce leaves instead. Many brands offer gluten-free options made from rice or corn. Always check the labels to be sure. The chickpea mixture is naturally gluten-free, so you can enjoy the flavors without worry. You can add protein to your wraps in several ways. Grilled chicken or tofu are great options. Both add flavor and extra nutrition. You can also mix in more legumes like black beans or lentils. These options keep the wraps filling and satisfying without losing the fresh taste. Lemon-dill chickpea wraps are tasty, healthy, and easy to make. You learned how to prepare fresh ingredients, layer flavors, and customize your wraps. Don't forget the tips for storing leftovers and meal prepping. Enjoy them now or save some for later. These wraps are perfect for quick meals or snacks. Explore variations and make them your own. Eating well can be simple and fun. Enjoy every bite!

Lemon-Dill Chickpea Wraps

Discover the vibrant taste of Lemon-Dill Chickpea Wraps, a healthy and delicious meal you can whip up in just 15 minutes! Packed with protein-rich chickpeas, fresh veggies, and zesty flavors, these wraps are perfect for a quick lunch or a light dinner. Follow our easy recipe to bring this nutritious dish to your table and impress your family and friends. Click through to explore the detailed recipe and elevate your mealtime!

Ingredients
  

1 can (15 oz) chickpeas, drained and rinsed

1/4 cup Greek yogurt

1 tablespoon tahini

1 tablespoon fresh lemon juice

Zest of 1 lemon

1 tablespoon fresh dill, chopped

1 clove garlic, minced

Salt and pepper to taste

4 large whole grain wraps

1 cup baby spinach

1 large cucumber, thinly sliced

1 bell pepper, thinly sliced

Cherry tomatoes, halved (optional)

Instructions
 

In a medium bowl, mash the chickpeas using a fork or a potato masher, leaving some chunks for texture.

    Add the Greek yogurt, tahini, lemon juice, lemon zest, chopped dill, minced garlic, salt, and pepper to the mashed chickpeas. Mix until well combined and creamy.

      Take a whole grain wrap and lay it flat on a surface. Place a generous scoop of the chickpea mixture in the center of the wrap.

        Top the chickpea mixture with a handful of baby spinach, followed by slices of cucumber, bell pepper, and cherry tomatoes if using.

          Fold in the sides of the wrap, then roll it tightly from the bottom to form a wrap. Ensure all the fillings are secured inside.

            Repeat the process with the remaining wraps and fill them with the chickpea mixture and veggies.

              Cut the wraps in half diagonally for easy handling.

                Prep Time: 15 mins | Total Time: 15 mins | Servings: 4

                  - Presentation Tips: Arrange the wraps on a serving platter, and garnish with additional fresh dill and lemon wedges for a pop of color. Serve with a side of your favorite dipping sauce for an added flavor dimension.

                    WANT TO SAVE THIS RECIPE?

                    Leave a Comment

                    Recipe Rating