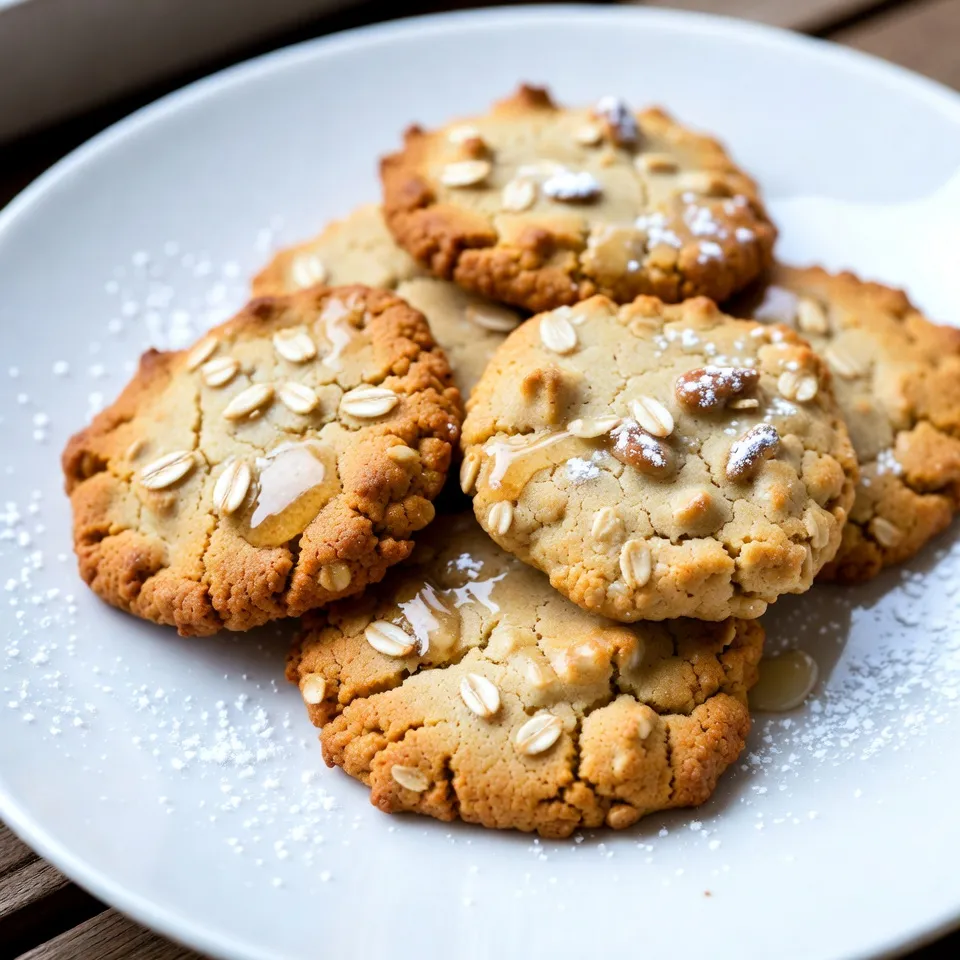
When you crave something sweet and wholesome, honey oatmeal cookies are the perfect treat. They are soft, chewy, and packed with flavor. In this guide, I’ll share simple ingredients and easy steps to make these cookies a hit at home. Plus, I'll give you tips for fun variations and healthier swaps. Get ready to enjoy a comforting and delicious cookie that warms the heart!
Why I Love This Recipe
- Perfectly Chewy Texture: These cookies have a delightful chewiness thanks to the rolled oats, making them a satisfying treat.
- Natural Sweetness: The use of honey and brown sugar provides a rich, natural sweetness that elevates the flavor profile.
- Customizable Add-ins: You can easily personalize these cookies by adding your favorite mix-ins, such as chocolate chips or nuts.
- Quick and Easy to Make: This recipe requires minimal prep time, making it perfect for a last-minute dessert.
Ingredients
Primary Ingredients for Honey Oatmeal Cookies
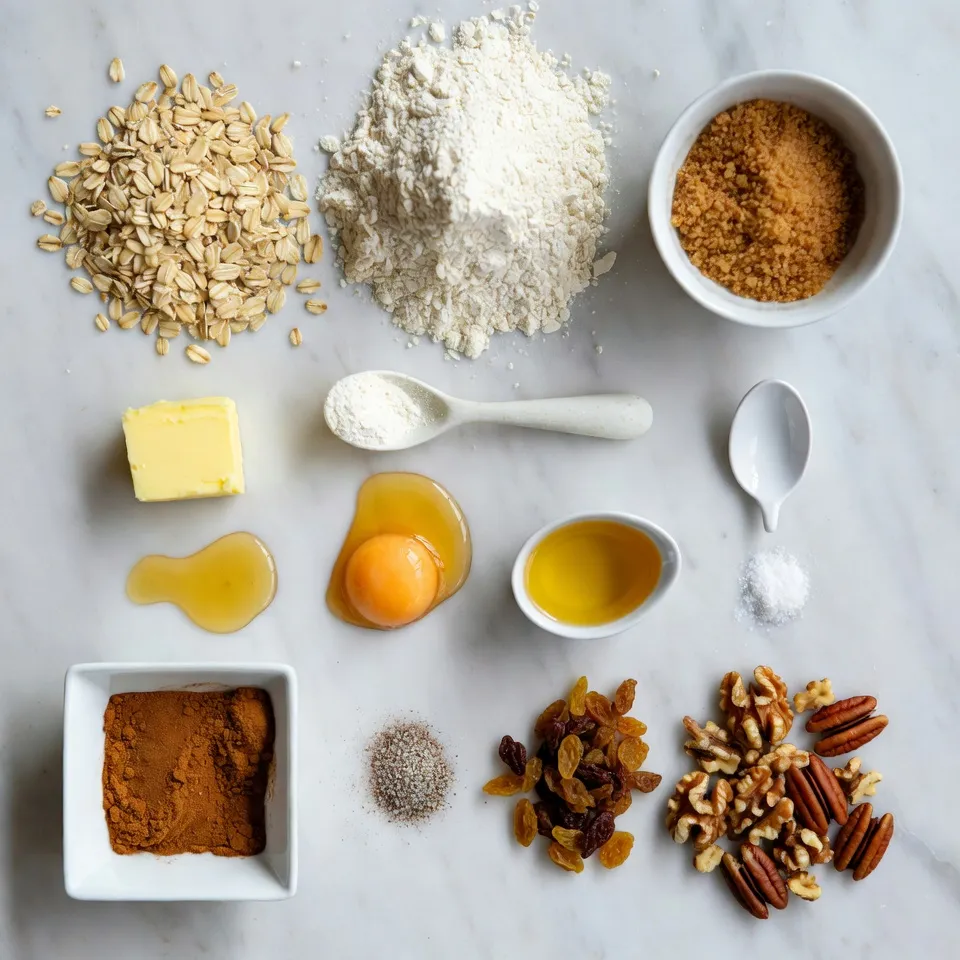
To make these tasty cookies, you need some key ingredients:
- 1 cup rolled oats
- 1 cup all-purpose flour
- ½ teaspoon baking soda
- ½ teaspoon cinnamon
- ¼ teaspoon salt
- ½ cup unsalted butter, softened
- ½ cup brown sugar, packed
- ¼ cup honey
- 1 large egg
- 1 teaspoon vanilla extract
These ingredients create a chewy texture. The oats give a hearty feel, while honey adds natural sweetness.
Optional Add-ins for Extra Flavor
You can make your cookies even better with some add-ins:
- ½ cup raisins or chocolate chips (optional)
- ½ cup chopped nuts (e.g., walnuts or pecans, optional)
Raisins bring a hint of chewiness, and nuts add a nice crunch. Chocolate chips make everything sweeter, and you can mix and match!
Substitutions and Dietary Adjustments
If you need substitutions, there are many options:
- Use gluten-free flour instead of all-purpose flour for a gluten-free version.
- Replace the egg with ¼ cup of applesauce for a vegan choice.
- Swap honey with maple syrup if you want a different flavor.
These changes allow you to make cookies fit your needs. Enjoy experimenting and find what works best for you!
Step-by-Step Instructions
Preparation Steps for the Dough
Start by gathering your ingredients. You need rolled oats, flour, baking soda, cinnamon, salt, butter, brown sugar, honey, an egg, and vanilla extract. If you want, add raisins, chocolate chips, or nuts.
1. Preheat your oven to 350°F (175°C). Line a baking sheet with parchment paper.
2. In a medium bowl, mix the oats, flour, baking soda, cinnamon, and salt. Stir these until they blend well.
3. In a large bowl, cream the softened butter and brown sugar. Beat until it looks smooth and fluffy.
4. Add honey, the egg, and vanilla extract. Mix these together till smooth.
5. Gradually add the dry mix. Stir just until combined. Do not overmix.
6. If you choose, fold in raisins, chocolate chips, or nuts.
Baking Instructions and Tips
1. Use a tablespoon to scoop portions of the dough. Place them on the baking sheet. Leave space between each scoop for spreading.
2. Bake for 10-12 minutes. Watch for the edges to turn golden brown. The centers can look soft but will firm up as they cool.
3. For best results, rotate your baking sheet halfway through. This helps cookies bake evenly.
Cooling and Serving Suggestions
1. When done, take the cookies out of the oven. Let them cool on the baking sheet for 5 minutes.
2. After that, transfer them to a wire rack. Allow them to cool completely.
3. Serve these cookies on a pretty plate. Drizzle honey on top for extra sweetness. A sprinkle of powdered sugar also looks nice. Enjoy your warm and chewy cookies!
Tips & Tricks
Achieving the Perfect Cookie Texture
To make the best honey oatmeal cookies, focus on the butter. Use softened butter, not melted. Creaming the butter and brown sugar helps create a light texture. Don't overmix your dough. Mix until just combined for chewy cookies. Bake them until the edges are golden but the centers seem soft. They will firm up as they cool.
Common Baking Mistakes to Avoid
One mistake is not preheating the oven. Always preheat to 350°F (175°C). This helps the cookies bake evenly. Another issue is using the wrong flour. All-purpose flour works best for this recipe. Lastly, avoid crowding the baking sheet. Leave space between cookies to allow for spreading.
How to Store Leftover Cookies
Store leftover cookies in an airtight container. They stay fresh for about a week. If you want to keep them longer, freeze them. Just place them in a freezer-safe bag. To thaw, leave them at room temperature for a few hours. Enjoy your cookies soft and chewy again!
Pro Tips
- Chill the Dough: For even chewier cookies, refrigerate the dough for at least 30 minutes before baking. This helps to prevent spreading and enhances the flavor.
- Use Fresh Ingredients: Ensure your baking soda and spices are fresh for the best flavor and texture. Old ingredients can lead to flat or bland cookies.
- Customize Your Add-ins: Feel free to experiment with various mix-ins like dried fruits, seeds, or different types of chocolate to suit your taste preferences.
- Perfect Storage: Store cookies in an airtight container at room temperature for up to a week. For longer freshness, freeze them in a single layer and transfer to a container once solid.
Variations
Healthier Substitutions for Ingredients
You can make these cookies healthier with some simple swaps. Instead of all-purpose flour, try using whole wheat flour. This adds fiber and nutrients. You can also replace some butter with unsweetened applesauce. This change cuts fat and adds moisture. Using less brown sugar can also help. Try just a third of a cup to reduce sugar while still keeping sweetness.
Flavor Variations with Different Add-ins
Add-ins can change the flavor of your cookies in fun ways. Instead of raisins, try dried cranberries or cherries for a tart touch. For a nutty flavor, use chopped almonds or pecans. You can also mix in dark chocolate chips for a rich taste. If you want a spice kick, add a pinch of nutmeg or ginger. These add-ins make each batch unique and fun to explore.
Seasonal Twists for Honey Oatmeal Cookies
Seasonal changes inspire great variations. In fall, add pumpkin spice and chopped apples for a cozy vibe. During winter, mix in peppermint chips for a festive flair. In the summer, fresh berries can give a bright burst of flavor. These seasonal twists let you enjoy honey oatmeal cookies all year round. Each season brings a new taste adventure!
Nutritional Information
Caloric Breakdown of Each Cookie
Each Honey Oatmeal Cookie has about 100 calories. This number can change based on the add-ins you choose. If you use chocolate chips or nuts, the calories may go up a bit. To keep track, you can divide the total calories by the number of cookies you bake.
Health Benefits of Ingredients Used
These cookies have oats, which are good for heart health. Oats can help lower bad cholesterol. Honey gives a natural sweetness and has antioxidants. It can also help soothe a sore throat. Brown sugar adds flavor but is less processed than white sugar. Using nuts can add healthy fats and protein, making the cookies more filling.
Tips for Reducing Sugar and Calories
You can cut sugar by using less brown sugar or honey. Replace some of the sugar with mashed bananas or applesauce. This change keeps cookies moist and sweet. You can also try using whole wheat flour for more fiber. If you skip the raisins or chocolate chips, you lower the calories too.
FAQs
How can I make Honey Oatmeal Cookies vegan?
To make these cookies vegan, swap the butter for a plant-based option. Use coconut oil or vegan butter. Replace the egg with a flax egg. To make a flax egg, mix one tablespoon of ground flaxseed with two and a half tablespoons of water. Let it sit for five minutes until it thickens. You can still use honey, but for a fully vegan cookie, substitute it with maple syrup or agave nectar.
What can I use instead of eggs in this recipe?
If you want to skip the eggs, use a flax egg or applesauce. A quarter cup of unsweetened applesauce works great in place of one egg. You can also use mashed banana or yogurt as alternatives. Each option adds moisture and keeps your cookies chewy.
Can I freeze Honey Oatmeal Cookies?
Yes, you can freeze these cookies! After baking, let them cool completely. Place the cookies in an airtight container or a freezer bag. They will last for about three months. To enjoy later, thaw them overnight in the fridge or microwave them for a few seconds. They will taste fresh and delightful!
In this article, we explored how to make delicious honey oatmeal cookies. We covered key ingredients, step-by-step instructions, and tips for success. You can try different flavors and healthier swaps to suit your taste. Remember to avoid common mistakes for the best texture. Finally, enjoy these cookies fresh or store them well for later. Each bite offers great taste and health benefits that you can feel good abou