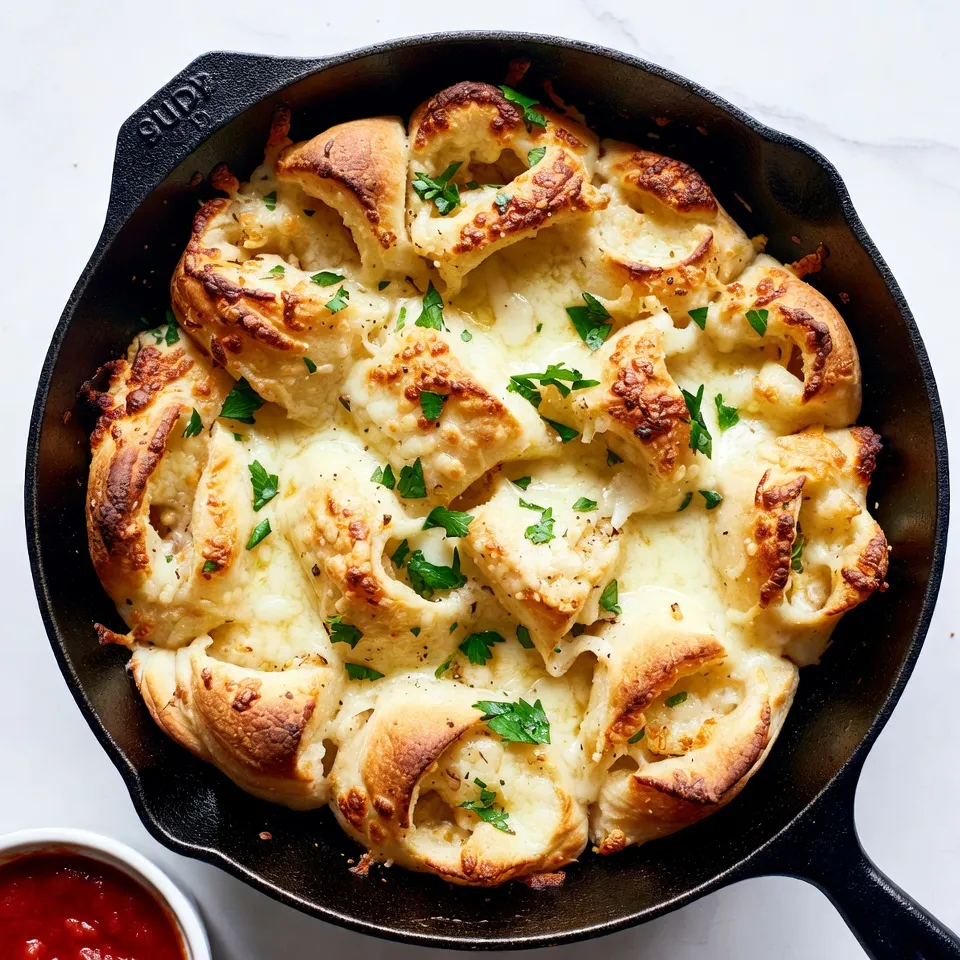
Are you ready to elevate your snack game? Garlic Parmesan Pull-Apart Bread is simple to make and oh-so-tasty! I’ll walk you through each step, from gathering ingredients to the perfect golden crust. Whether you're hosting a party or just craving comfort food, this recipe is sure to impress. Let’s get started and make delicious pull-apart bread together!
Why I Love This Recipe
- Easy to Make: This recipe is simple and requires minimal ingredients, making it perfect for any skill level.
- Flavorful Indulgence: The combination of garlic and Parmesan creates a rich, savory flavor that’s irresistible.
- Perfect for Sharing: Pull-apart bread is fun to eat and is great for gatherings, making it a social dish.
- Versatile Pairing: This bread pairs wonderfully with soups, salads, or as a snack with marinara sauce.
Ingredients
List of Ingredients
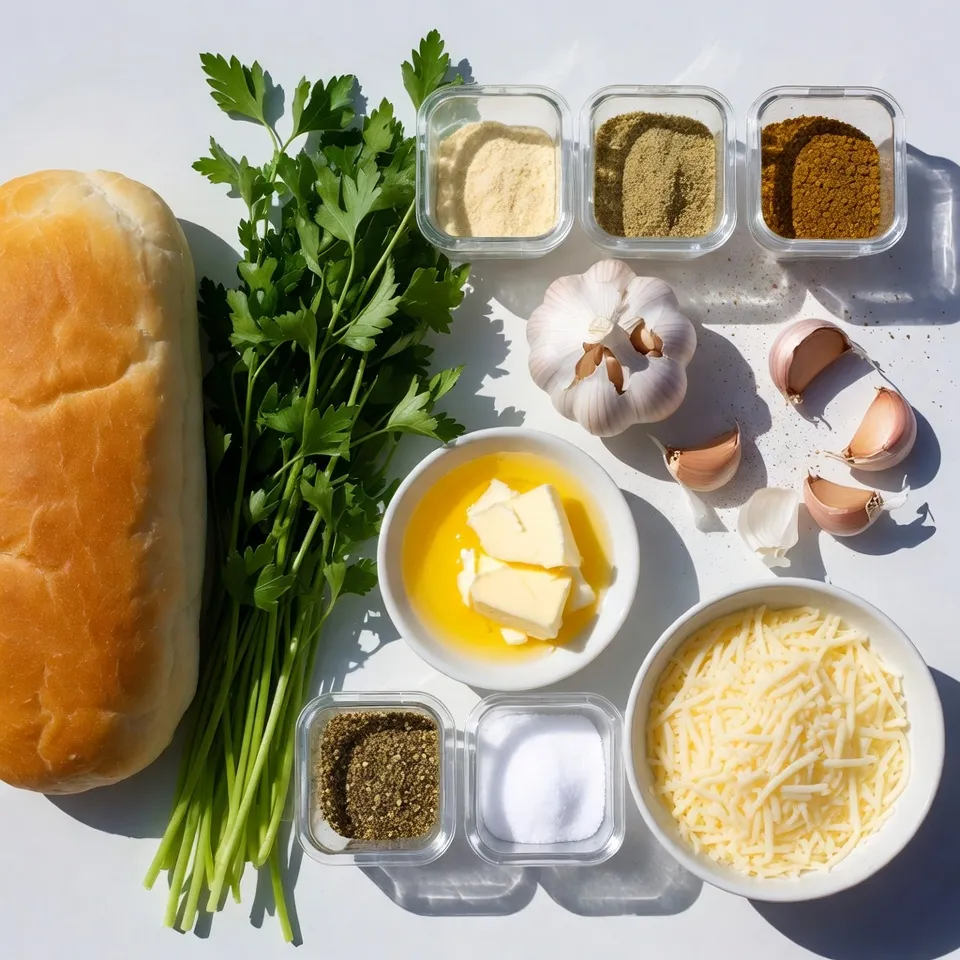
To make Garlic Parmesan Pull-Apart Bread, you will need:
- 1 loaf of fresh dough (store-bought or homemade)
- 4 tablespoons unsalted butter, melted
- 4 cloves garlic, minced
- 1 cup shredded Parmesan cheese
- 2 tablespoons fresh parsley, chopped
- 1 teaspoon garlic powder
- 1 teaspoon Italian seasoning
- ½ teaspoon salt
- ½ teaspoon black pepper
Ingredient Substitutions
You can swap out some ingredients if needed. Use olive oil instead of butter for a vegan option. If you don’t have fresh parsley, dried parsley works too. You can also try other cheeses like mozzarella or cheddar for a different flavor. For a kick, add red pepper flakes or use garlic salt instead of regular salt.
Recommended Tools for Preparation
To make this bread, you will need a few tools:
- A rolling pin for flattening the dough
- A sharp knife or pizza cutter for cutting the dough
- A mixing bowl for the garlic butter
- A 9x5-inch loaf pan or a cast-iron skillet for baking
- A kitchen towel to cover the dough while it rises
These tools will help you prepare the bread easily and keep things neat. Enjoy cooking!
Step-by-Step Instructions
Preparation of the Dough
Start by preheating your oven to 375°F (190°C). Grab a 9x5-inch loaf pan or a cast-iron skillet and grease it well. If you use store-bought dough, roll it out on a floured surface. Cut the dough into 1-inch squares. Make sure they are even for nice cooking.
Making the Garlic Butter Mixture
In a small bowl, melt 4 tablespoons of unsalted butter. Add in 4 cloves of minced garlic, 1 teaspoon of garlic powder, 1 teaspoon of Italian seasoning, ½ teaspoon of salt, and ½ teaspoon of black pepper. Mix it all well until combined. This mixture adds a great flavor to the bread.
Assembling the Pull-Apart Bread
Now, take each square of dough and dip it into the garlic butter mixture. Make sure all sides get well coated. Start stacking the buttered squares in your greased pan. As you stack, sprinkle shredded Parmesan cheese and chopped parsley between the layers. Keep going until you use all the dough. Drizzle any leftover garlic butter on top and add more Parmesan cheese. Cover the pan with a clean towel and let it rise for 20-30 minutes. After that, bake in the oven for 25-30 minutes. The top should be golden brown. When you tap it, it should sound hollow. Let it cool slightly, then pull apart the pieces and enjoy!
Tips & Tricks
Best Practices for Baking
For the best results, always preheat your oven. A hot oven helps the bread rise well. Use good quality ingredients. Fresh dough makes a big difference in taste. Grease your pan or skillet well. This helps the bread come out easily. I recommend using a 9x5-inch loaf pan or a cast-iron skillet. Both work great for this recipe.
How to Achieve a Golden Brown Crust
To get a nice golden crust, brush the top with extra garlic butter before baking. This adds flavor and helps with browning. Bake at 375°F (190°C) for 25-30 minutes. Keep an eye on the bread. If it browns too fast, you can cover it with foil. The bread is done when it sounds hollow when tapped.
Storing Leftovers Safely
If you have leftovers, let the bread cool first. Place it in an airtight container. You can keep it at room temperature for up to two days. For longer storage, wrap it in foil and freeze it. When you want to enjoy it again, just reheat in the oven. This helps keep the crust crispy.
Pro Tips
- Use Fresh Ingredients: For the best flavor, use fresh garlic and high-quality Parmesan cheese. This will enhance the overall taste of the bread.
- Experiment with Herbs: Feel free to add other herbs like thyme or oregano to the garlic butter mixture for additional flavor profiles.
- Let It Rise: Allowing the dough to rise properly before baking is crucial for achieving a light and fluffy texture. Don't rush this step!
- Serve Immediately: This bread is best served warm right out of the oven. If you have leftovers, reheat them in the oven for a few minutes before serving.
Variations
Cheesy Garlic Pull-Apart Bread Ideas
You can make this bread even cheesier! Try adding mozzarella or cheddar cheese. Layer it between the dough squares for a gooey texture. You can use a blend of cheeses to mix flavors. For a spicy kick, add pepper jack cheese. This will give your bread a fun twist.
Herbs and Spices Customization
Fresh herbs can change the flavor a lot. Try adding rosemary or thyme with the parsley. These herbs give a nice aroma and depth. You can also use dried herbs if you don’t have fresh ones. Experiment with different spice blends to find your favorite mix.
Adding Ingredients for Extra Flavor
Want to add more flavor? Consider adding cooked bacon bits or sun-dried tomatoes. Both add a savory taste to the bread. For a sweet note, try adding caramelized onions. You can even toss in some olives for a Mediterranean touch. Mix and match to create your perfect pull-apart bread!
Storage Info
How to Store Garlic Parmesan Pull-Apart Bread
To keep your Garlic Parmesan Pull-Apart Bread fresh, wrap it in plastic wrap. Place the wrapped bread in an airtight container. This helps keep moisture in and prevents air from getting in. Store it at room temperature for up to two days. If you want it to last longer, refrigeration is an option, but it may dry out.
Reheating Instructions
When it’s time to enjoy your bread again, preheat your oven to 350°F (175°C). Remove the bread from any wrapping. Wrap it in foil to keep it soft. Bake for about 10-15 minutes until warm. If you like a crispy crust, leave the foil off for the last few minutes. You can also reheat it in a microwave, but the bread may become chewy. Heat it for 15-20 seconds at a time.
Freezing for Long-Term Storage
For long-term storage, freezing is the best choice. Wrap the cooled bread tightly in plastic wrap. Then, place it in a freezer-safe bag or container. Label it with the date so you remember when you made it. You can freeze the bread for up to three months. To enjoy, let it thaw in the fridge overnight. Then, reheat it in the oven as mentioned above.
FAQs
Can I use store-bought dough for this recipe?
Yes, you can use store-bought dough. It saves time and effort. Look for fresh dough in the fridge section. You can also find frozen dough, but let it thaw first. The results will still be tasty and easy to pull apart.
How can I make this recipe ahead of time?
You can prepare this recipe ahead in a few steps. First, assemble the bread as directed. Then, cover it and place it in the fridge. You can keep it there for up to 24 hours. When ready, let it rise for about 30 minutes at room temperature before baking. This way, you’ll have fresh bread when you need it!
What can I serve with Garlic Parmesan Pull-Apart Bread?
This bread pairs well with many dishes. Here are some ideas:
- Marinara sauce: Perfect for dipping.
- Soup: Try it with tomato or minestrone.
- Salad: A fresh green salad adds balance.
- Grilled meats: Serve alongside chicken or steak for a feast.
These tasty options make your meal even better!
This blog post covered how to make Garlic Parmesan Pull-Apart Bread from start to finish. You learned about the key ingredients, helpful tools, and step-by-step instructions. I shared tips for baking, achieving a perfect crust, and storing leftovers. Plus, we explored fun variations to make this bread your own.
Remember, cooking is about enjoying the process and creating delicious food. Now it’s time to try this recipe and impress your friends and family! Happy bakin