Banana Pudding Cheesecake Bars: A No-Bake Dream Dessert
Imagine the moment when your spoon glides through a luscious layer of creamy, velvety cheesecake, only to uncover the nostalgic taste of banana pudding beneath. This is the magic of Banana Pudding Cheesecake Bars, a treat that combines two of the most beloved desserts into one incredible, no-bake masterpiece. Picture yourself savoring each bite, as the creamy topping melts in your mouth and the aromatic banana essence wafts through the air, leaving you yearning for more.
Growing up, banana pudding was a staple at every family gathering. The rich, sweet aroma would fill the kitchen, signaling that something special was about to be served. Marrying those cherished memories with the sophisticated allure of cheesecake, Banana Pudding Cheesecake Bars bring a new twist to an old favorite. This recipe is close to my heart, as it merges the warmth of family traditions with the excitement of creating something uniquely delicious.
What Makes Banana Pudding Cheesecake Bars Special
These Banana Pudding Cheesecake Bars are more than just a dessert; they're a celebration of flavor and ease. Here are a few reasons why you'll fall in love with this recipe:
- No-Bake Simplicity: Perfect for hot summer days when you’d rather not turn on the oven, these bars set beautifully in the fridge.
- Quick and Easy: With just 20 minutes of prep time, this recipe is a lifesaver for last-minute gatherings or when you're short on time.
- Budget-Friendly: Utilizing simple, readily available ingredients, this dessert won’t break the bank but will impress any crowd.
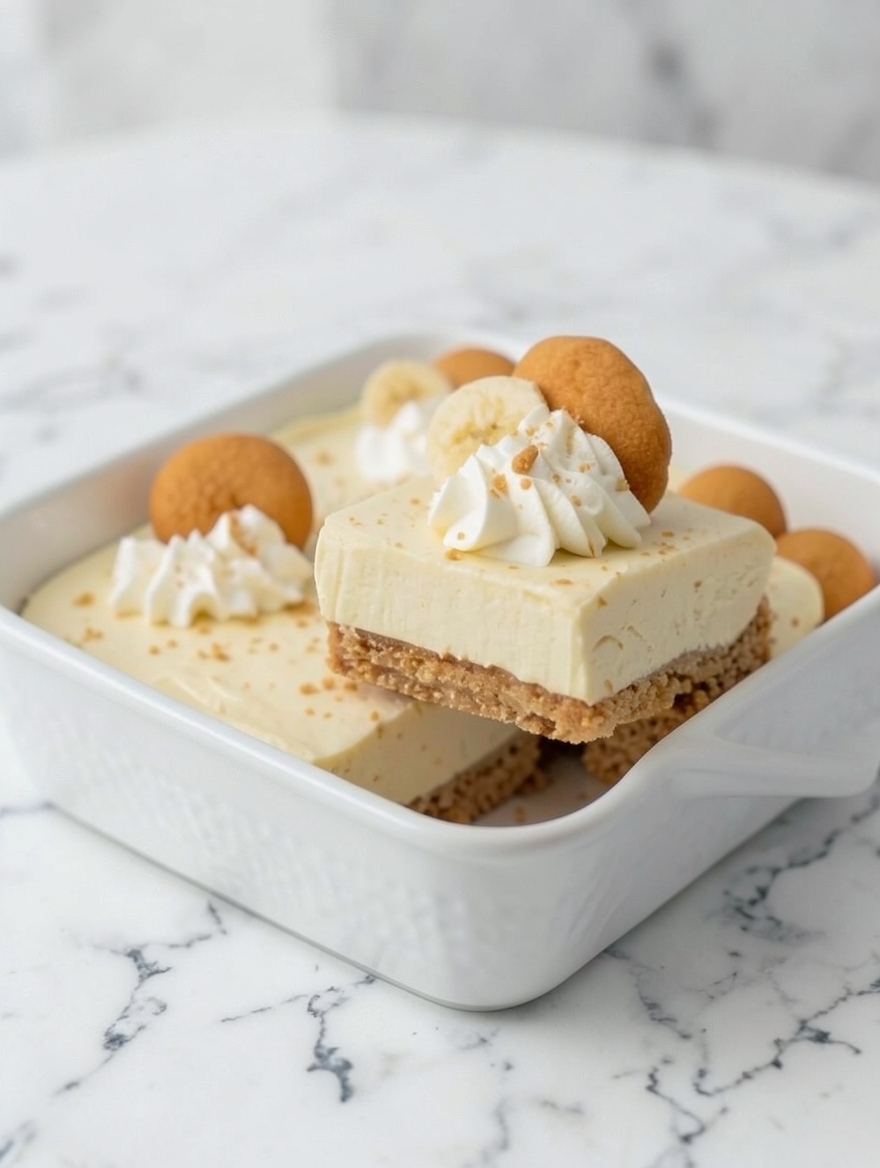
- Impressive Presentation: Garnished with whipped cream, banana slices, and Nilla wafers, these bars look as good as they taste.
Ingredient Breakdown
Key Ingredients
- Nilla wafer crumbs: These form the base crust, providing a crispy, buttery foundation that complements the creamy filling.
- Banana pudding mix: Infuses the dessert with that classic banana flavor we all adore, making each bite a nostalgic delight.
- Heavy whipping cream: Adds richness and stability to the cheesecake layer, ensuring the perfect creamy texture.
- Cream cheese: The star of the cheesecake layer, it brings a tangy creaminess that balances the sweetness of the pudding.
Substitutions and Tips
- Gluten-Free Option: Substitute regular Nilla wafers with gluten-free cookies.
- Dairy-Free Variation: Use dairy-free cream cheese and coconut cream instead of heavy whipping cream.
- Selecting Ingredients: Opt for ripe bananas if you're adding fresh slices; their natural sweetness will enhance the dish.
Step-by-Step Tips for Success
Creating the Perfect Crust
When mixing the Nilla wafer crumbs with melted butter, ensure that the mixture resembles wet sand. Press it firmly into the pan to form a solid base. A flat-bottomed glass works wonders for even compression.
Smooth Cheesecake Layer
Beat the cream cheese until completely smooth before adding other ingredients. This prevents lumps and ensures a silky texture. Gradually add the heavy whipping cream and beat until the mixture is fluffy and light.
Refrigeration Tips
Allow the bars to chill for at least 4 hours. This time is crucial for the layers to set properly. Overnight refrigeration is even better for firmer bars.
Variations & Customizations
Flavor Tweaks
- Chocolate Drizzle: Add a drizzle of melted chocolate over the bars before serving for a rich, decadent twist.
- Nutty Crunch: Sprinkle crushed pecans or walnuts over the top for added texture and flavor.
- Citrus Zest: Add a hint of lemon or lime zest to the cream cheese mixture for a refreshing citrus note.
Healthy Adjustments
- Reduced Sugar: Use a sugar-free banana pudding mix and a low-calorie sweetener instead of powdered sugar.
- Lower Fat: Substitute full-fat cream cheese with a reduced-fat version.
Serving Suggestions
For a complete dessert experience, serve Banana Pudding Cheesecake Bars with a side of fresh fruit or a scoop of vanilla ice cream. When plating, cut the bars into neat squares and arrange them on a decorative platter.
Garnish Ideas
- Whipped Cream: A dollop of freshly whipped cream adds a touch of elegance and extra creaminess.
- Banana Slices: Top with fresh banana slices for an added burst of flavor and color.
- Nilla Wafer Halves: Press halves of Nilla wafers into the top as a nod to the delicious crust below.
Storage & Meal Prep
These bars can be stored in the refrigerator for up to 5 days. Cover them tightly with plastic wrap or store in an airtight container to maintain freshness. For longer storage, freeze the bars for up to 2 months. Thaw overnight in the refrigerator before serving.
Reheating Instructions
While these bars are best served cold, if you prefer them slightly warm, allow them to sit at room temperature for 10-15 minutes before serving.
Nutritional Benefits
While Banana Pudding Cheesecake Bars are an indulgent treat, they contain some beneficial ingredients. Bananas are a great source of potassium, which supports heart health, while the dairy provides calcium and protein. Opting for a lower-sugar or reduced-fat version can make this dessert a more guilt-free choice.
FAQ Section
Can I make these bars ahead of time?
Absolutely! These bars can be made a day in advance and stored in the refrigerator, making them perfect for stress-free entertaining.
What can I use instead of Nilla wafers for the crust?
For a different flavor, try using graham crackers or digestive biscuits. For a gluten-free option, select a gluten-free cookie that you enjoy.
Can I use instant pudding instead of regular pudding mix?
Yes, instant banana pudding mix works perfectly in this recipe and helps cut down on preparation time.
How can I ensure the cheesecake layer is smooth?
Be sure to beat the cream cheese until it's completely lump-free before adding other ingredients. Using room temperature cream cheese also aids in achieving a smooth consistency.
Is there a way to make this dessert vegan?
Yes, substitute the cream cheese with a vegan alternative, use coconut cream instead of heavy cream, and choose a vegan pudding mix.
Whether you're looking to impress guests or simply indulge in a delicious treat, Banana Pudding Cheesecake Bars are a simple and rewarding choice. Enjoy the fusion of flavors and the joy of sharing this delightful dessert with loved ones!