If you crave a rich, chocolate treat but want to skip the sugar, you’re in luck! I’m excited to share my easy recipe for decadent sugar-free chocolate mousse. This smooth dessert satisfies your chocolate cravings without the guilt. Using simple ingredients and straightforward steps, you can create a delightful dessert that everyone will love. Let’s dive in and make this scrumptious treat together!
Why I Love This Recipe
- Indulgent Flavor: This mousse is rich and creamy, offering a deliciously decadent chocolate experience without the sugar.
- Simple Ingredients: Made with just a few pantry staples, this recipe is easy to whip up at any time.
- Perfect for Special Occasions: Its elegant presentation makes it an ideal dessert for parties or celebrations.
- Customizable Sweetness: You can adjust the sweetness to your liking, making it suitable for various dietary preferences.
Ingredients
Main Ingredients for Chocolate Mousse
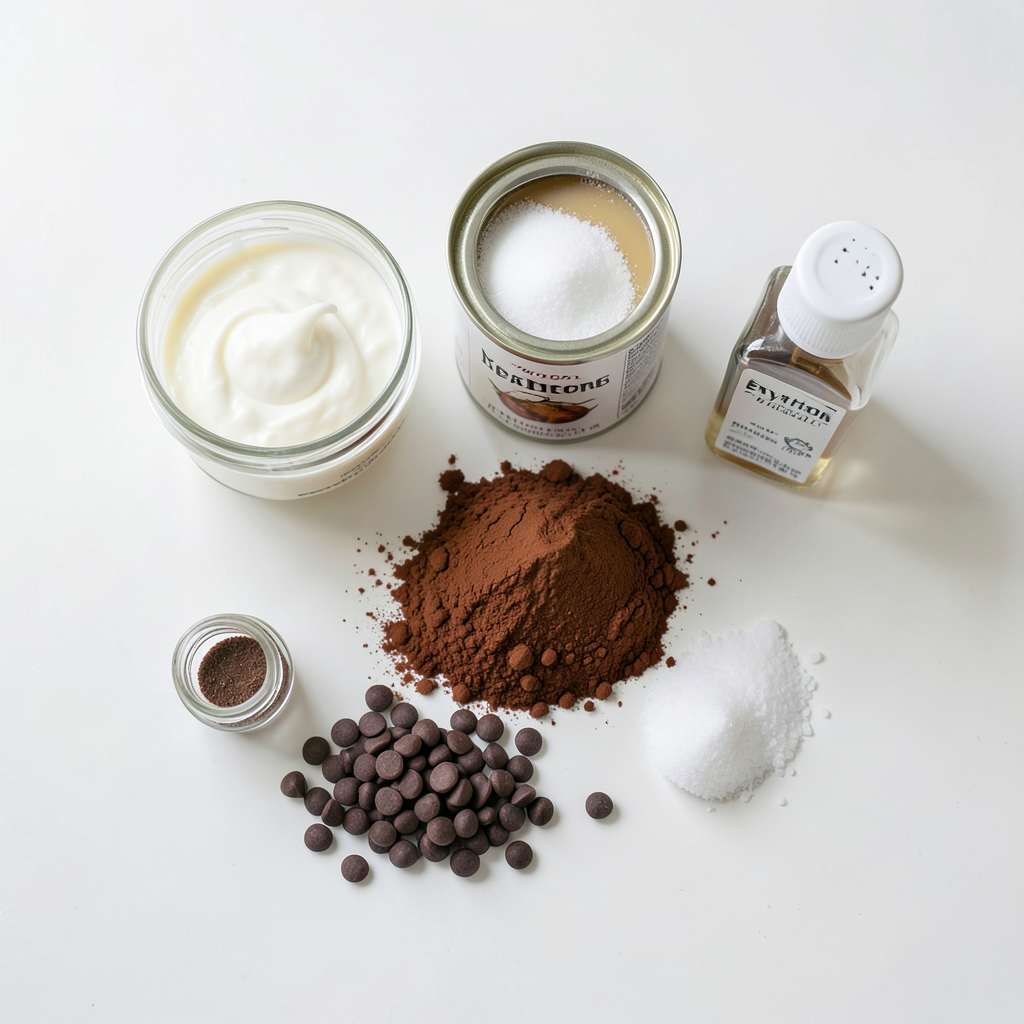
To make this decadent sugar-free chocolate mousse, you need a few key items:
- 1 cup heavy whipping cream
- 1 cup coconut milk (full fat)
- 1/3 cup unsweetened cocoa powder
- 1/2 cup sugar-free chocolate chips (or chopped sugar-free chocolate)
- 1 teaspoon vanilla extract
- Pinch of salt
These ingredients create a rich base for your mousse. The heavy cream adds a nice texture, while the coconut milk gives it a creamy feel. The cocoa powder and chocolate chips bring in that deep chocolate flavor, making it truly decadent.
Optional Ingredients for Added Sweetness
If you like your mousse a little sweeter, you can add:
- 2 tablespoons erythritol or any preferred sugar substitute
This option is great for those who want more sweetness without the sugar. Adjust it to your taste. Remember, you can always add a bit more, but you can't take it out once mixed!
Substitutions and Alternatives
You might not have all these items at home. Here are some easy swaps:
- Coconut milk: Use almond milk or cashew milk for a lighter touch.
- Heavy cream: Try whipped coconut cream for a dairy-free option.
- Sugar-free chocolate chips: You can use dark chocolate if you don't mind a little sugar.
These substitutions can help you make the mousse fit your needs while keeping it delicious!
Step-by-Step Instructions
Preparing the Chocolate Mixture
First, you need to heat the coconut milk. Pour one cup of coconut milk into a medium saucepan. Set the heat to medium. You want it to simmer, but not boil. This takes about three to five minutes. Once it's simmering, take the saucepan off the heat. Now, add half a cup of sugar-free chocolate chips. Stir well until they melt. Mix until the chocolate is smooth. This step gives your mousse its rich flavor.
Whipping the Cream
Next, grab a mixing bowl and pour in one cup of heavy whipping cream. Use an electric mixer for this part. Beat the cream on high speed. Watch for soft peaks to form. This means you have whipped it just right. You want it to be light and fluffy. Be careful not to overbeat. If you do, it can turn grainy, and we want smooth mousse!
Combining Ingredients and Setting
Now, it's time to bring everything together. Gently fold the melted chocolate mixture into the whipped cream. Use a spatula and be gentle. This keeps the air in the cream. Once combined, add one-third cup of unsweetened cocoa powder. Don’t forget the teaspoon of vanilla extract and a pinch of salt. If you want extra sweetness, add two tablespoons of erythritol. Fold just until combined; you want it smooth and creamy.
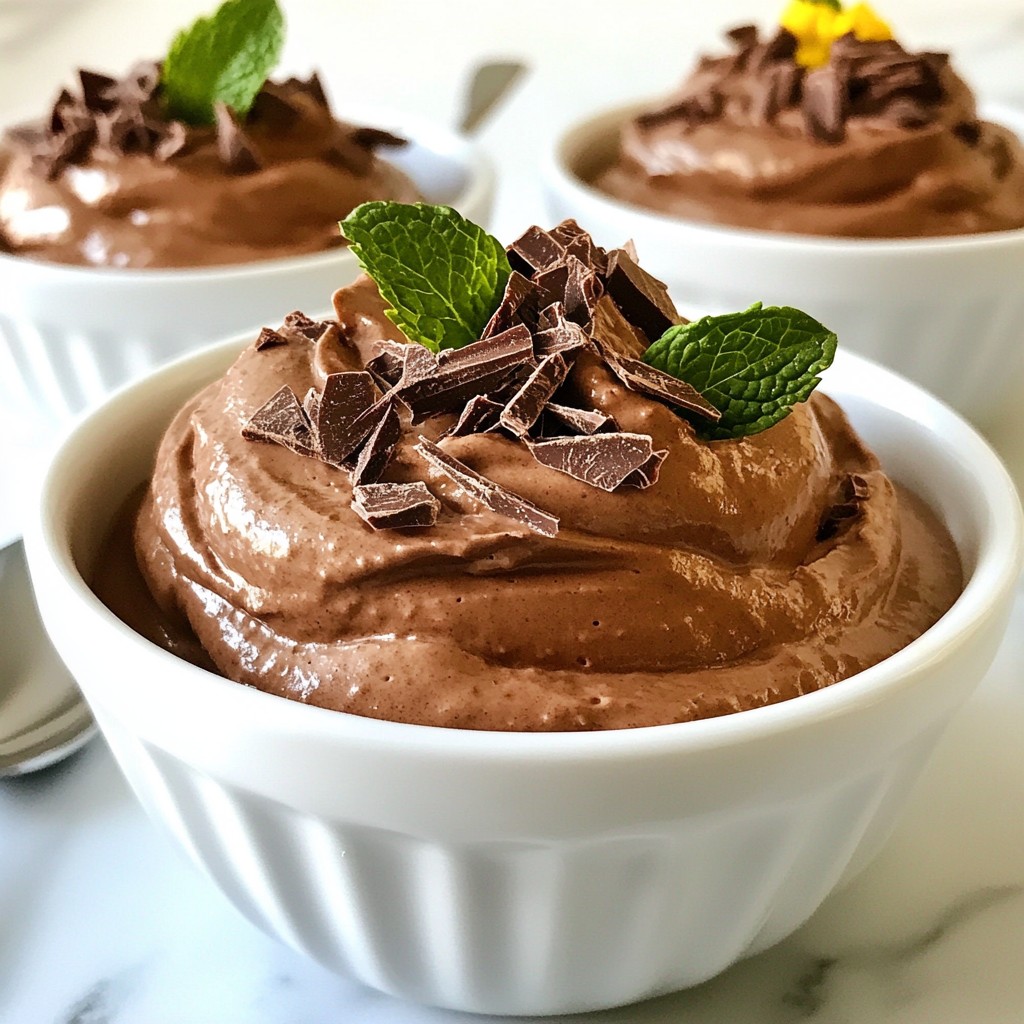
Finally, spoon this rich mousse into serving bowls. Make sure they are pretty; it makes a difference! Cover them and place them in the fridge. Let them chill for at least two hours. This step helps the mousse set up nicely. Enjoy the delicious results!
Tips & Tricks
Achieving the Perfect Texture
To get a great texture in your mousse, you must whip the cream well. Use cold heavy whipping cream for the best results. Whip it until soft peaks form. This step gives your mousse a light and airy feel. When you fold in the chocolate mix, do it gently. This keeps the cream fluffy. If you overmix, your mousse may turn dense and heavy.
Storage Tips for Leftovers
If you have leftover mousse, store it in an airtight container. Keep it in the fridge for up to three days. If you want to enjoy it later, you can freeze it. Just make sure to use a freezer-safe container. Thaw it in the fridge before serving. The texture might change slightly, but it will still taste great.
Serving Suggestions for Presentation
To make your mousse look fancy, use nice serving bowls or glasses. You can add a few chocolate shavings on top. Fresh berries or a sprig of mint also add color and flavor. For a unique twist, try drizzling a little sugar-free caramel sauce on top. These small touches can impress your guests and make your dessert stand out.
Pro Tips
- Chill Your Tools: Before whipping the cream, chill your mixing bowl and beaters in the fridge for about 15 minutes. This helps the cream whip up faster and achieve a fluffy texture.
- Use High-Quality Chocolate: The flavor of your mousse largely depends on the quality of the chocolate you use. Opt for a high-quality sugar-free chocolate for a richer taste.
- Don't Overmix: When folding the chocolate mixture into the whipped cream, be gentle. Overmixing can deflate the air you’ve incorporated, resulting in a denser mousse.
- Experiment with Flavors: Feel free to add a pinch of cinnamon, espresso powder, or even a splash of orange extract for an extra layer of flavor in your mousse!
Variations
Dairy-Free Alternatives
You can make this mousse dairy-free with simple swaps. Instead of heavy cream, use coconut cream for a rich texture. For a lighter option, try almond or soy milk. Both can work well, but coconut cream is the best choice for creaminess. These swaps let everyone enjoy this dessert without dairy.
Flavor Infusions
Want to add more flavor? Consider infusing your mousse with coffee or mint. For coffee, mix in a shot of espresso when you melt the chocolate. This adds a deep, rich taste. If you prefer mint, add a few drops of mint extract. This will make your mousse feel refreshing. Both options give a fun twist to the classic chocolate flavor.
Add-ins
You can also personalize your mousse with fun add-ins. Chopped nuts like almonds or hazelnuts add crunch. Fresh berries like raspberries or strawberries add sweetness and a pop of color. You can also fold in some shredded coconut for extra texture. These add-ins make the mousse more exciting and unique to your taste.
Storage Info
How to Store Leftover Mousse
Store any leftover mousse in an airtight container. This keeps it fresh and safe. Make sure to cover it well to avoid any air exposure. You can place it in the fridge for up to three days. If you want to save it longer, consider freezing it.
Best Practices for Freezing
To freeze the mousse, spoon it into freezer-safe containers. Leave some space at the top for expansion. Seal the containers tightly to prevent freezer burn. You can freeze the mousse for up to one month. When ready to eat, thaw it in the fridge overnight for the best texture.
Shelf Life and Expiration
The mousse will stay fresh for about three days in the fridge. After that, it may start to lose flavor and texture. If you notice any changes in smell or appearance, it's best to throw it away. Always check for signs of spoilage before enjoying your dessert.
FAQs
Can I make this mousse ahead of time?
Yes, you can make this mousse ahead of time. It stays fresh in the fridge for up to three days. Just cover it tightly with plastic wrap or a lid. This way, it keeps its creamy texture and rich flavor. Making it a day in advance can even enhance the taste.
What sweeteners can I use besides erythritol?
You can use several other sweeteners. Stevia, monk fruit, or xylitol all work well. Each sweetener has a different taste, so adjust to your liking. Start with a small amount and add more if needed. Just keep in mind that some sweeteners are sweeter than sugar, so use less.
Is this mousse suitable for special diets?
Yes, this mousse fits many special diets. It is sugar-free, making it great for low-sugar diets. With coconut milk, it is also dairy-free. For those on a keto diet, this mousse is a perfect fit. Always check the ingredients to ensure they meet your needs.
This blog post covered how to make delicious chocolate mousse step-by-step. We discussed the main and optional ingredients, along with some tasty substitutions. You learned how to whip cream, mix ingredients, and set the mousse perfectly. I shared tips for texture, storage, and serving ideas. You can also explore variations and answer common questions about the recipe.
With this guide, you can make a yummy dessert that suits everyone. Enjoy your chocolate mousse adventure!