Looking for a quick, tasty meal packed with protein? You’re in the right place! This Crockpot High Protein Chicken recipe is simple, and it makes dinner prep a breeze. I’ll share all the ingredients you'll need, step-by-step cooking instructions, and some tasty tips to elevate your dish. Whether you want a satisfying weeknight dinner or meal prep for the week, this recipe is here to help you enjoy healthy eating. Let’s get started!
Ingredients
Detailed Ingredient List
For this delicious crockpot high protein chicken, gather these ingredients:
- 2 lbs boneless, skinless chicken breasts
- 1 cup low-sodium chicken broth
- 1 cup black beans, rinsed and drained
- 1 cup quinoa, rinsed
- 1 red bell pepper, diced
- 1 cup corn (fresh, frozen, or canned)
- 1 onion, finely chopped
- 3 cloves garlic, minced
- 2 teaspoons cumin
- 1 teaspoon smoked paprika
- 1 teaspoon chili powder
- Salt and pepper to taste
- Fresh cilantro for garnish
Nutritional Benefits of Each Ingredient
Each ingredient adds nutrition to this meal.
- Chicken breasts are lean and high in protein. They help build muscle.
- Chicken broth adds flavor and keeps the chicken moist. It has low sodium to support heart health.
- Black beans offer fiber and protein, which help digestion and keep you full.
- Quinoa is a whole grain with protein and all nine essential amino acids. It promotes energy.
- Red bell pepper is rich in vitamins A and C, boosting the immune system.
- Corn provides fiber and minerals, good for digestion and energy.
- Onion contains antioxidants, which protect cells from damage.
- Garlic supports heart health and adds great flavor.
- Cumin and smoked paprika enhance taste while providing antioxidants.
- Chili powder adds a kick and boosts metabolism.
- Salt and pepper enhance flavors, but use them wisely for health.
- Cilantro adds freshness and vitamins to your dish.
Ingredient Substitutions
You can swap some ingredients if needed.
- For chicken, use turkey breasts or tofu for a plant-based option.
- Use vegetable broth instead of chicken broth for a vegetarian version.
- Swap black beans for kidney beans or lentils for variety.
- Quinoa can be replaced with brown rice or farro.
- Any color bell pepper works, or you can skip it if you prefer.
- Frozen corn works well if fresh is not available.
- Shallots can replace onion if you like a milder taste.
- Fresh herbs like parsley can replace cilantro for a different flavor.
Feel free to mix and match based on what you have! Each choice still makes a tasty, high protein meal.
Step-by-Step Instructions
Preparation Steps
To start, gather your ingredients. You will need:
- 2 lbs boneless, skinless chicken breasts
- 1 cup low-sodium chicken broth
- 1 cup black beans, rinsed and drained
- 1 cup quinoa, rinsed
- 1 red bell pepper, diced
- 1 cup corn (fresh, frozen, or canned)
- 1 onion, finely chopped
- 3 cloves garlic, minced
- 2 teaspoons cumin
- 1 teaspoon smoked paprika
- 1 teaspoon chili powder
- Salt and pepper to taste
- Fresh cilantro for garnish
First, place the chicken breasts in the bottom of your crockpot. This helps the chicken cook evenly. Next, pour the chicken broth over the chicken. This keeps it moist. In a bowl, mix the black beans, quinoa, diced red bell pepper, corn, chopped onion, minced garlic, cumin, smoked paprika, chili powder, salt, and pepper. This mix adds flavor and texture.
Cooking Instructions
Carefully spoon this mixture over the chicken in the crockpot. Spread it evenly. Cover the crockpot with its lid. Cook on low for 6-7 hours or on high for 3-4 hours. The chicken will be done when it easily shreds with a fork.
Shredding and Serving the Chicken
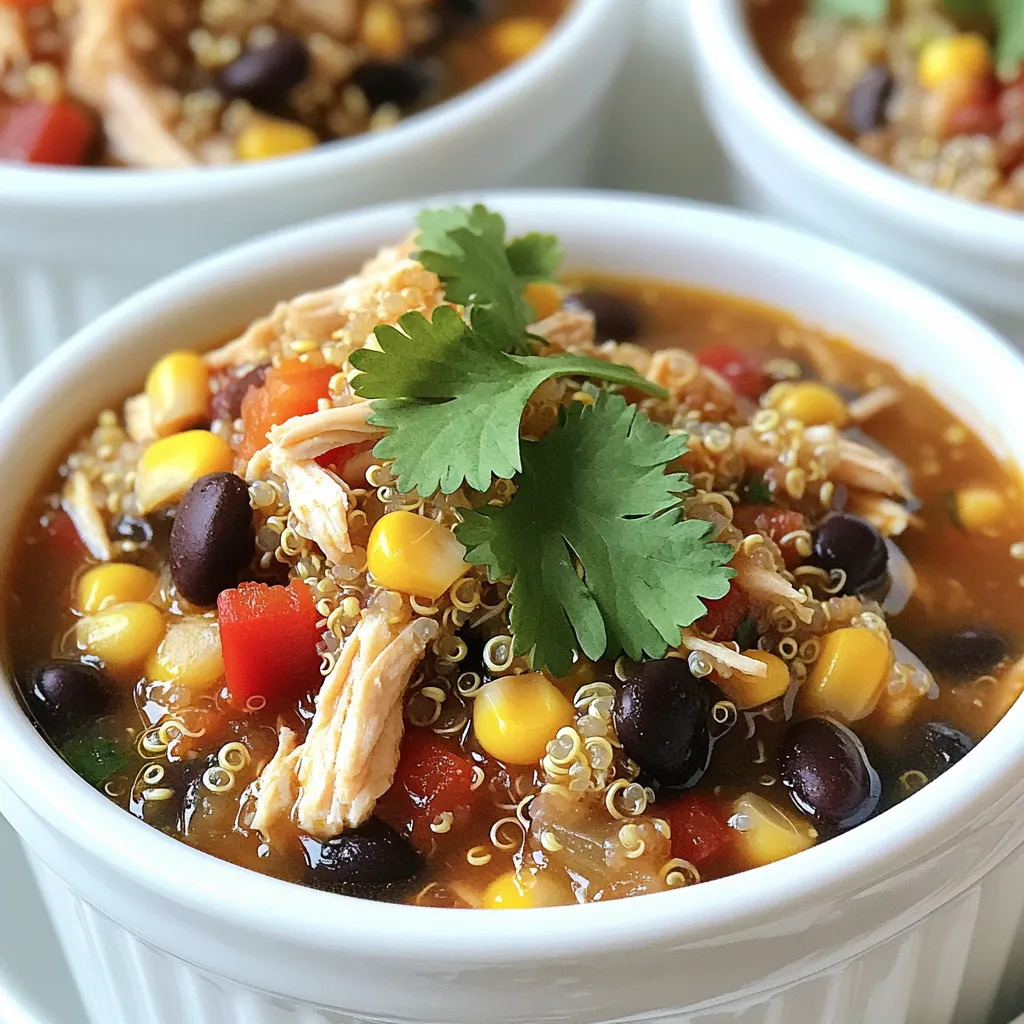
Once the chicken is cooked, take two forks and shred it in the pot. This makes it easy to mix with the other ingredients. Stir everything together. Taste your dish and adjust the seasoning if needed. For serving, dish it out into deep bowls and garnish with fresh cilantro. You can also add lime wedges on the side for a fresh kick. Enjoy your hearty, high-protein meal!
Tips & Tricks
How to Achieve the Perfect Shredded Chicken
To get the best shredded chicken, you need to start with good chicken. I use boneless, skinless chicken breasts. They cook well and shred easily. Place the chicken in the crockpot first. Pour chicken broth on top to keep it moist. Cook it on low for 6-7 hours. If you're in a rush, use the high setting for 3-4 hours. After cooking, use two forks to shred the chicken. Mix it well with the other ingredients in the pot. This way, it absorbs all the great flavors.
Flavor Enhancements
You can add even more flavor to your dish. Consider adding fresh herbs like cilantro or parsley. You can also squeeze lime juice for a zesty kick. If you like heat, try adding diced jalapeños or a splash of hot sauce. Another great idea is to mix in a tablespoon of your favorite salsa. Experiment with spices, like oregano or cayenne pepper, to make it your own. These small changes can make a big difference.
Time-Saving Tips for Meal Prep
Meal prep can save you lots of time. Cook a big batch of this chicken on the weekend. Divide it into meal-sized portions. Store them in airtight containers. You can keep them in the fridge for up to four days. If you want to store it longer, freeze it. Just thaw it overnight in the fridge before reheating. This way, you always have a healthy meal ready to go.
Variations
Adjusting Protein Content
You can easily change the protein in this dish. If you want more protein, add extra chicken. You can also use turkey breasts for a leaner option. If you want to lower the meat, try adding more beans or quinoa. They both pack great protein too! This way, you keep the dish healthy and filling.
Vegetarian or Vegan Alternatives
For a vegetarian option, replace the chicken with extra firm tofu. You should press the tofu first to remove excess water. This helps it soak up flavors. For a vegan option, you can use chickpeas or lentils. Both add protein and make this dish hearty. Just add them in the same way as the chicken.
Different Flavor Profiles
You can change the flavors to suit your taste. Want a spicy kick? Add jalapeños or cayenne pepper. For a sweeter touch, try adding diced mango or pineapple. If you like herbs, add fresh basil or oregano. Each choice gives you a new flavor experience! Adjusting these aspects can make your meal fun and exciting.
Storage Information
Best Practices for Refrigeration
Store your leftover Crockpot High Protein Chicken in an airtight container. Let it cool to room temperature first. Place it in the fridge within two hours of cooking. It will stay fresh for three to four days. Label your container with the date to keep track of its freshness.
Freezing Instructions
Freezing is a great option if you want to save some for later. Use freezer-safe containers or bags. Make sure to portion the chicken. This way, you can thaw only what you need. It can last up to three months in the freezer. To prevent freezer burn, remove as much air as possible.
How to Reheat Leftovers
When you're ready to enjoy leftovers, reheat them carefully. You can use the microwave or stovetop. If using the microwave, heat in short bursts and stir in between. If on the stovetop, add a splash of broth to keep it moist. Heat until it reaches a safe temperature of 165°F. Enjoy it hot, just like when you first made it!
FAQs
How long does it take to cook chicken in a crockpot?
It takes about 6-7 hours on low or 3-4 hours on high. Cooking time may vary based on your crockpot. Always check the chicken to make sure it is cooked through. The internal temperature should reach 165°F for safe eating. Using a meat thermometer helps ensure perfect cooking every time.
Can I use frozen chicken breasts?
Yes, you can use frozen chicken breasts. However, it’s best to cook them on high for about 4-5 hours. This way, the chicken cooks evenly and stays moist. If you use frozen chicken, avoid adding too much liquid. The ice will melt and could make the dish watery.
What sides pair well with high protein chicken dishes?
High protein chicken dishes go well with many sides. Here are some great options:
- Brown rice or quinoa for extra protein
- Steamed vegetables like broccoli or green beans
- A fresh salad with mixed greens
- Sweet potatoes for a sweet touch
- Cornbread for a comforting side
These sides not only taste good but also add nutrition to your meal.
We explored the key ingredients and their benefits in your chicken dish. I shared easy steps for cooking and serving tender, shredded chicken. We also discussed helpful tips to make your meal prep smoother. You can vary flavors or adjust protein as needed. Finally, I covered how to store and reheat your leftovers safely.
Enjoy your cooking journey and make meals that your family will love!