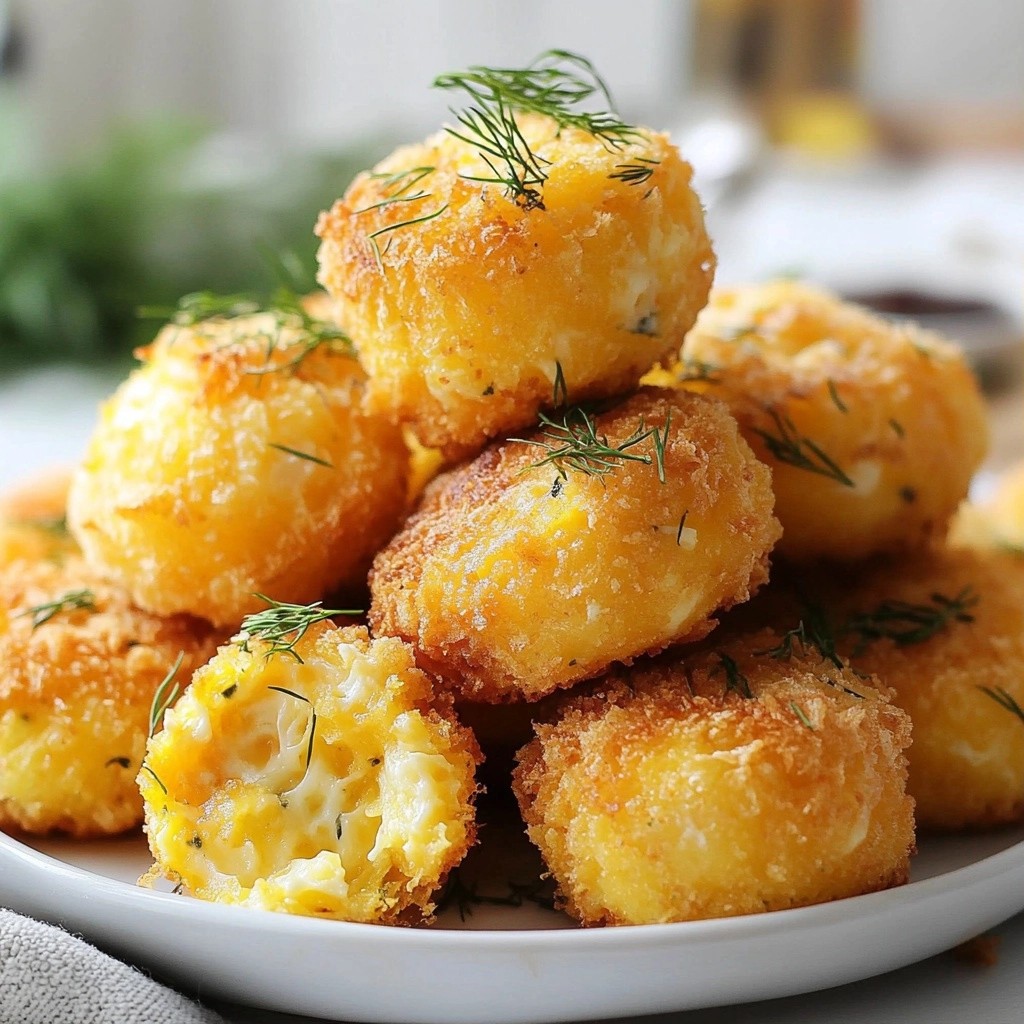
Are you ready to satisfy your snack cravings without breaking your keto diet? Join me as we whip up a batch of Crispy Keto Dill Pickle Cheese Bites! This easy snack recipe combines melty cheese with tangy dill pickles for a delicious treat. Follow my simple steps to create the perfect crispy bites that everyone will love. Let's dive in and transform your snack time into a flavorful adventure!
Why I Love This Recipe
- Delicious Flavor Combination: The blend of sharp cheddar and mozzarella cheese with tangy dill pickles creates a mouthwatering flavor that is irresistible.
- Keto-Friendly Snack: These bites are low in carbs and perfect for anyone following a keto diet, allowing you to indulge without guilt.
- Easy to Make: This recipe comes together quickly, making it a convenient option for busy days or spontaneous gatherings.
- Versatile Serving Options: Whether as an appetizer, snack, or party dish, these cheese bites pair wonderfully with a variety of dips.
Ingredients
Main Ingredients for Crispy Keto Dill Pickle Cheese Bites
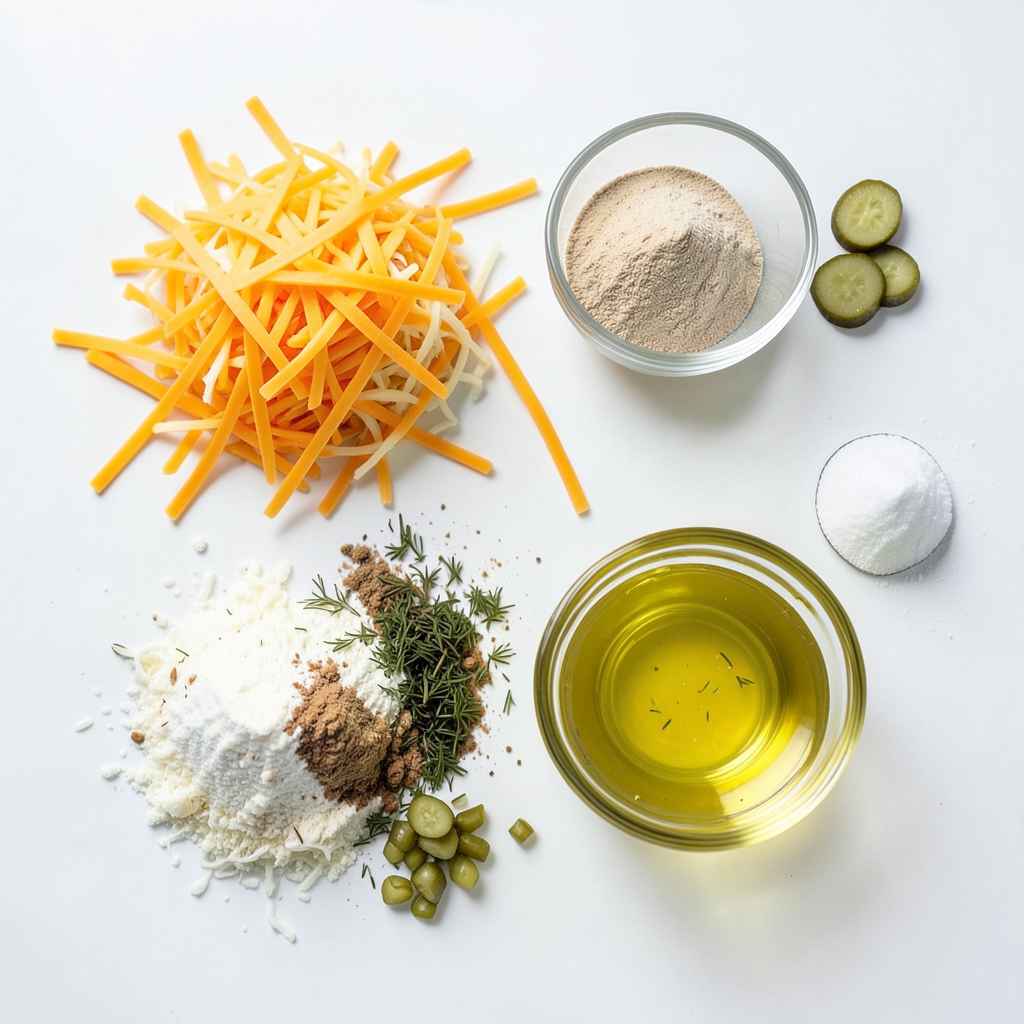
To make these tasty bites, you will need some simple main ingredients:
- 1 cup shredded sharp cheddar cheese
- 1 cup shredded mozzarella cheese
- 1/4 cup almond flour
- 1/4 teaspoon garlic powder
- 1/4 teaspoon onion powder
- 1/2 teaspoon dried dill
- 1/2 teaspoon baking powder
- 1/4 teaspoon salt
- 1/2 cup dill pickles, chopped finely
- 1 large egg, whisked
- Olive oil for frying
These ingredients combine to create a cheesy, crispy delight that pairs well with the tangy pickles.
Key Seasonings and Their Roles
Each seasoning has a special job in this recipe:
- Garlic powder adds a warm, savory flavor.
- Onion powder gives a subtle sweetness.
- Dried dill brings a fresh, herby taste that pairs perfectly with pickles.
- Baking powder helps the bites puff up slightly, making them light.
- Salt enhances all the flavors, bringing everything together.
Using these seasonings wisely brings out the best in your cheese bites.
Recommended Cheese Varieties and Alternatives
For this recipe, I suggest using:
- Sharp cheddar for its bold flavor.
- Mozzarella for its stretchy texture.
If you want alternatives, try:
- Pepper jack for a spicy kick.
- Cream cheese for a creamier texture.
- Parmesan for a nutty flavor.
Mixing different cheeses can create new and exciting flavors in your bites.
Step-by-Step Instructions
Preparation of Cheese Mixture
To start, grab a large mixing bowl. Add 1 cup of shredded sharp cheddar cheese and 1 cup of shredded mozzarella cheese. Next, sprinkle in 1/4 cup of almond flour, 1/4 teaspoon of garlic powder, and 1/4 teaspoon of onion powder. Then, measure 1/2 teaspoon of dried dill and 1/2 teaspoon of baking powder, adding both to the bowl. Finally, add 1/4 teaspoon of salt. Mix all these dry ingredients well until they blend evenly.
Now, finely chop 1/2 cup of dill pickles. Gently fold the chopped pickles into the cheese mixture. This step adds the tangy flavor we love in these bites. After that, pour in 1 large whisked egg. Stir until a sticky dough forms. This dough is key to holding your cheese bites together.
Forming and Frying the Cheese Bites
Next, heat a non-stick skillet over medium heat. Drizzle in some olive oil to coat the pan. While the pan heats, scoop small portions of the dough with a spoon. Roll these portions into balls about 1 inch wide. If the mixture sticks to your hands, lightly oil them to help.
Once the skillet is hot, place the cheese balls in the pan. Make sure to leave space between each one. Fry them for about 3-4 minutes until they turn golden brown. Carefully flip them over and cook for another 3-4 minutes on the other side. They should look crispy and delicious.
When they are ready, take them out of the skillet. Place the bites on a plate lined with paper towels to let excess oil drain away.
Tips for Achieving Perfect Crispiness
For the crispiest cheese bites, ensure your skillet is well-heated before adding the cheese balls. If the heat is too low, they won’t crisp up nicely. Keep the cheese bites spaced apart when frying to allow even cooking.
If you want extra crunch, just sprinkle a little more almond flour into the mixture. This will help create a nice crust. Always serve the bites warm for the best texture and flavor. Enjoy the crispy goodness with a tasty dip!
Tips & Tricks
Common Mistakes to Avoid
When making crispy keto dill pickle cheese bites, avoid a few common mistakes. First, don’t skip the drying step for pickles. Excess moisture can make your bites soggy. Pat them dry with a paper towel. Second, make sure your oil is hot enough. If it’s not, the bites will absorb too much oil and lose their crispiness. Lastly, don’t overcrowd the pan. This can lower the temperature and lead to uneven cooking.
Serving Suggestions for Optimal Enjoyment
To enjoy these cheese bites fully, consider how you serve them. Present them on a bright platter. This not only looks good but also makes them more appealing. Pair them with a small bowl of ranch dressing or tzatziki. The cool dips balance the warm, crispy bites perfectly. You can also sprinkle fresh dill on top. It adds color and enhances the dill flavor.
Recommended Dipping Sauces
The right dip can elevate your cheese bites. Here are a few great options:
- Ranch Dressing: Creamy and herby, it complements the tangy pickles.
- Tzatziki: This yogurt-based dip adds freshness and a hint of garlic.
- Hot Sauce: A spicy kick can make the bites more exciting.
- Mustard: A tangy mustard brings a nice contrast to the flavors.
Experiment with these dips to find your favorite!
Pro Tips
- Use Fresh Dill: For the best flavor, use fresh dill instead of dried. It enhances the taste and aroma of the cheese bites.
- Adjust the Thickness: If the dough is too thick, you can add a splash of water or an extra egg to make it easier to form into balls.
- Test the Oil Temperature: Before frying all the cheese bites, test a small piece in the oil to ensure it's at the right temperature for frying.
- Try Different Cheeses: Experiment with different types of cheese like pepper jack or gouda for a unique flavor twist.
Variations
Ingredient Substitutions for Different Flavors
You can switch up the cheese for fun flavors. Try gouda or pepper jack for a kick. If you want a dairy-free option, use vegan cheese. It melts well and tastes great. You can also swap almond flour for coconut flour. This gives a slight sweetness. For extra zest, add a splash of hot sauce to the mix.
Baking Instead of Frying: A Healthier Option
Baking is a simple way to make these bites healthier. Preheat your oven to 400°F. Place the cheese bites on a baking sheet lined with parchment paper. Brush them lightly with olive oil. Bake for about 15-20 minutes until they turn golden and crispy. This method results in fewer calories and less fat.
Adding More Vegetables for Extra Nutrition
Adding veggies can boost nutrition. You can mix in finely chopped spinach or zucchini. These add vitamins and fiber. Another great choice is bell peppers for a sweet crunch. Just make sure to chop them small. This way, they blend nicely into the cheese mixture.
Storage Info
Best Practices for Storing Leftovers
To keep your crispy keto dill pickle cheese bites fresh, store them in an airtight container. Place a paper towel inside to absorb moisture. This will help maintain crispiness. Refrigerate them and enjoy within three days for the best taste.
Reheating Methods for Maintaining Crispiness
When reheating, the oven is your best friend. Preheat it to 350°F (175°C). Place the cheese bites on a baking sheet. Heat for about 10 minutes. This method helps them regain that delightful crunch. Avoid using the microwave, as it can make them soggy.
Freezing and Thawing Guidelines
For longer storage, freeze the cheese bites after they cool completely. Use a freezer-safe container or bag. They can last up to three months in the freezer. To thaw, place them in the fridge overnight. Then, reheat them in the oven for that crispy texture. Enjoy your delicious snack anytime!
FAQs
How do you make Crispy Keto Dill Pickle Cheese Bites?
To make Crispy Keto Dill Pickle Cheese Bites, follow these simple steps:
1. Mix the Cheeses: In a bowl, combine 1 cup of shredded sharp cheddar and 1 cup of shredded mozzarella. Add 1/4 cup of almond flour, 1/4 teaspoon of garlic powder, 1/4 teaspoon of onion powder, 1/2 teaspoon of dried dill, 1/2 teaspoon of baking powder, and 1/4 teaspoon of salt. Mix until well blended.
2. Add Pickles: Gently fold in 1/2 cup of finely chopped dill pickles.
3. Incorporate Egg: Pour in 1 whisked large egg and stir until you have a sticky dough.
4. Heat the Pan: Preheat a skillet over medium heat and add olive oil.
5. Shape Bites: Scoop out small portions of the mixture and form them into 1-inch balls. If it's too sticky, lightly oil your hands.
6. Fry the Bites: Place the balls in the hot skillet, leaving space between them. Cook for 3-4 minutes until golden brown, then flip and cook for another 3-4 minutes.
7. Drain: Once crispy, remove them and place on paper towels to absorb excess oil.
These bites are warm and tangy, perfect for snacks!
Can I use different types of pickles for this recipe?
Yes, you can use different types of pickles! Sweet pickles or bread-and-butter pickles will change the flavor. However, dill pickles give the best tangy taste that pairs well with cheese. Experiment with your favorites to find what you like best. Just be sure to chop them finely for even cooking.
What is the nutritional information for each serving?
Each serving of Crispy Keto Dill Pickle Cheese Bites, which includes about four bites, contains roughly:
- Calories: 220
- Protein: 10g
- Fat: 18g
- Carbohydrates: 4g
- Fiber: 1g
- Net Carbs: 3g
These bites are low in carbs and high in flavor, making them a great snack for keto diets!
You learned about crispy keto dill pickle cheese bites from the ingredients to storage tips. Each step helps you create a tasty snack that's low in carbs. Remember to choose good cheese and avoid common mistakes for the best results. You can also explore variations for new flavors or healthier options. Enjoy these bites fresh or reheated, and share them with friends. With practice, you'll master this easy recipe and impress everyone with your skills. These bites will surely become a favorite in your kitchen.