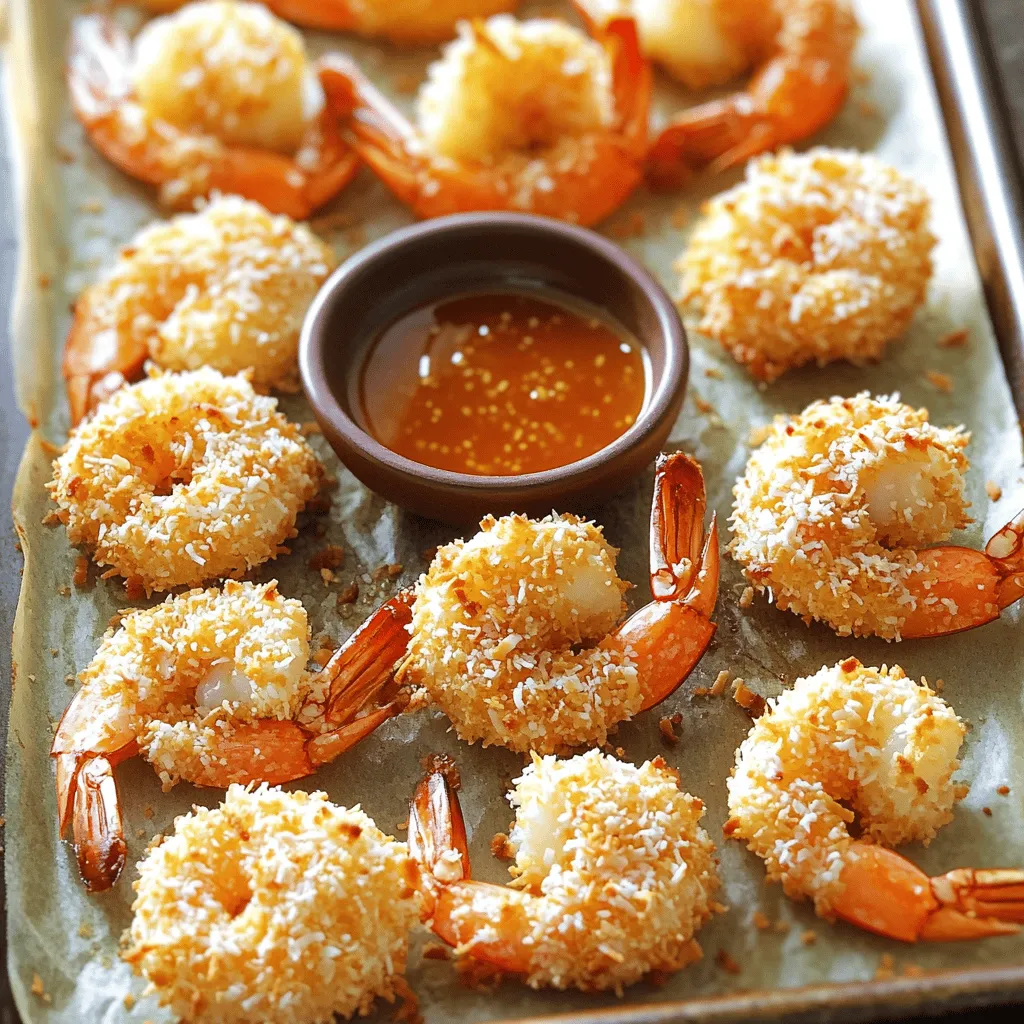
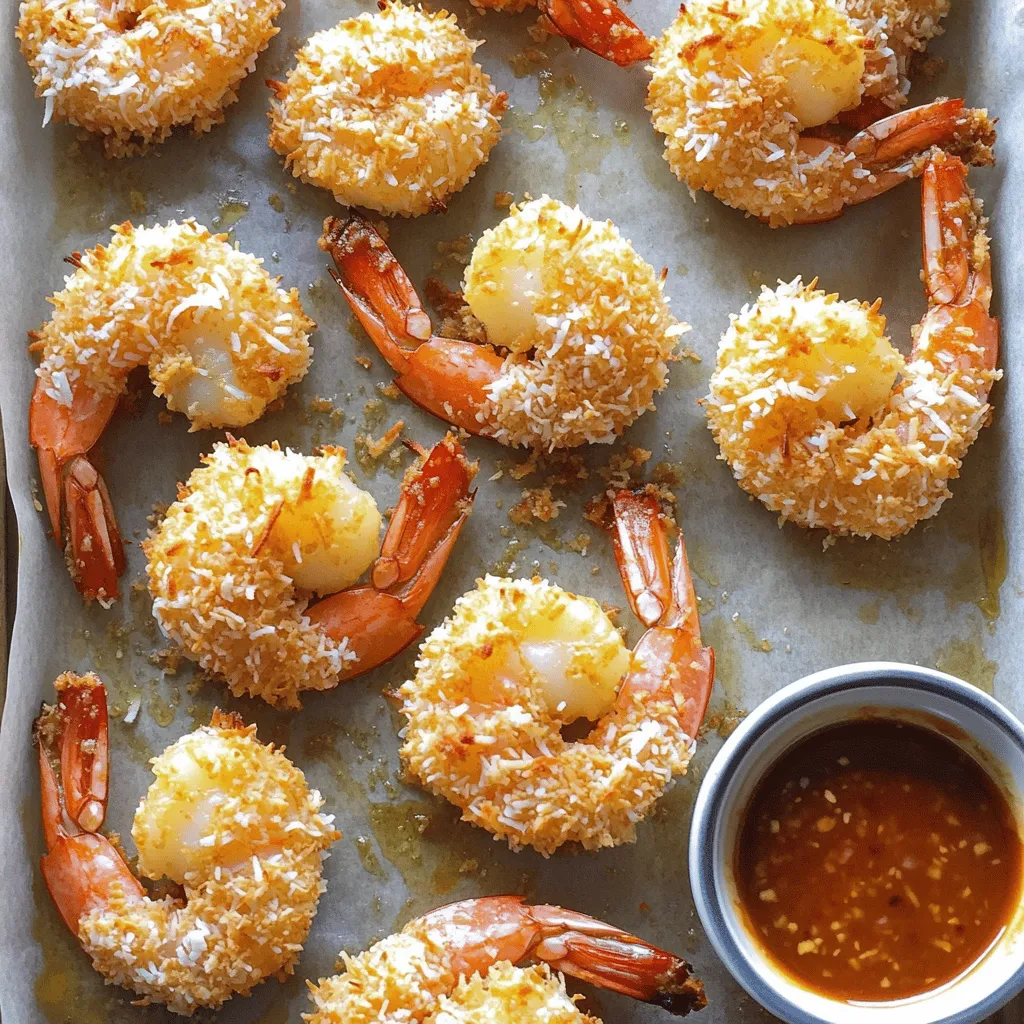
If you crave a dish that’s both crunchy and flavorful, look no further than crispy baked coconut shrimp! This tasty treat delights at any meal. With simple ingredients and easy steps, you can whip up this dish in no time. Whether you’re looking to impress guests or enjoy a fun weeknight dinner, this recipe guarantees satisfaction. Ready to dive in? Let’s bring that tropical crunch to your table!
Ingredients
To make crispy baked coconut shrimp, gather these simple ingredients:
– 1 pound large shrimp, peeled and deveined
– 1 cup shredded coconut (sweetened or unsweetened)
– ½ cup panko breadcrumbs
– ½ cup all-purpose flour
– 2 large eggs
– 1 teaspoon garlic powder
– 1 teaspoon paprika
– Salt and pepper, to taste
– Cooking spray or olive oil for drizzling
– Sweet chili sauce or homemade mango salsa, for serving
Each ingredient plays a key role. The shrimp provide protein and a sweet taste. The shredded coconut adds crunch and flavor. Panko breadcrumbs help create a crispy coating. The flour works as a base, helping the egg and coconut stick. Garlic powder and paprika add depth to the flavor. Salt and pepper enhance the overall taste. Finally, the sweet chili sauce or mango salsa offers a perfect dip.
These ingredients make a delicious dish that is great for any meal. You can enjoy it as an appetizer, snack, or main course.
Step-by-Step Instructions
Prepping the Oven and Baking Sheet
– Preheat the oven to 400°F (200°C).
– Line a baking sheet with parchment paper.
This step makes sure the shrimp cook evenly. The parchment also helps with easy cleanup.
Creating a Breading Station
– Set up three shallow bowls.
– In the first bowl, mix flour with salt, pepper, garlic powder, and paprika.
– In the second bowl, beat the eggs until blended.
– In the third bowl, combine shredded coconut and panko breadcrumbs.
Having your bowls ready makes the breading process quick and fun. It keeps things tidy, too.
Breading the Shrimp
1. Take a shrimp and dip it into the flour mixture.
2. Coat both sides well; shake off extra flour.
3. Next, dip the shrimp into the beaten eggs.
4. Let the excess egg drip off.
5. Finally, press the shrimp into the coconut and panko mix.
This coating gives your shrimp a crunchy and tasty finish. Make sure to cover each shrimp fully.
Baking the Shrimp
– Place the coated shrimp on the baking sheet in a single layer.
– Lightly spray or drizzle olive oil over the shrimp for crisping.
– Bake for 12-15 minutes until golden brown and cooked through.
The internal temperature should reach 120°F (49°C). Keep an eye on them so they don’t overcook. These steps bring out the best flavor in your crispy baked coconut shrimp.
Tips & Tricks
Achieving the Perfect Crisp
To get that nice crunch, follow these tips:
– Use Panko Breadcrumbs: Panko gives a lighter, crunchier texture than regular breadcrumbs.
– Coat Well: Make sure to coat the shrimp completely in the coconut mixture.
– Oil It Up: Lightly spray or drizzle oil on top before baking. This helps it brown.
– Bake at the Right Temp: Keep your oven at 400°F (200°C) for the best crisp.
– Don’t Crowd the Pan: Leave space between shrimp on the baking sheet. This allows hot air to circulate.
Flavor Enhancements
Adding spices or herbs can make this dish shine. Try these ideas:
– Cayenne Pepper: For a spicy kick, add this to the flour mix.
– Coconut Flakes: Use larger flakes for more coconut flavor and texture.
– Lime Zest: Add zest to the coconut mix for a fresh twist.
– Cilantro or Parsley: Chopped herbs added to the breading can brighten the taste.
Serving Suggestions
What to serve with crispy baked coconut shrimp? Here are some tasty ideas:
– Dips: Sweet chili sauce pairs great. Mango salsa is also a hit.
– Sides: Serve with rice or a fresh salad.
– Drinks: Pair with a tropical drink, like coconut water or a fruity smoothie.
Variations
Adjusting for Dietary Preferences
If you need a gluten-free option, use almond flour instead of all-purpose flour. For breadcrumbs, try gluten-free panko. These changes keep the recipe tasty and crunchy without gluten. You can find these products in most stores. They work well in this dish and won’t change the flavor much.
Flavor Variations
You can spice up your coconut shrimp by changing the seasonings. Try adding cayenne pepper for heat or cumin for a warm flavor. You can also mix in some lime zest for a fresh twist. If you love herbs, try adding chopped cilantro or parsley to the coconut mixture. This adds a burst of flavor to each bite.
Alternative Cooking Methods
Want to cook your shrimp faster? Use an air fryer! Preheat it to 400°F (200°C). Arrange the breaded shrimp in a single layer. Cook for about 8 to 10 minutes or until they turn golden brown. This method gives you a nice crisp without needing to bake for long. It’s perfect for busy nights or quick snacks!
Storage Info
Refrigeration Guidance
To store leftover shrimp, place them in an airtight container. Make sure the shrimp cool down before sealing. This keeps them fresh and tasty. Store the shrimp in the fridge for up to two days. When you reheat them, do it gently to avoid rubbery shrimp.
Freezing Instructions
For longer storage, you can freeze the shrimp. First, let them cool completely. Then, place them in a freezer-safe bag. Remove as much air as possible before sealing. This will prevent freezer burn. You can freeze the shrimp for up to three months. When you want to eat them, thaw the shrimp in the fridge overnight. Reheat in the oven or air fryer for the best texture.
Shelf Life
Crispy baked coconut shrimp is best enjoyed fresh. However, if stored properly, it can last. In the fridge, they stay good for two days. In the freezer, they can last up to three months. Always check for any signs of spoilage, like off smells or changes in texture. Enjoy this dish at its best!
FAQs
How do I know when the shrimp are cooked?
You can check the shrimp for color and texture. Cooked shrimp turn pink and firm. Use a meat thermometer for precision. The internal temperature should reach 120°F (49°C). This ensures safety and perfect doneness.
Can I use frozen shrimp for this recipe?
Yes, you can use frozen shrimp. Just thaw them first. Place shrimp in cold water for about 15 minutes. Make sure to pat them dry before coating. This helps the breading stick well.
What can I serve with crispy baked coconut shrimp?
You can pair the shrimp with many tasty sides. Consider serving them with rice or a fresh salad. Sweet chili sauce or homemade mango salsa makes great dips. These flavors balance the crispy shrimp nicely.
Is it necessary to use panko breadcrumbs?
While panko gives a light, crunchy texture, you can use regular breadcrumbs. They may not be as crispy, but they will work. If you want crunch, try crushed cornflakes or even crushed crackers.
Can I make this recipe ahead of time?
You can prepare the shrimp ahead of time. Coat them and place them on a baking sheet. Cover the shrimp and refrigerate for up to 2 hours. Bake them just before serving for the best taste and texture.
Crispy baked coconut shrimp is easy and fun to make. We covered the ingredients, step-by-step instructions, and helpful tips. You’ll create a tasty dish that everyone will love.
Try different spices or cooking methods to keep things interesting. Store any leftovers properly to enjoy later. With these simple steps, you’ll impress friends and family with a delicious meal. You now have everything to make this dish a success!