Introduction
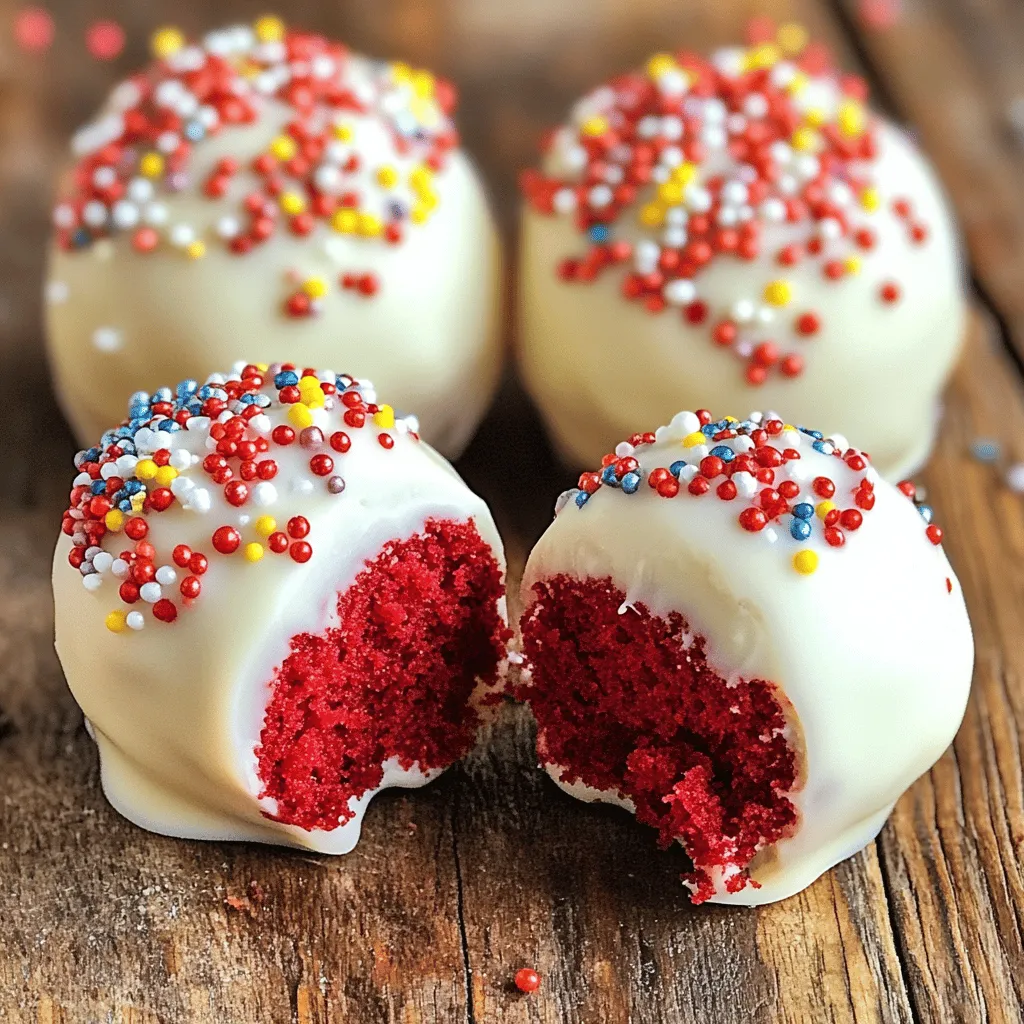
Red velvet cake has secured its place as a beloved dessert across various celebrations and gatherings. Its striking crimson hue and velvety texture evoke feelings of indulgence and festivity. This iconic cake, characterized by its rich flavor and alluring appearance, has become a staple for birthdays, anniversaries, and holiday parties. However, as our culinary creativity evolves, so does the way we enjoy this classic treat. Enter the Crimson Delight Red Velvet Cake Balls—a fun and portable twist on the traditional red velvet cake.
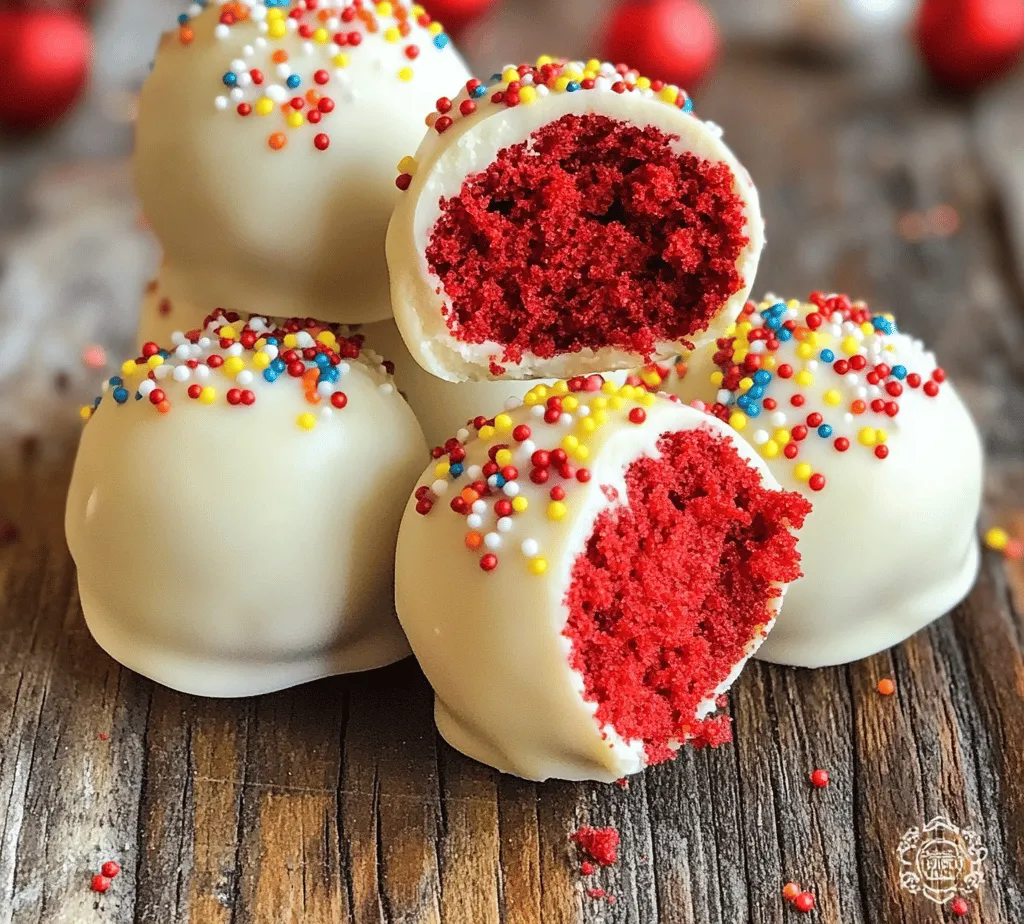
Cake balls have surged in popularity due to their delightful bite-sized format. They offer a perfect blend of flavor and texture, making them an ideal dessert for any occasion. Whether you’re hosting a party, looking for a unique gift, or simply treating yourself, these cake balls are sure to impress. With a creamy center and a smooth white chocolate coating, they encapsulate the essence of red velvet cake in a fun, easy-to-eat form.
In this article, we will provide a comprehensive guide to creating your own Crimson Delight Red Velvet Cake Balls. From understanding the rich history of red velvet cake to the detailed ingredient breakdown and step-by-step instructions, you will have all the knowledge needed to whip up these decadent treats in no time.
Understanding Red Velvet Cake
Historical Background of Red Velvet Cake
The origins of red velvet cake can be traced back to the early 20th century in North America, specifically during the Victorian era when desserts were often intricately styled and presented. The cake gained popularity during the Great Depression, when a famous recipe from the Waldorf-Astoria Hotel in New York City introduced it to a wider audience. This cake’s unique combination of cocoa powder, buttermilk, and vinegar created a distinct flavor profile that was both rich and tangy.
The vibrant red color of the cake is often attributed to the reaction between cocoa powder and acidic ingredients like buttermilk and vinegar. Initially, this color was a result of the natural cocoa powder used at the time, which was less processed than modern varieties. As the cake gained fame, the use of red food coloring became popularized, solidifying its iconic appearance.
Key Characteristics that Make Red Velvet Cake Unique
Red velvet cake is not just known for its color; it boasts a unique taste and texture that sets it apart from other desserts. The cake is usually soft and moist, thanks to the buttermilk and oil used in the recipe. The subtle hint of cocoa powder adds depth to the flavor without overwhelming the palate. The smooth cream cheese frosting that typically accompanies red velvet cake enhances the overall experience, creating a delightful balance of sweetness and tanginess.
The cake’s striking red color and rich flavor have made it synonymous with special occasions. Its vibrant hue symbolizes love and celebration, which is why it often graces wedding tables and Valentine’s Day festivities. The visual appeal of red velvet cake adds a touch of elegance to any dessert spread, making it a go-to choice for those looking to make a statement.
Why Red Velvet is Often Associated with Special Occasions
Red velvet cake has become more than just a dessert; it is a cultural symbol of celebration. Its association with special occasions stems from its rich history and the visual impact it offers. The cake’s luxurious appearance and decadent flavor make it befitting for events like weddings, anniversaries, and holidays.
In recent years, the trend of red velvet flavoring has expanded beyond the traditional cake, inspiring a variety of desserts such as cupcakes, cookies, and even pancakes. Each iteration retains the distinctive flavor profile while providing a modern twist that appeals to a broader audience.
Ingredients Breakdown
To create the perfect Crimson Delight Red Velvet Cake Balls, it is essential to understand the role of each ingredient in the recipe. Here’s a detailed breakdown of what you’ll need:
All-Purpose Flour
All-purpose flour serves as the foundation of the cake balls, providing structure and stability. Its moderate protein content allows for a tender crumb while still holding the mixture together. If you’re looking for alternatives, you can experiment with cake flour for a lighter texture or gluten-free flour blends for a gluten-free version.
Granulated Sugar
Granulated sugar plays a crucial role in sweetness and texture. It not only sweetens the cake but also contributes to the overall texture, helping to create a moist and tender crumb. The sugar dissolves during mixing, leading to a smooth batter. Brown sugar can be substituted for a richer flavor, but it may alter the texture slightly.
Baking Soda and Salt
Baking soda acts as a leavening agent in the recipe, helping the cake rise and achieve a light texture. The acid from the buttermilk and white vinegar activates the baking soda, producing carbon dioxide bubbles that create lift in the cake. Salt, on the other hand, enhances the overall flavor by balancing the sweetness.
Cocoa Powder
Cocoa powder adds a subtle chocolate flavor and contributes to the distinctive color of the cake. It enhances the richness without overpowering the other flavors. When selecting cocoa powder, opt for high-quality Dutch-processed cocoa for a smoother flavor, or natural cocoa for a more pronounced taste.
Vegetable Oil
Using vegetable oil instead of butter is key to achieving the moist texture characteristic of red velvet cake. Oil retains moisture better than butter, which can lead to a dry cake. Additionally, oil makes the batter easier to mix and results in a softer crumb. If you prefer, you can substitute with canola oil or melted coconut oil for a different flavor profile.
Buttermilk
Buttermilk is a vital ingredient that adds moisture and acidity to the cake. Its tangy flavor helps to balance the sweetness and enhances the overall taste. The acidity in buttermilk also reacts with baking soda, contributing to the leavening process. If you don’t have buttermilk on hand, you can create a substitute by mixing milk with a splash of vinegar or lemon juice.
Eggs
Eggs are essential for binding the ingredients together and providing structure to the cake. They also contribute moisture and richness. For a vegan version, you can experiment with egg substitutes like flaxseed meal or applesauce.
Red Food Coloring
Red food coloring is what gives this cake its signature hue. While liquid food coloring is commonly used, gel food coloring provides a more vibrant color without adding excess liquid to the batter. Be cautious not to overdo it; a little goes a long way to achieve that perfect crimson shade.
Vanilla Extract
Vanilla extract enhances the overall flavor of the cake, providing a warm and aromatic undertone. Use pure vanilla extract for the best flavor, as imitation vanilla can be less potent.
White Vinegar
White vinegar serves a dual purpose by adding a slight tang that balances the sweetness and activating the baking soda. This chemical reaction contributes to the leavening process, ensuring that your cake balls are light and fluffy.
Cream Cheese
Cream cheese is the star ingredient for the filling of your cake balls. It provides a rich, tangy flavor that complements the sweetness of the cake. Make sure to use softened cream cheese for easy mixing.
Powdered Sugar
Powdered sugar is used to sweeten the filling while also providing a smooth texture. It dissolves easily, allowing you to achieve the desired sweetness without the graininess of granulated sugar.
White Chocolate
White chocolate is used for coating the cake balls, giving them a beautiful finish and an added layer of sweetness. When melting white chocolate, be sure to use a double boiler or microwave in short intervals to avoid scorching.
Optional Decorative Elements
To elevate the presentation of your Crimson Delight Red Velvet Cake Balls, consider adding decorative elements such as sprinkles, edible glitter, or crushed nuts. These additions not only enhance visual appeal but can also provide textural contrast.
Step-by-Step Instructions
With a clear understanding of the ingredients, it’s time to dive into the preparation of your Crimson Delight Red Velvet Cake Balls. Follow these detailed steps to ensure success:
Preparing the Oven and Baking Pan
Before you start mixing your ingredients, preheat your oven to 350°F (175°C). Preheating the oven is crucial for even baking and helps the cake rise properly. While the oven is heating, prepare your baking pan by greasing it with cooking spray or butter and lining it with parchment paper. This will prevent the cake from sticking and make it easier to remove once cooled.
Mixing Dry Ingredients
In a large mixing bowl, sift together all-purpose flour, cocoa powder, baking soda, and salt. Sifting helps to aerate the flour and break up any lumps, ensuring a smooth batter. Combine the dry ingredients thoroughly to ensure even distribution, which is essential for consistent flavor and texture throughout the cake.
Combining Wet Ingredients
In another bowl, whisk together the vegetable oil, granulated sugar, eggs, buttermilk, red food coloring, vanilla extract, and white vinegar. Mix until the ingredients are well-combined and the mixture is smooth. The oil should create a glossy texture, while the buttermilk will promote a tender crumb. It’s important to achieve the right consistency—look for a smooth, slightly thick batter that flows easily off the whisk.
This step marks the beginning of your cake ball journey. By carefully preparing the ingredients and understanding their roles, you’re setting the foundation for a delicious outcome. Stay tuned for the next section, where we will continue with the baking and shaping of the cake balls, leading us one step closer to enjoying these delightful treats.
Merging Mixtures
Once your red velvet cake has cooled completely, it’s time to bring the cake and cream cheese filling together. Carefully combine the two mixtures in a large mixing bowl. Using a spatula or your hands, gently incorporate the cream cheese filling into the crumbled cake. Be cautious not to overmix; the goal is to have a cohesive mixture without a smooth batter-like consistency.
Importance of Not Overmixing and Achieving the Right Texture
Overmixing can lead to a dense texture, which is not ideal for cake balls. The mixture should retain a slight crumbly texture while still holding together. You want it to be slightly moist, allowing it to form easily into balls. If it feels too dry, consider adding a touch more cream cheese filling, but do this sparingly. The right balance will ensure that your cake balls have a delightful, melt-in-your-mouth quality.
Baking the Cake
For the baking process, preheat your oven to 350°F (175°C). Prepare your cake pan by greasing it with butter or non-stick spray and lining the bottom with parchment paper for easy removal. Pour the vibrant red velvet batter into the prepared pan and spread it evenly.
Key Indicators for Doneness and Cooling Tips
Bake the cake for 25-30 minutes, or until a toothpick inserted into the center comes out clean or with a few moist crumbs. Avoid opening the oven door too frequently during baking, as this can cause the cake to sink in the middle. Once baked, allow the cake to cool in the pan for about 10 minutes before transferring it to a wire rack to cool completely. Cooling is essential, as a warm cake can affect the texture when crumbling.
Preparing the Cream Cheese Filling
While your cake is cooling, you can prepare the cream cheese filling. In a mixing bowl, combine softened cream cheese and butter. Beat them together with an electric mixer until the mixture is smooth and creamy. Add vanilla extract and powdered sugar gradually, mixing until fully combined. The filling should have a luscious, creamy texture that complements the rich, velvety cake.
Achieving the Perfect Creamy Texture
To ensure the cream cheese filling is perfectly creamy, make sure both the cream cheese and butter are at room temperature. This will help them combine more easily without lumps. If you find that your filling is too thick, you can add a splash of milk to achieve the desired consistency.
Crumbling the Cake
Now it’s time to crumble the cooled cake. Place the cake in a large bowl and use your hands to break it apart into small pieces. Be gentle; you want the pieces to be uniform in size without large chunks remaining. If you prefer, you can also use a food processor for a quicker process, but pulse it lightly to avoid over-processing.
Tips for Crumbling Without Creating Too Many Large Pieces
To achieve a uniform crumble, ensure that the cake is completely cool before starting. Warm cake tends to clump together and can make it challenging to achieve the desired texture. If you encounter larger pieces while crumbling, simply break them apart with your fingers.
Mixing Filling with Crumbled Cake
Once the cake is crumbled, add the cream cheese filling gradually. Start with half of the filling, mix it in, and then add more as needed until the mixture holds together well. You’ll know it’s ready for shaping when it can be easily formed into a ball without crumbling apart. The mixture should feel moist and hold together firmly.
Forming the Cake Balls
With the mixture ready, you can start shaping your cake balls. Use a cookie scoop or your hands to form uniform balls, approximately 1 inch in diameter. This will ensure they cook evenly and have a consistent appearance.
Techniques for Uniform Sizing
To achieve uniform sizes, consider using a measuring spoon or a small ice cream scoop. This will help you portion out the mixture accurately. Roll the balls gently between your palms to create a smooth surface, which will also help in achieving an appealing final look.
Freezing the Cake Balls
Once all the cake balls are shaped, place them on a parchment-lined baking sheet and freeze them for about 30 minutes. Chilling the cake balls is essential as it helps them hold their shape during the coating process.
Importance of Chilling Before Coating
If the cake balls are warm when you coat them with chocolate, they may melt the chocolate or lose their round shape. Freezing them ensures that they maintain their form and the chocolate coating adheres perfectly.
Melting and Coating with White Chocolate
For the chocolate coating, you can use high-quality white chocolate chips or melting wafers. Place them in a microwave-safe bowl and melt them in 30-second intervals, stirring in between, until completely smooth.
Best Practices for Melting Chocolate and Coating Techniques
To ensure a smooth melt, avoid overheating the chocolate, as it can seize up. Once melted, dip each chilled cake ball into the white chocolate, using a fork to lift them out and allow excess chocolate to drip off. Place the coated balls back on the parchment-lined sheet.
Decorating the Cake Balls
After coating, add a touch of creativity by decorating your cake balls. You can sprinkle them with colorful sprinkles, edible glitter, or drizzle contrasting chocolate over the top. This not only enhances their appearance but also adds a playful touch to your desserts.
Creative Ideas for Using Sprinkles and Edible Glitter
Choose sprinkles that complement the red velvet theme, such as white or red. Edible glitter can add a festive sparkle, making your cake balls perfect for celebrations. You can also use crushed nuts or coconut flakes for added texture and flavor.
Final Cooling
Allow the coated cake balls to cool at room temperature until the chocolate is fully set. This process should take about 15 to 30 minutes. For quicker results, you can place them in the refrigerator for a few minutes.
Serving Suggestions
Crimson Delight Red Velvet Cake Balls are perfect for various occasions. Present them on a decorative platter, arranging them in colorful wrappers for an elegant look. Pair them with hot beverages like coffee or tea, or serve them alongside a glass of milk for a classic treat. For festive gatherings, consider packaging them in small boxes tied with ribbons for a delightful party favor.
Ideas for Presenting Crimson Delight Red Velvet Cake Balls
For a charming presentation, use tiered cake stands, or arrange the cake balls in mason jars for a rustic touch. Adding a sprig of mint or a few edible flowers can elevate their appeal.
Pairing Suggestions with Beverages
These cake balls pair wonderfully with a variety of beverages. Serve them alongside a rich espresso, a creamy latte, or even a glass of sparkling wine for a sophisticated touch. Their sweet flavor complements the bitterness of coffee and the acidity of wine beautifully.
Creative Ways to Package Them for Gifts or Parties
Consider using clear treat bags adorned with colorful ribbons or themed boxes for gifting. Personalize them with handwritten tags to add an extra special touch. They make delightful gifts for birthdays, holidays, or any special occasion.
Storage and Shelf Life
To keep your cake balls fresh, store them in an airtight container at room temperature for up to 3 days. For longer storage, you can refrigerate them for up to a week. If you want to keep them for an extended period, freeze them. They can last in the freezer for up to 3 months.
Best Practices for Storing Cake Balls
Ensure that the cake balls are fully set before storing. Layer them between parchment paper in an airtight container to prevent sticking. For frozen cake balls, place them in a freezer-safe bag, removing as much air as possible to prevent freezer burn.
Nutritional Information
Each Crimson Delight Red Velvet Cake Ball contains approximately 100 calories, depending on the size and ingredients used. While they are a delightful treat, it’s important to enjoy them in moderation, especially considering their rich cream cheese filling and chocolate coating.
Overview of Nutritional Content Per Serving
These cake balls offer a sweet indulgence that balances enjoyment and nutrition. Keep in mind that while they are a treat, they can be a part of a balanced diet when consumed occasionally.
Discussing Indulgence vs. Moderation
Treats like the Crimson Delight Red Velvet Cake Balls are perfect for celebrating special moments or simply enjoying a sweet snack. Embrace the joy of cooking and sharing, but remember that moderation is key to maintaining a healthy lifestyle.
Conclusion
Creating Crimson Delight Red Velvet Cake Balls is a delightful culinary adventure that combines the rich tradition of red velvet cake with the fun of bite-sized treats. The process is rewarding, and the results are perfect for any gathering, celebration, or personal treat.
If you haven’t yet tried this recipe, now is the perfect time to gather your ingredients and create these delicious cake balls. Not only will you enjoy the satisfaction of making them, but you’ll also delight in sharing them with friends and family. Experience the joy of crafting this wonderful dessert that merges tradition with creativity; you won’t regret it!


