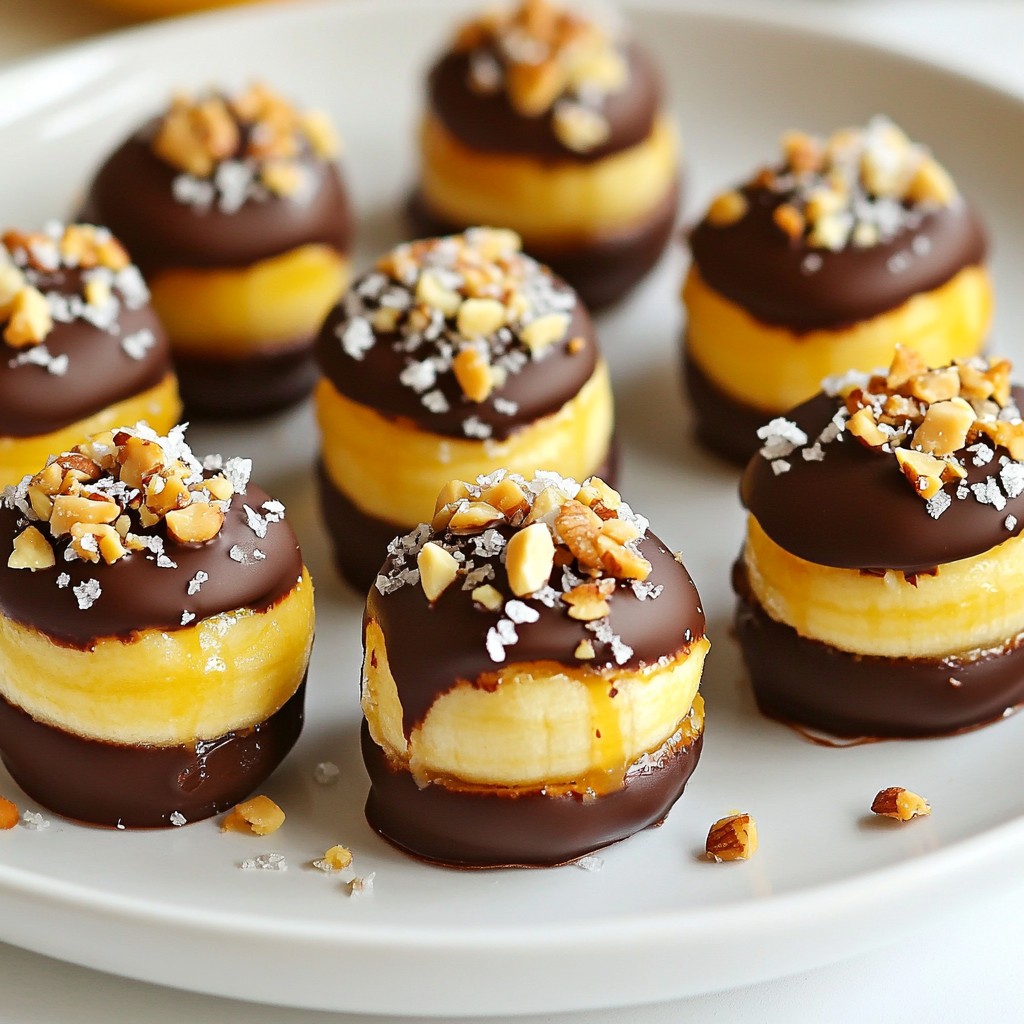
Looking for a snack that's both tasty and easy to make? These Chocolate Peanut Butter Banana Bites will hit the spot! With just a few simple ingredients—ripe bananas, smooth peanut butter, and rich dark chocolate—you can create a fun and delicious treat. Whether you want a quick energy boost or a sweet dessert, this recipe offers it all. Let’s dive into the steps to make this delightful snack!
Why I Love This Recipe
- Simple and Quick: This recipe requires minimal ingredients and can be prepared in just 15 minutes, making it a perfect last-minute treat.
- Healthy Indulgence: With natural peanut butter and bananas, these bites offer a delicious way to satisfy your sweet tooth while still being nutritious.
- Customizable: You can easily modify the toppings to suit your taste, whether you prefer nuts, coconut, or even a sprinkle of cinnamon.
- Freezer-Friendly: These banana bites can be stored in the freezer for up to two weeks, making them a convenient snack option for any time.
Ingredients
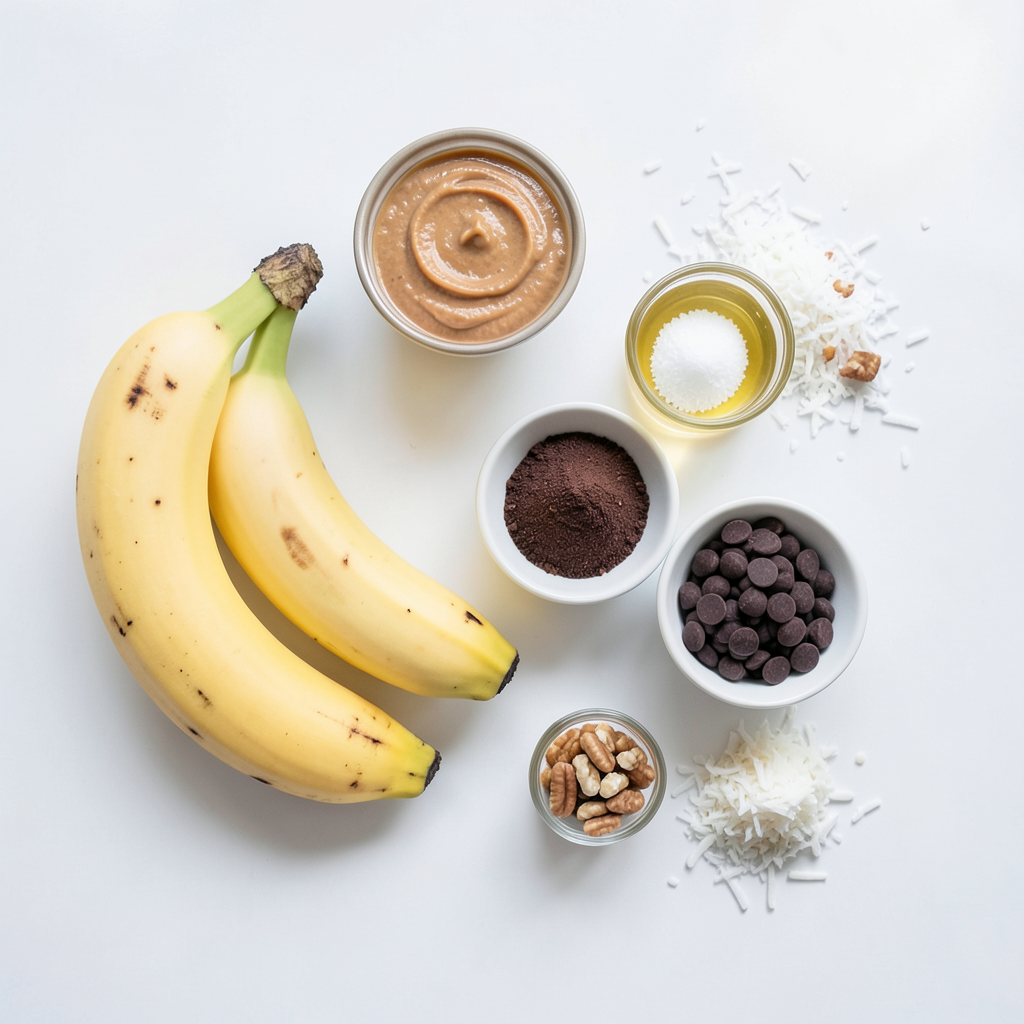
For these Chocolate Peanut Butter Banana Bites, you will need a few simple items. Each ingredient plays an important role in making this treat delicious. Here’s what you’ll need:
- Ripe bananas
- Natural peanut butter
- Dark chocolate chips
- Coconut oil
- Sea salt
- Optional toppings (chopped nuts, shredded coconut)
Using ripe bananas is key. They are sweet and easy to mash. Natural peanut butter adds creaminess and a rich taste. Dark chocolate chips give a nice, deep flavor. Coconut oil helps the chocolate melt smoothly. Sea salt balances the sweetness. Optional toppings like chopped nuts or shredded coconut add crunch and fun.
These ingredients mix well together. They create a sweet snack that feels like a treat. Plus, they are simple to find at any store. You can even use dairy-free chocolate chips if you prefer. With these ingredients, you can make a great snack in no time.
Step-by-Step Instructions
Preparation Phase
How to slice the bananas Start by peeling the ripe bananas. Place them on a cutting board. Use a sharp knife to slice the bananas into 1/2-inch thick rounds. Make sure the pieces are even for the best bite. Set the slices aside for later.
Preparing the peanut butter Next, grab a small bowl. Measure out 1/2 cup of natural peanut butter. Use a spoon to stir it until it is smooth and creamy. This step ensures that the peanut butter spreads easily on the bananas.
Assembly Phase
Creating banana sandwiches Take a baking sheet and line it with parchment paper. Place a spoonful of peanut butter on half of the banana slices. Then, top each with the remaining banana slices to make little sandwiches. Press them together gently to keep the filling inside.
Melting the chocolate mixture Now, get a microwave-safe bowl. Add 1 cup of dark chocolate chips and 1 tablespoon of coconut oil to the bowl. Microwave the mixture in 30-second intervals. Stir the chocolate after each interval until it is fully melted and smooth.
Coating Phase
Dipping the banana sandwiches in chocolate Take each banana sandwich and dip it into the melted chocolate. Make sure to coat all sides well. Gently shake off any extra chocolate before placing them back onto the parchment paper.
Adding toppings and final touches If you like, sprinkle a tiny pinch of sea salt over each chocolate-coated banana bite. For extra crunch, add chopped nuts or shredded coconut on top. This adds flavor and texture to your bites.
Tips & Tricks
Melting Chocolate Perfectly
To melt chocolate well, use a microwave. Place chocolate chips in a bowl. Microwave for 30 seconds. Stir, then repeat until smooth. This keeps chocolate from burning. If you prefer, use a double boiler. Fill a pot with water and heat it. Set a bowl on top, then add chocolate. Stir until it melts evenly.
Choosing the Right Peanut Butter
Natural peanut butter is best for this treat. It has no added sugar or oils. It gives a rich taste. Processed peanut butter is sweeter but often has additives. You can also try flavored peanut butter. Chocolate or honey flavors add a fun twist.
Serving Suggestions
Serve these banana bites cold for a refreshing snack. Place them on a colorful plate to impress guests. You can also stack them for a fun display. Adding a small bowl of chopped nuts nearby lets people customize their bites. This makes for a delightful snack at parties or gatherings.
Pro Tips
- Choose the Right Bananas: Use ripe bananas for optimal sweetness and creaminess. Overripe bananas can also add extra flavor.
- Peanut Butter Consistency: Ensure your peanut butter is at room temperature for easy spreading. Natural peanut butter tends to be runnier, making it ideal for this recipe.
- Melting Chocolate: Be cautious when melting chocolate; stop microwaving as soon as it's mostly melted and stir until smooth to prevent burning.
- Customize Toppings: Get creative with toppings! Consider using crushed pretzels for a salty crunch or mini chocolate chips for extra decadence.
Variations
Healthy Alternatives
You can make these bites vegan and gluten-free easily. Just use dairy-free chocolate chips. Look for brands that do not include milk. For gluten-free options, make sure your peanut butter is certified gluten-free.
Try different toppings for a twist. Instead of nuts, you could use seeds like sunflower or pumpkin. You could also sprinkle cinnamon or cocoa powder on top for added flavor.
Flavor Combinations
Don't be afraid to experiment with spices. A dash of cinnamon can add warmth. A few drops of vanilla extract in the peanut butter can boost the taste too.
You can layer other fruits between the banana slices. Sliced strawberries or apples add freshness. This makes each bite even more fun and tasty.
Storage Variations
To store leftovers, keep them in an airtight container. This keeps them fresh. They will last in the freezer for up to two weeks.
For long-term storage, wrap each bite in plastic before freezing. This helps prevent freezer burn. Just thaw them in the fridge before serving for the best taste.
Storage Info
Freezing Chocolate Peanut Butter Banana Bites
To freeze your banana bites, first, let them cool completely. Place the bites in a single layer on a baking sheet. Make sure they are not touching. Freeze them for about 30 minutes until firm. After they freeze, transfer them to a freezer-safe bag or container. This helps save space and keeps them fresh. Seal the bag tightly to avoid freezer burn.
When you're ready to serve, take out the number of bites you want. Allow them to thaw for about 10 to 15 minutes at room temperature. This way, they become soft enough to enjoy.
Shelf Life
In the freezer, these banana bites last for about two weeks. After that, their taste and texture may change. Always check for signs of spoilage before eating. If you see any ice crystals or a change in color, it’s best to discard them. If they smell off or have an unusual texture, it’s time to toss them. Keeping them stored properly helps maintain their yummy flavor!
FAQs
Can I use white chocolate instead?
Yes, you can use white chocolate. It will give a sweet, creamy taste. Just melt it like dark chocolate. Follow the same steps for dipping the banana bites.
How do I prevent chocolate from seizing?
To prevent seizing, make sure the bowl and utensils are dry. Even a drop of water can cause problems. Use a microwave-safe bowl. Heat the chocolate in small bursts, stirring often. If it does seize, add a tiny bit of coconut oil to help it smooth out.
What other fruits can I use for this recipe?
You can use strawberries or apples. Both fruits pair well with peanut butter and chocolate. Just slice them thinly, like the bananas. You can also try pears for a fun twist.
Can I make these bites ahead of time?
Yes, you can make them ahead. Store the bites in an airtight container in the freezer. They stay fresh for up to two weeks. Just take them out when you want a quick snack!
You learned how to make tasty chocolate peanut butter banana bites. We covered each step clearly, from slicing bananas to melting chocolate. I shared tips for perfect melting and suggested toppings and serving ideas. You can even try healthy alternatives and fun flavor combos!
Remember, these bites are easy to make and fun to eat. Enjoy your kitchen time and impress your friends with these treats. Happy cooking!