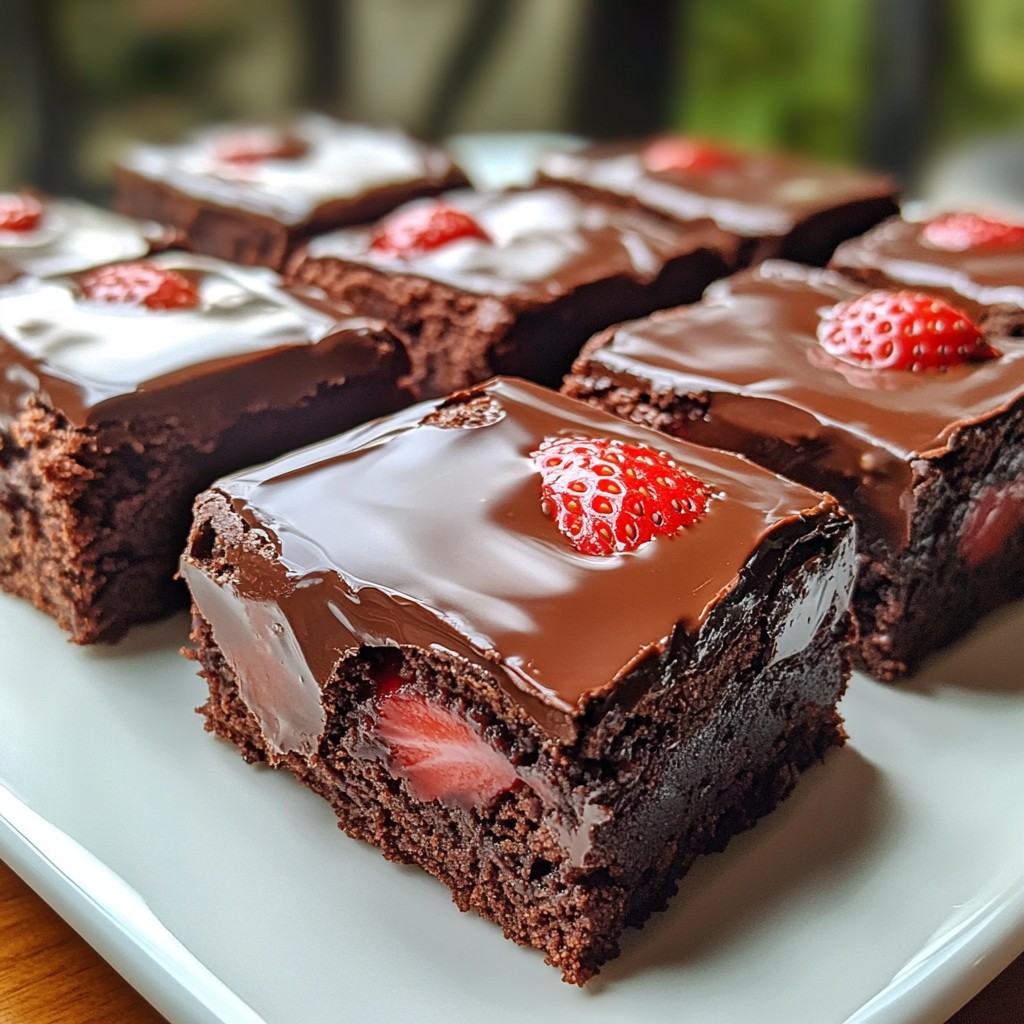
Are you ready to indulge in a dessert that brings together two favorites: chocolate and strawberries? These Chocolate Covered Strawberry Brownies are not only tasty but also simple to make. In this post, I'll share easy steps, great tips, and fun variations that will help you create this delightful treat for any occasion. Let’s make brownies that will impress everyone around you!
Why I Love This Recipe
- Decadent Flavor: The combination of rich chocolate and fresh strawberries creates a luxurious dessert that’s hard to resist.
- Easy to Make: This recipe comes together quickly, making it perfect for both novice bakers and seasoned pros.
- Perfect for Sharing: These brownies are ideal for gatherings; cut them into squares and watch them disappear!
- Versatile Treat: Enjoy these brownies chilled or at room temperature, and they’re sure to please any crowd.
Ingredients
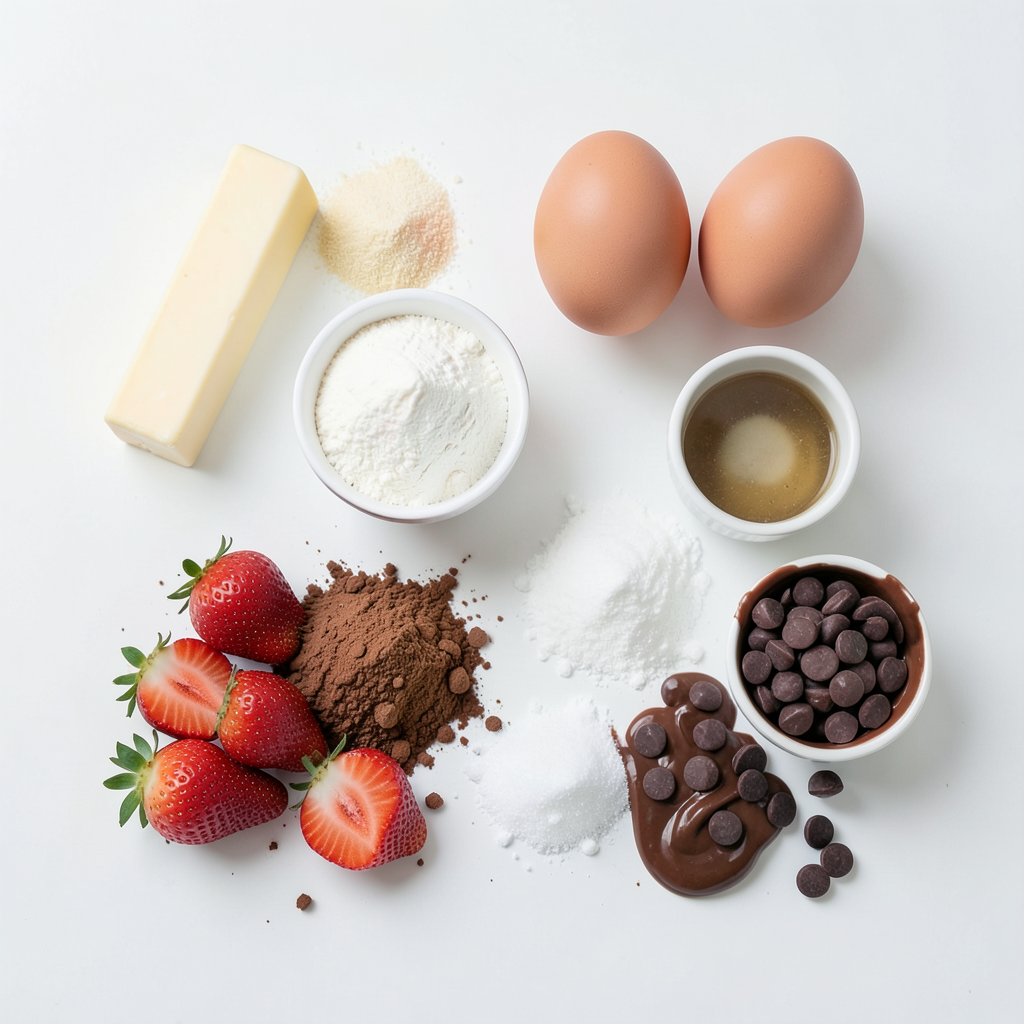
List of Ingredients
- 1 cup unsalted butter (2 sticks)
- 2 cups granulated sugar
- 4 large eggs
- 1 teaspoon vanilla extract
- 1 cup all-purpose flour
- 1 cup unsweetened cocoa powder
- 1 teaspoon baking powder
- 1/2 teaspoon salt
- 1 cup fresh strawberries, hulled and sliced
- 1/2 cup semisweet chocolate chips
- 1 cup milk chocolate for dipping
Each ingredient plays a key role in making the brownies rich and tasty. The butter adds moisture and a creamy texture. Sugar sweetens the brownies and helps them rise. Eggs bind the mixture and provide structure. Vanilla adds a lovely flavor. Flour and cocoa powder give the brownies their body and deep chocolate taste. Baking powder helps the brownies rise, while salt balances the sweetness. Strawberries add a fresh, fruity note, and chocolate chips bring extra chocolate goodness.
Alternative Ingredients
If you have dietary needs, I have some easy swaps. For gluten-free brownies, use almond flour or a gluten-free blend instead of all-purpose flour. If you want a lower-sugar option, try using a sugar substitute like stevia or erythritol. For a dairy-free version, you can use vegan butter and dairy-free chocolate chips.
When sourcing fresh strawberries, look for bright red berries with no soft spots. They should smell sweet and have a firm texture. Local farmers' markets often have the freshest options. For the chocolate, choose high-quality brands for the best melting and dipping results.
Step-by-Step Instructions
Preparation Steps
1. First, preheat your oven to 350°F (175°C). This heat is perfect for baking.
2. Grease and line a 9x13-inch baking pan with parchment paper. Leave some paper hanging over the edges. This makes removing the brownies easy.
3. In a medium saucepan, melt 1 cup of unsalted butter over medium heat. Stir it gently as it melts.
4. Once melted, take it off the heat. Mix in 2 cups of granulated sugar. Stir until it blends well.
5. Now add 4 large eggs one at a time. Mix well after each egg. Then stir in 1 teaspoon of vanilla extract. This adds great flavor.
6. In another bowl, whisk together 1 cup of flour, 1 cup of cocoa powder, 1 teaspoon of baking powder, and 1/2 teaspoon of salt. This is your dry mix.
7. Slowly add the dry mix to the butter mixture. Mix until just combined. Be careful not to overmix, or the brownies will be tough.
8. Gently fold in 1 cup of sliced strawberries and 1/2 cup of semisweet chocolate chips. These add sweetness and fruitiness to your brownies.
Baking Process
1. Pour the brownie batter into the prepared pan. Spread it evenly with a spatula.
2. Bake for 25-30 minutes. Check if they are done by inserting a toothpick in the center. If it comes out with a few moist crumbs, they are perfect.
3. Avoid overbaking them. This keeps them fudgy and soft.
4. Once done, take the brownies out of the oven. Let them cool completely in the pan on a wire rack.
5. To cut them, wait until they are cool. This helps you get neat squares. Use a sharp knife for best results.
Tips & Tricks
Achieving the Perfect Fudgy Brownie
To get fudgy brownies, avoid overmixing the batter. Overmixing adds air, which makes brownies cake-like. Mix just until you see no dry flour. This keeps them dense and chewy.
For cutting brownies neatly, let them cool completely. Use a sharp knife to slice. Dip the knife in hot water between cuts for a clean edge. Wipe the knife with a towel to keep it clean. This helps keep the chocolate and strawberry layers intact.
Enhancing Flavor
Want to kick up the flavor? Add mix-ins like walnuts or crushed cookies. You can also try adding a dash of espresso powder to deepen the chocolate taste.
For the best chocolate dipping, choose high-quality brands like Ghirardelli or Callebaut. They melt smoothly and give a rich taste. This makes the chocolate-covered brownies even more special and delicious.
Pro Tips
- Use Room Temperature Ingredients: For better emulsification, ensure your eggs and butter are at room temperature before mixing.
- Don't Overmix the Batter: Overmixing can lead to tough brownies. Mix until just combined for a fudgy texture.
- Chill for Better Dipping: Refrigerate the brownies for a short time before dipping in chocolate; cold brownies help the chocolate set faster.
- Experiment with Toppings: Add crushed nuts, sprinkles, or drizzles of caramel on top after dipping for extra flavor and decoration.
Variations
Flavor Additions
You can add different fruits to your brownies. Raspberries, cherries, and bananas work well with chocolate. These fruits add a nice tartness or sweetness. You can also mix in nuts if you like. Walnuts and pecans are great choices. They add crunch and flavor to the soft brownie base.
Dietary Variations
If you need a vegan version, use plant-based butter and flax eggs. For the eggs, mix one tablespoon of flaxseed meal with three tablespoons of water. Let it sit until it thickens. For gluten-free brownies, swap the all-purpose flour with almond or coconut flour. Low-sugar options use a sugar substitute like stevia or monk fruit. You can still enjoy these brownies without all the sugar!
Storage Info
Best Practices for Storing Brownies
To keep your brownies fresh, use an airtight container. I recommend placing parchment paper between layers. This helps prevent sticking. If you have leftovers, you can freeze them. Wrap each brownie in plastic wrap, then store them in a freezer bag. This will keep them tasty for up to three months.
Shelf Life
At room temperature, brownies last about 3 to 4 days. If you store them in the fridge, they can last up to a week. Always check for signs of spoilage. Look for a dry surface or an off smell. If they look or smell strange, it's best to toss them out.
FAQs
What should I do if my brownies are too dry?
If your brownies turn out dry, don't worry. Here are some tips to fix them:
- Add moisture: You can brush them with a simple syrup made of equal parts sugar and water.
- Serve with ice cream: This adds creaminess and balances dryness.
- Use a warm sauce: A chocolate or berry sauce can help enhance flavor and add moisture.
- Check your oven: Make sure your oven's temperature is correct. An oven that's too hot can dry out brownies.
Can I make these brownies ahead of time?
Yes, you can make these brownies in advance. Here are some best practices:
- Bake and cool: Bake the brownies and let them cool completely before storing.
- Wrap tightly: Use plastic wrap or foil to cover them. This keeps them fresh.
- Store in the fridge: Refrigerate for up to a week. Just remember to bring them to room temp before serving.
- Freeze for longer: You can freeze brownies for up to three months. Just thaw them in the fridge overnight when you're ready to eat.
How do I melt chocolate properly for dipping?
Melting chocolate is easy when you follow these steps:
1. Chop the chocolate: Cut it into small, even pieces for faster melting.
2. Use a microwave: Place chocolate in a microwave-safe bowl. Heat in 30-second bursts, stirring between each.
3. Check for smoothness: Stop when it’s almost fully melted. Stir until smooth.
4. Double boiler method: If you prefer, place a heat-safe bowl over simmering water. Stir until melted.
5. Avoid water: Make sure no water touches the chocolate, or it will seize up.
These steps help ensure your chocolate is perfect for dipping brownies!
This blog post covered everything you need for great brownies. We discussed key ingredients and their roles, and shared alternatives for special diets. I provided straightforward steps for preparation, baking, and cooling. You learned tips for perfecting texture and enhancing flavors. We explored variations to meet different tastes and preferences. Finally, I shared advice on storing brownies and answered common questions.
Enjoy baking, and remember, the perfect brownie is just a recipe away!